Cloudflare Mesh
Cloudflare Mesh connects your services and devices with post-quantum encrypted networking. Route traffic privately between servers, laptops, and phones without VPNs or bastion hosts.
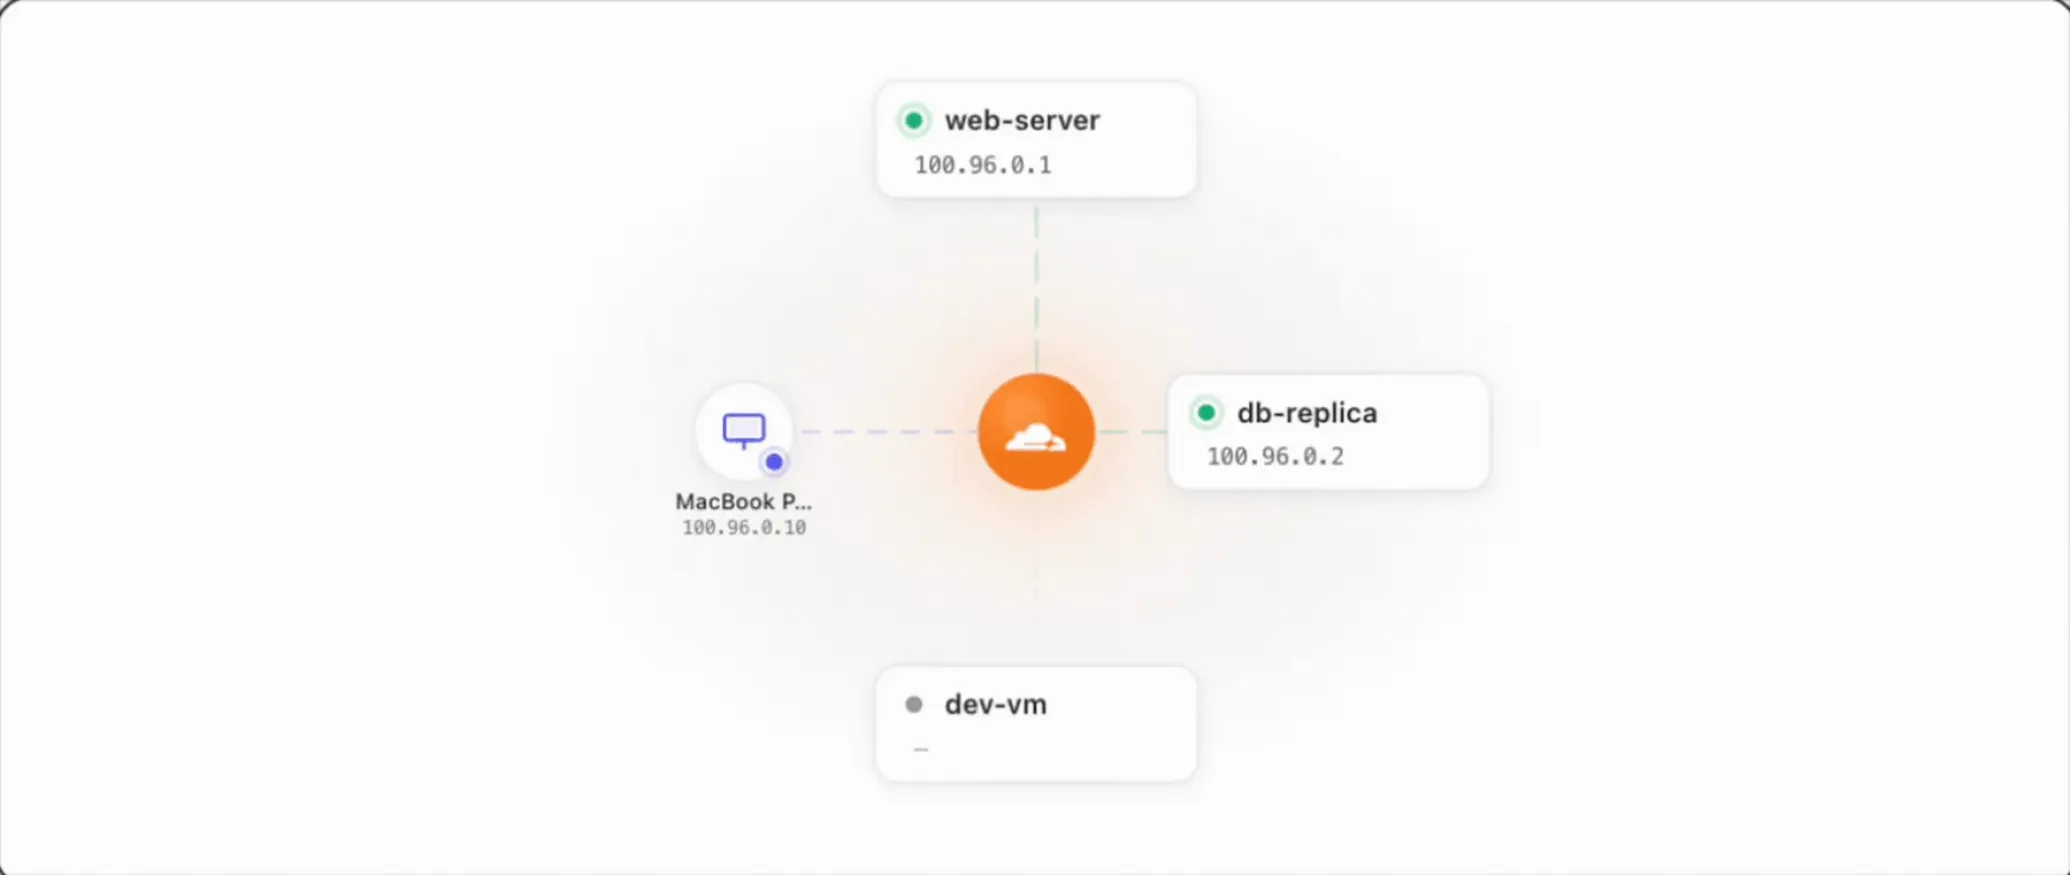
Every enrolled device and node receives a private IP address (Mesh IP) and can reach any other participant by IP over TCP, UDP, or ICMP, with traffic routed through Cloudflare's network.
Mesh nodes are Linux servers running the Cloudflare One Client (warp-cli) in headless mode. Client devices are laptops and phones running the same client with a UI.
Mesh has two types of participants:
| Mesh nodes | Client devices | |
|---|---|---|
| Runs on | Linux servers, VMs, containers | Laptops, phones, desktops |
| Client | Cloudflare One Client (warp-cli), headless | Cloudflare One Client (warp-cli) with UI |
| Mesh IP | Assigned on enrollment | Assigned on enrollment |
| Subnet routing | Can advertise CIDR routes | No — clients reach subnets through nodes |
| High availability | Supports active-passive replicas | Not applicable |
Any participant can reach any other participant by Mesh IP. Client-to-client connectivity works without deploying any Mesh nodes.
flowchart LR
  subgraph nodes["Mesh nodes"]
    A["web-server <br> 100.96.0.1"]
    B["db-replica <br> 100.96.0.2"]
  end
  subgraph devices["Client devices"]
    C["MacBook <br> 100.96.0.10"]
    D["iPhone <br> 100.96.0.11"]
  end
  A <--> CF((Cloudflare <br> network))
  B <--> CF
  CF <--> C
  CF <--> D
All traffic passes through Cloudflare, so Gateway network policies, device posture checks, and access rules apply to every connection.
Every participant is assigned a private IP from the 100.96.0.0/12 range. In other parts of the Cloudflare One documentation, these addresses are referred to as device IPs.
This range uses CGNAT address space ↗ to avoid conflicts with RFC 1918 private ranges (10.x, 172.16.x, 192.168.x). If the default range conflicts with your network, you can configure a custom subnet.
View a device's Mesh IP on the Mesh overview page ↗ or on the node detail page in the dashboard.
For details on reserved ranges, refer to Reserved IP addresses.
Both Cloudflare Mesh and Cloudflare Tunnel connect private infrastructure to Cloudflare, but they solve different problems:
| Cloudflare Mesh | Cloudflare Tunnel | |
|---|---|---|
| Traffic direction | Bidirectional — any participant can initiate | Inbound to origin — clients connect to published services |
| Addressing | Every participant gets a Mesh IP | Server-side only, no Mesh IPs |
| Use case | Private IP connectivity between devices and servers | Publishing specific applications, hostnames, or IP routes |
| Connector | warp-cli | cloudflared |
| Protocols | TCP, UDP, ICMP | HTTP/S, TCP, SSH, RDP, SMB (proxied over WebSocket) |
Use Mesh when devices need to reach each other by private IP, or when your workload requires stable, long-lived TCP connections (SAP, database replication, ERP systems, RDP sessions). Mesh operates at L3/L4 and preserves connections end-to-end, making it the recommended software on-ramp for any traffic sensitive to connection interruptions. Use Tunnel when you want to publish services by hostname or proxy traffic to specific IP ranges through cloudflared.
Coming from another mesh networking product?
If you have used Tailscale, WireGuard, or a similar product, here is how concepts map to Cloudflare Mesh:
| Other products | Cloudflare Mesh |
|---|---|
| Tailnet / mesh network | Your Cloudflare account's Mesh network |
| Node / peer | Mesh node (servers) or client device (laptops/phones) |
| Subnet router | Mesh node with CIDR routes |
| MagicDNS / custom DNS | Local Domain Fallback + Gateway resolver policies |
| ACLs / access rules | Gateway network policies + device posture |
| Exit node | Attach a public CIDR to a Mesh node and traffic to those IPs exits through that node. For broader Internet filtering, use Gateway egress policies. |
| Admin console | Cloudflare dashboard ↗ under Networking > Mesh |
Key differences:
- You manage configuration entirely through the Cloudflare dashboard or API — no command-line administration needed.
- Gateway policies, device posture, and identity checks are built into the platform.
- Traffic routes through the nearest Cloudflare data center, not directly between devices.
- Create your first Mesh node — The dashboard wizard handles provisioning. Install the client on a Linux server with two commands.
- Connect client devices — Install the Cloudflare One Client on laptops and phones. They can reach each other and any Mesh node by Mesh IP.
- Add routes (optional) — Make subnets behind a Mesh node reachable from any device.
- Enable high availability (optional) — Run multiple replicas of a node for failover.
- Connect from Workers (optional) — Use VPC Network bindings to reach private services from Cloudflare Workers.
- Delegate access (optional) — Scope member permissions to specific Mesh nodes instead of granting account-wide control.