Create a tunnel (dashboard)
Follow this step-by-step guide to create your first remotely-managed tunnel using Cloudflare One.
-
Log in to Cloudflare One ↗ and go to Networks > Connectors > Cloudflare Tunnels.
-
Select Create a tunnel.
-
Choose Cloudflared for the connector type and select Next.
-
Enter a name for your tunnel. We suggest choosing a name that reflects the type of resources you want to connect through this tunnel (for example,
enterprise-VPC-01). -
Select Save tunnel.
-
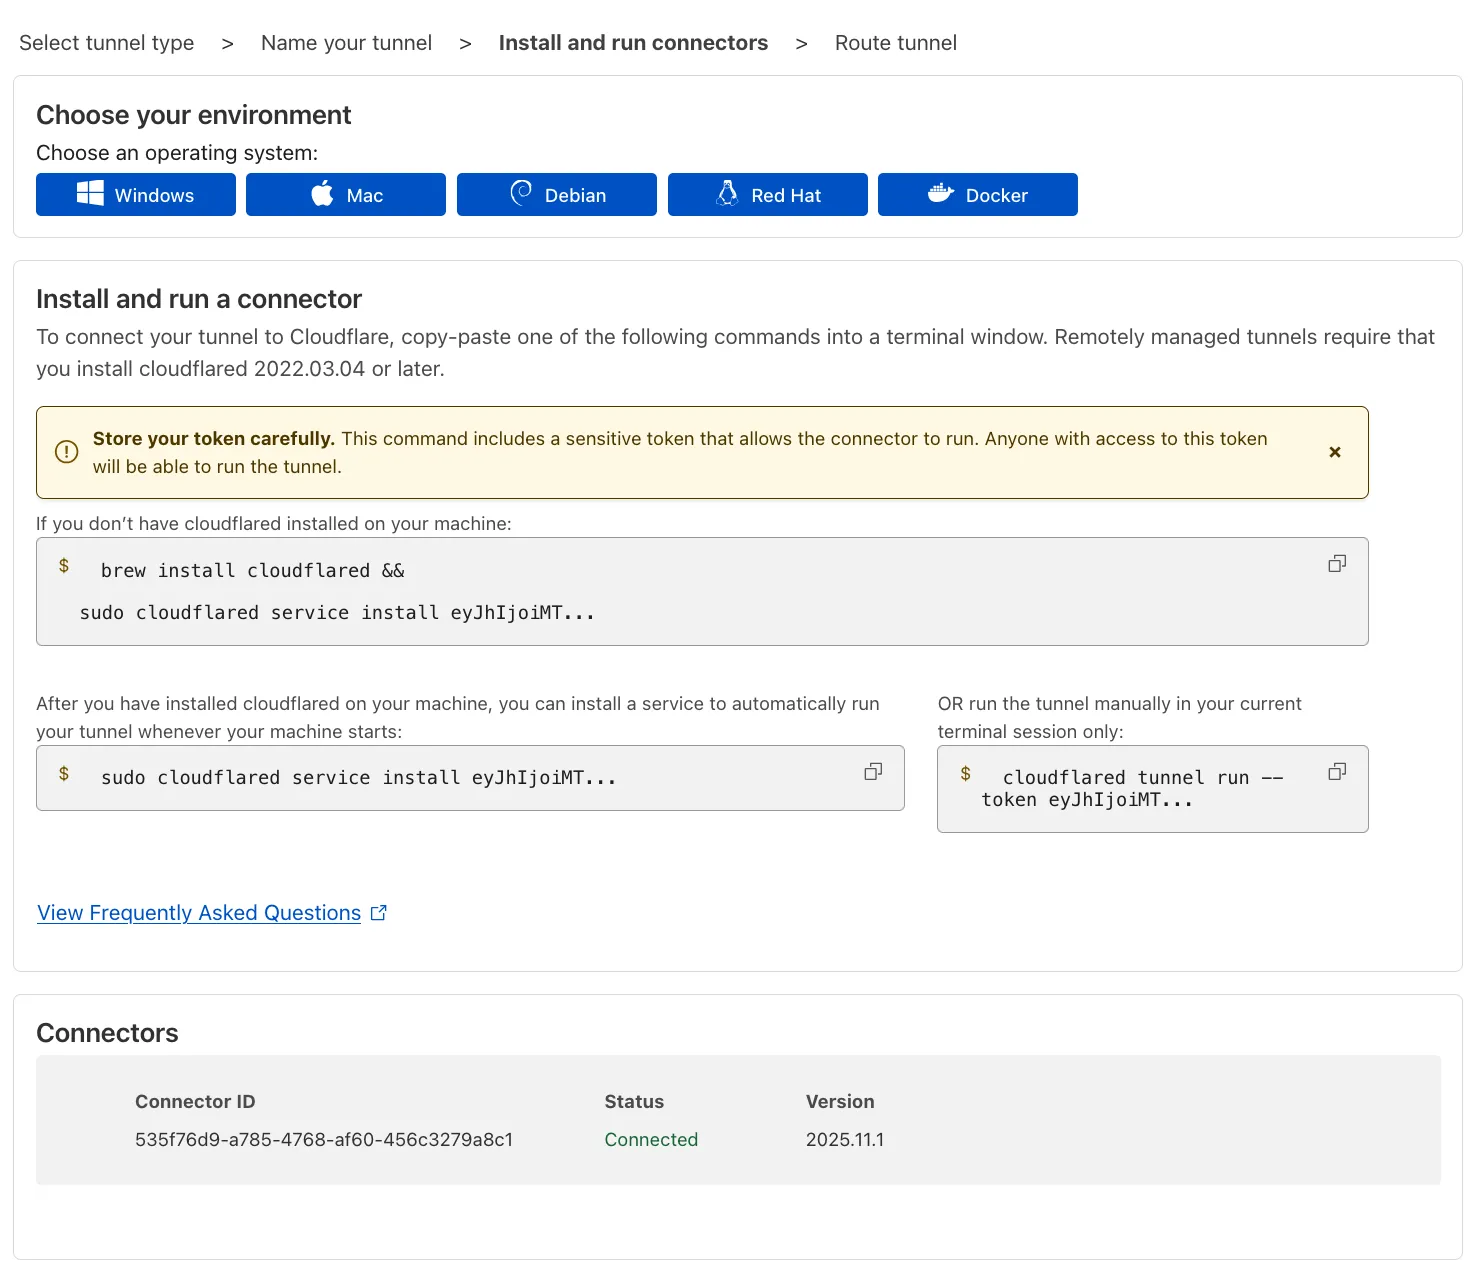
Next, you will need to install
cloudflaredand run it. To do so, check that the environment under Choose an environment reflects the operating system on your machine, then copy the command in the box below and paste it into a terminal window. Run the command. -
Once the command has finished running, your connector will appear in Cloudflare One.
-
Select Next.
The next steps depend on whether you want to publish an application to the Internet or connect a private network.
Follow these steps to publish an application to the Internet. If you are looking to connect a private resource, skip to the Connect a network section.
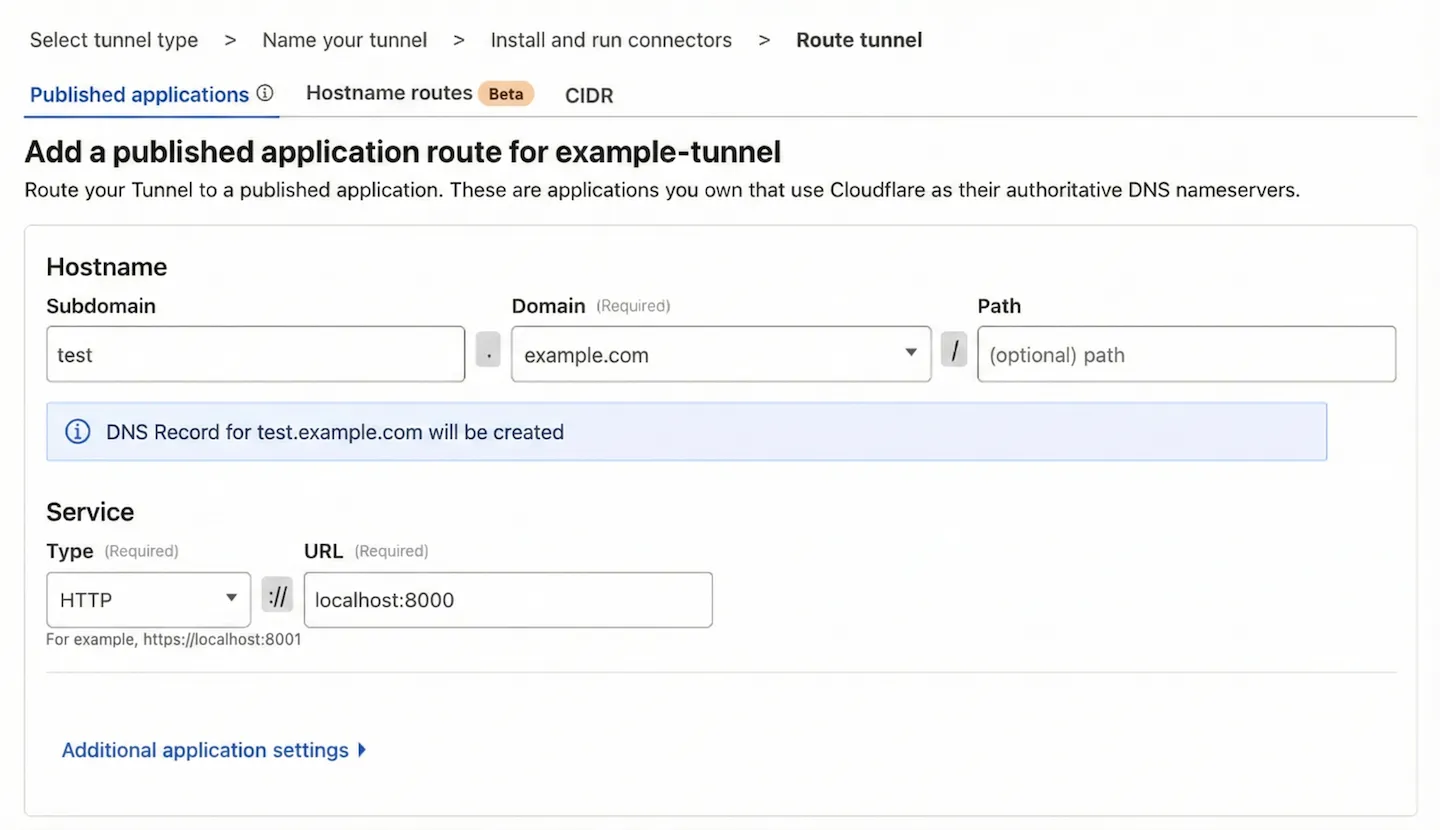
To add a published application when creating a new tunnel:
-
Go to the Published applications tab.
-
Enter a subdomain and select a Domain from the drop-down menu. Specify any subdomain or path information.
-
Under Service, choose a service type and specify its URL. For example,
- Type: HTTP
- URL:
localhost:8000
-
Under Additional application settings, specify any parameters you would like to add to your tunnel configuration.
-
Select Save.
Anyone on the Internet can now access the application at the specified hostname. To allow or block specific users, create an Access application.
To connect a private network through your tunnel:
- Go to the CIDR tab.
- In CIDR, enter the private IP address or CIDR range of your service (for example,
10.0.0.1or10.0.0.0/24). - Select Complete setup.
cloudflared can now route traffic to these destination IPs. To configure Zero Trust policies and connect as a user, refer to Connect an IP/CIDR.
After saving the tunnel, you will be redirected to the Networks > Connectors page. Your tunnel should be listed with a Healthy status. If your tunnel status is Inactive, Down, or Degraded, refer to the troubleshooting documentation for recommended next steps.