Generate YouTube thumbnails with Workers and Cloudflare Image Resizing
In this tutorial, you will learn how to programmatically generate a custom YouTube thumbnail using Cloudflare Workers and Cloudflare Image Resizing. You may want to generate a custom YouTube thumbnail to customize the thumbnail's design, call-to-actions and images used to encourage more viewers to watch your video.
This tutorial will help you understand how to work with Images,Image Resizing and Cloudflare Workers.
All of the tutorials assume you have already completed the Get started guide, which gets you set up with a Cloudflare Workers account, C3 ↗, and Wrangler.
To follow this tutorial, make sure you have Node, Cargo, and Wrangler installed on your machine.
In this tutorial, you will learn how to:
- Upload Images to Cloudflare with the Cloudflare dashboard or API.
- Set up a Worker project with Wrangler.
- Manipulate images with image transformations in your Worker.
To generate a custom thumbnail image, you first need to upload a background image to Cloudflare Images. This will serve as the image you use for transformations to generate the thumbnails.
Cloudflare Images allows you to store, resize, optimize and deliver images in a fast and secure manner. To get started, upload your images to the Cloudflare dashboard or use the Upload API.
To upload an image using the Cloudflare dashboard:
-
In the Cloudflare dashboard, go to the Transformations page.
Go to Transformations -
Use Quick Upload to either drag and drop an image or click to browse and choose a file from your local files.
-
After the image is uploaded, view it using the generated URL.
To upload your image with the Upload via URL API, refer to the example below:
curl --request POST \ --url https://api.cloudflare.com/client/v4/accounts/<ACCOUNT_ID>/images/v1 \ --header 'Authorization: Bearer <API_TOKEN>' \ --form 'url=<PATH_TO_IMAGE>' \ --form 'metadata={"key":"value"}' \ --form 'requireSignedURLs=false'ACCOUNT_ID: The current user's account id which can be found in your account settings.API_TOKEN: Needs to be generated to scoping Images permission.PATH_TO_IMAGE: Indicates the URL for the image you want to upload.
You will then receive a response similar to this:
{ "result": { "id": "2cdc28f0-017a-49c4-9ed7-87056c83901", "filename": "image.jpeg", "metadata": { "key": "value" }, "uploaded": "2022-01-31T16:39:28.458Z", "requireSignedURLs": false, "variants": [ "https://imagedelivery.net/Vi7wi5KSItxGFsWRG2Us6Q/2cdc28f0-017a-49c4-9ed7-87056c83901/public", "https://imagedelivery.net/Vi7wi5KSItxGFsWRG2Us6Q/2cdc28f0-017a-49c4-9ed7-87056c83901/thumbnail" ] }, "success": true, "errors": [], "messages": []}Now that you have uploaded your image, you will use it as the background image for your video's thumbnail.
After uploading your image, create a Worker that will enable you to transform text to image. This image can be used as an overlay on the background image you uploaded. Use the rustwasm-worker-template ↗.
You will need the following before you begin:
-
A recent version of Rust ↗.
-
Access to the
cargo-generatesubcommand:Terminal window cargo install cargo-generate
Create a new Worker project using the worker-rust template:
cargo generate https://github.com/cloudflare/rustwasm-worker-templateYou will now make a few changes to the files in your project directory.
- In the
lib.rsfile, add the following code block:
use worker::*;mod utils;
#[event(fetch)]pub async fn main(req: Request, env: Env, _ctx: worker::Context) -> Result<Response> {   // Optionally, get more helpful error messages written to the console in the case of a panic.   utils::set_panic_hook();
let router = Router::new(); router .get("/", |_, _| Response::ok("Hello from Workers!")) .run(req, env) .await}- Update the
Cargo.tomlfile in yourworker-to-textproject directory to use text-to-png ↗, a Rust package for rendering text to PNG. Add the package as a dependency by running:
cargo add text-to-png@0.2.0- Import the
text_to_pnglibrary into yourworker-to-textproject'slib.rsfile.
use text_to_png::{TextPng, TextRenderer};use worker::*;mod utils;
#[event(fetch)]pub async fn main(req: Request, env: Env, _ctx: worker::Context) -> Result<Response> {   // Optionally, get more helpful error messages written to the console in the case of a panic.   utils::set_panic_hook();
let router = Router::new(); router .get("/", |_, _| Response::ok("Hello from Workers!")) .run(req, env) .await}- Update
lib.rsto create ahandle-slashfunction that will activate the image transformation based on the text passed to the URL as a query parameter.
use text_to_png::{TextPng, TextRenderer};use worker::*;mod utils;
#[event(fetch)]pub async fn main(req: Request, env: Env, _ctx: worker::Context) -> Result<Response> {   // Optionally, get more helpful error messages written to the console in the case of a panic.   utils::set_panic_hook();
   let router = Router::new();   router       .get("/", |_, _| Response::ok("Hello from Workers!"))       .run(req, env)       .await}
async fn handle_slash(text: String) -> Result<Response> {}- In the
handle-slashfunction, call theTextRendererby assigning it to a renderer value, specifying that you want to use a custom font. Then, use therender_text_to_png_datamethod to transform the text into image format. In this example, the custom font (Inter-Bold.ttf) is located in an/assetsfolder at the root of the project which will be used for generating the thumbnail. You must update this portion of the code to point to your custom font file.
use text_to_png::{TextPng, TextRenderer};use worker::*;mod utils;
#[event(fetch)]pub async fn main(req: Request, env: Env, _ctx: worker::Context) -> Result<Response> {   // Optionally, get more helpful error messages written to the console in the case of a panic.   utils::set_panic_hook();
   let router = Router::new();   router       .get("/", |_, _| Response::ok("Hello from Workers!"))       .run(req, env)       .await}
async fn handle_slash(text: String) -> Result<Response> {  let renderer = TextRenderer::try_new_with_ttf_font_data(include_bytes!("../assets/Inter-Bold.ttf"))    .expect("Example font is definitely loadable");
let text_png: TextPng = renderer.render_text_to_png_data(text.replace("+", " "), 60, "003682").unwrap();}- Rewrite the
Routerfunction to callhandle_slashwhen a query is passed in the URL, otherwise return the"Hello Worker!"as the response.
use text_to_png::{TextPng, TextRenderer};use worker::*;mod utils;
#[event(fetch)]pub async fn main(req: Request, env: Env, _ctx: worker::Context) -> Result<Response> {   // Optionally, get more helpful error messages written to the console in the case of a panic.   utils::set_panic_hook();
  let router = Router::new();    router      .get_async("/", |req, _| async move {        if let Some(text) = req.url()?.query() {          handle_slash(text.into()).await        } else {          handle_slash("Hello Worker!".into()).await        }      })      .run(req, env)        .await}
async fn handle_slash(text: String) -> Result<Response> {  let renderer = TextRenderer::try_new_with_ttf_font_data(include_bytes!("../assets/Inter-Bold.ttf"))    .expect("Example font is definitely loadable");
let text_png: TextPng = renderer.render_text_to_png_data(text.replace("+", " "), 60, "003682").unwrap();}- In your
lib.rsfile, set the headers tocontent-type: image/pngso that the response is correctly rendered as a PNG image.
use text_to_png::{TextPng, TextRenderer};use worker::*;mod utils;
#[event(fetch)]pub async fn main(req: Request, env: Env, _ctx: worker::Context) -> Result<Response> {   // Optionally, get more helpful error messages written to the console in the case of a panic.   utils::set_panic_hook();
   let router = Router::new();    router      .get_async("/", |req, _| async move {        if let Some(text) = req.url()?.query() {          handle_slash(text.into()).await        } else {          handle_slash("Hello Worker!".into()).await        }      })      .run(req, env)        .await}
async fn handle_slash(text: String) -> Result<Response> {  let renderer = TextRenderer::try_new_with_ttf_font_data(include_bytes!("../assets/Inter-Bold.ttf"))    .expect("Example font is definitely loadable");
  let text_png: TextPng = renderer.render_text_to_png_data(text.replace("+", " "), 60, "003682").unwrap();
  let mut headers = Headers::new();  headers.set("content-type", "image/png")?;
  Ok(Response::from_bytes(text_png.data)?.with_headers(headers))}
The final lib.rs file should look as follows. Find the full code as an example repository on GitHub ↗.
use text_to_png::{TextPng, TextRenderer};use worker::*;
mod utils;
#[event(fetch)]pub async fn main(req: Request, env: Env, _ctx: worker::Context) -> Result<Response> { // Optionally, get more helpful error messages written to the console in the case of a panic. utils::set_panic_hook();
let router = Router::new();
router .get_async("/", |req, _| async move { if let Some(text) = req.url()?.query() { handle_slash(text.into()).await } else { handle_slash("Hello Worker!".into()).await } }) .run(req, env) .await}
async fn handle_slash(text: String) -> Result<Response> { let renderer = TextRenderer::try_new_with_ttf_font_data(include_bytes!("../assets/Inter-Bold.ttf")) .expect("Example font is definitely loadable");
let text = if text.len() > 128 { "Nope".into() } else { text };
let text = urlencoding::decode(&text).map_err(|_| worker::Error::BadEncoding)?;
let text_png: TextPng = renderer.render_text_to_png_data(text.replace("+", " "), 60, "003682").unwrap();
let mut headers = Headers::new(); headers.set("content-type", "image/png")?;
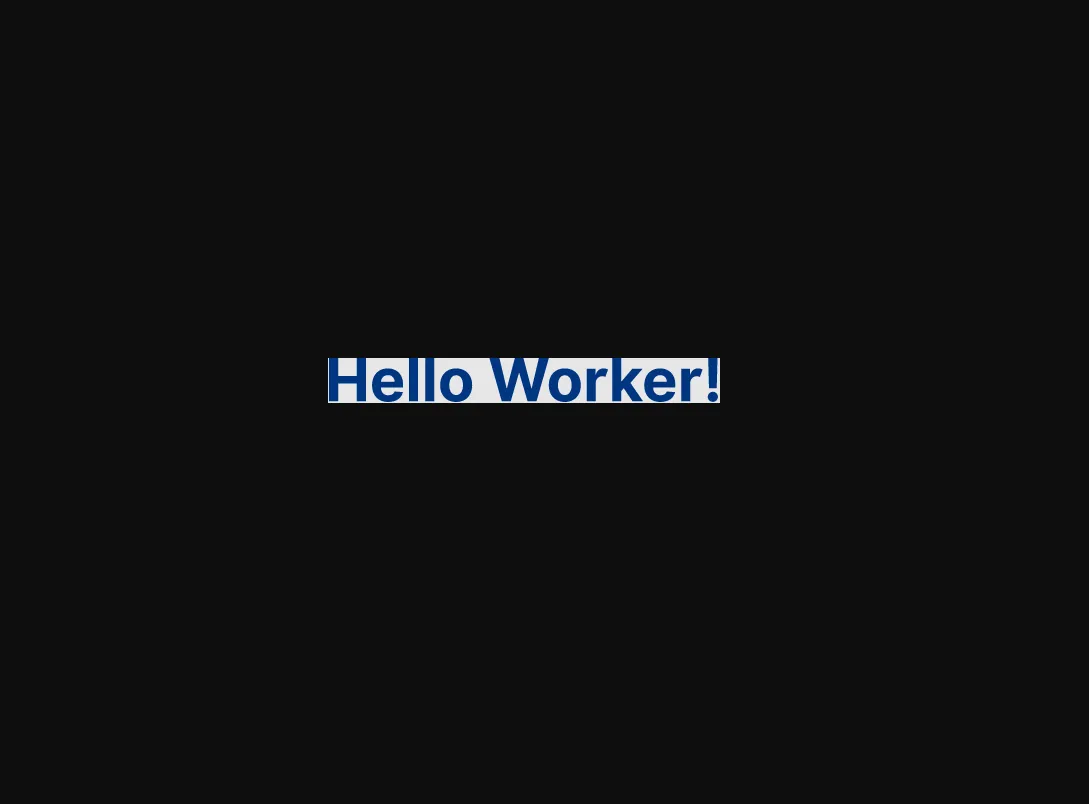
Ok(Response::from_bytes(text_png.data)?.with_headers(headers))}After you have finished updating your project, start a local server for developing your Worker by running:
npx wrangler devThis should spin up a localhost instance with the image displayed:
Adding a query parameter with custom text, you should receive:

To deploy your Worker, open your Wrangler file and update the name key with your project's name. Below is an example with this tutorial's project name:
{ "$schema": "./node_modules/wrangler/config-schema.json", "name": "worker-to-text"}"$schema" = "./node_modules/wrangler/config-schema.json"name = "worker-to-text"Then run the npx wrangler deploy command to deploy your Worker.
npx wrangler deployA .workers.dev domain will be generated for your Worker after running wrangler deploy. You will use this domain in the main thumbnail image.
Create a Worker to serve the image you uploaded to Images by running:
npm create cloudflare@latest -- thumbnail-imageyarn create cloudflare thumbnail-imagepnpm create cloudflare@latest thumbnail-imageFor setup, select the following options:
- For What would you like to start with?, choose
Hello World example. - For Which template would you like to use?, choose
Worker only. - For Which language do you want to use?, choose
JavaScript. - For Do you want to use git for version control?, choose
Yes. - For Do you want to deploy your application?, choose
No(we will be making some changes before deploying).
To start developing your Worker, cd into your new project directory:
cd thumbnail-imageThis will create a new Worker project named thumbnail-image. In the src/index.js file, add the following code block:
export default { async fetch(request, env) { const url = new URL(request.url); if (url.pathname === "/original-image") { const image = await fetch( `https://imagedelivery.net/${env.CLOUDFLARE_ACCOUNT_HASH}/${IMAGE_ID}/public`, ); return image; } return new Response("Image Resizing with a Worker"); },};Update env.CLOUDFLARE_ACCOUNT_HASH with your Cloudflare account ID. Update env.IMAGE_ID with your image ID.
Run your Worker and go to the /original-image route to review your image.
You will now use Cloudflare image transformations, with the fetch method, to add your dynamic text image as an overlay on top of your background image. Start by displaying the resulting image on a different route. Call the new route /thumbnail.
export default {  async fetch(request, env) {    const url = new URL(request.url);    if (url.pathname === "/original-image") {      const image = await fetch(        `https://imagedelivery.net/${env.CLOUDFLARE_ACCOUNT_HASH}/${IMAGE_ID}/public`,      );      return image;    }
    if (url.pathname === "/thumbnail") {    }
    return new Response("Image Resizing with a Worker");  },};
Next, use the fetch method to apply the image transformation changes on top of the background image. The overlay options are nested in options.cf.image.
export default {  async fetch(request, env) {    const url = new URL(request.url);
    if (url.pathname === "/original-image") {      const image = await fetch(        `https://imagedelivery.net/${env.CLOUDFLARE_ACCOUNT_HASH}/${IMAGE_ID}/public`,      );      return image;    }
    if (url.pathname === "/thumbnail") {      fetch(imageURL, {        cf: {          image: {},        },      });    }
    return new Response("Image Resizing with a Worker");  },};
The imageURL is the URL of the image you want to use as a background image. In the cf.image object, specify the options you want to apply to the background image.
Add your background image to an assets directory on GitHub and push your changes to GitHub. Copy the URL of the image upload by performing a left click on the image and selecting the Copy Remote File Url option.
Replace the imageURL value with the copied remote URL.
if (url.pathname === "/thumbnail") { const imageURL = "https://github.com/lauragift21/social-image-demo/blob/1ed9044463b891561b7438ecdecbdd9da48cdb03/assets/cover.png?raw=true"; fetch(imageURL, { cf: { image: {}, }, });}Next, add overlay options in the image object. Resize the image to the preferred width and height for YouTube thumbnails and use the draw option to add overlay text using the deployed URL of your text-to-image Worker.
fetch(imageURL, { cf: { image: { width: 1280, height: 720, draw: [ { url: "https://text-to-image.examples.workers.dev", left: 40, }, ], }, },});Image transformations can only be tested when you deploy your Worker.
To deploy your Worker, open your Wrangler file and update the name key with your project's name. Below is an example with this tutorial's project name:
{ "$schema": "./node_modules/wrangler/config-schema.json", "name": "thumbnail-image"}"$schema" = "./node_modules/wrangler/config-schema.json"name = "thumbnail-image"Deploy your Worker by running:
npx wrangler deployThe command deploys your Worker to custom workers.dev subdomain. Go to your .workers.dev subdomain and go to the /thumbnail route.
You should see the resized image with the text Hello Workers!.

You will now make text applied dynamic. Making your text dynamic will allow you change the text and have it update on the image automatically.
To add dynamic text, append any text attached to the /thumbnail URL using query parameters and pass it down to the text-to-image Worker URL as a parameter.
for (const title of url.searchParams.values()) { try { const editedImage = await fetch(imageURL, { cf: { image: { width: 1280, height: 720, draw: [ { url: `https://text-to-image.examples.workers.dev/?${title}`, left: 50, }, ], }, }, }); return editedImage; } catch (error) { console.log(error); }}This will always return the text you pass as a query string in the generated image. This example URL, https://socialcard.cdnuptime.com/thumbnail?Getting%20Started%20With%20Cloudflare%20Images ↗, will generate the following image:

By completing this tutorial, you have successfully made a custom YouTube thumbnail generator.
In this tutorial, you learned how to use Cloudflare Workers and Cloudflare image transformations to generate custom YouTube thumbnails. To learn more about Cloudflare Workers and image transformations, refer to Resize an image with a Worker.