---
title: Cloudflare Workers
description: Build and deploy serverless applications across Cloudflare's global network with Workers.
image: https://developers.cloudflare.com/dev-products-preview.png
---
> Documentation Index
> Fetch the complete documentation index at: https://developers.cloudflare.com/workers/llms.txt
> Use this file to discover all available pages before exploring further.
[Skip to content](#%5Ftop)
# Cloudflare Workers
A serverless platform for building, deploying, and scaling apps across [Cloudflare's global network ↗](https://www.cloudflare.com/network/) with a single command — no infrastructure to manage, no complex configuration
With Cloudflare Workers, you can expect to:
* Deliver fast performance with high reliability anywhere in the world
* Build full-stack apps with your framework of choice, including [React](https://developers.cloudflare.com/workers/framework-guides/web-apps/react/), [Vue](https://developers.cloudflare.com/workers/framework-guides/web-apps/vue/), [Svelte](https://developers.cloudflare.com/workers/framework-guides/web-apps/sveltekit/), [Next](https://developers.cloudflare.com/workers/framework-guides/web-apps/nextjs/), [Astro](https://developers.cloudflare.com/workers/framework-guides/web-apps/astro/), [React Router](https://developers.cloudflare.com/workers/framework-guides/web-apps/react-router/), [and more](https://developers.cloudflare.com/workers/framework-guides/)
* Use your preferred language, including [JavaScript](https://developers.cloudflare.com/workers/languages/javascript/), [TypeScript](https://developers.cloudflare.com/workers/languages/typescript/), [Python](https://developers.cloudflare.com/workers/languages/python/), [Rust](https://developers.cloudflare.com/workers/languages/rust/), [and more](https://developers.cloudflare.com/workers/runtime-apis/webassembly/)
* Gain deep visibility and insight with built-in [observability](https://developers.cloudflare.com/workers/observability/logs/)
* Get started for free and grow with flexible [pricing](https://developers.cloudflare.com/workers/platform/pricing/), affordable at any scale
Get started with your first project:
[ Deploy a template ](https://dash.cloudflare.com/?to=/:account/workers-and-pages/templates) [ Deploy with Wrangler CLI ](https://developers.cloudflare.com/workers/get-started/guide/)
---
## Build with Workers
#### Front-end applications
Deploy [static assets](https://developers.cloudflare.com/workers/static-assets/) to Cloudflare's [CDN & cache](https://developers.cloudflare.com/cache/) for fast rendering
#### Back-end applications
Build APIs and connect to data stores with [Smart Placement](https://developers.cloudflare.com/workers/configuration/placement/) to optimize latency
#### Serverless AI inference
Run LLMs, generate images, and more with [Workers AI](https://developers.cloudflare.com/workers-ai/)
#### Background jobs
Schedule [cron jobs](https://developers.cloudflare.com/workers/configuration/cron-triggers/), run durable [Workflows](https://developers.cloudflare.com/workflows/), and integrate with [Queues](https://developers.cloudflare.com/queues/)
#### Observability & monitoring
Monitor performance, debug issues, and analyze traffic with [real-time logs](https://developers.cloudflare.com/workers/observability/logs/) and [analytics](https://developers.cloudflare.com/workers/observability/metrics-and-analytics/)
---
## Integrate with Workers
Connect to external services like databases, APIs, and storage via [Bindings](https://developers.cloudflare.com/workers/runtime-apis/bindings/), enabling functionality with just a few lines of code:
**Storage**
**[Durable Objects](https://developers.cloudflare.com/durable-objects/)**
Scalable stateful storage for real-time coordination.
**[D1](https://developers.cloudflare.com/d1/)**
Serverless SQL database built for fast, global queries.
**[KV](https://developers.cloudflare.com/kv/)**
Low-latency key-value storage for fast, edge-cached reads.
**[Queues](https://developers.cloudflare.com/queues/)**
Guaranteed delivery with no charges for egress bandwidth.
**[Hyperdrive](https://developers.cloudflare.com/hyperdrive/)**
Connect to your external database with accelerated queries, cached at the edge.
**Compute**
**[Workers AI](https://developers.cloudflare.com/workers-ai/)**
Machine learning models powered by serverless GPUs.
**[Workflows](https://developers.cloudflare.com/workflows/)**
Durable, long-running operations with automatic retries.
**[Vectorize](https://developers.cloudflare.com/vectorize/)**
Vector database for AI-powered semantic search.
**[R2](https://developers.cloudflare.com/r2/)**
Zero-egress object storage for cost-efficient data access.
**[Browser Run](https://developers.cloudflare.com/browser-run/)**
Programmatic serverless browser instances.
**Media**
**[Cache / CDN](https://developers.cloudflare.com/cache/)**
Global caching for high-performance, low-latency delivery.
**[Images](https://developers.cloudflare.com/images/)**
Streamlined image infrastructure from a single API.
---
Want to connect with the Workers community? [Join our Discord ↗](https://discord.cloudflare.com)
```json
{"@context":"https://schema.org","@type":"WebPage","@id":"https://developers.cloudflare.com/workers/#page","headline":"Overview · Cloudflare Workers docs","description":"Build and deploy serverless applications across Cloudflare's global network with Workers.","url":"https://developers.cloudflare.com/workers/","inLanguage":"en","image":"https://developers.cloudflare.com/dev-products-preview.png","dateModified":"2026-04-23","publisher":{"@type":"Organization","name":"Cloudflare","url":"https://www.cloudflare.com/"},"isPartOf":{"@type":"WebSite","@id":"https://developers.cloudflare.com/#website","name":"Cloudflare Docs","url":"https://developers.cloudflare.com/"}}
{"@context":"https://schema.org","@type":"BreadcrumbList","itemListElement":[{"@type":"ListItem","position":1,"item":{"@id":"/directory/","name":"Directory"}},{"@type":"ListItem","position":2,"item":{"@id":"/workers/","name":"Workers"}}]}
```
---
---
title: Examples
description: Browse code examples and starter templates for Cloudflare Workers.
image: https://developers.cloudflare.com/dev-products-preview.png
---
> Documentation Index
> Fetch the complete documentation index at: https://developers.cloudflare.com/workers/llms.txt
> Use this file to discover all available pages before exploring further.
[Skip to content](#%5Ftop)
# Examples
Explore the following examples for Workers.
[Single Page App (SPA) shell with bootstrap dataUse HTMLRewriter to inject prefetched bootstrap data into an SPA shell, eliminating client-side data fetching on initial load. Works with Workers Static Assets or an externally hosted SPA.](https://developers.cloudflare.com/workers/examples/spa-shell/)[Write to Analytics EngineWrite custom analytics events to Workers Analytics Engine for high-cardinality, time-series data.](https://developers.cloudflare.com/workers/examples/analytics-engine/)[Stream large JSONParse and transform large JSON request and response bodies using streaming.](https://developers.cloudflare.com/workers/examples/streaming-json/)[HTTP Basic AuthenticationShows how to restrict access using the HTTP Basic schema.](https://developers.cloudflare.com/workers/examples/basic-auth/)[Fetch HTMLSend a request to a remote server, read HTML from the response, and serve that HTML.](https://developers.cloudflare.com/workers/examples/fetch-html/)[Return small HTML pageDeliver an HTML page from an HTML string directly inside the Worker script.](https://developers.cloudflare.com/workers/examples/return-html/)[Return JSONReturn JSON directly from a Worker script, useful for building APIs and middleware.](https://developers.cloudflare.com/workers/examples/return-json/)[Sign requestsVerify a signed request using the HMAC and SHA-256 algorithms or return a 403.](https://developers.cloudflare.com/workers/examples/signing-requests/)[Stream OpenAI API ResponsesUse the OpenAI v4 SDK to stream responses from OpenAI.](https://developers.cloudflare.com/workers/examples/openai-sdk-streaming/)[Using timingSafeEqualProtect against timing attacks by safely comparing values using timingSafeEqual.](https://developers.cloudflare.com/workers/examples/protect-against-timing-attacks/)[Turnstile with WorkersInject Turnstile implicitly into HTML elements using the HTMLRewriter runtime API.](https://developers.cloudflare.com/workers/examples/turnstile-html-rewriter/)[Custom Domain with ImagesSet up custom domain for Images using a Worker or serve images using a prefix path and Cloudflare registered domain.](https://developers.cloudflare.com/workers/examples/images-workers/)[103 Early HintsAllow a client to request static assets while waiting for the HTML response.](https://developers.cloudflare.com/workers/examples/103-early-hints/)[Cache Tags using WorkersSend Additional Cache Tags using Workers](https://developers.cloudflare.com/workers/examples/cache-tags/)[Accessing the Cloudflare ObjectAccess custom Cloudflare properties and control how Cloudflare features are applied to every request.](https://developers.cloudflare.com/workers/examples/accessing-the-cloudflare-object/)[Aggregate requestsSend two GET request to two urls and aggregates the responses into one response.](https://developers.cloudflare.com/workers/examples/aggregate-requests/)[Block on TLSInspects the incoming request's TLS version and blocks if under TLSv1.2.](https://developers.cloudflare.com/workers/examples/block-on-tls/)[Bulk redirectsRedirect requests to certain URLs based on a mapped object to the request's URL.](https://developers.cloudflare.com/workers/examples/bulk-redirects/)[Cache POST requestsCache POST requests using the Cache API.](https://developers.cloudflare.com/workers/examples/cache-post-request/)[Conditional responseReturn a response based on the incoming request's URL, HTTP method, User Agent, IP address, ASN or device type.](https://developers.cloudflare.com/workers/examples/conditional-response/)[Cookie parsingGiven the cookie name, get the value of a cookie. You can also use cookies for A/B testing.](https://developers.cloudflare.com/workers/examples/extract-cookie-value/)[Fetch JSONSend a GET request and read in JSON from the response. Use to fetch external data.](https://developers.cloudflare.com/workers/examples/fetch-json/)[Geolocation: Custom StylingPersonalize website styling based on localized user time.](https://developers.cloudflare.com/workers/examples/geolocation-custom-styling/)[Geolocation: Hello WorldGet all geolocation data fields and display them in HTML.](https://developers.cloudflare.com/workers/examples/geolocation-hello-world/)[Post JSONSend a POST request with JSON data. Use to share data with external servers.](https://developers.cloudflare.com/workers/examples/post-json/)[RedirectRedirect requests from one URL to another or from one set of URLs to another set.](https://developers.cloudflare.com/workers/examples/redirect/)[Rewrite linksRewrite URL links in HTML using the HTMLRewriter. This is useful for JAMstack websites.](https://developers.cloudflare.com/workers/examples/rewrite-links/)[Set security headersSet common security headers (X-XSS-Protection, X-Frame-Options, X-Content-Type-Options, Permissions-Policy, Referrer-Policy, Strict-Transport-Security, Content-Security-Policy).](https://developers.cloudflare.com/workers/examples/security-headers/)[Multiple Cron TriggersSet multiple Cron Triggers on three different schedules.](https://developers.cloudflare.com/workers/examples/multiple-cron-triggers/)[Setting Cron TriggersSet a Cron Trigger for your Worker.](https://developers.cloudflare.com/workers/examples/cron-trigger/)[Using the WebSockets APIUse the WebSockets API to communicate in real time with your Cloudflare Workers.](https://developers.cloudflare.com/workers/examples/websockets/)[Geolocation: Weather applicationFetch weather data from an API using the user's geolocation data.](https://developers.cloudflare.com/workers/examples/geolocation-app-weather/)[A/B testing with same-URL direct accessSet up an A/B test by controlling what response is served based on cookies. This version supports passing the request through to test and control on the origin, bypassing random assignment.](https://developers.cloudflare.com/workers/examples/ab-testing/)[Alter headersExample of how to add, change, or delete headers sent in a request or returned in a response.](https://developers.cloudflare.com/workers/examples/alter-headers/)[Auth with headersAllow or deny a request based on a known pre-shared key in a header. This is not meant to replace the WebCrypto API.](https://developers.cloudflare.com/workers/examples/auth-with-headers/)[Bulk origin overrideResolve requests to your domain to a set of proxy third-party origin URLs.](https://developers.cloudflare.com/workers/examples/bulk-origin-proxy/)[Using the Cache APIUse the Cache API to store responses in Cloudflare's cache.](https://developers.cloudflare.com/workers/examples/cache-api/)[Cache using fetchDetermine how to cache a resource by setting TTLs, custom cache keys, and cache headers in a fetch request.](https://developers.cloudflare.com/workers/examples/cache-using-fetch/)[CORS header proxyAdd the necessary CORS headers to a third party API response.](https://developers.cloudflare.com/workers/examples/cors-header-proxy/)[Country code redirectRedirect a response based on the country code in the header of a visitor.](https://developers.cloudflare.com/workers/examples/country-code-redirect/)[Data loss preventionProtect sensitive data to prevent data loss, and send alerts to a webhooks server in the event of a data breach.](https://developers.cloudflare.com/workers/examples/data-loss-prevention/)[Debugging logsSend debugging information in an errored response to a logging service.](https://developers.cloudflare.com/workers/examples/debugging-logs/)[Hot-link protectionBlock other websites from linking to your content. This is useful for protecting images.](https://developers.cloudflare.com/workers/examples/hot-link-protection/)[Logging headers to consoleExamine the contents of a Headers object by logging to console with a Map.](https://developers.cloudflare.com/workers/examples/logging-headers/)[Modify request propertyCreate a modified request with edited properties based off of an incoming request.](https://developers.cloudflare.com/workers/examples/modify-request-property/)[Modify responseFetch and modify response properties which are immutable by creating a copy first.](https://developers.cloudflare.com/workers/examples/modify-response/)[Read POSTServe an HTML form, then read POST requests. Use also to read JSON or POST data from an incoming request.](https://developers.cloudflare.com/workers/examples/read-post/)[Respond with another siteRespond to the Worker request with the response from another website (example.com in this example).](https://developers.cloudflare.com/workers/examples/respond-with-another-site/)
```json
{"@context":"https://schema.org","@type":"WebPage","@id":"https://developers.cloudflare.com/workers/examples/#page","headline":"Examples · Cloudflare Workers docs","description":"Browse code examples and starter templates for Cloudflare Workers.","url":"https://developers.cloudflare.com/workers/examples/","inLanguage":"en","image":"https://developers.cloudflare.com/dev-products-preview.png","dateModified":"2026-05-20","publisher":{"@type":"Organization","name":"Cloudflare","url":"https://www.cloudflare.com/"},"isPartOf":{"@type":"WebSite","@id":"https://developers.cloudflare.com/#website","name":"Cloudflare Docs","url":"https://developers.cloudflare.com/"}}
{"@context":"https://schema.org","@type":"BreadcrumbList","itemListElement":[{"@type":"ListItem","position":1,"item":{"@id":"/directory/","name":"Directory"}},{"@type":"ListItem","position":2,"item":{"@id":"/workers/","name":"Workers"}},{"@type":"ListItem","position":3,"item":{"@id":"/workers/examples/","name":"Examples"}}]}
```
---
---
title: 103 Early Hints
description: Allow a client to request static assets while waiting for the HTML response.
image: https://developers.cloudflare.com/dev-products-preview.png
---
> Documentation Index
> Fetch the complete documentation index at: https://developers.cloudflare.com/workers/llms.txt
> Use this file to discover all available pages before exploring further.
[Skip to content](#%5Ftop)
# 103 Early Hints
Allow a client to request static assets while waiting for the HTML response.
If you want to get started quickly, click on the button below.
[](https://deploy.workers.cloudflare.com/?url=https://github.com/cloudflare/docs-examples/tree/main/workers/103-early-hints)
This creates a repository in your GitHub account and deploys the application to Cloudflare Workers.
`103` Early Hints is an HTTP status code designed to speed up content delivery. When enabled, Cloudflare can cache the `Link` headers marked with preload and/or preconnect from HTML pages and serve them in a `103` Early Hints response before reaching the origin server. Browsers can use these hints to fetch linked assets while waiting for the origin’s final response, dramatically improving page load speeds.
To ensure Early Hints are enabled on your zone:
1. In the Cloudflare dashboard, go to the **Speed settings** page.
[ Go to **Settings** ](https://dash.cloudflare.com/?to=/:account/:zone/speed/optimization)
2. Go to **Content Optimization**.
3. Enable the **Early Hints** toggle to on.
You can return `Link` headers from a Worker running on your zone to speed up your page load times.
* [ JavaScript ](#tab-panel-12427)
* [ TypeScript ](#tab-panel-12428)
* [ Python ](#tab-panel-12429)
* [ Hono ](#tab-panel-12430)
**JavaScript**
```js
const CSS = "body { color: red; }";
const HTML = `
Early Hints test
Early Hints test page
`;
export default {
async fetch(req) {
// If request is for test.css, serve the raw CSS
if (/test\.css$/.test(req.url)) {
return new Response(CSS, {
headers: {
"content-type": "text/css",
},
});
} else {
// Serve raw HTML using Early Hints for the CSS file
return new Response(HTML, {
headers: {
"content-type": "text/html",
link: "; rel=preload; as=style",
},
});
}
},
};
```
**JavaScript**
```js
const CSS = "body { color: red; }";
const HTML = `
Early Hints test
Early Hints test page
`;
export default {
async fetch(req): Promise {
// If request is for test.css, serve the raw CSS
if (/test\.css$/.test(req.url)) {
return new Response(CSS, {
headers: {
"content-type": "text/css",
},
});
} else {
// Serve raw HTML using Early Hints for the CSS file
return new Response(HTML, {
headers: {
"content-type": "text/html",
link: "; rel=preload; as=style",
},
});
}
},
} satisfies ExportedHandler;
```
**Python**
```py
import re
from workers import Response, WorkerEntrypoint
CSS = "body { color: red; }"
HTML = """
Early Hints test
Early Hints test page
"""
class Default(WorkerEntrypoint):
async def fetch(self, request):
if re.search("test.css", request.url):
headers = {"content-type": "text/css"}
return Response(CSS, headers=headers)
else:
headers = {"content-type": "text/html","link": "; rel=preload; as=style"}
return Response(HTML, headers=headers)
```
**TypeScript**
```ts
import { Hono } from "hono";
const app = new Hono();
const CSS = "body { color: red; }";
const HTML = `
Early Hints test
Early Hints test page
`;
// Serve CSS file
app.get("/test.css", (c) => {
return c.body(CSS, {
headers: {
"content-type": "text/css",
},
});
});
// Serve HTML with early hints
app.get("*", (c) => {
return c.html(HTML, {
headers: {
link: "; rel=preload; as=style",
},
});
});
export default app;
```
```json
{"@context":"https://schema.org","@type":"TechArticle","@id":"https://developers.cloudflare.com/workers/examples/103-early-hints/#page","headline":"103 Early Hints · Cloudflare Workers docs","description":"Allow a client to request static assets while waiting for the HTML response.","url":"https://developers.cloudflare.com/workers/examples/103-early-hints/","inLanguage":"en","image":"https://developers.cloudflare.com/dev-products-preview.png","dateModified":"2026-04-23","publisher":{"@type":"Organization","name":"Cloudflare","url":"https://www.cloudflare.com/"},"isPartOf":{"@type":"WebSite","@id":"https://developers.cloudflare.com/#website","name":"Cloudflare Docs","url":"https://developers.cloudflare.com/"},"keywords":["Middleware","Headers","JavaScript","TypeScript","Python"]}
{"@context":"https://schema.org","@type":"BreadcrumbList","itemListElement":[{"@type":"ListItem","position":1,"item":{"@id":"/directory/","name":"Directory"}},{"@type":"ListItem","position":2,"item":{"@id":"/workers/","name":"Workers"}},{"@type":"ListItem","position":3,"item":{"@id":"/workers/examples/","name":"Examples"}},{"@type":"ListItem","position":4,"item":{"@id":"/workers/examples/103-early-hints/","name":"103 Early Hints"}}]}
```
---
---
title: A/B testing with same-URL direct access
description: Set up an A/B test by controlling what response is served based on cookies. This version supports passing the request through to test and control on the origin, bypassing random assignment.
image: https://developers.cloudflare.com/dev-products-preview.png
---
> Documentation Index
> Fetch the complete documentation index at: https://developers.cloudflare.com/workers/llms.txt
> Use this file to discover all available pages before exploring further.
[Skip to content](#%5Ftop)
# A/B testing with same-URL direct access
Set up an A/B test by controlling what response is served based on cookies. This version supports passing the request through to test and control on the origin, bypassing random assignment.
* [ JavaScript ](#tab-panel-12431)
* [ TypeScript ](#tab-panel-12432)
* [ Python ](#tab-panel-12433)
* [ Hono ](#tab-panel-12434)
**JavaScript**
```js
const NAME = "myExampleWorkersABTest";
export default {
async fetch(req) {
const url = new URL(req.url);
// Enable Passthrough to allow direct access to control and test routes.
if (url.pathname.startsWith("/control") || url.pathname.startsWith("/test"))
return fetch(req);
// Determine which group this requester is in.
const cookie = req.headers.get("cookie");
if (cookie && cookie.includes(`${NAME}=control`)) {
url.pathname = "/control" + url.pathname;
} else if (cookie && cookie.includes(`${NAME}=test`)) {
url.pathname = "/test" + url.pathname;
} else {
// If there is no cookie, this is a new client. Choose a group and set the cookie.
const group = Math.random() < 0.5 ? "test" : "control"; // 50/50 split
if (group === "control") {
url.pathname = "/control" + url.pathname;
} else {
url.pathname = "/test" + url.pathname;
}
// Reconstruct response to avoid immutability
let res = await fetch(url);
res = new Response(res.body, res);
// Set cookie to enable persistent A/B sessions.
res.headers.append("Set-Cookie", `${NAME}=${group}; path=/`);
return res;
}
return fetch(url);
},
};
```
**TypeScript**
```ts
const NAME = "myExampleWorkersABTest";
export default {
async fetch(req): Promise {
const url = new URL(req.url);
// Enable Passthrough to allow direct access to control and test routes.
if (url.pathname.startsWith("/control") || url.pathname.startsWith("/test"))
return fetch(req);
// Determine which group this requester is in.
const cookie = req.headers.get("cookie");
if (cookie && cookie.includes(`${NAME}=control`)) {
url.pathname = "/control" + url.pathname;
} else if (cookie && cookie.includes(`${NAME}=test`)) {
url.pathname = "/test" + url.pathname;
} else {
// If there is no cookie, this is a new client. Choose a group and set the cookie.
const group = Math.random() < 0.5 ? "test" : "control"; // 50/50 split
if (group === "control") {
url.pathname = "/control" + url.pathname;
} else {
url.pathname = "/test" + url.pathname;
}
// Reconstruct response to avoid immutability
let res = await fetch(url);
res = new Response(res.body, res);
// Set cookie to enable persistent A/B sessions.
res.headers.append("Set-Cookie", `${NAME}=${group}; path=/`);
return res;
}
return fetch(url);
},
} satisfies ExportedHandler;
```
**Python**
```py
import random
from urllib.parse import urlparse, urlunparse
from workers import Response, fetch, WorkerEntrypoint
NAME = "myExampleWorkersABTest"
class Default(WorkerEntrypoint):
async def fetch(self, request):
url = urlparse(request.url)
# Uncomment below when testing locally
# url = url._replace(netloc="example.com") if "localhost" in url.netloc else url
# Enable Passthrough to allow direct access to control and test routes.
if url.path.startswith("/control") or url.path.startswith("/test"):
return fetch(urlunparse(url))
# Determine which group this requester is in.
cookie = request.headers.get("cookie")
if cookie and f'{NAME}=control' in cookie:
url = url._replace(path="/control" + url.path)
elif cookie and f'{NAME}=test' in cookie:
url = url._replace(path="/test" + url.path)
else:
# If there is no cookie, this is a new client. Choose a group and set the cookie.
group = "test" if random.random() < 0.5 else "control"
if group == "control":
url = url._replace(path="/control" + url.path)
else:
url = url._replace(path="/test" + url.path)
# Reconstruct response to avoid immutability
res = await fetch(urlunparse(url))
headers = dict(res.headers)
headers["Set-Cookie"] = f'{NAME}={group}; path=/'
return Response(res.body, headers=headers)
return fetch(urlunparse(url))
```
**TypeScript**
```ts
import { Hono } from "hono";
import { getCookie, setCookie } from "hono/cookie";
const app = new Hono();
const NAME = "myExampleWorkersABTest";
// Enable passthrough to allow direct access to control and test routes
app.all("/control/*", (c) => fetch(c.req.raw));
app.all("/test/*", (c) => fetch(c.req.raw));
// Middleware to handle A/B testing logic
app.use("*", async (c) => {
const url = new URL(c.req.url);
// Determine which group this requester is in
const abTestCookie = getCookie(c, NAME);
if (abTestCookie === "control") {
// User is in control group
url.pathname = "/control" + c.req.path;
} else if (abTestCookie === "test") {
// User is in test group
url.pathname = "/test" + c.req.path;
} else {
// If there is no cookie, this is a new client
// Choose a group and set the cookie (50/50 split)
const group = Math.random() < 0.5 ? "test" : "control";
// Update URL path based on assigned group
if (group === "control") {
url.pathname = "/control" + c.req.path;
} else {
url.pathname = "/test" + c.req.path;
}
// Set cookie to enable persistent A/B sessions
setCookie(c, NAME, group, {
path: "/",
});
}
const res = await fetch(url);
return c.body(res.body, res);
});
export default app;
```
```json
{"@context":"https://schema.org","@type":"TechArticle","@id":"https://developers.cloudflare.com/workers/examples/ab-testing/#page","headline":"A/B testing with same-URL direct access · Cloudflare Workers docs","description":"Set up an A/B test by controlling what response is served based on cookies. This version supports passing the request through to test and control on the origin, bypassing random assignment.","url":"https://developers.cloudflare.com/workers/examples/ab-testing/","inLanguage":"en","image":"https://developers.cloudflare.com/dev-products-preview.png","dateModified":"2026-04-23","publisher":{"@type":"Organization","name":"Cloudflare","url":"https://www.cloudflare.com/"},"isPartOf":{"@type":"WebSite","@id":"https://developers.cloudflare.com/#website","name":"Cloudflare Docs","url":"https://developers.cloudflare.com/"},"keywords":["JavaScript","TypeScript","Python"]}
{"@context":"https://schema.org","@type":"BreadcrumbList","itemListElement":[{"@type":"ListItem","position":1,"item":{"@id":"/directory/","name":"Directory"}},{"@type":"ListItem","position":2,"item":{"@id":"/workers/","name":"Workers"}},{"@type":"ListItem","position":3,"item":{"@id":"/workers/examples/","name":"Examples"}},{"@type":"ListItem","position":4,"item":{"@id":"/workers/examples/ab-testing/","name":"A/B testing with same-URL direct access"}}]}
```
---
---
title: Accessing the Cloudflare Object
description: Access custom Cloudflare properties and control how Cloudflare features are applied to every request.
image: https://developers.cloudflare.com/dev-products-preview.png
---
> Documentation Index
> Fetch the complete documentation index at: https://developers.cloudflare.com/workers/llms.txt
> Use this file to discover all available pages before exploring further.
[Skip to content](#%5Ftop)
# Accessing the Cloudflare Object
Access custom Cloudflare properties and control how Cloudflare features are applied to every request.
If you want to get started quickly, click on the button below.
[](https://deploy.workers.cloudflare.com/?url=https://github.com/cloudflare/docs-examples/tree/main/workers/accessing-the-cloudflare-object)
This creates a repository in your GitHub account and deploys the application to Cloudflare Workers.
* [ JavaScript ](#tab-panel-12435)
* [ TypeScript ](#tab-panel-12436)
* [ Hono ](#tab-panel-12437)
* [ Python ](#tab-panel-12438)
**JavaScript**
```js
export default {
async fetch(req) {
const data =
req.cf !== undefined
? req.cf
: { error: "The `cf` object is not available inside the preview." };
return new Response(JSON.stringify(data, null, 2), {
headers: {
"content-type": "application/json;charset=UTF-8",
},
});
},
};
```
**TypeScript**
```ts
export default {
async fetch(req): Promise {
const data =
req.cf !== undefined
? req.cf
: { error: "The `cf` object is not available inside the preview." };
return new Response(JSON.stringify(data, null, 2), {
headers: {
"content-type": "application/json;charset=UTF-8",
},
});
},
} satisfies ExportedHandler;
```
**TypeScript**
```ts
import { Hono } from "hono";
const app = new Hono();
app.get("*", async (c) => {
// Access the raw request to get the cf object
const req = c.req.raw;
// Check if the cf object is available
const data =
req.cf !== undefined
? req.cf
: { error: "The `cf` object is not available inside the preview." };
// Return the data formatted with 2-space indentation
return c.json(data);
});
export default app;
```
**Python**
```py
import json
from workers import Response, WorkerEntrypoint
from js import JSON
class Default(WorkerEntrypoint):
async def fetch(self, request):
error = json.dumps({ "error": "The `cf` object is not available inside the preview." })
data = request.cf if request.cf is not None else error
headers = {"content-type":"application/json"}
return Response(JSON.stringify(data, None, 2), headers=headers)
```
```json
{"@context":"https://schema.org","@type":"TechArticle","@id":"https://developers.cloudflare.com/workers/examples/accessing-the-cloudflare-object/#page","headline":"Accessing the Cloudflare Object · Cloudflare Workers docs","description":"Access custom Cloudflare properties and control how Cloudflare features are applied to every request.","url":"https://developers.cloudflare.com/workers/examples/accessing-the-cloudflare-object/","inLanguage":"en","image":"https://developers.cloudflare.com/dev-products-preview.png","dateModified":"2026-04-23","publisher":{"@type":"Organization","name":"Cloudflare","url":"https://www.cloudflare.com/"},"isPartOf":{"@type":"WebSite","@id":"https://developers.cloudflare.com/#website","name":"Cloudflare Docs","url":"https://developers.cloudflare.com/"},"keywords":["JavaScript","TypeScript","Python"]}
{"@context":"https://schema.org","@type":"BreadcrumbList","itemListElement":[{"@type":"ListItem","position":1,"item":{"@id":"/directory/","name":"Directory"}},{"@type":"ListItem","position":2,"item":{"@id":"/workers/","name":"Workers"}},{"@type":"ListItem","position":3,"item":{"@id":"/workers/examples/","name":"Examples"}},{"@type":"ListItem","position":4,"item":{"@id":"/workers/examples/accessing-the-cloudflare-object/","name":"Accessing the Cloudflare Object"}}]}
```
---
---
title: Aggregate requests
description: Send two GET request to two urls and aggregates the responses into one response.
image: https://developers.cloudflare.com/dev-products-preview.png
---
> Documentation Index
> Fetch the complete documentation index at: https://developers.cloudflare.com/workers/llms.txt
> Use this file to discover all available pages before exploring further.
[Skip to content](#%5Ftop)
# Aggregate requests
Send two GET request to two urls and aggregates the responses into one response.
If you want to get started quickly, click on the button below.
[](https://deploy.workers.cloudflare.com/?url=https://github.com/cloudflare/docs-examples/tree/main/workers/aggregate-requests)
This creates a repository in your GitHub account and deploys the application to Cloudflare Workers.
* [ JavaScript ](#tab-panel-12439)
* [ TypeScript ](#tab-panel-12440)
* [ Hono ](#tab-panel-12441)
* [ Python ](#tab-panel-12442)
**JavaScript**
```js
export default {
async fetch(request) {
// someHost is set up to return JSON responses
const someHost = "https://jsonplaceholder.typicode.com";
const url1 = someHost + "/todos/1";
const url2 = someHost + "/todos/2";
const responses = await Promise.all([fetch(url1), fetch(url2)]);
const results = await Promise.all(responses.map((r) => r.json()));
const options = {
headers: { "content-type": "application/json;charset=UTF-8" },
};
return new Response(JSON.stringify(results), options);
},
};
```
**TypeScript**
```ts
export default {
async fetch(request) {
// someHost is set up to return JSON responses
const someHost = "https://jsonplaceholder.typicode.com";
const url1 = someHost + "/todos/1";
const url2 = someHost + "/todos/2";
const responses = await Promise.all([fetch(url1), fetch(url2)]);
const results = await Promise.all(responses.map((r) => r.json()));
const options = {
headers: { "content-type": "application/json;charset=UTF-8" },
};
return new Response(JSON.stringify(results), options);
},
} satisfies ExportedHandler;
```
**TypeScript**
```ts
import { Hono } from "hono";
const app = new Hono();
app.get("*", async (c) => {
// someHost is set up to return JSON responses
const someHost = "https://jsonplaceholder.typicode.com";
const url1 = someHost + "/todos/1";
const url2 = someHost + "/todos/2";
// Fetch both URLs concurrently
const responses = await Promise.all([fetch(url1), fetch(url2)]);
// Parse JSON responses concurrently
const results = await Promise.all(responses.map((r) => r.json()));
// Return aggregated results
return c.json(results);
});
export default app;
```
**Python**
```py
from workers import Response, fetch, WorkerEntrypoint
import asyncio
import json
class Default(WorkerEntrypoint):
async def fetch(self, request):
# some_host is set up to return JSON responses
some_host = "https://jsonplaceholder.typicode.com"
url1 = some_host + "/todos/1"
url2 = some_host + "/todos/2"
responses = await asyncio.gather(fetch(url1), fetch(url2))
results = await asyncio.gather(*(r.json() for r in responses))
headers = {"content-type": "application/json;charset=UTF-8"}
return Response.json(results, headers=headers)
```
```json
{"@context":"https://schema.org","@type":"TechArticle","@id":"https://developers.cloudflare.com/workers/examples/aggregate-requests/#page","headline":"Aggregate requests · Cloudflare Workers docs","description":"Send two GET request to two urls and aggregates the responses into one response.","url":"https://developers.cloudflare.com/workers/examples/aggregate-requests/","inLanguage":"en","image":"https://developers.cloudflare.com/dev-products-preview.png","dateModified":"2026-04-23","publisher":{"@type":"Organization","name":"Cloudflare","url":"https://www.cloudflare.com/"},"isPartOf":{"@type":"WebSite","@id":"https://developers.cloudflare.com/#website","name":"Cloudflare Docs","url":"https://developers.cloudflare.com/"},"keywords":["JavaScript","TypeScript","Python"]}
{"@context":"https://schema.org","@type":"BreadcrumbList","itemListElement":[{"@type":"ListItem","position":1,"item":{"@id":"/directory/","name":"Directory"}},{"@type":"ListItem","position":2,"item":{"@id":"/workers/","name":"Workers"}},{"@type":"ListItem","position":3,"item":{"@id":"/workers/examples/","name":"Examples"}},{"@type":"ListItem","position":4,"item":{"@id":"/workers/examples/aggregate-requests/","name":"Aggregate requests"}}]}
```
---
---
title: Alter headers
description: Example of how to add, change, or delete headers sent in a request or returned in a response.
image: https://developers.cloudflare.com/dev-products-preview.png
---
> Documentation Index
> Fetch the complete documentation index at: https://developers.cloudflare.com/workers/llms.txt
> Use this file to discover all available pages before exploring further.
[Skip to content](#%5Ftop)
# Alter headers
Example of how to add, change, or delete headers sent in a request or returned in a response.
If you want to get started quickly, click on the button below.
[](https://deploy.workers.cloudflare.com/?url=https://github.com/cloudflare/docs-examples/tree/main/workers/alter-headers)
This creates a repository in your GitHub account and deploys the application to Cloudflare Workers.
* [ JavaScript ](#tab-panel-12443)
* [ TypeScript ](#tab-panel-12444)
* [ Python ](#tab-panel-12445)
* [ Hono ](#tab-panel-12446)
**JavaScript**
```js
export default {
async fetch(request) {
const response = await fetch("https://example.com");
// Clone the response so that it's no longer immutable
const newResponse = new Response(response.body, response);
// Add a custom header with a value
newResponse.headers.append(
"x-workers-hello",
"Hello from Cloudflare Workers",
);
// Delete headers
newResponse.headers.delete("x-header-to-delete");
newResponse.headers.delete("x-header2-to-delete");
// Adjust the value for an existing header
newResponse.headers.set("x-header-to-change", "NewValue");
return newResponse;
},
};
```
**TypeScript**
```ts
export default {
async fetch(request): Promise {
const response = await fetch(request);
// Clone the response so that it's no longer immutable
const newResponse = new Response(response.body, response);
// Add a custom header with a value
newResponse.headers.append(
"x-workers-hello",
"Hello from Cloudflare Workers",
);
// Delete headers
newResponse.headers.delete("x-header-to-delete");
newResponse.headers.delete("x-header2-to-delete");
// Adjust the value for an existing header
newResponse.headers.set("x-header-to-change", "NewValue");
return newResponse;
},
} satisfies ExportedHandler;
```
**Python**
```py
from workers import Response, fetch, WorkerEntrypoint
class Default(WorkerEntrypoint):
async def fetch(self, request):
response = await fetch("https://example.com")
# Grab the response headers so they can be modified
new_headers = response.headers
# Add a custom header with a value
new_headers["x-workers-hello"] = "Hello from Cloudflare Workers"
# Delete headers
if "x-header-to-delete" in new_headers:
del new_headers["x-header-to-delete"]
if "x-header2-to-delete" in new_headers:
del new_headers["x-header2-to-delete"]
# Adjust the value for an existing header
new_headers["x-header-to-change"] = "NewValue"
return Response(response.body, headers=new_headers)
```
**TypeScript**
```ts
import { Hono } from 'hono';
const app = new Hono();
app.use('*', async (c, next) => {
// Process the request with the next middleware/handler
await next();
// After the response is generated, we can modify its headers
// Add a custom header with a value
c.res.headers.append(
"x-workers-hello",
"Hello from Cloudflare Workers with Hono"
);
// Delete headers
c.res.headers.delete("x-header-to-delete");
c.res.headers.delete("x-header2-to-delete");
// Adjust the value for an existing header
c.res.headers.set("x-header-to-change", "NewValue");
});
app.get('*', async (c) => {
// Fetch content from example.com
const response = await fetch("https://example.com");
// Return the response body with original headers
// (our middleware will modify the headers before sending)
return new Response(response.body, {
headers: response.headers
});
});
export default app;
```
You can also use the [custom-headers-example template ↗](https://github.com/kristianfreeman/custom-headers-example) to deploy this code to your custom domain.
```json
{"@context":"https://schema.org","@type":"TechArticle","@id":"https://developers.cloudflare.com/workers/examples/alter-headers/#page","headline":"Alter headers · Cloudflare Workers docs","description":"Example of how to add, change, or delete headers sent in a request or returned in a response.","url":"https://developers.cloudflare.com/workers/examples/alter-headers/","inLanguage":"en","image":"https://developers.cloudflare.com/dev-products-preview.png","dateModified":"2026-04-23","publisher":{"@type":"Organization","name":"Cloudflare","url":"https://www.cloudflare.com/"},"isPartOf":{"@type":"WebSite","@id":"https://developers.cloudflare.com/#website","name":"Cloudflare Docs","url":"https://developers.cloudflare.com/"},"keywords":["Headers","Middleware","JavaScript","TypeScript","Python"]}
{"@context":"https://schema.org","@type":"BreadcrumbList","itemListElement":[{"@type":"ListItem","position":1,"item":{"@id":"/directory/","name":"Directory"}},{"@type":"ListItem","position":2,"item":{"@id":"/workers/","name":"Workers"}},{"@type":"ListItem","position":3,"item":{"@id":"/workers/examples/","name":"Examples"}},{"@type":"ListItem","position":4,"item":{"@id":"/workers/examples/alter-headers/","name":"Alter headers"}}]}
```
---
---
title: Write to Analytics Engine
description: Write custom analytics events to Workers Analytics Engine for high-cardinality, time-series data.
image: https://developers.cloudflare.com/dev-products-preview.png
---
> Documentation Index
> Fetch the complete documentation index at: https://developers.cloudflare.com/workers/llms.txt
> Use this file to discover all available pages before exploring further.
[Skip to content](#%5Ftop)
# Write to Analytics Engine
Write custom analytics events to Workers Analytics Engine.
[Workers Analytics Engine](https://developers.cloudflare.com/analytics/analytics-engine/) provides time-series analytics at scale. Use it to track custom metrics, build usage-based billing, or understand service health on a per-customer basis.
Unlike logs, Analytics Engine is designed for aggregated queries over high-cardinality data. Writes are non-blocking and do not impact request latency.
## Configure the binding
Add an Analytics Engine dataset binding to your Wrangler configuration file. The dataset is created automatically when you first write to it.
* [ wrangler.jsonc ](#tab-panel-12447)
* [ wrangler.toml ](#tab-panel-12448)
**JSONC**
```jsonc
{
"analytics_engine_datasets": [
{
"binding": "ANALYTICS",
"dataset": "my_dataset",
},
],
}
```
**TOML**
```toml
[[analytics_engine_datasets]]
binding = "ANALYTICS"
dataset = "my_dataset"
```
## Write data points
* [ JavaScript ](#tab-panel-12449)
* [ TypeScript ](#tab-panel-12450)
**JavaScript**
```js
export default {
async fetch(request, env) {
const url = new URL(request.url);
// Write a page view event
env.ANALYTICS.writeDataPoint({
blobs: [
url.pathname,
request.headers.get("cf-connecting-country") ?? "unknown",
],
doubles: [1], // Count
indexes: [url.hostname], // Sampling key
});
// Write a response timing event
const start = Date.now();
const response = await fetch(request);
const duration = Date.now() - start;
env.ANALYTICS.writeDataPoint({
blobs: [url.pathname, response.status.toString()],
doubles: [duration],
indexes: [url.hostname],
});
// Writes are non-blocking - no need to await or use waitUntil()
return response;
},
};
```
**TypeScript**
```ts
interface Env {
ANALYTICS: AnalyticsEngineDataset;
}
export default {
async fetch(request: Request, env: Env): Promise {
const url = new URL(request.url);
// Write a page view event
env.ANALYTICS.writeDataPoint({
blobs: [
url.pathname,
request.headers.get("cf-connecting-country") ?? "unknown",
],
doubles: [1], // Count
indexes: [url.hostname], // Sampling key
});
// Write a response timing event
const start = Date.now();
const response = await fetch(request);
const duration = Date.now() - start;
env.ANALYTICS.writeDataPoint({
blobs: [url.pathname, response.status.toString()],
doubles: [duration],
indexes: [url.hostname],
});
// Writes are non-blocking - no need to await or use waitUntil()
return response;
},
};
```
## Data point structure
Each data point consists of:
* **blobs** (strings) - Dimensions for grouping and filtering. Use for paths, regions, status codes, or customer IDs.
* **doubles** (numbers) - Numeric values to record, such as counts, durations, or sizes.
* **indexes** (strings) - A single string used as the [sampling key](https://developers.cloudflare.com/analytics/analytics-engine/sql-api/#sampling). Group related events under the same index.
## Query your data
Query your data using the [SQL API](https://developers.cloudflare.com/analytics/analytics-engine/sql-api/):
```bash
curl "https://api.cloudflare.com/client/v4/accounts/$CLOUDFLARE_ACCOUNT_ID/analytics_engine/sql" \
--header "Authorization: Bearer $CLOUDFLARE_API_TOKEN" \
--data "SELECT blob1 AS path, SUM(_sample_interval) AS views FROM my_dataset WHERE timestamp > NOW() - INTERVAL '1' HOUR GROUP BY path ORDER BY views DESC LIMIT 10"
```
## Related resources
* [Analytics Engine documentation](https://developers.cloudflare.com/analytics/analytics-engine/) \- Full reference for Workers Analytics Engine.
* [SQL API reference](https://developers.cloudflare.com/analytics/analytics-engine/sql-api/) \- Query syntax and available functions.
* [Grafana integration](https://developers.cloudflare.com/analytics/analytics-engine/grafana/) \- Visualize Analytics Engine data in Grafana.
```json
{"@context":"https://schema.org","@type":"TechArticle","@id":"https://developers.cloudflare.com/workers/examples/analytics-engine/#page","headline":"Write to Analytics Engine · Cloudflare Workers docs","description":"Write custom analytics events to Workers Analytics Engine for high-cardinality, time-series data.","url":"https://developers.cloudflare.com/workers/examples/analytics-engine/","inLanguage":"en","image":"https://developers.cloudflare.com/dev-products-preview.png","dateModified":"2026-04-23","publisher":{"@type":"Organization","name":"Cloudflare","url":"https://www.cloudflare.com/"},"isPartOf":{"@type":"WebSite","@id":"https://developers.cloudflare.com/#website","name":"Cloudflare Docs","url":"https://developers.cloudflare.com/"}}
{"@context":"https://schema.org","@type":"BreadcrumbList","itemListElement":[{"@type":"ListItem","position":1,"item":{"@id":"/directory/","name":"Directory"}},{"@type":"ListItem","position":2,"item":{"@id":"/workers/","name":"Workers"}},{"@type":"ListItem","position":3,"item":{"@id":"/workers/examples/","name":"Examples"}},{"@type":"ListItem","position":4,"item":{"@id":"/workers/examples/analytics-engine/","name":"Write to Analytics Engine"}}]}
```
---
---
title: Auth with headers
description: Allow or deny a request based on a known pre-shared key in a header. This is not meant to replace the WebCrypto API.
image: https://developers.cloudflare.com/dev-products-preview.png
---
> Documentation Index
> Fetch the complete documentation index at: https://developers.cloudflare.com/workers/llms.txt
> Use this file to discover all available pages before exploring further.
[Skip to content](#%5Ftop)
# Auth with headers
Allow or deny a request based on a known pre-shared key in a header. This is not meant to replace the WebCrypto API.
Caution when using in production
The example code contains a generic header key and value of `X-Custom-PSK` and `mypresharedkey`. To best protect your resources, change the header key and value in the Workers editor before saving your code.
* [ JavaScript ](#tab-panel-12451)
* [ TypeScript ](#tab-panel-12452)
* [ Python ](#tab-panel-12453)
* [ Hono ](#tab-panel-12454)
**JavaScript**
```js
export default {
async fetch(request) {
/**
* @param {string} PRESHARED_AUTH_HEADER_KEY Custom header to check for key
* @param {string} PRESHARED_AUTH_HEADER_VALUE Hard coded key value
*/
const PRESHARED_AUTH_HEADER_KEY = "X-Custom-PSK";
const PRESHARED_AUTH_HEADER_VALUE = "mypresharedkey";
const psk = request.headers.get(PRESHARED_AUTH_HEADER_KEY);
if (psk === PRESHARED_AUTH_HEADER_VALUE) {
// Correct preshared header key supplied. Fetch request from origin.
return fetch(request);
}
// Incorrect key supplied. Reject the request.
return new Response("Sorry, you have supplied an invalid key.", {
status: 403,
});
},
};
```
**TypeScript**
```ts
export default {
async fetch(request): Promise {
/**
* @param {string} PRESHARED_AUTH_HEADER_KEY Custom header to check for key
* @param {string} PRESHARED_AUTH_HEADER_VALUE Hard coded key value
*/
const PRESHARED_AUTH_HEADER_KEY = "X-Custom-PSK";
const PRESHARED_AUTH_HEADER_VALUE = "mypresharedkey";
const psk = request.headers.get(PRESHARED_AUTH_HEADER_KEY);
if (psk === PRESHARED_AUTH_HEADER_VALUE) {
// Correct preshared header key supplied. Fetch request from origin.
return fetch(request);
}
// Incorrect key supplied. Reject the request.
return new Response("Sorry, you have supplied an invalid key.", {
status: 403,
});
},
} satisfies ExportedHandler;
```
**Python**
```py
from workers import WorkerEntrypoint, Response, fetch
class Default(WorkerEntrypoint):
async def fetch(self, request):
PRESHARED_AUTH_HEADER_KEY = "X-Custom-PSK"
PRESHARED_AUTH_HEADER_VALUE = "mypresharedkey"
psk = request.headers[PRESHARED_AUTH_HEADER_KEY]
if psk == PRESHARED_AUTH_HEADER_VALUE:
# Correct preshared header key supplied. Fetch request from origin.
return fetch(request)
# Incorrect key supplied. Reject the request.
return Response("Sorry, you have supplied an invalid key.", status=403)
```
**TypeScript**
```ts
import { Hono } from 'hono';
const app = new Hono();
// Add authentication middleware
app.use('*', async (c, next) => {
/**
* Define authentication constants
*/
const PRESHARED_AUTH_HEADER_KEY = "X-Custom-PSK";
const PRESHARED_AUTH_HEADER_VALUE = "mypresharedkey";
// Get the pre-shared key from the request header
const psk = c.req.header(PRESHARED_AUTH_HEADER_KEY);
if (psk === PRESHARED_AUTH_HEADER_VALUE) {
// Correct preshared header key supplied. Continue to the next handler.
await next();
} else {
// Incorrect key supplied. Reject the request.
return c.text("Sorry, you have supplied an invalid key.", 403);
}
});
// Handle all authenticated requests by passing through to origin
app.all('*', async (c) => {
return fetch(c.req.raw);
});
export default app;
```
```json
{"@context":"https://schema.org","@type":"TechArticle","@id":"https://developers.cloudflare.com/workers/examples/auth-with-headers/#page","headline":"Auth with headers · Cloudflare Workers docs","description":"Allow or deny a request based on a known pre-shared key in a header. This is not meant to replace the WebCrypto API.","url":"https://developers.cloudflare.com/workers/examples/auth-with-headers/","inLanguage":"en","image":"https://developers.cloudflare.com/dev-products-preview.png","dateModified":"2026-04-23","publisher":{"@type":"Organization","name":"Cloudflare","url":"https://www.cloudflare.com/"},"isPartOf":{"@type":"WebSite","@id":"https://developers.cloudflare.com/#website","name":"Cloudflare Docs","url":"https://developers.cloudflare.com/"},"keywords":["Authentication","WebCrypto","JavaScript","TypeScript","Python"]}
{"@context":"https://schema.org","@type":"BreadcrumbList","itemListElement":[{"@type":"ListItem","position":1,"item":{"@id":"/directory/","name":"Directory"}},{"@type":"ListItem","position":2,"item":{"@id":"/workers/","name":"Workers"}},{"@type":"ListItem","position":3,"item":{"@id":"/workers/examples/","name":"Examples"}},{"@type":"ListItem","position":4,"item":{"@id":"/workers/examples/auth-with-headers/","name":"Auth with headers"}}]}
```
---
---
title: HTTP Basic Authentication
description: Shows how to restrict access using the HTTP Basic schema.
image: https://developers.cloudflare.com/dev-products-preview.png
---
> Documentation Index
> Fetch the complete documentation index at: https://developers.cloudflare.com/workers/llms.txt
> Use this file to discover all available pages before exploring further.
[Skip to content](#%5Ftop)
# HTTP Basic Authentication
Shows how to restrict access using the HTTP Basic schema.
Note
This example Worker makes use of the [Node.js Buffer API](https://developers.cloudflare.com/workers/runtime-apis/nodejs/buffer/), which is available as part of the Workers runtime [Node.js compatibility mode](https://developers.cloudflare.com/workers/runtime-apis/nodejs/). To run this Worker, you will need to [enable the nodejs\_compat compatibility flag](https://developers.cloudflare.com/workers/configuration/compatibility-flags/#nodejs-compatibility-flag).
Caution when using in production
This code is provided as a sample, and is not suitable for production use. Basic Authentication sends credentials unencrypted, and must be used with an HTTPS connection to be considered secure. For a production-ready authentication system, consider using [Cloudflare Access ↗](https://developers.cloudflare.com/cloudflare-one/access-controls/applications/http-apps/self-hosted-public-app/).
* [ JavaScript ](#tab-panel-12455)
* [ TypeScript ](#tab-panel-12456)
* [ Rust ](#tab-panel-12457)
* [ Hono ](#tab-panel-12458)
**JavaScript**
```js
/**
* Shows how to restrict access using the HTTP Basic schema.
* @see https://developer.mozilla.org/en-US/docs/Web/HTTP/Authentication
* @see https://tools.ietf.org/html/rfc7617
*
*/
import { Buffer } from "node:buffer";
const encoder = new TextEncoder();
/**
* Protect against timing attacks by safely comparing values using `timingSafeEqual`.
* Refer to https://developers.cloudflare.com/workers/runtime-apis/web-crypto/#timingsafeequal for more details
* @param {string} a
* @param {string} b
* @returns {boolean}
*/
function timingSafeEqual(a, b) {
const aBytes = encoder.encode(a);
const bBytes = encoder.encode(b);
// Do not return early when lengths differ — that leaks the secret's
// length through timing. Compare against self and negate instead.
if (aBytes.byteLength !== bBytes.byteLength) {
return !crypto.subtle.timingSafeEqual(aBytes, aBytes);
}
return crypto.subtle.timingSafeEqual(aBytes, bBytes);
}
export default {
/**
*
* @param {Request} request
* @param {{PASSWORD: string}} env
* @returns
*/
async fetch(request, env) {
const BASIC_USER = "admin";
// You will need an admin password. This should be
// attached to your Worker as an encrypted secret.
// Refer to https://developers.cloudflare.com/workers/configuration/secrets/
const BASIC_PASS = env.PASSWORD ?? "password";
const url = new URL(request.url);
switch (url.pathname) {
case "/":
return new Response("Anyone can access the homepage.");
case "/logout":
// Invalidate the "Authorization" header by returning a HTTP 401.
// We do not send a "WWW-Authenticate" header, as this would trigger
// a popup in the browser, immediately asking for credentials again.
return new Response("Logged out.", { status: 401 });
case "/admin": {
// The "Authorization" header is sent when authenticated.
const authorization = request.headers.get("Authorization");
if (!authorization) {
return new Response("You need to login.", {
status: 401,
headers: {
// Prompts the user for credentials.
"WWW-Authenticate": 'Basic realm="my scope", charset="UTF-8"',
},
});
}
const [scheme, encoded] = authorization.split(" ");
// The Authorization header must start with Basic, followed by a space.
if (!encoded || scheme !== "Basic") {
return new Response("Malformed authorization header.", {
status: 400,
});
}
const credentials = Buffer.from(encoded, "base64").toString();
// The username & password are split by the first colon.
//=> example: "username:password"
const index = credentials.indexOf(":");
const user = credentials.substring(0, index);
const pass = credentials.substring(index + 1);
if (
!timingSafeEqual(BASIC_USER, user) ||
!timingSafeEqual(BASIC_PASS, pass)
) {
return new Response("You need to login.", {
status: 401,
headers: {
// Prompts the user for credentials.
"WWW-Authenticate": 'Basic realm="my scope", charset="UTF-8"',
},
});
}
return new Response("🎉 You have private access!", {
status: 200,
headers: {
"Cache-Control": "no-store",
},
});
}
}
return new Response("Not Found.", { status: 404 });
},
};
```
**TypeScript**
```ts
/**
* Shows how to restrict access using the HTTP Basic schema.
* @see https://developer.mozilla.org/en-US/docs/Web/HTTP/Authentication
* @see https://tools.ietf.org/html/rfc7617
*
*/
import { Buffer } from "node:buffer";
const encoder = new TextEncoder();
/**
* Protect against timing attacks by safely comparing values using `timingSafeEqual`.
* Refer to https://developers.cloudflare.com/workers/runtime-apis/web-crypto/#timingsafeequal for more details
*/
function timingSafeEqual(a: string, b: string) {
const aBytes = encoder.encode(a);
const bBytes = encoder.encode(b);
// Do not return early when lengths differ — that leaks the secret's
// length through timing. Compare against self and negate instead.
if (aBytes.byteLength !== bBytes.byteLength) {
return !crypto.subtle.timingSafeEqual(aBytes, aBytes);
}
return crypto.subtle.timingSafeEqual(aBytes, bBytes);
}
interface Env {
PASSWORD: string;
}
export default {
async fetch(request, env): Promise {
const BASIC_USER = "admin";
// You will need an admin password. This should be
// attached to your Worker as an encrypted secret.
// Refer to https://developers.cloudflare.com/workers/configuration/secrets/
const BASIC_PASS = env.PASSWORD ?? "password";
const url = new URL(request.url);
switch (url.pathname) {
case "/":
return new Response("Anyone can access the homepage.");
case "/logout":
// Invalidate the "Authorization" header by returning a HTTP 401.
// We do not send a "WWW-Authenticate" header, as this would trigger
// a popup in the browser, immediately asking for credentials again.
return new Response("Logged out.", { status: 401 });
case "/admin": {
// The "Authorization" header is sent when authenticated.
const authorization = request.headers.get("Authorization");
if (!authorization) {
return new Response("You need to login.", {
status: 401,
headers: {
// Prompts the user for credentials.
"WWW-Authenticate": 'Basic realm="my scope", charset="UTF-8"',
},
});
}
const [scheme, encoded] = authorization.split(" ");
// The Authorization header must start with Basic, followed by a space.
if (!encoded || scheme !== "Basic") {
return new Response("Malformed authorization header.", {
status: 400,
});
}
const credentials = Buffer.from(encoded, "base64").toString();
// The username and password are split by the first colon.
//=> example: "username:password"
const index = credentials.indexOf(":");
const user = credentials.substring(0, index);
const pass = credentials.substring(index + 1);
if (
!timingSafeEqual(BASIC_USER, user) ||
!timingSafeEqual(BASIC_PASS, pass)
) {
return new Response("You need to login.", {
status: 401,
headers: {
// Prompts the user for credentials.
"WWW-Authenticate": 'Basic realm="my scope", charset="UTF-8"',
},
});
}
return new Response("🎉 You have private access!", {
status: 200,
headers: {
"Cache-Control": "no-store",
},
});
}
}
return new Response("Not Found.", { status: 404 });
},
} satisfies ExportedHandler;
```
```rs
use base64::prelude::*;
use worker::*;
#[event(fetch)]
async fn fetch(req: Request, env: Env, _ctx: Context) -> Result {
let basic_user = "admin";
// You will need an admin password. This should be
// attached to your Worker as an encrypted secret.
// Refer to https://developers.cloudflare.com/workers/configuration/secrets/
let basic_pass = match env.secret("PASSWORD") {
Ok(s) => s.to_string(),
Err(_) => "password".to_string(),
};
let url = req.url()?;
match url.path() {
"/" => Response::ok("Anyone can access the homepage."),
// Invalidate the "Authorization" header by returning a HTTP 401.
// We do not send a "WWW-Authenticate" header, as this would trigger
// a popup in the browser, immediately asking for credentials again.
"/logout" => Response::error("Logged out.", 401),
"/admin" => {
// The "Authorization" header is sent when authenticated.
let authorization = req.headers().get("Authorization")?;
if authorization == None {
let mut headers = Headers::new();
// Prompts the user for credentials.
headers.set(
"WWW-Authenticate",
"Basic realm='my scope', charset='UTF-8'",
)?;
return Ok(Response::error("You need to login.", 401)?.with_headers(headers));
}
let authorization = authorization.unwrap();
let auth: Vec<&str> = authorization.split(" ").collect();
let scheme = auth[0];
let encoded = auth[1];
// The Authorization header must start with Basic, followed by a space.
if encoded == "" || scheme != "Basic" {
return Response::error("Malformed authorization header.", 400);
}
let buff = BASE64_STANDARD.decode(encoded).unwrap();
let credentials = String::from_utf8_lossy(&buff);
// The username & password are split by the first colon.
//=> example: "username:password"
let credentials: Vec<&str> = credentials.split(':').collect();
let user = credentials[0];
let pass = credentials[1];
if user != basic_user || pass != basic_pass {
let mut headers = Headers::new();
// Prompts the user for credentials.
headers.set(
"WWW-Authenticate",
"Basic realm='my scope', charset='UTF-8'",
)?;
return Ok(Response::error("You need to login.", 401)?.with_headers(headers));
}
let mut headers = Headers::new();
headers.set("Cache-Control", "no-store")?;
Ok(Response::ok("🎉 You have private access!")?.with_headers(headers))
}
_ => Response::error("Not Found.", 404),
}
}
```
**TypeScript**
```ts
/**
* Shows how to restrict access using the HTTP Basic schema with Hono.
* @see https://developer.mozilla.org/en-US/docs/Web/HTTP/Authentication
* @see https://tools.ietf.org/html/rfc7617
*/
import { Hono } from "hono";
import { basicAuth } from "hono/basic-auth";
// Define environment interface
interface Env {
Bindings: {
USERNAME: string;
PASSWORD: string;
};
}
const app = new Hono();
// Public homepage - accessible to everyone
app.get("/", (c) => {
return c.text("Anyone can access the homepage.");
});
// Admin route - protected with Basic Auth
app.get(
"/admin",
async (c, next) => {
const auth = basicAuth({
username: c.env.USERNAME,
password: c.env.PASSWORD,
});
return await auth(c, next);
},
(c) => {
return c.text("🎉 You have private access!", 200, {
"Cache-Control": "no-store",
});
},
);
export default app;
```
```json
{"@context":"https://schema.org","@type":"TechArticle","@id":"https://developers.cloudflare.com/workers/examples/basic-auth/#page","headline":"HTTP Basic Authentication · Cloudflare Workers docs","description":"Shows how to restrict access using the HTTP Basic schema.","url":"https://developers.cloudflare.com/workers/examples/basic-auth/","inLanguage":"en","image":"https://developers.cloudflare.com/dev-products-preview.png","dateModified":"2026-04-23","publisher":{"@type":"Organization","name":"Cloudflare","url":"https://www.cloudflare.com/"},"isPartOf":{"@type":"WebSite","@id":"https://developers.cloudflare.com/#website","name":"Cloudflare Docs","url":"https://developers.cloudflare.com/"},"keywords":["Security","Authentication","JavaScript","TypeScript","Rust"]}
{"@context":"https://schema.org","@type":"BreadcrumbList","itemListElement":[{"@type":"ListItem","position":1,"item":{"@id":"/directory/","name":"Directory"}},{"@type":"ListItem","position":2,"item":{"@id":"/workers/","name":"Workers"}},{"@type":"ListItem","position":3,"item":{"@id":"/workers/examples/","name":"Examples"}},{"@type":"ListItem","position":4,"item":{"@id":"/workers/examples/basic-auth/","name":"HTTP Basic Authentication"}}]}
```
---
---
title: Block on TLS
description: Inspects the incoming request's TLS version and blocks if under TLSv1.2.
image: https://developers.cloudflare.com/dev-products-preview.png
---
> Documentation Index
> Fetch the complete documentation index at: https://developers.cloudflare.com/workers/llms.txt
> Use this file to discover all available pages before exploring further.
[Skip to content](#%5Ftop)
# Block on TLS
Inspects the incoming request's TLS version and blocks if under TLSv1.2.
* [ JavaScript ](#tab-panel-12459)
* [ TypeScript ](#tab-panel-12460)
* [ Hono ](#tab-panel-12461)
* [ Python ](#tab-panel-12462)
**JavaScript**
```js
export default {
async fetch(request) {
try {
const tlsVersion = request.cf.tlsVersion;
// Allow only TLS versions 1.2 and 1.3
if (tlsVersion !== "TLSv1.2" && tlsVersion !== "TLSv1.3") {
return new Response("Please use TLS version 1.2 or higher.", {
status: 403,
});
}
return fetch(request);
} catch (err) {
console.error(
"request.cf does not exist in the previewer, only in production",
);
return new Response(`Error in workers script ${err.message}`, {
status: 500,
});
}
},
};
```
**TypeScript**
```ts
export default {
async fetch(request): Promise {
try {
const tlsVersion = request.cf.tlsVersion;
// Allow only TLS versions 1.2 and 1.3
if (tlsVersion !== "TLSv1.2" && tlsVersion !== "TLSv1.3") {
return new Response("Please use TLS version 1.2 or higher.", {
status: 403,
});
}
return fetch(request);
} catch (err) {
console.error(
"request.cf does not exist in the previewer, only in production",
);
return new Response(`Error in workers script ${err.message}`, {
status: 500,
});
}
},
} satisfies ExportedHandler;
```
**TypeScript**
```ts
import { Hono } from "hono";
const app = new Hono();
// Middleware to check TLS version
app.use("*", async (c, next) => {
// Access the raw request to get the cf object with TLS info
const request = c.req.raw;
const tlsVersion = request.cf?.tlsVersion;
// Allow only TLS versions 1.2 and 1.3
if (tlsVersion !== "TLSv1.2" && tlsVersion !== "TLSv1.3") {
return c.text("Please use TLS version 1.2 or higher.", 403);
}
await next();
});
app.onError((err, c) => {
console.error(
"request.cf does not exist in the previewer, only in production",
);
return c.text(`Error in workers script: ${err.message}`, 500);
});
app.get("/", async (c) => {
return c.text(`TLS Version: ${c.req.raw.cf.tlsVersion}`);
});
export default app;
```
**Python**
```py
from workers import WorkerEntrypoint, Response, fetch
class Default(WorkerEntrypoint):
async def fetch(self, request):
tls_version = request.cf.tlsVersion
if tls_version not in ("TLSv1.2", "TLSv1.3"):
return Response("Please use TLS version 1.2 or higher.", status=403)
return fetch(request)
```
```json
{"@context":"https://schema.org","@type":"TechArticle","@id":"https://developers.cloudflare.com/workers/examples/block-on-tls/#page","headline":"Block on TLS · Cloudflare Workers docs","description":"Inspects the incoming request's TLS version and blocks if under TLSv1.2.","url":"https://developers.cloudflare.com/workers/examples/block-on-tls/","inLanguage":"en","image":"https://developers.cloudflare.com/dev-products-preview.png","dateModified":"2026-04-23","publisher":{"@type":"Organization","name":"Cloudflare","url":"https://www.cloudflare.com/"},"isPartOf":{"@type":"WebSite","@id":"https://developers.cloudflare.com/#website","name":"Cloudflare Docs","url":"https://developers.cloudflare.com/"},"keywords":["Security","Middleware","JavaScript","TypeScript","Python"]}
{"@context":"https://schema.org","@type":"BreadcrumbList","itemListElement":[{"@type":"ListItem","position":1,"item":{"@id":"/directory/","name":"Directory"}},{"@type":"ListItem","position":2,"item":{"@id":"/workers/","name":"Workers"}},{"@type":"ListItem","position":3,"item":{"@id":"/workers/examples/","name":"Examples"}},{"@type":"ListItem","position":4,"item":{"@id":"/workers/examples/block-on-tls/","name":"Block on TLS"}}]}
```
---
---
title: Bulk origin override
description: Resolve requests to your domain to a set of proxy third-party origin URLs.
image: https://developers.cloudflare.com/dev-products-preview.png
---
> Documentation Index
> Fetch the complete documentation index at: https://developers.cloudflare.com/workers/llms.txt
> Use this file to discover all available pages before exploring further.
[Skip to content](#%5Ftop)
# Bulk origin override
Resolve requests to your domain to a set of proxy third-party origin URLs.
* [ JavaScript ](#tab-panel-12463)
* [ TypeScript ](#tab-panel-12464)
* [ Hono ](#tab-panel-12465)
* [ Python ](#tab-panel-12466)
**JavaScript**
```js
export default {
async fetch(request) {
/**
* An object with different URLs to fetch
* @param {Object} ORIGINS
*/
const ORIGINS = {
"starwarsapi.yourdomain.com": "swapi.dev",
"google.yourdomain.com": "www.google.com",
};
const url = new URL(request.url);
// Check if incoming hostname is a key in the ORIGINS object
if (url.hostname in ORIGINS) {
const target = ORIGINS[url.hostname];
url.hostname = target;
// If it is, proxy request to that third party origin
return fetch(url.toString(), request);
}
// Otherwise, process request as normal
return fetch(request);
},
};
```
**TypeScript**
```ts
export default {
async fetch(request): Promise {
/**
* An object with different URLs to fetch
* @param {Object} ORIGINS
*/
const ORIGINS = {
"starwarsapi.yourdomain.com": "swapi.dev",
"google.yourdomain.com": "www.google.com",
};
const url = new URL(request.url);
// Check if incoming hostname is a key in the ORIGINS object
if (url.hostname in ORIGINS) {
const target = ORIGINS[url.hostname];
url.hostname = target;
// If it is, proxy request to that third party origin
return fetch(url.toString(), request);
}
// Otherwise, process request as normal
return fetch(request);
},
} satisfies ExportedHandler;
```
**TypeScript**
```ts
import { Hono } from "hono";
import { proxy } from "hono/proxy";
// An object with different URLs to fetch
const ORIGINS: Record = {
"starwarsapi.yourdomain.com": "swapi.dev",
"google.yourdomain.com": "www.google.com",
};
const app = new Hono();
app.all("*", async (c) => {
const url = new URL(c.req.url);
// Check if incoming hostname is a key in the ORIGINS object
if (url.hostname in ORIGINS) {
const target = ORIGINS[url.hostname];
url.hostname = target;
// If it is, proxy request to that third party origin
return proxy(url, c.req.raw);
}
// Otherwise, process request as normal
return proxy(c.req.raw);
});
export default app;
```
**Python**
```py
from workers import WorkerEntrypoint
from js import fetch, URL
class Default(WorkerEntrypoint):
async def fetch(self, request):
# A dict with different URLs to fetch
ORIGINS = {
"starwarsapi.yourdomain.com": "swapi.dev",
"google.yourdomain.com": "www.google.com",
}
url = URL.new(request.url)
# Check if incoming hostname is a key in the ORIGINS object
if url.hostname in ORIGINS:
url.hostname = ORIGINS[url.hostname]
# If it is, proxy request to that third party origin
return fetch(url.toString(), request)
# Otherwise, process request as normal
return fetch(request)
```
```json
{"@context":"https://schema.org","@type":"TechArticle","@id":"https://developers.cloudflare.com/workers/examples/bulk-origin-proxy/#page","headline":"Bulk origin override · Cloudflare Workers docs","description":"Resolve requests to your domain to a set of proxy third-party origin URLs.","url":"https://developers.cloudflare.com/workers/examples/bulk-origin-proxy/","inLanguage":"en","image":"https://developers.cloudflare.com/dev-products-preview.png","dateModified":"2026-04-23","publisher":{"@type":"Organization","name":"Cloudflare","url":"https://www.cloudflare.com/"},"isPartOf":{"@type":"WebSite","@id":"https://developers.cloudflare.com/#website","name":"Cloudflare Docs","url":"https://developers.cloudflare.com/"},"keywords":["Middleware","JavaScript","TypeScript","Python"]}
{"@context":"https://schema.org","@type":"BreadcrumbList","itemListElement":[{"@type":"ListItem","position":1,"item":{"@id":"/directory/","name":"Directory"}},{"@type":"ListItem","position":2,"item":{"@id":"/workers/","name":"Workers"}},{"@type":"ListItem","position":3,"item":{"@id":"/workers/examples/","name":"Examples"}},{"@type":"ListItem","position":4,"item":{"@id":"/workers/examples/bulk-origin-proxy/","name":"Bulk origin override"}}]}
```
---
---
title: Bulk redirects
description: Redirect requests to certain URLs based on a mapped object to the request's URL.
image: https://developers.cloudflare.com/dev-products-preview.png
---
> Documentation Index
> Fetch the complete documentation index at: https://developers.cloudflare.com/workers/llms.txt
> Use this file to discover all available pages before exploring further.
[Skip to content](#%5Ftop)
# Bulk redirects
Redirect requests to certain URLs based on a mapped object to the request's URL.
* [ JavaScript ](#tab-panel-12467)
* [ TypeScript ](#tab-panel-12468)
* [ Python ](#tab-panel-12469)
* [ Hono ](#tab-panel-12470)
**JavaScript**
```js
export default {
async fetch(request) {
const externalHostname = "examples.cloudflareworkers.com";
const redirectMap = new Map([
["/bulk1", "https://" + externalHostname + "/redirect2"],
["/bulk2", "https://" + externalHostname + "/redirect3"],
["/bulk3", "https://" + externalHostname + "/redirect4"],
["/bulk4", "https://google.com"],
]);
const requestURL = new URL(request.url);
const path = requestURL.pathname;
const location = redirectMap.get(path);
if (location) {
return Response.redirect(location, 301);
}
// If request not in map, return the original request
return fetch(request);
},
};
```
**TypeScript**
```ts
export default {
async fetch(request): Promise {
const externalHostname = "examples.cloudflareworkers.com";
const redirectMap = new Map([
["/bulk1", "https://" + externalHostname + "/redirect2"],
["/bulk2", "https://" + externalHostname + "/redirect3"],
["/bulk3", "https://" + externalHostname + "/redirect4"],
["/bulk4", "https://google.com"],
]);
const requestURL = new URL(request.url);
const path = requestURL.pathname;
const location = redirectMap.get(path);
if (location) {
return Response.redirect(location, 301);
}
// If request not in map, return the original request
return fetch(request);
},
} satisfies ExportedHandler;
```
**Python**
```py
from workers import WorkerEntrypoint, Response, fetch
from urllib.parse import urlparse
class Default(WorkerEntrypoint):
async def fetch(self, request):
external_hostname = "examples.cloudflareworkers.com"
redirect_map = {
"/bulk1": "https://" + external_hostname + "/redirect2",
"/bulk2": "https://" + external_hostname + "/redirect3",
"/bulk3": "https://" + external_hostname + "/redirect4",
"/bulk4": "https://google.com",
}
url = urlparse(request.url)
location = redirect_map.get(url.path, None)
if location:
return Response.redirect(location, 301)
# If request not in map, return the original request
return fetch(request)
```
**TypeScript**
```ts
import { Hono } from "hono";
const app = new Hono();
// Configure your redirects
const externalHostname = "examples.cloudflareworkers.com";
const redirectMap = new Map([
["/bulk1", `https://${externalHostname}/redirect2`],
["/bulk2", `https://${externalHostname}/redirect3`],
["/bulk3", `https://${externalHostname}/redirect4`],
["/bulk4", "https://google.com"],
]);
// Middleware to handle redirects
app.use("*", async (c, next) => {
const path = c.req.path;
const location = redirectMap.get(path);
if (location) {
// If path is in our redirect map, perform the redirect
return c.redirect(location, 301);
}
// Otherwise, continue to the next handler
await next();
});
// Default handler for requests that don't match any redirects
app.all("*", async (c) => {
// Pass through to origin
return fetch(c.req.raw);
});
export default app;
```
```json
{"@context":"https://schema.org","@type":"TechArticle","@id":"https://developers.cloudflare.com/workers/examples/bulk-redirects/#page","headline":"Bulk redirects · Cloudflare Workers docs","description":"Redirect requests to certain URLs based on a mapped object to the request's URL.","url":"https://developers.cloudflare.com/workers/examples/bulk-redirects/","inLanguage":"en","image":"https://developers.cloudflare.com/dev-products-preview.png","dateModified":"2026-04-23","publisher":{"@type":"Organization","name":"Cloudflare","url":"https://www.cloudflare.com/"},"isPartOf":{"@type":"WebSite","@id":"https://developers.cloudflare.com/#website","name":"Cloudflare Docs","url":"https://developers.cloudflare.com/"},"keywords":["Middleware","Redirects","JavaScript","TypeScript","Python"]}
{"@context":"https://schema.org","@type":"BreadcrumbList","itemListElement":[{"@type":"ListItem","position":1,"item":{"@id":"/directory/","name":"Directory"}},{"@type":"ListItem","position":2,"item":{"@id":"/workers/","name":"Workers"}},{"@type":"ListItem","position":3,"item":{"@id":"/workers/examples/","name":"Examples"}},{"@type":"ListItem","position":4,"item":{"@id":"/workers/examples/bulk-redirects/","name":"Bulk redirects"}}]}
```
---
---
title: Using the Cache API
description: Use the Cache API to store responses in Cloudflare's cache.
image: https://developers.cloudflare.com/dev-products-preview.png
---
> Documentation Index
> Fetch the complete documentation index at: https://developers.cloudflare.com/workers/llms.txt
> Use this file to discover all available pages before exploring further.
[Skip to content](#%5Ftop)
# Using the Cache API
Use the Cache API to store responses in Cloudflare's cache.
If you want to get started quickly, click on the button below.
[](https://deploy.workers.cloudflare.com/?url=https://github.com/cloudflare/docs-examples/tree/main/workers/cache-api)
This creates a repository in your GitHub account and deploys the application to Cloudflare Workers.
* [ JavaScript ](#tab-panel-12471)
* [ TypeScript ](#tab-panel-12472)
* [ Python ](#tab-panel-12473)
* [ Hono ](#tab-panel-12474)
**JavaScript**
```js
export default {
async fetch(request, env, ctx) {
const cacheUrl = new URL(request.url);
// Construct the cache key from the cache URL
const cacheKey = new Request(cacheUrl.toString(), request);
const cache = caches.default;
// Check whether the value is already available in the cache
// if not, you will need to fetch it from origin, and store it in the cache
let response = await cache.match(cacheKey);
if (!response) {
console.log(
`Response for request url: ${request.url} not present in cache. Fetching and caching request.`,
);
// If not in cache, get it from origin
response = await fetch(request);
// Must use Response constructor to inherit all of response's fields
response = new Response(response.body, response);
// Cache API respects Cache-Control headers. Setting s-maxage to 10
// will limit the response to be in cache for 10 seconds max
// Any changes made to the response here will be reflected in the cached value
response.headers.append("Cache-Control", "s-maxage=10");
ctx.waitUntil(cache.put(cacheKey, response.clone()));
} else {
console.log(`Cache hit for: ${request.url}.`);
}
return response;
},
};
```
**TypeScript**
```ts
interface Env {}
export default {
async fetch(request, env, ctx): Promise {
const cacheUrl = new URL(request.url);
// Construct the cache key from the cache URL
const cacheKey = new Request(cacheUrl.toString(), request);
const cache = caches.default;
// Check whether the value is already available in the cache
// if not, you will need to fetch it from origin, and store it in the cache
let response = await cache.match(cacheKey);
if (!response) {
console.log(
`Response for request url: ${request.url} not present in cache. Fetching and caching request.`,
);
// If not in cache, get it from origin
response = await fetch(request);
// Must use Response constructor to inherit all of response's fields
response = new Response(response.body, response);
// Cache API respects Cache-Control headers. Setting s-maxage to 10
// will limit the response to be in cache for 10 seconds max
// Any changes made to the response here will be reflected in the cached value
response.headers.append("Cache-Control", "s-maxage=10");
ctx.waitUntil(cache.put(cacheKey, response.clone()));
} else {
console.log(`Cache hit for: ${request.url}.`);
}
return response;
},
} satisfies ExportedHandler;
```
**Python**
```py
from workers import WorkerEntrypoint
from pyodide.ffi import create_proxy
from js import Response, Request, URL, caches, fetch
class Default(WorkerEntrypoint):
async def fetch(self, request):
cache_url = request.url
# Construct the cache key from the cache URL
cache_key = Request.new(cache_url, request)
cache = caches.default
# Check whether the value is already available in the cache
# if not, you will need to fetch it from origin, and store it in the cache
response = await cache.match(cache_key)
if response is None:
print(f"Response for request url: {request.url} not present in cache. Fetching and caching request.")
# If not in cache, get it from origin
response = await fetch(request)
# Must use Response constructor to inherit all of response's fields
response = Response.new(response.body, response)
# Cache API respects Cache-Control headers. Setting s-max-age to 10
# will limit the response to be in cache for 10 seconds s-maxage
# Any changes made to the response here will be reflected in the cached value
response.headers.append("Cache-Control", "s-maxage=10")
self.ctx.waitUntil(create_proxy(cache.put(cache_key, response.clone())))
else:
print(f"Cache hit for: {request.url}.")
return response
```
**TypeScript**
```ts
import { Hono } from "hono";
import { cache } from "hono/cache";
const app = new Hono();
// We leverage hono built-in cache helper here
app.get(
"*",
cache({
cacheName: "my-cache",
cacheControl: "max-age=3600", // 1 hour
}),
);
// Add a route to handle the request if it's not in cache
app.get("*", (c) => {
return c.text("Hello from Hono!");
});
export default app;
```
```json
{"@context":"https://schema.org","@type":"TechArticle","@id":"https://developers.cloudflare.com/workers/examples/cache-api/#page","headline":"Using the Cache API · Cloudflare Workers docs","description":"Use the Cache API to store responses in Cloudflare's cache.","url":"https://developers.cloudflare.com/workers/examples/cache-api/","inLanguage":"en","image":"https://developers.cloudflare.com/dev-products-preview.png","dateModified":"2026-04-23","publisher":{"@type":"Organization","name":"Cloudflare","url":"https://www.cloudflare.com/"},"isPartOf":{"@type":"WebSite","@id":"https://developers.cloudflare.com/#website","name":"Cloudflare Docs","url":"https://developers.cloudflare.com/"},"keywords":["Middleware","Caching","JavaScript","TypeScript","Python"]}
{"@context":"https://schema.org","@type":"BreadcrumbList","itemListElement":[{"@type":"ListItem","position":1,"item":{"@id":"/directory/","name":"Directory"}},{"@type":"ListItem","position":2,"item":{"@id":"/workers/","name":"Workers"}},{"@type":"ListItem","position":3,"item":{"@id":"/workers/examples/","name":"Examples"}},{"@type":"ListItem","position":4,"item":{"@id":"/workers/examples/cache-api/","name":"Using the Cache API"}}]}
```
---
---
title: Cache POST requests
description: Cache POST requests using the Cache API.
image: https://developers.cloudflare.com/dev-products-preview.png
---
> Documentation Index
> Fetch the complete documentation index at: https://developers.cloudflare.com/workers/llms.txt
> Use this file to discover all available pages before exploring further.
[Skip to content](#%5Ftop)
# Cache POST requests
Cache POST requests using the Cache API.
If you want to get started quickly, click on the button below.
[](https://deploy.workers.cloudflare.com/?url=https://github.com/cloudflare/docs-examples/tree/main/workers/cache-post-request)
This creates a repository in your GitHub account and deploys the application to Cloudflare Workers.
* [ JavaScript ](#tab-panel-12475)
* [ TypeScript ](#tab-panel-12476)
* [ Python ](#tab-panel-12477)
* [ Hono ](#tab-panel-12478)
**JavaScript**
```js
export default {
async fetch(request, env, ctx) {
async function sha256(message) {
// encode as UTF-8
const msgBuffer = await new TextEncoder().encode(message);
// hash the message
const hashBuffer = await crypto.subtle.digest("SHA-256", msgBuffer);
// convert bytes to hex string
return [...new Uint8Array(hashBuffer)]
.map((b) => b.toString(16).padStart(2, "0"))
.join("");
}
try {
if (request.method.toUpperCase() === "POST") {
const body = await request.clone().text();
// Hash the request body to use it as a part of the cache key
const hash = await sha256(body);
const cacheUrl = new URL(request.url);
// Store the URL in cache by prepending the body's hash
cacheUrl.pathname = "/posts" + cacheUrl.pathname + hash;
// Convert to a GET to be able to cache
const cacheKey = new Request(cacheUrl.toString(), {
headers: request.headers,
method: "GET",
});
const cache = caches.default;
// Find the cache key in the cache
let response = await cache.match(cacheKey);
// Otherwise, fetch response to POST request from origin
if (!response) {
response = await fetch(request);
ctx.waitUntil(cache.put(cacheKey, response.clone()));
}
return response;
}
return fetch(request);
} catch (e) {
return new Response("Error thrown " + e.message);
}
},
};
```
**TypeScript**
```ts
interface Env {}
export default {
async fetch(request, env, ctx): Promise {
async function sha256(message) {
// encode as UTF-8
const msgBuffer = await new TextEncoder().encode(message);
// hash the message
const hashBuffer = await crypto.subtle.digest("SHA-256", msgBuffer);
// convert bytes to hex string
return [...new Uint8Array(hashBuffer)]
.map((b) => b.toString(16).padStart(2, "0"))
.join("");
}
try {
if (request.method.toUpperCase() === "POST") {
const body = await request.clone().text();
// Hash the request body to use it as a part of the cache key
const hash = await sha256(body);
const cacheUrl = new URL(request.url);
// Store the URL in cache by prepending the body's hash
cacheUrl.pathname = "/posts" + cacheUrl.pathname + hash;
// Convert to a GET to be able to cache
const cacheKey = new Request(cacheUrl.toString(), {
headers: request.headers,
method: "GET",
});
const cache = caches.default;
// Find the cache key in the cache
let response = await cache.match(cacheKey);
// Otherwise, fetch response to POST request from origin
if (!response) {
response = await fetch(request);
ctx.waitUntil(cache.put(cacheKey, response.clone()));
}
return response;
}
return fetch(request);
} catch (e) {
return new Response("Error thrown " + e.message);
}
},
} satisfies ExportedHandler;
```
**Python**
```py
import hashlib
from workers import WorkerEntrypoint
from pyodide.ffi import create_proxy
from js import fetch, URL, Headers, Request, caches
class Default(WorkerEntrypoint):
async def fetch(self, request, _, ctx):
if 'POST' in request.method:
# Hash the request body to use it as a part of the cache key
body = await request.clone().text()
body_hash = hashlib.sha256(body.encode('UTF-8')).hexdigest()
# Store the URL in cache by prepending the body's hash
cache_url = URL.new(request.url)
cache_url.pathname = "/posts" + cache_url.pathname + body_hash
# Convert to a GET to be able to cache
headers = Headers.new(dict(request.headers).items())
cache_key = Request.new(cache_url.toString(), method='GET', headers=headers)
# Find the cache key in the cache
cache = caches.default
response = await cache.match(cache_key)
# Otherwise, fetch response to POST request from origin
if response is None:
response = await fetch(request)
ctx.waitUntil(create_proxy(cache.put(cache_key, response.clone())))
return response
return fetch(request)
```
**TypeScript**
```ts
import { Hono } from "hono";
import { sha256 } from "hono/utils/crypto";
const app = new Hono();
// Middleware for caching POST requests
app.post("*", async (c) => {
try {
// Get the request body
const body = await c.req.raw.clone().text();
// Hash the request body to use it as part of the cache key
const hash = await sha256(body);
// Create the cache URL
const cacheUrl = new URL(c.req.url);
// Store the URL in cache by prepending the body's hash
cacheUrl.pathname = "/posts" + cacheUrl.pathname + hash;
// Convert to a GET to be able to cache
const cacheKey = new Request(cacheUrl.toString(), {
headers: c.req.raw.headers,
method: "GET",
});
const cache = caches.default;
// Find the cache key in the cache
let response = await cache.match(cacheKey);
// If not in cache, fetch response to POST request from origin
if (!response) {
response = await fetch(c.req.raw);
c.executionCtx.waitUntil(cache.put(cacheKey, response.clone()));
}
return response;
} catch (e) {
return c.text("Error thrown " + e.message, 500);
}
});
// Handle all other HTTP methods
app.all("*", (c) => {
return fetch(c.req.raw);
});
export default app;
```
```json
{"@context":"https://schema.org","@type":"TechArticle","@id":"https://developers.cloudflare.com/workers/examples/cache-post-request/#page","headline":"Cache POST requests · Cloudflare Workers docs","description":"Cache POST requests using the Cache API.","url":"https://developers.cloudflare.com/workers/examples/cache-post-request/","inLanguage":"en","image":"https://developers.cloudflare.com/dev-products-preview.png","dateModified":"2026-04-23","publisher":{"@type":"Organization","name":"Cloudflare","url":"https://www.cloudflare.com/"},"isPartOf":{"@type":"WebSite","@id":"https://developers.cloudflare.com/#website","name":"Cloudflare Docs","url":"https://developers.cloudflare.com/"},"keywords":["Middleware","Caching","JavaScript","TypeScript","Python"]}
{"@context":"https://schema.org","@type":"BreadcrumbList","itemListElement":[{"@type":"ListItem","position":1,"item":{"@id":"/directory/","name":"Directory"}},{"@type":"ListItem","position":2,"item":{"@id":"/workers/","name":"Workers"}},{"@type":"ListItem","position":3,"item":{"@id":"/workers/examples/","name":"Examples"}},{"@type":"ListItem","position":4,"item":{"@id":"/workers/examples/cache-post-request/","name":"Cache POST requests"}}]}
```
---
---
title: Cache Tags using Workers
description: Send Additional Cache Tags using Workers
image: https://developers.cloudflare.com/dev-products-preview.png
---
> Documentation Index
> Fetch the complete documentation index at: https://developers.cloudflare.com/workers/llms.txt
> Use this file to discover all available pages before exploring further.
[Skip to content](#%5Ftop)
# Cache Tags using Workers
Send Additional Cache Tags using Workers
If you want to get started quickly, click on the button below.
[](https://deploy.workers.cloudflare.com/?url=https://github.com/cloudflare/docs-examples/tree/main/workers/cache-tags)
This creates a repository in your GitHub account and deploys the application to Cloudflare Workers.
* [ JavaScript ](#tab-panel-12479)
* [ TypeScript ](#tab-panel-12480)
* [ Hono ](#tab-panel-12481)
* [ Python ](#tab-panel-12482)
**JavaScript**
```js
export default {
async fetch(request) {
const requestUrl = new URL(request.url);
const params = requestUrl.searchParams;
const tags =
params && params.has("tags") ? params.get("tags").split(",") : [];
const url = params && params.has("uri") ? params.get("uri") : "";
if (!url) {
const errorObject = {
error: "URL cannot be empty",
};
return new Response(JSON.stringify(errorObject), { status: 400 });
}
const init = {
cf: {
cacheTags: tags,
},
};
return fetch(url, init)
.then((result) => {
const cacheStatus = result.headers.get("cf-cache-status");
const lastModified = result.headers.get("last-modified");
const response = {
cache: cacheStatus,
lastModified: lastModified,
};
return new Response(JSON.stringify(response), {
status: result.status,
});
})
.catch((err) => {
const errorObject = {
error: err.message,
};
return new Response(JSON.stringify(errorObject), { status: 500 });
});
},
};
```
**TypeScript**
```ts
export default {
async fetch(request): Promise {
const requestUrl = new URL(request.url);
const params = requestUrl.searchParams;
const tags =
params && params.has("tags") ? params.get("tags").split(",") : [];
const url = params && params.has("uri") ? params.get("uri") : "";
if (!url) {
const errorObject = {
error: "URL cannot be empty",
};
return new Response(JSON.stringify(errorObject), { status: 400 });
}
const init = {
cf: {
cacheTags: tags,
},
};
return fetch(url, init)
.then((result) => {
const cacheStatus = result.headers.get("cf-cache-status");
const lastModified = result.headers.get("last-modified");
const response = {
cache: cacheStatus,
lastModified: lastModified,
};
return new Response(JSON.stringify(response), {
status: result.status,
});
})
.catch((err) => {
const errorObject = {
error: err.message,
};
return new Response(JSON.stringify(errorObject), { status: 500 });
});
},
} satisfies ExportedHandler;
```
**TypeScript**
```ts
import { Hono } from "hono";
const app = new Hono();
app.all("*", async (c) => {
const tags = c.req.query("tags") ? c.req.query("tags").split(",") : [];
const uri = c.req.query("uri") ? c.req.query("uri") : "";
if (!uri) {
return c.json({ error: "URL cannot be empty" }, 400);
}
const init = {
cf: {
cacheTags: tags,
},
};
const result = await fetch(uri, init);
const cacheStatus = result.headers.get("cf-cache-status");
const lastModified = result.headers.get("last-modified");
const response = {
cache: cacheStatus,
lastModified: lastModified,
};
return c.json(response, result.status);
});
app.onError((err, c) => {
return c.json({ error: err.message }, 500);
});
export default app;
```
**Python**
```py
from workers import WorkerEntrypoint, Response, fetch
from js import URL
class Default(WorkerEntrypoint):
async def fetch(self, request):
request_url = URL.new(request.url)
params = request_url.searchParams
tags = params["tags"].split(",") if "tags" in params else []
url = params["uri"] or None
if url is None:
return Response.json({"error": "URL cannot be empty"}, status=400)
result = await fetch(url, cf={"cacheTags": tags})
cache_status = result.headers["cf-cache-status"]
last_modified = result.headers["last-modified"]
return Response.json({"cache": cache_status, "lastModified": last_modified}, status=result.status)
```
```json
{"@context":"https://schema.org","@type":"TechArticle","@id":"https://developers.cloudflare.com/workers/examples/cache-tags/#page","headline":"Cache Tags using Workers · Cloudflare Workers docs","description":"Send Additional Cache Tags using Workers","url":"https://developers.cloudflare.com/workers/examples/cache-tags/","inLanguage":"en","image":"https://developers.cloudflare.com/dev-products-preview.png","dateModified":"2026-07-06","publisher":{"@type":"Organization","name":"Cloudflare","url":"https://www.cloudflare.com/"},"isPartOf":{"@type":"WebSite","@id":"https://developers.cloudflare.com/#website","name":"Cloudflare Docs","url":"https://developers.cloudflare.com/"},"keywords":["Caching","JavaScript","TypeScript","Python"]}
{"@context":"https://schema.org","@type":"BreadcrumbList","itemListElement":[{"@type":"ListItem","position":1,"item":{"@id":"/directory/","name":"Directory"}},{"@type":"ListItem","position":2,"item":{"@id":"/workers/","name":"Workers"}},{"@type":"ListItem","position":3,"item":{"@id":"/workers/examples/","name":"Examples"}},{"@type":"ListItem","position":4,"item":{"@id":"/workers/examples/cache-tags/","name":"Cache Tags using Workers"}}]}
```
---
---
title: Cache using fetch
description: Determine how to cache a resource by setting TTLs, custom cache keys, and cache headers in a fetch request.
image: https://developers.cloudflare.com/dev-products-preview.png
---
> Documentation Index
> Fetch the complete documentation index at: https://developers.cloudflare.com/workers/llms.txt
> Use this file to discover all available pages before exploring further.
[Skip to content](#%5Ftop)
# Cache using fetch
Determine how to cache a resource by setting TTLs, custom cache keys, and cache headers in a fetch request.
If you want to get started quickly, click on the button below.
[](https://deploy.workers.cloudflare.com/?url=https://github.com/cloudflare/docs-examples/tree/main/workers/cache-using-fetch)
This creates a repository in your GitHub account and deploys the application to Cloudflare Workers.
* [ JavaScript ](#tab-panel-12483)
* [ TypeScript ](#tab-panel-12484)
* [ Hono ](#tab-panel-12485)
* [ Python ](#tab-panel-12486)
* [ Rust ](#tab-panel-12487)
**JavaScript**
```js
export default {
async fetch(request) {
const url = new URL(request.url);
// Only use the path for the cache key, removing query strings
// and always store using HTTPS, for example, https://www.example.com/file-uri-here
const someCustomKey = `https://${url.hostname}${url.pathname}`;
let response = await fetch(request, {
cf: {
// Always cache this fetch regardless of content type
// for a max of 5 seconds before revalidating the resource
cacheTtl: 5,
cacheEverything: true,
//Enterprise only feature, see Cache API for other plans
cacheKey: someCustomKey,
},
});
// Reconstruct the Response object to make its headers mutable.
response = new Response(response.body, response);
// Set cache control headers to cache on browser for 25 minutes
response.headers.set("Cache-Control", "max-age=1500");
return response;
},
};
```
**TypeScript**
```ts
export default {
async fetch(request): Promise {
const url = new URL(request.url);
// Only use the path for the cache key, removing query strings
// and always store using HTTPS, for example, https://www.example.com/file-uri-here
const someCustomKey = `https://${url.hostname}${url.pathname}`;
let response = await fetch(request, {
cf: {
// Always cache this fetch regardless of content type
// for a max of 5 seconds before revalidating the resource
cacheTtl: 5,
cacheEverything: true,
//Enterprise only feature, see Cache API for other plans
cacheKey: someCustomKey,
},
});
// Reconstruct the Response object to make its headers mutable.
response = new Response(response.body, response);
// Set cache control headers to cache on browser for 25 minutes
response.headers.set("Cache-Control", "max-age=1500");
return response;
},
} satisfies ExportedHandler;
```
**TypeScript**
```ts
import { Hono } from 'hono';
type Bindings = {};
const app = new Hono<{ Bindings: Bindings }>();
app.all('*', async (c) => {
const url = new URL(c.req.url);
// Only use the path for the cache key, removing query strings
// and always store using HTTPS, for example, https://www.example.com/file-uri-here
const someCustomKey = `https://${url.hostname}${url.pathname}`;
// Fetch the request with custom cache settings
let response = await fetch(c.req.raw, {
cf: {
// Always cache this fetch regardless of content type
// for a max of 5 seconds before revalidating the resource
cacheTtl: 5,
cacheEverything: true,
// Enterprise only feature, see Cache API for other plans
cacheKey: someCustomKey,
},
});
// Reconstruct the Response object to make its headers mutable
response = new Response(response.body, response);
// Set cache control headers to cache on browser for 25 minutes
response.headers.set("Cache-Control", "max-age=1500");
return response;
});
export default app;
```
**Python**
```py
from workers import WorkerEntrypoint, Response, fetch
from urllib.parse import urlparse
class Default(WorkerEntrypoint):
async def fetch(self, request):
url = urlparse(request.url)
# Only use the path for the cache key, removing query strings
# and always store using HTTPS, for example, https://www.example.com/file-uri-here
some_custom_key = f"https://{url.hostname}{url.path}"
response = await fetch(
request,
cf={
# Always cache this fetch regardless of content type
# for a max of 5 seconds before revalidating the resource
"cacheTtl": 5,
"cacheEverything": True,
# Enterprise only feature, see Cache API for other plans
"cacheKey": some_custom_key,
},
)
# Reconstruct the Response object to make its headers mutable
new_response = Response(response.body, headers=dict(response.headers))
# Set cache control headers to cache on browser for 25 minutes
new_response.headers["Cache-Control"] = "max-age=1500"
return new_response
```
```rs
use worker::*;
#[event(fetch)]
async fn fetch(req: Request, _env: Env, _ctx: Context) -> Result {
let url = req.url()?;
// Only use the path for the cache key, removing query strings
// and always store using HTTPS, for example, https://www.example.com/file-uri-here
let custom_key = format!(
"https://{host}{path}",
host = url.host_str().unwrap(),
path = url.path()
);
let request = Request::new_with_init(
url.as_str(),
&RequestInit {
headers: req.headers().clone(),
method: req.method(),
cf: CfProperties {
// Always cache this fetch regardless of content type
// for a max of 5 seconds before revalidating the resource
cache_ttl: Some(5),
cache_everything: Some(true),
// Enterprise only feature, see Cache API for other plans
cache_key: Some(custom_key),
..CfProperties::default()
},
..RequestInit::default()
},
)?;
let mut response = Fetch::Request(request).send().await?;
// Set cache control headers to cache on browser for 25 minutes
let _ = response.headers_mut().set("Cache-Control", "max-age=1500");
Ok(response)
}
```
## Caching HTML resources
**JavaScript**
```js
// Force Cloudflare to cache an asset
fetch(event.request, { cf: { cacheEverything: true } });
```
Setting the cache level to **Cache Everything** will override the default cacheability of the asset. For time-to-live (TTL), Cloudflare will still rely on headers set by the origin.
## Custom cache keys
Note
This feature is available only to Enterprise customers.
A request's cache key is what determines if two requests are the same for caching purposes. If a request has the same cache key as some previous request, then Cloudflare can serve the same cached response for both. For more about cache keys, refer to the [Create custom cache keys](https://developers.cloudflare.com/cache/how-to/cache-keys/#create-custom-cache-keys) documentation.
**JavaScript**
```js
// Set cache key for this request to "some-string".
fetch(event.request, { cf: { cacheKey: "some-string" } });
```
Normally, Cloudflare computes the cache key for a request based on the request's URL. Sometimes, though, you may like different URLs to be treated as if they were the same for caching purposes. For example, if your website content is hosted from both Amazon S3 and Google Cloud Storage - you have the same content in both places, and you can use a Worker to randomly balance between the two. However, you do not want to end up caching two copies of your content. You could utilize custom cache keys to cache based on the original request URL rather than the subrequest URL:
* [ JavaScript ](#tab-panel-12488)
* [ TypeScript ](#tab-panel-12489)
* [ Hono ](#tab-panel-12490)
**JavaScript**
```js
export default {
async fetch(request) {
let url = new URL(request.url);
if (Math.random() < 0.5) {
url.hostname = "example.s3.amazonaws.com";
} else {
url.hostname = "example.storage.googleapis.com";
}
let newRequest = new Request(url, request);
return fetch(newRequest, {
cf: { cacheKey: request.url },
});
},
};
```
**TypeScript**
```ts
export default {
async fetch(request): Promise {
let url = new URL(request.url);
if (Math.random() < 0.5) {
url.hostname = "example.s3.amazonaws.com";
} else {
url.hostname = "example.storage.googleapis.com";
}
let newRequest = new Request(url, request);
return fetch(newRequest, {
cf: { cacheKey: request.url },
});
},
} satisfies ExportedHandler;
```
**TypeScript**
```ts
import { Hono } from 'hono';
type Bindings = {};
const app = new Hono<{ Bindings: Bindings }>();
app.all('*', async (c) => {
const originalUrl = c.req.url;
const url = new URL(originalUrl);
// Randomly select a storage backend
if (Math.random() < 0.5) {
url.hostname = "example.s3.amazonaws.com";
} else {
url.hostname = "example.storage.googleapis.com";
}
// Create a new request to the selected backend
const newRequest = new Request(url, c.req.raw);
// Fetch using the original URL as the cache key
return fetch(newRequest, {
cf: { cacheKey: originalUrl },
});
});
export default app;
```
Workers operating on behalf of different zones cannot affect each other's cache. You can only override cache keys when making requests within your own zone (in the above example `event.request.url` was the key stored), or requests to hosts that are not on Cloudflare. When making a request to another Cloudflare zone (for example, belonging to a different Cloudflare customer), that zone fully controls how its own content is cached within Cloudflare; you cannot override it.
## Cache expected Vary responses
Use `cf.vary` when an origin returns a `Vary` header and you want a Worker subrequest to cache expected variants. This setting applies only to the `fetch()` request where you set it.
For Vary behavior details, refer to [Vary](https://developers.cloudflare.com/cache/concepts/vary/). For the full request init object, refer to [cf.vary](https://developers.cloudflare.com/workers/runtime-apis/request/#the-cfvary-property).
* [ JavaScript ](#tab-panel-12493)
* [ TypeScript ](#tab-panel-12494)
**src/index.js**
```js
export default {
async fetch(request) {
return fetch(request, {
cf: {
vary: {
default: { action: "bypass" },
headers: {
accept: {
action: "normalize",
media_types: ["text/html", "application/json"],
},
"accept-language": {
action: "normalize",
languages: ["en", "fr", "de"],
},
},
},
},
});
},
};
```
**src/index.ts**
```ts
export default {
async fetch(request): Promise {
return fetch(request, {
cf: {
vary: {
default: { action: "bypass" },
headers: {
accept: {
action: "normalize",
media_types: ["text/html", "application/json"],
},
"accept-language": {
action: "normalize",
languages: ["en", "fr", "de"],
},
},
},
},
});
},
} satisfies ExportedHandler;
```
## Override based on origin response code
**JavaScript**
```js
// Force response to be cached for 86400 seconds for 200 status
// codes, 1 second for 404, and do not cache 500 errors.
fetch(request, {
cf: { cacheTtlByStatus: { "200-299": 86400, 404: 1, "500-599": 0 } },
});
```
This option is a version of the `cacheTtl` feature which chooses a TTL based on the response's status code and does not automatically set `cacheEverything: true`. If the response to this request has a status code that matches, Cloudflare will cache for the instructed time, and override cache directives sent by the origin. You can review [details on the cacheTtl feature on the Request page](https://developers.cloudflare.com/workers/runtime-apis/request/#the-cf-property-requestinitcfproperties).
## Customize cache behavior based on request file type
Using custom cache keys and overrides based on response code, you can write a Worker that sets the TTL based on the response status code from origin, and request file type.
The following example demonstrates how you might use this to cache requests for streaming media assets:
* [ Module Worker ](#tab-panel-12491)
* [ Service Worker ](#tab-panel-12492)
**index.js**
```js
export default {
async fetch(request) {
// Instantiate new URL to make it mutable
const newRequest = new URL(request.url);
const customCacheKey = `${newRequest.hostname}${newRequest.pathname}`;
const queryCacheKey = `${newRequest.hostname}${newRequest.pathname}${newRequest.search}`;
// Different asset types usually have different caching strategies. Most of the time media content such as audio, videos and images that are not user-generated content would not need to be updated often so a long TTL would be best. However, with HLS streaming, manifest files usually are set with short TTLs so that playback will not be affected, as this files contain the data that the player would need. By setting each caching strategy for categories of asset types in an object within an array, you can solve complex needs when it comes to media content for your application
const cacheAssets = [
{
asset: "video",
key: customCacheKey,
regex:
/(.*\/Video)|(.*\.(m4s|mp4|ts|avi|mpeg|mpg|mkv|bin|webm|vob|flv|m2ts|mts|3gp|m4v|wmv|qt))/,
info: 0,
ok: 31556952,
redirects: 30,
clientError: 10,
serverError: 0,
},
{
asset: "image",
key: queryCacheKey,
regex:
/(.*\/Images)|(.*\.(jpg|jpeg|png|bmp|pict|tif|tiff|webp|gif|heif|exif|bat|bpg|ppm|pgn|pbm|pnm))/,
info: 0,
ok: 3600,
redirects: 30,
clientError: 10,
serverError: 0,
},
{
asset: "frontEnd",
key: queryCacheKey,
regex: /^.*\.(css|js)/,
info: 0,
ok: 3600,
redirects: 30,
clientError: 10,
serverError: 0,
},
{
asset: "audio",
key: customCacheKey,
regex:
/(.*\/Audio)|(.*\.(flac|aac|mp3|alac|aiff|wav|ogg|aiff|opus|ape|wma|3gp))/,
info: 0,
ok: 31556952,
redirects: 30,
clientError: 10,
serverError: 0,
},
{
asset: "directPlay",
key: customCacheKey,
regex: /.*(\/Download)/,
info: 0,
ok: 31556952,
redirects: 30,
clientError: 10,
serverError: 0,
},
{
asset: "manifest",
key: customCacheKey,
regex: /^.*\.(m3u8|mpd)/,
info: 0,
ok: 3,
redirects: 2,
clientError: 1,
serverError: 0,
},
];
const { asset, regex, ...cache } =
cacheAssets.find(({ regex }) => newRequest.pathname.match(regex)) ?? {};
const newResponse = await fetch(request, {
cf: {
cacheKey: cache.key,
polish: false,
cacheEverything: true,
cacheTtlByStatus: {
"100-199": cache.info,
"200-299": cache.ok,
"300-399": cache.redirects,
"400-499": cache.clientError,
"500-599": cache.serverError,
},
cacheTags: ["static"],
},
});
const response = new Response(newResponse.body, newResponse);
// For debugging purposes
response.headers.set("debug", JSON.stringify(cache));
return response;
},
};
```
Service Workers are deprecated
Service Workers are deprecated, but still supported. We recommend using [Module Workers](https://developers.cloudflare.com/workers/reference/migrate-to-module-workers/) instead. New features may not be supported for Service Workers.
**index.js**
```js
addEventListener("fetch", (event) => {
return event.respondWith(handleRequest(event.request));
});
async function handleRequest(request) {
// Instantiate new URL to make it mutable
const newRequest = new URL(request.url);
// Set `const` to be used in the array later on
const customCacheKey = `${newRequest.hostname}${newRequest.pathname}`;
const queryCacheKey = `${newRequest.hostname}${newRequest.pathname}${newRequest.search}`;
// Set all variables needed to manipulate Cloudflare's cache using the fetch API in the `cf` object. You will be passing these variables in the objects down below.
const cacheAssets = [
{
asset: "video",
key: customCacheKey,
regex:
/(.*\/Video)|(.*\.(m4s|mp4|ts|avi|mpeg|mpg|mkv|bin|webm|vob|flv|m2ts|mts|3gp|m4v|wmv|qt))/,
info: 0,
ok: 31556952,
redirects: 30,
clientError: 10,
serverError: 0,
},
{
asset: "image",
key: queryCacheKey,
regex:
/(.*\/Images)|(.*\.(jpg|jpeg|png|bmp|pict|tif|tiff|webp|gif|heif|exif|bat|bpg|ppm|pgn|pbm|pnm))/,
info: 0,
ok: 3600,
redirects: 30,
clientError: 10,
serverError: 0,
},
{
asset: "frontEnd",
key: queryCacheKey,
regex: /^.*\.(css|js)/,
info: 0,
ok: 3600,
redirects: 30,
clientError: 10,
serverError: 0,
},
{
asset: "audio",
key: customCacheKey,
regex:
/(.*\/Audio)|(.*\.(flac|aac|mp3|alac|aiff|wav|ogg|aiff|opus|ape|wma|3gp))/,
info: 0,
ok: 31556952,
redirects: 30,
clientError: 10,
serverError: 0,
},
{
asset: "directPlay",
key: customCacheKey,
regex: /.*(\/Download)/,
info: 0,
ok: 31556952,
redirects: 30,
clientError: 10,
serverError: 0,
},
{
asset: "manifest",
key: customCacheKey,
regex: /^.*\.(m3u8|mpd)/,
info: 0,
ok: 3,
redirects: 2,
clientError: 1,
serverError: 0,
},
];
// the `.find` method is used to find elements in an array (`cacheAssets`), in this case, `regex`, which can passed to the .`match` method to match on file extensions to cache, since they are many media types in the array. If you want to add more types, update the array. Refer to https://developer.mozilla.org/en-US/docs/Web/JavaScript/Reference/Global_Objects/Array/find for more information.
const { asset, regex, ...cache } =
cacheAssets.find(({ regex }) => newRequest.pathname.match(regex)) ?? {};
const newResponse = await fetch(request, {
cf: {
cacheKey: cache.key,
polish: false,
cacheEverything: true,
cacheTtlByStatus: {
"100-199": cache.info,
"200-299": cache.ok,
"300-399": cache.redirects,
"400-499": cache.clientError,
"500-599": cache.serverError,
},
cacheTags: ["static"],
},
});
const response = new Response(newResponse.body, newResponse);
// For debugging purposes
response.headers.set("debug", JSON.stringify(cache));
return response;
}
```
## Using the HTTP Cache API
The `cache` mode can be set in `fetch` options. Currently Workers only support the `no-store` and `no-cache` mode for controlling the cache. When `no-store` is supplied the cache is bypassed on the way to the origin and the request is not cacheable. When `no-cache` is supplied the cache is forced to revalidate the currently cached response with the origin.
**JavaScript**
```js
fetch(request, { cache: 'no-store'});
fetch(request, { cache: 'no-cache'});
```
```json
{"@context":"https://schema.org","@type":"TechArticle","@id":"https://developers.cloudflare.com/workers/examples/cache-using-fetch/#page","headline":"Cache using fetch · Cloudflare Workers docs","description":"Determine how to cache a resource by setting TTLs, custom cache keys, and cache headers in a fetch request.","url":"https://developers.cloudflare.com/workers/examples/cache-using-fetch/","inLanguage":"en","image":"https://developers.cloudflare.com/dev-products-preview.png","dateModified":"2026-07-06","publisher":{"@type":"Organization","name":"Cloudflare","url":"https://www.cloudflare.com/"},"isPartOf":{"@type":"WebSite","@id":"https://developers.cloudflare.com/#website","name":"Cloudflare Docs","url":"https://developers.cloudflare.com/"},"keywords":["Caching","Middleware","JavaScript","TypeScript","Python","Rust"]}
{"@context":"https://schema.org","@type":"BreadcrumbList","itemListElement":[{"@type":"ListItem","position":1,"item":{"@id":"/directory/","name":"Directory"}},{"@type":"ListItem","position":2,"item":{"@id":"/workers/","name":"Workers"}},{"@type":"ListItem","position":3,"item":{"@id":"/workers/examples/","name":"Examples"}},{"@type":"ListItem","position":4,"item":{"@id":"/workers/examples/cache-using-fetch/","name":"Cache using fetch"}}]}
```
---
---
title: Conditional response
description: Return a response based on the incoming request's URL, HTTP method, User Agent, IP address, ASN or device type.
image: https://developers.cloudflare.com/dev-products-preview.png
---
> Documentation Index
> Fetch the complete documentation index at: https://developers.cloudflare.com/workers/llms.txt
> Use this file to discover all available pages before exploring further.
[Skip to content](#%5Ftop)
# Conditional response
Return a response based on the incoming request's URL, HTTP method, User Agent, IP address, ASN or device type.
If you want to get started quickly, click on the button below.
[](https://deploy.workers.cloudflare.com/?url=https://github.com/cloudflare/docs-examples/tree/main/workers/conditional-response)
This creates a repository in your GitHub account and deploys the application to Cloudflare Workers.
* [ JavaScript ](#tab-panel-12495)
* [ TypeScript ](#tab-panel-12496)
* [ Python ](#tab-panel-12497)
* [ Hono ](#tab-panel-12498)
**JavaScript**
```js
export default {
async fetch(request) {
const BLOCKED_HOSTNAMES = ["nope.mywebsite.com", "bye.website.com"];
// Return a new Response based on a URL's hostname
const url = new URL(request.url);
if (BLOCKED_HOSTNAMES.includes(url.hostname)) {
return new Response("Blocked Host", { status: 403 });
}
// Block paths ending in .doc or .xml based on the URL's file extension
const forbiddenExtRegExp = new RegExp(/\.(doc|xml)$/);
if (forbiddenExtRegExp.test(url.pathname)) {
return new Response("Blocked Extension", { status: 403 });
}
// On HTTP method
if (request.method === "POST") {
return new Response("Response for POST");
}
// On User Agent
const userAgent = request.headers.get("User-Agent") || "";
if (userAgent.includes("bot")) {
return new Response("Block User Agent containing bot", { status: 403 });
}
// On Client's IP address
const clientIP = request.headers.get("CF-Connecting-IP");
if (clientIP === "1.2.3.4") {
return new Response("Block the IP 1.2.3.4", { status: 403 });
}
// On ASN
if (request.cf && request.cf.asn == 64512) {
return new Response("Block the ASN 64512 response");
}
// On Device Type
// Requires Enterprise "CF-Device-Type Header" zone setting or
// Page Rule with "Cache By Device Type" setting applied.
const device = request.headers.get("CF-Device-Type");
if (device === "mobile") {
return Response.redirect("https://mobile.example.com");
}
console.error(
"Getting Client's IP address, device type, and ASN are not supported in playground. Must test on a live worker",
);
return fetch(request);
},
};
```
**TypeScript**
```ts
export default {
async fetch(request): Promise {
const BLOCKED_HOSTNAMES = ["nope.mywebsite.com", "bye.website.com"];
// Return a new Response based on a URL's hostname
const url = new URL(request.url);
if (BLOCKED_HOSTNAMES.includes(url.hostname)) {
return new Response("Blocked Host", { status: 403 });
}
// Block paths ending in .doc or .xml based on the URL's file extension
const forbiddenExtRegExp = new RegExp(/\.(doc|xml)$/);
if (forbiddenExtRegExp.test(url.pathname)) {
return new Response("Blocked Extension", { status: 403 });
}
// On HTTP method
if (request.method === "POST") {
return new Response("Response for POST");
}
// On User Agent
const userAgent = request.headers.get("User-Agent") || "";
if (userAgent.includes("bot")) {
return new Response("Block User Agent containing bot", { status: 403 });
}
// On Client's IP address
const clientIP = request.headers.get("CF-Connecting-IP");
if (clientIP === "1.2.3.4") {
return new Response("Block the IP 1.2.3.4", { status: 403 });
}
// On ASN
if (request.cf && request.cf.asn == 64512) {
return new Response("Block the ASN 64512 response");
}
// On Device Type
// Requires Enterprise "CF-Device-Type Header" zone setting or
// Page Rule with "Cache By Device Type" setting applied.
const device = request.headers.get("CF-Device-Type");
if (device === "mobile") {
return Response.redirect("https://mobile.example.com");
}
console.error(
"Getting Client's IP address, device type, and ASN are not supported in playground. Must test on a live worker",
);
return fetch(request);
},
} satisfies ExportedHandler;
```
**Python**
```py
import re
from workers import WorkerEntrypoint, Response, fetch
from urllib.parse import urlparse
class Default(WorkerEntrypoint):
async def fetch(self, request):
blocked_hostnames = ["nope.mywebsite.com", "bye.website.com"]
url = urlparse(request.url)
# Block on hostname
if url.hostname in blocked_hostnames:
return Response("Blocked Host", status=403)
# On paths ending in .doc or .xml
if re.search(r'\.(doc|xml)$', url.path):
return Response("Blocked Extension", status=403)
# On HTTP method
if "POST" in request.method:
return Response("Response for POST")
# On User Agent
user_agent = request.headers["User-Agent"] or ""
if "bot" in user_agent:
return Response("Block User Agent containing bot", status=403)
# On Client's IP address
client_ip = request.headers["CF-Connecting-IP"]
if client_ip == "1.2.3.4":
return Response("Block the IP 1.2.3.4", status=403)
# On ASN
if request.cf and request.cf.asn == 64512:
return Response("Block the ASN 64512 response")
# On Device Type
# Requires Enterprise "CF-Device-Type Header" zone setting or
# Page Rule with "Cache By Device Type" setting applied.
device = request.headers["CF-Device-Type"]
if device == "mobile":
return Response.redirect("https://mobile.example.com")
return fetch(request)
```
**TypeScript**
```ts
import { Hono } from "hono";
import { HTTPException } from "hono/http-exception";
const app = new Hono();
// Middleware to handle all conditions before reaching the main handler
app.use("*", async (c, next) => {
const request = c.req.raw;
const BLOCKED_HOSTNAMES = ["nope.mywebsite.com", "bye.website.com"];
const hostname = new URL(c.req.url)?.hostname;
// Return a new Response based on a URL's hostname
if (BLOCKED_HOSTNAMES.includes(hostname)) {
return c.text("Blocked Host", 403);
}
// Block paths ending in .doc or .xml based on the URL's file extension
const forbiddenExtRegExp = new RegExp(/\.(doc|xml)$/);
if (forbiddenExtRegExp.test(c.req.pathname)) {
return c.text("Blocked Extension", 403);
}
// On User Agent
const userAgent = c.req.header("User-Agent") || "";
if (userAgent.includes("bot")) {
return c.text("Block User Agent containing bot", 403);
}
// On Client's IP address
const clientIP = c.req.header("CF-Connecting-IP");
if (clientIP === "1.2.3.4") {
return c.text("Block the IP 1.2.3.4", 403);
}
// On ASN
if (request.cf && request.cf.asn === 64512) {
return c.text("Block the ASN 64512 response");
}
// On Device Type
// Requires Enterprise "CF-Device-Type Header" zone setting or
// Page Rule with "Cache By Device Type" setting applied.
const device = c.req.header("CF-Device-Type");
if (device === "mobile") {
return c.redirect("https://mobile.example.com");
}
// Continue to the next handler
await next();
});
// Handle POST requests differently
app.post("*", (c) => {
return c.text("Response for POST");
});
// Default handler for other methods
app.get("*", async (c) => {
console.error(
"Getting Client's IP address, device type, and ASN are not supported in playground. Must test on a live worker",
);
// Fetch the original request
return fetch(c.req.raw);
});
export default app;
```
```json
{"@context":"https://schema.org","@type":"TechArticle","@id":"https://developers.cloudflare.com/workers/examples/conditional-response/#page","headline":"Conditional response · Cloudflare Workers docs","description":"Return a response based on the incoming request's URL, HTTP method, User Agent, IP address, ASN or device type.","url":"https://developers.cloudflare.com/workers/examples/conditional-response/","inLanguage":"en","image":"https://developers.cloudflare.com/dev-products-preview.png","dateModified":"2026-04-23","publisher":{"@type":"Organization","name":"Cloudflare","url":"https://www.cloudflare.com/"},"isPartOf":{"@type":"WebSite","@id":"https://developers.cloudflare.com/#website","name":"Cloudflare Docs","url":"https://developers.cloudflare.com/"},"keywords":["Middleware","JavaScript","TypeScript","Python"]}
{"@context":"https://schema.org","@type":"BreadcrumbList","itemListElement":[{"@type":"ListItem","position":1,"item":{"@id":"/directory/","name":"Directory"}},{"@type":"ListItem","position":2,"item":{"@id":"/workers/","name":"Workers"}},{"@type":"ListItem","position":3,"item":{"@id":"/workers/examples/","name":"Examples"}},{"@type":"ListItem","position":4,"item":{"@id":"/workers/examples/conditional-response/","name":"Conditional response"}}]}
```
---
---
title: CORS header proxy
description: Add the necessary CORS headers to a third party API response.
image: https://developers.cloudflare.com/dev-products-preview.png
---
> Documentation Index
> Fetch the complete documentation index at: https://developers.cloudflare.com/workers/llms.txt
> Use this file to discover all available pages before exploring further.
[Skip to content](#%5Ftop)
# CORS header proxy
Add the necessary CORS headers to a third party API response.
If you want to get started quickly, click on the button below.
[](https://deploy.workers.cloudflare.com/?url=https://github.com/cloudflare/docs-examples/tree/main/workers/cors-header-proxy)
This creates a repository in your GitHub account and deploys the application to Cloudflare Workers.
* [ JavaScript ](#tab-panel-12499)
* [ TypeScript ](#tab-panel-12500)
* [ Hono ](#tab-panel-12501)
* [ Python ](#tab-panel-12502)
* [ Rust ](#tab-panel-12503)
**JavaScript**
```js
export default {
async fetch(request) {
const corsHeaders = {
"Access-Control-Allow-Origin": "*",
"Access-Control-Allow-Methods": "GET,HEAD,POST,OPTIONS",
"Access-Control-Max-Age": "86400",
};
// The URL for the remote third party API you want to fetch from
// but does not implement CORS
const API_URL = "https://examples.cloudflareworkers.com/demos/demoapi";
// The endpoint you want the CORS reverse proxy to be on
const PROXY_ENDPOINT = "/corsproxy/";
// The rest of this snippet for the demo page
function rawHtmlResponse(html) {
return new Response(html, {
headers: {
"content-type": "text/html;charset=UTF-8",
},
});
}
const DEMO_PAGE = `
Waiting
`;
async function handleRequest(request) {
const url = new URL(request.url);
let apiUrl = url.searchParams.get("apiurl");
if (apiUrl == null) {
apiUrl = API_URL;
}
// Rewrite request to point to API URL. This also makes the request mutable
// so you can add the correct Origin header to make the API server think
// that this request is not cross-site.
request = new Request(apiUrl, request);
request.headers.set("Origin", new URL(apiUrl).origin);
let response = await fetch(request);
// Recreate the response so you can modify the headers
response = new Response(response.body, response);
// Set CORS headers
response.headers.set("Access-Control-Allow-Origin", url.origin);
// Append to/Add Vary header so browser will cache response correctly
response.headers.append("Vary", "Origin");
return response;
}
async function handleOptions(request) {
if (
request.headers.get("Origin") !== null &&
request.headers.get("Access-Control-Request-Method") !== null &&
request.headers.get("Access-Control-Request-Headers") !== null
) {
// Handle CORS preflight requests.
return new Response(null, {
headers: {
...corsHeaders,
"Access-Control-Allow-Headers": request.headers.get(
"Access-Control-Request-Headers",
),
},
});
} else {
// Handle standard OPTIONS request.
return new Response(null, {
headers: {
Allow: "GET, HEAD, POST, OPTIONS",
},
});
}
}
const url = new URL(request.url);
if (url.pathname.startsWith(PROXY_ENDPOINT)) {
if (request.method === "OPTIONS") {
// Handle CORS preflight requests
return handleOptions(request);
} else if (
request.method === "GET" ||
request.method === "HEAD" ||
request.method === "POST"
) {
// Handle requests to the API server
return handleRequest(request);
} else {
return new Response(null, {
status: 405,
statusText: "Method Not Allowed",
});
}
} else {
return rawHtmlResponse(DEMO_PAGE);
}
},
};
```
**TypeScript**
```ts
export default {
async fetch(request): Promise {
const corsHeaders = {
"Access-Control-Allow-Origin": "*",
"Access-Control-Allow-Methods": "GET,HEAD,POST,OPTIONS",
"Access-Control-Max-Age": "86400",
};
// The URL for the remote third party API you want to fetch from
// but does not implement CORS
const API_URL = "https://examples.cloudflareworkers.com/demos/demoapi";
// The endpoint you want the CORS reverse proxy to be on
const PROXY_ENDPOINT = "/corsproxy/";
// The rest of this snippet for the demo page
function rawHtmlResponse(html) {
return new Response(html, {
headers: {
"content-type": "text/html;charset=UTF-8",
},
});
}
const DEMO_PAGE = `
Waiting
`;
async function handleRequest(request) {
const url = new URL(request.url);
let apiUrl = url.searchParams.get("apiurl");
if (apiUrl == null) {
apiUrl = API_URL;
}
// Rewrite request to point to API URL. This also makes the request mutable
// so you can add the correct Origin header to make the API server think
// that this request is not cross-site.
request = new Request(apiUrl, request);
request.headers.set("Origin", new URL(apiUrl).origin);
let response = await fetch(request);
// Recreate the response so you can modify the headers
response = new Response(response.body, response);
// Set CORS headers
response.headers.set("Access-Control-Allow-Origin", url.origin);
// Append to/Add Vary header so browser will cache response correctly
response.headers.append("Vary", "Origin");
return response;
}
async function handleOptions(request) {
if (
request.headers.get("Origin") !== null &&
request.headers.get("Access-Control-Request-Method") !== null &&
request.headers.get("Access-Control-Request-Headers") !== null
) {
// Handle CORS preflight requests.
return new Response(null, {
headers: {
...corsHeaders,
"Access-Control-Allow-Headers": request.headers.get(
"Access-Control-Request-Headers",
),
},
});
} else {
// Handle standard OPTIONS request.
return new Response(null, {
headers: {
Allow: "GET, HEAD, POST, OPTIONS",
},
});
}
}
const url = new URL(request.url);
if (url.pathname.startsWith(PROXY_ENDPOINT)) {
if (request.method === "OPTIONS") {
// Handle CORS preflight requests
return handleOptions(request);
} else if (
request.method === "GET" ||
request.method === "HEAD" ||
request.method === "POST"
) {
// Handle requests to the API server
return handleRequest(request);
} else {
return new Response(null, {
status: 405,
statusText: "Method Not Allowed",
});
}
} else {
return rawHtmlResponse(DEMO_PAGE);
}
},
} satisfies ExportedHandler;
```
**TypeScript**
```ts
import { Hono } from "hono";
import { cors } from "hono/cors";
// The URL for the remote third party API you want to fetch from
// but does not implement CORS
const API_URL = "https://examples.cloudflareworkers.com/demos/demoapi";
// The endpoint you want the CORS reverse proxy to be on
const PROXY_ENDPOINT = "/corsproxy/";
const app = new Hono();
// Demo page handler
app.get("*", async (c) => {
// Only handle non-proxy requests with this handler
if (c.req.path.startsWith(PROXY_ENDPOINT)) {
return next();
}
// Create the demo page HTML
const DEMO_PAGE = `
Waiting
"#
);
if req.url()?.path().starts_with(proxy_endpoint) {
match req.method() {
Method::Options => return handle_options(req, &cors_headers),
Method::Get | Method::Head | Method::Post => return handle_request(req, api_url).await,
_ => return Response::error("Method Not Allowed", 405),
}
}
raw_html_response(&demo_page)
}
```
```json
{"@context":"https://schema.org","@type":"TechArticle","@id":"https://developers.cloudflare.com/workers/examples/cors-header-proxy/#page","headline":"CORS header proxy · Cloudflare Workers docs","description":"Add the necessary CORS headers to a third party API response.","url":"https://developers.cloudflare.com/workers/examples/cors-header-proxy/","inLanguage":"en","image":"https://developers.cloudflare.com/dev-products-preview.png","dateModified":"2026-07-06","publisher":{"@type":"Organization","name":"Cloudflare","url":"https://www.cloudflare.com/"},"isPartOf":{"@type":"WebSite","@id":"https://developers.cloudflare.com/#website","name":"Cloudflare Docs","url":"https://developers.cloudflare.com/"},"keywords":["Security","Headers","JavaScript","TypeScript","Python","Rust"]}
{"@context":"https://schema.org","@type":"BreadcrumbList","itemListElement":[{"@type":"ListItem","position":1,"item":{"@id":"/directory/","name":"Directory"}},{"@type":"ListItem","position":2,"item":{"@id":"/workers/","name":"Workers"}},{"@type":"ListItem","position":3,"item":{"@id":"/workers/examples/","name":"Examples"}},{"@type":"ListItem","position":4,"item":{"@id":"/workers/examples/cors-header-proxy/","name":"CORS header proxy"}}]}
```
---
---
title: Country code redirect
description: Redirect a response based on the country code in the header of a visitor.
image: https://developers.cloudflare.com/dev-products-preview.png
---
> Documentation Index
> Fetch the complete documentation index at: https://developers.cloudflare.com/workers/llms.txt
> Use this file to discover all available pages before exploring further.
[Skip to content](#%5Ftop)
# Country code redirect
Redirect a response based on the country code in the header of a visitor.
If you want to get started quickly, click on the button below.
[](https://deploy.workers.cloudflare.com/?url=https://github.com/cloudflare/docs-examples/tree/main/workers/country-code-redirect)
This creates a repository in your GitHub account and deploys the application to Cloudflare Workers.
* [ JavaScript ](#tab-panel-12504)
* [ TypeScript ](#tab-panel-12505)
* [ Python ](#tab-panel-12506)
* [ Hono ](#tab-panel-12507)
**JavaScript**
```js
export default {
async fetch(request) {
/**
* A map of the URLs to redirect to
* @param {Object} countryMap
*/
const countryMap = {
US: "https://example.com/us",
EU: "https://example.com/eu",
};
// Use the cf object to obtain the country of the request
// more on the cf object: https://developers.cloudflare.com/workers/runtime-apis/request#incomingrequestcfproperties
const country = request.cf.country;
if (country != null && country in countryMap) {
const url = countryMap[country];
// Remove this logging statement from your final output.
console.log(
`Based on ${country}-based request, your user would go to ${url}.`,
);
return Response.redirect(url);
} else {
return fetch("https://example.com", request);
}
},
};
```
**TypeScript**
```ts
export default {
async fetch(request): Promise {
/**
* A map of the URLs to redirect to
* @param {Object} countryMap
*/
const countryMap = {
US: "https://example.com/us",
EU: "https://example.com/eu",
};
// Use the cf object to obtain the country of the request
// more on the cf object: https://developers.cloudflare.com/workers/runtime-apis/request#incomingrequestcfproperties
const country = request.cf.country;
if (country != null && country in countryMap) {
const url = countryMap[country];
return Response.redirect(url);
} else {
return fetch(request);
}
},
} satisfies ExportedHandler;
```
**Python**
```py
from workers import WorkerEntrypoint, Response, fetch
class Default(WorkerEntrypoint):
async def fetch(self, request):
countries = {
"US": "https://example.com/us",
"EU": "https://example.com/eu",
}
# Use the cf object to obtain the country of the request
# more on the cf object: https://developers.cloudflare.com/workers/runtime-apis/request#incomingrequestcfproperties
country = request.cf.country
if country and country in countries:
url = countries[country]
return Response.redirect(url)
return fetch("https://example.com", request)
```
**TypeScript**
```ts
import { Hono } from 'hono';
// Define the RequestWithCf interface to add Cloudflare-specific properties
interface RequestWithCf extends Request {
cf: {
country: string;
// Other CF properties can be added as needed
};
}
const app = new Hono();
app.get('*', async (c) => {
/**
* A map of the URLs to redirect to
*/
const countryMap: Record = {
US: "https://example.com/us",
EU: "https://example.com/eu",
};
// Cast the raw request to include Cloudflare-specific properties
const request = c.req.raw as RequestWithCf;
// Use the cf object to obtain the country of the request
// more on the cf object: https://developers.cloudflare.com/workers/runtime-apis/request#incomingrequestcfproperties
const country = request.cf.country;
if (country != null && country in countryMap) {
const url = countryMap[country];
// Redirect using Hono's redirect helper
return c.redirect(url);
} else {
// Default fallback
return fetch("https://example.com", request);
}
});
export default app;
```
```json
{"@context":"https://schema.org","@type":"TechArticle","@id":"https://developers.cloudflare.com/workers/examples/country-code-redirect/#page","headline":"Country code redirect · Cloudflare Workers docs","description":"Redirect a response based on the country code in the header of a visitor.","url":"https://developers.cloudflare.com/workers/examples/country-code-redirect/","inLanguage":"en","image":"https://developers.cloudflare.com/dev-products-preview.png","dateModified":"2026-04-23","publisher":{"@type":"Organization","name":"Cloudflare","url":"https://www.cloudflare.com/"},"isPartOf":{"@type":"WebSite","@id":"https://developers.cloudflare.com/#website","name":"Cloudflare Docs","url":"https://developers.cloudflare.com/"},"keywords":["Redirects","Geolocation","JavaScript","TypeScript","Python"]}
{"@context":"https://schema.org","@type":"BreadcrumbList","itemListElement":[{"@type":"ListItem","position":1,"item":{"@id":"/directory/","name":"Directory"}},{"@type":"ListItem","position":2,"item":{"@id":"/workers/","name":"Workers"}},{"@type":"ListItem","position":3,"item":{"@id":"/workers/examples/","name":"Examples"}},{"@type":"ListItem","position":4,"item":{"@id":"/workers/examples/country-code-redirect/","name":"Country code redirect"}}]}
```
---
---
title: Setting Cron Triggers
description: Set a Cron Trigger for your Worker.
image: https://developers.cloudflare.com/dev-products-preview.png
---
> Documentation Index
> Fetch the complete documentation index at: https://developers.cloudflare.com/workers/llms.txt
> Use this file to discover all available pages before exploring further.
[Skip to content](#%5Ftop)
# Setting Cron Triggers
Set a Cron Trigger for your Worker.
* [ JavaScript ](#tab-panel-12508)
* [ TypeScript ](#tab-panel-12509)
* [ Python ](#tab-panel-12510)
* [ Hono ](#tab-panel-12511)
**JavaScript**
```js
export default {
async scheduled(controller, env, ctx) {
console.log("cron processed");
},
};
```
**TypeScript**
```ts
interface Env {}
export default {
async scheduled(
controller: ScheduledController,
env: Env,
ctx: ExecutionContext,
) {
console.log("cron processed");
},
};
```
**Python**
```python
from workers import WorkerEntrypoint, Response
class Default(WorkerEntrypoint):
async def scheduled(self, controller, env, ctx):
print("cron processed")
```
**TypeScript**
```ts
import { Hono } from "hono";
interface Env {}
// Create Hono app
const app = new Hono<{ Bindings: Env }>();
// Regular routes for normal HTTP requests
app.get("/", (c) => c.text("Hello World!"));
// Export both the app and a scheduled function
export default {
// The Hono app handles regular HTTP requests
fetch: app.fetch,
// The scheduled function handles Cron triggers
async scheduled(
controller: ScheduledController,
env: Env,
ctx: ExecutionContext,
) {
console.log("cron processed");
// You could also perform actions like:
// - Fetching data from external APIs
// - Updating KV or Durable Object storage
// - Running maintenance tasks
// - Sending notifications
},
};
```
## Set Cron Triggers in Wrangler
Refer to [Cron Triggers](https://developers.cloudflare.com/workers/configuration/cron-triggers/) for more information on how to add a Cron Trigger.
If you are deploying with Wrangler, set the cron syntax (once per hour as shown below) by adding this to your Wrangler file:
* [ wrangler.jsonc ](#tab-panel-12512)
* [ wrangler.toml ](#tab-panel-12513)
**JSONC**
```jsonc
{
"$schema": "./node_modules/wrangler/config-schema.json",
"name": "worker",
// ...
"triggers": {
"crons": [
"0 * * * *"
]
}
}
```
**TOML**
```toml
"$schema" = "./node_modules/wrangler/config-schema.json"
name = "worker"
[triggers]
crons = [ "0 * * * *" ]
```
You also can set a different Cron Trigger for each [environment](https://developers.cloudflare.com/workers/wrangler/environments/) in your [Wrangler configuration file](https://developers.cloudflare.com/workers/wrangler/configuration/). You need to put the `[triggers]` table under your chosen environment. For example:
* [ wrangler.jsonc ](#tab-panel-12514)
* [ wrangler.toml ](#tab-panel-12515)
**JSONC**
```jsonc
{
"env": {
"dev": {
"triggers": {
"crons": [
"0 * * * *"
]
}
}
}
}
```
**TOML**
```toml
[env.dev.triggers]
crons = [ "0 * * * *" ]
```
## Test Cron Triggers using Wrangler
The recommended way of testing Cron Triggers is using Wrangler.
Cron Triggers can be tested using Wrangler by passing in the `--test-scheduled` flag to [wrangler dev](https://developers.cloudflare.com/workers/wrangler/commands/general/#dev). This will expose a `/__scheduled` (or `/cdn-cgi/handler/scheduled` for Python Workers) route which can be used to test using a HTTP request. To simulate different cron patterns, a `cron` query parameter can be passed in.
```sh
npx wrangler dev --test-scheduled
curl "http://localhost:8787/__scheduled?cron=0+*+*+*+*"
curl "http://localhost:8787/cdn-cgi/handler/scheduled?cron=*+*+*+*+*" # Python Workers
```
```json
{"@context":"https://schema.org","@type":"TechArticle","@id":"https://developers.cloudflare.com/workers/examples/cron-trigger/#page","headline":"Setting Cron Triggers · Cloudflare Workers docs","description":"Set a Cron Trigger for your Worker.","url":"https://developers.cloudflare.com/workers/examples/cron-trigger/","inLanguage":"en","image":"https://developers.cloudflare.com/dev-products-preview.png","dateModified":"2026-04-23","publisher":{"@type":"Organization","name":"Cloudflare","url":"https://www.cloudflare.com/"},"isPartOf":{"@type":"WebSite","@id":"https://developers.cloudflare.com/#website","name":"Cloudflare Docs","url":"https://developers.cloudflare.com/"},"keywords":["Middleware","JavaScript","TypeScript"]}
{"@context":"https://schema.org","@type":"BreadcrumbList","itemListElement":[{"@type":"ListItem","position":1,"item":{"@id":"/directory/","name":"Directory"}},{"@type":"ListItem","position":2,"item":{"@id":"/workers/","name":"Workers"}},{"@type":"ListItem","position":3,"item":{"@id":"/workers/examples/","name":"Examples"}},{"@type":"ListItem","position":4,"item":{"@id":"/workers/examples/cron-trigger/","name":"Setting Cron Triggers"}}]}
```
---
---
title: Data loss prevention
description: Protect sensitive data to prevent data loss, and send alerts to a webhooks server in the event of a data breach.
image: https://developers.cloudflare.com/dev-products-preview.png
---
> Documentation Index
> Fetch the complete documentation index at: https://developers.cloudflare.com/workers/llms.txt
> Use this file to discover all available pages before exploring further.
[Skip to content](#%5Ftop)
# Data loss prevention
Protect sensitive data to prevent data loss, and send alerts to a webhooks server in the event of a data breach.
If you want to get started quickly, click on the button below.
[](https://deploy.workers.cloudflare.com/?url=https://github.com/cloudflare/docs-examples/tree/main/workers/data-loss-prevention)
This creates a repository in your GitHub account and deploys the application to Cloudflare Workers.
* [ JavaScript ](#tab-panel-12516)
* [ TypeScript ](#tab-panel-12517)
* [ Python ](#tab-panel-12518)
* [ Hono ](#tab-panel-12519)
**JavaScript**
```js
export default {
async fetch(request) {
const DEBUG = true;
const SOME_HOOK_SERVER = "https://webhook.flow-wolf.io/hook";
/**
* Alert a data breach by posting to a webhook server
*/
async function postDataBreach(request) {
return await fetch(SOME_HOOK_SERVER, {
method: "POST",
headers: {
"content-type": "application/json;charset=UTF-8",
},
body: JSON.stringify({
ip: request.headers.get("cf-connecting-ip"),
time: Date.now(),
request: request,
}),
});
}
/**
* Define personal data with regular expressions.
* Respond with block if credit card data, and strip
* emails and phone numbers from the response.
* Execution will be limited to MIME type "text/*".
*/
const response = await fetch(request);
// Return origin response, if response wasn’t text
const contentType = response.headers.get("content-type") || "";
if (!contentType.toLowerCase().includes("text/")) {
return response;
}
let text = await response.text();
// When debugging replace the response
// from the origin with an email
text = DEBUG
? text.replace("You may use this", "me@example.com may use this")
: text;
const sensitiveRegexsMap = {
creditCard: String.raw`\b(?:4[0-9]{12}(?:[0-9]{3})?|(?:5[1-5][0-9]{2}|222[1-9]|22[3-9][0-9]|2[3-6][0-9]{2}|27[01][0-9]|2720)[0-9]{12}|3[47][0-9]{13}|3(?:0[0-5]|[68][0-9])[0-9]{11}|6(?:011|5[0-9]{2})[0-9]{12}|(?:2131|1800|35\d{3})\d{11})\b`,
email: String.raw`\b[A-Z0-9._%+-]+@[A-Z0-9.-]+\.[A-Z]{2,}\b`,
phone: String.raw`\b07\d{9}\b`,
};
for (const kind in sensitiveRegexsMap) {
const sensitiveRegex = new RegExp(sensitiveRegexsMap[kind], "ig");
const match = await sensitiveRegex.test(text);
if (match) {
// Alert a data breach
await postDataBreach(request);
// Respond with a block if credit card,
// otherwise replace sensitive text with `*`s
return kind === "creditCard"
? new Response(kind + " found\nForbidden\n", {
status: 403,
statusText: "Forbidden",
})
: new Response(text.replace(sensitiveRegex, "**********"), response);
}
}
return new Response(text, response);
},
};
```
**TypeScript**
```ts
export default {
async fetch(request): Promise {
const DEBUG = true;
const SOME_HOOK_SERVER = "https://webhook.flow-wolf.io/hook";
/**
* Alert a data breach by posting to a webhook server
*/
async function postDataBreach(request) {
return await fetch(SOME_HOOK_SERVER, {
method: "POST",
headers: {
"content-type": "application/json;charset=UTF-8",
},
body: JSON.stringify({
ip: request.headers.get("cf-connecting-ip"),
time: Date.now(),
request: request,
}),
});
}
/**
* Define personal data with regular expressions.
* Respond with block if credit card data, and strip
* emails and phone numbers from the response.
* Execution will be limited to MIME type "text/*".
*/
const response = await fetch(request);
// Return origin response, if response wasn’t text
const contentType = response.headers.get("content-type") || "";
if (!contentType.toLowerCase().includes("text/")) {
return response;
}
let text = await response.text();
// When debugging replace the response
// from the origin with an email
text = DEBUG
? text.replace("You may use this", "me@example.com may use this")
: text;
const sensitiveRegexsMap = {
creditCard: String.raw`\b(?:4[0-9]{12}(?:[0-9]{3})?|(?:5[1-5][0-9]{2}|222[1-9]|22[3-9][0-9]|2[3-6][0-9]{2}|27[01][0-9]|2720)[0-9]{12}|3[47][0-9]{13}|3(?:0[0-5]|[68][0-9])[0-9]{11}|6(?:011|5[0-9]{2})[0-9]{12}|(?:2131|1800|35\d{3})\d{11})\b`,
email: String.raw`\b[A-Z0-9._%+-]+@[A-Z0-9.-]+\.[A-Z]{2,}\b`,
phone: String.raw`\b07\d{9}\b`,
};
for (const kind in sensitiveRegexsMap) {
const sensitiveRegex = new RegExp(sensitiveRegexsMap[kind], "ig");
const match = await sensitiveRegex.test(text);
if (match) {
// Alert a data breach
await postDataBreach(request);
// Respond with a block if credit card,
// otherwise replace sensitive text with `*`s
return kind === "creditCard"
? new Response(kind + " found\nForbidden\n", {
status: 403,
statusText: "Forbidden",
})
: new Response(text.replace(sensitiveRegex, "**********"), response);
}
}
return new Response(text, response);
},
} satisfies ExportedHandler;
```
**Python**
```py
import re
from workers import WorkerEntrypoint
from datetime import datetime
from js import Response, fetch, JSON, Headers
# Alert a data breach by posting to a webhook server
async def post_data_breach(request):
some_hook_server = "https://webhook.flow-wolf.io/hook"
headers = Headers.new({"content-type": "application/json"}.items())
body = JSON.stringify({
"ip": request.headers["cf-connecting-ip"],
"time": datetime.now(),
"request": request,
})
return await fetch(some_hook_server, method="POST", headers=headers, body=body)
class Default(WorkerEntrypoint):
async def fetch(self, request):
debug = True
# Define personal data with regular expressions.
# Respond with block if credit card data, and strip
# emails and phone numbers from the response.
# Execution will be limited to MIME type "text/*".
response = await fetch(request)
# Return origin response, if response wasn’t text
content_type = response.headers["content-type"] or ""
if "text" not in content_type:
return response
text = await response.text()
# When debugging replace the response from the origin with an email
text = text.replace("You may use this", "me@example.com may use this") if debug else text
sensitive_regex = [
("credit_card",
r'\b(?:4[0-9]{12}(?:[0-9]{3})?|(?:5[1-5][0-9]{2}|222[1-9]|22[3-9][0-9]|2[3-6][0-9]{2}|27[01][0-9]|2720)[0-9]{12}|3[47][0-9]{13}|3(?:0[0-5]|[68][0-9])[0-9]{11}|6(?:011|5[0-9]{2})[0-9]{12}|(?:2131|1800|35\d{3})\d{11})\b'),
("email", r'\b[A-Z0-9._%+-]+@[A-Z0-9.-]+\.[A-Z]{2,}\b'),
("phone", r'\b07\d{9}\b'),
]
for (kind, regex) in sensitive_regex:
match = re.search(regex, text, flags=re.IGNORECASE)
if match:
# Alert a data breach
await post_data_breach(request)
# Respond with a block if credit card, otherwise replace sensitive text with `*`s
card_resp = Response.new(kind + " found\nForbidden\n", status=403,statusText="Forbidden")
sensitive_resp = Response.new(re.sub(regex, "*"*10, text, flags=re.IGNORECASE), response)
return card_resp if kind == "credit_card" else sensitive_resp
return Response.new(text, response)
```
**TypeScript**
```ts
import { Hono } from 'hono';
const app = new Hono();
// Configuration
const DEBUG = true;
const SOME_HOOK_SERVER = "https://webhook.flow-wolf.io/hook";
// Define sensitive data patterns
const sensitiveRegexsMap = {
creditCard: String.raw`\b(?:4[0-9]{12}(?:[0-9]{3})?|(?:5[1-5][0-9]{2}|222[1-9]|22[3-9][0-9]|2[3-6][0-9]{2}|27[01][0-9]|2720)[0-9]{12}|3[47][0-9]{13}|3(?:0[0-5]|[68][0-9])[0-9]{11}|6(?:011|5[0-9]{2})[0-9]{12}|(?:2131|1800|35\d{3})\d{11})\b`,
email: String.raw`\b[A-Z0-9._%+-]+@[A-Z0-9.-]+\.[A-Z]{2,}\b`,
phone: String.raw`\b07\d{9}\b`,
};
/**
* Alert a data breach by posting to a webhook server
*/
async function postDataBreach(request: Request) {
return await fetch(SOME_HOOK_SERVER, {
method: "POST",
headers: {
"content-type": "application/json;charset=UTF-8",
},
body: JSON.stringify({
ip: request.headers.get("cf-connecting-ip"),
time: Date.now(),
request: request,
}),
});
}
// Main middleware to handle data loss prevention
app.use('*', async (c) => {
// Fetch the origin response
const response = await fetch(c.req.raw);
// Return origin response if response wasn't text
const contentType = response.headers.get("content-type") || "";
if (!contentType.toLowerCase().includes("text/")) {
return response;
}
// Get the response text
let text = await response.text();
// When debugging, replace the response from the origin with an email
text = DEBUG
? text.replace("You may use this", "me@example.com may use this")
: text;
// Check for sensitive data
for (const kind in sensitiveRegexsMap) {
const sensitiveRegex = new RegExp(sensitiveRegexsMap[kind], "ig");
const match = sensitiveRegex.test(text);
if (match) {
// Alert a data breach
await postDataBreach(c.req.raw);
// Respond with a block if credit card, otherwise replace sensitive text with `*`s
if (kind === "creditCard") {
return c.text(`${kind} found\nForbidden\n`, 403);
} else {
return new Response(text.replace(sensitiveRegex, "**********"), {
status: response.status,
statusText: response.statusText,
headers: response.headers,
});
}
}
}
// Return the modified response
return new Response(text, {
status: response.status,
statusText: response.statusText,
headers: response.headers,
});
});
export default app;
```
```json
{"@context":"https://schema.org","@type":"TechArticle","@id":"https://developers.cloudflare.com/workers/examples/data-loss-prevention/#page","headline":"Data loss prevention · Cloudflare Workers docs","description":"Protect sensitive data to prevent data loss, and send alerts to a webhooks server in the event of a data breach.","url":"https://developers.cloudflare.com/workers/examples/data-loss-prevention/","inLanguage":"en","image":"https://developers.cloudflare.com/dev-products-preview.png","dateModified":"2026-04-23","publisher":{"@type":"Organization","name":"Cloudflare","url":"https://www.cloudflare.com/"},"isPartOf":{"@type":"WebSite","@id":"https://developers.cloudflare.com/#website","name":"Cloudflare Docs","url":"https://developers.cloudflare.com/"},"keywords":["Security","JavaScript","TypeScript","Python"]}
{"@context":"https://schema.org","@type":"BreadcrumbList","itemListElement":[{"@type":"ListItem","position":1,"item":{"@id":"/directory/","name":"Directory"}},{"@type":"ListItem","position":2,"item":{"@id":"/workers/","name":"Workers"}},{"@type":"ListItem","position":3,"item":{"@id":"/workers/examples/","name":"Examples"}},{"@type":"ListItem","position":4,"item":{"@id":"/workers/examples/data-loss-prevention/","name":"Data loss prevention"}}]}
```
---
---
title: Debugging logs
description: Send debugging information in an errored response to a logging service.
image: https://developers.cloudflare.com/dev-products-preview.png
---
> Documentation Index
> Fetch the complete documentation index at: https://developers.cloudflare.com/workers/llms.txt
> Use this file to discover all available pages before exploring further.
[Skip to content](#%5Ftop)
# Debugging logs
Send debugging information in an errored response to a logging service.
If you want to get started quickly, click on the button below.
[](https://deploy.workers.cloudflare.com/?url=https://github.com/cloudflare/docs-examples/tree/main/workers/debugging-logs)
This creates a repository in your GitHub account and deploys the application to Cloudflare Workers.
* [ JavaScript ](#tab-panel-12520)
* [ TypeScript ](#tab-panel-12521)
* [ Python ](#tab-panel-12522)
* [ Hono ](#tab-panel-12523)
**JavaScript**
```js
export default {
async fetch(request, env, ctx) {
// Service configured to receive logs
const LOG_URL = "https://log-service.example.com/";
async function postLog(data) {
return await fetch(LOG_URL, {
method: "POST",
body: data,
});
}
let response;
try {
response = await fetch(request);
if (!response.ok && !response.redirected) {
const body = await response.text();
throw new Error(
"Bad response at origin. Status: " +
response.status +
" Body: " +
// Ensure the string is small enough to be a header
body.trim().substring(0, 10),
);
}
} catch (err) {
// Without ctx.waitUntil(), your fetch() to Cloudflare's
// logging service may or may not complete
ctx.waitUntil(postLog(err.toString()));
const stack = JSON.stringify(err.stack) || err;
// Copy the response and initialize body to the stack trace
response = new Response(stack, response);
// Add the error stack into a header to find out what happened
response.headers.set("X-Debug-stack", stack);
response.headers.set("X-Debug-err", err);
}
return response;
},
};
```
**TypeScript**
```ts
interface Env {}
export default {
async fetch(request, env, ctx): Promise {
// Service configured to receive logs
const LOG_URL = "https://log-service.example.com/";
async function postLog(data) {
return await fetch(LOG_URL, {
method: "POST",
body: data,
});
}
let response;
try {
response = await fetch(request);
if (!response.ok && !response.redirected) {
const body = await response.text();
throw new Error(
"Bad response at origin. Status: " +
response.status +
" Body: " +
// Ensure the string is small enough to be a header
body.trim().substring(0, 10),
);
}
} catch (err) {
// Without ctx.waitUntil(), your fetch() to Cloudflare's
// logging service may or may not complete
ctx.waitUntil(postLog(err.toString()));
const stack = JSON.stringify(err.stack) || err;
// Copy the response and initialize body to the stack trace
response = new Response(stack, response);
// Add the error stack into a header to find out what happened
response.headers.set("X-Debug-stack", stack);
response.headers.set("X-Debug-err", err);
}
return response;
},
} satisfies ExportedHandler;
```
**Python**
```py
from workers import WorkerEntrypoint
from pyodide.ffi import create_proxy
from js import Response, fetch
async def post_log(data):
log_url = "https://log-service.example.com/"
await fetch(log_url, method="POST", body=data)
class Default(WorkerEntrypoint):
async def fetch(self, request):
# Service configured to receive logs
response = await fetch(request)
try:
if not response.ok and not response.redirected:
body = await response.text()
# Simulating an error. Ensure the string is small enough to be a header
raise Exception(f'Bad response at origin. Status:{response.status} Body:{body.strip()[:10]}')
except Exception as e:
# Without ctx.waitUntil(), your fetch() to Cloudflare's
# logging service may or may not complete
self.ctx.waitUntil(create_proxy(post_log(str(e))))
# Copy the response and add to header
response = Response.new(stack, response)
response.headers["X-Debug-err"] = str(e)
return response
```
**TypeScript**
```ts
import { Hono } from 'hono';
// Define the environment with appropriate types
interface Env {}
const app = new Hono<{ Bindings: Env }>();
// Service configured to receive logs
const LOG_URL = "https://log-service.example.com/";
// Function to post logs to an external service
async function postLog(data: string) {
return await fetch(LOG_URL, {
method: "POST",
body: data,
});
}
// Middleware to handle error logging
app.use('*', async (c, next) => {
try {
// Process the request with the next handler
await next();
// After processing, check if the response indicates an error
if (c.res && (!c.res.ok && !c.res.redirected)) {
const body = await c.res.clone().text();
throw new Error(
"Bad response at origin. Status: " +
c.res.status +
" Body: " +
// Ensure the string is small enough to be a header
body.trim().substring(0, 10)
);
}
} catch (err) {
// Without waitUntil, the fetch to the logging service may not complete
c.executionCtx.waitUntil(
postLog(err.toString())
);
// Get the error stack or error itself
const stack = JSON.stringify(err.stack) || err.toString();
// Create a new response with the error information
const response = c.res ?
new Response(stack, {
status: c.res.status,
headers: c.res.headers
}) :
new Response(stack, { status: 500 });
// Add debug headers
response.headers.set("X-Debug-stack", stack);
response.headers.set("X-Debug-err", err.toString());
// Set the modified response
c.res = response;
}
});
// Default route handler that passes requests through
app.all('*', async (c) => {
return fetch(c.req.raw);
});
export default app;
```
```json
{"@context":"https://schema.org","@type":"TechArticle","@id":"https://developers.cloudflare.com/workers/examples/debugging-logs/#page","headline":"Debugging logs · Cloudflare Workers docs","description":"Send debugging information in an errored response to a logging service.","url":"https://developers.cloudflare.com/workers/examples/debugging-logs/","inLanguage":"en","image":"https://developers.cloudflare.com/dev-products-preview.png","dateModified":"2026-04-23","publisher":{"@type":"Organization","name":"Cloudflare","url":"https://www.cloudflare.com/"},"isPartOf":{"@type":"WebSite","@id":"https://developers.cloudflare.com/#website","name":"Cloudflare Docs","url":"https://developers.cloudflare.com/"},"keywords":["Debugging","JavaScript","TypeScript","Python"]}
{"@context":"https://schema.org","@type":"BreadcrumbList","itemListElement":[{"@type":"ListItem","position":1,"item":{"@id":"/directory/","name":"Directory"}},{"@type":"ListItem","position":2,"item":{"@id":"/workers/","name":"Workers"}},{"@type":"ListItem","position":3,"item":{"@id":"/workers/examples/","name":"Examples"}},{"@type":"ListItem","position":4,"item":{"@id":"/workers/examples/debugging-logs/","name":"Debugging logs"}}]}
```
---
---
title: Cookie parsing
description: Given the cookie name, get the value of a cookie. You can also use cookies for A/B testing.
image: https://developers.cloudflare.com/dev-products-preview.png
---
> Documentation Index
> Fetch the complete documentation index at: https://developers.cloudflare.com/workers/llms.txt
> Use this file to discover all available pages before exploring further.
[Skip to content](#%5Ftop)
# Cookie parsing
Given the cookie name, get the value of a cookie. You can also use cookies for A/B testing.
If you want to get started quickly, click on the button below.
[](https://deploy.workers.cloudflare.com/?url=https://github.com/cloudflare/docs-examples/tree/main/workers/extract-cookie-value)
This creates a repository in your GitHub account and deploys the application to Cloudflare Workers.
* [ JavaScript ](#tab-panel-12524)
* [ TypeScript ](#tab-panel-12525)
* [ Python ](#tab-panel-12526)
* [ Hono ](#tab-panel-12527)
**JavaScript**
```js
import { parse } from "cookie";
export default {
async fetch(request) {
// The name of the cookie
const COOKIE_NAME = "__uid";
const cookie = parse(request.headers.get("Cookie") || "");
if (cookie[COOKIE_NAME] != null) {
// Respond with the cookie value
return new Response(cookie[COOKIE_NAME]);
}
return new Response("No cookie with name: " + COOKIE_NAME);
},
};
```
**TypeScript**
```ts
import { parse } from "cookie";
export default {
async fetch(request): Promise {
// The name of the cookie
const COOKIE_NAME = "__uid";
const cookie = parse(request.headers.get("Cookie") || "");
if (cookie[COOKIE_NAME] != null) {
// Respond with the cookie value
return new Response(cookie[COOKIE_NAME]);
}
return new Response("No cookie with name: " + COOKIE_NAME);
},
} satisfies ExportedHandler;
```
**Python**
```py
from http.cookies import SimpleCookie
from workers import WorkerEntrypoint, Response
class Default(WorkerEntrypoint):
async def fetch(self, request):
# Name of the cookie
cookie_name = "__uid"
cookies = SimpleCookie(request.headers["Cookie"] or "")
if cookie_name in cookies:
# Respond with cookie value
return Response(cookies[cookie_name].value)
return Response("No cookie with name: " + cookie_name)
```
**TypeScript**
```ts
import { Hono } from 'hono';
import { getCookie } from 'hono/cookie';
const app = new Hono();
app.get('*', (c) => {
// The name of the cookie
const COOKIE_NAME = "__uid";
// Get the specific cookie value using Hono's cookie helper
const cookieValue = getCookie(c, COOKIE_NAME);
if (cookieValue) {
// Respond with the cookie value
return c.text(cookieValue);
}
return c.text("No cookie with name: " + COOKIE_NAME);
});
export default app;
```
External dependencies
This example requires the npm package [cookie ↗](https://www.npmjs.com/package/cookie) to be installed in your JavaScript project.
The Hono example uses the built-in cookie utilities provided by Hono, so no external dependencies are needed for that implementation.
```json
{"@context":"https://schema.org","@type":"TechArticle","@id":"https://developers.cloudflare.com/workers/examples/extract-cookie-value/#page","headline":"Cookie parsing · Cloudflare Workers docs","description":"Given the cookie name, get the value of a cookie. You can also use cookies for A/B testing.","url":"https://developers.cloudflare.com/workers/examples/extract-cookie-value/","inLanguage":"en","image":"https://developers.cloudflare.com/dev-products-preview.png","dateModified":"2026-04-23","publisher":{"@type":"Organization","name":"Cloudflare","url":"https://www.cloudflare.com/"},"isPartOf":{"@type":"WebSite","@id":"https://developers.cloudflare.com/#website","name":"Cloudflare Docs","url":"https://developers.cloudflare.com/"},"keywords":["Headers","JavaScript","TypeScript","Python"]}
{"@context":"https://schema.org","@type":"BreadcrumbList","itemListElement":[{"@type":"ListItem","position":1,"item":{"@id":"/directory/","name":"Directory"}},{"@type":"ListItem","position":2,"item":{"@id":"/workers/","name":"Workers"}},{"@type":"ListItem","position":3,"item":{"@id":"/workers/examples/","name":"Examples"}},{"@type":"ListItem","position":4,"item":{"@id":"/workers/examples/extract-cookie-value/","name":"Cookie parsing"}}]}
```
---
---
title: Fetch HTML
description: Send a request to a remote server, read HTML from the response, and serve that HTML.
image: https://developers.cloudflare.com/dev-products-preview.png
---
> Documentation Index
> Fetch the complete documentation index at: https://developers.cloudflare.com/workers/llms.txt
> Use this file to discover all available pages before exploring further.
[Skip to content](#%5Ftop)
# Fetch HTML
Send a request to a remote server, read HTML from the response, and serve that HTML.
If you want to get started quickly, click on the button below.
[](https://deploy.workers.cloudflare.com/?url=https://github.com/cloudflare/docs-examples/tree/main/workers/fetch-html)
This creates a repository in your GitHub account and deploys the application to Cloudflare Workers.
* [ JavaScript ](#tab-panel-12528)
* [ TypeScript ](#tab-panel-12529)
* [ Python ](#tab-panel-12530)
* [ Hono ](#tab-panel-12531)
**JavaScript**
```js
export default {
async fetch(request) {
/**
* Replace `remote` with the host you wish to send requests to
*/
const remote = "https://example.com";
return await fetch(remote, request);
},
};
```
[Run Worker in Playground](https://workers.cloudflare.com/playground#LYVwNgLglgDghgJwgegGYHsHALQBM4RwDcABAEbogB2+CAngLzbPYZb6HbW5QDGU2AAwA2AIwBWACyiAzDIBMAdnkBOAFwsWbYBzhcafASInS5S1QFgAUAGF0VCAFMH2ACJQAzjHQeo0e2ok2ngExCRUcMCODABEUDSOAB4AdABWHjGkqFBgzpHRcQkp6THWdg7OENgAKnQwjoFwMDBgfARQ9sipcABucB68CLAQANTA6LjgjtbWSd5IJLiOqHDgECQA3lYkJP10VLxBjhC8ABYAFAiOAI4gjh4QAJSb2zskyABUH69vHyQASo4WnBeI4SAADK7jJzgkgAdz8pxIEFOYNOPnWdEo8M8SIg6BIHmcuBIV1u9wgHmR6B+Ow+yFpvHsD1JjmhYIYJBipwgEBgHjUyGQSUiLUcySZwEyVlpVwgIAQVF2cLgfiOJwuUPQTgANKzyQ9HkRXgBfHVWE1EayaZjaXT6Hj8IRiKSyBTKFRlexOFzuLw+PwdKiBYK6UgRKKxKKEXSZII5PKRmJkMDoMilWzeyo1OoNXbNVq8dqddL2GZWDYxYCqqgAfXGk1yMTUhSWxQyJutNrtoQdhmdJjd5hUzGsQA)
**TypeScript**
```ts
export default {
async fetch(request: Request): Promise {
/**
* Replace `remote` with the host you wish to send requests to
*/
const remote = "https://example.com";
return await fetch(remote, request);
},
};
```
**Python**
```py
from workers import WorkerEntrypoint
from js import fetch
class Default(WorkerEntrypoint):
async def fetch(self, request):
# Replace `remote` with the host you wish to send requests to
remote = "https://example.com"
return await fetch(remote, request)
```
**TypeScript**
```ts
import { Hono } from "hono";
const app = new Hono();
app.all("*", async (c) => {
/**
* Replace `remote` with the host you wish to send requests to
*/
const remote = "https://example.com";
// Forward the request to the remote server
return await fetch(remote, c.req.raw);
});
export default app;
```
```json
{"@context":"https://schema.org","@type":"TechArticle","@id":"https://developers.cloudflare.com/workers/examples/fetch-html/#page","headline":"Fetch HTML · Cloudflare Workers docs","description":"Send a request to a remote server, read HTML from the response, and serve that HTML.","url":"https://developers.cloudflare.com/workers/examples/fetch-html/","inLanguage":"en","image":"https://developers.cloudflare.com/dev-products-preview.png","dateModified":"2026-04-23","publisher":{"@type":"Organization","name":"Cloudflare","url":"https://www.cloudflare.com/"},"isPartOf":{"@type":"WebSite","@id":"https://developers.cloudflare.com/#website","name":"Cloudflare Docs","url":"https://developers.cloudflare.com/"},"keywords":["JavaScript","TypeScript","Python"]}
{"@context":"https://schema.org","@type":"BreadcrumbList","itemListElement":[{"@type":"ListItem","position":1,"item":{"@id":"/directory/","name":"Directory"}},{"@type":"ListItem","position":2,"item":{"@id":"/workers/","name":"Workers"}},{"@type":"ListItem","position":3,"item":{"@id":"/workers/examples/","name":"Examples"}},{"@type":"ListItem","position":4,"item":{"@id":"/workers/examples/fetch-html/","name":"Fetch HTML"}}]}
```
---
---
title: Fetch JSON
description: Send a GET request and read in JSON from the response. Use to fetch external data.
image: https://developers.cloudflare.com/dev-products-preview.png
---
> Documentation Index
> Fetch the complete documentation index at: https://developers.cloudflare.com/workers/llms.txt
> Use this file to discover all available pages before exploring further.
[Skip to content](#%5Ftop)
# Fetch JSON
Send a GET request and read in JSON from the response. Use to fetch external data.
If you want to get started quickly, click on the button below.
[](https://deploy.workers.cloudflare.com/?url=https://github.com/cloudflare/docs-examples/tree/main/workers/fetch-json)
This creates a repository in your GitHub account and deploys the application to Cloudflare Workers.
* [ JavaScript ](#tab-panel-12532)
* [ TypeScript ](#tab-panel-12533)
* [ Python ](#tab-panel-12534)
* [ Hono ](#tab-panel-12535)
**JavaScript**
```js
export default {
async fetch(request, env, ctx) {
const url = "https://jsonplaceholder.typicode.com/todos/1";
// gatherResponse returns both content-type & response body as a string
async function gatherResponse(response) {
const { headers } = response;
const contentType = headers.get("content-type") || "";
if (contentType.includes("application/json")) {
return { contentType, result: JSON.stringify(await response.json()) };
}
return { contentType, result: await response.text() };
}
const response = await fetch(url);
const { contentType, result } = await gatherResponse(response);
const options = { headers: { "content-type": contentType } };
return new Response(result, options);
},
};
```
**TypeScript**
```ts
interface Env {}
export default {
async fetch(request, env, ctx): Promise {
const url = "https://jsonplaceholder.typicode.com/todos/1";
// gatherResponse returns both content-type & response body as a string
async function gatherResponse(response) {
const { headers } = response;
const contentType = headers.get("content-type") || "";
if (contentType.includes("application/json")) {
return { contentType, result: JSON.stringify(await response.json()) };
}
return { contentType, result: await response.text() };
}
const response = await fetch(url);
const { contentType, result } = await gatherResponse(response);
const options = { headers: { "content-type": contentType } };
return new Response(result, options);
},
} satisfies ExportedHandler;
```
**Python**
```py
from workers import WorkerEntrypoint, Response, fetch
import json
class Default(WorkerEntrypoint):
async def fetch(self, request):
url = "https://jsonplaceholder.typicode.com/todos/1"
# gather_response returns both content-type & response body as a string
async def gather_response(response):
headers = response.headers
content_type = headers["content-type"] or ""
if "application/json" in content_type:
return (content_type, json.dumps(await response.json()))
return (content_type, await response.text())
response = await fetch(url)
content_type, result = await gather_response(response)
headers = {"content-type": content_type}
return Response(result, headers=headers)
```
**TypeScript**
```ts
import { Hono } from 'hono';
type Env = {};
const app = new Hono<{ Bindings: Env }>();
app.get('*', async (c) => {
const url = "https://jsonplaceholder.typicode.com/todos/1";
// gatherResponse returns both content-type & response body as a string
async function gatherResponse(response: Response) {
const { headers } = response;
const contentType = headers.get("content-type") || "";
if (contentType.includes("application/json")) {
return { contentType, result: JSON.stringify(await response.json()) };
}
return { contentType, result: await response.text() };
}
const response = await fetch(url);
const { contentType, result } = await gatherResponse(response);
return new Response(result, {
headers: { "content-type": contentType }
});
});
export default app;
```
```json
{"@context":"https://schema.org","@type":"TechArticle","@id":"https://developers.cloudflare.com/workers/examples/fetch-json/#page","headline":"Fetch JSON · Cloudflare Workers docs","description":"Send a GET request and read in JSON from the response. Use to fetch external data.","url":"https://developers.cloudflare.com/workers/examples/fetch-json/","inLanguage":"en","image":"https://developers.cloudflare.com/dev-products-preview.png","dateModified":"2026-04-23","publisher":{"@type":"Organization","name":"Cloudflare","url":"https://www.cloudflare.com/"},"isPartOf":{"@type":"WebSite","@id":"https://developers.cloudflare.com/#website","name":"Cloudflare Docs","url":"https://developers.cloudflare.com/"},"keywords":["JSON","JavaScript","TypeScript","Python"]}
{"@context":"https://schema.org","@type":"BreadcrumbList","itemListElement":[{"@type":"ListItem","position":1,"item":{"@id":"/directory/","name":"Directory"}},{"@type":"ListItem","position":2,"item":{"@id":"/workers/","name":"Workers"}},{"@type":"ListItem","position":3,"item":{"@id":"/workers/examples/","name":"Examples"}},{"@type":"ListItem","position":4,"item":{"@id":"/workers/examples/fetch-json/","name":"Fetch JSON"}}]}
```
---
---
title: Geolocation: Weather application
description: Fetch weather data from an API using the user's geolocation data.
image: https://developers.cloudflare.com/dev-products-preview.png
---
> Documentation Index
> Fetch the complete documentation index at: https://developers.cloudflare.com/workers/llms.txt
> Use this file to discover all available pages before exploring further.
[Skip to content](#%5Ftop)
# Geolocation: Weather application
Fetch weather data from an API using the user's geolocation data.
If you want to get started quickly, click on the button below.
[](https://deploy.workers.cloudflare.com/?url=https://github.com/cloudflare/docs-examples/tree/main/workers/geolocation-app-weather)
This creates a repository in your GitHub account and deploys the application to Cloudflare Workers.
* [ JavaScript ](#tab-panel-12536)
* [ TypeScript ](#tab-panel-12537)
* [ Hono ](#tab-panel-12538)
* [ Python ](#tab-panel-12539)
**JavaScript**
```js
export default {
async fetch(request) {
let endpoint = "https://api.waqi.info/feed/geo:";
const token = ""; //Use a token from https://aqicn.org/api/
let html_style = `body{padding:6em; font-family: sans-serif;} h1{color:#f6821f}`;
let html_content = "
`;
// Add background gradient based on hour
html_style += `body{background:${await toCSSGradient(hour)};}`;
// Complete HTML document
let html = `
Geolocation: Customized Design
${html_content}
`;
return c.html(html);
});
export default app;
```
```json
{"@context":"https://schema.org","@type":"TechArticle","@id":"https://developers.cloudflare.com/workers/examples/geolocation-custom-styling/#page","headline":"Geolocation: Custom Styling · Cloudflare Workers docs","description":"Personalize website styling based on localized user time.","url":"https://developers.cloudflare.com/workers/examples/geolocation-custom-styling/","inLanguage":"en","image":"https://developers.cloudflare.com/dev-products-preview.png","dateModified":"2026-04-23","publisher":{"@type":"Organization","name":"Cloudflare","url":"https://www.cloudflare.com/"},"isPartOf":{"@type":"WebSite","@id":"https://developers.cloudflare.com/#website","name":"Cloudflare Docs","url":"https://developers.cloudflare.com/"},"keywords":["Geolocation","JavaScript","TypeScript"]}
{"@context":"https://schema.org","@type":"BreadcrumbList","itemListElement":[{"@type":"ListItem","position":1,"item":{"@id":"/directory/","name":"Directory"}},{"@type":"ListItem","position":2,"item":{"@id":"/workers/","name":"Workers"}},{"@type":"ListItem","position":3,"item":{"@id":"/workers/examples/","name":"Examples"}},{"@type":"ListItem","position":4,"item":{"@id":"/workers/examples/geolocation-custom-styling/","name":"Geolocation: Custom Styling"}}]}
```
---
---
title: Geolocation: Hello World
description: Get all geolocation data fields and display them in HTML.
image: https://developers.cloudflare.com/dev-products-preview.png
---
> Documentation Index
> Fetch the complete documentation index at: https://developers.cloudflare.com/workers/llms.txt
> Use this file to discover all available pages before exploring further.
[Skip to content](#%5Ftop)
# Geolocation: Hello World
Get all geolocation data fields and display them in HTML.
If you want to get started quickly, click on the button below.
[](https://deploy.workers.cloudflare.com/?url=https://github.com/cloudflare/docs-examples/tree/main/workers/geolocation-hello-world)
This creates a repository in your GitHub account and deploys the application to Cloudflare Workers.
* [ JavaScript ](#tab-panel-12543)
* [ TypeScript ](#tab-panel-12544)
* [ Python ](#tab-panel-12545)
* [ Hono ](#tab-panel-12546)
**JavaScript**
```js
export default {
async fetch(request) {
let html_content = "";
let html_style =
"body{padding:6em; font-family: sans-serif;} h1{color:#f6821f;}";
html_content += "
Colo: " + request.cf.colo + "
";
html_content += "
Country: " + request.cf.country + "
";
html_content += "
City: " + request.cf.city + "
";
html_content += "
Continent: " + request.cf.continent + "
";
html_content += "
Latitude: " + request.cf.latitude + "
";
html_content += "
Longitude: " + request.cf.longitude + "
";
html_content += "
PostalCode: " + request.cf.postalCode + "
";
html_content += "
MetroCode: " + request.cf.metroCode + "
";
html_content += "
Region: " + request.cf.region + "
";
html_content += "
RegionCode: " + request.cf.regionCode + "
";
html_content += "
Timezone: " + request.cf.timezone + "
";
let html = `
Geolocation: Hello World
Geolocation: Hello World!
You now have access to geolocation data about where your user is visiting from.
You now have access to geolocation data about where your user is visiting from.
{html_content}
"""
headers = {"content-type": "text/html;charset=UTF-8"}
return Response(html, headers=headers)
```
**TypeScript**
```ts
import { Hono } from "hono";
import { html } from "hono/html";
// Define the RequestWithCf interface to add Cloudflare-specific properties
interface RequestWithCf extends Request {
cf: {
// Cloudflare-specific properties for geolocation
colo: string;
country: string;
city: string;
continent: string;
latitude: string;
longitude: string;
postalCode: string;
metroCode: string;
region: string;
regionCode: string;
timezone: string;
// Add other CF properties as needed
};
}
const app = new Hono();
app.get("*", (c) => {
// Cast the raw request to include Cloudflare-specific properties
const request = c.req.raw;
// Define styles
const html_style =
"body{padding:6em; font-family: sans-serif;} h1{color:#f6821f;}";
// Create content with geolocation data
let html_content = html`
Colo: ${request.cf.colo}
Country: ${request.cf.country}
City: ${request.cf.city}
Continent: ${request.cf.continent}
Latitude: ${request.cf.latitude}
Longitude: ${request.cf.longitude}
PostalCode: ${request.cf.postalCode}
MetroCode: ${request.cf.metroCode}
Region: ${request.cf.region}
RegionCode: ${request.cf.regionCode}
Timezone: ${request.cf.timezone}
`;
// Compose the full HTML
const htmlContent = html`
Geolocation: Hello World
Geolocation: Hello World!
You now have access to geolocation data about where your user is
visiting from.
${html_content}
`;
// Return the HTML response
return c.html(htmlContent);
});
export default app;
```
```json
{"@context":"https://schema.org","@type":"TechArticle","@id":"https://developers.cloudflare.com/workers/examples/geolocation-hello-world/#page","headline":"Geolocation: Hello World · Cloudflare Workers docs","description":"Get all geolocation data fields and display them in HTML.","url":"https://developers.cloudflare.com/workers/examples/geolocation-hello-world/","inLanguage":"en","image":"https://developers.cloudflare.com/dev-products-preview.png","dateModified":"2026-04-23","publisher":{"@type":"Organization","name":"Cloudflare","url":"https://www.cloudflare.com/"},"isPartOf":{"@type":"WebSite","@id":"https://developers.cloudflare.com/#website","name":"Cloudflare Docs","url":"https://developers.cloudflare.com/"},"keywords":["Geolocation","JavaScript","TypeScript","Python"]}
{"@context":"https://schema.org","@type":"BreadcrumbList","itemListElement":[{"@type":"ListItem","position":1,"item":{"@id":"/directory/","name":"Directory"}},{"@type":"ListItem","position":2,"item":{"@id":"/workers/","name":"Workers"}},{"@type":"ListItem","position":3,"item":{"@id":"/workers/examples/","name":"Examples"}},{"@type":"ListItem","position":4,"item":{"@id":"/workers/examples/geolocation-hello-world/","name":"Geolocation: Hello World"}}]}
```
---
---
title: Hot-link protection
description: Block other websites from linking to your content. This is useful for protecting images.
image: https://developers.cloudflare.com/dev-products-preview.png
---
> Documentation Index
> Fetch the complete documentation index at: https://developers.cloudflare.com/workers/llms.txt
> Use this file to discover all available pages before exploring further.
[Skip to content](#%5Ftop)
# Hot-link protection
Block other websites from linking to your content. This is useful for protecting images.
If you want to get started quickly, click on the button below.
[](https://deploy.workers.cloudflare.com/?url=https://github.com/cloudflare/docs-examples/tree/main/workers/hot-link-protection)
This creates a repository in your GitHub account and deploys the application to Cloudflare Workers.
* [ JavaScript ](#tab-panel-12547)
* [ TypeScript ](#tab-panel-12548)
* [ Python ](#tab-panel-12549)
* [ Hono ](#tab-panel-12550)
**JavaScript**
```js
export default {
async fetch(request) {
const HOMEPAGE_URL = "https://tutorial.cloudflareworkers.com/";
const PROTECTED_TYPE = "image/";
// Fetch the original request
const response = await fetch(request);
// If it's an image, engage hotlink protection based on the
// Referer header.
const referer = request.headers.get("Referer");
const contentType = response.headers.get("Content-Type") || "";
if (referer && contentType.startsWith(PROTECTED_TYPE)) {
// If the hostnames don't match, it's a hotlink
if (new URL(referer).hostname !== new URL(request.url).hostname) {
// Redirect the user to your website
return Response.redirect(HOMEPAGE_URL, 302);
}
}
// Everything is fine, return the response normally.
return response;
},
};
```
**TypeScript**
```ts
export default {
async fetch(request): Promise {
const HOMEPAGE_URL = "https://tutorial.cloudflareworkers.com/";
const PROTECTED_TYPE = "image/";
// Fetch the original request
const response = await fetch(request);
// If it's an image, engage hotlink protection based on the
// Referer header.
const referer = request.headers.get("Referer");
const contentType = response.headers.get("Content-Type") || "";
if (referer && contentType.startsWith(PROTECTED_TYPE)) {
// If the hostnames don't match, it's a hotlink
if (new URL(referer).hostname !== new URL(request.url).hostname) {
// Redirect the user to your website
return Response.redirect(HOMEPAGE_URL, 302);
}
}
// Everything is fine, return the response normally.
return response;
},
} satisfies ExportedHandler;
```
**Python**
```py
from workers import WorkerEntrypoint, Response, fetch
from urllib.parse import urlparse
class Default(WorkerEntrypoint):
async def fetch(self, request):
homepage_url = "https://tutorial.cloudflareworkers.com/"
protected_type = "image/"
# Fetch the original request
response = await fetch(request)
# If it's an image, engage hotlink protection based on the referer header
referer = request.headers["Referer"]
content_type = response.headers["Content-Type"] or ""
if referer and content_type.startswith(protected_type):
# If the hostnames don't match, it's a hotlink
if urlparse(referer).hostname != urlparse(request.url).hostname:
# Redirect the user to your website
return Response.redirect(homepage_url, 302)
# Everything is fine, return the response normally
return response
```
**TypeScript**
```ts
import { Hono } from 'hono';
const app = new Hono();
// Middleware for hot-link protection
app.use('*', async (c, next) => {
const HOMEPAGE_URL = "https://tutorial.cloudflareworkers.com/";
const PROTECTED_TYPE = "image/";
// Continue to the next handler to get the response
await next();
// If we have a response, check for hotlinking
if (c.res) {
// If it's an image, engage hotlink protection based on the Referer header
const referer = c.req.header("Referer");
const contentType = c.res.headers.get("Content-Type") || "";
if (referer && contentType.startsWith(PROTECTED_TYPE)) {
// If the hostnames don't match, it's a hotlink
if (new URL(referer).hostname !== new URL(c.req.url).hostname) {
// Redirect the user to your website
c.res = c.redirect(HOMEPAGE_URL, 302);
}
}
}
});
// Default route handler that passes through the request to the origin
app.all('*', async (c) => {
// Fetch the original request
return fetch(c.req.raw);
});
export default app;
```
```json
{"@context":"https://schema.org","@type":"TechArticle","@id":"https://developers.cloudflare.com/workers/examples/hot-link-protection/#page","headline":"Hot-link protection · Cloudflare Workers docs","description":"Block other websites from linking to your content. This is useful for protecting images.","url":"https://developers.cloudflare.com/workers/examples/hot-link-protection/","inLanguage":"en","image":"https://developers.cloudflare.com/dev-products-preview.png","dateModified":"2026-04-23","publisher":{"@type":"Organization","name":"Cloudflare","url":"https://www.cloudflare.com/"},"isPartOf":{"@type":"WebSite","@id":"https://developers.cloudflare.com/#website","name":"Cloudflare Docs","url":"https://developers.cloudflare.com/"},"keywords":["Security","Headers","JavaScript","TypeScript","Python"]}
{"@context":"https://schema.org","@type":"BreadcrumbList","itemListElement":[{"@type":"ListItem","position":1,"item":{"@id":"/directory/","name":"Directory"}},{"@type":"ListItem","position":2,"item":{"@id":"/workers/","name":"Workers"}},{"@type":"ListItem","position":3,"item":{"@id":"/workers/examples/","name":"Examples"}},{"@type":"ListItem","position":4,"item":{"@id":"/workers/examples/hot-link-protection/","name":"Hot-link protection"}}]}
```
---
---
title: Custom Domain with Images
description: Set up custom domain for Images using a Worker or serve images using a prefix path and Cloudflare registered domain.
image: https://developers.cloudflare.com/dev-products-preview.png
---
> Documentation Index
> Fetch the complete documentation index at: https://developers.cloudflare.com/workers/llms.txt
> Use this file to discover all available pages before exploring further.
[Skip to content](#%5Ftop)
# Custom Domain with Images
Set up custom domain for Images using a Worker or serve images using a prefix path and Cloudflare registered domain.
If you want to get started quickly, click on the button below.
[](https://deploy.workers.cloudflare.com/?url=https://github.com/cloudflare/docs-examples/tree/main/workers/images-workers)
This creates a repository in your GitHub account and deploys the application to Cloudflare Workers.
To serve images from a custom domain:
1. In the Cloudflare dashboard, go to the **Workers & Pages** page.
[ Go to **Workers & Pages** ](https://dash.cloudflare.com/?to=/:account/workers-and-pages)
2. Select **Create application** \> **Workers** \> **Create Worker** and create your Worker.
3. In your Worker, select **Quick edit** and paste the following code.
* [ JavaScript ](#tab-panel-12551)
* [ TypeScript ](#tab-panel-12552)
* [ Hono ](#tab-panel-12553)
* [ Python ](#tab-panel-12554)
**JavaScript**
```js
export default {
async fetch(request) {
// You can find this in the dashboard, it should look something like this: ZWd9g1K7eljCn_KDTu_MWA
const accountHash = "";
const { pathname } = new URL(request.url);
// A request to something like cdn.example.com/83eb7b2-5392-4565-b69e-aff66acddd00/public
// will fetch "https://imagedelivery.net//83eb7b2-5392-4565-b69e-aff66acddd00/public"
return fetch(`https://imagedelivery.net/${accountHash}${pathname}`);
},
};
```
**TypeScript**
```ts
export default {
async fetch(request): Promise {
// You can find this in the dashboard, it should look something like this: ZWd9g1K7eljCn_KDTu_MWA
const accountHash = "";
const { pathname } = new URL(request.url);
// A request to something like cdn.example.com/83eb7b2-5392-4565-b69e-aff66acddd00/public
// will fetch "https://imagedelivery.net//83eb7b2-5392-4565-b69e-aff66acddd00/public"
return fetch(`https://imagedelivery.net/${accountHash}${pathname}`);
},
} satisfies ExportedHandler;
```
**TypeScript**
```ts
import { Hono } from 'hono';
interface Env {
// You can store your account hash as a binding variable
ACCOUNT_HASH?: string;
}
const app = new Hono<{ Bindings: Env }>();
app.get('*', async (c) => {
// You can find this in the dashboard, it should look something like this: ZWd9g1K7eljCn_KDTu_MWA
// Either get it from environment or hardcode it here
const accountHash = c.env.ACCOUNT_HASH || "";
const url = new URL(c.req.url);
// A request to something like cdn.example.com/83eb7b2-5392-4565-b69e-aff66acddd00/public
// will fetch "https://imagedelivery.net//83eb7b2-5392-4565-b69e-aff66acddd00/public"
return fetch(`https://imagedelivery.net/${accountHash}${url.pathname}`);
});
export default app;
```
**Python**
```py
from workers import WorkerEntrypoint
from js import URL, fetch
class Default(WorkerEntrypoint):
async def fetch(self, request):
# You can find this in the dashboard, it should look something like this: ZWd9g1K7eljCn_KDTu_MWA
account_hash = ""
url = URL.new(request.url)
# A request to something like cdn.example.com/83eb7b2-5392-4565-b69e-aff66acddd00/public
# will fetch "https://imagedelivery.net//83eb7b2-5392-4565-b69e-aff66acddd00/public"
return fetch(f'https://imagedelivery.net/{account_hash}{url.pathname}')
```
Another way you can serve images from a custom domain is by using the `cdn-cgi/imagedelivery` prefix path which is used as path to trigger `cdn-cgi` image proxy.
Below is an example showing the hostname as a Cloudflare proxied domain under the same account as the Image, followed with the prefix path and the image ``, `` and `` which can be found in the **Images** on the Cloudflare dashboard.
**JavaScript**
```js
https://example.com/cdn-cgi/imagedelivery///
```
```json
{"@context":"https://schema.org","@type":"TechArticle","@id":"https://developers.cloudflare.com/workers/examples/images-workers/#page","headline":"Custom Domain with Images · Cloudflare Workers docs","description":"Set up custom domain for Images using a Worker or serve images using a prefix path and Cloudflare registered domain.","url":"https://developers.cloudflare.com/workers/examples/images-workers/","inLanguage":"en","image":"https://developers.cloudflare.com/dev-products-preview.png","dateModified":"2026-04-23","publisher":{"@type":"Organization","name":"Cloudflare","url":"https://www.cloudflare.com/"},"isPartOf":{"@type":"WebSite","@id":"https://developers.cloudflare.com/#website","name":"Cloudflare Docs","url":"https://developers.cloudflare.com/"},"keywords":["JavaScript","TypeScript","Python"]}
{"@context":"https://schema.org","@type":"BreadcrumbList","itemListElement":[{"@type":"ListItem","position":1,"item":{"@id":"/directory/","name":"Directory"}},{"@type":"ListItem","position":2,"item":{"@id":"/workers/","name":"Workers"}},{"@type":"ListItem","position":3,"item":{"@id":"/workers/examples/","name":"Examples"}},{"@type":"ListItem","position":4,"item":{"@id":"/workers/examples/images-workers/","name":"Custom Domain with Images"}}]}
```
---
---
title: Logging headers to console
description: Examine the contents of a Headers object by logging to console with a Map.
image: https://developers.cloudflare.com/dev-products-preview.png
---
> Documentation Index
> Fetch the complete documentation index at: https://developers.cloudflare.com/workers/llms.txt
> Use this file to discover all available pages before exploring further.
[Skip to content](#%5Ftop)
# Logging headers to console
Examine the contents of a Headers object by logging to console with a Map.
If you want to get started quickly, click on the button below.
[](https://deploy.workers.cloudflare.com/?url=https://github.com/cloudflare/docs-examples/tree/main/workers/logging-headers)
This creates a repository in your GitHub account and deploys the application to Cloudflare Workers.
* [ JavaScript ](#tab-panel-12555)
* [ TypeScript ](#tab-panel-12556)
* [ Python ](#tab-panel-12557)
* [ Rust ](#tab-panel-12558)
* [ Hono ](#tab-panel-12559)
**JavaScript**
```js
export default {
async fetch(request) {
console.log(new Map(request.headers));
return new Response("Hello world");
},
};
```
**TypeScript**
```ts
export default {
async fetch(request): Promise {
console.log(new Map(request.headers));
return new Response("Hello world");
},
} satisfies ExportedHandler;
```
**Python**
```py
from workers import WorkerEntrypoint, Response
class Default(WorkerEntrypoint):
async def fetch(self, request):
print(dict(request.headers))
return Response('Hello world')
```
```rs
use worker::*;
#[event(fetch)]
async fn fetch(req: HttpRequest, _env: Env, _ctx: Context) -> Result {
console_log!("{:?}", req.headers());
Response::ok("hello world")
}
```
**TypeScript**
```ts
import { Hono } from 'hono';
const app = new Hono();
app.get('*', (c) => {
// Different ways to log headers in Hono:
// 1. Using Map to display headers in console
console.log('Headers as Map:', new Map(c.req.raw.headers));
// 2. Using spread operator to log headers
console.log('Headers spread:', [...c.req.raw.headers]);
// 3. Using Object.fromEntries to convert to an object
console.log('Headers as Object:', Object.fromEntries(c.req.raw.headers));
// 4. Hono's built-in header accessor (for individual headers)
console.log('User-Agent:', c.req.header('User-Agent'));
// 5. Using c.req.headers to get all headers
console.log('All headers from Hono context:', c.req.header());
return c.text('Hello world');
});
export default app;
```
---
## Console-logging headers
Use a `Map` if you need to log a `Headers` object to the console:
**JavaScript**
```js
console.log(new Map(request.headers));
```
Use the `spread` operator if you need to quickly stringify a `Headers` object:
**JavaScript**
```js
let requestHeaders = JSON.stringify([...request.headers]);
```
Use `Object.fromEntries` to convert the headers to an object:
**JavaScript**
```js
let requestHeaders = Object.fromEntries(request.headers);
```
### The problem
When debugging Workers, examine the headers on a request or response. A common mistake is to try to log headers to the developer console via code like this:
**JavaScript**
```js
console.log(request.headers);
```
Or this:
**JavaScript**
```js
console.log(`Request headers: ${JSON.stringify(request.headers)}`);
```
Both attempts result in what appears to be an empty object — the string `"{}"` — even though calling `request.headers.has("Your-Header-Name")` might return true. This is the same behavior that browsers implement.
The reason this happens is because [Headers ↗](https://developer.mozilla.org/en-US/docs/Web/API/Headers) objects do not store headers in enumerable JavaScript properties, so the developer console and JSON stringifier do not know how to read the names and values of the headers. It is not actually an empty object, but rather an opaque object.
`Headers` objects are iterable, which you can take advantage of to develop a couple of quick one-liners for debug-printing headers.
### Pass headers through a Map
The first common idiom for making Headers `console.log()`\-friendly is to construct a `Map` object from the `Headers` object and log the `Map` object.
**JavaScript**
```js
console.log(new Map(request.headers));
```
This works because:
* `Map` objects can be constructed from iterables, like `Headers`.
* The `Map` object does store its entries in enumerable JavaScript properties, so the developer console can see into it.
### Spread headers into an array
The `Map` approach works for calls to `console.log()`. If you need to stringify your headers, you will discover that stringifying a `Map` yields nothing more than `[object Map]`.
Even though a `Map` stores its data in enumerable properties, those properties are [Symbol ↗](https://developer.mozilla.org/en-US/docs/Web/JavaScript/Reference/Global%5FObjects/Symbol)\-keyed. Because of this, `JSON.stringify()` will [ignore Symbol-keyed properties ↗](https://developer.mozilla.org/en-US/docs/Web/JavaScript/Reference/Global%5FObjects/Symbol#symbols%5Fand%5Fjson.stringify) and you will receive an empty `{}`.
Instead, you can take advantage of the iterability of the `Headers` object in a new way by applying the [spread operator ↗](https://developer.mozilla.org/en-US/docs/Web/JavaScript/Reference/Operators/Spread%5Fsyntax) (`...`) to it.
**JavaScript**
```js
let requestHeaders = JSON.stringify([...request.headers], null, 2);
console.log(`Request headers: ${requestHeaders}`);
```
### Convert headers into an object with Object.fromEntries (ES2019)
ES2019 provides [Object.fromEntries ↗](https://github.com/tc39/proposal-object-from-entries) which is a call to convert the headers into an object:
**JavaScript**
```js
let headersObject = Object.fromEntries(request.headers);
let requestHeaders = JSON.stringify(headersObject, null, 2);
console.log(`Request headers: ${requestHeaders}`);
```
This results in something like:
**JavaScript**
```js
Request headers: {
"accept": "text/html,application/xhtml+xml,application/xml;q=0.9,image/webp,image/apng,*/*;q=0.8",
"accept-encoding": "gzip",
"accept-language": "en-US,en;q=0.9",
"cf-ipcountry": "US",
// ...
}"
```
```json
{"@context":"https://schema.org","@type":"TechArticle","@id":"https://developers.cloudflare.com/workers/examples/logging-headers/#page","headline":"Logging headers to console · Cloudflare Workers docs","description":"Examine the contents of a Headers object by logging to console with a Map.","url":"https://developers.cloudflare.com/workers/examples/logging-headers/","inLanguage":"en","image":"https://developers.cloudflare.com/dev-products-preview.png","dateModified":"2026-04-23","publisher":{"@type":"Organization","name":"Cloudflare","url":"https://www.cloudflare.com/"},"isPartOf":{"@type":"WebSite","@id":"https://developers.cloudflare.com/#website","name":"Cloudflare Docs","url":"https://developers.cloudflare.com/"},"keywords":["Debugging","Headers","JavaScript","Rust","TypeScript","Python"]}
{"@context":"https://schema.org","@type":"BreadcrumbList","itemListElement":[{"@type":"ListItem","position":1,"item":{"@id":"/directory/","name":"Directory"}},{"@type":"ListItem","position":2,"item":{"@id":"/workers/","name":"Workers"}},{"@type":"ListItem","position":3,"item":{"@id":"/workers/examples/","name":"Examples"}},{"@type":"ListItem","position":4,"item":{"@id":"/workers/examples/logging-headers/","name":"Logging headers to console"}}]}
```
---
---
title: Modify request property
description: Create a modified request with edited properties based off of an incoming request.
image: https://developers.cloudflare.com/dev-products-preview.png
---
> Documentation Index
> Fetch the complete documentation index at: https://developers.cloudflare.com/workers/llms.txt
> Use this file to discover all available pages before exploring further.
[Skip to content](#%5Ftop)
# Modify request property
Create a modified request with edited properties based off of an incoming request.
If you want to get started quickly, click on the button below.
[](https://deploy.workers.cloudflare.com/?url=https://github.com/cloudflare/docs-examples/tree/main/workers/modify-request-property)
This creates a repository in your GitHub account and deploys the application to Cloudflare Workers.
* [ JavaScript ](#tab-panel-12560)
* [ TypeScript ](#tab-panel-12561)
* [ Python ](#tab-panel-12562)
* [ Hono ](#tab-panel-12563)
**JavaScript**
```js
export default {
async fetch(request) {
/**
* Example someHost is set up to return raw JSON
* @param {string} someUrl the URL to send the request to, since we are setting hostname too only path is applied
* @param {string} someHost the host the request will resolve too
*/
const someHost = "example.com";
const someUrl = "https://foo.example.com/api.js";
/**
* The best practice is to only assign new RequestInit properties
* on the request object using either a method or the constructor
*/
const newRequestInit = {
// Change method
method: "POST",
// Change body
body: JSON.stringify({ bar: "foo" }),
// Change the redirect mode.
redirect: "follow",
// Change headers, note this method will erase existing headers
headers: {
"Content-Type": "application/json",
},
// Change a Cloudflare feature on the outbound response
cf: { apps: false },
};
// Change just the host
const url = new URL(someUrl);
url.hostname = someHost;
// Best practice is to always use the original request to construct the new request
// to clone all the attributes. Applying the URL also requires a constructor
// since once a Request has been constructed, its URL is immutable.
const newRequest = new Request(
url.toString(),
new Request(request, newRequestInit),
);
// Set headers using method
newRequest.headers.set("X-Example", "bar");
newRequest.headers.set("Content-Type", "application/json");
try {
return await fetch(newRequest);
} catch (e) {
return new Response(JSON.stringify({ error: e.message }), {
status: 500,
});
}
},
};
```
**TypeScript**
```ts
export default {
async fetch(request): Promise {
/**
* Example someHost is set up to return raw JSON
* @param {string} someUrl the URL to send the request to, since we are setting hostname too only path is applied
* @param {string} someHost the host the request will resolve too
*/
const someHost = "example.com";
const someUrl = "https://foo.example.com/api.js";
/**
* The best practice is to only assign new RequestInit properties
* on the request object using either a method or the constructor
*/
const newRequestInit = {
// Change method
method: "POST",
// Change body
body: JSON.stringify({ bar: "foo" }),
// Change the redirect mode.
redirect: "follow",
// Change headers, note this method will erase existing headers
headers: {
"Content-Type": "application/json",
},
// Change a Cloudflare feature on the outbound response
cf: { apps: false },
};
// Change just the host
const url = new URL(someUrl);
url.hostname = someHost;
// Best practice is to always use the original request to construct the new request
// to clone all the attributes. Applying the URL also requires a constructor
// since once a Request has been constructed, its URL is immutable.
const newRequest = new Request(
url.toString(),
new Request(request, newRequestInit),
);
// Set headers using method
newRequest.headers.set("X-Example", "bar");
newRequest.headers.set("Content-Type", "application/json");
try {
return await fetch(newRequest);
} catch (e) {
return new Response(JSON.stringify({ error: e.message }), {
status: 500,
});
}
},
} satisfies ExportedHandler;
```
**Python**
```py
import json
from workers import WorkerEntrypoint, Response, fetch
from js import Request
from urllib.parse import urlparse
class Default(WorkerEntrypoint):
async def fetch(self, request):
some_host = "example.com"
some_url = "https://foo.example.com/api.js"
# The best practice is to only assign new_request_init properties
# on the request object using either a method or the constructor
new_request_init = {
"method": "POST", # Change method
"body": json.dumps({"bar": "foo"}), # Change body
"redirect": "follow", # Change the redirect mode
# Change headers, note this method will erase existing headers
"headers": {
"Content-Type": "application/json",
},
# Change a Cloudflare feature on the outbound response
"cf": {"apps": False},
}
# Change just the host
parsed = urlparse(some_url)
new_url = parsed._replace(netloc=some_host).geturl()
# Best practice is to always use the original request to construct the new request
# to clone all the attributes. Applying the URL also requires a constructor
# since once a Request has been constructed, its URL is immutable.
org_request = Request.new(request, new_request_init)
new_request = Request.new(new_url, org_request)
new_request.headers["X-Example"] = "bar"
new_request.headers["Content-Type"] = "application/json"
try:
return await fetch(new_request)
except Exception as e:
return Response.join({"error": str(e)}, status=500)
```
**TypeScript**
```ts
import { Hono } from "hono";
const app = new Hono();
app.all("*", async (c) => {
/**
* Example someHost is set up to return raw JSON
*/
const someHost = "example.com";
const someUrl = "https://foo.example.com/api.js";
// Create a URL object to modify the hostname
const url = new URL(someUrl);
url.hostname = someHost;
// Create a new request
// First create a clone of the original request with the new properties
const requestClone = new Request(c.req.raw, {
// Change method
method: "POST",
// Change body
body: JSON.stringify({ bar: "foo" }),
// Change the redirect mode
redirect: "follow" as RequestRedirect,
// Change headers, note this method will erase existing headers
headers: {
"Content-Type": "application/json",
"X-Example": "bar",
},
// Change a Cloudflare feature on the outbound response
cf: { apps: false },
});
// Then create a new request with the modified URL
const newRequest = new Request(url.toString(), requestClone);
// Send the modified request
const response = await fetch(newRequest);
// Return the response
return response;
});
// Handle errors
app.onError((err, c) => {
return err.getResponse();
});
export default app;
```
```json
{"@context":"https://schema.org","@type":"TechArticle","@id":"https://developers.cloudflare.com/workers/examples/modify-request-property/#page","headline":"Modify request property · Cloudflare Workers docs","description":"Create a modified request with edited properties based off of an incoming request.","url":"https://developers.cloudflare.com/workers/examples/modify-request-property/","inLanguage":"en","image":"https://developers.cloudflare.com/dev-products-preview.png","dateModified":"2026-07-06","publisher":{"@type":"Organization","name":"Cloudflare","url":"https://www.cloudflare.com/"},"isPartOf":{"@type":"WebSite","@id":"https://developers.cloudflare.com/#website","name":"Cloudflare Docs","url":"https://developers.cloudflare.com/"},"keywords":["Middleware","Headers","JavaScript","TypeScript","Python"]}
{"@context":"https://schema.org","@type":"BreadcrumbList","itemListElement":[{"@type":"ListItem","position":1,"item":{"@id":"/directory/","name":"Directory"}},{"@type":"ListItem","position":2,"item":{"@id":"/workers/","name":"Workers"}},{"@type":"ListItem","position":3,"item":{"@id":"/workers/examples/","name":"Examples"}},{"@type":"ListItem","position":4,"item":{"@id":"/workers/examples/modify-request-property/","name":"Modify request property"}}]}
```
---
---
title: Modify response
description: Fetch and modify response properties which are immutable by creating a copy first.
image: https://developers.cloudflare.com/dev-products-preview.png
---
> Documentation Index
> Fetch the complete documentation index at: https://developers.cloudflare.com/workers/llms.txt
> Use this file to discover all available pages before exploring further.
[Skip to content](#%5Ftop)
# Modify response
Fetch and modify response properties which are immutable by creating a copy first.
If you want to get started quickly, click on the button below.
[](https://deploy.workers.cloudflare.com/?url=https://github.com/cloudflare/docs-examples/tree/main/workers/modify-response)
This creates a repository in your GitHub account and deploys the application to Cloudflare Workers.
* [ JavaScript ](#tab-panel-12564)
* [ TypeScript ](#tab-panel-12565)
* [ Python ](#tab-panel-12566)
* [ Hono ](#tab-panel-12567)
**JavaScript**
```js
export default {
async fetch(request) {
/**
* @param {string} headerNameSrc Header to get the new value from
* @param {string} headerNameDst Header to set based off of value in src
*/
const headerNameSrc = "foo"; //"Orig-Header"
const headerNameDst = "Last-Modified";
/**
* Response properties are immutable. To change them, construct a new
* Response and pass modified status or statusText in the ResponseInit
* object. Response headers can be modified through the headers `set` method.
*/
const originalResponse = await fetch(request);
// Change status and statusText, but preserve body and headers
let response = new Response(originalResponse.body, {
status: 500,
statusText: "some message",
headers: originalResponse.headers,
});
// Change response body by adding the foo prop
const originalBody = await originalResponse.json();
const body = JSON.stringify({ foo: "bar", ...originalBody });
response = new Response(body, response);
// Add a header using set method
response.headers.set("foo", "bar");
// Set destination header to the value of the source header
const src = response.headers.get(headerNameSrc);
if (src != null) {
response.headers.set(headerNameDst, src);
console.log(
`Response header "${headerNameDst}" was set to "${response.headers.get(
headerNameDst,
)}"`,
);
}
return response;
},
};
```
**TypeScript**
```ts
export default {
async fetch(request): Promise {
/**
* @param {string} headerNameSrc Header to get the new value from
* @param {string} headerNameDst Header to set based off of value in src
*/
const headerNameSrc = "foo"; //"Orig-Header"
const headerNameDst = "Last-Modified";
/**
* Response properties are immutable. To change them, construct a new
* Response and pass modified status or statusText in the ResponseInit
* object. Response headers can be modified through the headers `set` method.
*/
const originalResponse = await fetch(request);
// Change status and statusText, but preserve body and headers
let response = new Response(originalResponse.body, {
status: 500,
statusText: "some message",
headers: originalResponse.headers,
});
// Change response body by adding the foo prop
const originalBody = await originalResponse.json();
const body = JSON.stringify({ foo: "bar", ...originalBody });
response = new Response(body, response);
// Add a header using set method
response.headers.set("foo", "bar");
// Set destination header to the value of the source header
const src = response.headers.get(headerNameSrc);
if (src != null) {
response.headers.set(headerNameDst, src);
console.log(
`Response header "${headerNameDst}" was set to "${response.headers.get(
headerNameDst,
)}"`,
);
}
return response;
},
} satisfies ExportedHandler;
```
**Python**
```py
from workers import WorkerEntrypoint, Response, fetch
import json
class Default(WorkerEntrypoint):
async def fetch(self, request):
header_name_src = "foo" # Header to get the new value from
header_name_dst = "Last-Modified" # Header to set based off of value in src
# Response properties are immutable. To change them, construct a new response
original_response = await fetch(request)
# Change status and statusText, but preserve body and headers
response = Response(original_response.body, status=500, status_text="some message", headers=original_response.headers)
# Change response body by adding the foo prop
new_body = await original_response.json()
new_body["foo"] = "bar"
response.replace_body(json.dumps(new_body))
# Add a new header
response.headers["foo"] = "bar"
# Set destination header to the value of the source header
src = response.headers[header_name_src]
if src is not None:
response.headers[header_name_dst] = src
print(f'Response header {header_name_dst} was set to {response.headers[header_name_dst]}')
return response
```
**TypeScript**
```ts
import { Hono } from 'hono';
const app = new Hono();
app.get('*', async (c) => {
/**
* Header configuration
*/
const headerNameSrc = "foo"; // Header to get the new value from
const headerNameDst = "Last-Modified"; // Header to set based off of value in src
/**
* Response properties are immutable. With Hono, we can modify the response
* by creating custom response objects.
*/
const originalResponse = await fetch(c.req.raw);
// Get the JSON body from the original response
const originalBody = await originalResponse.json();
// Modify the body by adding a new property
const modifiedBody = {
foo: "bar",
...originalBody
};
// Create a new custom response with modified status, headers, and body
const response = new Response(JSON.stringify(modifiedBody), {
status: 500,
statusText: "some message",
headers: originalResponse.headers,
});
// Add a header using set method
response.headers.set("foo", "bar");
// Set destination header to the value of the source header
const src = response.headers.get(headerNameSrc);
if (src != null) {
response.headers.set(headerNameDst, src);
console.log(
`Response header "${headerNameDst}" was set to "${response.headers.get(headerNameDst)}"`
);
}
return response;
});
export default app;
```
```json
{"@context":"https://schema.org","@type":"TechArticle","@id":"https://developers.cloudflare.com/workers/examples/modify-response/#page","headline":"Modify response · Cloudflare Workers docs","description":"Fetch and modify response properties which are immutable by creating a copy first.","url":"https://developers.cloudflare.com/workers/examples/modify-response/","inLanguage":"en","image":"https://developers.cloudflare.com/dev-products-preview.png","dateModified":"2026-04-23","publisher":{"@type":"Organization","name":"Cloudflare","url":"https://www.cloudflare.com/"},"isPartOf":{"@type":"WebSite","@id":"https://developers.cloudflare.com/#website","name":"Cloudflare Docs","url":"https://developers.cloudflare.com/"},"keywords":["Middleware","Headers","JavaScript","TypeScript","Python"]}
{"@context":"https://schema.org","@type":"BreadcrumbList","itemListElement":[{"@type":"ListItem","position":1,"item":{"@id":"/directory/","name":"Directory"}},{"@type":"ListItem","position":2,"item":{"@id":"/workers/","name":"Workers"}},{"@type":"ListItem","position":3,"item":{"@id":"/workers/examples/","name":"Examples"}},{"@type":"ListItem","position":4,"item":{"@id":"/workers/examples/modify-response/","name":"Modify response"}}]}
```
---
---
title: Multiple Cron Triggers
description: Set multiple Cron Triggers on three different schedules.
image: https://developers.cloudflare.com/dev-products-preview.png
---
> Documentation Index
> Fetch the complete documentation index at: https://developers.cloudflare.com/workers/llms.txt
> Use this file to discover all available pages before exploring further.
[Skip to content](#%5Ftop)
# Multiple Cron Triggers
Set multiple Cron Triggers on three different schedules.
If you want to get started quickly, click on the button below.
[](https://deploy.workers.cloudflare.com/?url=https://github.com/cloudflare/docs-examples/tree/main/workers/multiple-cron-triggers)
This creates a repository in your GitHub account and deploys the application to Cloudflare Workers.
* [ JavaScript ](#tab-panel-12568)
* [ TypeScript ](#tab-panel-12569)
* [ Hono ](#tab-panel-12570)
**JavaScript**
```js
export default {
async scheduled(event, env, ctx) {
// Write code for updating your API
switch (event.cron) {
case "*/3 * * * *":
// Every three minutes
await updateAPI();
break;
case "*/10 * * * *":
// Every ten minutes
await updateAPI2();
break;
case "*/45 * * * *":
// Every forty-five minutes
await updateAPI3();
break;
}
console.log("cron processed");
},
};
```
**TypeScript**
```ts
interface Env {}
export default {
async scheduled(
controller: ScheduledController,
env: Env,
ctx: ExecutionContext,
) {
// Write code for updating your API
switch (controller.cron) {
case "*/3 * * * *":
// Every three minutes
await updateAPI();
break;
case "*/10 * * * *":
// Every ten minutes
await updateAPI2();
break;
case "*/45 * * * *":
// Every forty-five minutes
await updateAPI3();
break;
}
console.log("cron processed");
},
};
```
**TypeScript**
```ts
import { Hono } from "hono";
interface Env {}
// Create Hono app
const app = new Hono<{ Bindings: Env }>();
// Regular routes for normal HTTP requests
app.get("/", (c) => c.text("Multiple Cron Trigger Example"));
// Export both the app and a scheduled function
export default {
// The Hono app handles regular HTTP requests
fetch: app.fetch,
// The scheduled function handles Cron triggers
async scheduled(
controller: ScheduledController,
env: Env,
ctx: ExecutionContext,
) {
// Check which cron schedule triggered this execution
switch (controller.cron) {
case "*/3 * * * *":
// Every three minutes
await updateAPI();
break;
case "*/10 * * * *":
// Every ten minutes
await updateAPI2();
break;
case "*/45 * * * *":
// Every forty-five minutes
await updateAPI3();
break;
}
console.log("cron processed");
},
};
```
## Test Cron Triggers using Wrangler
The recommended way of testing Cron Triggers is using Wrangler.
Cron Triggers can be tested using Wrangler by passing in the `--test-scheduled` flag to [wrangler dev](https://developers.cloudflare.com/workers/wrangler/commands/general/#dev). This will expose a `/__scheduled` (or `/cdn-cgi/handler/scheduled` for Python Workers) route which can be used to test using a HTTP request. To simulate different cron patterns, a `cron` query parameter can be passed in.
```sh
npx wrangler dev --test-scheduled
curl "http://localhost:8787/__scheduled?cron=*%2F3+*+*+*+*"
curl "http://localhost:8787/cdn-cgi/handler/scheduled?cron=*+*+*+*+*" # Python Workers
```
```json
{"@context":"https://schema.org","@type":"TechArticle","@id":"https://developers.cloudflare.com/workers/examples/multiple-cron-triggers/#page","headline":"Multiple Cron Triggers · Cloudflare Workers docs","description":"Set multiple Cron Triggers on three different schedules.","url":"https://developers.cloudflare.com/workers/examples/multiple-cron-triggers/","inLanguage":"en","image":"https://developers.cloudflare.com/dev-products-preview.png","dateModified":"2026-04-23","publisher":{"@type":"Organization","name":"Cloudflare","url":"https://www.cloudflare.com/"},"isPartOf":{"@type":"WebSite","@id":"https://developers.cloudflare.com/#website","name":"Cloudflare Docs","url":"https://developers.cloudflare.com/"},"keywords":["Middleware","JavaScript","TypeScript"]}
{"@context":"https://schema.org","@type":"BreadcrumbList","itemListElement":[{"@type":"ListItem","position":1,"item":{"@id":"/directory/","name":"Directory"}},{"@type":"ListItem","position":2,"item":{"@id":"/workers/","name":"Workers"}},{"@type":"ListItem","position":3,"item":{"@id":"/workers/examples/","name":"Examples"}},{"@type":"ListItem","position":4,"item":{"@id":"/workers/examples/multiple-cron-triggers/","name":"Multiple Cron Triggers"}}]}
```
---
---
title: Stream OpenAI API Responses
description: Use the OpenAI v4 SDK to stream responses from OpenAI.
image: https://developers.cloudflare.com/dev-products-preview.png
---
> Documentation Index
> Fetch the complete documentation index at: https://developers.cloudflare.com/workers/llms.txt
> Use this file to discover all available pages before exploring further.
[Skip to content](#%5Ftop)
# Stream OpenAI API Responses
Use the OpenAI v4 SDK to stream responses from OpenAI.
If you want to get started quickly, click on the button below.
[](https://deploy.workers.cloudflare.com/?url=https://github.com/cloudflare/docs-examples/tree/main/workers/openai-sdk-streaming)
This creates a repository in your GitHub account and deploys the application to Cloudflare Workers.
In order to run this code, you must install the OpenAI SDK by running `npm i openai`.
Note
For analytics, caching, rate limiting, and more, you can also send requests like this through Cloudflare's [AI Gateway](https://developers.cloudflare.com/ai-gateway/usage/providers/openai/).
* [ TypeScript ](#tab-panel-12571)
* [ Hono ](#tab-panel-12572)
**TypeScript**
```ts
import OpenAI from "openai";
export default {
async fetch(request, env, ctx): Promise {
const openai = new OpenAI({
apiKey: env.OPENAI_API_KEY,
});
// Create a TransformStream to handle streaming data
let { readable, writable } = new TransformStream();
let writer = writable.getWriter();
const textEncoder = new TextEncoder();
ctx.waitUntil(
(async () => {
const stream = await openai.chat.completions.create({
model: "gpt-4o-mini",
messages: [{ role: "user", content: "Tell me a story" }],
stream: true,
});
// loop over the data as it is streamed and write to the writeable
for await (const part of stream) {
writer.write(
textEncoder.encode(part.choices[0]?.delta?.content || ""),
);
}
writer.close();
})(),
);
// Send the readable back to the browser
return new Response(readable);
},
} satisfies ExportedHandler;
```
**TypeScript**
```ts
import { Hono } from "hono";
import { streamText } from "hono/streaming";
import OpenAI from "openai";
interface Env {
OPENAI_API_KEY: string;
}
const app = new Hono<{ Bindings: Env }>();
app.get("*", async (c) => {
const openai = new OpenAI({
apiKey: c.env.OPENAI_API_KEY,
});
const chatStream = await openai.chat.completions.create({
model: "gpt-4o-mini",
messages: [{ role: "user", content: "Tell me a story" }],
stream: true,
});
return streamText(c, async (stream) => {
for await (const message of chatStream) {
await stream.write(message.choices[0].delta.content || "");
}
stream.close();
});
});
export default app;
```
```json
{"@context":"https://schema.org","@type":"TechArticle","@id":"https://developers.cloudflare.com/workers/examples/openai-sdk-streaming/#page","headline":"Stream OpenAI API Responses · Cloudflare Workers docs","description":"Use the OpenAI v4 SDK to stream responses from OpenAI.","url":"https://developers.cloudflare.com/workers/examples/openai-sdk-streaming/","inLanguage":"en","image":"https://developers.cloudflare.com/dev-products-preview.png","dateModified":"2026-04-23","publisher":{"@type":"Organization","name":"Cloudflare","url":"https://www.cloudflare.com/"},"isPartOf":{"@type":"WebSite","@id":"https://developers.cloudflare.com/#website","name":"Cloudflare Docs","url":"https://developers.cloudflare.com/"},"keywords":["AI","JavaScript","TypeScript"]}
{"@context":"https://schema.org","@type":"BreadcrumbList","itemListElement":[{"@type":"ListItem","position":1,"item":{"@id":"/directory/","name":"Directory"}},{"@type":"ListItem","position":2,"item":{"@id":"/workers/","name":"Workers"}},{"@type":"ListItem","position":3,"item":{"@id":"/workers/examples/","name":"Examples"}},{"@type":"ListItem","position":4,"item":{"@id":"/workers/examples/openai-sdk-streaming/","name":"Stream OpenAI API Responses"}}]}
```
---
---
title: Post JSON
description: Send a POST request with JSON data. Use to share data with external servers.
image: https://developers.cloudflare.com/dev-products-preview.png
---
> Documentation Index
> Fetch the complete documentation index at: https://developers.cloudflare.com/workers/llms.txt
> Use this file to discover all available pages before exploring further.
[Skip to content](#%5Ftop)
# Post JSON
Send a POST request with JSON data. Use to share data with external servers.
If you want to get started quickly, click on the button below.
[](https://deploy.workers.cloudflare.com/?url=https://github.com/cloudflare/docs-examples/tree/main/workers/post-json)
This creates a repository in your GitHub account and deploys the application to Cloudflare Workers.
* [ JavaScript ](#tab-panel-12573)
* [ TypeScript ](#tab-panel-12574)
* [ Python ](#tab-panel-12575)
* [ Hono ](#tab-panel-12576)
**JavaScript**
```js
export default {
async fetch(request) {
/**
* Example someHost is set up to take in a JSON request
* Replace url with the host you wish to send requests to
* @param {string} url the URL to send the request to
* @param {BodyInit} body the JSON data to send in the request
*/
const someHost = "https://examples.cloudflareworkers.com/demos";
const url = someHost + "/requests/json";
const body = {
results: ["default data to send"],
errors: null,
msg: "I sent this to the fetch",
};
/**
* gatherResponse awaits and returns a response body as a string.
* Use await gatherResponse(..) in an async function to get the response body
* @param {Response} response
*/
async function gatherResponse(response) {
const { headers } = response;
const contentType = headers.get("content-type") || "";
if (contentType.includes("application/json")) {
return JSON.stringify(await response.json());
} else if (contentType.includes("application/text")) {
return response.text();
} else if (contentType.includes("text/html")) {
return response.text();
} else {
return response.text();
}
}
const init = {
body: JSON.stringify(body),
method: "POST",
headers: {
"content-type": "application/json;charset=UTF-8",
},
};
const response = await fetch(url, init);
const results = await gatherResponse(response);
return new Response(results, init);
},
};
```
**TypeScript**
```ts
export default {
async fetch(request): Promise {
/**
* Example someHost is set up to take in a JSON request
* Replace url with the host you wish to send requests to
* @param {string} url the URL to send the request to
* @param {BodyInit} body the JSON data to send in the request
*/
const someHost = "https://examples.cloudflareworkers.com/demos";
const url = someHost + "/requests/json";
const body = {
results: ["default data to send"],
errors: null,
msg: "I sent this to the fetch",
};
/**
* gatherResponse awaits and returns a response body as a string.
* Use await gatherResponse(..) in an async function to get the response body
* @param {Response} response
*/
async function gatherResponse(response) {
const { headers } = response;
const contentType = headers.get("content-type") || "";
if (contentType.includes("application/json")) {
return JSON.stringify(await response.json());
} else if (contentType.includes("application/text")) {
return response.text();
} else if (contentType.includes("text/html")) {
return response.text();
} else {
return response.text();
}
}
const init = {
body: JSON.stringify(body),
method: "POST",
headers: {
"content-type": "application/json;charset=UTF-8",
},
};
const response = await fetch(url, init);
const results = await gatherResponse(response);
return new Response(results, init);
},
} satisfies ExportedHandler;
```
**Python**
```py
import json
from workers import WorkerEntrypoint, Response, fetch
async def gather_response(response):
headers = response.headers
content_type = headers["content-type"] or ""
if "application/json" in content_type:
return (content_type, json.dumps(dict(await response.json())))
return (content_type, await response.text())
class Default(WorkerEntrypoint):
async def fetch(self, _request):
url = "https://jsonplaceholder.typicode.com/todos/1"
body = {
"results": ["default data to send"],
"errors": None,
"msg": "I sent this to the fetch",
}
response = await fetch(
url,
method="POST",
body=json.dumps(body),
headers={"content-type": "application/json;charset=UTF-8"},
)
content_type, result = await gather_response(response)
return Response(result, headers={"content-type": content_type})
```
**TypeScript**
```ts
import { Hono } from 'hono';
const app = new Hono();
app.get('*', async (c) => {
/**
* Example someHost is set up to take in a JSON request
* Replace url with the host you wish to send requests to
*/
const someHost = "https://examples.cloudflareworkers.com/demos";
const url = someHost + "/requests/json";
const body = {
results: ["default data to send"],
errors: null,
msg: "I sent this to the fetch",
};
/**
* gatherResponse awaits and returns a response body as a string.
* Use await gatherResponse(..) in an async function to get the response body
*/
async function gatherResponse(response: Response) {
const { headers } = response;
const contentType = headers.get("content-type") || "";
if (contentType.includes("application/json")) {
return { contentType, result: JSON.stringify(await response.json()) };
} else if (contentType.includes("application/text")) {
return { contentType, result: await response.text() };
} else if (contentType.includes("text/html")) {
return { contentType, result: await response.text() };
} else {
return { contentType, result: await response.text() };
}
}
const init = {
body: JSON.stringify(body),
method: "POST",
headers: {
"content-type": "application/json;charset=UTF-8",
},
};
const response = await fetch(url, init);
const { contentType, result } = await gatherResponse(response);
return new Response(result, {
headers: {
"content-type": contentType,
},
});
});
export default app;
```
```json
{"@context":"https://schema.org","@type":"TechArticle","@id":"https://developers.cloudflare.com/workers/examples/post-json/#page","headline":"Post JSON · Cloudflare Workers docs","description":"Send a POST request with JSON data. Use to share data with external servers.","url":"https://developers.cloudflare.com/workers/examples/post-json/","inLanguage":"en","image":"https://developers.cloudflare.com/dev-products-preview.png","dateModified":"2026-07-06","publisher":{"@type":"Organization","name":"Cloudflare","url":"https://www.cloudflare.com/"},"isPartOf":{"@type":"WebSite","@id":"https://developers.cloudflare.com/#website","name":"Cloudflare Docs","url":"https://developers.cloudflare.com/"},"keywords":["JSON","JavaScript","TypeScript","Python"]}
{"@context":"https://schema.org","@type":"BreadcrumbList","itemListElement":[{"@type":"ListItem","position":1,"item":{"@id":"/directory/","name":"Directory"}},{"@type":"ListItem","position":2,"item":{"@id":"/workers/","name":"Workers"}},{"@type":"ListItem","position":3,"item":{"@id":"/workers/examples/","name":"Examples"}},{"@type":"ListItem","position":4,"item":{"@id":"/workers/examples/post-json/","name":"Post JSON"}}]}
```
---
---
title: Using timingSafeEqual
description: Protect against timing attacks by safely comparing values using `timingSafeEqual`.
image: https://developers.cloudflare.com/dev-products-preview.png
---
> Documentation Index
> Fetch the complete documentation index at: https://developers.cloudflare.com/workers/llms.txt
> Use this file to discover all available pages before exploring further.
[Skip to content](#%5Ftop)
# Using timingSafeEqual
Protect against timing attacks by safely comparing values using `timingSafeEqual`.
If you want to get started quickly, click on the button below.
[](https://deploy.workers.cloudflare.com/?url=https://github.com/cloudflare/docs-examples/tree/main/workers/protect-against-timing-attacks)
This creates a repository in your GitHub account and deploys the application to Cloudflare Workers.
The [crypto.subtle.timingSafeEqual](https://developers.cloudflare.com/workers/runtime-apis/web-crypto/#timingsafeequal) function compares two values using a constant-time algorithm. The time taken is independent of the contents of the values.
When strings are compared using the equality operator (`==` or `===`), the comparison will end at the first mismatched character. By using `timingSafeEqual`, an attacker would not be able to use timing to find where at which point in the two strings there is a difference.
The `timingSafeEqual` function takes two `ArrayBuffer` or `TypedArray` values to compare. These buffers must be of equal length, otherwise an exception is thrown. Note that this function is not constant time with respect to the length of the parameters and also does not guarantee constant time for the surrounding code. Handling of secrets should be taken with care to not introduce timing side channels.
Warning
Do not return early when the input and secret have different lengths. An early return leaks the length of the secret through response timing. Instead, always perform a constant-time comparison as shown in the examples below — when lengths differ, compare the user input against itself and negate the result so the check still fails but takes the same amount of time.
In order to compare two strings, you must use the [TextEncoder](https://developers.cloudflare.com/workers/runtime-apis/encoding/#textencoder) API.
* [ TypeScript ](#tab-panel-12577)
* [ Python ](#tab-panel-12578)
* [ Hono ](#tab-panel-12579)
**TypeScript**
```ts
interface Environment {
MY_SECRET_VALUE?: string;
}
export default {
async fetch(req: Request, env: Environment) {
if (!env.MY_SECRET_VALUE) {
return new Response("Missing secret binding", { status: 500 });
}
const authToken = req.headers.get("Authorization") || "";
const encoder = new TextEncoder();
const userValue = encoder.encode(authToken);
const secretValue = encoder.encode(env.MY_SECRET_VALUE);
// Do not return early when lengths differ — that leaks the secret's
// length through timing. Instead, always perform a constant-time
// comparison: when the lengths match compare directly; otherwise
// compare the user input against itself (always true) and negate.
const lengthsMatch = userValue.byteLength === secretValue.byteLength;
const isEqual = lengthsMatch
? crypto.subtle.timingSafeEqual(userValue, secretValue)
: !crypto.subtle.timingSafeEqual(userValue, userValue);
if (!isEqual) {
return new Response("Unauthorized", { status: 401 });
}
return new Response("Welcome!");
},
};
```
**Python**
```py
from workers import WorkerEntrypoint, Response
from js import TextEncoder, crypto
class Default(WorkerEntrypoint):
async def fetch(self, request):
auth_token = request.headers["Authorization"] or ""
secret = self.env.MY_SECRET_VALUE
if secret is None:
return Response("Missing secret binding", status=500)
encoder = TextEncoder.new()
user_value = encoder.encode(auth_token)
secret_value = encoder.encode(secret)
# Do not return early when lengths differ — that leaks the secret's
# length through timing. Always perform a constant-time comparison.
if user_value.byteLength == secret_value.byteLength:
is_equal = crypto.subtle.timingSafeEqual(user_value, secret_value)
else:
is_equal = not crypto.subtle.timingSafeEqual(user_value, user_value)
if not is_equal:
return Response("Unauthorized", status=401)
return Response("Welcome!")
```
**TypeScript**
```ts
import { Hono } from 'hono';
interface Environment {
Bindings: {
MY_SECRET_VALUE?: string;
}
}
const app = new Hono();
// Middleware to handle authentication with timing-safe comparison
app.use('*', async (c, next) => {
const secret = c.env.MY_SECRET_VALUE;
if (!secret) {
return c.text("Missing secret binding", 500);
}
const authToken = c.req.header("Authorization") || "";
const encoder = new TextEncoder();
const userValue = encoder.encode(authToken);
const secretValue = encoder.encode(secret);
// Do not return early when lengths differ — that leaks the secret's
// length through timing. Instead, always perform a constant-time
// comparison: when the lengths match compare directly; otherwise
// compare the user input against itself (always true) and negate.
const lengthsMatch = userValue.byteLength === secretValue.byteLength;
const isEqual = lengthsMatch
? crypto.subtle.timingSafeEqual(userValue, secretValue)
: !crypto.subtle.timingSafeEqual(userValue, userValue);
if (!isEqual) {
return c.text("Unauthorized", 401);
}
// If we got here, the auth token is valid
await next();
});
// Protected route
app.get('*', (c) => {
return c.text("Welcome!");
});
export default app;
```
```json
{"@context":"https://schema.org","@type":"TechArticle","@id":"https://developers.cloudflare.com/workers/examples/protect-against-timing-attacks/#page","headline":"Using timingSafeEqual · Cloudflare Workers docs","description":"Protect against timing attacks by safely comparing values using timingSafeEqual.","url":"https://developers.cloudflare.com/workers/examples/protect-against-timing-attacks/","inLanguage":"en","image":"https://developers.cloudflare.com/dev-products-preview.png","dateModified":"2026-04-23","publisher":{"@type":"Organization","name":"Cloudflare","url":"https://www.cloudflare.com/"},"isPartOf":{"@type":"WebSite","@id":"https://developers.cloudflare.com/#website","name":"Cloudflare Docs","url":"https://developers.cloudflare.com/"},"keywords":["Security","WebCrypto","TypeScript","Python"]}
{"@context":"https://schema.org","@type":"BreadcrumbList","itemListElement":[{"@type":"ListItem","position":1,"item":{"@id":"/directory/","name":"Directory"}},{"@type":"ListItem","position":2,"item":{"@id":"/workers/","name":"Workers"}},{"@type":"ListItem","position":3,"item":{"@id":"/workers/examples/","name":"Examples"}},{"@type":"ListItem","position":4,"item":{"@id":"/workers/examples/protect-against-timing-attacks/","name":"Using timingSafeEqual"}}]}
```
---
---
title: Read POST
description: Serve an HTML form, then read POST requests. Use also to read JSON or POST data from an incoming request.
image: https://developers.cloudflare.com/dev-products-preview.png
---
> Documentation Index
> Fetch the complete documentation index at: https://developers.cloudflare.com/workers/llms.txt
> Use this file to discover all available pages before exploring further.
[Skip to content](#%5Ftop)
# Read POST
Serve an HTML form, then read POST requests. Use also to read JSON or POST data from an incoming request.
If you want to get started quickly, click on the button below.
[](https://deploy.workers.cloudflare.com/?url=https://github.com/cloudflare/docs-examples/tree/main/workers/read-post)
This creates a repository in your GitHub account and deploys the application to Cloudflare Workers.
* [ JavaScript ](#tab-panel-12580)
* [ TypeScript ](#tab-panel-12581)
* [ Python ](#tab-panel-12582)
* [ Rust ](#tab-panel-12583)
* [ Hono ](#tab-panel-12584)
**JavaScript**
```js
export default {
async fetch(request) {
/**
* rawHtmlResponse returns HTML inputted directly
* into the worker script
* @param {string} html
*/
function rawHtmlResponse(html) {
return new Response(html, {
headers: {
"content-type": "text/html;charset=UTF-8",
},
});
}
/**
* readRequestBody reads in the incoming request body
* Use await readRequestBody(..) in an async function to get the string
* @param {Request} request the incoming request to read from
*/
async function readRequestBody(request) {
const contentType = request.headers.get("content-type");
if (contentType.includes("application/json")) {
return JSON.stringify(await request.json());
} else if (contentType.includes("application/text")) {
return request.text();
} else if (contentType.includes("text/html")) {
return request.text();
} else if (contentType.includes("form")) {
const formData = await request.formData();
const body = {};
for (const entry of formData.entries()) {
body[entry[0]] = entry[1];
}
return JSON.stringify(body);
} else {
// Perhaps some other type of data was submitted in the form
// like an image, or some other binary data.
return "a file";
}
}
const { url } = request;
if (url.includes("form")) {
return rawHtmlResponse(someForm);
}
if (request.method === "POST") {
const reqBody = await readRequestBody(request);
const retBody = `The request body sent in was ${reqBody}`;
return new Response(retBody);
} else if (request.method === "GET") {
return new Response("The request was a GET");
}
},
};
```
**TypeScript**
```ts
export default {
async fetch(request): Promise {
/**
* rawHtmlResponse returns HTML inputted directly
* into the worker script
* @param {string} html
*/
function rawHtmlResponse(html) {
return new Response(html, {
headers: {
"content-type": "text/html;charset=UTF-8",
},
});
}
/**
* readRequestBody reads in the incoming request body
* Use await readRequestBody(..) in an async function to get the string
* @param {Request} request the incoming request to read from
*/
async function readRequestBody(request: Request) {
const contentType = request.headers.get("content-type");
if (contentType.includes("application/json")) {
return JSON.stringify(await request.json());
} else if (contentType.includes("application/text")) {
return request.text();
} else if (contentType.includes("text/html")) {
return request.text();
} else if (contentType.includes("form")) {
const formData = await request.formData();
const body = {};
for (const entry of formData.entries()) {
body[entry[0]] = entry[1];
}
return JSON.stringify(body);
} else {
// Perhaps some other type of data was submitted in the form
// like an image, or some other binary data.
return "a file";
}
}
const { url } = request;
if (url.includes("form")) {
return rawHtmlResponse(someForm);
}
if (request.method === "POST") {
const reqBody = await readRequestBody(request);
const retBody = `The request body sent in was ${reqBody}`;
return new Response(retBody);
} else if (request.method === "GET") {
return new Response("The request was a GET");
}
},
} satisfies ExportedHandler;
```
**Python**
```py
from workers import WorkerEntrypoint
from js import Object, Response, Headers, JSON
async def read_request_body(request):
headers = request.headers
content_type = headers["content-type"] or ""
if "application/json" in content_type:
return JSON.stringify(await request.json())
if "form" in content_type:
form = await request.formData()
data = Object.fromEntries(form.entries())
return JSON.stringify(data)
return await request.text()
class Default(WorkerEntrypoint):
async def fetch(self, request):
def raw_html_response(html):
headers = Headers.new({"content-type": "text/html;charset=UTF-8"}.items())
return Response.new(html, headers=headers)
if "form" in request.url:
return raw_html_response("")
if "POST" in request.method:
req_body = await read_request_body(request)
ret_body = f"The request body sent in was {req_body}"
return Response.new(ret_body)
return Response.new("The request was not POST")
```
```rs
use serde::{Deserialize, Serialize};
use worker::*;
fn raw_html_response(html: &str) -> Result {
Response::from_html(html)
}
#[derive(Deserialize, Serialize, Debug)]
struct Payload {
msg: String,
}
async fn read_request_body(mut req: Request) -> String {
let ctype = req.headers().get("content-type").unwrap().unwrap();
match ctype.as_str() {
"application/json" => format!("{:?}", req.json::().await.unwrap()),
"text/html" => req.text().await.unwrap(),
"multipart/form-data" => format!("{:?}", req.form_data().await.unwrap()),
_ => String::from("a file"),
}
}
#[event(fetch)]
async fn fetch(req: Request, _env: Env, _ctx: Context) -> Result {
if String::from(req.url()?).contains("form") {
return raw_html_response("some html form");
}
match req.method() {
Method::Post => {
let req_body = read_request_body(req).await;
Response::ok(format!("The request body sent in was {}", req_body))
}
_ => Response::ok(format!("The result was a {:?}", req.method())),
}
}
```
**TypeScript**
```ts
import { Hono } from "hono";
import { html } from "hono/html";
const app = new Hono();
/**
* readRequestBody reads in the incoming request body
* @param {Request} request the incoming request to read from
*/
async function readRequestBody(request: Request): Promise {
const contentType = request.headers.get("content-type") || "";
if (contentType.includes("application/json")) {
const body = await request.json();
return JSON.stringify(body);
} else if (contentType.includes("application/text")) {
return request.text();
} else if (contentType.includes("text/html")) {
return request.text();
} else if (contentType.includes("form")) {
const formData = await request.formData();
const body: Record = {};
for (const [key, value] of formData.entries()) {
body[key] = value.toString();
}
return JSON.stringify(body);
} else {
// Perhaps some other type of data was submitted in the form
// like an image, or some other binary data.
return "a file";
}
}
const someForm = html`
`;
app.get("*", async (c) => {
const url = c.req.url;
if (url.includes("form")) {
return c.html(someForm);
}
return c.text("The request was a GET");
});
app.post("*", async (c) => {
const reqBody = await readRequestBody(c.req.raw);
const retBody = `The request body sent in was ${reqBody}`;
return c.text(retBody);
});
export default app;
```
Prevent potential errors when accessing request.body
The body of a [Request ↗](https://developer.mozilla.org/en-US/docs/Web/API/Request) can only be accessed once. If you previously used `request.formData()` in the same request, you may encounter a TypeError when attempting to access `request.body`.
To avoid errors, create a clone of the Request object with `request.clone()` for each subsequent attempt to access a Request's body. Keep in mind that Workers have a [memory limit of 128 MB per Worker](https://developers.cloudflare.com/workers/platform/limits/#memory) and loading particularly large files into a Worker's memory multiple times may reach this limit. To ensure memory usage does not reach this limit, consider using [Streams](https://developers.cloudflare.com/workers/runtime-apis/streams/).
```json
{"@context":"https://schema.org","@type":"TechArticle","@id":"https://developers.cloudflare.com/workers/examples/read-post/#page","headline":"Read POST · Cloudflare Workers docs","description":"Serve an HTML form, then read POST requests. Use also to read JSON or POST data from an incoming request.","url":"https://developers.cloudflare.com/workers/examples/read-post/","inLanguage":"en","image":"https://developers.cloudflare.com/dev-products-preview.png","dateModified":"2026-04-23","publisher":{"@type":"Organization","name":"Cloudflare","url":"https://www.cloudflare.com/"},"isPartOf":{"@type":"WebSite","@id":"https://developers.cloudflare.com/#website","name":"Cloudflare Docs","url":"https://developers.cloudflare.com/"},"keywords":["JSON","JavaScript","TypeScript","Python","Rust"]}
{"@context":"https://schema.org","@type":"BreadcrumbList","itemListElement":[{"@type":"ListItem","position":1,"item":{"@id":"/directory/","name":"Directory"}},{"@type":"ListItem","position":2,"item":{"@id":"/workers/","name":"Workers"}},{"@type":"ListItem","position":3,"item":{"@id":"/workers/examples/","name":"Examples"}},{"@type":"ListItem","position":4,"item":{"@id":"/workers/examples/read-post/","name":"Read POST"}}]}
```
---
---
title: Redirect
description: Redirect requests from one URL to another or from one set of URLs to another set.
image: https://developers.cloudflare.com/dev-products-preview.png
---
> Documentation Index
> Fetch the complete documentation index at: https://developers.cloudflare.com/workers/llms.txt
> Use this file to discover all available pages before exploring further.
[Skip to content](#%5Ftop)
# Redirect
Redirect requests from one URL to another or from one set of URLs to another set.
If you want to get started quickly, click on the button below.
[](https://deploy.workers.cloudflare.com/?url=https://github.com/cloudflare/docs-examples/tree/main/workers/redirect)
This creates a repository in your GitHub account and deploys the application to Cloudflare Workers.
## Redirect all requests to one URL
* [ JavaScript ](#tab-panel-12590)
* [ TypeScript ](#tab-panel-12591)
* [ Python ](#tab-panel-12592)
* [ Rust ](#tab-panel-12593)
* [ Hono ](#tab-panel-12594)
**JavaScript**
```js
export default {
async fetch(request) {
const destinationURL = "https://example.com";
const statusCode = 301;
return Response.redirect(destinationURL, statusCode);
},
};
```
[Run Worker in Playground](https://workers.cloudflare.com/playground#LYVwNgLglgDghgJwgegGYHsHALQBM4RwDcABAEbogB2+CAngLzbPYZb6HbW5QDGU2AAwBGYYIDMggCwAOAEyCAbFIBcLFm2Ac4XGnwEixk2QuUBYAFABhdFQgBTO9gAiUAM4x0bqNFsqSmngExCRUcMD2DABEUDT2AB4AdABWblGkqFBgjuGRMXFJqVGWNnaOENgAKnQw9v5wMDBgfARQtsjJcABucG68CLAQANTA6Ljg9paWCZ5IJLj2qHDgECQA3hYkJL10VLwB9hC8ABYAFAj2AI4g9m4QAJTrm1skvLZ387fQYb5UAKoAJQAMiQGCQoscIBAYG4VMhkAlwk17Ik3sB0s8tm8qB87gQQG4bAtQSRJMIiJiSBcICAEFQSADbp4cSiLjwLrwIKcFndYq1bICgQAaEh4mmEsb2e4UrYAXyFFllREs6mYmm0uh4-CEogk0nkSikJVsDicrg8Xh8bSo-kC2lIYQi0QihG06QCWRyTqiZDA6DIxWsJvKVRqdW2jWavH5VA6blsUwsayiwDgsQA+qNxtkoip8gtCmlZSrVergpr9DqjPrTFJmJYgA)
**TypeScript**
```ts
export default {
async fetch(request): Promise {
const destinationURL = "https://example.com";
const statusCode = 301;
return Response.redirect(destinationURL, statusCode);
},
} satisfies ExportedHandler;
```
**Python**
```py
from workers import WorkerEntrypoint, Response
class Default(WorkerEntrypoint):
def fetch(self, request):
destinationURL = "https://example.com"
statusCode = 301
return Response.redirect(destinationURL, statusCode)
```
```rs
use worker::*;
#[event(fetch)]
async fn fetch(_req: Request, _env: Env, _ctx: Context) -> Result {
let destination_url = Url::parse("https://example.com")?;
let status_code = 301;
Response::redirect_with_status(destination_url, status_code)
}
```
**TypeScript**
```ts
import { Hono } from "hono";
const app = new Hono();
app.all("*", (c) => {
const destinationURL = "https://example.com";
const statusCode = 301;
return c.redirect(destinationURL, statusCode);
});
export default app;
```
## Redirect requests from one domain to another
* [ JavaScript ](#tab-panel-12585)
* [ TypeScript ](#tab-panel-12586)
* [ Python ](#tab-panel-12587)
* [ Rust ](#tab-panel-12588)
* [ Hono ](#tab-panel-12589)
**JavaScript**
```js
export default {
async fetch(request) {
const base = "https://example.com";
const statusCode = 301;
const url = new URL(request.url);
const { pathname, search } = url;
const destinationURL = `${base}${pathname}${search}`;
console.log(destinationURL);
return Response.redirect(destinationURL, statusCode);
},
};
```
**TypeScript**
```ts
export default {
async fetch(request): Promise {
const base = "https://example.com";
const statusCode = 301;
const url = new URL(request.url);
const { pathname, search } = url;
const destinationURL = `${base}${pathname}${search}`;
console.log(destinationURL);
return Response.redirect(destinationURL, statusCode);
},
} satisfies ExportedHandler;
```
**Python**
```py
from workers import WorkerEntrypoint, Response
from urllib.parse import urlparse
class Default(WorkerEntrypoint):
async def fetch(self, request):
base = "https://example.com"
statusCode = 301
url = urlparse(request.url)
destinationURL = f'{base}{url.path}{url.query}'
print(destinationURL)
return Response.redirect(destinationURL, statusCode)
```
```rs
use worker::*;
#[event(fetch)]
async fn fetch(req: Request, _env: Env, _ctx: Context) -> Result {
let mut base = Url::parse("https://example.com")?;
let status_code = 301;
let url = req.url()?;
base.set_path(url.path());
base.set_query(url.query());
console_log!("{:?}", base.to_string());
Response::redirect_with_status(base, status_code)
}
```
**TypeScript**
```ts
import { Hono } from "hono";
const app = new Hono();
app.all("*", (c) => {
const base = "https://example.com";
const statusCode = 301;
const { pathname, search } = new URL(c.req.url);
const destinationURL = `${base}${pathname}${search}`;
console.log(destinationURL);
return c.redirect(destinationURL, statusCode);
});
export default app;
```
```json
{"@context":"https://schema.org","@type":"TechArticle","@id":"https://developers.cloudflare.com/workers/examples/redirect/#page","headline":"Redirect · Cloudflare Workers docs","description":"Redirect requests from one URL to another or from one set of URLs to another set.","url":"https://developers.cloudflare.com/workers/examples/redirect/","inLanguage":"en","image":"https://developers.cloudflare.com/dev-products-preview.png","dateModified":"2026-04-23","publisher":{"@type":"Organization","name":"Cloudflare","url":"https://www.cloudflare.com/"},"isPartOf":{"@type":"WebSite","@id":"https://developers.cloudflare.com/#website","name":"Cloudflare Docs","url":"https://developers.cloudflare.com/"},"keywords":["Middleware","Redirects","JavaScript","TypeScript","Python","Rust"]}
{"@context":"https://schema.org","@type":"BreadcrumbList","itemListElement":[{"@type":"ListItem","position":1,"item":{"@id":"/directory/","name":"Directory"}},{"@type":"ListItem","position":2,"item":{"@id":"/workers/","name":"Workers"}},{"@type":"ListItem","position":3,"item":{"@id":"/workers/examples/","name":"Examples"}},{"@type":"ListItem","position":4,"item":{"@id":"/workers/examples/redirect/","name":"Redirect"}}]}
```
---
---
title: Respond with another site
description: Respond to the Worker request with the response from another website (example.com in this example).
image: https://developers.cloudflare.com/dev-products-preview.png
---
> Documentation Index
> Fetch the complete documentation index at: https://developers.cloudflare.com/workers/llms.txt
> Use this file to discover all available pages before exploring further.
[Skip to content](#%5Ftop)
# Respond with another site
Respond to the Worker request with the response from another website (example.com in this example).
If you want to get started quickly, click on the button below.
[](https://deploy.workers.cloudflare.com/?url=https://github.com/cloudflare/docs-examples/tree/main/workers/respond-with-another-site)
This creates a repository in your GitHub account and deploys the application to Cloudflare Workers.
* [ JavaScript ](#tab-panel-12595)
* [ TypeScript ](#tab-panel-12596)
* [ Python ](#tab-panel-12597)
**JavaScript**
```js
export default {
async fetch(request) {
function MethodNotAllowed(request) {
return new Response(`Method ${request.method} not allowed.`, {
status: 405,
headers: {
Allow: "GET",
},
});
}
// Only GET requests work with this proxy.
if (request.method !== "GET") return MethodNotAllowed(request);
return fetch(`https://example.com`);
},
};
```
[Run Worker in Playground](https://workers.cloudflare.com/playground#LYVwNgLglgDghgJwgegGYHsHALQBM4RwDcABAEbogB2+CAngLzbPYZb6HbW5QDGU2AAwB2YQFYAzGOEBOABxyALIIBcLFm2Ac4XGnwEjxU2QuUBYAFABhdFQgBTO9gAiUAM4x0bqNFsqSmngExCRUcMD2DABEUDT2AB4AdABWblGkqFBgjuGRMXFJqVGWNnaOENgAKnQw9v5wMDBgfARQtsjJcABucG68CLAQANTA6Ljg9paWCZ5IJLj2qHDgECQA3hYkJL10VLwB9hC8ABYAFAj2AI4g9m4QAJTrm1sB1Ly+VCQAsofHYwBy6AgAEEwGB0AB3ey4c5XG53R4bF4vC4QEAIT5UewQkgAJVuniobnspwABj8IH9cCQACRrC7XW4QRIRSljAC+oSB2zBkOhiVJABonsjkXcCCA3P5lGJBc9RSRjvY4AsEFKRQqXqDwRD-FEAOIAUUqUTlmpI7LNovZ9yI8ot9uQyBIAHkqGA6CQjZUSAz4RA3CQIZgANZBnzHEiU9wkGAIdDxOiJe1QVAkWGMu4s35jEgAQgYDBIBuNUUeqPRnwpVMBIN5UJhfqZtvtFYxByOZ1JxwgEBgUqdCXCTXsiV46GApJbW0tFnZREs6mYmm0uh4-CEokk0nkSkEJVsDicrg8Xh8bSo-kC2lIYQi0VZKuC6QCWRy96iZHBZGK1kP5SqGo6m2Rpml4Vp2lSWwpgsNYomAOBYgAfVGcZsiiFR8gWQo0nZRclxXYI130TcjB3UxBGYSwgA)
**TypeScript**
```ts
export default {
async fetch(request): Promise {
function MethodNotAllowed(request) {
return new Response(`Method ${request.method} not allowed.`, {
status: 405,
headers: {
Allow: "GET",
},
});
}
// Only GET requests work with this proxy.
if (request.method !== "GET") return MethodNotAllowed(request);
return fetch(`https://example.com`);
},
} satisfies ExportedHandler;
```
**Python**
```py
from workers import WorkerEntrypoint, Response, fetch
class Default(WorkerEntrypoint):
def fetch(self, request):
def method_not_allowed(request):
msg = f'Method {request.method} not allowed.'
headers = {"Allow": "GET"}
return Response(msg, headers=headers, status=405)
# Only GET requests work with this proxy.
if request.method != "GET":
return method_not_allowed(request)
return fetch("https://example.com")
```
```json
{"@context":"https://schema.org","@type":"TechArticle","@id":"https://developers.cloudflare.com/workers/examples/respond-with-another-site/#page","headline":"Respond with another site · Cloudflare Workers docs","description":"Respond to the Worker request with the response from another website (example.com in this example).","url":"https://developers.cloudflare.com/workers/examples/respond-with-another-site/","inLanguage":"en","image":"https://developers.cloudflare.com/dev-products-preview.png","dateModified":"2026-04-23","publisher":{"@type":"Organization","name":"Cloudflare","url":"https://www.cloudflare.com/"},"isPartOf":{"@type":"WebSite","@id":"https://developers.cloudflare.com/#website","name":"Cloudflare Docs","url":"https://developers.cloudflare.com/"},"keywords":["Middleware","JavaScript","TypeScript","Python"]}
{"@context":"https://schema.org","@type":"BreadcrumbList","itemListElement":[{"@type":"ListItem","position":1,"item":{"@id":"/directory/","name":"Directory"}},{"@type":"ListItem","position":2,"item":{"@id":"/workers/","name":"Workers"}},{"@type":"ListItem","position":3,"item":{"@id":"/workers/examples/","name":"Examples"}},{"@type":"ListItem","position":4,"item":{"@id":"/workers/examples/respond-with-another-site/","name":"Respond with another site"}}]}
```
---
---
title: Return small HTML page
description: Deliver an HTML page from an HTML string directly inside the Worker script.
image: https://developers.cloudflare.com/dev-products-preview.png
---
> Documentation Index
> Fetch the complete documentation index at: https://developers.cloudflare.com/workers/llms.txt
> Use this file to discover all available pages before exploring further.
[Skip to content](#%5Ftop)
# Return small HTML page
Deliver an HTML page from an HTML string directly inside the Worker script.
If you want to get started quickly, click on the button below.
[](https://deploy.workers.cloudflare.com/?url=https://github.com/cloudflare/docs-examples/tree/main/workers/return-html)
This creates a repository in your GitHub account and deploys the application to Cloudflare Workers.
* [ JavaScript ](#tab-panel-12598)
* [ TypeScript ](#tab-panel-12599)
* [ Python ](#tab-panel-12600)
* [ Rust ](#tab-panel-12601)
* [ Hono ](#tab-panel-12602)
**JavaScript**
```js
export default {
async fetch(request) {
const html = `
`;
return new Response(html, {
headers: {
"content-type": "text/html;charset=UTF-8",
},
});
},
} satisfies ExportedHandler;
```
**Python**
```py
from workers import WorkerEntrypoint, Response
class Default(WorkerEntrypoint):
async def fetch(self, request):
html = """
Hello World
This markup was generated by a Cloudflare Worker.
"""
headers = {"content-type": "text/html;charset=UTF-8"}
return Response(html, headers=headers)
```
```rs
use worker::*;
#[event(fetch)]
async fn fetch(_req: Request, _env: Env, _ctx: Context) -> Result {
let html = r#"
Hello World
This markup was generated by a Cloudflare Worker.
"#;
Response::from_html(html)
}
```
**TypeScript**
```ts
import { Hono } from "hono";
import { html } from "hono/html";
const app = new Hono();
app.get("*", (c) => {
const doc = html`
Hello World
This markup was generated by a Cloudflare Worker with Hono.
`;
return c.html(doc);
});
export default app;
```
```json
{"@context":"https://schema.org","@type":"TechArticle","@id":"https://developers.cloudflare.com/workers/examples/return-html/#page","headline":"Return small HTML page · Cloudflare Workers docs","description":"Deliver an HTML page from an HTML string directly inside the Worker script.","url":"https://developers.cloudflare.com/workers/examples/return-html/","inLanguage":"en","image":"https://developers.cloudflare.com/dev-products-preview.png","dateModified":"2026-04-23","publisher":{"@type":"Organization","name":"Cloudflare","url":"https://www.cloudflare.com/"},"isPartOf":{"@type":"WebSite","@id":"https://developers.cloudflare.com/#website","name":"Cloudflare Docs","url":"https://developers.cloudflare.com/"},"keywords":["JavaScript","TypeScript","Python","Rust"]}
{"@context":"https://schema.org","@type":"BreadcrumbList","itemListElement":[{"@type":"ListItem","position":1,"item":{"@id":"/directory/","name":"Directory"}},{"@type":"ListItem","position":2,"item":{"@id":"/workers/","name":"Workers"}},{"@type":"ListItem","position":3,"item":{"@id":"/workers/examples/","name":"Examples"}},{"@type":"ListItem","position":4,"item":{"@id":"/workers/examples/return-html/","name":"Return small HTML page"}}]}
```
---
---
title: Return JSON
description: Return JSON directly from a Worker script, useful for building APIs and middleware.
image: https://developers.cloudflare.com/dev-products-preview.png
---
> Documentation Index
> Fetch the complete documentation index at: https://developers.cloudflare.com/workers/llms.txt
> Use this file to discover all available pages before exploring further.
[Skip to content](#%5Ftop)
# Return JSON
Return JSON directly from a Worker script, useful for building APIs and middleware.
If you want to get started quickly, click on the button below.
[](https://deploy.workers.cloudflare.com/?url=https://github.com/cloudflare/docs-examples/tree/main/workers/return-json)
This creates a repository in your GitHub account and deploys the application to Cloudflare Workers.
* [ JavaScript ](#tab-panel-12603)
* [ TypeScript ](#tab-panel-12604)
* [ Python ](#tab-panel-12605)
* [ Rust ](#tab-panel-12606)
* [ Hono ](#tab-panel-12607)
**JavaScript**
```js
export default {
async fetch(request) {
const data = {
hello: "world",
};
return Response.json(data);
},
};
```
[Run Worker in Playground](https://workers.cloudflare.com/playground#LYVwNgLglgDghgJwgegGYHsHALQBM4RwDcABAEbogB2+CAngLzbPYZb6HbW5QDGU2AAwAWAMwBGQQDZRw4QCYAnAHYAXCxZtgHOFxp8BIidNkKVAWABQAYXRUIAU3vYAIlADOMdO6jQ7qki08AmISKjhgBwYAIigaBwAPADoAK3do0lQoMCcIqNj45LToq1t7JwhsABU6GAcAuBgYMD4CKDtkFLgANzh3XgRYCABqYHRccAcrK0SvJBJcB1Q4cAgSAG9LEhI+uipeQIcIXgALAAoEBwBHEAd3CABKDa3tkl47e4WQkgZn19eTg4wGB0AFogB3TBgXDRAA0L22AF8iJYESRLhAQAgqCQAEp3LxUdwOVLuOxnHQPFFI+HIqwaZhaHR6Hj8IRiSQyORKZSlOyOZxuTzeXztKgBII6UjhSIxSKEHQZQLZXKy6JkEFkEo2fkVaq1eo7JotXhtDppOzTSzraLAOBxAD6YwmOWiqgKiyK6UR9IZTJCLIM7OMXLMymYViAA)
**TypeScript**
```ts
export default {
async fetch(request): Promise {
const data = {
hello: "world",
};
return Response.json(data);
},
} satisfies ExportedHandler;
```
**Python**
```py
from workers import WorkerEntrypoint, Response
import json
class Default(WorkerEntrypoint):
def fetch(self, request):
data = json.dumps({"hello": "world"})
headers = {"content-type": "application/json"}
return Response(data, headers=headers)
```
```rs
use serde::{Deserialize, Serialize};
use worker::*;
#[derive(Deserialize, Serialize, Debug)]
struct Json {
hello: String,
}
#[event(fetch)]
async fn fetch(_req: Request, _env: Env, _ctx: Context) -> Result {
let data = Json {
hello: String::from("world"),
};
Response::from_json(&data)
}
```
**TypeScript**
```ts
import { Hono } from "hono";
const app = new Hono();
app.get("*", (c) => {
const data = {
hello: "world",
};
return c.json(data);
});
export default app;
```
```json
{"@context":"https://schema.org","@type":"TechArticle","@id":"https://developers.cloudflare.com/workers/examples/return-json/#page","headline":"Return JSON · Cloudflare Workers docs","description":"Return JSON directly from a Worker script, useful for building APIs and middleware.","url":"https://developers.cloudflare.com/workers/examples/return-json/","inLanguage":"en","image":"https://developers.cloudflare.com/dev-products-preview.png","dateModified":"2026-04-23","publisher":{"@type":"Organization","name":"Cloudflare","url":"https://www.cloudflare.com/"},"isPartOf":{"@type":"WebSite","@id":"https://developers.cloudflare.com/#website","name":"Cloudflare Docs","url":"https://developers.cloudflare.com/"},"keywords":["JSON","JavaScript","TypeScript","Python","Rust"]}
{"@context":"https://schema.org","@type":"BreadcrumbList","itemListElement":[{"@type":"ListItem","position":1,"item":{"@id":"/directory/","name":"Directory"}},{"@type":"ListItem","position":2,"item":{"@id":"/workers/","name":"Workers"}},{"@type":"ListItem","position":3,"item":{"@id":"/workers/examples/","name":"Examples"}},{"@type":"ListItem","position":4,"item":{"@id":"/workers/examples/return-json/","name":"Return JSON"}}]}
```
---
---
title: Rewrite links
description: Rewrite URL links in HTML using the HTMLRewriter. This is useful for JAMstack websites.
image: https://developers.cloudflare.com/dev-products-preview.png
---
> Documentation Index
> Fetch the complete documentation index at: https://developers.cloudflare.com/workers/llms.txt
> Use this file to discover all available pages before exploring further.
[Skip to content](#%5Ftop)
# Rewrite links
Rewrite URL links in HTML using the HTMLRewriter. This is useful for JAMstack websites.
If you want to get started quickly, click on the button below.
[](https://deploy.workers.cloudflare.com/?url=https://github.com/cloudflare/docs-examples/tree/main/workers/rewrite-links)
This creates a repository in your GitHub account and deploys the application to Cloudflare Workers.
* [ JavaScript ](#tab-panel-12608)
* [ TypeScript ](#tab-panel-12609)
* [ Python ](#tab-panel-12610)
* [ Hono ](#tab-panel-12611)
**JavaScript**
```js
export default {
async fetch(request) {
const OLD_URL = "developer.mozilla.org";
const NEW_URL = "mynewdomain.com";
class AttributeRewriter {
constructor(attributeName) {
this.attributeName = attributeName;
}
element(element) {
const attribute = element.getAttribute(this.attributeName);
if (attribute) {
element.setAttribute(
this.attributeName,
attribute.replace(OLD_URL, NEW_URL),
);
}
}
}
const rewriter = new HTMLRewriter()
.on("a", new AttributeRewriter("href"))
.on("img", new AttributeRewriter("src"));
const res = await fetch(request);
const contentType = res.headers.get("Content-Type");
// If the response is HTML, it can be transformed with
// HTMLRewriter -- otherwise, it should pass through
if (contentType.startsWith("text/html")) {
return rewriter.transform(res);
} else {
return res;
}
},
};
```
**TypeScript**
```ts
export default {
async fetch(request): Promise {
const OLD_URL = "developer.mozilla.org";
const NEW_URL = "mynewdomain.com";
class AttributeRewriter {
constructor(attributeName) {
this.attributeName = attributeName;
}
element(element) {
const attribute = element.getAttribute(this.attributeName);
if (attribute) {
element.setAttribute(
this.attributeName,
attribute.replace(OLD_URL, NEW_URL),
);
}
}
}
const rewriter = new HTMLRewriter()
.on("a", new AttributeRewriter("href"))
.on("img", new AttributeRewriter("src"));
const res = await fetch(request);
const contentType = res.headers.get("Content-Type");
// If the response is HTML, it can be transformed with
// HTMLRewriter -- otherwise, it should pass through
if (contentType.startsWith("text/html")) {
return rewriter.transform(res);
} else {
return res;
}
},
} satisfies ExportedHandler;
```
**Python**
```py
from workers import WorkerEntrypoint
from pyodide.ffi import create_proxy
from js import HTMLRewriter, fetch
class AttributeRewriter:
old_url = "developer.mozilla.org"
new_url = "mynewdomain.com"
def __init__(self, attr_name):
self.attr_name = attr_name
def element(self, element):
attr = element.getAttribute(self.attr_name)
if attr:
element.setAttribute(
self.attr_name, attr.replace(self.old_url, self.new_url)
)
href = create_proxy(AttributeRewriter("href"))
src = create_proxy(AttributeRewriter("src"))
rewriter = HTMLRewriter.new().on("a", href).on("img", src)
class Default(WorkerEntrypoint):
async def fetch(self, request):
res = await fetch(request)
content_type = res.headers["Content-Type"]
# If the response is HTML, it can be transformed with
# HTMLRewriter -- otherwise, it should pass through
if content_type.startswith("text/html"):
return rewriter.transform(res)
return res
```
**TypeScript**
```ts
import { Hono } from 'hono';
import { html } from 'hono/html';
const app = new Hono();
app.get('*', async (c) => {
const OLD_URL = "developer.mozilla.org";
const NEW_URL = "mynewdomain.com";
class AttributeRewriter {
attributeName: string;
constructor(attributeName: string) {
this.attributeName = attributeName;
}
element(element: Element) {
const attribute = element.getAttribute(this.attributeName);
if (attribute) {
element.setAttribute(
this.attributeName,
attribute.replace(OLD_URL, NEW_URL)
);
}
}
}
// Make a fetch request using the original request
const res = await fetch(c.req.raw);
const contentType = res.headers.get("Content-Type") || "";
// If the response is HTML, transform it with HTMLRewriter
if (contentType.startsWith("text/html")) {
const rewriter = new HTMLRewriter()
.on("a", new AttributeRewriter("href"))
.on("img", new AttributeRewriter("src"));
return new Response(rewriter.transform(res).body, {
headers: res.headers
});
} else {
// Pass through the response as is
return res;
}
});
export default app;
```
```json
{"@context":"https://schema.org","@type":"TechArticle","@id":"https://developers.cloudflare.com/workers/examples/rewrite-links/#page","headline":"Rewrite links · Cloudflare Workers docs","description":"Rewrite URL links in HTML using the HTMLRewriter. This is useful for JAMstack websites.","url":"https://developers.cloudflare.com/workers/examples/rewrite-links/","inLanguage":"en","image":"https://developers.cloudflare.com/dev-products-preview.png","dateModified":"2026-04-23","publisher":{"@type":"Organization","name":"Cloudflare","url":"https://www.cloudflare.com/"},"isPartOf":{"@type":"WebSite","@id":"https://developers.cloudflare.com/#website","name":"Cloudflare Docs","url":"https://developers.cloudflare.com/"},"keywords":["JavaScript","TypeScript","Python"]}
{"@context":"https://schema.org","@type":"BreadcrumbList","itemListElement":[{"@type":"ListItem","position":1,"item":{"@id":"/directory/","name":"Directory"}},{"@type":"ListItem","position":2,"item":{"@id":"/workers/","name":"Workers"}},{"@type":"ListItem","position":3,"item":{"@id":"/workers/examples/","name":"Examples"}},{"@type":"ListItem","position":4,"item":{"@id":"/workers/examples/rewrite-links/","name":"Rewrite links"}}]}
```
---
---
title: Set security headers
description: Set common security headers (X-XSS-Protection, X-Frame-Options, X-Content-Type-Options, Permissions-Policy, Referrer-Policy, Strict-Transport-Security, Content-Security-Policy).
image: https://developers.cloudflare.com/dev-products-preview.png
---
> Documentation Index
> Fetch the complete documentation index at: https://developers.cloudflare.com/workers/llms.txt
> Use this file to discover all available pages before exploring further.
[Skip to content](#%5Ftop)
# Set security headers
Set common security headers (X-XSS-Protection, X-Frame-Options, X-Content-Type-Options, Permissions-Policy, Referrer-Policy, Strict-Transport-Security, Content-Security-Policy).
If you want to get started quickly, click on the button below.
[](https://deploy.workers.cloudflare.com/?url=https://github.com/cloudflare/docs-examples/tree/main/workers/security-headers)
This creates a repository in your GitHub account and deploys the application to Cloudflare Workers.
To inject CSP nonces into inline ``,
{ html: true },
);
}
},
})
.transform(shell);
},
};
async function fetchBootstrapData(env, pathname, headers) {
try {
const res = await fetch(`${env.API_BASE_URL}/api/bootstrap`, {
headers: {
Cookie: headers.get("Cookie") || "",
"X-Request-Path": pathname,
},
});
if (!res.ok) return null;
return await res.json();
} catch {
// If the API is down, the shell still loads and the SPA
// falls back to client-side data fetching.
return null;
}
}
```
**TypeScript**
```ts
// Env is generated by `wrangler types` — run it whenever you change your config.
// Do not manually define Env — it drifts from your actual bindings.
export default {
async fetch(request: Request, env: Env): Promise {
const url = new URL(request.url);
// Serve root-level static files (favicon.ico, robots.txt) directly.
// Hashed assets under /assets/* skip the Worker entirely via run_worker_first.
if (url.pathname.match(/\.\w+$/) && !url.pathname.endsWith(".html")) {
return env.ASSETS.fetch(request);
}
// Start fetching bootstrap data immediately — do not await yet.
const dataPromise = fetchBootstrapData(env, url.pathname, request.headers);
// Fetch the SPA shell from static assets (co-located, sub-millisecond).
const shell = await env.ASSETS.fetch(
new Request(new URL("/index.html", request.url)),
);
// Use HTMLRewriter to stream the shell and inject data into .
return new HTMLRewriter()
.on("body", {
async element(el) {
const data = await dataPromise;
if (data) {
el.prepend(
``,
{ html: true },
);
}
},
})
.transform(shell);
},
} satisfies ExportedHandler;
async function fetchBootstrapData(
env: Env,
pathname: string,
headers: Headers,
): Promise {
try {
const res = await fetch(`${env.API_BASE_URL}/api/bootstrap`, {
headers: {
Cookie: headers.get("Cookie") || "",
"X-Request-Path": pathname,
},
});
if (!res.ok) return null;
return await res.json();
} catch {
// If the API is down, the shell still loads and the SPA
// falls back to client-side data fetching.
return null;
}
}
```
---
## Option 2: SPA hosted on an external origin
Use this variant when your HTML, CSS, and JavaScript are deployed outside Cloudflare. The Worker fetches the SPA shell from the external origin, uses HTMLRewriter to inject bootstrap data, and streams the modified response to the browser.
### Configure the Worker
Because the SPA is not in Workers Static Assets, you do not need an `assets` block. Instead, store the external origin URL as an environment variable. Attach the Worker to your domain with a [Custom Domain](https://developers.cloudflare.com/workers/configuration/routing/custom-domains/) or a [Route](https://developers.cloudflare.com/workers/configuration/routing/routes/).
* [ wrangler.jsonc ](#tab-panel-12623)
* [ wrangler.toml ](#tab-panel-12624)
**JSONC**
```jsonc
{
"name": "my-spa-proxy",
"main": "src/worker.ts",
// Set this to today's date
"compatibility_date": "2026-07-20",
"compatibility_flags": ["nodejs_compat"],
"vars": {
"SPA_ORIGIN": "https://my-spa.example-hosting.com",
"API_BASE_URL": "https://api.example.com",
},
}
```
**TOML**
```toml
name = "my-spa-proxy"
main = "src/worker.ts"
# Set this to today's date
compatibility_date = "2026-07-20"
compatibility_flags = [ "nodejs_compat" ]
[vars]
SPA_ORIGIN = "https://my-spa.example-hosting.com"
API_BASE_URL = "https://api.example.com"
```
### Inject bootstrap data with HTMLRewriter
The Worker fetches both the SPA shell and API data in parallel. When the SPA origin responds, HTMLRewriter streams the HTML while injecting bootstrap data into ``. Static assets (CSS, JS, images) are passed through to the external origin without modification.
* [ JavaScript ](#tab-panel-12627)
* [ TypeScript ](#tab-panel-12628)
**JavaScript**
```js
// Env is generated by `wrangler types` — run it whenever you change your config.
// Do not manually define Env — it drifts from your actual bindings.
export default {
async fetch(request, env) {
const url = new URL(request.url);
// Pass static asset requests through to the external origin unmodified.
if (url.pathname.match(/\.\w+$/) && !url.pathname.endsWith(".html")) {
return fetch(new Request(`${env.SPA_ORIGIN}${url.pathname}`, request));
}
// Start fetching bootstrap data immediately — do not await yet.
const dataPromise = fetchBootstrapData(env, url.pathname, request.headers);
// Fetch the SPA shell from the external origin.
// SPA routers serve index.html for all routes.
const shell = await fetch(`${env.SPA_ORIGIN}/index.html`);
if (!shell.ok) {
return new Response("Origin returned an error", { status: 502 });
}
// Use HTMLRewriter to stream the shell and inject data into .
return new HTMLRewriter()
.on("body", {
async element(el) {
const data = await dataPromise;
if (data) {
el.prepend(
``,
{ html: true },
);
}
},
})
.transform(shell);
},
};
async function fetchBootstrapData(env, pathname, headers) {
try {
const res = await fetch(`${env.API_BASE_URL}/api/bootstrap`, {
headers: {
Cookie: headers.get("Cookie") || "",
"X-Request-Path": pathname,
},
});
if (!res.ok) return null;
return await res.json();
} catch {
// If the API is down, the shell still loads and the SPA
// falls back to client-side data fetching.
return null;
}
}
```
**TypeScript**
```ts
// Env is generated by `wrangler types` — run it whenever you change your config.
// Do not manually define Env — it drifts from your actual bindings.
export default {
async fetch(request: Request, env: Env): Promise {
const url = new URL(request.url);
// Pass static asset requests through to the external origin unmodified.
if (url.pathname.match(/\.\w+$/) && !url.pathname.endsWith(".html")) {
return fetch(new Request(`${env.SPA_ORIGIN}${url.pathname}`, request));
}
// Start fetching bootstrap data immediately — do not await yet.
const dataPromise = fetchBootstrapData(env, url.pathname, request.headers);
// Fetch the SPA shell from the external origin.
// SPA routers serve index.html for all routes.
const shell = await fetch(`${env.SPA_ORIGIN}/index.html`);
if (!shell.ok) {
return new Response("Origin returned an error", { status: 502 });
}
// Use HTMLRewriter to stream the shell and inject data into .
return new HTMLRewriter()
.on("body", {
async element(el) {
const data = await dataPromise;
if (data) {
el.prepend(
``,
{ html: true },
);
}
},
})
.transform(shell);
},
} satisfies ExportedHandler;
async function fetchBootstrapData(
env: Env,
pathname: string,
headers: Headers,
): Promise {
try {
const res = await fetch(`${env.API_BASE_URL}/api/bootstrap`, {
headers: {
Cookie: headers.get("Cookie") || "",
"X-Request-Path": pathname,
},
});
if (!res.ok) return null;
return await res.json();
} catch {
// If the API is down, the shell still loads and the SPA
// falls back to client-side data fetching.
return null;
}
}
```
## Consume prefetched data in your SPA
On the client, read `window.__BOOTSTRAP_DATA__` before making any API calls. If the data exists, use it directly. Otherwise, fall back to a normal fetch.
**src/App.tsx**
```tsx
// React example — works the same way in Vue, Svelte, or any other framework.
import { useEffect, useState } from "react";
function App() {
const [data, setData] = useState(window.__BOOTSTRAP_DATA__ || null);
const [loading, setLoading] = useState(!data);
useEffect(() => {
if (data) return; // Already have prefetched data — skip the API call.
fetch("/api/bootstrap")
.then((res) => res.json())
.then((result) => {
setData(result);
setLoading(false);
});
}, []);
if (loading) return ;
return ;
}
```
Add a type declaration so TypeScript recognizes the global property:
**global.d.ts**
```ts
declare global {
interface Window {
__BOOTSTRAP_DATA__?: unknown;
}
}
```
## Additional injection techniques
You can chain multiple HTMLRewriter handlers to inject more than bootstrap data.
### Set meta tags
Inject Open Graph or other `` tags based on the request path. This gives social-media crawlers correct previews without a full server-side rendering framework.
**TypeScript**
```ts
new HTMLRewriter()
.on("head", {
element(el) {
el.append(``, {
html: true,
});
},
})
.transform(shell);
```
### Add CSP nonces
Generate a nonce per request and inject it into both the Content-Security-Policy header and each inline ``,
{ html: true },
);
},
})
.transform(shell);
```
## Related resources
* [HTMLRewriter](https://developers.cloudflare.com/workers/runtime-apis/html-rewriter/) — Streaming HTML parser and transformer.
* [Workers Static Assets](https://developers.cloudflare.com/workers/static-assets/) — Serve static files alongside your Worker.
* [Static Assets routing](https://developers.cloudflare.com/workers/static-assets/routing/) — Configure `run_worker_first` and `not_found_handling`.
* [Static Assets binding](https://developers.cloudflare.com/workers/static-assets/binding/) — Reference for the `ASSETS` binding and routing options.
* [Custom Domains](https://developers.cloudflare.com/workers/configuration/routing/custom-domains/) — Attach a Worker to a domain as the origin.
* [Routes](https://developers.cloudflare.com/workers/configuration/routing/routes/) — Run a Worker in front of an existing origin server.
* [Workers Best Practices](https://developers.cloudflare.com/workers/best-practices/workers-best-practices/) — Code patterns and configuration guidance for Workers.
```json
{"@context":"https://schema.org","@type":"TechArticle","@id":"https://developers.cloudflare.com/workers/examples/spa-shell/#page","headline":"Single Page App (SPA) shell with bootstrap data · Cloudflare Workers docs","description":"Use HTMLRewriter to inject prefetched bootstrap data into an SPA shell, eliminating client-side data fetching on initial load. Works with Workers Static Assets or an externally hosted SPA.","url":"https://developers.cloudflare.com/workers/examples/spa-shell/","inLanguage":"en","image":"https://developers.cloudflare.com/dev-products-preview.png","dateModified":"2026-04-23","publisher":{"@type":"Organization","name":"Cloudflare","url":"https://www.cloudflare.com/"},"isPartOf":{"@type":"WebSite","@id":"https://developers.cloudflare.com/#website","name":"Cloudflare Docs","url":"https://developers.cloudflare.com/"},"keywords":["TypeScript","SPA"]}
{"@context":"https://schema.org","@type":"BreadcrumbList","itemListElement":[{"@type":"ListItem","position":1,"item":{"@id":"/directory/","name":"Directory"}},{"@type":"ListItem","position":2,"item":{"@id":"/workers/","name":"Workers"}},{"@type":"ListItem","position":3,"item":{"@id":"/workers/examples/","name":"Examples"}},{"@type":"ListItem","position":4,"item":{"@id":"/workers/examples/spa-shell/","name":"Single Page App (SPA) shell with bootstrap data"}}]}
```
---
---
title: Stream large JSON
description: Parse and transform large JSON request and response bodies using streaming.
image: https://developers.cloudflare.com/dev-products-preview.png
---
> Documentation Index
> Fetch the complete documentation index at: https://developers.cloudflare.com/workers/llms.txt
> Use this file to discover all available pages before exploring further.
[Skip to content](#%5Ftop)
# Stream large JSON
Parse and transform large JSON request and response bodies using streaming.
Use the [Streams API](https://developers.cloudflare.com/workers/runtime-apis/streams/) to process JSON payloads that would exceed a Worker's 128 MB memory limit if fully buffered. Streaming allows you to parse and transform JSON data incrementally as it arrives. This is faster than buffering the entire payload into memory, as your Worker can start processing data incrementally, and allows your Worker to handle multi-gigabyte payloads or files within its memory limits.
The [@streamparser/json-whatwg ↗](https://www.npmjs.com/package/@streamparser/json-whatwg) library provides a streaming JSON parser compatible with the Web Streams API.
Install the dependency:
```sh
npm install @streamparser/json-whatwg
```
## Stream a JSON request body
This example parses a large JSON request body and extracts specific fields without loading the entire payload into memory.
* [ TypeScript ](#tab-panel-12629)
* [ JavaScript ](#tab-panel-12630)
**TypeScript**
```ts
import { JSONParser } from "@streamparser/json-whatwg";
export default {
async fetch(request): Promise {
const parser = new JSONParser({ paths: ["$.users.*"] });
const users: string[] = [];
// Pipe the request body through the JSON parser
const reader = request.body
.pipeThrough(parser)
.getReader();
// Process matching JSON values as they stream in
while (true) {
const { done, value } = await reader.read();
if (done) break;
// Extract only the name field from each user object
if (value.value?.name) {
users.push(value.value.name);
}
}
return Response.json({ userNames: users });
},
} satisfies ExportedHandler;
```
**JavaScript**
```js
import { JSONParser } from "@streamparser/json-whatwg";
export default {
async fetch(request) {
const parser = new JSONParser({ paths: ["$.users.*"] });
const users = [];
// Pipe the request body through the JSON parser
const reader = request.body
.pipeThrough(parser)
.getReader();
// Process matching JSON values as they stream in
while (true) {
const { done, value } = await reader.read();
if (done) break;
// Extract only the name field from each user object
if (value.value?.name) {
users.push(value.value.name);
}
}
return Response.json({ userNames: users });
},
};
```
## Stream and transform a JSON response
This example fetches a large JSON response from an upstream API, transforms specific fields, and streams the modified response to the client.
* [ TypeScript ](#tab-panel-12631)
* [ JavaScript ](#tab-panel-12632)
**TypeScript**
```ts
import { JSONParser } from "@streamparser/json-whatwg";
export default {
async fetch(request): Promise {
const response = await fetch("https://api.example.com/large-dataset.json");
const parser = new JSONParser({ paths: ["$.items.*"] });
const { readable, writable } = new TransformStream();
const writer = writable.getWriter();
const encoder = new TextEncoder();
// Process the upstream response in the background
(async () => {
const reader = response.body
.pipeThrough(parser)
.getReader();
await writer.write(encoder.encode('{"processedItems":['));
let first = true;
while (true) {
const { done, value } = await reader.read();
if (done) break;
// Transform each item as it streams through
const item = value.value;
const transformed = {
id: item.id,
title: item.title.toUpperCase(),
processed: true,
};
if (!first) await writer.write(encoder.encode(","));
first = false;
await writer.write(encoder.encode(JSON.stringify(transformed)));
}
await writer.write(encoder.encode("]}"));
await writer.close();
})();
return new Response(readable, {
headers: { "Content-Type": "application/json" },
});
},
} satisfies ExportedHandler;
```
**JavaScript**
```js
import { JSONParser } from "@streamparser/json-whatwg";
export default {
async fetch(request) {
const response = await fetch("https://api.example.com/large-dataset.json");
const parser = new JSONParser({ paths: ["$.items.*"] });
const { readable, writable } = new TransformStream();
const writer = writable.getWriter();
const encoder = new TextEncoder();
// Process the upstream response in the background
(async () => {
const reader = response.body
.pipeThrough(parser)
.getReader();
await writer.write(encoder.encode('{"processedItems":['));
let first = true;
while (true) {
const { done, value } = await reader.read();
if (done) break;
// Transform each item as it streams through
const item = value.value;
const transformed = {
id: item.id,
title: item.title.toUpperCase(),
processed: true,
};
if (!first) await writer.write(encoder.encode(","));
first = false;
await writer.write(encoder.encode(JSON.stringify(transformed)));
}
await writer.write(encoder.encode("]}"));
await writer.close();
})();
return new Response(readable, {
headers: { "Content-Type": "application/json" },
});
},
};
```
## Related resources
* [Streams API](https://developers.cloudflare.com/workers/runtime-apis/streams/) \- Learn more about streaming in Workers
* [TransformStream](https://developers.cloudflare.com/workers/runtime-apis/streams/transformstream/) \- Create custom stream transformations
* [@streamparser/json-whatwg ↗](https://www.npmjs.com/package/@streamparser/json-whatwg) \- Streaming JSON parser documentation
```json
{"@context":"https://schema.org","@type":"TechArticle","@id":"https://developers.cloudflare.com/workers/examples/streaming-json/#page","headline":"Stream large JSON · Cloudflare Workers docs","description":"Parse and transform large JSON request and response bodies using streaming.","url":"https://developers.cloudflare.com/workers/examples/streaming-json/","inLanguage":"en","image":"https://developers.cloudflare.com/dev-products-preview.png","dateModified":"2026-04-23","publisher":{"@type":"Organization","name":"Cloudflare","url":"https://www.cloudflare.com/"},"isPartOf":{"@type":"WebSite","@id":"https://developers.cloudflare.com/#website","name":"Cloudflare Docs","url":"https://developers.cloudflare.com/"},"keywords":["Middleware","JSON","JavaScript","TypeScript"]}
{"@context":"https://schema.org","@type":"BreadcrumbList","itemListElement":[{"@type":"ListItem","position":1,"item":{"@id":"/directory/","name":"Directory"}},{"@type":"ListItem","position":2,"item":{"@id":"/workers/","name":"Workers"}},{"@type":"ListItem","position":3,"item":{"@id":"/workers/examples/","name":"Examples"}},{"@type":"ListItem","position":4,"item":{"@id":"/workers/examples/streaming-json/","name":"Stream large JSON"}}]}
```
---
---
title: Turnstile with Workers
description: Inject [Turnstile](/turnstile/) implicitly into HTML elements using the HTMLRewriter runtime API.
image: https://developers.cloudflare.com/dev-products-preview.png
---
> Documentation Index
> Fetch the complete documentation index at: https://developers.cloudflare.com/workers/llms.txt
> Use this file to discover all available pages before exploring further.
[Skip to content](#%5Ftop)
# Turnstile with Workers
Inject [Turnstile](https://developers.cloudflare.com/turnstile/) implicitly into HTML elements using the HTMLRewriter runtime API.
* [ JavaScript ](#tab-panel-12633)
* [ TypeScript ](#tab-panel-12634)
* [ Hono ](#tab-panel-12635)
* [ Python ](#tab-panel-12636)
**JavaScript**
```js
export default {
async fetch(request, env) {
const SITE_KEY = env.SITE_KEY; // The Turnstile Sitekey of your widget (pass as env or secret)
const TURNSTILE_ATTR_NAME = "your_id_to_replace"; // The id of the element to put a Turnstile widget in
let res = await fetch(request);
// Instantiate the API to run on specific elements, for example, `head`, `div`
let newRes = new HTMLRewriter()
// `.on` attaches the element handler and this allows you to match on element/attributes or to use the specific methods per the API
.on("head", {
element(element) {
// In this case, you are using `append` to add a new script to the `head` element
element.append(
``,
{ html: true },
);
},
})
.on("div", {
element(element) {
// Add a turnstile widget element into if an element with the id of TURNSTILE_ATTR_NAME is found
if (element.getAttribute("id") === TURNSTILE_ATTR_NAME) {
element.append(
``,
{ html: true },
);
}
},
})
.transform(res);
return newRes;
},
};
```
**TypeScript**
```ts
export default {
async fetch(request, env): Promise {
const SITE_KEY = env.SITE_KEY; // The Turnstile Sitekey of your widget (pass as env or secret)
const TURNSTILE_ATTR_NAME = "your_id_to_replace"; // The id of the element to put a Turnstile widget in
let res = await fetch(request);
// Instantiate the API to run on specific elements, for example, `head`, `div`
let newRes = new HTMLRewriter()
// `.on` attaches the element handler and this allows you to match on element/attributes or to use the specific methods per the API
.on("head", {
element(element) {
// In this case, you are using `append` to add a new script to the `head` element
element.append(
``,
{ html: true },
);
},
})
.on("div", {
element(element) {
// Add a turnstile widget element into if an element with the id of TURNSTILE_ATTR_NAME is found
if (element.getAttribute("id") === TURNSTILE_ATTR_NAME) {
element.append(
``,
{ html: true },
);
}
},
})
.transform(res);
return newRes;
},
} satisfies ExportedHandler;
```
**TypeScript**
```ts
import { Hono } from "hono";
interface Env {
SITE_KEY: string;
SECRET_KEY: string;
TURNSTILE_ATTR_NAME?: string;
}
const app = new Hono<{ Bindings: Env }>();
// Middleware to inject Turnstile widget
app.use("*", async (c, next) => {
const SITE_KEY = c.env.SITE_KEY; // The Turnstile Sitekey from environment
const TURNSTILE_ATTR_NAME = c.env.TURNSTILE_ATTR_NAME || "your_id_to_replace"; // The target element ID
// Process the request through the original endpoint
await next();
// Only process HTML responses
const contentType = c.res.headers.get("content-type");
if (!contentType || !contentType.includes("text/html")) {
return;
}
// Clone the response to make it modifiable
const originalResponse = c.res;
const responseBody = await originalResponse.text();
// Create an HTMLRewriter instance to modify the HTML
const rewriter = new HTMLRewriter()
// Add the Turnstile script to the head
.on("head", {
element(element) {
element.append(
``,
{ html: true },
);
},
})
// Add the Turnstile widget to the target div
.on("div", {
element(element) {
if (element.getAttribute("id") === TURNSTILE_ATTR_NAME) {
element.append(
``,
{ html: true },
);
}
},
});
// Create a new response with the same properties as the original
const modifiedResponse = new Response(responseBody, {
status: originalResponse.status,
statusText: originalResponse.statusText,
headers: originalResponse.headers,
});
// Transform the response using HTMLRewriter
c.res = rewriter.transform(modifiedResponse);
});
// Handle POST requests for form submission with Turnstile validation
app.post("*", async (c) => {
const formData = await c.req.formData();
const token = formData.get("cf-turnstile-response");
const ip = c.req.header("CF-Connecting-IP");
// If no token, return an error
if (!token) {
return c.text("Missing Turnstile token", 400);
}
// Prepare verification data
const verifyFormData = new FormData();
verifyFormData.append("secret", c.env.SECRET_KEY || "");
verifyFormData.append("response", token.toString());
if (ip) verifyFormData.append("remoteip", ip);
// Verify the token with Turnstile API
const verifyResult = await fetch(
"https://challenges.cloudflare.com/turnstile/v0/siteverify",
{
method: "POST",
body: verifyFormData,
},
);
const outcome = await verifyResult.json<{ success: boolean }>;
// If verification fails, return an error
if (!outcome.success) {
return c.text("The provided Turnstile token was not valid!", 401);
}
// If verification succeeds, proceed with the original request
// You would typically handle the form submission logic here
// For this example, we'll just send a success response
return c.text("Form submission successful!");
});
// Default handler for GET requests
app.get("*", async (c) => {
// Fetch the original content (you'd replace this with your actual content source)
return await fetch(c.req.raw);
});
export default app;
```
**Python**
```py
from workers import WorkerEntrypoint
from pyodide.ffi import create_proxy
from js import HTMLRewriter, fetch
class Default(WorkerEntrypoint):
async def fetch(self, request):
site_key = self.env.SITE_KEY
attr_name = self.env.TURNSTILE_ATTR_NAME
res = await fetch(request)
class Append:
def element(self, element):
s = ''
element.append(s, {"html": True})
class AppendOnID:
def __init__(self, name):
self.name = name
def element(self, element):
# You are using the `getAttribute` method here to retrieve the `id` or `class` of an element
if element.getAttribute("id") == self.name:
div = f''
element.append(div, { "html": True })
# Instantiate the API to run on specific elements, for example, `head`, `div`
head = create_proxy(Append())
div = create_proxy(AppendOnID(attr_name))
new_res = HTMLRewriter.new().on("head", head).on("div", div).transform(res)
return new_res
```
Note
This is only half the implementation for Turnstile. The corresponding token that is a result of a widget being rendered also needs to be verified using the [Siteverify API](https://developers.cloudflare.com/turnstile/get-started/server-side-validation/). Refer to the example below for one such implementation.
**JavaScript**
```js
async function handlePost(request, env) {
const body = await request.formData();
// Turnstile injects a token in `cf-turnstile-response`.
const token = body.get('cf-turnstile-response');
const ip = request.headers.get('CF-Connecting-IP');
// Validate the token by calling the `/siteverify` API.
let formData = new FormData();
// `secret_key` here is the Turnstile Secret key, which should be set using Wrangler secrets
formData.append('secret', self.env.SECRET_KEY);
formData.append('response', token);
formData.append('remoteip', ip); //This is optional.
const url = 'https://challenges.cloudflare.com/turnstile/v0/siteverify';
const result = await fetch(url, {
body: formData,
method: 'POST',
});
const outcome = await result.json();
if (!outcome.success) {
return new Response('The provided Turnstile token was not valid!', { status: 401 });
}
// The Turnstile token was successfully validated. Proceed with your application logic.
// Validate login, redirect user, etc.
// Clone the original request with a new body
const newRequest = new Request(request, {
body: request.body, // Reuse the body
method: request.method,
headers: request.headers
});
return await fetch(newRequest);
}
export default {
async fetch(request, env) {
const SITE_KEY = env.SITE_KEY; // The Turnstile Sitekey of your widget (pass as env or secret)
const TURNSTILE_ATTR_NAME = 'your_id_to_replace'; // The id of the element to put a Turnstile widget in
let res = await fetch(request)
if (request.method === 'POST') {
return handlePost(request, env)
}
// Instantiate the API to run on specific elements, for example, `head`, `div`
let newRes = new HTMLRewriter()
// `.on` attaches the element handler and this allows you to match on element/attributes or to use the specific methods per the API
.on('head', {
element(element) {
// In this case, you are using `append` to add a new script to the `head` element
element.append(``, { html: true });
},
})
.on('div', {
element(element) {
// You are using the `getAttribute` method here to retrieve the `id` or `class` of an element
if (element.getAttribute('id') === ) {
element.append(``, { html: true });
}
},
})
.transform(res);
return newRes
}
}
```
Prevent potential errors when accessing request.body
The body of a [Request ↗](https://developer.mozilla.org/en-US/docs/Web/API/Request) can only be accessed once. If you previously used `request.formData()` in the same request, you may encounter a TypeError when attempting to access `request.body`.
To avoid errors, create a clone of the Request object with `request.clone()` for each subsequent attempt to access a Request's body. Keep in mind that Workers have a [memory limit of 128 MB per Worker](https://developers.cloudflare.com/workers/platform/limits/#memory) and loading particularly large files into a Worker's memory multiple times may reach this limit. To ensure memory usage does not reach this limit, consider using [Streams](https://developers.cloudflare.com/workers/runtime-apis/streams/).
```json
{"@context":"https://schema.org","@type":"TechArticle","@id":"https://developers.cloudflare.com/workers/examples/turnstile-html-rewriter/#page","headline":"Turnstile with Workers · Cloudflare Workers docs","description":"Inject Turnstile implicitly into HTML elements using the HTMLRewriter runtime API.","url":"https://developers.cloudflare.com/workers/examples/turnstile-html-rewriter/","inLanguage":"en","image":"https://developers.cloudflare.com/dev-products-preview.png","dateModified":"2026-04-23","publisher":{"@type":"Organization","name":"Cloudflare","url":"https://www.cloudflare.com/"},"isPartOf":{"@type":"WebSite","@id":"https://developers.cloudflare.com/#website","name":"Cloudflare Docs","url":"https://developers.cloudflare.com/"},"keywords":["JavaScript","TypeScript","Python"]}
{"@context":"https://schema.org","@type":"BreadcrumbList","itemListElement":[{"@type":"ListItem","position":1,"item":{"@id":"/directory/","name":"Directory"}},{"@type":"ListItem","position":2,"item":{"@id":"/workers/","name":"Workers"}},{"@type":"ListItem","position":3,"item":{"@id":"/workers/examples/","name":"Examples"}},{"@type":"ListItem","position":4,"item":{"@id":"/workers/examples/turnstile-html-rewriter/","name":"Turnstile with Workers"}}]}
```
---
---
title: Using the WebSockets API
description: Use the WebSockets API to communicate in real time with your Cloudflare Workers.
image: https://developers.cloudflare.com/dev-products-preview.png
---
> Documentation Index
> Fetch the complete documentation index at: https://developers.cloudflare.com/workers/llms.txt
> Use this file to discover all available pages before exploring further.
[Skip to content](#%5Ftop)
# Using the WebSockets API
Use the WebSockets API to communicate in real time with your Cloudflare Workers.
WebSockets allow you to communicate in real time with your Cloudflare Workers serverless functions. In this guide, you will learn the basics of WebSockets on Cloudflare Workers, both from the perspective of writing WebSocket servers in your Workers functions, as well as connecting to and working with those WebSocket servers as a client.
WebSockets are open connections sustained between the client and the origin server. Inside a WebSocket connection, the client and the origin can pass data back and forth without having to reestablish sessions. This makes exchanging data within a WebSocket connection fast. WebSockets are often used for real-time applications such as live chat and gaming.
Note
WebSockets utilize an event-based system for receiving and sending messages, much like the Workers runtime model of responding to events.
Note
If your application needs to coordinate among multiple WebSocket connections, such as a chat room or game match, you will need clients to send messages to a single-point-of-coordination. Durable Objects provide a single-point-of-coordination for Cloudflare Workers, and are often used in parallel with WebSockets to persist state over multiple clients and connections. In this case, refer to [Durable Objects](https://developers.cloudflare.com/durable-objects/) to get started, and prefer using the Durable Objects' extended [WebSockets API](https://developers.cloudflare.com/durable-objects/best-practices/websockets/).
## Write a WebSocket Server
WebSocket servers in Cloudflare Workers allow you to receive messages from a client in real time. This guide will show you how to set up a WebSocket server in Workers.
A client can make a WebSocket request in the browser by instantiating a new instance of `WebSocket`, passing in the URL for your Workers function:
**JavaScript**
```js
// In client-side JavaScript, connect to your Workers function using WebSockets:
const websocket = new WebSocket(
"wss://example-websocket.signalnerve.workers.dev",
);
```
Note
For more details about creating and working with WebSockets in the client, refer to [Writing a WebSocket client](#write-a-websocket-client).
When an incoming WebSocket request reaches the Workers function, it will contain an `Upgrade` header, set to the string value `websocket`. Check for this header before continuing to instantiate a WebSocket:
* [ JavaScript ](#tab-panel-12637)
* [ Rust ](#tab-panel-12638)
**JavaScript**
```js
async function handleRequest(request) {
const upgradeHeader = request.headers.get('Upgrade');
if (!upgradeHeader || upgradeHeader !== 'websocket') {
return new Response('Expected Upgrade: websocket', { status: 426 });
}
}
```
```rs
use worker::*;
#[event(fetch)]
async fn fetch(req: HttpRequest, _env: Env, _ctx: Context) -> Result {
let upgrade_header = match req.headers().get("Upgrade") {
Some(h) => h.to_str().unwrap(),
None => "",
};
if upgrade_header != "websocket" {
return worker::Response::error("Expected Upgrade: websocket", 426);
}
}
```
After you have appropriately checked for the `Upgrade` header, you can create a new instance of `WebSocketPair`, which contains server and client WebSockets. One of these WebSockets should be handled by the Workers function and the other should be returned as part of a `Response` with the [101 status code ↗](https://developer.mozilla.org/en-US/docs/Web/HTTP/Reference/Status/101), indicating the request is switching protocols:
* [ JavaScript ](#tab-panel-12639)
* [ Rust ](#tab-panel-12640)
**JavaScript**
```js
async function handleRequest(request) {
const upgradeHeader = request.headers.get('Upgrade');
if (!upgradeHeader || upgradeHeader !== 'websocket') {
return new Response('Expected Upgrade: websocket', { status: 426 });
}
const webSocketPair = new WebSocketPair();
const client = webSocketPair[0],
server = webSocketPair[1];
return new Response(null, {
status: 101,
webSocket: client,
});
}
```
```rs
use worker::*;
#[event(fetch)]
async fn fetch(req: HttpRequest, _env: Env, _ctx: Context) -> Result {
let upgrade_header = match req.headers().get("Upgrade") {
Some(h) => h.to_str().unwrap(),
None => "",
};
if upgrade_header != "websocket" {
return worker::Response::error("Expected Upgrade: websocket", 426);
}
let ws = WebSocketPair::new()?;
let client = ws.client;
let server = ws.server;
server.accept()?;
worker::Response::from_websocket(client)
}
```
The `WebSocketPair` constructor returns an Object, with the `0` and `1` keys each holding a `WebSocket` instance as its value. It is common to grab the two WebSockets from this pair using [Object.values ↗](https://developer.mozilla.org/en-US/docs/Web/JavaScript/Reference/Global%5Fobjects/Object/values) and [ES6 destructuring ↗](https://developer.mozilla.org/en-US/docs/Web/JavaScript/Reference/Operators/Destructuring%5Fassignment), as seen in the below example.
In order to begin communicating with the `client` WebSocket in your Worker, call `accept` on the `server` WebSocket. This will tell the Workers runtime that it should listen for WebSocket data and keep the connection open with your `client` WebSocket:
* [ JavaScript ](#tab-panel-12641)
* [ Rust ](#tab-panel-12642)
**JavaScript**
```js
async function handleRequest(request) {
const upgradeHeader = request.headers.get('Upgrade');
if (!upgradeHeader || upgradeHeader !== 'websocket') {
return new Response('Expected Upgrade: websocket', { status: 426 });
}
const webSocketPair = new WebSocketPair();
const [client, server] = Object.values(webSocketPair);
server.accept();
return new Response(null, {
status: 101,
webSocket: client,
});
}
```
```rs
use worker::*;
#[event(fetch)]
async fn fetch(req: HttpRequest, _env: Env, _ctx: Context) -> Result {
let upgrade_header = match req.headers().get("Upgrade") {
Some(h) => h.to_str().unwrap(),
None => "",
};
if upgrade_header != "websocket" {
return worker::Response::error("Expected Upgrade: websocket", 426);
}
let ws = WebSocketPair::new()?;
let client = ws.client;
let server = ws.server;
server.accept()?;
worker::Response::from_websocket(client)
}
```
WebSockets emit a number of [Events](https://developers.cloudflare.com/workers/runtime-apis/websockets/#events) that can be connected to using `addEventListener`. The below example hooks into the `message` event and emits a `console.log` with the data from it:
* [ JavaScript ](#tab-panel-12643)
* [ Rust ](#tab-panel-12644)
* [ Hono ](#tab-panel-12645)
**JavaScript**
```js
async function handleRequest(request) {
const upgradeHeader = request.headers.get('Upgrade');
if (!upgradeHeader || upgradeHeader !== 'websocket') {
return new Response('Expected Upgrade: websocket', { status: 426 });
}
const webSocketPair = new WebSocketPair();
const [client, server] = Object.values(webSocketPair);
server.accept();
server.addEventListener('message', event => {
console.log(event.data);
});
return new Response(null, {
status: 101,
webSocket: client,
});
}
```
```rs
use futures::StreamExt;
use worker::*;
#[event(fetch)]
async fn fetch(req: HttpRequest, _env: Env, _ctx: Context) -> Result {
let upgrade_header = match req.headers().get("Upgrade") {
Some(h) => h.to_str().unwrap(),
None => "",
};
if upgrade_header != "websocket" {
return worker::Response::error("Expected Upgrade: websocket", 426);
}
let ws = WebSocketPair::new()?;
let client = ws.client;
let server = ws.server;
server.accept()?;
wasm_bindgen_futures::spawn_local(async move {
let mut event_stream = server.events().expect("could not open stream");
while let Some(event) = event_stream.next().await {
match event.expect("received error in websocket") {
WebsocketEvent::Message(msg) => server.send(&msg.text()).unwrap(),
WebsocketEvent::Close(event) => console_log!("{:?}", event),
}
}
});
worker::Response::from_websocket(client)
}
```
**TypeScript**
```ts
import { Hono } from 'hono'
import { upgradeWebSocket } from 'hono/cloudflare-workers'
const app = new Hono()
app.get(
'*',
upgradeWebSocket((c) => {
return {
onMessage(event, ws) {
console.log('Received message from client:', event.data)
ws.send(`Echo: ${event.data}`)
},
onClose: () => {
console.log('WebSocket closed:', event)
},
onError: () => {
console.error('WebSocket error:', event)
},
}
})
)
export default app;
```
### Connect to the WebSocket server from a client
Writing WebSocket clients that communicate with your Workers function is a two-step process: first, create the WebSocket instance, and then attach event listeners to it:
**JavaScript**
```js
const websocket = new WebSocket(
"wss://websocket-example.signalnerve.workers.dev",
);
websocket.addEventListener("message", (event) => {
console.log("Message received from server");
console.log(event.data);
});
```
WebSocket clients can send messages back to the server using the [send](https://developers.cloudflare.com/workers/runtime-apis/websockets/#send) function:
**JavaScript**
```js
websocket.send("MESSAGE");
```
When the WebSocket interaction is complete, the client can close the connection using [close](https://developers.cloudflare.com/workers/runtime-apis/websockets/#close):
**JavaScript**
```js
websocket.close();
```
For an example of this in practice, refer to the [websocket-template ↗](https://github.com/cloudflare/websocket-template) to get started with WebSockets.
## Write a WebSocket client
Cloudflare Workers supports the `new WebSocket(url)` constructor. A Worker can establish a WebSocket connection to a remote server in the same manner as the client implementation described above.
Additionally, Cloudflare supports establishing WebSocket connections by making a fetch request to a URL with the `Upgrade` header set.
**JavaScript**
```js
async function websocket(url) {
// Make a fetch request including `Upgrade: websocket` header.
// The Workers Runtime will automatically handle other requirements
// of the WebSocket protocol, like the Sec-WebSocket-Key header.
let resp = await fetch(url, {
headers: {
Upgrade: "websocket",
},
});
// If the WebSocket handshake completed successfully, then the
// response has a `webSocket` property.
let ws = resp.webSocket;
if (!ws) {
throw new Error("server didn't accept WebSocket");
}
// Call accept() to indicate that you'll be handling the socket here
// in JavaScript, as opposed to returning it on to a client.
// You can pass { allowHalfOpen: true } if you need to coordinate
// the close handshake manually (for example, when proxying).
ws.accept();
// Now you can send and receive messages like before.
ws.send("hello");
ws.addEventListener("message", (msg) => {
console.log(msg.data);
});
}
```
## WebSocket close behavior
With the [web\_socket\_auto\_reply\_to\_close](https://developers.cloudflare.com/workers/configuration/compatibility-flags/#websocket-auto-reply-to-close) compatibility flag (enabled by default on compatibility dates on or after `2026-04-07`), the Workers runtime automatically replies to incoming Close frames and transitions `readyState` to `CLOSED` before firing the `close` event. You do not need to call `close()` in your `close` event handler, but doing so is safe (the call is silently ignored).
If you need half-open behavior (for example, for WebSocket proxying), pass `{ allowHalfOpen: true }` to `accept()`. Note that `new WebSocket(url)` always auto-replies after this flag takes effect. To get half-open behavior for a client WebSocket, use the `fetch()`\-based pattern shown above and call `ws.accept({ allowHalfOpen: true })`.
For more details, refer to [WebSocket close behavior](https://developers.cloudflare.com/workers/runtime-apis/websockets/#close-behavior).
## WebSocket compression
Cloudflare Workers supports WebSocket compression. Refer to [WebSocket Compression](https://developers.cloudflare.com/workers/configuration/compatibility-flags/#websocket-compression) for more information.
```json
{"@context":"https://schema.org","@type":"TechArticle","@id":"https://developers.cloudflare.com/workers/examples/websockets/#page","headline":"Using the WebSockets API · Cloudflare Workers docs","description":"Use the WebSockets API to communicate in real time with your Cloudflare Workers.","url":"https://developers.cloudflare.com/workers/examples/websockets/","inLanguage":"en","image":"https://developers.cloudflare.com/dev-products-preview.png","dateModified":"2026-04-23","publisher":{"@type":"Organization","name":"Cloudflare","url":"https://www.cloudflare.com/"},"isPartOf":{"@type":"WebSite","@id":"https://developers.cloudflare.com/#website","name":"Cloudflare Docs","url":"https://developers.cloudflare.com/"},"keywords":["WebSockets","JavaScript","Rust"]}
{"@context":"https://schema.org","@type":"BreadcrumbList","itemListElement":[{"@type":"ListItem","position":1,"item":{"@id":"/directory/","name":"Directory"}},{"@type":"ListItem","position":2,"item":{"@id":"/workers/","name":"Workers"}},{"@type":"ListItem","position":3,"item":{"@id":"/workers/examples/","name":"Examples"}},{"@type":"ListItem","position":4,"item":{"@id":"/workers/examples/websockets/","name":"Using the WebSockets API"}}]}
```
---
---
title: Tutorials
description: Step-by-step Workers tutorials and video guides to help you build projects on Cloudflare.
image: https://developers.cloudflare.com/dev-products-preview.png
---
> Documentation Index
> Fetch the complete documentation index at: https://developers.cloudflare.com/workers/llms.txt
> Use this file to discover all available pages before exploring further.
[Skip to content](#%5Ftop)
# Tutorials
View tutorials to help you get started with Workers.
| Name | Last Updated | Difficulty |
| -------------------------------------------------------------------------------------------------------------------------------------------------------------------------------------- | ------------------ | ------------ |
| [Deploy a Browser Run Worker with Durable Objects](https://developers.cloudflare.com/browser-run/how-to/browser-run-with-do/) | almost 3 years ago | Beginner |
| [Generate OG images for Astro sites](https://developers.cloudflare.com/browser-run/how-to/og-images-astro/) | | Intermediate |
| [Pre-render pages for crawlers](https://developers.cloudflare.com/browser-run/how-to/pre-render-pages/) | | Intermediate |
| [Build a Comments API](https://developers.cloudflare.com/d1/tutorials/build-a-comments-api/) | 4 months ago | Intermediate |
| [Build an Interactive ChatGPT App](https://developers.cloudflare.com/workers/demos/chatgpt-app/) | 9 months ago | Advanced |
| [Deploy an Express.js application on Cloudflare Workers](https://developers.cloudflare.com/workers/tutorials/deploy-an-express-app/) | 9 months ago | Beginner |
| [Connect to a PostgreSQL database with Cloudflare Workers](https://developers.cloudflare.com/workers/tutorials/postgres/) | about 1 year ago | Beginner |
| [Query D1 using Prisma ORM](https://developers.cloudflare.com/d1/tutorials/d1-and-prisma-orm/) | about 1 year ago | Beginner |
| [Migrate from Netlify to Workers](https://developers.cloudflare.com/workers/static-assets/migration-guides/netlify-to-workers/) | about 1 year ago | Beginner |
| [Migrate from Vercel to Workers](https://developers.cloudflare.com/workers/static-assets/migration-guides/vercel-to-workers/) | about 1 year ago | Beginner |
| [Tutorial - React SPA with an API](https://developers.cloudflare.com/workers/vite-plugin/tutorial/) | over 1 year ago | Beginner |
| [Connect to a MySQL database with Cloudflare Workers](https://developers.cloudflare.com/workers/tutorials/mysql/) | over 1 year ago | Beginner |
| [Set up and use a Prisma Postgres database](https://developers.cloudflare.com/workers/tutorials/using-prisma-postgres-with-workers/) | over 1 year ago | Beginner |
| [Store and Catalog AI Generated Images with R2 (Part 3)](https://developers.cloudflare.com/workers-ai/guides/tutorials/image-generation-playground/image-generator-store-and-catalog/) | over 1 year ago | Beginner |
| [Build a Retrieval Augmented Generation (RAG) AI](https://developers.cloudflare.com/workers-ai/guides/tutorials/build-a-retrieval-augmented-generation-ai/) | over 1 year ago | Beginner |
| [Using BigQuery with Workers AI](https://developers.cloudflare.com/workers-ai/guides/tutorials/using-bigquery-with-workers-ai/) | over 1 year ago | Beginner |
| [How to Build an Image Generator using Workers AI](https://developers.cloudflare.com/workers-ai/guides/tutorials/image-generation-playground/) | almost 2 years ago | Beginner |
| [Build an AI Image Generator Playground (Part 1)](https://developers.cloudflare.com/workers-ai/guides/tutorials/image-generation-playground/image-generator-flux/) | almost 2 years ago | Beginner |
| [Add New AI Models to your Playground (Part 2)](https://developers.cloudflare.com/workers-ai/guides/tutorials/image-generation-playground/image-generator-flux-newmodels/) | almost 2 years ago | Beginner |
| [Use event notification to summarize PDF files on upload](https://developers.cloudflare.com/r2/tutorials/summarize-pdf/) | almost 2 years ago | Intermediate |
| [Handle rate limits of external APIs](https://developers.cloudflare.com/queues/tutorials/handle-rate-limits/) | almost 2 years ago | Beginner |
| [Build an API to access D1 using a proxy Worker](https://developers.cloudflare.com/d1/tutorials/build-an-api-to-access-d1/) | almost 2 years ago | Intermediate |
| [Deploy a Worker](https://developers.cloudflare.com/pulumi/tutorial/hello-world/) | almost 2 years ago | Beginner |
| [Build a web crawler with Queues and Browser Run](https://developers.cloudflare.com/queues/tutorials/web-crawler-with-browser-run/) | almost 2 years ago | Intermediate |
| [Create a fine-tuned OpenAI model with R2](https://developers.cloudflare.com/workers/tutorials/create-finetuned-chatgpt-ai-models-with-r2/) | about 2 years ago | Intermediate |
| [Build a Slackbot](https://developers.cloudflare.com/workers/tutorials/build-a-slackbot/) | about 2 years ago | Beginner |
| [Use Workers KV directly from Rust](https://developers.cloudflare.com/workers/tutorials/workers-kv-from-rust/) | about 2 years ago | Intermediate |
| [Build a todo list Jamstack application](https://developers.cloudflare.com/workers/tutorials/build-a-jamstack-app/) | about 2 years ago | Beginner |
| [Send Emails With Postmark](https://developers.cloudflare.com/workers/tutorials/send-emails-with-postmark/) | about 2 years ago | Beginner |
| [Send Emails With Resend](https://developers.cloudflare.com/workers/tutorials/send-emails-with-resend/) | about 2 years ago | Beginner |
| [Log and store upload events in R2 with event notifications](https://developers.cloudflare.com/r2/tutorials/upload-logs-event-notifications/) | over 2 years ago | Beginner |
| [Create custom headers for Cloudflare Access-protected origins with Workers](https://developers.cloudflare.com/cloudflare-one/tutorials/access-workers/) | over 2 years ago | Intermediate |
| [Create a serverless, globally distributed time-series API with Timescale](https://developers.cloudflare.com/hyperdrive/tutorials/serverless-timeseries-api-with-timescale/) | over 2 years ago | Beginner |
| [GitHub SMS notifications using Twilio](https://developers.cloudflare.com/workers/tutorials/github-sms-notifications-using-twilio/) | almost 3 years ago | Beginner |
| [Deploy a real-time chat application](https://developers.cloudflare.com/workers/tutorials/deploy-a-realtime-chat-app/) | almost 3 years ago | Intermediate |
| [Build a QR code generator](https://developers.cloudflare.com/workers/tutorials/build-a-qr-code-generator/) | about 3 years ago | Beginner |
| [Securely access and upload assets with Cloudflare R2](https://developers.cloudflare.com/workers/tutorials/upload-assets-with-r2/) | about 3 years ago | Beginner |
| [OpenAI GPT function calling with JavaScript and Cloudflare Workers](https://developers.cloudflare.com/workers/tutorials/openai-function-calls-workers/) | about 3 years ago | Beginner |
| [Handle form submissions with Airtable](https://developers.cloudflare.com/workers/tutorials/handle-form-submissions-with-airtable/) | about 3 years ago | Beginner |
| [Connect to and query your Turso database using Workers](https://developers.cloudflare.com/workers/tutorials/connect-to-turso-using-workers/) | over 3 years ago | Beginner |
| [Generate YouTube thumbnails with Workers and Cloudflare Image Resizing](https://developers.cloudflare.com/workers/tutorials/generate-youtube-thumbnails-with-workers-and-images/) | over 3 years ago | Intermediate |
```json
{"@context":"https://schema.org","@type":"WebPage","@id":"https://developers.cloudflare.com/workers/tutorials/#page","headline":"Tutorials · Cloudflare Workers docs","description":"Step-by-step Workers tutorials and video guides to help you build projects on Cloudflare.","url":"https://developers.cloudflare.com/workers/tutorials/","inLanguage":"en","image":"https://developers.cloudflare.com/dev-products-preview.png","dateModified":"2026-05-19","publisher":{"@type":"Organization","name":"Cloudflare","url":"https://www.cloudflare.com/"},"isPartOf":{"@type":"WebSite","@id":"https://developers.cloudflare.com/#website","name":"Cloudflare Docs","url":"https://developers.cloudflare.com/"}}
{"@context":"https://schema.org","@type":"BreadcrumbList","itemListElement":[{"@type":"ListItem","position":1,"item":{"@id":"/directory/","name":"Directory"}},{"@type":"ListItem","position":2,"item":{"@id":"/workers/","name":"Workers"}},{"@type":"ListItem","position":3,"item":{"@id":"/workers/tutorials/","name":"Tutorials"}}]}
```
---
---
title: Build a todo list Jamstack application
description: This tutorial explains how to build a todo list application using HTML, CSS, and JavaScript.
image: https://developers.cloudflare.com/dev-products-preview.png
---
> Documentation Index
> Fetch the complete documentation index at: https://developers.cloudflare.com/workers/llms.txt
> Use this file to discover all available pages before exploring further.
[Skip to content](#%5Ftop)
# Build a todo list Jamstack application
In this tutorial, you will build a todo list application using HTML, CSS, and JavaScript. The application data will be stored in [Workers KV](https://developers.cloudflare.com/kv/api/).
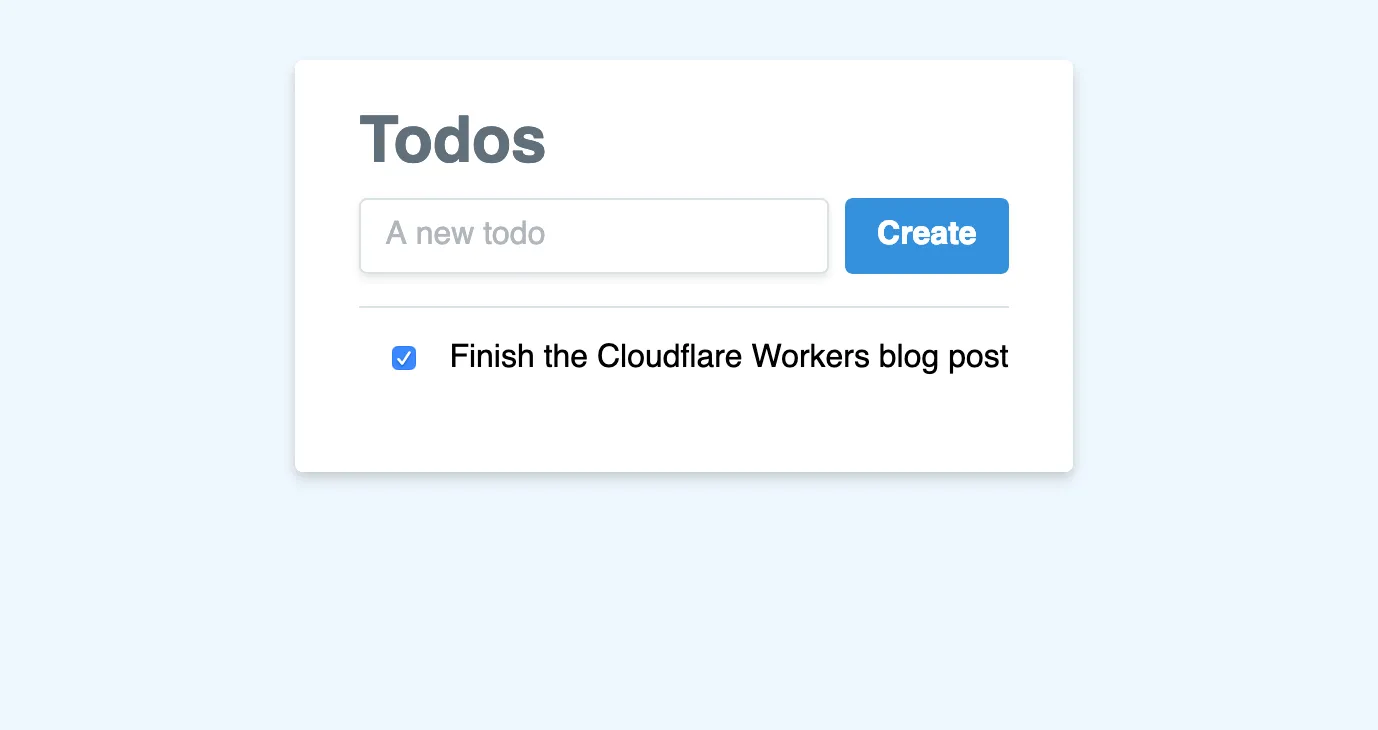
Before starting this project, you should have some experience with HTML, CSS, and JavaScript. You will learn:
1. How building with Workers makes allows you to focus on writing code and ship finished products.
2. How the addition of Workers KV makes this tutorial a great introduction to building full, data-driven applications.
If you would like to see the finished code for this project, find the [project on GitHub ↗](https://github.com/lauragift21/cloudflare-workers-todos) and refer to the [live demo ↗](https://todos.examples.workers.dev/) to review what you will be building.
## Before you start
All of the tutorials assume you have already completed the [Get started guide](https://developers.cloudflare.com/workers/get-started/guide/), which gets you set up with a Cloudflare Workers account, [C3 ↗](https://github.com/cloudflare/workers-sdk/tree/main/packages/create-cloudflare), and [Wrangler](https://developers.cloudflare.com/workers/wrangler/install-and-update/).
## 1\. Create a new Workers project
First, use the [create-cloudflare ↗](https://www.npmjs.com/package/create-cloudflare) CLI tool to create a new Cloudflare Workers project named `todos`. In this tutorial, you will use the default `Hello World` template to create a Workers project.
npm yarn pnpm
```
npm create cloudflare@latest -- todos
```
```
yarn create cloudflare todos
```
```
pnpm create cloudflare@latest todos
```
For setup, select the following options:
* For _What would you like to start with?_, choose `Hello World example`.
* For _Which template would you like to use?_, choose `Worker only`.
* For _Which language do you want to use?_, choose `JavaScript`.
* For _Do you want to use git for version control?_, choose `Yes`.
* For _Do you want to deploy your application?_, choose `No` (we will be making some changes before deploying).
Move into your newly created directory:
```sh
cd todos
```
Inside of your new `todos` Worker project directory, `index.js` represents the entry point to your Cloudflare Workers application.
All incoming HTTP requests to a Worker are passed to the [fetch() handler](https://developers.cloudflare.com/workers/runtime-apis/handlers/fetch/) as a [request](https://developers.cloudflare.com/workers/runtime-apis/request/) object. After a request is received by the Worker, the response your application constructs will be returned to the user. This tutorial will guide you through understanding how the request/response pattern works and how you can use it to build fully featured applications.
**JavaScript**
```js
export default {
async fetch(request, env, ctx) {
return new Response("Hello World!");
},
};
```
In your default `index.js` file, you can see that request/response pattern in action. The `fetch` constructs a new `Response` with the body text `'Hello World!'`.
When a Worker receives a `request`, the Worker returns the newly constructed response to the client. Your Worker will serve new responses directly from [Cloudflare's global network ↗](https://www.cloudflare.com/network) instead of continuing to your origin server. A standard server would accept requests and return responses. Cloudflare Workers allows you to respond by constructing responses directly on the Cloudflare global network.
## 2\. Review project details
Any project you deploy to Cloudflare Workers can make use of modern JavaScript tooling like [ES modules](https://developers.cloudflare.com/workers/reference/migrate-to-module-workers/), `npm` packages, and [async/await ↗](https://developer.mozilla.org/en-US/docs/Web/JavaScript/Reference/Statements/async%5Ffunction) functions to build your application. In addition to writing Workers, you can use Workers to [build full applications](https://developers.cloudflare.com/workers/tutorials/build-a-slackbot/) using the same tooling and process as in this tutorial.
In this tutorial, you will build a todo list application running on Workers that allows reading data from a [KV](https://developers.cloudflare.com/kv/) store and using the data to populate an HTML response to send to the client.
The work needed to create this application is split into three tasks:
1. Write data to KV.
2. Rendering data from KV.
3. Adding todos from the application UI.
For the remainder of this tutorial you will complete each task, iterating on your application, and then publish it to your own domain.
## 3\. Write data to KV
To begin, you need to understand how to populate your todo list with actual data. To do this, use [Cloudflare Workers KV](https://developers.cloudflare.com/kv/) — a key-value store that you can access inside of your Worker to read and write data.
To get started with KV, set up a namespace. All of your cached data will be stored inside that namespace and, with configuration, you can access that namespace inside the Worker with a predefined variable. Use Wrangler to create a new namespace called `TODOS` with the [kv namespace create command](https://developers.cloudflare.com/workers/wrangler/commands/kv/#kv-namespace-create) and get the associated namespace ID by running the following command in your terminal:
**Create a new KV namespace**
```sh
npx wrangler kv namespace create "TODOS" --preview
```
The associated namespace can be combined with a `--preview` flag to interact with a preview namespace instead of a production namespace. Namespaces can be added to your application by defining them inside your Wrangler configuration. Copy your newly created namespace ID, and in your [Wrangler configuration file](https://developers.cloudflare.com/workers/wrangler/configuration/), define a `kv_namespaces` key to set up your namespace:
* [ wrangler.jsonc ](#tab-panel-13057)
* [ wrangler.toml ](#tab-panel-13058)
**JSONC**
```jsonc
{
"kv_namespaces": [
{
"binding": "TODOS",
"id": "",
"preview_id": ""
}
]
}
```
**TOML**
```toml
[[kv_namespaces]]
binding = "TODOS"
id = ""
preview_id = ""
```
The defined namespace, `TODOS`, will now be available inside of your codebase. With that, it is time to understand the [KV API](https://developers.cloudflare.com/kv/api/). A KV namespace has three primary methods you can use to interface with your cache: `get`, `put`, and `delete`.
Start storing data by defining an initial set of data, which you will put inside of the cache using the `put` method. The following example defines a `defaultData` object instead of an array of todo items. You may want to store metadata and other information inside of this cache object later on. Given that data object, use `JSON.stringify` to add a string into the cache:
**JavaScript**
```js
export default {
async fetch(request, env, ctx) {
const defaultData = {
todos: [
{
id: 1,
name: "Finish the Cloudflare Workers blog post",
completed: false,
},
],
};
await env.TODOS.put("data", JSON.stringify(defaultData));
return new Response("Hello World!");
},
};
```
Workers KV is an eventually consistent, global datastore. Any writes within a region are immediately reflected within that same region but will not be immediately available in other regions. However, those writes will eventually be available everywhere and, at that point, Workers KV guarantees that data within each region will be consistent.
Given the presence of data in the cache and the assumption that your cache is eventually consistent, this code needs a slight adjustment: the application should check the cache and use its value, if the key exists. If it does not, you will use `defaultData` as the data source for now (it should be set in the future) and write it to the cache for future use. After breaking out the code into a few functions for simplicity, the result looks like this:
**JavaScript**
```js
export default {
async fetch(request, env, ctx) {
const defaultData = {
todos: [
{
id: 1,
name: "Finish the Cloudflare Workers blog post",
completed: false,
},
],
};
const setCache = (data) => env.TODOS.put("data", data);
const getCache = () => env.TODOS.get("data");
let data;
const cache = await getCache();
if (!cache) {
await setCache(JSON.stringify(defaultData));
data = defaultData;
} else {
data = JSON.parse(cache);
}
return new Response(JSON.stringify(data));
},
};
```
## Render data from KV
Given the presence of data in your code, which is the cached data object for your application, you should take this data and render it in a user interface.
To do this, make a new `html` variable in your Workers script and use it to build up a static HTML template that you can serve to the client. In `fetch`, construct a new `Response` with a `Content-Type: text/html` header and serve it to the client:
**JavaScript**
```js
const html = `
Todos
Todos
`;
async fetch (request, env, ctx) {
// previous code
return new Response(html, {
headers: {
'Content-Type': 'text/html'
}
});
}
```
You have a static HTML site being rendered and you can begin populating it with data. In the body, add a `div` tag with an `id` of `todos`:
**JavaScript**
```js
const html = `
Todos
Todos
`;
```
Add a `
`;
```
Your static page can take in `window.todos` and render HTML based on it, but you have not actually passed in any data from KV. To do this, you will need to make a few changes.
First, your `html` variable will change to a function. The function will take in a `todos` argument, which will populate the `window.todos` variable in the above code sample:
**JavaScript**
```js
const html = (todos) => `
`;
```
This code updates the cache. Remember that the KV cache is eventually consistent — even if you were to update your Worker to read from the cache and return it, you have no guarantees it will actually be up to date. Instead, update the list of todos locally, by taking your original code for rendering the todo list, making it a reusable function called `populateTodos`, and calling it when the page loads and when the cache request has finished:
**JavaScript**
```js
const html = (todos) => `
`;
```
With the client-side code in place, deploying the new version of the function should put all these pieces together. The result is an actual dynamic todo list.
## 5\. Update todos from the application UI
For the final piece of your todo list, you need to be able to update todos — specifically, marking them as completed.
Luckily, a great deal of the infrastructure for this work is already in place. You can update the todo list data in the cache, as evidenced by your `createTodo` function. Performing updates on a todo is more of a client-side task than a Worker-side one.
To start, the `populateTodos` function can be updated to generate a `div` for each todo. In addition, move the name of the todo into a child element of that `div`:
**JavaScript**
```js
const html = (todos) => `
`;
```
You have designed the client-side part of this code to handle an array of todos and render a list of HTML elements. There is a number of things that you have been doing that you have not quite had a use for yet – specifically, the inclusion of IDs and updating the todo's completed state. These things work well together to actually support updating todos in the application UI.
To start, it would be useful to attach the ID of each todo in the HTML. By doing this, you can then refer to the element later in order to correspond it to the todo in the JavaScript part of your code. Data attributes and the corresponding `dataset` method in JavaScript are a perfect way to implement this. When you generate your `div` element for each todo, you can attach a data attribute called todo to each `div`:
**JavaScript**
```js
const html = (todos) => `
`;
```
Inside your HTML, each `div` for a todo now has an attached data attribute, which looks like:
```html
```
You can now generate a checkbox for each todo element. This checkbox will default to unchecked for new todos but you can mark it as checked as the element is rendered in the window:
**JavaScript**
```js
const html = (todos) => `
`;
```
The checkbox is set up to correctly reflect the value of completed on each todo but it does not yet update when you actually check the box. To do this, attach the `completeTodo` function as an event listener on the `click` event. Inside the function, inspect the checkbox element, find its parent (the todo `div`), and use its `todo` data attribute to find the corresponding todo in the data array. You can toggle the completed status, update its properties, and rerender the UI:
**JavaScript**
```js
const html = (todos) => `
`;
```
The final result of your code is a system that checks the `todos` variable, updates your Cloudflare KV cache with that value, and then does a re-render of the UI based on the data it has locally.
## 6\. Conclusion and next steps
By completing this tutorial, you have built a static HTML, CSS, and JavaScript application that is transparently powered by Workers and Workers KV, which take full advantage of Cloudflare's global network.
If you would like to keep improving on your project, you can implement a better design (you can refer to a live version available at [todos.signalnerve.workers.dev ↗](https://todos.signalnerve.workers.dev/)), or make additional improvements to security and speed.
You may also want to add user-specific caching. Right now, the cache key is always `data` – this means that any visitor to the site will share the same todo list with other visitors. Within your Worker, you could use values from the client request to create and maintain user-specific lists. For example, you may generate a cache key based on the requesting IP:
**JavaScript**
```js
export default {
async fetch(request, env, ctx) {
const defaultData = {
todos: [
{
id: 1,
name: "Finish the Cloudflare Workers blog post",
completed: false,
},
],
};
const setCache = (key, data) => env.TODOS.put(key, data);
const getCache = (key) => env.TODOS.get(key);
const ip = request.headers.get("CF-Connecting-IP");
const myKey = `data-${ip}`;
if (request.method === "PUT") {
const body = await request.text();
try {
JSON.parse(body);
await setCache(myKey, body);
return new Response(body, { status: 200 });
} catch (err) {
return new Response(err, { status: 500 });
}
}
let data;
const cache = await getCache();
if (!cache) {
await setCache(myKey, JSON.stringify(defaultData));
data = defaultData;
} else {
data = JSON.parse(cache);
}
const body = html(JSON.stringify(data.todos).replace(/ `
Todos
Todos
`;
export default {
async fetch(request, env, ctx) {
const defaultData = {
todos: [
{
id: 1,
name: "Finish the Cloudflare Workers blog post",
completed: false,
},
],
};
const setCache = (key, data) => env.TODOS.put(key, data);
const getCache = (key) => env.TODOS.get(key);
const ip = request.headers.get("CF-Connecting-IP");
const myKey = `data-${ip}`;
if (request.method === "PUT") {
const body = await request.text();
try {
JSON.parse(body);
await setCache(myKey, body);
return new Response(body, { status: 200 });
} catch (err) {
return new Response(err, { status: 500 });
}
}
let data;
const cache = await getCache();
if (!cache) {
await setCache(myKey, JSON.stringify(defaultData));
data = defaultData;
} else {
data = JSON.parse(cache);
}
const body = html(JSON.stringify(data.todos).replace(/ Documentation Index
> Fetch the complete documentation index at: https://developers.cloudflare.com/workers/llms.txt
> Use this file to discover all available pages before exploring further.
[Skip to content](#%5Ftop)
# Build a QR code generator
In this tutorial, you will build and publish a Worker application that generates QR codes.
If you would like to review the code for this tutorial, the final version of the codebase is [available on GitHub ↗](https://github.com/kristianfreeman/workers-qr-code-generator). You can take the code provided in the example repository, customize it, and deploy it for use in your own projects.
## Before you start
All of the tutorials assume you have already completed the [Get started guide](https://developers.cloudflare.com/workers/get-started/guide/), which gets you set up with a Cloudflare Workers account, [C3 ↗](https://github.com/cloudflare/workers-sdk/tree/main/packages/create-cloudflare), and [Wrangler](https://developers.cloudflare.com/workers/wrangler/install-and-update/).
## 1\. Create a new Workers project
First, use the [create-cloudflare CLI](https://developers.cloudflare.com/pages/get-started/c3) to create a new Cloudflare Workers project. To do this, open a terminal window and run the following command:
npm yarn pnpm
```
npm create cloudflare@latest -- qr-code-generator
```
```
yarn create cloudflare qr-code-generator
```
```
pnpm create cloudflare@latest qr-code-generator
```
For setup, select the following options:
* For _What would you like to start with?_, choose `Hello World example`.
* For _Which template would you like to use?_, choose `Worker only`.
* For _Which language do you want to use?_, choose `JavaScript`.
* For _Do you want to use git for version control?_, choose `Yes`.
* For _Do you want to deploy your application?_, choose `No` (we will be making some changes before deploying).
Then, move into your newly created directory:
```sh
cd qr-code-generator
```
Inside of your new `qr-code-generator` Worker project directory, `index.js` represents the entry point to your Cloudflare Workers application.
All Cloudflare Workers applications start by listening for `fetch` events, which are triggered when a client makes a request to a Workers route. After a request is received by the Worker, the response your application constructs will be returned to the user. This tutorial will guide you through understanding how the request/response pattern works and how you can use it to build fully featured applications.
**JavaScript**
```js
export default {
async fetch(request, env, ctx) {
return new Response("Hello Worker!");
},
};
```
In your default `index.js` file, you can see that request/response pattern in action. The `fetch` constructs a new `Response` with the body text `'Hello Worker!'`.
When a Worker receives a `fetch` event, the Worker returns the newly constructed response to the client. Your Worker will serve new responses directly from [Cloudflare's global network ↗](https://www.cloudflare.com/network) instead of continuing to your origin server. A standard server would accept requests and return responses. Cloudflare Workers allows you to respond quickly by constructing responses directly on the Cloudflare global network.
## 2\. Handle Incoming Request
Any project you publish to Cloudflare Workers can make use of modern JavaScript tooling like ES modules, `npm` packages, and [async/await ↗](https://developer.mozilla.org/en-US/docs/Web/JavaScript/Reference/Statements/async%5Ffunction) functions to build your application. In addition to writing Workers, you can use Workers to [build full applications](https://developers.cloudflare.com/workers/tutorials/build-a-slackbot/) using the same tooling and process as in this tutorial.
The QR code generator you will build in this tutorial will be a Worker that runs on a single route and receives requests. Each request will contain a text message (a URL, for example), which the function will encode into a QR code. The function will then respond with the QR code in PNG image format.
At this point in the tutorial, your Worker function can receive requests and return a simple response with the text `"Hello Worker!"`. To handle data coming into your Worker, check if the incoming request is a `POST` request:
**JavaScript**
```js
export default {
async fetch(request, env, ctx) {
if (request.method === "POST") {
return new Response("Hello Worker!");
}
},
};
```
Currently, if an incoming request is not a `POST`, the function will return `undefined`. However, a Worker always needs to return a `Response`. Since the function should only accept incoming `POST` requests, return a new `Response` with a [405 status code ↗](https://developer.mozilla.org/en-US/docs/Web/HTTP/Reference/Status/405) if the incoming request is not a `POST`:
**JavaScript**
```js
export default {
async fetch(request, env, ctx) {
if (request.method === "POST") {
return new Response("Hello Worker!");
}
return new Response("Expected POST request", {
status: 405,
});
},
};
```
You have established the basic flow of the request. You will now set up a response to incoming valid requests. If a `POST` request comes in, the function should generate a QR code. To start, move the `"Hello Worker!"` response into a new function, `generateQRCode`, which will ultimately contain the bulk of your function’s logic:
**JavaScript**
```js
export default {
async fetch(request, env, ctx) {
if (request.method === "POST") {
}
},
};
async function generateQRCode(request) {
// TODO: Include QR code generation
return new Response("Hello worker!");
}
```
With the `generateQRCode` function filled out, call it within `fetch` function and return its result directly to the client:
**JavaScript**
```js
export default {
async fetch(request, env, ctx) {
if (request.method === "POST") {
return generateQRCode(request);
}
},
};
```
## 3\. Build a QR code generator
All projects deployed to Cloudflare Workers support npm packages. This support makes it easy to rapidly build out functionality in your Workers. The ['qrcode-svg' ↗](https://github.com/papnkukn/qrcode-svg) package is a great way to take text and encode it into a QR code. In the command line, install and save 'qrcode-svg' to your project’s 'package.json':
npm yarn pnpm bun
```
npm i qrcode-svg
```
```
yarn add qrcode-svg
```
```
pnpm add qrcode-svg
```
```
bun add qrcode-svg
```
In `index.js`, import the `qrcode-svg` package as the variable `QRCode`. In the `generateQRCode` function, parse the incoming request as JSON using `request.json`, and generate a new QR code using the `qrcode-svg` package. The QR code is generated as an SVG. Construct a new instance of `Response`, passing in the SVG data as the body, and a `Content-Type` header of `image/svg+xml`. This will allow browsers to properly parse the data coming back from your Worker as an image:
**JavaScript**
```js
import QRCode from "qrcode-svg";
async function generateQRCode(request) {
const { text } = await request.json();
const qr = new QRCode({ content: text || "https://workers.dev" });
return new Response(qr.svg(), {
headers: { "Content-Type": "image/svg+xml" },
});
}
```
## 4\. Test in an application UI
The Worker will execute when a user sends a `POST` request to a route, but it is best practice to also provide a proper interface for testing the function. At this point in the tutorial, if any request is received by your function that is not a `POST`, a `405` response is returned. The new version of `fetch` should return a new `Response` with a static HTML document instead of the `405` error:
**JavaScript**
```js
export default {
async fetch(request, env, ctx) {
if (request.method === "POST") {
return generateQRCode(request);
}
return new Response(landing, {
headers: {
"Content-Type": "text/html",
},
});
},
};
async function generateQRCode(request) {
const { text } = await request.json();
const qr = new QRCode({ content: text || "https://workers.dev" });
return new Response(qr.svg(), {
headers: { "Content-Type": "image/svg+xml" },
});
}
const landing = `
QR Generator
Click the below button to generate a new QR code. This will make a request to your Worker.
Generated QR Code Image
`;
```
The `landing` variable, which is a static HTML string, sets up an `input` tag and a corresponding `button`, which calls the `generateQRCode` function. This function will make an HTTP `POST` request back to your Worker, allowing you to see the corresponding QR code image returned on the page.
With the above steps complete, your Worker is ready. The full version of the code looks like this:
**JavaScript**
```js
const QRCode = require("qrcode-svg");
export default {
async fetch(request, env, ctx) {
if (request.method === "POST") {
return generateQRCode(request);
}
return new Response(landing, {
headers: {
"Content-Type": "text/html",
},
});
},
};
async function generateQRCode(request) {
const { text } = await request.json();
const qr = new QRCode({ content: text || "https://workers.dev" });
return new Response(qr.svg(), {
headers: { "Content-Type": "image/svg+xml" },
});
}
const landing = `
QR Generator
Click the below button to generate a new QR code. This will make a request to your Worker.
Generated QR Code Image
`;
```
## 5\. Deploy your Worker
With all the above steps complete, you have written the code for a QR code generator on Cloudflare Workers.
Wrangler has built-in support for bundling, uploading, and releasing your Cloudflare Workers application. To do this, run `npx wrangler deploy`, which will build and deploy your code.
**Deploy your Worker project**
```sh
npx wrangler deploy
```
## Related resources
In this tutorial, you built and deployed a Worker application for generating QR codes. If you would like to see the full source code for this application, you can find it [on GitHub ↗](https://github.com/kristianfreeman/workers-qr-code-generator).
If you want to get started building your own projects, review the existing list of [Quickstart templates](https://developers.cloudflare.com/workers/get-started/quickstarts/).
```json
{"@context":"https://schema.org","@type":"TechArticle","@id":"https://developers.cloudflare.com/workers/tutorials/build-a-qr-code-generator/#page","headline":"Build a QR code generator · Cloudflare Workers docs","description":"This tutorial shows you how to build and publish a Worker application that generates QR codes. The final version of the codebase is available on GitHub.","url":"https://developers.cloudflare.com/workers/tutorials/build-a-qr-code-generator/","inLanguage":"en","image":"https://developers.cloudflare.com/dev-products-preview.png","dateModified":"2026-04-23","publisher":{"@type":"Organization","name":"Cloudflare","url":"https://www.cloudflare.com/"},"isPartOf":{"@type":"WebSite","@id":"https://developers.cloudflare.com/#website","name":"Cloudflare Docs","url":"https://developers.cloudflare.com/"},"keywords":["JavaScript"]}
{"@context":"https://schema.org","@type":"BreadcrumbList","itemListElement":[{"@type":"ListItem","position":1,"item":{"@id":"/directory/","name":"Directory"}},{"@type":"ListItem","position":2,"item":{"@id":"/workers/","name":"Workers"}},{"@type":"ListItem","position":3,"item":{"@id":"/workers/tutorials/","name":"Tutorials"}},{"@type":"ListItem","position":4,"item":{"@id":"/workers/tutorials/build-a-qr-code-generator/","name":"Build a QR code generator"}}]}
```
---
---
title: Build a Slackbot
description: Learn how to build a Slackbot with Hono and TypeScript in Cloudflare Workers
image: https://developers.cloudflare.com/dev-products-preview.png
---
> Documentation Index
> Fetch the complete documentation index at: https://developers.cloudflare.com/workers/llms.txt
> Use this file to discover all available pages before exploring further.
[Skip to content](#%5Ftop)
# Build a Slackbot
In this tutorial, you will build a [Slack ↗](https://slack.com) bot using [Cloudflare Workers](https://developers.cloudflare.com/workers/). Your bot will make use of GitHub webhooks to send messages to a Slack channel when issues are updated or created, and allow users to write a command to look up GitHub issues from inside Slack.
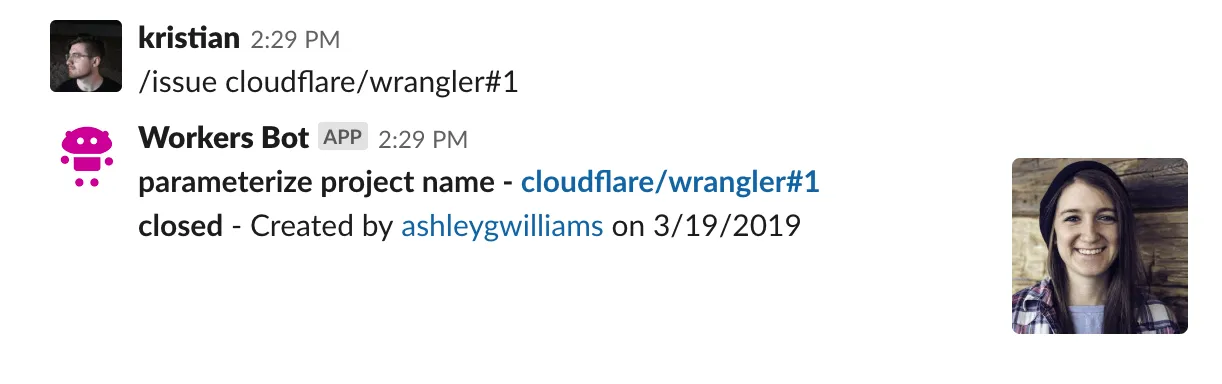
This tutorial is recommended for people who are familiar with writing web applications. You will use TypeScript as the programming language and [Hono ↗](https://hono.dev/) as the web framework. If you have built an application with tools like [Node ↗](https://nodejs.org) and [Express ↗](https://expressjs.com), this project will feel very familiar to you. If you are new to writing web applications or have wanted to build something like a Slack bot in the past, but were intimidated by deployment or configuration, Workers will be a way for you to focus on writing code and shipping projects.
If you would like to review the code or how the bot works in an actual Slack channel before proceeding with this tutorial, you can access the final version of the codebase [on GitHub ↗](https://github.com/yusukebe/workers-slack-bot). From GitHub, you can add your own Slack API keys and deploy it to your own Slack channels for testing.
---
## Before you start
All of the tutorials assume you have already completed the [Get started guide](https://developers.cloudflare.com/workers/get-started/guide/), which gets you set up with a Cloudflare Workers account, [C3 ↗](https://github.com/cloudflare/workers-sdk/tree/main/packages/create-cloudflare), and [Wrangler](https://developers.cloudflare.com/workers/wrangler/install-and-update/).
## Set up Slack
This tutorial assumes that you already have a Slack account, and the ability to create and manage Slack applications.
### Configure a Slack application
To post messages from your Cloudflare Worker into a Slack channel, you will need to create an application in Slack’s UI. To do this, go to Slack’s API section, at [api.slack.com/apps ↗](https://api.slack.com/apps), and select **Create New App**.
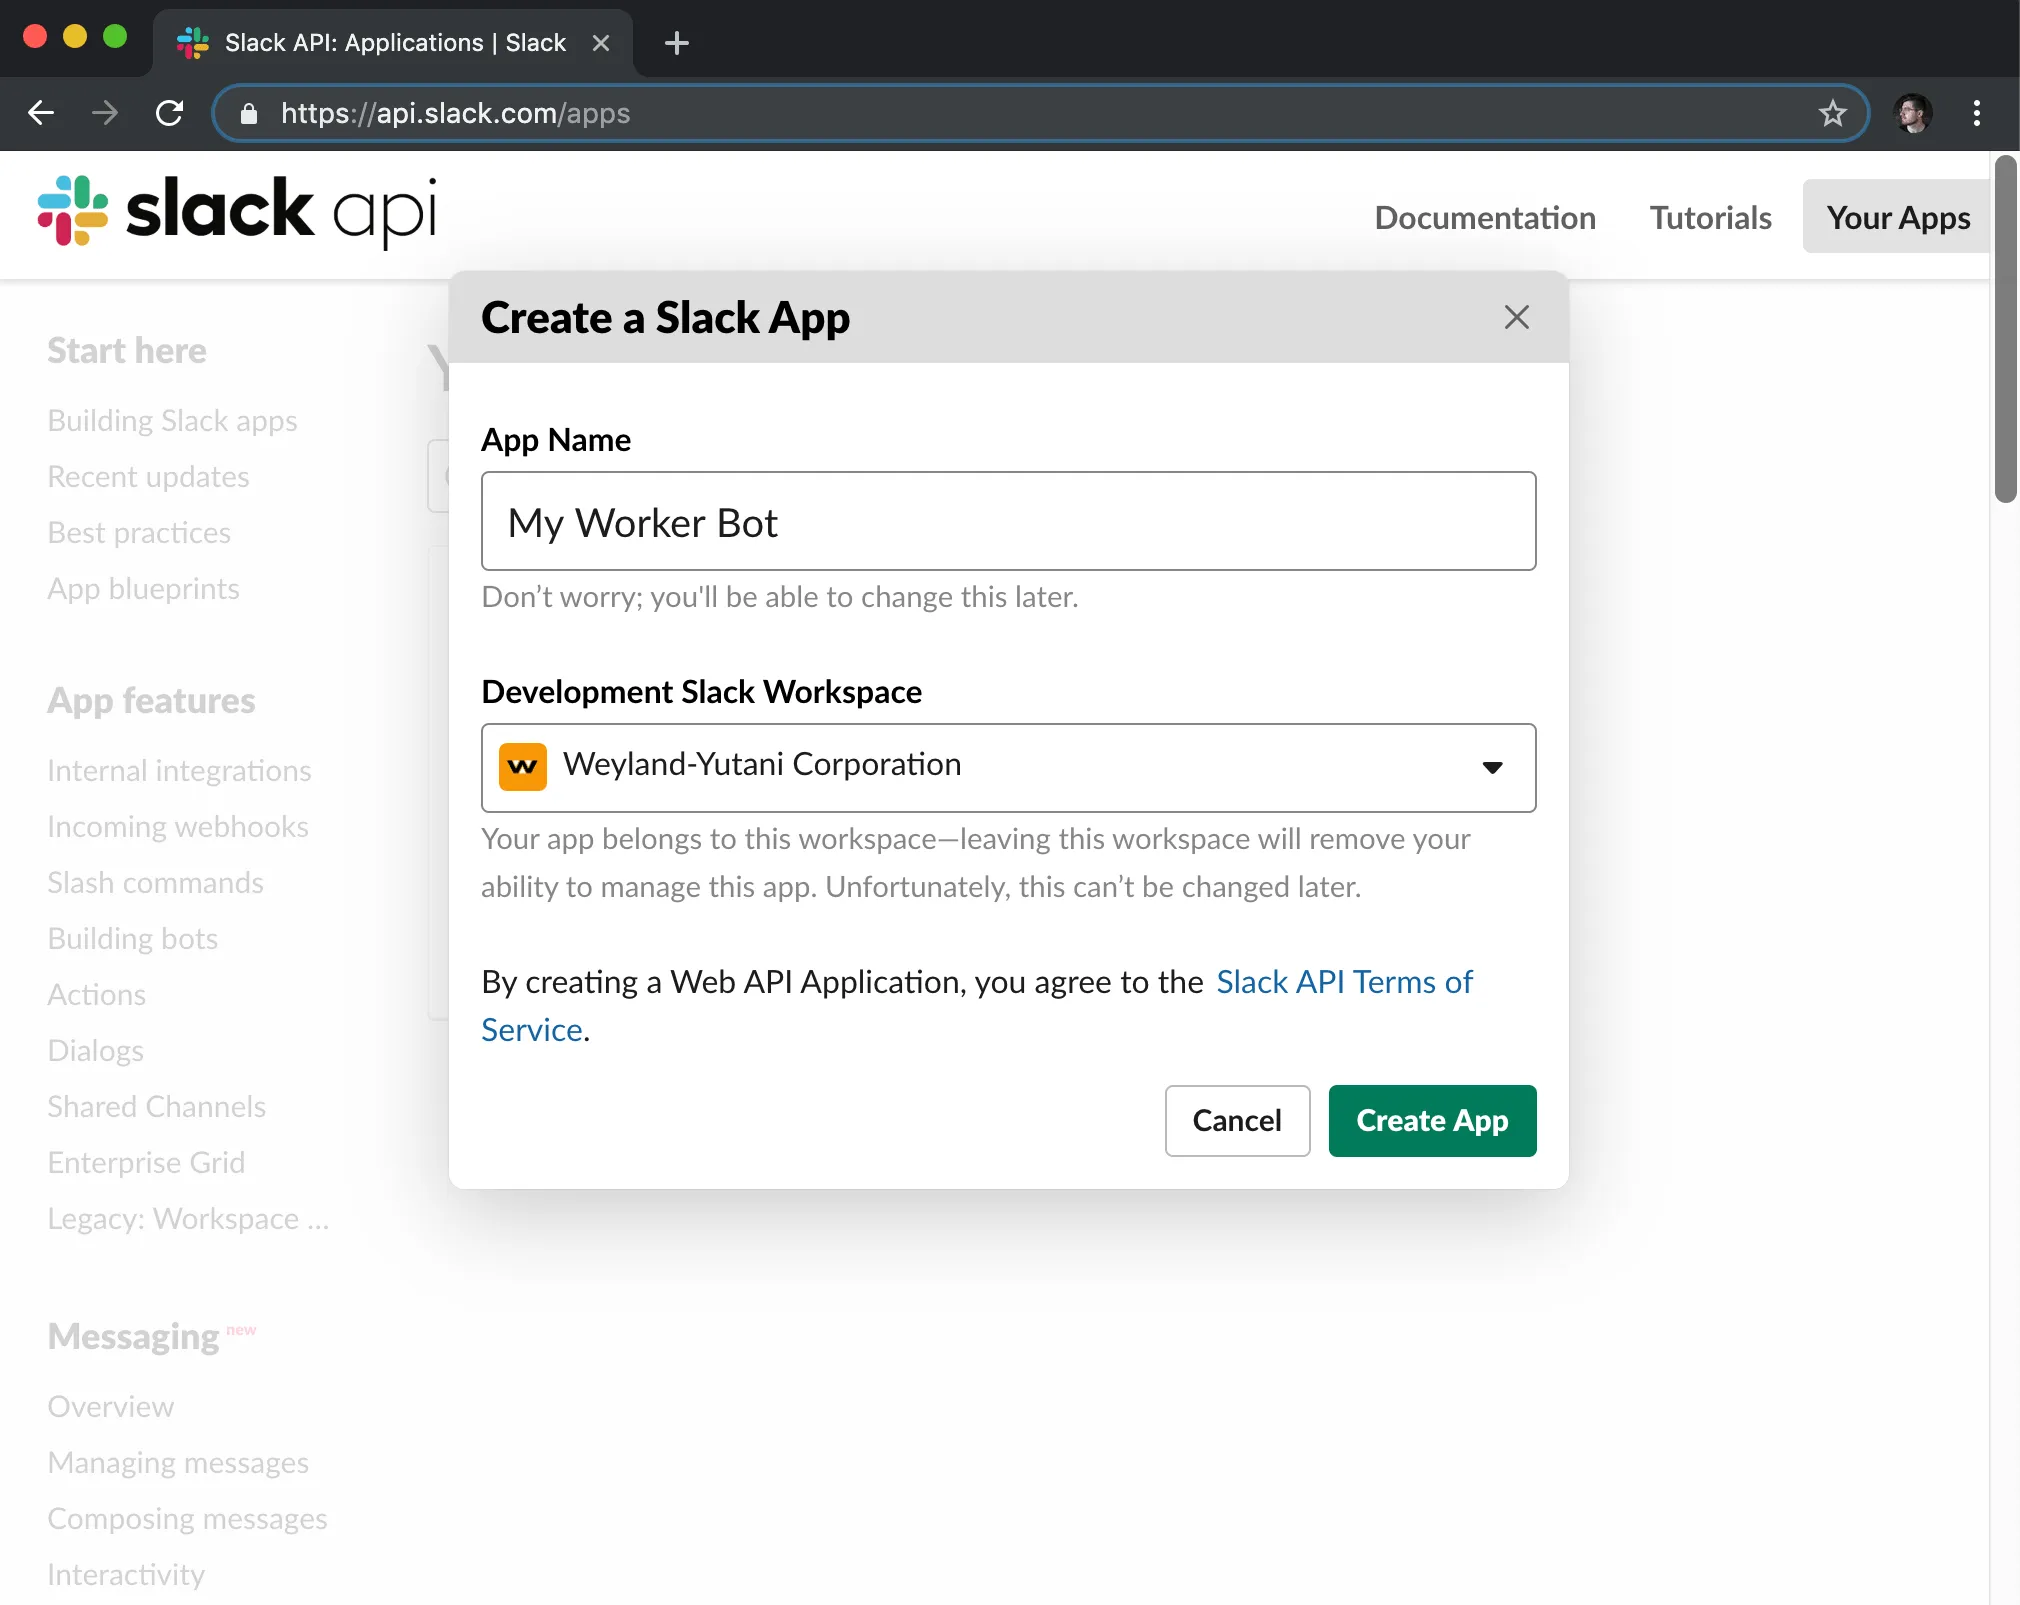
Slack applications have many features. You will make use of two of them, Incoming Webhooks and Slash Commands, to build your Worker-powered Slack bot.
#### Incoming Webhook
Incoming Webhooks are URLs that you can use to send messages to your Slack channels. Your incoming webhook will be paired with GitHub’s webhook support to send messages to a Slack channel whenever there are updates to issues in a given repository. You will see the code in more detail as you build your application. First, create a Slack webhook:
1. On the sidebar of Slack's UI, select **Incoming Webhooks**.
2. In **Webhook URLs for your Workspace**, select **Add New Webhook to Workspace**.
3. On the following screen, select the channel that you want your webhook to send messages to (you can select a room, like #general or #code, or be messaged directly by your Slack bot when the webhook is called.)
4. Authorize the new webhook URL.
After authorizing your webhook URL, you will be returned to the **Incoming Webhooks** page and can view your new webhook URL. You will add this into your Workers code later. Next, you will add the second component to your Slack bot: a Slash Command.
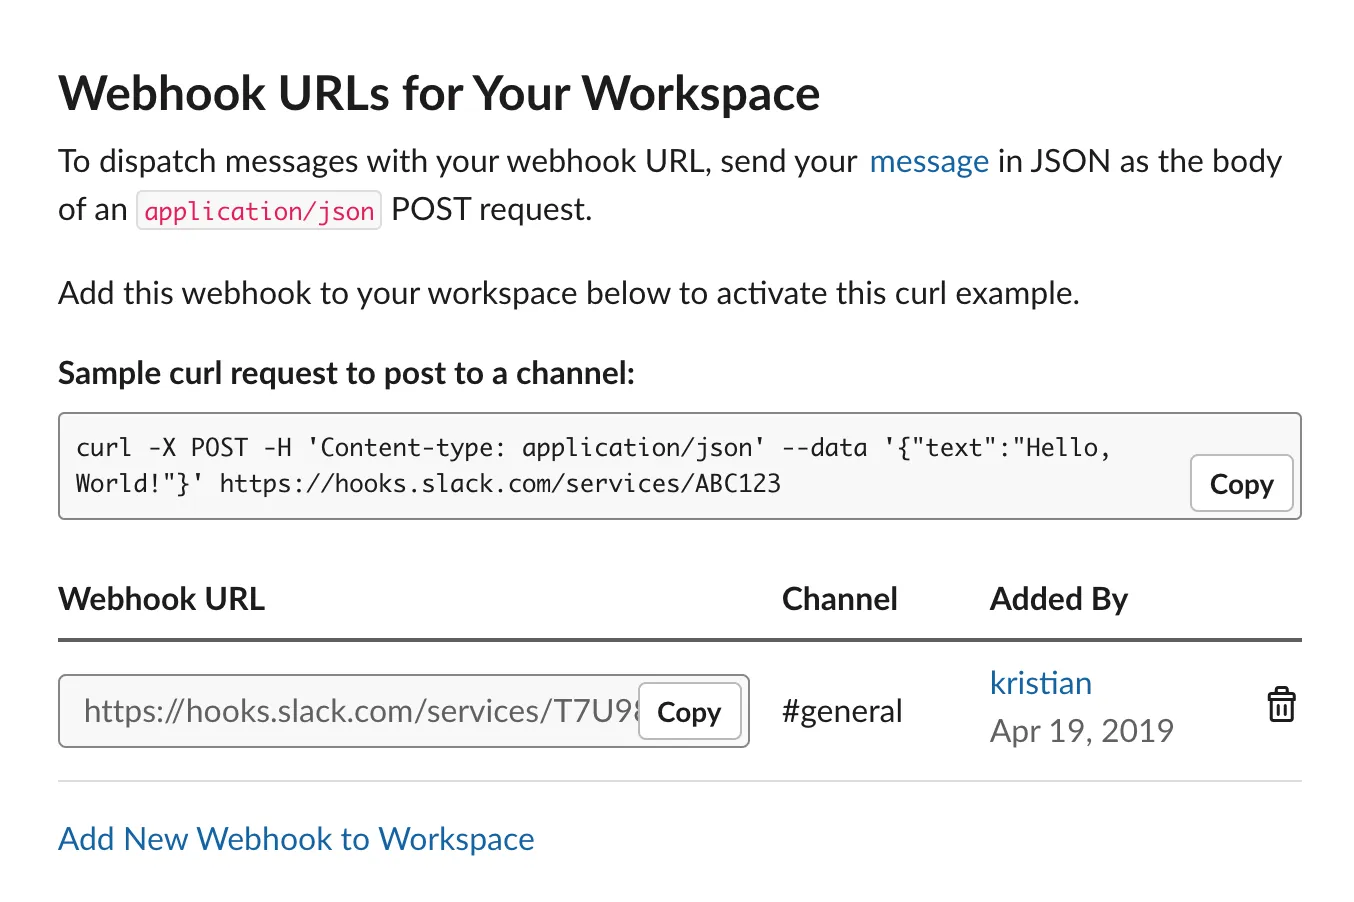
#### Slash Command
A Slash Command in Slack is a custom-configured command that can be attached to a URL request. For example, if you configured `/weather `, Slack would make an HTTP POST request to a configured URL, passing the text `` to get the weather for a specified zip code. In your application, you will use the `/issue` command to look up GitHub issues using the [GitHub API ↗](https://developer.github.com). Typing `/issue cloudflare/wrangler#1` will send the text `cloudflare/wrangler#1` in a HTTP POST request to your application, which the application will use to find the [relevant GitHub issue ↗](https://github.com/cloudflare/wrangler-legacy/issues/1).
1. On the Slack sidebar, select **Slash Commands**.
2. Create your first slash command.
For this tutorial, you will use the command `/issue`. The request URL should be the `/lookup` path on your application URL: for example, if your application will be hosted at `https://myworkerurl.com`, the Request URL should be `https://myworkerurl.com/lookup`.
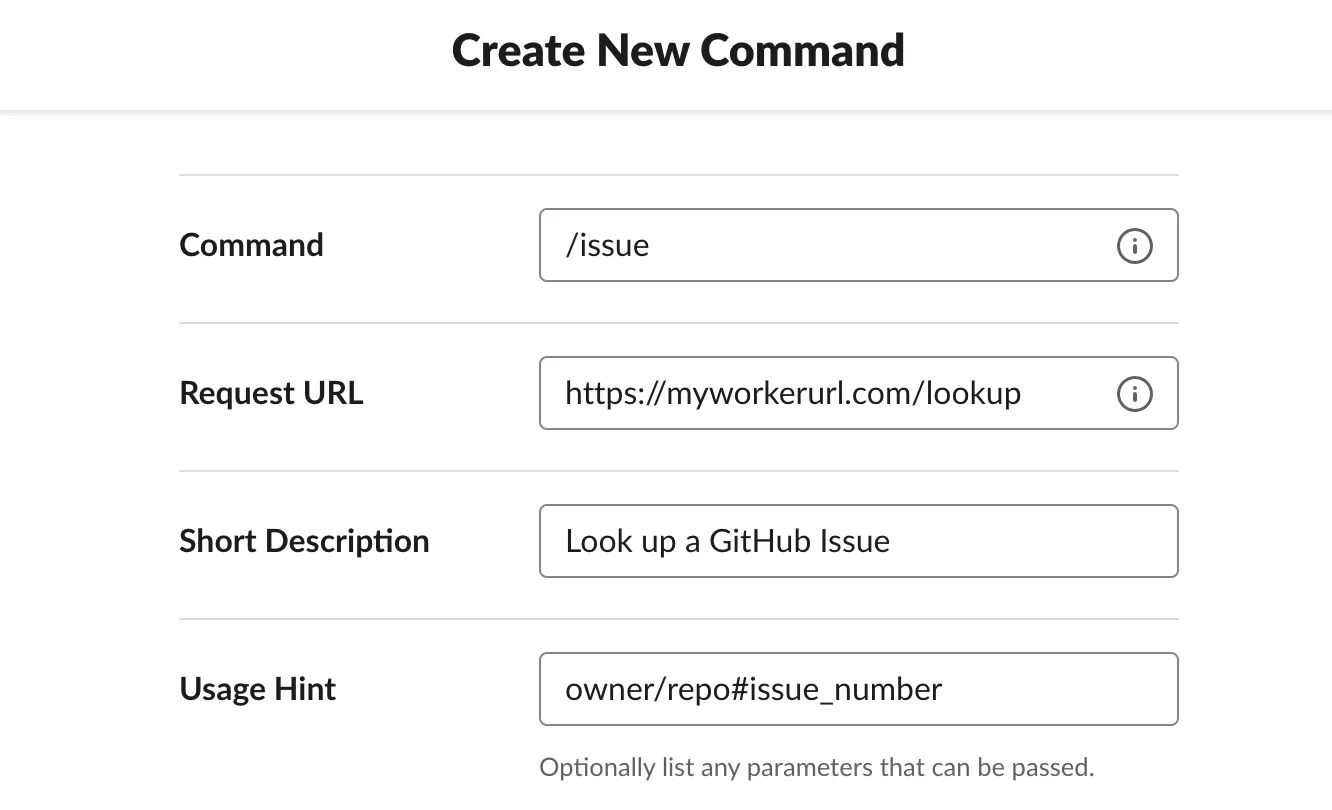
### Configure your GitHub Webhooks
Your Cloudflare Workers application will be able to handle incoming requests from Slack. It should also be able to receive events directly from GitHub. If a GitHub issue is created or updated, you can make use of GitHub webhooks to send that event to your Workers application and post a corresponding message in Slack.
To configure a webhook:
1. Go to your GitHub repository's **Settings** \> **Webhooks** \> **Add webhook**.
If you have a repository like `https://github.com/user/repo`, you can access the **Webhooks** page directly at `https://github.com/user/repo/settings/hooks`.
1. Set the Payload URL to the `/webhook` path on your Worker URL.
For example, if your Worker will be hosted at `https://myworkerurl.com`, the Payload URL should be `https://myworkerurl.com/webhook`.
1. In the **Content type** dropdown, select **application/json**.
The **Content type** for your payload can either be a URL-encoded payload (`application/x-www-form-urlencoded`) or JSON (`application/json`). For the purpose of this tutorial and to make parsing the payload sent to your application, select JSON.
1. In **Which events would you like to trigger this webhook?**, select **Let me select individual events**.
GitHub webhooks allow you to specify which events you would like to have sent to your webhook. By default, the webhook will send `push` events from your repository. For the purpose of this tutorial, you will choose **Let me select individual events**.
1. Select the **Issues** event type.
There are many different event types that can be enabled for your webhook. Selecting **Issues** will send every issue-related event to your webhook, including when issues are opened, edited, deleted, and more. If you would like to expand your Slack bot application in the future, you can select more of these events after the tutorial.
1. Select **Add webhook**.

When your webhook is created, it will attempt to send a test payload to your application. Since your application is not actually deployed yet, leave the configuration as it is. You will later return to your repository to create, edit, and close some issues to ensure that the webhook is working once your application is deployed.
## Init
To initiate the project, use the command line interface [C3 (create-cloudflare-cli) ↗](https://github.com/cloudflare/workers-sdk/tree/main/packages/create-cloudflare).
npm yarn pnpm
```
npm create cloudflare@latest -- slack-bot
```
```
yarn create cloudflare slack-bot
```
```
pnpm create cloudflare@latest slack-bot
```
Follow these steps to create a Hono project.
* For _What would you like to start with_?, select `Framework Starter`.
* For _Which development framework do you want to use?_, select `Hono`.
* For, _Do you want to deploy your application?_, select `No`.
Go to the `slack-bot` directory:
```sh
cd slack-bot
```
Open `src/index.ts` in an editor to find the following code.
**TypeScript**
```ts
import { Hono } from "hono";
type Bindings = {
[key in keyof CloudflareBindings]: CloudflareBindings[key];
};
const app = new Hono<{ Bindings: Bindings }>();
app.get("/", (c) => {
return c.text("Hello Hono!");
});
export default app;
```
This is a minimal application using Hono. If a GET access comes in on the path `/`, it will return a response with the text `Hello Hono!`. It also returns a message `404 Not Found` with status code 404 if any other path or method is accessed.
To run the application on your local machine, execute the following command.
npm yarn pnpm bun
```
npm i -- dev
```
```
yarn add dev
```
```
pnpm add dev
```
```
bun add dev
```
Access to `http://localhost:8787` in your browser after the server has been started, and you can see the message.
Hono helps you to create your Workers application easily and quickly.
## Build
Now, let's create a Slack bot on Cloudflare Workers.
### Separating files
You can create your application in several files instead of writing all endpoints and functions in one file. With Hono, it is able to add routing of child applications to the parent application using the function `app.route()`.
For example, imagine the following Web API application.
**TypeScript**
```ts
import { Hono } from "hono";
const app = new Hono();
app.get("/posts", (c) => c.text("Posts!"));
app.post("/posts", (c) => c.text("Created!", 201));
export default app;
```
You can add the routes under `/api/v1`.
**TypeScript**
```ts
import { Hono } from "hono";
import api from "./api";
const app = new Hono();
app.route("/api/v1", api);
export default app;
```
It will return `Posts!` when accessing `GET /api/v1/posts`.
The Slack bot will have two child applications called "route" each.
1. `lookup` route will take requests from Slack (sent when a user uses the `/issue` command), and look up the corresponding issue using the GitHub API. This application will be added to `/lookup` in the main application.
2. `webhook` route will be called when an issue changes on GitHub, via a configured webhook. This application will be add to `/webhook` in the main application.
Create the route files in a directory named `routes`.
**Create new folders and files**
```sh
mkdir -p src/routes
touch src/routes/lookup.ts
touch src/routes/webhook.ts
```
Then update the main application.
**TypeScript**
```ts
import { Hono } from "hono";
import lookup from "./routes/lookup";
import webhook from "./routes/webhook";
const app = new Hono();
app.route("/lookup", lookup);
app.route("/webhook", webhook);
export default app;
```
### Defining TypeScript types
Before implementing the actual functions, you need to define the TypeScript types you will use in this project. Create a new file in the application at `src/types.ts` and write the code. `Bindings` is a type that describes the Cloudflare Workers environment variables. `Issue` is a type for a GitHub issue and `User` is a type for a GitHub user. You will need these later.
**TypeScript**
```ts
export type Bindings = {
SLACK_WEBHOOK_URL: string;
};
export type Issue = {
html_url: string;
title: string;
body: string;
state: string;
created_at: string;
number: number;
user: User;
};
type User = {
html_url: string;
login: string;
avatar_url: string;
};
```
### Creating the lookup route
Start creating the lookup route in `src/routes/lookup.ts`.
**TypeScript**
```ts
import { Hono } from "hono";
const app = new Hono();
export default app;
```
To understand how you should design this function, you need to understand how Slack slash commands send data to URLs.
According to the [documentation for Slack slash commands ↗](https://api.slack.com/interactivity/slash-commands), Slack sends an HTTP POST request to your specified URL, with a `application/x-www-form-urlencoded` content type. For example, if someone were to type `/issue cloudflare/wrangler#1`, you could expect a data payload in the format:
```txt
token=gIkuvaNzQIHg97ATvDxqgjtO
&team_id=T0001
&team_domain=example
&enterprise_id=E0001
&enterprise_name=Globular%20Construct%20Inc
&channel_id=C2147483705
&channel_name=test
&user_id=U2147483697
&user_name=Steve
&command=/issue
&text=cloudflare/wrangler#1
&response_url=https://hooks.slack.com/commands/1234/5678
&trigger_id=13345224609.738474920.8088930838d88f008e0
```
Given this payload body, you need to parse it, and get the value of the `text` key. With that `text`, for example, `cloudflare/wrangler#1`, you can parse that string into known piece of data (`owner`, `repo`, and `issue_number`), and use it to make a request to GitHub’s API, to retrieve the issue data.
With Slack slash commands, you can respond to a slash command by returning structured data as the response to the incoming slash command. In this case, you should use the response from GitHub’s API to present a formatted version of the GitHub issue, including pieces of data like the title of the issue, who created it, and the date it was created. Slack’s new [Block Kit ↗](https://api.slack.com/block-kit) framework will allow you to return a detailed message response, by constructing text and image blocks with the data from GitHub’s API.
#### Parsing slash commands
To begin, the `lookup` route should parse the messages coming from Slack. As previously mentioned, the Slack API sends an HTTP POST in URL Encoded format. You can get the variable `text` by parsing it with `c.req.json()`.
**TypeScript**
```ts
import { Hono } from "hono";
const app = new Hono();
app.post("/", async (c) => {
const { text } = await c.req.parseBody();
if (typeof text !== "string") {
return c.notFound();
}
});
export default app;
```
Given a `text` variable, that contains text like `cloudflare/wrangler#1`, you should parse that text, and get the individual parts from it for use with GitHub’s API: `owner`, `repo`, and `issue_number`.
To do this, create a new file in your application, at `src/utils/github.ts`. This file will contain a number of “utility” functions for working with GitHub’s API. The first of these will be a string parser, called `parseGhIssueString`:
**TypeScript**
```ts
const ghIssueRegex =
/(?[\w.-]*)\/(?[\w.-]*)\#(?\d*)/;
export const parseGhIssueString = (text: string) => {
const match = text.match(ghIssueRegex);
return match ? (match.groups ?? {}) : {};
};
```
`parseGhIssueString` takes in a `text` input, matches it against `ghIssueRegex`, and if a match is found, returns the `groups` object from that match, making use of the `owner`, `repo`, and `issue_number` capture groups defined in the regex. By exporting this function from `src/utils/github.ts`, you can make use of it back in `src/handlers/lookup.ts`:
**TypeScript**
```ts
import { Hono } from "hono";
import { parseGhIssueString } from "../utils/github";
const app = new Hono();
app.post("/", async (c) => {
const { text } = await c.req.parseBody();
if (typeof text !== "string") {
return c.notFound();
}
const { owner, repo, issue_number } = parseGhIssueString(text);
});
export default app;
```
#### Making requests to GitHub’s API
With this data, you can make your first API lookup to GitHub. Again, make a new function in `src/utils/github.ts`, to make a `fetch` request to the GitHub API for the issue data:
**TypeScript**
```ts
const ghIssueRegex =
/(?[\w.-]*)\/(?[\w.-]*)\#(?\d*)/;
export const parseGhIssueString = (text: string) => {
const match = text.match(ghIssueRegex);
return match ? (match.groups ?? {}) : {};
};
export const fetchGithubIssue = (
owner: string,
repo: string,
issue_number: string,
) => {
const url = `https://api.github.com/repos/${owner}/${repo}/issues/${issue_number}`;
const headers = { "User-Agent": "simple-worker-slack-bot" };
return fetch(url, { headers });
};
```
Back in `src/handlers/lookup.ts`, use `fetchGitHubIssue` to make a request to GitHub’s API, and parse the response:
**TypeScript**
```ts
import { Hono } from "hono";
import { fetchGithubIssue, parseGhIssueString } from "../utils/github";
import { Issue } from "../types";
const app = new Hono();
app.post("/", async (c) => {
const { text } = await c.req.parseBody();
if (typeof text !== "string") {
return c.notFound();
}
const { owner, repo, issue_number } = parseGhIssueString(text);
const response = await fetchGithubIssue(owner, repo, issue_number);
const issue = await response.json();
});
export default app;
```
#### Constructing a Slack message
After you have received a response back from GitHub’s API, the final step is to construct a Slack message with the issue data, and return it to the user. The final result will look something like this:
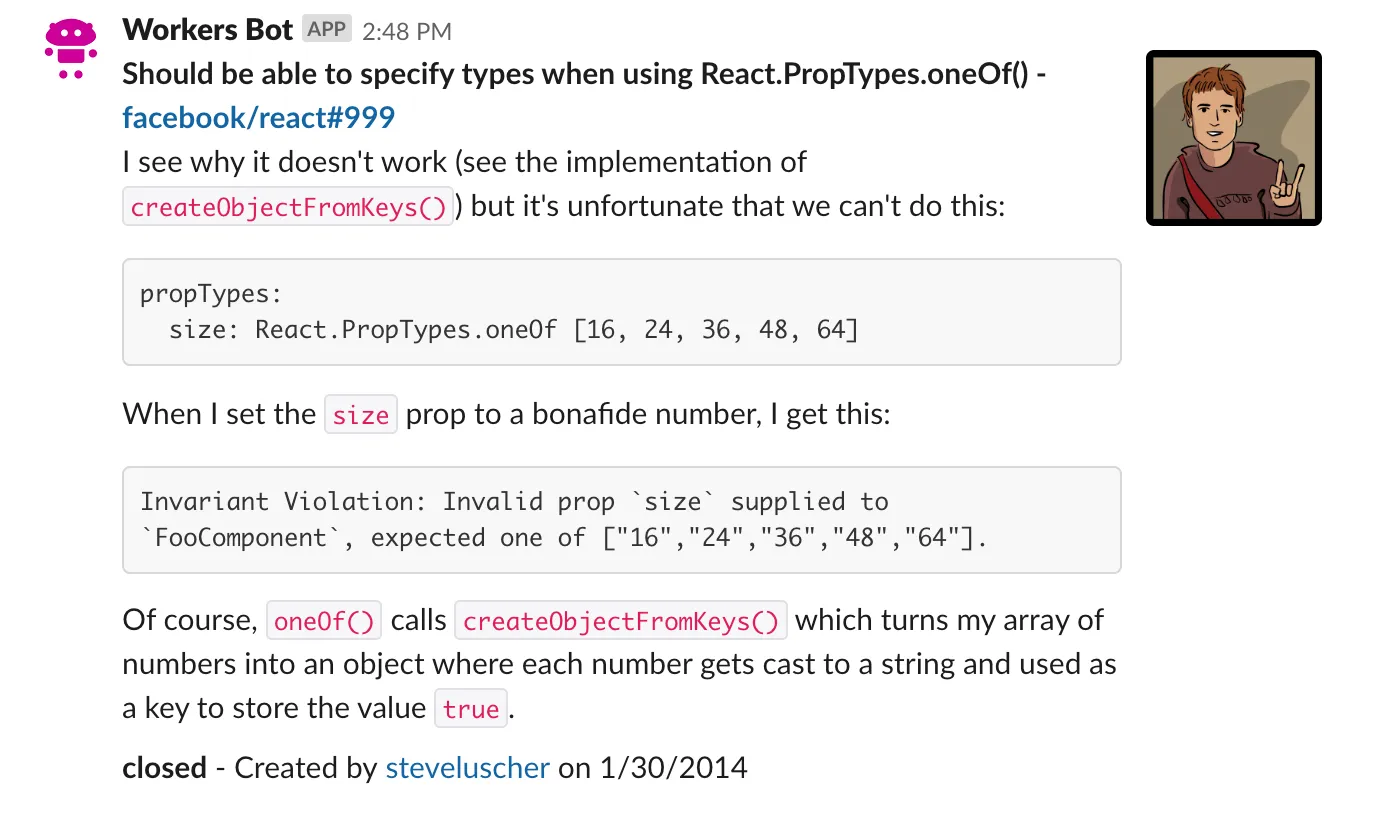
You can see four different pieces in the above screenshot:
1. The first line (bolded) links to the issue, and shows the issue title
2. The following lines (including code snippets) are the issue body
3. The last line of text shows the issue status, the issue creator (with a link to the user’s GitHub profile), and the creation date for the issue
4. The profile picture of the issue creator, on the right-hand side
The previously mentioned [Block Kit ↗](https://api.slack.com/block-kit) framework will help take the issue data (in the structure lined out in [GitHub’s REST API documentation ↗](https://developer.github.com/v3/issues/)) and format it into something like the above screenshot.
Create another file, `src/utils/slack.ts`, to contain the function `constructGhIssueSlackMessage`, a function for taking issue data, and turning it into a collection of blocks. Blocks are JavaScript objects that Slack will use to format the message:
**TypeScript**
```ts
import { Issue } from "../types";
export const constructGhIssueSlackMessage = (
issue: Issue,
issue_string: string,
prefix_text?: string,
) => {
const issue_link = `<${issue.html_url}|${issue_string}>`;
const user_link = `<${issue.user.html_url}|${issue.user.login}>`;
const date = new Date(Date.parse(issue.created_at)).toLocaleDateString();
const text_lines = [
prefix_text,
`*${issue.title} - ${issue_link}*`,
issue.body,
`*${issue.state}* - Created by ${user_link} on ${date}`,
];
};
```
Slack messages accept a variant of Markdown, which supports bold text via asterisks (`*bolded text*`), and links in the format ``.
Given that format, construct `issue_link`, which takes the `html_url` property from the GitHub API `issue` data (in format `https://github.com/cloudflare/wrangler-legacy/issues/1`), and the `issue_string` sent from the Slack slash command, and combines them into a clickable link in the Slack message.
`user_link` is similar, using `issue.user.html_url` (in the format `https://github.com/signalnerve`, a GitHub user) and the user’s GitHub username (`issue.user.login`), to construct a clickable link to the GitHub user.
Finally, parse `issue.created_at`, an ISO 8601 string, convert it into an instance of a JavaScript `Date`, and turn it into a formatted string, in the format `MM/DD/YY`.
With those variables in place, `text_lines` is an array of each line of text for the Slack message. The first line is the **issue title** and the **issue link**, the second is the **issue body**, and the final line is the **issue state** (for example, open or closed), the **user link**, and the **creation date**.
With the text constructed, you can finally construct your Slack message, returning an array of blocks for Slack’s [Block Kit ↗](https://api.slack.com/block-kit). In this case, there is only have one block: a [section ↗](https://api.slack.com/reference/messaging/blocks#section) block with Markdown text, and an accessory image of the user who created the issue. Return that single block inside of an array, to complete the `constructGhIssueSlackMessage` function:
**TypeScript**
```ts
import { Issue } from "../types";
export const constructGhIssueSlackMessage = (
issue: Issue,
issue_string: string,
prefix_text?: string,
) => {
const issue_link = `<${issue.html_url}|${issue_string}>`;
const user_link = `<${issue.user.html_url}|${issue.user.login}>`;
const date = new Date(Date.parse(issue.created_at)).toLocaleDateString();
const text_lines = [
prefix_text,
`*${issue.title} - ${issue_link}*`,
issue.body,
`*${issue.state}* - Created by ${user_link} on ${date}`,
];
return [
{
type: "section",
text: {
type: "mrkdwn",
text: text_lines.join("\n"),
},
accessory: {
type: "image",
image_url: issue.user.avatar_url,
alt_text: issue.user.login,
},
},
];
};
```
#### Finishing the lookup route
In `src/handlers/lookup.ts`, use `constructGhIssueSlackMessage` to construct `blocks`, and return them as a new response with `c.json()` when the slash command is called:
**TypeScript**
```ts
import { Hono } from "hono";
import { fetchGithubIssue, parseGhIssueString } from "../utils/github";
import { constructGhIssueSlackMessage } from "../utils/slack";
import { Issue } from "../types";
const app = new Hono();
app.post("/", async (c) => {
const { text } = await c.req.parseBody();
if (typeof text !== "string") {
return c.notFound();
}
const { owner, repo, issue_number } = parseGhIssueString(text);
const response = await fetchGithubIssue(owner, repo, issue_number);
const issue = await response.json();
const blocks = constructGhIssueSlackMessage(issue, text);
return c.json({
blocks,
response_type: "in_channel",
});
});
export default app;
```
One additional parameter passed into the response is `response_type`. By default, responses to slash commands are ephemeral, meaning that they are only seen by the user who writes the slash command. Passing a `response_type` of `in_channel`, as seen above, will cause the response to appear for all users in the channel.
If you would like the messages to remain private, remove the `response_type` line. This will cause `response_type` to default to `ephemeral`.
#### Handling errors
The `lookup` route is almost complete, but there are a number of errors that can occur in the route, such as parsing the body from Slack, getting the issue from GitHub, or constructing the Slack message itself. Although Hono applications can handle errors without having to do anything, you can customize the response returned in the following way.
**TypeScript**
```ts
import { Hono } from "hono";
import { fetchGithubIssue, parseGhIssueString } from "../utils/github";
import { constructGhIssueSlackMessage } from "../utils/slack";
import { Issue } from "../types";
const app = new Hono();
app.post("/", async (c) => {
const { text } = await c.req.parseBody();
if (typeof text !== "string") {
return c.notFound();
}
const { owner, repo, issue_number } = parseGhIssueString(text);
const response = await fetchGithubIssue(owner, repo, issue_number);
const issue = await response.json();
const blocks = constructGhIssueSlackMessage(issue, text);
return c.json({
blocks,
response_type: "in_channel",
});
});
app.onError((_e, c) => {
return c.text(
"Uh-oh! We couldn't find the issue you provided. " +
"We can only find public issues in the following format: `owner/repo#issue_number`.",
);
});
export default app;
```
### Creating the webhook route
You are now halfway through implementing the routes for your Workers application. In implementing the next route, `src/routes/webhook.ts`, you will re-use a lot of the code that you have already written for the lookup route.
At the beginning of this tutorial, you configured a GitHub webhook to track any events related to issues in your repository. When an issue is opened, for example, the function corresponding to the path `/webhook` on your Workers application should take the data sent to it from GitHub, and post a new message in the configured Slack channel.
In `src/routes/webhook.ts`, define a blank Hono application. The difference from the `lookup` route is that the `Bindings` is passed as a generics for the `new Hono()`. This is necessary to give the appropriate TypeScript type to `SLACK_WEBHOOK_URL` which will be used later.
**TypeScript**
```ts
import { Hono } from "hono";
import { Bindings } from "../types";
const app = new Hono<{ Bindings: Bindings }>();
export default app;
```
Much like with the `lookup` route, you will need to parse the incoming payload inside of `request`, get the relevant issue data from it (refer to [the GitHub API documentation on IssueEvent ↗](https://developer.github.com/v3/activity/events/types/#issuesevent) for the full payload schema), and send a formatted message to Slack to indicate what has changed. The final version will look something like this:
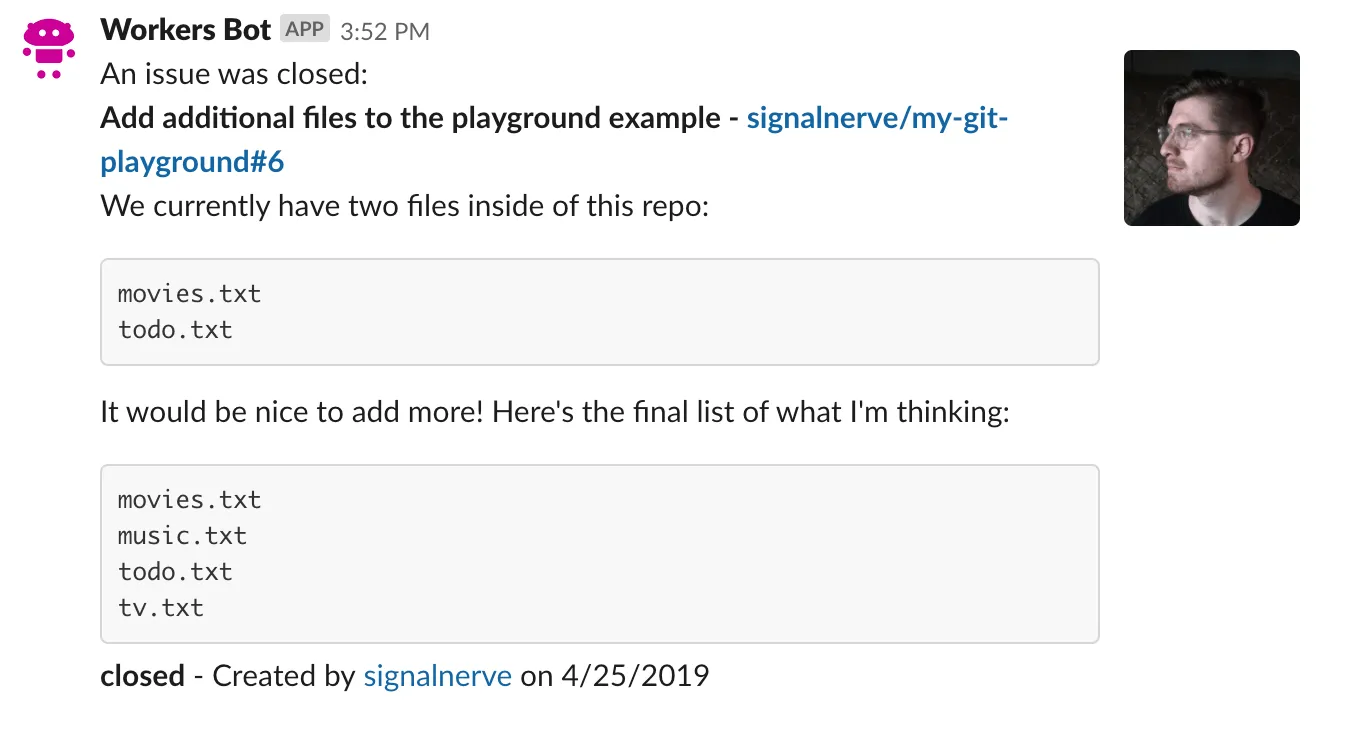
Compare this message format to the format returned when a user uses the `/issue` slash command. You will see that there is only one actual difference between the two: the addition of an action text on the first line, in the format `An issue was $action:`. This action, which is sent as part of the `IssueEvent` from GitHub, will be used as you construct a very familiar looking collection of blocks using Slack’s Block Kit.
#### Parsing event data
To start filling out the route, parse the request body formatted JSON into an object and construct some helper variables:
**TypeScript**
```ts
import { Hono } from "hono";
import { constructGhIssueSlackMessage } from "../utils/slack";
const app = new Hono();
app.post("/", async (c) => {
const { action, issue, repository } = await c.req.json();
const prefix_text = `An issue was ${action}:`;
const issue_string = `${repository.owner.login}/${repository.name}#${issue.number}`;
});
export default app;
```
An `IssueEvent`, the payload sent from GitHub as part of your webhook configuration, includes an `action` (what happened to the issue: for example, it was opened, closed, locked, etc.), the `issue` itself, and the `repository`, among other things.
Use `c.req.json()` to convert the payload body of the request from JSON into a plain JS object. Use ES6 destructuring to set `action`, `issue` and `repository` as variables you can use in your code. `prefix_text` is a string indicating what happened to the issue, and `issue_string` is the familiar string `owner/repo#issue_number` that you have seen before: while the `lookup` route directly used the text sent from Slack to fill in `issue_string`, you will construct it directly based on the data passed in the JSON payload.
#### Constructing and sending a Slack message
The messages your Slack bot sends back to your Slack channel from the `lookup` and `webhook` routes are incredibly similar. Because of this, you can re-use the existing `constructGhIssueSlackMessage` to continue populating `src/handlers/webhook.ts`. Import the function from `src/utils/slack.ts`, and pass the issue data into it:
**TypeScript**
```ts
import { Hono } from "hono";
import { constructGhIssueSlackMessage } from "../utils/slack";
const app = new Hono();
app.post("/", async (c) => {
const { action, issue, repository } = await c.req.json();
const prefix_text = `An issue was ${action}:`;
const issue_string = `${repository.owner.login}/${repository.name}#${issue.number}`;
const blocks = constructGhIssueSlackMessage(issue, issue_string, prefix_text);
});
export default app;
```
Importantly, the usage of `constructGhIssueSlackMessage` in this handler adds one additional argument to the function, `prefix_text`. Update the corresponding function inside of `src/utils/slack.ts`, adding `prefix_text` to the collection of `text_lines` in the message block, if it has been passed in to the function.
Add a utility function, `compact`, which takes an array, and filters out any `null` or `undefined` values from it. This function will be used to remove `prefix_text` from `text_lines` if it has not actually been passed in to the function, such as when called from `src/handlers/lookup.ts`. The full (and final) version of the `src/utils/slack.ts` looks like this:
**TypeScript**
```ts
import { Issue } from "../types";
const compact = (array: unknown[]) => array.filter((el) => el);
export const constructGhIssueSlackMessage = (
issue: Issue,
issue_string: string,
prefix_text?: string,
) => {
const issue_link = `<${issue.html_url}|${issue_string}>`;
const user_link = `<${issue.user.html_url}|${issue.user.login}>`;
const date = new Date(Date.parse(issue.created_at)).toLocaleDateString();
const text_lines = [
prefix_text,
`*${issue.title} - ${issue_link}*`,
issue.body,
`*${issue.state}* - Created by ${user_link} on ${date}`,
];
return [
{
type: "section",
text: {
type: "mrkdwn",
text: compact(text_lines).join("\n"),
},
accessory: {
type: "image",
image_url: issue.user.avatar_url,
alt_text: issue.user.login,
},
},
];
};
```
Back in `src/handlers/webhook.ts`, the `blocks` that are returned from `constructGhIssueSlackMessage` become the body in a new `fetch` request, an HTTP POST request to a Slack webhook URL. Once that request completes, return a response with status code `200`, and the body text `"OK"`:
**TypeScript**
```ts
import { Hono } from "hono";
import { constructGhIssueSlackMessage } from "../utils/slack";
import { Bindings } from "../types";
const app = new Hono<{ Bindings: Bindings }>();
app.post("/", async (c) => {
const { action, issue, repository } = await c.req.json();
const prefix_text = `An issue was ${action}:`;
const issue_string = `${repository.owner.login}/${repository.name}#${issue.number}`;
const blocks = constructGhIssueSlackMessage(issue, issue_string, prefix_text);
const fetchResponse = await fetch(c.env.SLACK_WEBHOOK_URL, {
body: JSON.stringify({ blocks }),
method: "POST",
headers: { "Content-Type": "application/json" },
});
return c.text("OK");
});
export default app;
```
The constant `SLACK_WEBHOOK_URL` represents the Slack Webhook URL that you created all the way back in the [Incoming Webhook](https://developers.cloudflare.com/workers/tutorials/build-a-slackbot/#incoming-webhook) section of this tutorial.
Warning
Since this webhook allows developers to post directly to your Slack channel, keep it secret.
To use this constant inside of your codebase, use the [wrangler secret](https://developers.cloudflare.com/workers/wrangler/commands/general/#secret) command:
**Set the SLACK\_WEBHOOK\_URL secret**
```sh
npx wrangler secret put SLACK_WEBHOOK_URL
```
```sh
Enter a secret value: https://hooks.slack.com/services/abc123
```
#### Handling errors
Similarly to the `lookup` route, the `webhook` route should include some basic error handling. Unlike `lookup`, which sends responses directly back into Slack, if something goes wrong with your webhook, it may be useful to actually generate an erroneous response, and return it to GitHub.
To do this, write the custom error handler with `app.onError()` and return a new response with a status code of `500`. The final version of `src/routes/webhook.ts` looks like this:
**TypeScript**
```ts
import { Hono } from "hono";
import { constructGhIssueSlackMessage } from "../utils/slack";
import { Bindings } from "../types";
const app = new Hono<{ Bindings: Bindings }>();
app.post("/", async (c) => {
const { action, issue, repository } = await c.req.json();
const prefix_text = `An issue was ${action}:`;
const issue_string = `${repository.owner.login}/${repository.name}#${issue.number}`;
const blocks = constructGhIssueSlackMessage(issue, issue_string, prefix_text);
const fetchResponse = await fetch(c.env.SLACK_WEBHOOK_URL, {
body: JSON.stringify({ blocks }),
method: "POST",
headers: { "Content-Type": "application/json" },
});
if (!fetchResponse.ok) throw new Error();
return c.text("OK");
});
app.onError((_e, c) => {
return c.json(
{
message: "Unable to handle webhook",
},
500,
);
});
export default app;
```
## Deploy
By completing the preceding steps, you have finished writing the code for your Slack bot. You can now deploy your application.
Wrangler has built-in support for bundling, uploading, and releasing your Cloudflare Workers application. To do this, run the following command which will build and deploy your code.
npm yarn pnpm bun
```
npm i -- deploy
```
```
yarn add deploy
```
```
pnpm add deploy
```
```
bun add deploy
```
Deploying your Workers application should now cause issue updates to start appearing in your Slack channel, as the GitHub webhook can now successfully reach your Workers webhook route:
## Related resources
In this tutorial, you built and deployed a Cloudflare Workers application that can respond to GitHub webhook events, and allow GitHub API lookups within Slack. If you would like to review the full source code for this application, you can find the repository [on GitHub ↗](https://github.com/yusukebe/workers-slack-bot).
If you want to get started building your own projects, review the existing list of [Quickstart templates](https://developers.cloudflare.com/workers/get-started/quickstarts/).
```json
{"@context":"https://schema.org","@type":"TechArticle","@id":"https://developers.cloudflare.com/workers/tutorials/build-a-slackbot/#page","headline":"Build a Slackbot · Cloudflare Workers docs","description":"Learn how to build a Slackbot with Hono and TypeScript in Cloudflare Workers","url":"https://developers.cloudflare.com/workers/tutorials/build-a-slackbot/","inLanguage":"en","image":"https://developers.cloudflare.com/dev-products-preview.png","dateModified":"2026-04-08","publisher":{"@type":"Organization","name":"Cloudflare","url":"https://www.cloudflare.com/"},"isPartOf":{"@type":"WebSite","@id":"https://developers.cloudflare.com/#website","name":"Cloudflare Docs","url":"https://developers.cloudflare.com/"},"keywords":["Hono","TypeScript"]}
{"@context":"https://schema.org","@type":"BreadcrumbList","itemListElement":[{"@type":"ListItem","position":1,"item":{"@id":"/directory/","name":"Directory"}},{"@type":"ListItem","position":2,"item":{"@id":"/workers/","name":"Workers"}},{"@type":"ListItem","position":3,"item":{"@id":"/workers/tutorials/","name":"Tutorials"}},{"@type":"ListItem","position":4,"item":{"@id":"/workers/tutorials/build-a-slackbot/","name":"Build a Slackbot"}}]}
```
---
---
title: Connect to and query your Turso database using Workers
description: This tutorial will guide you on how to build globally distributed applications with Cloudflare Workers, and Turso, an edge-hosted distributed database based on libSQL.
image: https://developers.cloudflare.com/dev-products-preview.png
---
> Documentation Index
> Fetch the complete documentation index at: https://developers.cloudflare.com/workers/llms.txt
> Use this file to discover all available pages before exploring further.
[Skip to content](#%5Ftop)
# Connect to and query your Turso database using Workers
This tutorial will guide you on how to build globally distributed applications with Cloudflare Workers, and [Turso ↗](https://chiselstrike.com/), an edge-hosted distributed database based on libSQL. By using Workers and Turso, you can create applications that are close to your end users without having to maintain or operate infrastructure in tens or hundreds of regions.
Note
For a more seamless experience, refer to the [Turso Database Integration guide](https://developers.cloudflare.com/workers/databases/third-party-integrations/turso/). The Turso Database Integration will guide you through connecting your Worker to a Turso database by securely configuring your database credentials as [secrets](https://developers.cloudflare.com/workers/configuration/secrets/) in your Worker.
## Prerequisites
Before continuing with this tutorial, you should have:
* Successfully [created up your first Cloudflare Worker](https://developers.cloudflare.com/workers/get-started/guide/) and/or have deployed a Cloudflare Worker before.
* Installed [Wrangler](https://developers.cloudflare.com/workers/wrangler/install-and-update/), a command-line tool for building Cloudflare Workers.
* A [GitHub account ↗](https://github.com/), required for authenticating to Turso.
* A basic familiarity with installing and using command-line interface (CLI) applications.
## Install the Turso CLI
You will need the Turso CLI to create and populate a database. Run either of the following two commands in your terminal to install the Turso CLI:
```sh
# On macOS or Linux with Homebrew
brew install chiselstrike/tap/turso
# Manual scripted installation
curl -sSfL | bash
```
After you have installed the Turso CLI, verify that the CLI is in your shell path:
```sh
turso --version
```
```sh
# This should output your current Turso CLI version (your installed version may be higher):
turso version v0.51.0
```
## Create and populate a database
Before you create your first Turso database, you need to log in to the CLI using your GitHub account by running:
```sh
turso auth login
```
```sh
Waiting for authentication...
✔ Success! Logged in as
```
`turso auth login` will open a browser window and ask you to sign into your GitHub account, if you are not already logged in. The first time you do this, you will need to give the Turso application permission to use your account. Select **Approve** to grant Turso the permissions needed.
After you have authenticated, you can create a database by running `turso db create `. Turso will automatically choose a location closest to you.
```sh
turso db create my-db
```
```sh
# Example:
[===> ]
Creating database my-db in Los Angeles, California (US) (lax)
# Once succeeded:
Created database my-db in Los Angeles, California (US) (lax) in 34 seconds.
```
With your first database created, you can now connect to it directly and execute SQL against it:
```sh
turso db shell my-db
```
To get started with your database, create and define a schema for your first table. In this example, you will create a `example_users` table with one column: `email` (of type `text`) and then populate it with one email address.
In the shell you just opened, paste in the following SQL:
```sql
create table example_users (email text);
insert into example_users values ('foo@bar.com');
```
If the SQL statements succeeded, there will be no output. Note that the trailing semi-colons (`;`) are necessary to terminate each SQL statement.
Type `.quit` to exit the shell.
## Use Wrangler to create a Workers project
The Workers command-line interface, [Wrangler](https://developers.cloudflare.com/workers/wrangler/install-and-update/), allows you to create, locally develop, and deploy your Workers projects.
To create a new Workers project (named `worker-turso-ts`), run the following:
npm yarn pnpm
```
npm create cloudflare@latest -- worker-turso-ts
```
```
yarn create cloudflare worker-turso-ts
```
```
pnpm create cloudflare@latest worker-turso-ts
```
For setup, select the following options:
* For _What would you like to start with?_, choose `Hello World example`.
* For _Which template would you like to use?_, choose `Worker only`.
* For _Which language do you want to use?_, choose `TypeScript`.
* For _Do you want to use git for version control?_, choose `Yes`.
* For _Do you want to deploy your application?_, choose `No` (we will be making some changes before deploying).
To start developing your Worker, `cd` into your new project directory:
```sh
cd worker-turso-ts
```
In your project directory, you now have the following files:
* `wrangler.json` / `wrangler.toml`: [Wrangler configuration file](https://developers.cloudflare.com/workers/wrangler/configuration/)
* `src/index.ts`: A minimal Hello World Worker written in TypeScript
* `package.json`: A minimal Node dependencies configuration file.
* `tsconfig.json`: TypeScript configuration that includes Workers types. Only generated if indicated.
For this tutorial, only the [Wrangler configuration file](https://developers.cloudflare.com/workers/wrangler/configuration/) and `src/index.ts` file are relevant. You will not need to edit the other files, and they should be left as is.
## Configure your Worker for your Turso database
The Turso client library requires two pieces of information to make a connection:
1. `LIBSQL_DB_URL` \- The connection string for your Turso database.
2. `LIBSQL_DB_AUTH_TOKEN` \- The authentication token for your Turso database. This should be kept a secret, and not committed to source code.
To get the URL for your database, run the following Turso CLI command, and copy the result:
```sh
turso db show my-db --url
```
```sh
libsql://my-db-.turso.io
```
Open the [Wrangler configuration file](https://developers.cloudflare.com/workers/wrangler/configuration/) in your editor and at the bottom of the file, create a new `[vars]` section representing the [environment variables](https://developers.cloudflare.com/workers/configuration/environment-variables/) for your project:
* [ wrangler.jsonc ](#tab-panel-13059)
* [ wrangler.toml ](#tab-panel-13060)
**JSONC**
```jsonc
{
"vars": {
"LIBSQL_DB_URL": "paste-your-url-here"
}
}
```
**TOML**
```toml
[vars]
LIBSQL_DB_URL = "paste-your-url-here"
```
Save the changes to the [Wrangler configuration file](https://developers.cloudflare.com/workers/wrangler/configuration/).
Next, create a long-lived authentication token for your Worker to use when connecting to your database. Run the following Turso CLI command, and copy the output to your clipboard:
```sh
turso db tokens create my-db -e none
# Will output a long text string (an encoded JSON Web Token)
```
To keep this token secret:
1. You will create a `.dev.vars` file for local development. Do not commit this file to source control. You should add `.dev.vars to your `.gitignore\` file if you are using Git.
* You will also create a [secret](https://developers.cloudflare.com/workers/configuration/secrets/) to keep your authentication token confidential.
First, create a new file called `.dev.vars` with the following structure. Paste your authentication token in the quotation marks:
```plaintext
LIBSQL_DB_AUTH_TOKEN=""
```
Save your changes to `.dev.vars`. Next, store the authentication token as a secret for your production Worker to reference. Run the following `wrangler secret` command to create a Secret with your token:
```sh
# Ensure you specify the secret name exactly: your Worker will need to reference it later.
npx wrangler secret put LIBSQL_DB_AUTH_TOKEN
```
```sh
? Enter a secret value: ›
```
Select `` on your keyboard to save the token as a secret. Both `LIBSQL_DB_URL` and `LIBSQL_DB_AUTH_TOKEN` will be available in your Worker's environment at runtime.
## Install extra libraries
Install the Turso client library and a router:
npm yarn pnpm bun
```
npm i @libsql/client itty-router
```
```
yarn add @libsql/client itty-router
```
```
pnpm add @libsql/client itty-router
```
```
bun add @libsql/client itty-router
```
The `@libsql/client` library allows you to query a Turso database. The `itty-router` library is a lightweight router you will use to help handle incoming requests to the worker.
## Write your Worker
You will now write a Worker that will:
1. Handle an HTTP request.
2. Route it to a specific handler to either list all users in our database or add a new user.
3. Return the results and/or success.
Open `src/index.ts` and delete the existing template. Copy the below code exactly as is and paste it into the file:
**TypeScript**
```ts
import { Client as LibsqlClient, createClient } from "@libsql/client/web";
import { Router, RouterType } from "itty-router";
export interface Env {
// The environment variable containing your the URL for your Turso database.
LIBSQL_DB_URL?: string;
// The Secret that contains the authentication token for your Turso database.
LIBSQL_DB_AUTH_TOKEN?: string;
// These objects are created before first use, then stashed here
// for future use
router?: RouterType;
}
export default {
async fetch(request, env): Promise {
if (env.router === undefined) {
env.router = buildRouter(env);
}
return env.router.fetch(request);
},
} satisfies ExportedHandler;
function buildLibsqlClient(env: Env): LibsqlClient {
const url = env.LIBSQL_DB_URL?.trim();
if (url === undefined) {
throw new Error("LIBSQL_DB_URL env var is not defined");
}
const authToken = env.LIBSQL_DB_AUTH_TOKEN?.trim();
if (authToken === undefined) {
throw new Error("LIBSQL_DB_AUTH_TOKEN env var is not defined");
}
return createClient({ url, authToken });
}
function buildRouter(env: Env): RouterType {
const router = Router();
router.get("/users", async () => {
const client = buildLibsqlClient(env);
const rs = await client.execute("select * from example_users");
return Response.json(rs);
});
router.get("/add-user", async (request) => {
const client = buildLibsqlClient(env);
const email = request.query.email;
if (email === undefined) {
return new Response("Missing email", { status: 400 });
}
if (typeof email !== "string") {
return new Response("email must be a single string", { status: 400 });
}
if (email.length === 0) {
return new Response("email length must be > 0", { status: 400 });
}
try {
await client.execute({
sql: "insert into example_users values (?)",
args: [email],
});
} catch (e) {
console.error(e);
return new Response("database insert failed");
}
return new Response("Added");
});
router.all("*", () => new Response("Not Found.", { status: 404 }));
return router;
}
```
Save your `src/index.ts` file with your changes.
Note:
* The libSQL client library import '@libsql/client/web' must be imported exactly as shown when working with Cloudflare workers. The non-web import will not work in the Workers environment.
* The `Env` interface contains the environment variable and secret you defined earlier.
* The `Env` interface also caches the libSQL client object and router, which are created on the first request to the Worker.
* The `/users` route fetches all rows from the `example_users` table you created in the Turso shell. It simply serializes the `ResultSet` object as JSON directly to the caller.
* The `/add-user` route inserts a new row using a value provided in the query string.
With your environment configured and your code ready, you will now test your Worker locally before you deploy.
## Run the Worker locally with Wrangler
To run a local instance of our Worker (entirely on your machine), run the following command:
```sh
npx wrangler dev
```
You should be able to review output similar to the following:
```txt
Your worker has access to the following bindings:
- Vars:
- LIBSQL_DB_URL: "your-url"
⎔ Starting a local server...
╭─────────────────────────────────────────────────────────────────────────────────────────────────────────────────────────────────────────────────────────────────────╮
│ [b] open a browser, [d] open Devtools, [l] turn off local mode, [c] clear console, [x] to exit │
╰─────────────────────────────────────────────────────────────────────────────────────────────────────────────────────────────────────────────────────────────────────╯
Debugger listening on ws://127.0.0.1:61918/1064babd-bc9d-4bed-b171-b35dab3b7680
For help, see: https://nodejs.org/en/docs/inspector
Debugger attached.
[mf:inf] Worker reloaded! (40.25KiB)
[mf:inf] Listening on 0.0.0.0:8787
[mf:inf] - http://127.0.0.1:8787
[mf:inf] - http://192.168.1.136:8787
[mf:inf] Updated `Request.cf` object cache!
```
The localhost address — the one with `127.0.0.1` in it — is a web-server running locally on your machine.
Connect to it and validate your Worker returns the email address you inserted when you created your `example_users` table by visiting the `/users` route in your browser: [http://127.0.0.1:8787/users ↗](http://127.0.0.1:8787/users).
You should see JSON similar to the following containing the data from the `example_users` table:
```json
{
"columns": ["email"],
"rows": [{ "email": "foo@bar.com" }],
"rowsAffected": 0
}
```
Warning
If you see an error instead of a list of users, double check that:
* You have entered the correct value for your `LIBSQL_DB_URL` in the [Wrangler configuration file](https://developers.cloudflare.com/workers/wrangler/configuration/).
* You have set a secret called `LIBSQL_DB_AUTH_TOKEN` with your database authentication token.
Both of these need to be present and match the variable names in your Worker's code.
Test the `/add-users` route and pass it an email address to insert: [http://127.0.0.1:8787/add-user?email=test@test.com ↗](http://127.0.0.1:8787/add-user?email=test@test.com.)
You should see the text `“Added”`. If you load the first URL with the `/users` route again ([http://127.0.0.1:8787/users ↗](http://127.0.0.1:8787/users)), it will show the newly added row. You can repeat this as many times as you like. Note that due to its design, your application will not stop you from adding duplicate email addresses.
Quit Wrangler by typing `q` into the shell where it was started.
## Deploy to Cloudflare
After you have validated that your Worker can connect to your Turso database, deploy your Worker. Run the following Wrangler command to deploy your Worker to the Cloudflare global network:
```sh
npx wrangler deploy
```
The first time you run this command, it will launch a browser, ask you to sign in with your Cloudflare account, and grant permissions to Wrangler.
The `deploy` command will output the following:
```txt
Your worker has access to the following bindings:
- Vars:
- LIBSQL_DB_URL: "your-url"
...
Published worker-turso-ts (0.19 sec)
https://worker-turso-ts..workers.dev
Current Deployment ID: f9e6b48f-5aac-40bd-8f44-8a40be2212ff
```
You have now deployed a Worker that can connect to your Turso database, query it, and insert new data.
## Optional: Clean up
To clean up the resources you created as part of this tutorial:
* If you do not want to keep this Worker, run `npx wrangler delete worker-turso-ts` to delete the deployed Worker.
* You can also delete your Turso database via `turso db destroy my-db`.
## Related resources
* Find the [complete project source code on GitHub ↗](https://github.com/cloudflare/workers-sdk/tree/main/templates/worker-turso-ts/).
* Understand how to [debug your Cloudflare Worker](https://developers.cloudflare.com/workers/observability/).
* Join the [Cloudflare Developer Discord ↗](https://discord.cloudflare.com).
* Join the [ChiselStrike (Turso) Discord ↗](https://discord.com/invite/4B5D7hYwub).
```json
{"@context":"https://schema.org","@type":"TechArticle","@id":"https://developers.cloudflare.com/workers/tutorials/connect-to-turso-using-workers/#page","headline":"Connect to and query your Turso database using Workers · Cloudflare Workers docs","description":"This tutorial will guide you on how to build globally distributed applications with Cloudflare Workers, and Turso, an edge-hosted distributed database based on libSQL.","url":"https://developers.cloudflare.com/workers/tutorials/connect-to-turso-using-workers/","inLanguage":"en","image":"https://developers.cloudflare.com/dev-products-preview.png","dateModified":"2026-04-23","publisher":{"@type":"Organization","name":"Cloudflare","url":"https://www.cloudflare.com/"},"isPartOf":{"@type":"WebSite","@id":"https://developers.cloudflare.com/#website","name":"Cloudflare Docs","url":"https://developers.cloudflare.com/"},"keywords":["TypeScript","SQL"]}
{"@context":"https://schema.org","@type":"BreadcrumbList","itemListElement":[{"@type":"ListItem","position":1,"item":{"@id":"/directory/","name":"Directory"}},{"@type":"ListItem","position":2,"item":{"@id":"/workers/","name":"Workers"}},{"@type":"ListItem","position":3,"item":{"@id":"/workers/tutorials/","name":"Tutorials"}},{"@type":"ListItem","position":4,"item":{"@id":"/workers/tutorials/connect-to-turso-using-workers/","name":"Connect to and query your Turso database using Workers"}}]}
```
---
---
title: Create a fine-tuned OpenAI model with R2
description: In this tutorial, you will use the OpenAI API and Cloudflare R2 to create a fine-tuned model.
image: https://developers.cloudflare.com/dev-products-preview.png
---
> Documentation Index
> Fetch the complete documentation index at: https://developers.cloudflare.com/workers/llms.txt
> Use this file to discover all available pages before exploring further.
[Skip to content](#%5Ftop)
# Create a fine-tuned OpenAI model with R2
In this tutorial, you will use the [OpenAI ↗](https://openai.com) API and [Cloudflare R2](https://developers.cloudflare.com/r2) to create a [fine-tuned model ↗](https://platform.openai.com/docs/guides/fine-tuning).
This feature in OpenAI's API allows you to derive a custom model from OpenAI's various large language models based on a set of custom instructions and example answers. These instructions and example answers are written in a document, known as a fine-tune document. This document will be stored in R2 and dynamically provided to OpenAI's APIs when creating a new fine-tune model.
In order to use this feature, you will do the following tasks:
1. Upload a fine-tune document to R2.
2. Read the R2 file and upload it to OpenAI.
3. Create a new fine-tuned model based on the document.
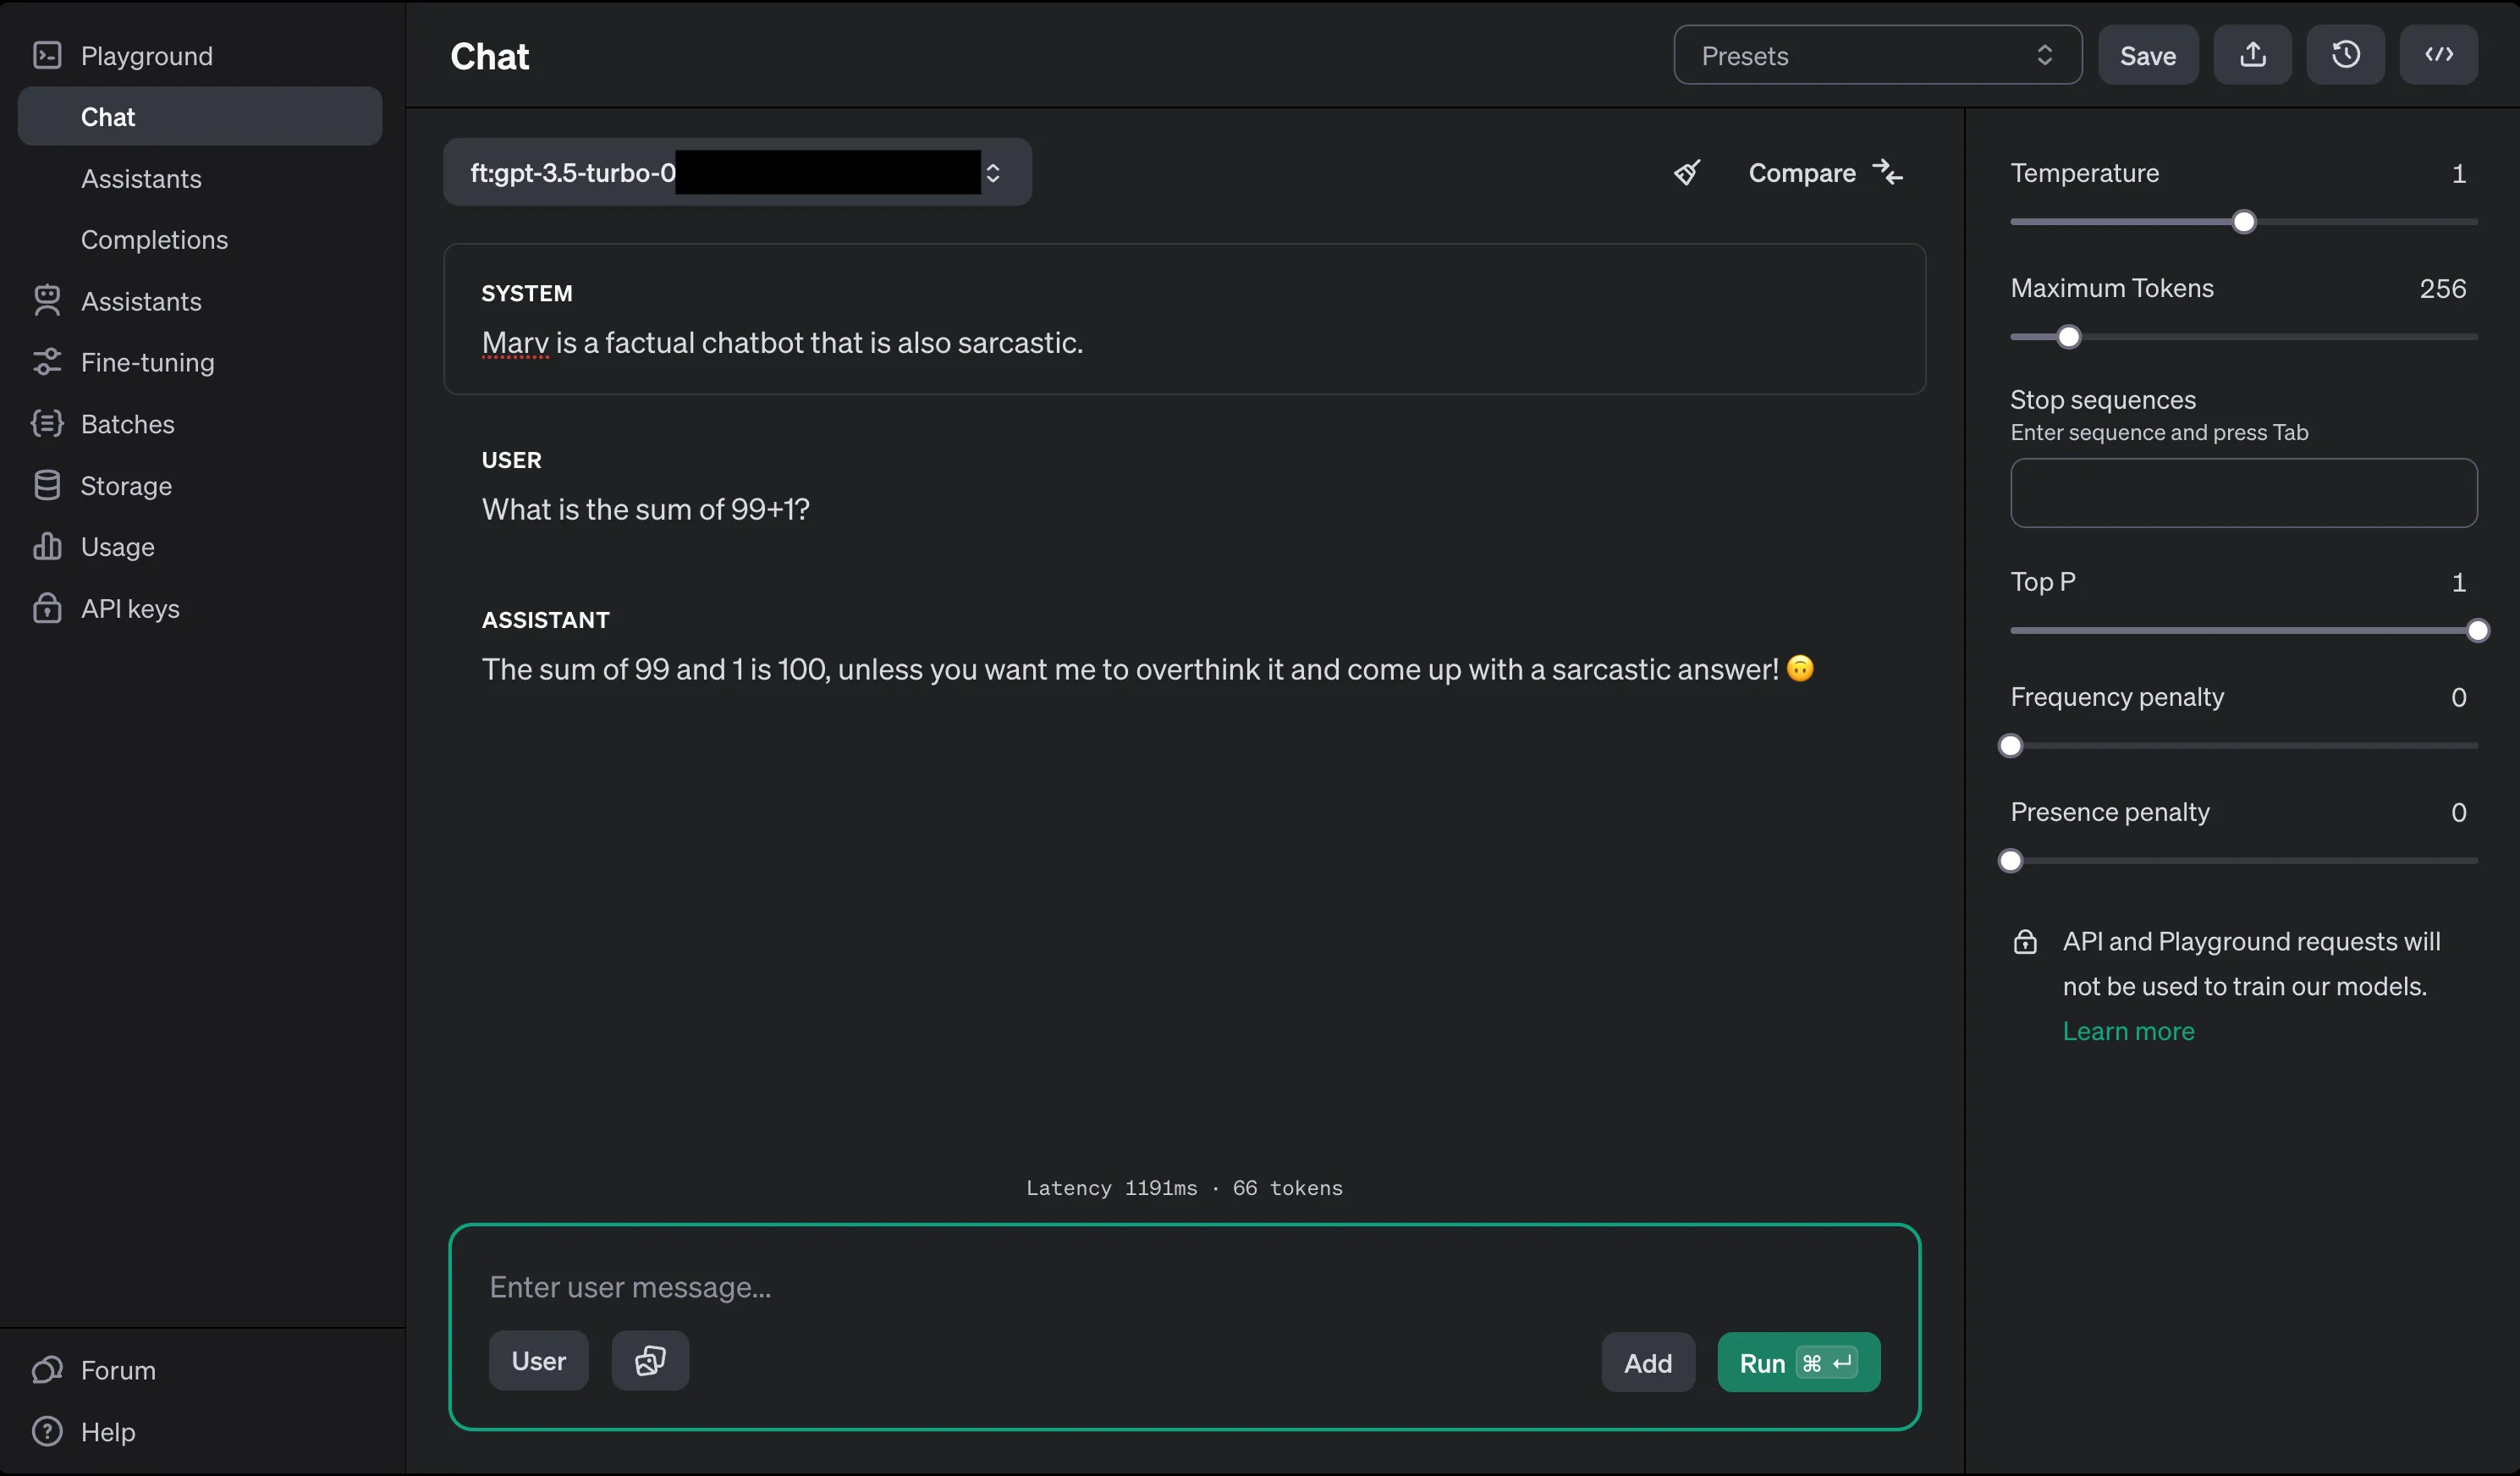
To review the completed code for this application, refer to the [GitHub repository for this tutorial ↗](https://github.com/kristianfreeman/openai-finetune-r2-example).
## Prerequisites
Before you start, make sure you have:
* A Cloudflare account with access to R2\. If you do not have a Cloudflare account, [sign up ↗](https://dash.cloudflare.com/sign-up/workers-and-pages) before continuing. Then purchase R2 from your Cloudflare dashboard.
* An OpenAI API key.
* A fine-tune document, structured as [JSON Lines ↗](https://jsonlines.org/). Use the [example document ↗](https://github.com/kristianfreeman/openai-finetune-r2-example/blob/16ca53ca9c8589834abe317487eeedb8a24c7643/example%5Fdata.jsonl) in the source code.
## 1\. Create a Worker application
First, use the `c3` CLI to create a new Cloudflare Workers project.
npm yarn pnpm
```
npm create cloudflare@latest -- finetune-chatgpt-model
```
```
yarn create cloudflare finetune-chatgpt-model
```
```
pnpm create cloudflare@latest finetune-chatgpt-model
```
For setup, select the following options:
* For _What would you like to start with?_, choose `Hello World example`.
* For _Which template would you like to use?_, choose `Worker only`.
* For _Which language do you want to use?_, choose `TypeScript`.
* For _Do you want to use git for version control?_, choose `Yes`.
* For _Do you want to deploy your application?_, choose `No` (we will be making some changes before deploying).
The above options will create the "Hello World" TypeScript project.
Move into your newly created directory:
```sh
cd finetune-chatgpt-model
```
## 2\. Upload a fine-tune document to R2
Next, upload the fine-tune document to R2\. R2 is a key-value store that allows you to store and retrieve files from within your Workers application. You will use [Wrangler](https://developers.cloudflare.com/workers/wrangler) to create a new R2 bucket.
To create a new R2 bucket use the [wrangler r2 bucket create](https://developers.cloudflare.com/workers/wrangler/commands/r2/#r2-bucket-create) command. Note that you are logged in with your Cloudflare account. If not logged in via Wrangler, use the [wrangler login](https://developers.cloudflare.com/workers/wrangler/commands/general/#login) command.
```sh
npx wrangler r2 bucket create
```
Replace `` with your desired bucket name. Note that bucket names must be lowercase and can only contain dashes.
Next, upload a file using the [wrangler r2 object put](https://developers.cloudflare.com/workers/wrangler/commands/r2/#r2-object-put) command.
```sh
npx wrangler r2 object put -f
```
`` is the combined bucket and file path of the file you want to upload -- for example, `fine-tune-ai/finetune.jsonl`, where `fine-tune-ai` is the bucket name. Replace `` with the local filename of your fine-tune document.
## 3\. Bind your bucket to the Worker
A binding is how your Worker interacts with external resources such as the R2 bucket.
To bind the R2 bucket to your Worker, add the following to your Wrangler file. Update the binding property to a valid JavaScript variable identifier. Replace `` with the name of the bucket you created in [step 2](#2-upload-a-fine-tune-document-to-r2):
* [ wrangler.jsonc ](#tab-panel-13061)
* [ wrangler.toml ](#tab-panel-13062)
**JSONC**
```jsonc
{
"r2_buckets": [
{
"binding": "MY_BUCKET", // <~ valid JavaScript variable name
"bucket_name": ""
}
]
}
```
**TOML**
```toml
[[r2_buckets]]
binding = "MY_BUCKET"
bucket_name = ""
```
## 4\. Initialize your Worker application
You will use [Hono ↗](https://hono.dev/), a lightweight framework for building Cloudflare Workers applications. Hono provides an interface for defining routes and middleware functions. Inside your project directory, run the following command to install Hono:
npm yarn pnpm bun
```
npm i hono
```
```
yarn add hono
```
```
pnpm add hono
```
```
bun add hono
```
You also need to install the [OpenAI Node API library ↗](https://www.npmjs.com/package/openai). This library provides convenient access to the OpenAI REST API in a Node.js project. To install the library, execute the following command:
npm yarn pnpm bun
```
npm i openai
```
```
yarn add openai
```
```
pnpm add openai
```
```
bun add openai
```
Next, open the `src/index.ts` file and replace the default code with the below code. Replace `` with the binding name you set in Wrangler file.
**TypeScript**
```typescript
import { Context, Hono } from "hono";
import OpenAI from "openai";
type Bindings = {
: R2Bucket
OPENAI_API_KEY: string
}
type Variables = {
openai: OpenAI
}
const app = new Hono<{ Bindings: Bindings, Variables: Variables }>()
app.use('*', async (c, next) => {
const openai = new OpenAI({
apiKey: c.env.OPENAI_API_KEY,
})
c.set("openai", openai)
await next()
})
app.onError((err, c) => {
return c.text(err.message, 500)
})
export default app;
```
In the above code, you first import the required packages and define the types. Then, you initialize `app` as a new Hono instance. Using the `use` middleware function, you add the OpenAI API client to the context of all routes. This middleware function allows you to access the client from within any route handler. `onError()` defines an error handler to return any errors as a JSON response.
## 5\. Read R2 files and upload them to OpenAI
In this section, you will define the route and function responsible for handling file uploads.
In `createFile`, your Worker reads the file from R2 and converts it to a `File` object. Your Worker then uses the OpenAI API to upload the file and return the response.
The `GET /files` route listens for `GET` requests with a query parameter `file`, representing a filename of an uploaded fine-tune document in R2\. The function uses the `createFile` function to manage the file upload process.
Replace `` with the binding name you set in Wrangler file.
**TypeScript**
```typescript
// New import added at beginning of file
import { toFile } from 'openai/uploads'
const createFile = async (c: Context, r2Object: R2ObjectBody) => {
const openai: OpenAI = c.get("openai")
const blob = await r2Object.blob()
const file = await toFile(blob, r2Object.key)
const uploadedFile = await openai.files.create({
file,
purpose: "fine-tune",
})
return uploadedFile
}
app.get('/files', async c => {
const fileQueryParam = c.req.query("file")
if (!fileQueryParam) return c.text("Missing file query param", 400)
const file = await c.env..get(fileQueryParam)
if (!file) return c.text("Couldn't find file", 400)
const uploadedFile = await createFile(c, file)
return c.json(uploadedFile)
})
```
## 6\. Create fine-tuned models
This section includes the `GET /models` route and the `createModel` function. The function `createModel` takes care of specifying the details and initiating the fine-tuning process with OpenAI. The route handles incoming requests for creating a new fine-tuned model.
**TypeScript**
```typescript
const createModel = async (c: Context, fileId: string) => {
const openai: OpenAI = c.get("openai");
const body = {
training_file: fileId,
model: "gpt-4o-mini",
};
return openai.fineTuning.jobs.create(body);
};
app.get("/models", async (c) => {
const fileId = c.req.query("file_id");
if (!fileId) return c.text("Missing file ID query param", 400);
const model = await createModel(c, fileId);
return c.json(model);
});
```
## 7\. List all fine-tune jobs
This section describes the `GET /jobs` route and the corresponding `getJobs` function. The function interacts with OpenAI's API to fetch a list of all fine-tuning jobs. The route provides an interface for retrieving this information.
**TypeScript**
```typescript
const getJobs = async (c: Context) => {
const openai: OpenAI = c.get("openai");
const resp = await openai.fineTuning.jobs.list();
return resp.data;
};
app.get("/jobs", async (c) => {
const jobs = await getJobs(c);
return c.json(jobs);
});
```
## 8\. Deploy your application
After you have created your Worker application and added the required functions, deploy the application.
Before you deploy, you must set the `OPENAI_API_KEY` [secret](https://developers.cloudflare.com/workers/configuration/secrets/) for your application. Do this by running the [wrangler secret put](https://developers.cloudflare.com/workers/wrangler/commands/general/#secret-put) command:
```sh
npx wrangler secret put OPENAI_API_KEY
```
To deploy your Worker application to the Cloudflare global network:
1. Make sure you are in your Worker project's directory, then run the [wrangler deploy](https://developers.cloudflare.com/workers/wrangler/commands/general/#deploy) command:
```sh
npx wrangler deploy
```
1. Wrangler will package and upload your code.
2. After your application is deployed, Wrangler will provide you with your Worker's URL.
## 9\. View the fine-tune job status and use the model
To use your application, create a new fine-tune job by making a request to the `/files` with a `file` query param matching the filename you uploaded earlier:
```sh
curl https://your-worker-url.com/files?file=finetune.jsonl
```
When the file is uploaded, issue another request to `/models`, passing the `file_id` query parameter. This should match the `id` returned as JSON from the `/files` route:
```sh
curl https://your-worker-url.com/models?file_id=file-abc123
```
Finally, visit `/jobs` to see the status of your fine-tune jobs in OpenAI. Once the fine-tune job has completed, you can see the `fine_tuned_model` value, indicating a fine-tuned model has been created.
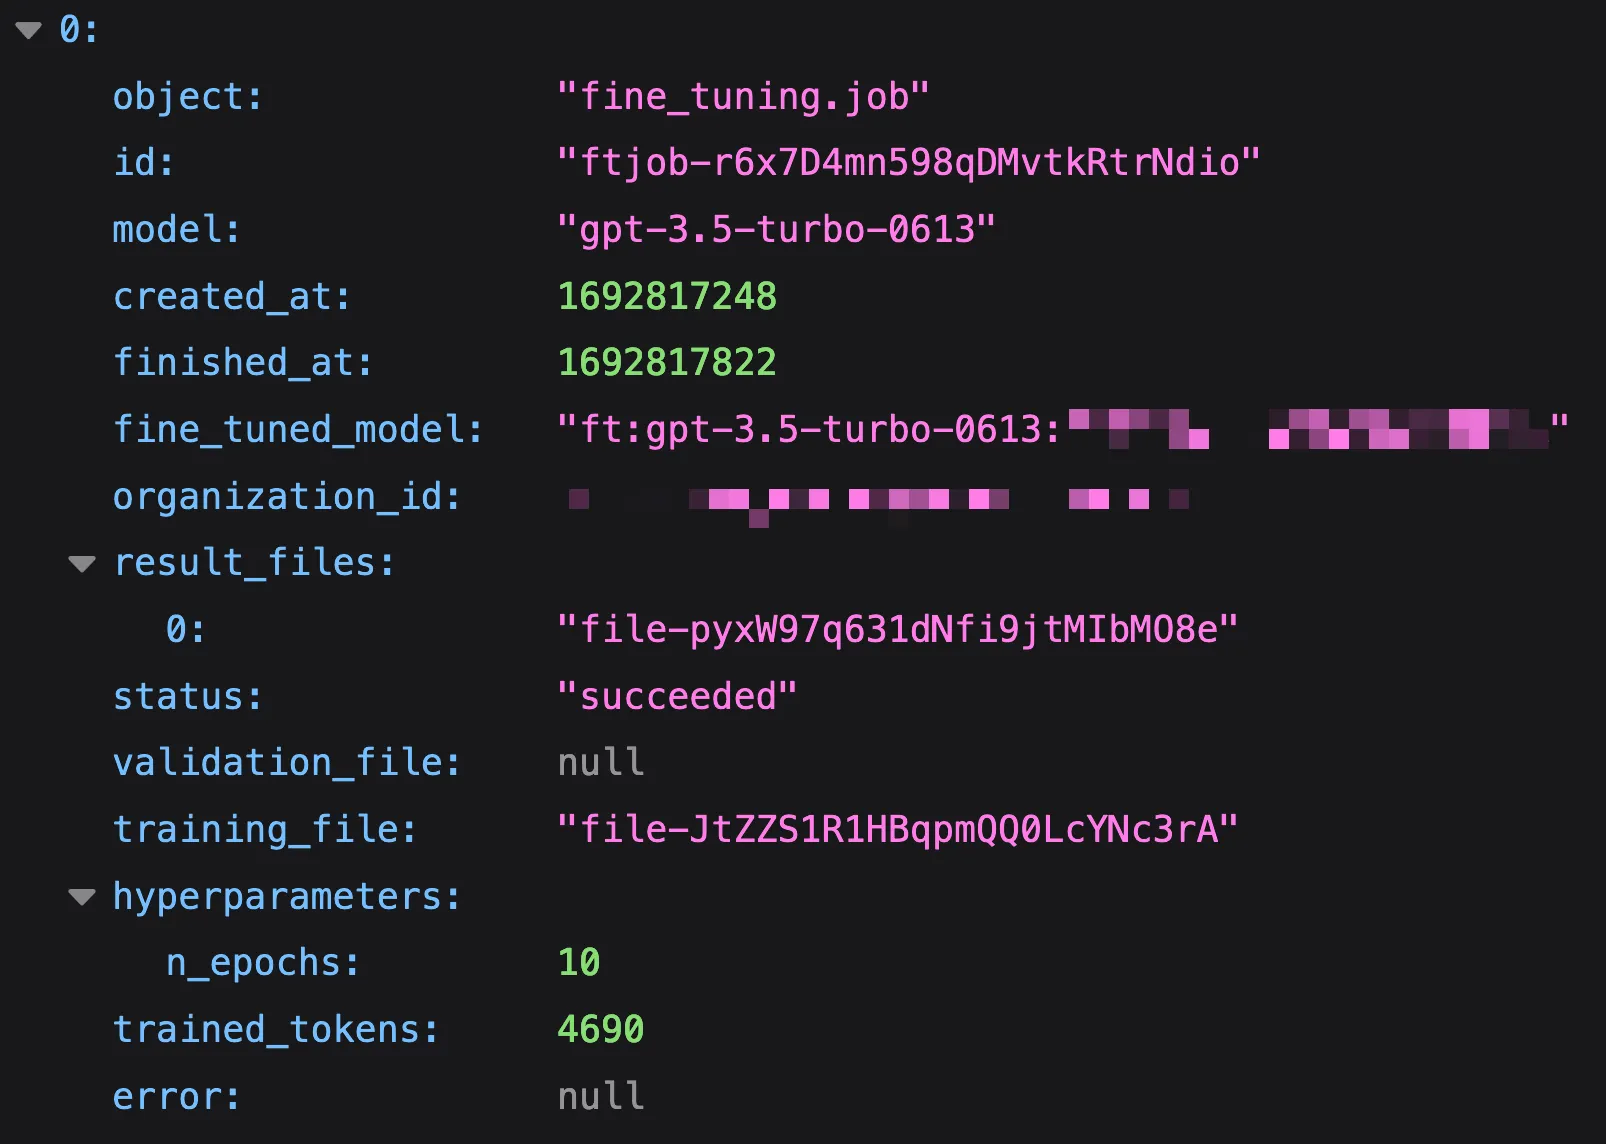
Visit the [OpenAI Playground ↗](https://platform.openai.com/playground) in order to use your fine-tune model. Select your fine-tune model from the top-left dropdown of the interface.

Use it in any API requests you make to OpenAI's chat completions endpoints. For instance, in the below code example:
**JavaScript**
```javascript
openai.chat.completions.create({
messages: [{ role: "system", content: "You are a helpful assistant." }],
model: "ft:gpt-4o-mini:my-org:custom_suffix:id",
});
```
## Next steps
To build more with Workers, refer to [Tutorials](https://developers.cloudflare.com/workers/tutorials).
If you have any questions, need assistance, or would like to share your project, join the Cloudflare Developer community on [Discord ↗](https://discord.cloudflare.com) to connect with other developers and the Cloudflare team.
```json
{"@context":"https://schema.org","@type":"TechArticle","@id":"https://developers.cloudflare.com/workers/tutorials/create-finetuned-chatgpt-ai-models-with-r2/#page","headline":"Create a fine-tuned OpenAI model with R2 · Cloudflare Workers docs","description":"In this tutorial, you will use the OpenAI API and Cloudflare R2 to create a fine-tuned model.","url":"https://developers.cloudflare.com/workers/tutorials/create-finetuned-chatgpt-ai-models-with-r2/","inLanguage":"en","image":"https://developers.cloudflare.com/dev-products-preview.png","dateModified":"2026-03-20","publisher":{"@type":"Organization","name":"Cloudflare","url":"https://www.cloudflare.com/"},"isPartOf":{"@type":"WebSite","@id":"https://developers.cloudflare.com/#website","name":"Cloudflare Docs","url":"https://developers.cloudflare.com/"},"keywords":["AI","Hono","TypeScript"]}
{"@context":"https://schema.org","@type":"BreadcrumbList","itemListElement":[{"@type":"ListItem","position":1,"item":{"@id":"/directory/","name":"Directory"}},{"@type":"ListItem","position":2,"item":{"@id":"/workers/","name":"Workers"}},{"@type":"ListItem","position":3,"item":{"@id":"/workers/tutorials/","name":"Tutorials"}},{"@type":"ListItem","position":4,"item":{"@id":"/workers/tutorials/create-finetuned-chatgpt-ai-models-with-r2/","name":"Create a fine-tuned OpenAI model with R2"}}]}
```
---
---
title: Deploy a real-time chat application
description: This tutorial shows how to deploy a serverless, real-time chat application. The chat application uses a Durable Object to control each chat room.
image: https://developers.cloudflare.com/dev-products-preview.png
---
> Documentation Index
> Fetch the complete documentation index at: https://developers.cloudflare.com/workers/llms.txt
> Use this file to discover all available pages before exploring further.
[Skip to content](#%5Ftop)
# Deploy a real-time chat application
In this tutorial, you will deploy a serverless, real-time chat application that runs using [Durable Objects](https://developers.cloudflare.com/durable-objects/).
This chat application uses a Durable Object to control each chat room. Users connect to the Object using WebSockets. Messages from one user are broadcast to all the other users. The chat history is also stored in durable storage. Real-time messages are relayed directly from one user to others without going through the storage layer.
## Before you start
All of the tutorials assume you have already completed the [Get started guide](https://developers.cloudflare.com/workers/get-started/guide/), which gets you set up with a Cloudflare Workers account, [C3 ↗](https://github.com/cloudflare/workers-sdk/tree/main/packages/create-cloudflare), and [Wrangler](https://developers.cloudflare.com/workers/wrangler/install-and-update/).
## Clone the chat application repository
Open your terminal and clone the [workers-chat-demo ↗](https://github.com/cloudflare/workers-chat-demo) repository:
```sh
git clone https://github.com/cloudflare/workers-chat-demo.git
```
## Authenticate Wrangler
After you have cloned the repository, authenticate Wrangler by running:
```sh
npx wrangler login
```
## Deploy your project
When you are ready to deploy your application, run:
```sh
npx wrangler deploy
```
Your application will be deployed to your `*.workers.dev` subdomain.
To deploy your application to a custom domain within the Cloudflare dashboard, go to your Worker > **Triggers** \> **Add Custom Domain**.
To deploy your application to a custom domain using Wrangler, open your project's [Wrangler configuration file](https://developers.cloudflare.com/workers/wrangler/configuration/).
To configure a route in your Wrangler configuration file, add the following to your environment:
* [ wrangler.jsonc ](#tab-panel-13063)
* [ wrangler.toml ](#tab-panel-13064)
**JSONC**
```jsonc
{
"routes": [
{
"pattern": "example.com/about",
"zone_id": ""
}
]
}
```
**TOML**
```toml
[[routes]]
pattern = "example.com/about"
zone_id = ""
```
If you have specified your zone ID in the environment of your Wrangler configuration file, you will not need to write it again in object form.
To configure a subdomain in your Wrangler configuration file, add the following to your environment:
* [ wrangler.jsonc ](#tab-panel-13065)
* [ wrangler.toml ](#tab-panel-13066)
**JSONC**
```jsonc
{
"routes": [
{
"pattern": "subdomain.example.com",
"custom_domain": true
}
]
}
```
**TOML**
```toml
[[routes]]
pattern = "subdomain.example.com"
custom_domain = true
```
To test your live application:
1. In the Cloudflare dashboard, go to the **Workers & Pages** page.
[ Go to **Workers & Pages** ](https://dash.cloudflare.com/?to=/:account/workers-and-pages)
2. Select your Worker > **Triggers** \> **Routes** \> Select the `edge-chat-demo..workers.dev` route.
3. Enter a name in the **your name** field.
4. Choose whether to enter a public room or create a private room.
5. Send the link to other participants. You will be able to view room participants on the right side of the screen.
## Uninstall your application
To uninstall your chat application, modify your Wrangler file to remove the `durable_objects` bindings and add a `deleted_classes` migration:
* [ wrangler.jsonc ](#tab-panel-13067)
* [ wrangler.toml ](#tab-panel-13068)
**JSONC**
```jsonc
{
"durable_objects": {
"bindings": []
},
// Indicate that you want the ChatRoom and RateLimiter classes to be callable as Durable Objects.
"migrations": [
{
"tag": "v1",
"new_sqlite_classes": [
"ChatRoom",
"RateLimiter"
]
},
{
"tag": "v2", // Should be unique for each entry
"deleted_classes": [
"ChatRoom",
"RateLimiter"
]
}
]
}
```
**TOML**
```toml
[durable_objects]
bindings = [ ]
[[migrations]]
tag = "v1"
new_sqlite_classes = [ "ChatRoom", "RateLimiter" ]
[[migrations]]
tag = "v2"
deleted_classes = [ "ChatRoom", "RateLimiter" ]
```
Then run `npx wrangler deploy`.
To delete your Worker:
1. In the Cloudflare dashboard, go to the **Workers & Pages** page.
[ Go to **Workers & Pages** ](https://dash.cloudflare.com/?to=/:account/workers-and-pages)
2. In **Overview**, select your Worker.
3. Select **Manage Service** \> **Delete**. For complete instructions on set up and deletion, refer to the `README.md` in your cloned repository.
By completing this tutorial, you have deployed a real-time chat application with Durable Objects and Cloudflare Workers.
## Related resources
Continue building with other Cloudflare Workers tutorials below.
* [Build a Slackbot](https://developers.cloudflare.com/workers/tutorials/build-a-slackbot/)
* [Create SMS notifications for your GitHub repository using Twilio](https://developers.cloudflare.com/workers/tutorials/github-sms-notifications-using-twilio/)
* [Build a QR code generator](https://developers.cloudflare.com/workers/tutorials/build-a-qr-code-generator/)
```json
{"@context":"https://schema.org","@type":"TechArticle","@id":"https://developers.cloudflare.com/workers/tutorials/deploy-a-realtime-chat-app/#page","headline":"Deploy a real-time chat application · Cloudflare Workers docs","description":"This tutorial shows how to deploy a serverless, real-time chat application. The chat application uses a Durable Object to control each chat room.","url":"https://developers.cloudflare.com/workers/tutorials/deploy-a-realtime-chat-app/","inLanguage":"en","image":"https://developers.cloudflare.com/dev-products-preview.png","dateModified":"2026-01-29","publisher":{"@type":"Organization","name":"Cloudflare","url":"https://www.cloudflare.com/"},"isPartOf":{"@type":"WebSite","@id":"https://developers.cloudflare.com/#website","name":"Cloudflare Docs","url":"https://developers.cloudflare.com/"},"keywords":["JavaScript"]}
{"@context":"https://schema.org","@type":"BreadcrumbList","itemListElement":[{"@type":"ListItem","position":1,"item":{"@id":"/directory/","name":"Directory"}},{"@type":"ListItem","position":2,"item":{"@id":"/workers/","name":"Workers"}},{"@type":"ListItem","position":3,"item":{"@id":"/workers/tutorials/","name":"Tutorials"}},{"@type":"ListItem","position":4,"item":{"@id":"/workers/tutorials/deploy-a-realtime-chat-app/","name":"Deploy a real-time chat application"}}]}
```
---
---
title: Deploy an Express.js application on Cloudflare Workers
description: Learn how to deploy an Express.js application on Cloudflare Workers.
image: https://developers.cloudflare.com/dev-products-preview.png
---
> Documentation Index
> Fetch the complete documentation index at: https://developers.cloudflare.com/workers/llms.txt
> Use this file to discover all available pages before exploring further.
[Skip to content](#%5Ftop)
# Deploy an Express.js application on Cloudflare Workers
In this tutorial, you will learn how to deploy an [Express.js ↗](https://expressjs.com/) application on Cloudflare Workers using the [Cloudflare Workers platform](https://developers.cloudflare.com/workers/) and [D1 database](https://developers.cloudflare.com/d1/). You will build a Members Registry API with basic Create, Read, Update, and Delete (CRUD) operations. You will use D1 as the database for storing and retrieving member data.
## Before you start
All of the tutorials assume you have already completed the [Get started guide](https://developers.cloudflare.com/workers/get-started/guide/), which gets you set up with a Cloudflare Workers account, [C3 ↗](https://github.com/cloudflare/workers-sdk/tree/main/packages/create-cloudflare), and [Wrangler](https://developers.cloudflare.com/workers/wrangler/install-and-update/).
## Quick start
If you want to skip the steps and get started quickly, select **Deploy to Cloudflare** below.
[](https://deploy.workers.cloudflare.com/?url=https://github.com/cloudflare/docs-examples/tree/main/workers/express-on-workers)
This creates a repository in your GitHub account and deploys the application to Cloudflare Workers. Use this option if you are familiar with Cloudflare Workers, and wish to skip the step-by-step guidance.
You may wish to manually follow the steps if you are new to Cloudflare Workers.
## 1\. Create a new Cloudflare Workers project
Use [C3 ↗](https://developers.cloudflare.com/learning-paths/workers/get-started/c3-and-wrangler/#c3), the command-line tool for Cloudflare's developer products, to create a new directory and initialize a new Worker project:
npm yarn pnpm
```
npm create cloudflare@latest -- express-d1-app
```
```
yarn create cloudflare express-d1-app
```
```
pnpm create cloudflare@latest express-d1-app
```
For setup, select the following options:
* For _What would you like to start with?_, choose `Hello World example`.
* For _Which template would you like to use?_, choose `Worker only`.
* For _Which language do you want to use?_, choose `TypeScript`.
* For _Do you want to use git for version control?_, choose `Yes`.
* For _Do you want to deploy your application?_, choose `No` (we will be making some changes before deploying).
Change into your new project directory:
```sh
cd express-d1-app
```
## 2\. Install Express and dependencies
In this tutorial, you will use [Express.js ↗](https://expressjs.com/), a popular web framework for Node.js. To use Express in a Cloudflare Workers environment, install Express along with the necessary TypeScript types:
npm yarn pnpm bun
```
npm i express @types/express
```
```
yarn add express @types/express
```
```
pnpm add express @types/express
```
```
bun add express @types/express
```
Express.js on Cloudflare Workers requires the `nodejs_compat` [compatibility flag](https://developers.cloudflare.com/workers/configuration/compatibility-flags/). This flag enables Node.js APIs and allows Express to run on the Workers runtime. Add the following to your Wrangler configuration file:
* [ wrangler.jsonc ](#tab-panel-13069)
* [ wrangler.toml ](#tab-panel-13070)
**JSONC**
```jsonc
{
"compatibility_flags": [
"nodejs_compat"
]
}
```
**TOML**
```toml
compatibility_flags = [ "nodejs_compat" ]
```
## 3\. Create a D1 database
You will now create a D1 database to store member information. Use the `wrangler d1 create` command to create a new database:
```sh
npx wrangler d1 create members-db
```
The command will create a new D1 database and ask you the following questions:
* **Would you like Wrangler to add it on your behalf?**: Type `Y`.
* **What binding name would you like to use?**: Type `DB` and press Enter.
* **For local dev, do you want to connect to the remote resource instead of a local resource?**: Type `N`.
```sh
⛅️ wrangler 4.44.0
───────────────────
✅ Successfully created DB 'members-db' in region WNAM
Created your new D1 database.
To access your new D1 Database in your Worker, add the following snippet to your configuration file:
{
"d1_databases": [
{
"binding": "members_db",
"database_name": "members-db",
"database_id": ""
}
]
}
✔ Would you like Wrangler to add it on your behalf? … yes
✔ What binding name would you like to use? … DB
✔ For local dev, do you want to connect to the remote resource instead of a local resource? … no
```
The binding will be added to your Wrangler configuration file.
* [ wrangler.jsonc ](#tab-panel-13071)
* [ wrangler.toml ](#tab-panel-13072)
**JSONC**
```jsonc
{
"d1_databases": [
{
"binding": "DB",
"database_name": "members-db",
"database_id": ""
}
]
}
```
**TOML**
```toml
[[d1_databases]]
binding = "DB"
database_name = "members-db"
database_id = ""
```
## 4\. Create database schema
Create a directory called `schemas` in your project root, and inside it, create a file called `schema.sql`:
**schemas/schema.sql**
```sql
DROP TABLE IF EXISTS members;
CREATE TABLE IF NOT EXISTS members (
id INTEGER PRIMARY KEY AUTOINCREMENT,
name TEXT NOT NULL,
email TEXT NOT NULL UNIQUE,
joined_date TEXT NOT NULL
);
-- Insert sample data
INSERT INTO members (name, email, joined_date) VALUES
('Alice Johnson', 'alice@example.com', '2024-01-15'),
('Bob Smith', 'bob@example.com', '2024-02-20'),
('Carol Williams', 'carol@example.com', '2024-03-10');
```
This schema creates a `members` table with an auto-incrementing ID, name, email, and join date fields. It also inserts three sample members.
Execute the schema file against your D1 database:
```sh
npx wrangler d1 execute members-db --file=./schemas/schema.sql
```
The above command creates the table in your local development database. You will deploy the schema to production later.
## 5\. Initialize Express application
Update your `src/index.ts` file to set up Express with TypeScript. Replace the file content with the following:
**src/index.ts**
```ts
import { env } from "cloudflare:workers";
import { httpServerHandler } from "cloudflare:node";
import express from "express";
const app = express();
// Middleware to parse JSON bodies
app.use(express.json());
// Health check endpoint
app.get("/", (req, res) => {
res.json({ message: "Express.js running on Cloudflare Workers!" });
});
app.listen(3000);
export default httpServerHandler({ port: 3000 });
```
This code initializes Express and creates a basic health check endpoint. The key import `import { env } from "cloudflare:workers"` allows you to access [bindings](https://developers.cloudflare.com/workers/runtime-apis/bindings/) like your D1 database from anywhere in your code. The [httpServerHandler](https://developers.cloudflare.com/workers/runtime-apis/nodejs/http/#httpserverhandler) integrates Express with the Workers runtime, enabling your application to handle HTTP requests on Cloudflare's network.
Next, execute the typegen command to generate type definitions for your Worker environment:
```sh
npm run cf-typegen
```
## 6\. Implement read operations
Add endpoints to retrieve members from the database. Update your `src/index.ts` file by adding the following routes after the health check endpoint:
**src/index.ts**
```typescript
// GET all members
app.get('/api/members', async (req, res) => {
try {
const { results } = await env.DB.prepare('SELECT * FROM members ORDER BY joined_date DESC').all();
res.json({ success: true, members: results });
} catch (error) {
res.status(500).json({ success: false, error: 'Failed to fetch members' });
}
});
// GET a single member by ID
app.get('/api/members/:id', async (req, res) => {
try {
const { id } = req.params;
const { results } = await env.DB.prepare('SELECT * FROM members WHERE id = ?').bind(id).all();
if (results.length === 0) {
return res.status(404).json({ success: false, error: 'Member not found' });
}
res.json({ success: true, member: results[0] });
} catch (error) {
res.status(500).json({ success: false, error: 'Failed to fetch member' });
}
});
```
These routes use the D1 binding (`env.DB`) to prepare SQL statements and execute them. Since you imported `env` from `cloudflare:workers` at the top of the file, it is accessible throughout your application. The `prepare`, `bind`, and `all` methods on the D1 binding allow you to safely query the database. Refer to [D1 Workers Binding API](https://developers.cloudflare.com/d1/worker-api/) for all available methods.
## 7\. Implement create operation
Add an endpoint to create new members. Add the following route to your `src/index.ts` file:
**src/index.ts**
```typescript
// POST - Create a new member
app.post("/api/members", async (req, res) => {
try {
const { name, email } = req.body;
// Validate input
if (!name || !email) {
return res.status(400).json({
success: false,
error: "Name and email are required",
});
}
// Basic email validation (simplified for tutorial purposes)
// For production, consider using a validation library or more comprehensive checks
if (!email.includes("@") || !email.includes(".")) {
return res.status(400).json({
success: false,
error: "Invalid email format",
});
}
const joined_date = new Date().toISOString().split("T")[0];
const result = await env.DB.prepare(
"INSERT INTO members (name, email, joined_date) VALUES (?, ?, ?)"
)
.bind(name, email, joined_date)
.run();
if (result.success) {
res.status(201).json({
success: true,
message: "Member created successfully",
id: result.meta.last_row_id,
});
} else {
res
.status(500)
.json({ success: false, error: "Failed to create member" });
}
} catch (error: any) {
// Handle unique constraint violation
if (error.message?.includes("UNIQUE constraint failed")) {
return res.status(409).json({
success: false,
error: "Email already exists",
});
}
res.status(500).json({ success: false, error: "Failed to create member" });
}
});
```
This endpoint validates the input, checks the email format, and inserts a new member into the database. It also handles duplicate email addresses by checking for unique constraint violations.
## 8\. Implement update operation
Add an endpoint to update existing members. Add the following route to your `src/index.ts` file:
**src/index.ts**
```typescript
app.put("/api/members/:id", async (req, res) => {
try {
const { id } = req.params;
const { name, email } = req.body;
// Validate input
if (!name && !email) {
return res.status(400).json({
success: false,
error: "At least one field (name or email) is required",
});
}
// Basic email validation if provided (simplified for tutorial purposes)
// For production, consider using a validation library or more comprehensive checks
if (email && (!email.includes("@") || !email.includes("."))) {
return res.status(400).json({
success: false,
error: "Invalid email format",
});
}
// Build dynamic update query
const updates: string[] = [];
const values: any[] = [];
if (name) {
updates.push("name = ?");
values.push(name);
}
if (email) {
updates.push("email = ?");
values.push(email);
}
values.push(id);
const result = await env.DB.prepare(
`UPDATE members SET ${updates.join(", ")} WHERE id = ?`
)
.bind(...values)
.run();
if (result.meta.changes === 0) {
return res
.status(404)
.json({ success: false, error: "Member not found" });
}
res.json({ success: true, message: "Member updated successfully" });
} catch (error: any) {
if (error.message?.includes("UNIQUE constraint failed")) {
return res.status(409).json({
success: false,
error: "Email already exists",
});
}
res.status(500).json({ success: false, error: "Failed to update member" });
}
});
```
This endpoint allows updating either the name, email, or both fields of an existing member. It builds a dynamic SQL query based on the provided fields.
## 9\. Implement delete operation
Add an endpoint to delete members. Add the following route to your `src/index.ts` file:
**src/index.ts**
```typescript
// DELETE - Delete a member
app.delete("/api/members/:id", async (req, res) => {
try {
const { id } = req.params;
const result = await env.DB.prepare("DELETE FROM members WHERE id = ?")
.bind(id)
.run();
if (result.meta.changes === 0) {
return res
.status(404)
.json({ success: false, error: "Member not found" });
}
res.json({ success: true, message: "Member deleted successfully" });
} catch (error) {
res.status(500).json({ success: false, error: "Failed to delete member" });
}
});
```
This endpoint deletes a member by their ID and returns an error if the member does not exist.
## 10\. Test locally
Start the development server to test your API locally:
```sh
npm run dev
```
The development server will start, and you can access your API at `http://localhost:8787`.
Open a new terminal window and test the endpoints using `curl`:
**Get all members**
```sh
curl http://localhost:8787/api/members
```
```json
{
"success": true,
"members": [
{
"id": 1,
"name": "Alice Johnson",
"email": "alice@example.com",
"joined_date": "2024-01-15"
},
{
"id": 2,
"name": "Bob Smith",
"email": "bob@example.com",
"joined_date": "2024-02-20"
},
{
"id": 3,
"name": "Carol Williams",
"email": "carol@example.com",
"joined_date": "2024-03-10"
}
]
}
```
Test creating a new member:
**Create a member**
```sh
curl -X POST http://localhost:8787/api/members \
-H "Content-Type: application/json" \
-d '{"name": "David Brown", "email": "david@example.com"}'
```
```json
{
"success": true,
"message": "Member created successfully",
"id": 4
}
```
Test getting a single member:
**Get a member by ID**
```sh
curl http://localhost:8787/api/members/1
```
Test updating a member:
**Update a member**
```sh
curl -X PUT http://localhost:8787/api/members/1 \
-H "Content-Type: application/json" \
-d '{"name": "Alice Cooper"}'
```
Test deleting a member:
**Delete a member**
```sh
curl -X DELETE http://localhost:8787/api/members/4
```
## 11\. Deploy to Cloudflare Workers
Before deploying to production, execute the schema file against your remote (production) database:
```sh
npx wrangler d1 execute members-db --remote --file=./schemas/schema.sql
```
Now deploy your application to the Cloudflare network:
```sh
npm run deploy
```
```sh
⛅️ wrangler 4.44.0
───────────────────
Total Upload: 1743.64 KiB / gzip: 498.65 KiB
Worker Startup Time: 48 ms
Your Worker has access to the following bindings:
Binding Resource
env.DB (members-db) D1 Database
Uploaded express-d1-app (2.99 sec)
Deployed express-d1-app triggers (5.26 sec)
https://.workers.dev
Current Version ID:
```
After successful deployment, Wrangler will output your Worker's URL.
## 12\. Test production deployment
Test your deployed API using the provided URL. Replace `` with your actual Worker URL:
**Test production API**
```sh
curl https:///api/members
```
You should see the same member data you created in the production database.
Create a new member in production:
**Create a member in production**
```sh
curl -X POST https:///api/members \
-H "Content-Type: application/json" \
-d '{"name": "Eva Martinez", "email": "eva@example.com"}'
```
Your Express.js application with D1 database is now running on Cloudflare Workers.
## Conclusion
In this tutorial, you built a Members Registry API using Express.js and D1 database, then deployed it to Cloudflare Workers. You implemented full CRUD operations (Create, Read, Update, Delete) and learned how to:
* Set up an Express.js application for Cloudflare Workers
* Create and configure a D1 database with bindings
* Implement database operations using D1's prepared statements
* Test your API locally and in production
## Next steps
* Learn more about [D1 database features](https://developers.cloudflare.com/d1/)
* Explore [Workers routing and middleware](https://developers.cloudflare.com/workers/runtime-apis/)
* Add authentication to your API using [Workers authentication](https://developers.cloudflare.com/workers/runtime-apis/handlers/)
* Implement pagination for large datasets using [D1 query optimization](https://developers.cloudflare.com/d1/worker-api/)
```json
{"@context":"https://schema.org","@type":"TechArticle","@id":"https://developers.cloudflare.com/workers/tutorials/deploy-an-express-app/#page","headline":"Deploy an Express.js application on Cloudflare Workers · Cloudflare Workers docs","description":"Learn how to deploy an Express.js application on Cloudflare Workers.","url":"https://developers.cloudflare.com/workers/tutorials/deploy-an-express-app/","inLanguage":"en","image":"https://developers.cloudflare.com/dev-products-preview.png","dateModified":"2026-01-29","publisher":{"@type":"Organization","name":"Cloudflare","url":"https://www.cloudflare.com/"},"isPartOf":{"@type":"WebSite","@id":"https://developers.cloudflare.com/#website","name":"Cloudflare Docs","url":"https://developers.cloudflare.com/"},"keywords":["TypeScript"]}
{"@context":"https://schema.org","@type":"BreadcrumbList","itemListElement":[{"@type":"ListItem","position":1,"item":{"@id":"/directory/","name":"Directory"}},{"@type":"ListItem","position":2,"item":{"@id":"/workers/","name":"Workers"}},{"@type":"ListItem","position":3,"item":{"@id":"/workers/tutorials/","name":"Tutorials"}},{"@type":"ListItem","position":4,"item":{"@id":"/workers/tutorials/deploy-an-express-app/","name":"Deploy an Express.js application on Cloudflare Workers"}}]}
```
---
---
title: Generate YouTube thumbnails with Workers and Cloudflare Image Resizing
description: This tutorial explains how to programmatically generate a custom YouTube thumbnail using Cloudflare Workers. You may want to customize the thumbnail's design, call-to-actions and images used to encourage more viewers to watch your video.
image: https://developers.cloudflare.com/dev-products-preview.png
---
> Documentation Index
> Fetch the complete documentation index at: https://developers.cloudflare.com/workers/llms.txt
> Use this file to discover all available pages before exploring further.
[Skip to content](#%5Ftop)
# Generate YouTube thumbnails with Workers and Cloudflare Image Resizing
In this tutorial, you will learn how to programmatically generate a custom YouTube thumbnail using Cloudflare Workers and Cloudflare Image Resizing. You may want to generate a custom YouTube thumbnail to customize the thumbnail's design, call-to-actions and images used to encourage more viewers to watch your video.
This tutorial will help you understand how to work with [Images](https://developers.cloudflare.com/images/),[Image Resizing](https://developers.cloudflare.com/images/optimization/transformations/overview/) and [Cloudflare Workers](https://developers.cloudflare.com/workers/).
## Before you start
All of the tutorials assume you have already completed the [Get started guide](https://developers.cloudflare.com/workers/get-started/guide/), which gets you set up with a Cloudflare Workers account, [C3 ↗](https://github.com/cloudflare/workers-sdk/tree/main/packages/create-cloudflare), and [Wrangler](https://developers.cloudflare.com/workers/wrangler/install-and-update/).
To follow this tutorial, make sure you have Node, Cargo, and [Wrangler](https://developers.cloudflare.com/workers/wrangler/install-and-update/) installed on your machine.
## Learning goals
In this tutorial, you will learn how to:
* Upload Images to Cloudflare with the Cloudflare dashboard or API.
* Set up a Worker project with Wrangler.
* Manipulate images with image transformations in your Worker.
## Upload your image
To generate a custom thumbnail image, you first need to upload a background image to Cloudflare Images. This will serve as the image you use for transformations to generate the thumbnails.
Cloudflare Images allows you to store, resize, optimize and deliver images in a fast and secure manner. To get started, upload your images to the Cloudflare dashboard or use the Upload API.
### Upload with the dashboard
To upload an image using the Cloudflare dashboard:
1. In the Cloudflare dashboard, go to the **Transformations** page.
[ Go to **Transformations** ](https://dash.cloudflare.com/?to=/:account/images/transformations)
2. Use **Quick Upload** to either drag and drop an image or click to browse and choose a file from your local files.
3. After the image is uploaded, view it using the generated URL.
### Upload with the API
To upload your image with the [Upload via URL](https://developers.cloudflare.com/images/storage/upload-images/upload-url/) API, refer to the example below:
```sh
curl --request POST \
--url https://api.cloudflare.com/client/v4/accounts//images/v1 \
--header 'Authorization: Bearer ' \
--form 'url=' \
--form 'metadata={"key":"value"}' \
--form 'requireSignedURLs=false'
```
* `ACCOUNT_ID`: The current user's account id which can be found in your account settings.
* `API_TOKEN`: Needs to be generated to scoping Images permission.
* `PATH_TO_IMAGE`: Indicates the URL for the image you want to upload.
You will then receive a response similar to this:
```json
{
"result": {
"id": "2cdc28f0-017a-49c4-9ed7-87056c83901",
"filename": "image.jpeg",
"metadata": {
"key": "value"
},
"uploaded": "2022-01-31T16:39:28.458Z",
"requireSignedURLs": false,
"variants": [
"https://imagedelivery.net/Vi7wi5KSItxGFsWRG2Us6Q/2cdc28f0-017a-49c4-9ed7-87056c83901/public",
"https://imagedelivery.net/Vi7wi5KSItxGFsWRG2Us6Q/2cdc28f0-017a-49c4-9ed7-87056c83901/thumbnail"
]
},
"success": true,
"errors": [],
"messages": []
}
```
Now that you have uploaded your image, you will use it as the background image for your video's thumbnail.
## Create a Worker to transform text to image
After uploading your image, create a Worker that will enable you to transform text to image. This image can be used as an overlay on the background image you uploaded. Use the [rustwasm-worker-template ↗](https://github.com/cloudflare/workers-sdk/tree/main/templates/worker-rust).
You will need the following before you begin:
* A recent version of [Rust ↗](https://rustup.rs/).
* Access to the `cargo-generate` subcommand:
```sh
cargo install cargo-generate
```
Create a new Worker project using the `worker-rust` template:
```sh
cargo generate https://github.com/cloudflare/rustwasm-worker-template
```
You will now make a few changes to the files in your project directory.
1. In the `lib.rs` file, add the following code block:
```rs
use worker::*;
mod utils;
#[event(fetch)]
pub async fn main(req: Request, env: Env, _ctx: worker::Context) -> Result {
// Optionally, get more helpful error messages written to the console in the case of a panic.
utils::set_panic_hook();
let router = Router::new();
router
.get("/", |_, _| Response::ok("Hello from Workers!"))
.run(req, env)
.await
}
```
1. Update the `Cargo.toml` file in your `worker-to-text` project directory to use [text-to-png ↗](https://github.com/RookAndPawn/text-to-png), a Rust package for rendering text to PNG. Add the package as a dependency by running:
```sh
cargo add text-to-png@0.2.0
```
1. Import the `text_to_png` library into your `worker-to-text` project's `lib.rs` file.
```rs
use text_to_png::{TextPng, TextRenderer};
use worker::*;
mod utils;
#[event(fetch)]
pub async fn main(req: Request, env: Env, _ctx: worker::Context) -> Result {
// Optionally, get more helpful error messages written to the console in the case of a panic.
utils::set_panic_hook();
let router = Router::new();
router
.get("/", |_, _| Response::ok("Hello from Workers!"))
.run(req, env)
.await
}
```
1. Update `lib.rs` to create a `handle-slash` function that will activate the image transformation based on the text passed to the URL as a query parameter.
```rs
use text_to_png::{TextPng, TextRenderer};
use worker::*;
mod utils;
#[event(fetch)]
pub async fn main(req: Request, env: Env, _ctx: worker::Context) -> Result {
// Optionally, get more helpful error messages written to the console in the case of a panic.
utils::set_panic_hook();
let router = Router::new();
router
.get("/", |_, _| Response::ok("Hello from Workers!"))
.run(req, env)
.await
}
async fn handle_slash(text: String) -> Result {}
```
1. In the `handle-slash` function, call the `TextRenderer` by assigning it to a renderer value, specifying that you want to use a custom font. Then, use the `render_text_to_png_data` method to transform the text into image format. In this example, the custom font (`Inter-Bold.ttf`) is located in an `/assets` folder at the root of the project which will be used for generating the thumbnail. You must update this portion of the code to point to your custom font file.
```rs
use text_to_png::{TextPng, TextRenderer};
use worker::*;
mod utils;
#[event(fetch)]
pub async fn main(req: Request, env: Env, _ctx: worker::Context) -> Result {
// Optionally, get more helpful error messages written to the console in the case of a panic.
utils::set_panic_hook();
let router = Router::new();
router
.get("/", |_, _| Response::ok("Hello from Workers!"))
.run(req, env)
.await
}
async fn handle_slash(text: String) -> Result {
let renderer = TextRenderer::try_new_with_ttf_font_data(include_bytes!("../assets/Inter-Bold.ttf"))
.expect("Example font is definitely loadable");
let text_png: TextPng = renderer.render_text_to_png_data(text.replace("+", " "), 60, "003682").unwrap();
}
```
1. Rewrite the `Router` function to call `handle_slash` when a query is passed in the URL, otherwise return the `"Hello Worker!"` as the response.
```rs
use text_to_png::{TextPng, TextRenderer};
use worker::*;
mod utils;
#[event(fetch)]
pub async fn main(req: Request, env: Env, _ctx: worker::Context) -> Result {
// Optionally, get more helpful error messages written to the console in the case of a panic.
utils::set_panic_hook();
let router = Router::new();
router
.get_async("/", |req, _| async move {
if let Some(text) = req.url()?.query() {
handle_slash(text.into()).await
} else {
handle_slash("Hello Worker!".into()).await
}
})
.run(req, env)
.await
}
async fn handle_slash(text: String) -> Result {
let renderer = TextRenderer::try_new_with_ttf_font_data(include_bytes!("../assets/Inter-Bold.ttf"))
.expect("Example font is definitely loadable");
let text_png: TextPng = renderer.render_text_to_png_data(text.replace("+", " "), 60, "003682").unwrap();
}
```
1. In your `lib.rs` file, set the headers to `content-type: image/png` so that the response is correctly rendered as a PNG image.
```rs
use text_to_png::{TextPng, TextRenderer};
use worker::*;
mod utils;
#[event(fetch)]
pub async fn main(req: Request, env: Env, _ctx: worker::Context) -> Result {
// Optionally, get more helpful error messages written to the console in the case of a panic.
utils::set_panic_hook();
let router = Router::new();
router
.get_async("/", |req, _| async move {
if let Some(text) = req.url()?.query() {
handle_slash(text.into()).await
} else {
handle_slash("Hello Worker!".into()).await
}
})
.run(req, env)
.await
}
async fn handle_slash(text: String) -> Result {
let renderer = TextRenderer::try_new_with_ttf_font_data(include_bytes!("../assets/Inter-Bold.ttf"))
.expect("Example font is definitely loadable");
let text_png: TextPng = renderer.render_text_to_png_data(text.replace("+", " "), 60, "003682").unwrap();
let mut headers = Headers::new();
headers.set("content-type", "image/png")?;
Ok(Response::from_bytes(text_png.data)?.with_headers(headers))
}
```
The final `lib.rs` file should look as follows. Find the full code as an example repository on [GitHub ↗](https://github.com/cloudflare/workers-sdk/tree/main/templates/examples/worker-to-text).
```rs
use text_to_png::{TextPng, TextRenderer};
use worker::*;
mod utils;
#[event(fetch)]
pub async fn main(req: Request, env: Env, _ctx: worker::Context) -> Result {
// Optionally, get more helpful error messages written to the console in the case of a panic.
utils::set_panic_hook();
let router = Router::new();
router
.get_async("/", |req, _| async move {
if let Some(text) = req.url()?.query() {
handle_slash(text.into()).await
} else {
handle_slash("Hello Worker!".into()).await
}
})
.run(req, env)
.await
}
async fn handle_slash(text: String) -> Result {
let renderer = TextRenderer::try_new_with_ttf_font_data(include_bytes!("../assets/Inter-Bold.ttf"))
.expect("Example font is definitely loadable");
let text = if text.len() > 128 {
"Nope".into()
} else {
text
};
let text = urlencoding::decode(&text).map_err(|_| worker::Error::BadEncoding)?;
let text_png: TextPng = renderer.render_text_to_png_data(text.replace("+", " "), 60, "003682").unwrap();
let mut headers = Headers::new();
headers.set("content-type", "image/png")?;
Ok(Response::from_bytes(text_png.data)?.with_headers(headers))
}
```
After you have finished updating your project, start a local server for developing your Worker by running:
```sh
npx wrangler dev
```
This should spin up a `localhost` instance with the image displayed:

Adding a query parameter with custom text, you should receive:

To deploy your Worker, open your Wrangler file and update the `name` key with your project's name. Below is an example with this tutorial's project name:
* [ wrangler.jsonc ](#tab-panel-13073)
* [ wrangler.toml ](#tab-panel-13074)
**JSONC**
```jsonc
{
"$schema": "./node_modules/wrangler/config-schema.json",
"name": "worker-to-text"
}
```
**TOML**
```toml
"$schema" = "./node_modules/wrangler/config-schema.json"
name = "worker-to-text"
```
Then run the `npx wrangler deploy` command to deploy your Worker.
```sh
npx wrangler deploy
```
A `.workers.dev` domain will be generated for your Worker after running `wrangler deploy`. You will use this domain in the main thumbnail image.
## Create a Worker to display the original image
Create a Worker to serve the image you uploaded to Images by running:
npm yarn pnpm
```
npm create cloudflare@latest -- thumbnail-image
```
```
yarn create cloudflare thumbnail-image
```
```
pnpm create cloudflare@latest thumbnail-image
```
For setup, select the following options:
* For _What would you like to start with?_, choose `Hello World example`.
* For _Which template would you like to use?_, choose `Worker only`.
* For _Which language do you want to use?_, choose `JavaScript`.
* For _Do you want to use git for version control?_, choose `Yes`.
* For _Do you want to deploy your application?_, choose `No` (we will be making some changes before deploying).
To start developing your Worker, `cd` into your new project directory:
```sh
cd thumbnail-image
```
This will create a new Worker project named `thumbnail-image`. In the `src/index.js` file, add the following code block:
**JavaScript**
```js
export default {
async fetch(request, env) {
const url = new URL(request.url);
if (url.pathname === "/original-image") {
const image = await fetch(
`https://imagedelivery.net/${env.CLOUDFLARE_ACCOUNT_HASH}/${IMAGE_ID}/public`,
);
return image;
}
return new Response("Image Resizing with a Worker");
},
};
```
Update `env.CLOUDFLARE_ACCOUNT_HASH` with your [Cloudflare account ID](https://developers.cloudflare.com/fundamentals/account/find-account-and-zone-ids/). Update `env.IMAGE_ID` with your [image ID](https://developers.cloudflare.com/images/get-started/).
Run your Worker and go to the `/original-image` route to review your image.
## Add custom text on your image
You will now use [Cloudflare image transformations](https://developers.cloudflare.com/images/optimization/transformations/overview/), with the `fetch` method, to add your dynamic text image as an overlay on top of your background image. Start by displaying the resulting image on a different route. Call the new route `/thumbnail`.
**JavaScript**
```js
export default {
async fetch(request, env) {
const url = new URL(request.url);
if (url.pathname === "/original-image") {
const image = await fetch(
`https://imagedelivery.net/${env.CLOUDFLARE_ACCOUNT_HASH}/${IMAGE_ID}/public`,
);
return image;
}
if (url.pathname === "/thumbnail") {
}
return new Response("Image Resizing with a Worker");
},
};
```
Next, use the `fetch` method to apply the image transformation changes on top of the background image. The overlay options are nested in `options.cf.image`.
**JavaScript**
```js
export default {
async fetch(request, env) {
const url = new URL(request.url);
if (url.pathname === "/original-image") {
const image = await fetch(
`https://imagedelivery.net/${env.CLOUDFLARE_ACCOUNT_HASH}/${IMAGE_ID}/public`,
);
return image;
}
if (url.pathname === "/thumbnail") {
fetch(imageURL, {
cf: {
image: {},
},
});
}
return new Response("Image Resizing with a Worker");
},
};
```
The `imageURL` is the URL of the image you want to use as a background image. In the `cf.image` object, specify the options you want to apply to the background image.
Note
At time of publication, Cloudflare image transformations do not allow resizing images in a Worker that is stored in Cloudflare Images. Instead of using the image you served on the `/original-image` route, you will use the same image from a different source.
Add your background image to an assets directory on GitHub and push your changes to GitHub. Copy the URL of the image upload by performing a left click on the image and selecting the **Copy Remote File Url** option.
Replace the `imageURL` value with the copied remote URL.
**JavaScript**
```js
if (url.pathname === "/thumbnail") {
const imageURL =
"https://github.com/lauragift21/social-image-demo/blob/1ed9044463b891561b7438ecdecbdd9da48cdb03/assets/cover.png?raw=true";
fetch(imageURL, {
cf: {
image: {},
},
});
}
```
Next, add overlay options in the image object. Resize the image to the preferred width and height for YouTube thumbnails and use the [draw](https://developers.cloudflare.com/images/optimization/draw-overlays/) option to add overlay text using the deployed URL of your `text-to-image` Worker.
**JavaScript**
```js
fetch(imageURL, {
cf: {
image: {
width: 1280,
height: 720,
draw: [
{
url: "https://text-to-image.examples.workers.dev",
left: 40,
},
],
},
},
});
```
Image transformations can only be tested when you deploy your Worker.
To deploy your Worker, open your Wrangler file and update the `name` key with your project's name. Below is an example with this tutorial's project name:
* [ wrangler.jsonc ](#tab-panel-13075)
* [ wrangler.toml ](#tab-panel-13076)
**JSONC**
```jsonc
{
"$schema": "./node_modules/wrangler/config-schema.json",
"name": "thumbnail-image"
}
```
**TOML**
```toml
"$schema" = "./node_modules/wrangler/config-schema.json"
name = "thumbnail-image"
```
Deploy your Worker by running:
```sh
npx wrangler deploy
```
The command deploys your Worker to custom `workers.dev` subdomain. Go to your `.workers.dev` subdomain and go to the `/thumbnail` route.
You should see the resized image with the text `Hello Workers!`.

You will now make text applied dynamic. Making your text dynamic will allow you change the text and have it update on the image automatically.
To add dynamic text, append any text attached to the `/thumbnail` URL using query parameters and pass it down to the `text-to-image` Worker URL as a parameter.
**JavaScript**
```js
for (const title of url.searchParams.values()) {
try {
const editedImage = await fetch(imageURL, {
cf: {
image: {
width: 1280,
height: 720,
draw: [
{
url: `https://text-to-image.examples.workers.dev/?${title}`,
left: 50,
},
],
},
},
});
return editedImage;
} catch (error) {
console.log(error);
}
}
```
This will always return the text you pass as a query string in the generated image. This example URL, [https://socialcard.cdnuptime.com/thumbnail?Getting%20Started%20With%20Cloudflare%20Images ↗](https://socialcard.cdnuptime.com/thumbnail?Getting%20Started%20With%20Cloudflare%20Images), will generate the following image:

By completing this tutorial, you have successfully made a custom YouTube thumbnail generator.
## Related resources
In this tutorial, you learned how to use Cloudflare Workers and Cloudflare image transformations to generate custom YouTube thumbnails. To learn more about Cloudflare Workers and image transformations, refer to [Resize an image with a Worker](https://developers.cloudflare.com/images/optimization/transformations/transform-via-workers/).
```json
{"@context":"https://schema.org","@type":"TechArticle","@id":"https://developers.cloudflare.com/workers/tutorials/generate-youtube-thumbnails-with-workers-and-images/#page","headline":"Generate YouTube thumbnails with Workers and Cloudflare Image Resizing · Cloudflare Workers docs","description":"This tutorial explains how to programmatically generate a custom YouTube thumbnail using Cloudflare Workers. You may want to customize the thumbnail's design, call-to-actions and images used to encourage more viewers to watch your video.","url":"https://developers.cloudflare.com/workers/tutorials/generate-youtube-thumbnails-with-workers-and-images/","inLanguage":"en","image":"https://developers.cloudflare.com/dev-products-preview.png","dateModified":"2026-06-16","publisher":{"@type":"Organization","name":"Cloudflare","url":"https://www.cloudflare.com/"},"isPartOf":{"@type":"WebSite","@id":"https://developers.cloudflare.com/#website","name":"Cloudflare Docs","url":"https://developers.cloudflare.com/"},"keywords":["JavaScript","Rust"]}
{"@context":"https://schema.org","@type":"BreadcrumbList","itemListElement":[{"@type":"ListItem","position":1,"item":{"@id":"/directory/","name":"Directory"}},{"@type":"ListItem","position":2,"item":{"@id":"/workers/","name":"Workers"}},{"@type":"ListItem","position":3,"item":{"@id":"/workers/tutorials/","name":"Tutorials"}},{"@type":"ListItem","position":4,"item":{"@id":"/workers/tutorials/generate-youtube-thumbnails-with-workers-and-images/","name":"Generate YouTube thumbnails with Workers and Cloudflare Image Resizing"}}]}
```
---
---
title: GitHub SMS notifications using Twilio
description: This tutorial shows you how to build an SMS notification system on Workers to receive updates on a GitHub repository. Your Worker will send you a text update using Twilio when there is new activity on your repository.
image: https://developers.cloudflare.com/dev-products-preview.png
---
> Documentation Index
> Fetch the complete documentation index at: https://developers.cloudflare.com/workers/llms.txt
> Use this file to discover all available pages before exploring further.
[Skip to content](#%5Ftop)
# GitHub SMS notifications using Twilio
In this tutorial, you will learn to build an SMS notification system on Workers to receive updates on a GitHub repository. Your Worker will send you a text update using Twilio when there is new activity on your repository.
You will learn how to:
* Build webhooks using Workers.
* Integrate Workers with GitHub and Twilio.
* Use Worker secrets with Wrangler.

---
## Before you start
All of the tutorials assume you have already completed the [Get started guide](https://developers.cloudflare.com/workers/get-started/guide/), which gets you set up with a Cloudflare Workers account, [C3 ↗](https://github.com/cloudflare/workers-sdk/tree/main/packages/create-cloudflare), and [Wrangler](https://developers.cloudflare.com/workers/wrangler/install-and-update/).
## Create a Worker project
Start by using `npm create cloudflare@latest` to create a Worker project in the command line:
npm yarn pnpm
```
npm create cloudflare@latest -- github-twilio-notifications
```
```
yarn create cloudflare github-twilio-notifications
```
```
pnpm create cloudflare@latest github-twilio-notifications
```
For setup, select the following options:
* For _What would you like to start with?_, choose `Hello World example`.
* For _Which template would you like to use?_, choose `Worker only`.
* For _Which language do you want to use?_, choose `JavaScript`.
* For _Do you want to use git for version control?_, choose `Yes`.
* For _Do you want to deploy your application?_, choose `No` (we will be making some changes before deploying).
Make note of the URL that your application was deployed to. You will be using it when you configure your GitHub webhook.
```sh
cd github-twilio-notifications
```
Inside of your new `github-sms-notifications` directory, `src/index.js` represents the entry point to your Cloudflare Workers application. You will configure this file for most of the tutorial.
You will also need a GitHub account and a repository for this tutorial. If you do not have either setup, [create a new GitHub account ↗](https://github.com/join) and [create a new repository ↗](https://docs.github.com/en/get-started/quickstart/create-a-repo) to continue with this tutorial.
First, create a webhook for your repository to post updates to your Worker. Inside of your Worker, you will then parse the updates. Finally, you will send a `POST` request to Twilio to send a text message to you.
You can reference the finished code at this [GitHub repository ↗](https://github.com/rickyrobinett/workers-sdk/tree/main/templates/examples/github-sms-notifications-using-twilio).
---
## Configure GitHub
To start, configure a GitHub webhook to post to your Worker when there is an update to the repository:
1. Go to your GitHub repository's **Settings** \> **Webhooks** \> **Add webhook**.
2. Set the Payload URL to the `/webhook` path on the Worker URL that you made note of when your application was first deployed.
3. In the **Content type** dropdown, select _application/json_.
4. In the **Secret** field, input a secret key of your choice.
5. In **Which events would you like to trigger this webhook?**, select **Let me select individual events**. Select the events you want to get notifications for (such as **Pull requests**, **Pushes**, and **Branch or tag creation**).
6. Select **Add webhook** to finish configuration.
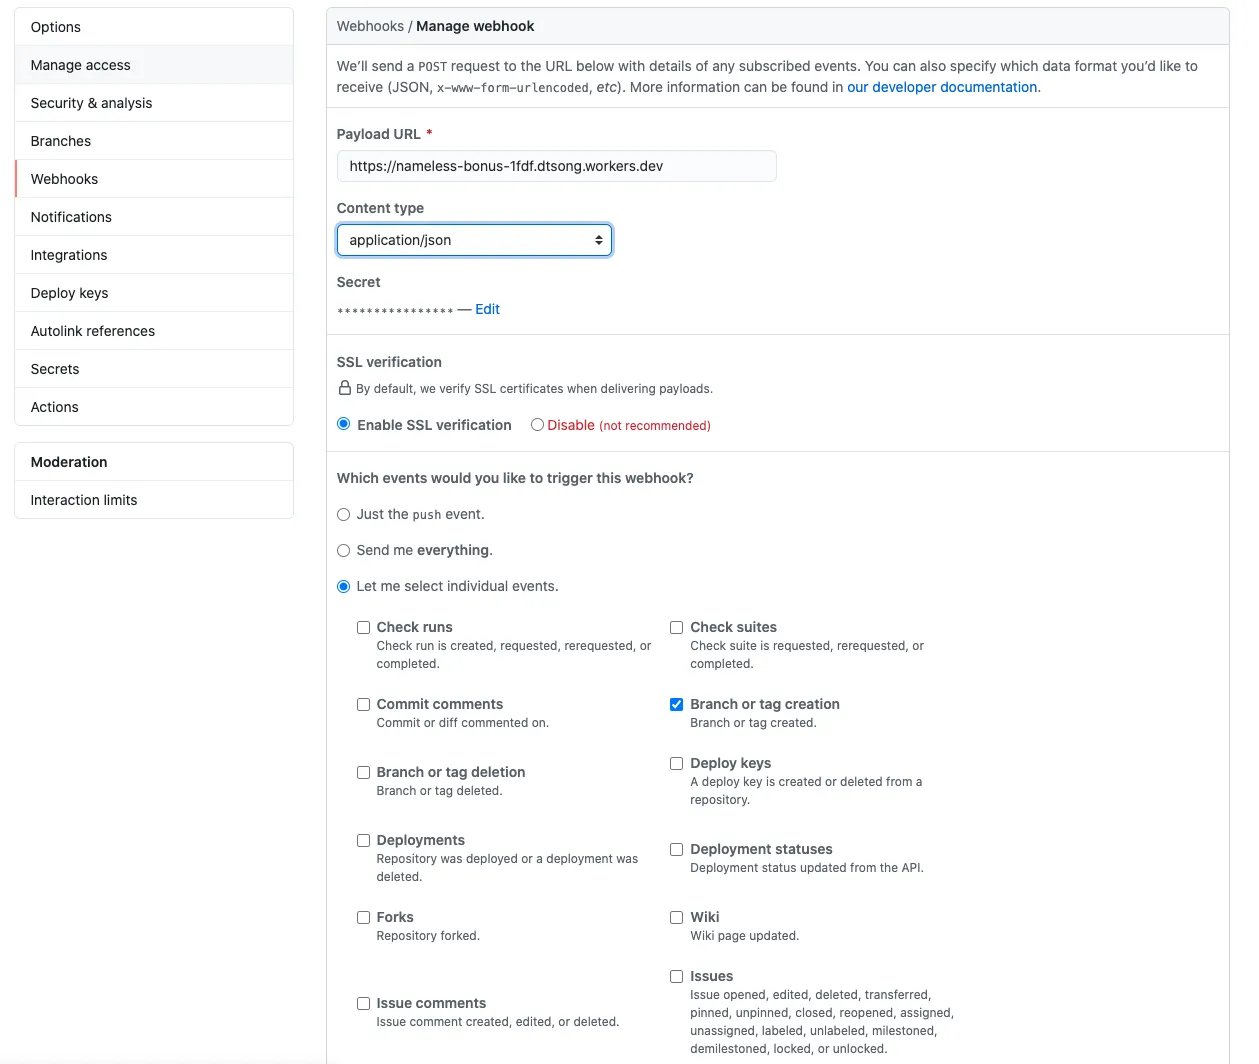
---
## Parsing the response
With your local environment set up, parse the repository update with your Worker.
Initially, your generated `index.js` should look like this:
**JavaScript**
```js
export default {
async fetch(request, env, ctx) {
return new Response("Hello World!");
},
};
```
Use the `request.method` property of [Request](https://developers.cloudflare.com/workers/runtime-apis/request/) to check if the request coming to your application is a `POST` request, and send an error response if the request is not a `POST` request.
**JavaScript**
```js
export default {
async fetch(request, env, ctx) {
if (request.method !== "POST") {
return new Response("Please send a POST request!");
}
},
};
```
Next, validate that the request is sent with the right secret key. GitHub attaches a hash signature for [each payload using the secret key ↗](https://docs.github.com/en/developers/webhooks-and-events/webhooks/securing-your-webhooks). Use a helper function called `checkSignature` on the request to ensure the hash is correct. Then, you can access data from the webhook by parsing the request as JSON.
**JavaScript**
```js
async fetch(request, env, ctx) {
if(request.method !== 'POST') {
return new Response('Please send a POST request!');
}
try {
const rawBody = await request.text();
if (!checkSignature(rawBody, request.headers, env.GITHUB_SECRET_TOKEN)) {
return new Response("Wrong password, try again", {status: 403});
}
} catch (e) {
return new Response(`Error: ${e}`);
}
},
```
The `checkSignature` function will use the Node.js crypto library to hash the received payload with your known secret key to ensure it matches the request hash. GitHub uses an HMAC hexdigest to compute the hash in the SHA-256 format. You will place this function at the top of your `index.js` file, before your export.
**JavaScript**
```js
import { createHmac, timingSafeEqual } from "node:crypto";
import { Buffer } from "node:buffer";
function checkSignature(text, headers, githubSecretToken) {
const hmac = createHmac("sha256", githubSecretToken);
hmac.update(text);
const expectedSignature = hmac.digest("hex");
const actualSignature = headers.get("x-hub-signature-256");
const trusted = Buffer.from(`sha256=${expectedSignature}`, "ascii");
const untrusted = Buffer.from(actualSignature, "ascii");
return (
trusted.byteLength == untrusted.byteLength &&
timingSafeEqual(trusted, untrusted)
);
}
```
To make this work, you need to use [wrangler secret put](https://developers.cloudflare.com/workers/wrangler/commands/general/#secret-put) to set your `GITHUB_SECRET_TOKEN`. This token is the secret you picked earlier when configuring you GitHub webhook:
```sh
npx wrangler secret put GITHUB_SECRET_TOKEN
```
Add the nodejs\_compat flag to your Wrangler file:
* [ wrangler.jsonc ](#tab-panel-13077)
* [ wrangler.toml ](#tab-panel-13078)
**JSONC**
```jsonc
{
"compatibility_flags": [
"nodejs_compat"
]
}
```
**TOML**
```toml
compatibility_flags = [ "nodejs_compat" ]
```
---
## Sending a text with Twilio
You will send a text message to you about your repository activity using Twilio. You need a Twilio account and a phone number that can receive text messages. [Refer to the Twilio guide to get set up ↗](https://www.twilio.com/messaging/sms). (If you are new to Twilio, they have [an interactive game ↗](https://www.twilio.com/quest) where you can learn how to use their platform and get some free credits for beginners to the service.)
You can then create a helper function to send text messages by sending a `POST` request to the Twilio API endpoint. [Refer to the Twilio reference ↗](https://www.twilio.com/docs/sms/api/message-resource#create-a-message-resource) to learn more about this endpoint.
Create a new function called `sendText()` that will handle making the request to Twilio:
**JavaScript**
```js
async function sendText(accountSid, authToken, message) {
const endpoint = `https://api.twilio.com/2010-04-01/Accounts/${accountSid}/Messages.json`;
const encoded = new URLSearchParams({
To: "%YOUR_PHONE_NUMBER%",
From: "%YOUR_TWILIO_NUMBER%",
Body: message,
});
const token = btoa(`${accountSid}:${authToken}`);
const request = {
body: encoded,
method: "POST",
headers: {
Authorization: `Basic ${token}`,
"Content-Type": "application/x-www-form-urlencoded",
},
};
const response = await fetch(endpoint, request);
const result = await response.json();
return Response.json(result);
}
```
To make this work, you need to set some secrets to hide your `ACCOUNT_SID` and `AUTH_TOKEN` from the source code. You can set secrets with [wrangler secret put](https://developers.cloudflare.com/workers/wrangler/commands/general/#secret-put) in your command line.
```sh
npx wrangler secret put TWILIO_ACCOUNT_SID
npx wrangler secret put TWILIO_AUTH_TOKEN
```
Modify your `githubWebhookHandler` to send a text message using the `sendText` function you just made.
**JavaScript**
```js
async fetch(request, env, ctx) {
if(request.method !== 'POST') {
return new Response('Please send a POST request!');
}
try {
const rawBody = await request.text();
if (!checkSignature(rawBody, request.headers, env.GITHUB_SECRET_TOKEN)) {
return new Response('Wrong password, try again', {status: 403});
}
const action = request.headers.get('X-GitHub-Event');
const json = JSON.parse(rawBody);
const repoName = json.repository.full_name;
const senderName = json.sender.login;
return await sendText(
env.TWILIO_ACCOUNT_SID,
env.TWILIO_AUTH_TOKEN,
`${senderName} completed ${action} onto your repo ${repoName}`
);
} catch (e) {
return new Response(`Error: ${e}`);
}
};
```
Run the `npx wrangler deploy` command to redeploy your Worker project:
```sh
npx wrangler deploy
```

Now when you make an update (that you configured in the GitHub **Webhook** settings) to your repository, you will get a text soon after. If you have never used Git before, refer to the [GIT Push and Pull Tutorial ↗](https://www.datacamp.com/tutorial/git-push-pull) for pushing to your repository.
Reference the finished code [on GitHub ↗](https://github.com/rickyrobinett/workers-sdk/tree/main/templates/examples/github-sms-notifications-using-twilio).
By completing this tutorial, you have learned how to build webhooks using Workers, integrate Workers with GitHub and Twilio, and use Worker secrets with Wrangler.
## Related resources
* [Build a JAMStack app](https://developers.cloudflare.com/workers/tutorials/build-a-jamstack-app/)
* [Build a QR code generator](https://developers.cloudflare.com/workers/tutorials/build-a-qr-code-generator/)
```json
{"@context":"https://schema.org","@type":"TechArticle","@id":"https://developers.cloudflare.com/workers/tutorials/github-sms-notifications-using-twilio/#page","headline":"GitHub SMS notifications using Twilio · Cloudflare Workers docs","description":"This tutorial shows you how to build an SMS notification system on Workers to receive updates on a GitHub repository. Your Worker will send you a text update using Twilio when there is new activity on your repository.","url":"https://developers.cloudflare.com/workers/tutorials/github-sms-notifications-using-twilio/","inLanguage":"en","image":"https://developers.cloudflare.com/dev-products-preview.png","dateModified":"2026-04-23","publisher":{"@type":"Organization","name":"Cloudflare","url":"https://www.cloudflare.com/"},"isPartOf":{"@type":"WebSite","@id":"https://developers.cloudflare.com/#website","name":"Cloudflare Docs","url":"https://developers.cloudflare.com/"},"keywords":["JavaScript"]}
{"@context":"https://schema.org","@type":"BreadcrumbList","itemListElement":[{"@type":"ListItem","position":1,"item":{"@id":"/directory/","name":"Directory"}},{"@type":"ListItem","position":2,"item":{"@id":"/workers/","name":"Workers"}},{"@type":"ListItem","position":3,"item":{"@id":"/workers/tutorials/","name":"Tutorials"}},{"@type":"ListItem","position":4,"item":{"@id":"/workers/tutorials/github-sms-notifications-using-twilio/","name":"GitHub SMS notifications using Twilio"}}]}
```
---
---
title: Handle form submissions with Airtable
description: Use Cloudflare Workers and Airtable to persist form submissions from a front-end user interface. Workers will handle incoming form submissions and use Airtables REST API to asynchronously persist the data in an Airtable base.
image: https://developers.cloudflare.com/dev-products-preview.png
---
> Documentation Index
> Fetch the complete documentation index at: https://developers.cloudflare.com/workers/llms.txt
> Use this file to discover all available pages before exploring further.
[Skip to content](#%5Ftop)
# Handle form submissions with Airtable
In this tutorial, you will use [Cloudflare Workers](https://developers.cloudflare.com/workers/) and [Airtable ↗](https://airtable.com) to persist form submissions from a front-end user interface. Airtable is a free-to-use spreadsheet solution that has an approachable API for developers. Workers will handle incoming form submissions and use Airtable's [REST API ↗](https://airtable.com/api) to asynchronously persist the data in an Airtable base (Airtable's term for a spreadsheet) for later reference.

## Before you start
All of the tutorials assume you have already completed the [Get started guide](https://developers.cloudflare.com/workers/get-started/guide/), which gets you set up with a Cloudflare Workers account, [C3 ↗](https://github.com/cloudflare/workers-sdk/tree/main/packages/create-cloudflare), and [Wrangler](https://developers.cloudflare.com/workers/wrangler/install-and-update/).
## 1\. Create a form
For this tutorial, you will be building a Workers function that handles input from a contact form. The form this tutorial references will collect a first name, last name, email address, phone number, message subject, and a message.
Build a form
If this is your first time building a form and you would like to follow a tutorial to create a form with Cloudflare Pages, refer to the [HTML forms](https://developers.cloudflare.com/pages/tutorials/forms) tutorial.
Review a simplified example of the form used in this tuttorial. Note that the `action` parameter of the `
```
## 2\. Create a Worker project
To handle the form submission, create and deploy a Worker that parses the incoming form data and prepares it for submission to Airtable.
Create a new `airtable-form-handler` Worker project:
npm yarn pnpm
```
npm create cloudflare@latest -- airtable-form-handler
```
```
yarn create cloudflare airtable-form-handler
```
```
pnpm create cloudflare@latest airtable-form-handler
```
For setup, select the following options:
* For _What would you like to start with?_, choose `Hello World example`.
* For _Which template would you like to use?_, choose `Worker only`.
* For _Which language do you want to use?_, choose `JavaScript`.
* For _Do you want to use git for version control?_, choose `Yes`.
* For _Do you want to deploy your application?_, choose `No` (we will be making some changes before deploying).
Then, move into the newly created directory:
```sh
cd airtable-form-handler
```
## 3\. Configure an Airtable base
When your Worker is complete, it will send data up to an Airtable base via Airtable's REST API.
If you do not have an Airtable account, create one (the free plan is sufficient to complete this tutorial). In Airtable's dashboard, create a new base by selecting **Start from scratch**.
After you have created a new base, set it up for use with the front-end form. Delete the existing columns, and create six columns, with the following field types:
| Field name | Airtable field type |
| ------------ | ------------------- |
| First Name | "Single line text" |
| Last Name | "Single line text" |
| Email | "Email" |
| Phone Number | "Phone number" |
| Subject | "Single line text" |
| Message | "Long text" |
Note that the field names are case-sensitive. If you change the field names, you will need to exactly match your new field names in the API request you make to Airtable later in the tutorial. Finally, you can optionally rename your table -- by defaulte it will have a name like Table 1\. In the below code, we assume the table has been renamed with a more descriptive name, like `Form Submissions`.
Next, navigate to [Airtable's API page ↗](https://airtable.com/api) and select your new base. Note that you must be logged into Airtable to see your base information. In the API documentation page, find your **Airtable base ID**.
You will also need to create a **Personal access token** that you'll use to access your Airtable base. You can do so by visiting the [Personal access tokens ↗](https://airtable.com/create/tokens) page on Airtable's website and creating a new token. Make sure that you configure the token in the following way:
* Scope: the `data.records:write` scope must be set on the token
* Access: access should be granted to the base you have been working with in this tutorial
The results access token should now be set in your application. To make the token available in your codebase, use the [wrangler secret](https://developers.cloudflare.com/workers/wrangler/commands/general/#secret) command. The `secret` command encrypts and stores environment variables for use in your function, without revealing them to users.
Run `wrangler secret put`, passing `AIRTABLE_ACCESS_TOKEN` as the name of your secret:
```sh
npx wrangler secret put AIRTABLE_ACCESS_TOKEN
```
```sh
Enter the secret text you would like assigned to the variable AIRTABLE_ACCESS_TOKEN on the script named airtable-form-handler:
******
🌀 Creating the secret for script name airtable-form-handler
✨ Success! Uploaded secret AIRTABLE_ACCESS_TOKEN.
```
Before you continue, review the keys that you should have from Airtable:
1. **Airtable Table Name**: The name for your table, like Form Submissions.
2. **Airtable Base ID**: The alphanumeric base ID found at the top of your base's API page.
3. **Airtable Access Token**: A Personal Access Token created by the user to access information about your new Airtable base.
## 4\. Submit data to Airtable
With your Airtable base set up, and the keys and IDs you need to communicate with the API ready, you will now set up your Worker to persist data from your form into Airtable.
In your Worker project's `index.js` file, replace the default code with a Workers fetch handler that can respond to requests. When the URL requested has a pathname of `/submit`, you will handle a new form submission, otherwise, you will return a `404 Not Found` response.
**JavaScript**
```js
export default {
async fetch(request, env) {
const url = new URL(request.url);
if (url.pathname === "/submit") {
await submitHandler(request, env);
}
return new Response("Not found", { status: 404 });
},
};
```
The `submitHandler` has two functions. First, it will parse the form data coming from your HTML5 form. Once the data is parsed, use the Airtable API to persist a new row (a new form submission) to your table:
**JavaScript**
```js
async function submitHandler(request, env) {
if (request.method !== "POST") {
return new Response("Method Not Allowed", {
status: 405,
});
}
const body = await request.formData();
const { first_name, last_name, email, phone, subject, message } =
Object.fromEntries(body);
// The keys in "fields" are case-sensitive, and
// should exactly match the field names you set up
// in your Airtable table, such as "First Name".
const reqBody = {
fields: {
"First Name": first_name,
"Last Name": last_name,
Email: email,
"Phone Number": phone,
Subject: subject,
Message: message,
},
};
await createAirtableRecord(env, reqBody);
}
// Existing code
// export default ...
```
Prevent potential errors when accessing request.body
The body of a [Request ↗](https://developer.mozilla.org/en-US/docs/Web/API/Request) can only be accessed once. If you previously used `request.formData()` in the same request, you may encounter a TypeError when attempting to access `request.body`.
To avoid errors, create a clone of the Request object with `request.clone()` for each subsequent attempt to access a Request's body. Keep in mind that Workers have a [memory limit of 128 MB per Worker](https://developers.cloudflare.com/workers/platform/limits/#memory) and loading particularly large files into a Worker's memory multiple times may reach this limit. To ensure memory usage does not reach this limit, consider using [Streams](https://developers.cloudflare.com/workers/runtime-apis/streams/).
While the majority of this function is concerned with parsing the request body (the data being sent as part of the request), there are two important things to note. First, if the HTTP method sent to this function is not `POST`, you will return a new response with the status code of [405 Method Not Allowed ↗](https://httpstatuses.com/405).
The variable `reqBody` represents a collection of fields, which are key-value pairs for each column in your Airtable table. By formatting `reqBody` as an object with a collection of fields, you are creating a new record in your table with a value for each field.
Then you call `createAirtableRecord` (the function you will define next). The `createAirtableRecord` function accepts a `body` parameter, which conforms to the Airtable API's required format — namely, a JavaScript object containing key-value pairs under `fields`, representing a single record to be created on your table:
**JavaScript**
```js
async function createAirtableRecord(env, body) {
try {
const result = fetch(
`https://api.airtable.com/v0/${env.AIRTABLE_BASE_ID}/${encodeURIComponent(env.AIRTABLE_TABLE_NAME)}`,
{
method: "POST",
body: JSON.stringify(body),
headers: {
Authorization: `Bearer ${env.AIRTABLE_ACCESS_TOKEN}`,
"Content-Type": "application/json",
},
},
);
return result;
} catch (error) {
console.error(error);
}
}
// Existing code
// async function submitHandler
// export default ...
```
To make an authenticated request to Airtable, you need to provide four constants that represent data about your Airtable account, base, and table name. You have already set `AIRTABLE_ACCESS_TOKEN` using `wrangler secret`, since it is a value that should be encrypted. The **Airtable base ID** and **table name**, and `FORM_URL` are values that can be publicly shared in places like GitHub. Use Wrangler's [vars](https://developers.cloudflare.com/workers/wrangler/migration/v1-to-v2/wrangler-legacy/configuration/#vars) feature to pass public environment variables from your Wrangler file.
Add a `vars` table at the end of your Wrangler file:
* [ wrangler.jsonc ](#tab-panel-13079)
* [ wrangler.toml ](#tab-panel-13080)
**JSONC**
```jsonc
{
"$schema": "./node_modules/wrangler/config-schema.json",
"name": "workers-airtable-form",
"main": "src/index.js",
// Set this to today's date
"compatibility_date": "2026-07-20",
"vars": {
"AIRTABLE_BASE_ID": "exampleBaseId",
"AIRTABLE_TABLE_NAME": "Form Submissions"
}
}
```
**TOML**
```toml
"$schema" = "./node_modules/wrangler/config-schema.json"
name = "workers-airtable-form"
main = "src/index.js"
# Set this to today's date
compatibility_date = "2026-07-20"
[vars]
AIRTABLE_BASE_ID = "exampleBaseId"
AIRTABLE_TABLE_NAME = "Form Submissions"
```
With all these fields submitted, it is time to deploy your Workers serverless function and get your form communicating with it. First, publish your Worker:
**Deploy your Worker**
```sh
npx wrangler deploy
```
Your Worker project will deploy to a unique URL — for example, `https://workers-airtable-form.cloudflare.workers.dev`. This represents the first part of your front-end form's `action` attribute — the second part is the path for your form handler, which is `/submit`. In your front-end UI, configure your `form` tag as seen below:
```html
```
After you have deployed your new form (refer to the [HTML forms](https://developers.cloudflare.com/pages/tutorials/forms) tutorial if you need help creating a form), you should be able to submit a new form submission and see the value show up immediately in Airtable:

## Conclusion
With this tutorial completed, you have created a Worker that can accept form submissions and persist them to Airtable. You have learned how to parse form data, set up environment variables, and use the `fetch` API to make requests to external services outside of your Worker.
## Related resources
* [Build a Slackbot](https://developers.cloudflare.com/workers/tutorials/build-a-slackbot)
* [Build a To-Do List Jamstack App](https://developers.cloudflare.com/workers/tutorials/build-a-jamstack-app)
* [Build a blog using Nuxt.js and Sanity.io on Cloudflare Pages](https://developers.cloudflare.com/pages/tutorials/build-a-blog-using-nuxt-and-sanity)
* [James Quick's video on building a Cloudflare Workers + Airtable integration ↗](https://www.youtube.com/watch?v=tFQ2kbiu1K4)
```json
{"@context":"https://schema.org","@type":"TechArticle","@id":"https://developers.cloudflare.com/workers/tutorials/handle-form-submissions-with-airtable/#page","headline":"Handle form submissions with Airtable · Cloudflare Workers docs","description":"Use Cloudflare Workers and Airtable to persist form submissions from a front-end user interface. Workers will handle incoming form submissions and use Airtables REST API to asynchronously persist the data in an Airtable base.","url":"https://developers.cloudflare.com/workers/tutorials/handle-form-submissions-with-airtable/","inLanguage":"en","image":"https://developers.cloudflare.com/dev-products-preview.png","dateModified":"2026-04-23","publisher":{"@type":"Organization","name":"Cloudflare","url":"https://www.cloudflare.com/"},"isPartOf":{"@type":"WebSite","@id":"https://developers.cloudflare.com/#website","name":"Cloudflare Docs","url":"https://developers.cloudflare.com/"},"keywords":["Forms","JavaScript"]}
{"@context":"https://schema.org","@type":"BreadcrumbList","itemListElement":[{"@type":"ListItem","position":1,"item":{"@id":"/directory/","name":"Directory"}},{"@type":"ListItem","position":2,"item":{"@id":"/workers/","name":"Workers"}},{"@type":"ListItem","position":3,"item":{"@id":"/workers/tutorials/","name":"Tutorials"}},{"@type":"ListItem","position":4,"item":{"@id":"/workers/tutorials/handle-form-submissions-with-airtable/","name":"Handle form submissions with Airtable"}}]}
```
---
---
title: Connect to a MySQL database with Cloudflare Workers
description: This tutorial explains how to connect to a Cloudflare database using TCP Sockets and Hyperdrive. The Workers application you create in this tutorial will interact with a product database inside of MySQL.
image: https://developers.cloudflare.com/dev-products-preview.png
---
> Documentation Index
> Fetch the complete documentation index at: https://developers.cloudflare.com/workers/llms.txt
> Use this file to discover all available pages before exploring further.
[Skip to content](#%5Ftop)
# Connect to a MySQL database with Cloudflare Workers
In this tutorial, you will learn how to create a Cloudflare Workers application and connect it to a MySQL database using [TCP Sockets](https://developers.cloudflare.com/workers/runtime-apis/tcp-sockets/) and [Hyperdrive](https://developers.cloudflare.com/hyperdrive/). The Workers application you create in this tutorial will interact with a product database inside of MySQL.
Note
We recommend using [Hyperdrive](https://developers.cloudflare.com/hyperdrive/) to connect to your MySQL database. Hyperdrive provides optimal performance and will ensure secure connectivity between your Worker and your MySQL database.
When connecting directly to your MySQL database (without Hyperdrive), the MySQL drivers rely on unsupported Node.js APIs to create secure connections, which prevents connections.
## Prerequisites
To continue:
1. Sign up for a [Cloudflare account ↗](https://dash.cloudflare.com/sign-up/workers-and-pages) if you have not already.
2. Install [npm ↗](https://docs.npmjs.com/getting-started).
3. Install [Node.js ↗](https://nodejs.org/en/). Use a Node version manager like [Volta ↗](https://volta.sh/) or [nvm ↗](https://github.com/nvm-sh/nvm) to avoid permission issues and change Node.js versions. [Wrangler](https://developers.cloudflare.com/workers/wrangler/install-and-update/) requires a Node version of `16.17.0` or later.
4. Make sure you have access to a MySQL database.
## 1\. Create a Worker application
First, use the [create-cloudflare CLI ↗](https://github.com/cloudflare/workers-sdk/tree/main/packages/create-cloudflare) to create a new Worker application. To do this, open a terminal window and run the following command:
npm yarn pnpm
```
npm create cloudflare@latest -- mysql-tutorial
```
```
yarn create cloudflare mysql-tutorial
```
```
pnpm create cloudflare@latest mysql-tutorial
```
This will prompt you to install the [create-cloudflare ↗](https://www.npmjs.com/package/create-cloudflare) package and lead you through a setup wizard.
For setup, select the following options:
* For _What would you like to start with?_, choose `Hello World example`.
* For _Which template would you like to use?_, choose `Worker only`.
* For _Which language do you want to use?_, choose `TypeScript`.
* For _Do you want to use git for version control?_, choose `Yes`.
* For _Do you want to deploy your application?_, choose `No` (we will be making some changes before deploying).
If you choose to deploy, you will be asked to authenticate (if not logged in already), and your project will be deployed. If you deploy, you can still modify your Worker code and deploy again at the end of this tutorial.
Now, move into the newly created directory:
```sh
cd mysql-tutorial
```
## 2\. Enable Node.js compatibility
[Node.js compatibility](https://developers.cloudflare.com/workers/runtime-apis/nodejs/) is required for database drivers, including mysql2, and needs to be configured for your Workers project.
To enable both built-in runtime APIs and polyfills for your Worker or Pages project, add the [nodejs\_compat](https://developers.cloudflare.com/workers/configuration/compatibility-flags/#nodejs-compatibility-flag) [compatibility flag](https://developers.cloudflare.com/workers/configuration/compatibility-flags/#nodejs-compatibility-flag) to your [Wrangler configuration file](https://developers.cloudflare.com/workers/wrangler/configuration/), and set your compatibility date to September 23rd, 2024 or later. This will enable [Node.js compatibility](https://developers.cloudflare.com/workers/runtime-apis/nodejs/) for your Workers project.
* [ wrangler.jsonc ](#tab-panel-13083)
* [ wrangler.toml ](#tab-panel-13084)
**JSONC**
```jsonc
{
"compatibility_flags": [
"nodejs_compat"
],
// Set this to today's date
"compatibility_date": "2026-07-20"
}
```
**TOML**
```toml
compatibility_flags = [ "nodejs_compat" ]
# Set this to today's date
compatibility_date = "2026-07-20"
```
## 3\. Create a Hyperdrive configuration
Create a Hyperdrive configuration using the connection string for your MySQL database.
```bash
npx wrangler hyperdrive create --connection-string="mysql://user:password@HOSTNAME_OR_IP_ADDRESS:PORT/database_name"
```
This command outputs the Hyperdrive configuration `id` that will be used for your Hyperdrive [binding](https://developers.cloudflare.com/workers/runtime-apis/bindings/). Set up your binding by specifying the `id` in the Wrangler file.
* [ wrangler.jsonc ](#tab-panel-13081)
* [ wrangler.toml ](#tab-panel-13082)
**JSONC**
```jsonc
{
"$schema": "./node_modules/wrangler/config-schema.json",
"name": "hyperdrive-example",
"main": "src/index.ts",
// Set this to today's date
"compatibility_date": "2026-07-20",
"compatibility_flags": [
"nodejs_compat"
],
// Pasted from the output of `wrangler hyperdrive create --connection-string=[...]` above.
"hyperdrive": [
{
"binding": "HYPERDRIVE",
"id": ""
}
]
}
```
**TOML**
```toml
"$schema" = "./node_modules/wrangler/config-schema.json"
name = "hyperdrive-example"
main = "src/index.ts"
# Set this to today's date
compatibility_date = "2026-07-20"
compatibility_flags = [ "nodejs_compat" ]
[[hyperdrive]]
binding = "HYPERDRIVE"
id = ""
```
## 4\. Query your database from your Worker
Install the [mysql2 ↗](https://github.com/sidorares/node-mysql2) driver:
npm yarn pnpm bun
```
npm i mysql2@>3.13.0
```
```
yarn add mysql2@>3.13.0
```
```
pnpm add mysql2@>3.13.0
```
```
bun add mysql2@>3.13.0
```
Note
`mysql2` v3.13.0 or later is required
Add the required Node.js compatibility flags and Hyperdrive binding to your `wrangler.jsonc` file:
* [ wrangler.jsonc ](#tab-panel-13085)
* [ wrangler.toml ](#tab-panel-13086)
**JSONC**
```jsonc
{
// required for database drivers to function
"compatibility_flags": [
"nodejs_compat"
],
// Set this to today's date
"compatibility_date": "2026-07-20",
"hyperdrive": [
{
"binding": "HYPERDRIVE",
"id": ""
}
]
}
```
**TOML**
```toml
compatibility_flags = [ "nodejs_compat" ]
# Set this to today's date
compatibility_date = "2026-07-20"
[[hyperdrive]]
binding = "HYPERDRIVE"
id = ""
```
Create a new `connection` instance and pass the Hyperdrive parameters:
**TypeScript**
```ts
// mysql2 v3.13.0 or later is required
import { createConnection } from "mysql2/promise";
export default {
async fetch(request, env, ctx): Promise {
// Create a new connection on each request. Hyperdrive maintains the underlying
// database connection pool, so creating a new connection is fast.
const connection = await createConnection({
host: env.HYPERDRIVE.host,
user: env.HYPERDRIVE.user,
password: env.HYPERDRIVE.password,
database: env.HYPERDRIVE.database,
port: env.HYPERDRIVE.port,
// Required to enable mysql2 compatibility for Workers
disableEval: true,
});
try {
// Sample query
const [results, fields] = await connection.query("SHOW tables;");
// Return result rows as JSON
return Response.json({ results, fields });
} catch (e) {
console.error(e);
return Response.json(
{ error: e instanceof Error ? e.message : e },
{ status: 500 },
);
}
},
} satisfies ExportedHandler;
```
Note
The minimum version of `mysql2` required for Hyperdrive is `3.13.0`.
## 5\. Deploy your Worker
Run the following command to deploy your Worker:
```sh
npx wrangler deploy
```
Your application is now live and accessible at `..workers.dev`.
## Next steps
To build more with databases and Workers, refer to [Tutorials](https://developers.cloudflare.com/workers/tutorials) and explore the [Databases documentation](https://developers.cloudflare.com/workers/databases).
If you have any questions, need assistance, or would like to share your project, join the Cloudflare Developer community on [Discord ↗](https://discord.cloudflare.com) to connect with fellow developers and the Cloudflare team.
```json
{"@context":"https://schema.org","@type":"TechArticle","@id":"https://developers.cloudflare.com/workers/tutorials/mysql/#page","headline":"Connect to a MySQL database with Cloudflare Workers · Cloudflare Workers docs","description":"This tutorial explains how to connect to a Cloudflare database using TCP Sockets and Hyperdrive. The Workers application you create in this tutorial will interact with a product database inside of MySQL.","url":"https://developers.cloudflare.com/workers/tutorials/mysql/","inLanguage":"en","image":"https://developers.cloudflare.com/dev-products-preview.png","dateModified":"2026-02-02","publisher":{"@type":"Organization","name":"Cloudflare","url":"https://www.cloudflare.com/"},"isPartOf":{"@type":"WebSite","@id":"https://developers.cloudflare.com/#website","name":"Cloudflare Docs","url":"https://developers.cloudflare.com/"},"keywords":["MySQL","TypeScript","SQL"]}
{"@context":"https://schema.org","@type":"BreadcrumbList","itemListElement":[{"@type":"ListItem","position":1,"item":{"@id":"/directory/","name":"Directory"}},{"@type":"ListItem","position":2,"item":{"@id":"/workers/","name":"Workers"}},{"@type":"ListItem","position":3,"item":{"@id":"/workers/tutorials/","name":"Tutorials"}},{"@type":"ListItem","position":4,"item":{"@id":"/workers/tutorials/mysql/","name":"Connect to a MySQL database with Cloudflare Workers"}}]}
```
---
---
title: OpenAI GPT function calling with JavaScript and Cloudflare Workers
description: Build a project that leverages OpenAI's function calling feature, available in OpenAI's latest Chat Completions API models.
image: https://developers.cloudflare.com/dev-products-preview.png
---
> Documentation Index
> Fetch the complete documentation index at: https://developers.cloudflare.com/workers/llms.txt
> Use this file to discover all available pages before exploring further.
[Skip to content](#%5Ftop)
# OpenAI GPT function calling with JavaScript and Cloudflare Workers
In this tutorial, you will build a project that leverages [OpenAI's function calling ↗](https://platform.openai.com/docs/guides/function-calling) feature, available in OpenAI's latest Chat Completions API models.
The function calling feature allows the AI model to intelligently decide when to call a function based on the input, and respond in JSON format to match the function's signature. You will use the function calling feature to request for the model to determine a website URL which contains information relevant to a message from the user, retrieve the text content of the site, and, finally, return a final response from the model informed by real-time web data.
## What you will learn
* How to use OpenAI's function calling feature.
* Integrating OpenAI's API in a Cloudflare Worker.
* Fetching and processing website content using Cheerio.
* Handling API responses and function calls in JavaScript.
* Storing API keys as secrets with Wrangler.
---
## Before you start
All of the tutorials assume you have already completed the [Get started guide](https://developers.cloudflare.com/workers/get-started/guide/), which gets you set up with a Cloudflare Workers account, [C3 ↗](https://github.com/cloudflare/workers-sdk/tree/main/packages/create-cloudflare), and [Wrangler](https://developers.cloudflare.com/workers/wrangler/install-and-update/).
## 1\. Create a new Worker project
Create a Worker project in the command line:
npm yarn pnpm
```
npm create cloudflare@latest -- openai-function-calling-workers
```
```
yarn create cloudflare openai-function-calling-workers
```
```
pnpm create cloudflare@latest openai-function-calling-workers
```
For setup, select the following options:
* For _What would you like to start with?_, choose `Hello World example`.
* For _Which template would you like to use?_, choose `Worker only`.
* For _Which language do you want to use?_, choose `JavaScript`.
* For _Do you want to use git for version control?_, choose `Yes`.
* For _Do you want to deploy your application?_, choose `No` (we will be making some changes before deploying).
Go to your new `openai-function-calling-workers` Worker project:
```sh
cd openai-function-calling-workers
```
Inside of your new `openai-function-calling-workers` directory, find the `src/index.js` file. You will configure this file for most of the tutorial.
You will also need an OpenAI account and API key for this tutorial. If you do not have one, [create a new OpenAI account ↗](https://platform.openai.com/signup) and [create an API key ↗](https://platform.openai.com/account/api-keys) to continue with this tutorial. Make sure to store you API key somewhere safe so you can use it later.
## 2\. Make a request to OpenAI
With your Worker project created, make your first request to OpenAI. You will use the OpenAI node library to interact with the OpenAI API. In this project, you will also use the Cheerio library to handle processing the HTML content of websites
npm yarn pnpm bun
```
npm i openai cheerio
```
```
yarn add openai cheerio
```
```
pnpm add openai cheerio
```
```
bun add openai cheerio
```
Now, define the structure of your Worker in `index.js`:
**JavaScript**
```js
export default {
async fetch(request, env, ctx) {
// Initialize OpenAI API
// Handle incoming requests
return new Response("Hello World!");
},
};
```
Above `export default`, add the imports for `openai` and `cheerio`:
**JavaScript**
```js
import OpenAI from "openai";
import * as cheerio from "cheerio";
```
Within your `fetch` function, instantiate your `OpenAI` client:
**JavaScript**
```js
async fetch(request, env, ctx) {
const openai = new OpenAI({
apiKey: env.OPENAI_API_KEY,
});
// Handle incoming requests
return new Response('Hello World!');
},
```
Use [wrangler secret put](https://developers.cloudflare.com/workers/wrangler/commands/general/#secret-put) to set `OPENAI_API_KEY`. This [secret's](https://developers.cloudflare.com/workers/configuration/secrets/) value is the API key you created earlier in the OpenAI dashboard:
```sh
npx wrangler secret put
```
For local development, create a new file `.dev.vars` in your Worker project and add this line. Make sure to replace `OPENAI_API_KEY` with your own OpenAI API key:
```txt
OPENAI_API_KEY = ""
```
Now, make a request to the OpenAI [Chat Completions API ↗](https://platform.openai.com/docs/guides/gpt/chat-completions-api):
**JavaScript**
```js
export default {
async fetch(request, env, ctx) {
const openai = new OpenAI({
apiKey: env.OPENAI_API_KEY,
});
const url = new URL(request.url);
const message = url.searchParams.get("message");
const messages = [
{
role: "user",
content: message ? message : "What's in the news today?",
},
];
const tools = [
{
type: "function",
function: {
name: "read_website_content",
description: "Read the content on a given website",
parameters: {
type: "object",
properties: {
url: {
type: "string",
description: "The URL to the website to read",
},
},
required: ["url"],
},
},
},
];
const chatCompletion = await openai.chat.completions.create({
model: "gpt-4o-mini",
messages: messages,
tools: tools,
tool_choice: "auto",
});
const assistantMessage = chatCompletion.choices[0].message;
console.log(assistantMessage);
//Later you will continue handling the assistant's response here
return new Response(assistantMessage.content);
},
};
```
Review the arguments you are passing to OpenAI:
* **model**: This is the model you want OpenAI to use for your request. In this case, you are using `gpt-4o-mini`.
* **messages**: This is an array containing all messages that are part of the conversation. Initially you provide a message from the user, and we later add the response from the model. The content of the user message is either the `message` query parameter from the request URL or the default "What's in the news today?".
* **tools**: An array containing the actions available to the AI model. In this example you only have one tool, `read_website_content`, which reads the content on a given website.
* **name**: The name of your function. In this case, it is `read_website_content`.
* **description**: A short description that lets the model know the purpose of the function. This is optional but helps the model know when to select the tool.
* **parameters**: A JSON Schema object which describes the function. In this case we request a response containing an object with the required property `url`.
* **tool\_choice**: This argument is technically optional as `auto` is the default. This argument indicates that either a function call or a normal message response can be returned by OpenAI.
## 3\. Building your `read_website_content()` function
You will now need to define the `read_website_content` function, which is referenced in the `tools` array. The `read_website_content` function fetches the content of a given URL and extracts the text from `
` tags using the `cheerio` library:
Add this code above the `export default` block in your `index.js` file:
**JavaScript**
```js
async function read_website_content(url) {
console.log("reading website content");
const response = await fetch(url);
const body = await response.text();
let cheerioBody = cheerio.load(body);
const resp = {
website_body: cheerioBody("p").text(),
url: url,
};
return JSON.stringify(resp);
}
```
In this function, you take the URL that you received from OpenAI and use JavaScript's [Fetch API ↗](https://developer.mozilla.org/en-US/docs/Web/API/Fetch%5FAPI/Using%5FFetch) to pull the content of the website and extract the paragraph text. Now we need to determine when to call this function.
## 4\. Process the Assistant's Messages
Next, we need to process the response from the OpenAI API to check if it includes any function calls. If a function call is present, you should execute the corresponding function in your Worker. Note that the assistant may request multiple function calls.
Modify the fetch method within the `export default` block as follows:
**JavaScript**
```js
// ... your previous code ...
if (assistantMessage.tool_calls) {
for (const toolCall of assistantMessage.tool_calls) {
if (toolCall.function.name === "read_website_content") {
const url = JSON.parse(toolCall.function.arguments).url;
const websiteContent = await read_website_content(url);
messages.push({
role: "tool",
tool_call_id: toolCall.id,
name: toolCall.function.name,
content: websiteContent,
});
}
}
const secondChatCompletion = await openai.chat.completions.create({
model: "gpt-4o-mini",
messages: messages,
});
return new Response(secondChatCompletion.choices[0].message.content);
} else {
// this is your existing return statement
return new Response(assistantMessage.content);
}
```
Check if the assistant message contains any function calls by checking for the `tool_calls` property. Because the AI model can call multiple functions by default, you need to loop through any potential function calls and add them to the `messages` array. Each `read_website_content` call will invoke the `read_website_content` function you defined earlier and pass the URL generated by OpenAI as an argument. \`
The `secondChatCompletion` is needed to provide a response informed by the data you retrieved from each function call. Now, the last step is to deploy your Worker.
Test your code by running `npx wrangler dev` and open the provided url in your browser. This will now show you OpenAI’s response using real-time information from the retrieved web data.
## 5\. Deploy your Worker application
To deploy your application, run the `npx wrangler deploy` command to deploy your Worker application:
```sh
npx wrangler deploy
```
You can now preview your Worker at `..workers.dev`. Going to this URL will display the response from OpenAI. Optionally, add the `message` URL parameter to write a custom message: for example, `https://..workers.dev/?message=What is the weather in NYC today?`.
## 6\. Next steps
Reference the [finished code for this tutorial on GitHub ↗](https://github.com/LoganGrasby/Cloudflare-OpenAI-Functions-Demo/blob/main/src/worker.js).
To continue working with Workers and AI, refer to [the guide on using LangChain and Cloudflare Workers together ↗](https://blog.cloudflare.com/langchain-and-cloudflare/) or [how to build a ChatGPT plugin with Cloudflare Workers ↗](https://blog.cloudflare.com/magic-in-minutes-how-to-build-a-chatgpt-plugin-with-cloudflare-workers/).
If you have any questions, need assistance, or would like to share your project, join the Cloudflare Developer community on [Discord ↗](https://discord.cloudflare.com) to connect with fellow developers and the Cloudflare team.
```json
{"@context":"https://schema.org","@type":"TechArticle","@id":"https://developers.cloudflare.com/workers/tutorials/openai-function-calls-workers/#page","headline":"OpenAI GPT function calling with JavaScript and Cloudflare Workers · Cloudflare Workers docs","description":"Build a project that leverages OpenAI's function calling feature, available in OpenAI's latest Chat Completions API models.","url":"https://developers.cloudflare.com/workers/tutorials/openai-function-calls-workers/","inLanguage":"en","image":"https://developers.cloudflare.com/dev-products-preview.png","dateModified":"2026-04-23","publisher":{"@type":"Organization","name":"Cloudflare","url":"https://www.cloudflare.com/"},"isPartOf":{"@type":"WebSite","@id":"https://developers.cloudflare.com/#website","name":"Cloudflare Docs","url":"https://developers.cloudflare.com/"},"keywords":["AI","JavaScript"]}
{"@context":"https://schema.org","@type":"BreadcrumbList","itemListElement":[{"@type":"ListItem","position":1,"item":{"@id":"/directory/","name":"Directory"}},{"@type":"ListItem","position":2,"item":{"@id":"/workers/","name":"Workers"}},{"@type":"ListItem","position":3,"item":{"@id":"/workers/tutorials/","name":"Tutorials"}},{"@type":"ListItem","position":4,"item":{"@id":"/workers/tutorials/openai-function-calls-workers/","name":"OpenAI GPT function calling with JavaScript and Cloudflare Workers"}}]}
```
---
---
title: Connect to a PostgreSQL database with Cloudflare Workers
description: This tutorial explains how to connect to a Postgres database with Cloudflare Workers. The Workers application you create in this tutorial will interact with a product database inside of Postgres.
image: https://developers.cloudflare.com/dev-products-preview.png
---
> Documentation Index
> Fetch the complete documentation index at: https://developers.cloudflare.com/workers/llms.txt
> Use this file to discover all available pages before exploring further.
[Skip to content](#%5Ftop)
# Connect to a PostgreSQL database with Cloudflare Workers
In this tutorial, you will learn how to create a Cloudflare Workers application and connect it to a PostgreSQL database using [TCP Sockets](https://developers.cloudflare.com/workers/runtime-apis/tcp-sockets/) and [Hyperdrive](https://developers.cloudflare.com/hyperdrive/). The Workers application you create in this tutorial will interact with a product database inside of PostgreSQL.
## Prerequisites
To continue:
1. Sign up for a [Cloudflare account ↗](https://dash.cloudflare.com/sign-up/workers-and-pages) if you have not already.
2. Install [npm ↗](https://docs.npmjs.com/getting-started).
3. Install [Node.js ↗](https://nodejs.org/en/). Use a Node version manager like [Volta ↗](https://volta.sh/) or [nvm ↗](https://github.com/nvm-sh/nvm) to avoid permission issues and change Node.js versions. [Wrangler](https://developers.cloudflare.com/workers/wrangler/install-and-update/) requires a Node version of `16.17.0` or later.
4. Make sure you have access to a PostgreSQL database.
## 1\. Create a Worker application
First, use the [create-cloudflare CLI ↗](https://github.com/cloudflare/workers-sdk/tree/main/packages/create-cloudflare) to create a new Worker application. To do this, open a terminal window and run the following command:
npm yarn pnpm
```
npm create cloudflare@latest -- postgres-tutorial
```
```
yarn create cloudflare postgres-tutorial
```
```
pnpm create cloudflare@latest postgres-tutorial
```
This will prompt you to install the [create-cloudflare ↗](https://www.npmjs.com/package/create-cloudflare) package and lead you through a setup wizard.
For setup, select the following options:
* For _What would you like to start with?_, choose `Hello World example`.
* For _Which template would you like to use?_, choose `Worker only`.
* For _Which language do you want to use?_, choose `TypeScript`.
* For _Do you want to use git for version control?_, choose `Yes`.
* For _Do you want to deploy your application?_, choose `No` (we will be making some changes before deploying).
If you choose to deploy, you will be asked to authenticate (if not logged in already), and your project will be deployed. If you deploy, you can still modify your Worker code and deploy again at the end of this tutorial.
Now, move into the newly created directory:
```sh
cd postgres-tutorial
```
### Enable Node.js compatibility
[Node.js compatibility](https://developers.cloudflare.com/workers/runtime-apis/nodejs/) is required for database drivers, including Postgres.js, and needs to be configured for your Workers project.
To enable both built-in runtime APIs and polyfills for your Worker or Pages project, add the [nodejs\_compat](https://developers.cloudflare.com/workers/configuration/compatibility-flags/#nodejs-compatibility-flag) [compatibility flag](https://developers.cloudflare.com/workers/configuration/compatibility-flags/#nodejs-compatibility-flag) to your [Wrangler configuration file](https://developers.cloudflare.com/workers/wrangler/configuration/), and set your compatibility date to September 23rd, 2024 or later. This will enable [Node.js compatibility](https://developers.cloudflare.com/workers/runtime-apis/nodejs/) for your Workers project.
* [ wrangler.jsonc ](#tab-panel-13091)
* [ wrangler.toml ](#tab-panel-13092)
**JSONC**
```jsonc
{
"compatibility_flags": [
"nodejs_compat"
],
// Set this to today's date
"compatibility_date": "2026-07-20"
}
```
**TOML**
```toml
compatibility_flags = [ "nodejs_compat" ]
# Set this to today's date
compatibility_date = "2026-07-20"
```
## 2\. Add the PostgreSQL connection library
To connect to a PostgreSQL database, you will need the `pg` library. In your Worker application directory, run the following command to install the library:
npm yarn pnpm bun
```
npm i pg
```
```
yarn add pg
```
```
pnpm add pg
```
```
bun add pg
```
Next, install the TypeScript types for the `pg` library to enable type checking and autocompletion in your TypeScript code:
npm yarn pnpm bun
```
npm i -D @types/pg
```
```
yarn add -D @types/pg
```
```
pnpm add -D @types/pg
```
```
bun add -d @types/pg
```
Note
Make sure you are using `pg` (`node-postgres`) version `8.16.3` or higher.
## 3\. Configure the connection to the PostgreSQL database
Choose one of the two methods to connect to your PostgreSQL database:
1. [Use a connection string](#use-a-connection-string).
2. [Set explicit parameters](#set-explicit-parameters).
### Use a connection string
A connection string contains all the information needed to connect to a database. It is a URL that contains the following information:
```plaintext
postgresql://username:password@host:port/database
```
Replace `username`, `password`, `host`, `port`, and `database` with the appropriate values for your PostgreSQL database.
Set your connection string as a [secret](https://developers.cloudflare.com/workers/configuration/secrets/) so that it is not stored as plain text. Use [wrangler secret put](https://developers.cloudflare.com/workers/wrangler/commands/general/#secret) with the example variable name `DB_URL`:
```sh
npx wrangler secret put DB_URL
```
```sh
➜ wrangler secret put DB_URL
-------------------------------------------------------
? Enter a secret value: › ********************
✨ Success! Uploaded secret DB_URL
```
Set your `DB_URL` secret locally in a `.dev.vars` file as documented in [Local Development with Secrets](https://developers.cloudflare.com/workers/configuration/secrets/).
**.dev.vars**
```toml
DB_URL=""
```
### Set explicit parameters
Configure each database parameter as an [environment variable](https://developers.cloudflare.com/workers/configuration/environment-variables/) via the [Cloudflare dashboard](https://developers.cloudflare.com/workers/configuration/environment-variables/#add-environment-variables-via-the-dashboard) or in your Wrangler file. Refer to an example of a Wrangler file configuration:
* [ wrangler.jsonc ](#tab-panel-13087)
* [ wrangler.toml ](#tab-panel-13088)
**JSONC**
```jsonc
{
"vars": {
"DB_USERNAME": "postgres",
// Set your password by creating a secret so it is not stored as plain text
"DB_HOST": "ep-aged-sound-175961.us-east-2.aws.neon.tech",
"DB_PORT": 5432,
"DB_NAME": "productsdb"
}
}
```
**TOML**
```toml
[vars]
DB_USERNAME = "postgres"
DB_HOST = "ep-aged-sound-175961.us-east-2.aws.neon.tech"
DB_PORT = 5_432
DB_NAME = "productsdb"
```
To set your password as a [secret](https://developers.cloudflare.com/workers/configuration/secrets/) so that it is not stored as plain text, use [wrangler secret put](https://developers.cloudflare.com/workers/wrangler/commands/general/#secret). `DB_PASSWORD` is an example variable name for this secret to be accessed in your Worker:
```sh
npx wrangler secret put DB_PASSWORD
```
```sh
-------------------------------------------------------
? Enter a secret value: › ********************
✨ Success! Uploaded secret DB_PASSWORD
```
## 4\. Connect to the PostgreSQL database in the Worker
Open your Worker's main file (for example, `worker.ts`) and import the `Client` class from the `pg` library:
**TypeScript**
```typescript
import { Client } from "pg";
```
In the `fetch` event handler, connect to the PostgreSQL database using your chosen method, either the connection string or the explicit parameters.
### Use a connection string
**TypeScript**
```typescript
// create a new Client instance using the connection string
const sql = new Client({ connectionString: env.DB_URL });
// connect to the PostgreSQL database
await sql.connect();
```
### Set explicit parameters
**TypeScript**
```typescript
// create a new Client instance using explicit parameters
const sql = new Client({
username: env.DB_USERNAME,
password: env.DB_PASSWORD,
host: env.DB_HOST,
port: env.DB_PORT,
database: env.DB_NAME,
ssl: true, // Enable SSL for secure connections
});
// connect to the PostgreSQL database
await sql.connect();
```
## 5\. Interact with the products database
To demonstrate how to interact with the products database, you will fetch data from the `products` table by querying the table when a request is received.
Note
If you are following along in your own PostgreSQL instance, set up the `products` using the following SQL `CREATE TABLE` statement. This statement defines the columns and their respective data types for the `products` table:
```sql
CREATE TABLE products (
id SERIAL PRIMARY KEY,
name VARCHAR(255) NOT NULL,
description TEXT,
price DECIMAL(10, 2) NOT NULL
);
```
Replace the existing code in your `worker.ts` file with the following code:
**TypeScript**
```typescript
import { Client } from "pg";
export default {
async fetch(request, env, ctx): Promise {
// Create a new Client instance using the connection string
// or explicit parameters as shown in the previous steps.
// Here, we are using the connection string method.
const sql = new Client({
connectionString: env.DB_URL,
});
// Connect to the PostgreSQL database
await sql.connect();
// Query the products table
const result = await sql.query("SELECT * FROM products");
// Return the result as JSON
return new Response(JSON.stringify(result.rows), {
headers: {
"Content-Type": "application/json",
},
});
},
} satisfies ExportedHandler;
```
This code establishes a connection to the PostgreSQL database within your Worker application and queries the `products` table, returning the results as a JSON response.
## 6\. Deploy your Worker
Run the following command to deploy your Worker:
```sh
npx wrangler deploy
```
Your application is now live and accessible at `..workers.dev`.
After deploying, you can interact with your PostgreSQL products database using your Cloudflare Worker. Whenever a request is made to your Worker's URL, it will fetch data from the `products` table and return it as a JSON response. You can modify the query as needed to retrieve the desired data from your products database.
## 7\. Insert a new row into the products database
To insert a new row into the `products` table, create a new API endpoint in your Worker that handles a `POST` request. When a `POST` request is received with a JSON payload, the Worker will insert a new row into the `products` table with the provided data.
Assume the `products` table has the following columns: `id`, `name`, `description`, and `price`.
Add the following code snippet inside the `fetch` event handler in your `worker.ts` file, before the existing query code:
**TypeScript**
```typescript
import { Client } from "pg";
export default {
async fetch(request, env, ctx): Promise {
// Create a new Client instance using the connection string
// or explicit parameters as shown in the previous steps.
// Here, we are using the connection string method.
const sql = new Client({
connectionString: env.DB_URL,
});
// Connect to the PostgreSQL database
await sql.connect();
const url = new URL(request.url);
if (request.method === "POST" && url.pathname === "/products") {
// Parse the request's JSON payload
const productData = (await request.json()) as {
name: string;
description: string;
price: number;
};
const name = productData.name,
description = productData.description,
price = productData.price;
// Insert the new product into the products table
const insertResult = await sql.query(
`INSERT INTO products(name, description, price) VALUES($1, $2, $3)
RETURNING *`,
[name, description, price],
);
// Return the inserted row as JSON
return new Response(JSON.stringify(insertResult.rows), {
headers: { "Content-Type": "application/json" },
});
}
// Query the products table
const result = await sql.query("SELECT * FROM products");
// Return the result as JSON
return new Response(JSON.stringify(result.rows), {
headers: {
"Content-Type": "application/json",
},
});
},
} satisfies ExportedHandler;
```
This code snippet does the following:
1. Checks if the request is a `POST` request and the URL path is `/products`.
2. Parses the JSON payload from the request.
3. Constructs an `INSERT` SQL query using the provided product data.
4. Executes the query, inserting the new row into the `products` table.
5. Returns the inserted row as a JSON response.
Now, when you send a `POST` request to your Worker's URL with the `/products` path and a JSON payload, the Worker will insert a new row into the `products` table with the provided data. When a request to `/` is made, the Worker will return all products in the database.
After making these changes, deploy the Worker again by running:
```sh
npx wrangler deploy
```
You can now use your Cloudflare Worker to insert new rows into the `products` table. To test this functionality, send a `POST` request to your Worker's URL with the `/products` path, along with a JSON payload containing the new product data:
```json
{
"name": "Sample Product",
"description": "This is a sample product",
"price": 19.99
}
```
You have successfully created a Cloudflare Worker that connects to a PostgreSQL database and handles fetching data and inserting new rows into a products table.
## 8\. Use Hyperdrive to accelerate queries
Create a Hyperdrive configuration using the connection string for your PostgreSQL database.
```bash
npx wrangler hyperdrive create --connection-string="postgres://user:password@HOSTNAME_OR_IP_ADDRESS:PORT/database_name" --caching-disabled
```
This command outputs the Hyperdrive configuration `id` that will be used for your Hyperdrive [binding](https://developers.cloudflare.com/workers/runtime-apis/bindings/). Set up your binding by specifying the `id` in the Wrangler file.
* [ wrangler.jsonc ](#tab-panel-13089)
* [ wrangler.toml ](#tab-panel-13090)
**JSONC**
```jsonc
{
"$schema": "./node_modules/wrangler/config-schema.json",
"name": "hyperdrive-example",
"main": "src/index.ts",
// Set this to today's date
"compatibility_date": "2026-07-20",
"compatibility_flags": [
"nodejs_compat"
],
// Pasted from the output of `wrangler hyperdrive create --connection-string=[...]` above.
"hyperdrive": [
{
"binding": "HYPERDRIVE",
"id": ""
}
]
}
```
**TOML**
```toml
"$schema" = "./node_modules/wrangler/config-schema.json"
name = "hyperdrive-example"
main = "src/index.ts"
# Set this to today's date
compatibility_date = "2026-07-20"
compatibility_flags = [ "nodejs_compat" ]
[[hyperdrive]]
binding = "HYPERDRIVE"
id = ""
```
Create the types for your Hyperdrive binding using the following command:
```bash
npx wrangler types
```
Replace your existing connection string in your Worker code with the Hyperdrive connection string.
**JavaScript**
```js
export default {
async fetch(request, env, ctx): Promise {
const sql = new Client({connectionString: env.HYPERDRIVE.connectionString})
const url = new URL(request.url);
//rest of the routes and database queries
},
} satisfies ExportedHandler;
```
## 9\. Redeploy your Worker
Run the following command to deploy your Worker:
```sh
npx wrangler deploy
```
Your Worker application is now live and accessible at `..workers.dev`, using Hyperdrive. Hyperdrive accelerates database queries by pooling your connections and caching your requests across the globe.
## Next steps
To build more with databases and Workers, refer to [Tutorials](https://developers.cloudflare.com/workers/tutorials) and explore the [Databases documentation](https://developers.cloudflare.com/workers/databases).
If you have any questions, need assistance, or would like to share your project, join the Cloudflare Developer community on [Discord ↗](https://discord.cloudflare.com) to connect with fellow developers and the Cloudflare team.
```json
{"@context":"https://schema.org","@type":"TechArticle","@id":"https://developers.cloudflare.com/workers/tutorials/postgres/#page","headline":"Connect to a PostgreSQL database with Cloudflare Workers · Cloudflare Workers docs","description":"This tutorial explains how to connect to a Postgres database with Cloudflare Workers. The Workers application you create in this tutorial will interact with a product database inside of Postgres.","url":"https://developers.cloudflare.com/workers/tutorials/postgres/","inLanguage":"en","image":"https://developers.cloudflare.com/dev-products-preview.png","dateModified":"2026-03-20","publisher":{"@type":"Organization","name":"Cloudflare","url":"https://www.cloudflare.com/"},"isPartOf":{"@type":"WebSite","@id":"https://developers.cloudflare.com/#website","name":"Cloudflare Docs","url":"https://developers.cloudflare.com/"},"keywords":["PostgreSQL","TypeScript","SQL"]}
{"@context":"https://schema.org","@type":"BreadcrumbList","itemListElement":[{"@type":"ListItem","position":1,"item":{"@id":"/directory/","name":"Directory"}},{"@type":"ListItem","position":2,"item":{"@id":"/workers/","name":"Workers"}},{"@type":"ListItem","position":3,"item":{"@id":"/workers/tutorials/","name":"Tutorials"}},{"@type":"ListItem","position":4,"item":{"@id":"/workers/tutorials/postgres/","name":"Connect to a PostgreSQL database with Cloudflare Workers"}}]}
```
---
---
title: Send Emails With Postmark
description: This tutorial explains how to send transactional emails from Workers using Postmark.
image: https://developers.cloudflare.com/dev-products-preview.png
---
> Documentation Index
> Fetch the complete documentation index at: https://developers.cloudflare.com/workers/llms.txt
> Use this file to discover all available pages before exploring further.
[Skip to content](#%5Ftop)
# Send Emails With Postmark
In this tutorial, you will learn how to send transactional emails from Workers using [Postmark ↗](https://postmarkapp.com/). At the end of this tutorial, you’ll be able to:
* Create a Worker to send emails.
* Sign up and add a Cloudflare domain to Postmark.
* Send emails from your Worker using Postmark.
* Store API keys securely with secrets.
## Prerequisites
To continue with this tutorial, you’ll need:
* A [Cloudflare account ↗](https://dash.cloudflare.com/sign-up/workers-and-pages), if you don’t already have one.
* A [registered](https://developers.cloudflare.com/registrar/get-started/register-domain/) domain.
* Installed [npm ↗](https://docs.npmjs.com/getting-started).
* A [Postmark account ↗](https://account.postmarkapp.com/sign%5Fup).
## Create a Worker project
Start by using [C3](https://developers.cloudflare.com/pages/get-started/c3/) to create a Worker project in the command line, then, answer the prompts:
```sh
npm create cloudflare@latest
```
Alternatively, you can use CLI arguments to speed things up:
```sh
npm create cloudflare@latest email-with-postmark -- --type=hello-world --ts=false --git=true --deploy=false
```
This creates a simple hello-world Worker having the following content:
**JavaScript**
```js
export default {
async fetch(request, env, ctx) {
return new Response("Hello World!");
},
};
```
## Add your domain to Postmark
If you don’t already have a Postmark account, you can sign up for a [free account here ↗](https://account.postmarkapp.com/sign%5Fup). After signing up, check your inbox for a link to confirm your sender signature. This verifies and enables you to send emails from your registered email address.
To enable email sending from other addresses on your domain, navigate to `Sender Signatures` on the Postmark dashboard, `Add Domain or Signature` \> `Add Domain`, then type in your domain and click on `Verify Domain`.
Next, you’re presented with a list of DNS records to add to your Cloudflare domain. On your Cloudflare dashboard, select the domain you entered earlier and navigate to `DNS` \> `Records`. Copy/paste the DNS records (DKIM, and Return-Path) from Postmark to your Cloudflare domain.
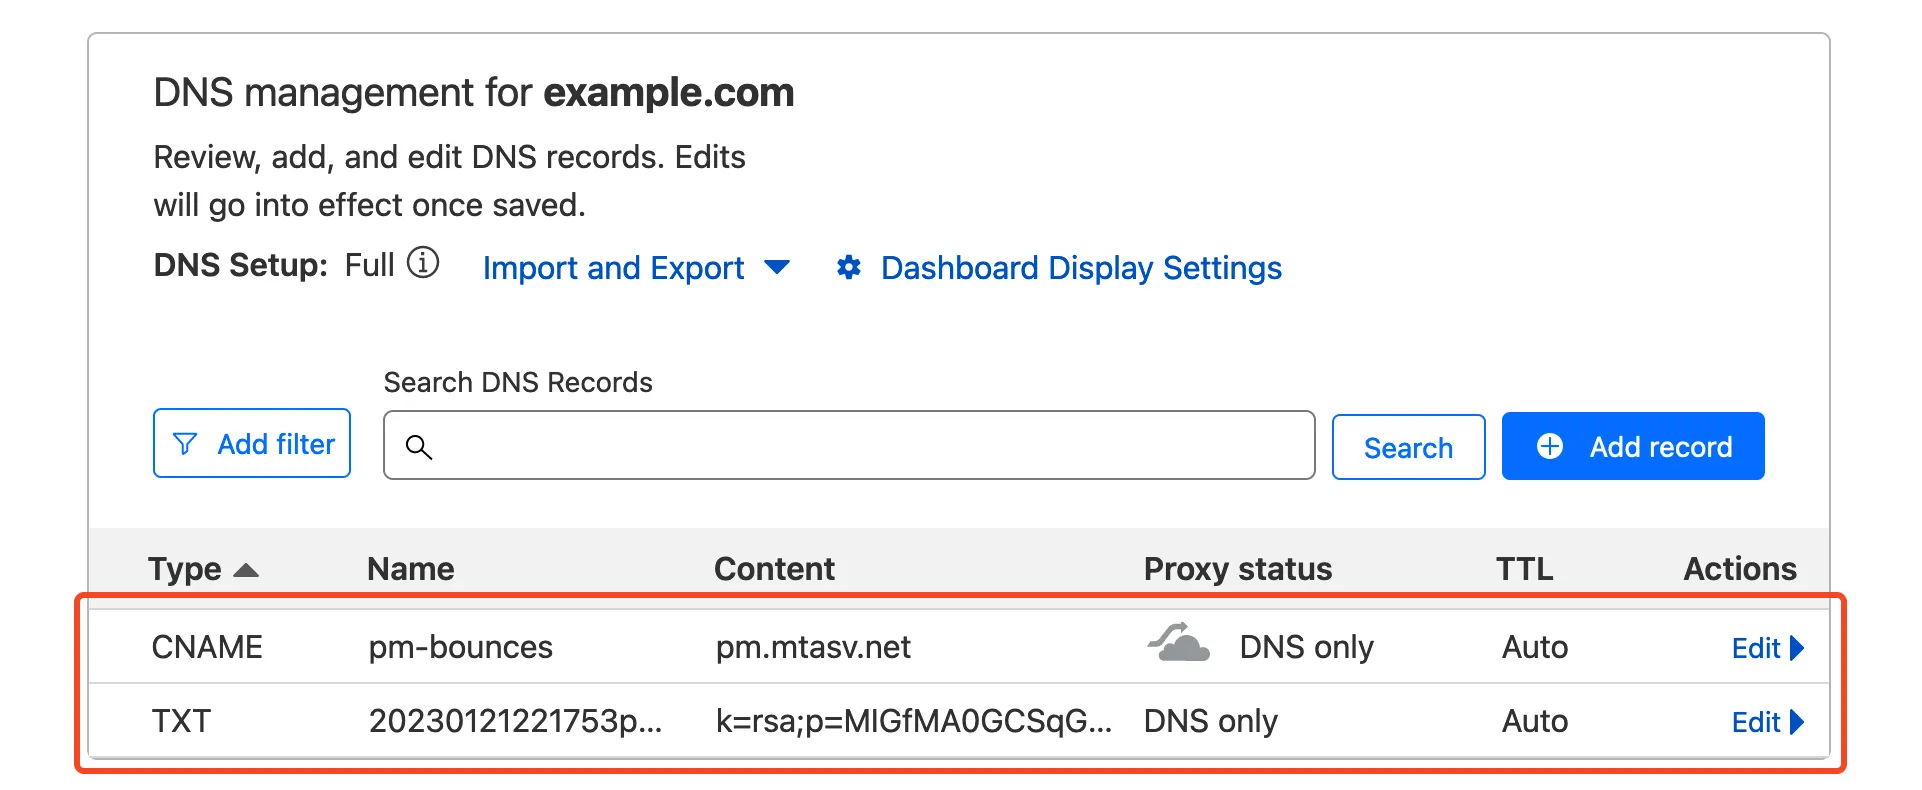
Note
If you need more help adding DNS records in Cloudflare, refer to [Manage DNS records](https://developers.cloudflare.com/dns/manage-dns-records/how-to/create-dns-records/).
When that’s done, head back to Postmark and click on the `Verify` buttons. If all records are properly configured, your domain status should be updated to `Verified`.
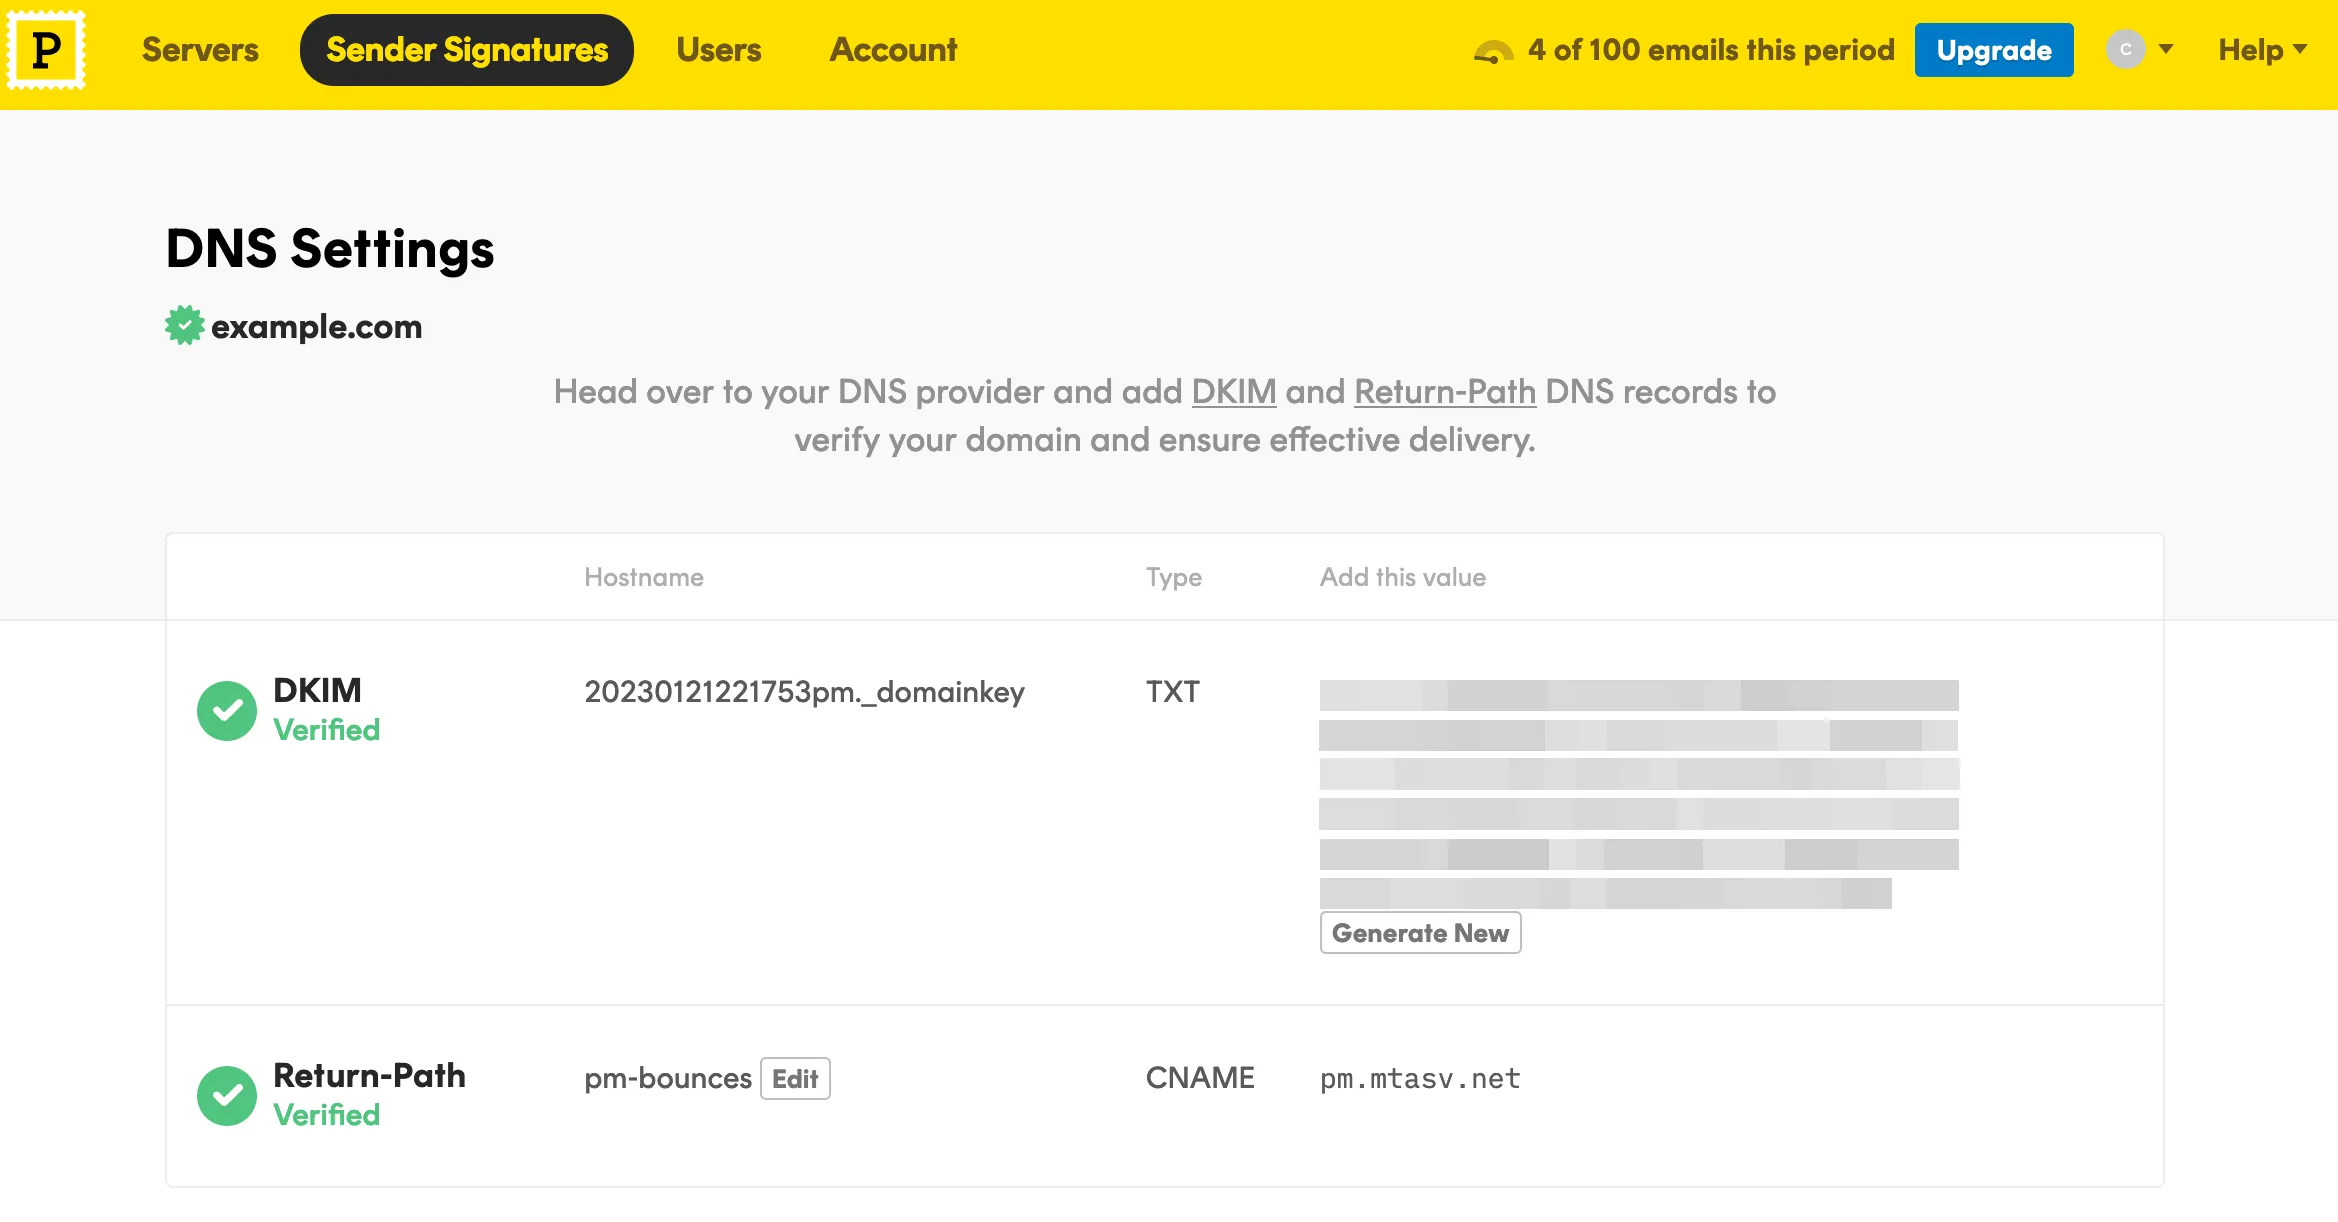
To grab your API token, navigate to the `Servers` tab, then `My First Server` \> `API Tokens`, then copy your API key to a safe place.
## Send emails from your Worker
The final step is putting it all together in a Worker. In your Worker, make a post request with `fetch` to Postmark’s email API and include your token and message body:
Note
[Postmark’s JavaScript library ↗](https://www.npmjs.com/package/postmark) is currently not supported on Workers. Use the [email API ↗](https://postmarkapp.com/developer/user-guide/send-email-with-api) instead.
```jsx
export default {
async fetch(request, env, ctx) {
return await fetch("https://api.postmarkapp.com/email", {
method: "POST",
headers: {
"Content-Type": "application/json",
"X-Postmark-Server-Token": "your_postmark_api_token_here",
},
body: JSON.stringify({
From: "hello@example.com",
To: "someone@example.com",
Subject: "Hello World",
HtmlBody: "
Hello from Workers
",
}),
});
},
};
```
To test your code locally, run the following command and navigate to [http://localhost:8787/ ↗](http://localhost:8787/) in a browser:
```sh
npm start
```
Deploy your Worker with `npm run deploy`.
## Move API token to Secrets
Sensitive information such as API keys and token should always be stored in secrets. All secrets are encrypted to add an extra layer of protection. That said, it’s a good idea to move your API token to a secret and access it from the environment of your Worker.
To add secrets for local development, create a `.dev.vars` file which works exactly like a `.env` file:
```txt
POSTMARK_API_TOKEN=your_postmark_api_token_here
```
Also ensure the secret is added to your deployed worker by running:
**Add secret to deployed Worker**
```sh
npx wrangler secret put POSTMARK_API_TOKEN
```
The added secret can be accessed on via the `env` parameter passed to your Worker’s fetch event handler:
```jsx
export default {
async fetch(request, env, ctx) {
return await fetch("https://api.postmarkapp.com/email", {
method: "POST",
headers: {
"Content-Type": "application/json",
"X-Postmark-Server-Token": env.POSTMARK_API_TOKEN,
},
body: JSON.stringify({
From: "hello@example.com",
To: "someone@example.com",
Subject: "Hello World",
HtmlBody: "
Hello from Workers
",
}),
});
},
};
```
And finally, deploy this update with `npm run deploy`.
## Related resources
* [Storing API keys and tokens with Secrets](https://developers.cloudflare.com/workers/configuration/secrets/).
* [Transferring your domain to Cloudflare](https://developers.cloudflare.com/registrar/get-started/transfer-domain-to-cloudflare/).
* [Send emails from Workers](https://developers.cloudflare.com/email-service/api/send-emails/workers-api/)
```json
{"@context":"https://schema.org","@type":"TechArticle","@id":"https://developers.cloudflare.com/workers/tutorials/send-emails-with-postmark/#page","headline":"Send Emails With Postmark · Cloudflare Workers docs","description":"This tutorial explains how to send transactional emails from Workers using Postmark.","url":"https://developers.cloudflare.com/workers/tutorials/send-emails-with-postmark/","inLanguage":"en","image":"https://developers.cloudflare.com/dev-products-preview.png","dateModified":"2026-06-09","publisher":{"@type":"Organization","name":"Cloudflare","url":"https://www.cloudflare.com/"},"isPartOf":{"@type":"WebSite","@id":"https://developers.cloudflare.com/#website","name":"Cloudflare Docs","url":"https://developers.cloudflare.com/"},"keywords":["JavaScript"]}
{"@context":"https://schema.org","@type":"BreadcrumbList","itemListElement":[{"@type":"ListItem","position":1,"item":{"@id":"/directory/","name":"Directory"}},{"@type":"ListItem","position":2,"item":{"@id":"/workers/","name":"Workers"}},{"@type":"ListItem","position":3,"item":{"@id":"/workers/tutorials/","name":"Tutorials"}},{"@type":"ListItem","position":4,"item":{"@id":"/workers/tutorials/send-emails-with-postmark/","name":"Send Emails With Postmark"}}]}
```
---
---
title: Send Emails With Resend
description: This tutorial explains how to send emails from Cloudflare Workers using Resend.
image: https://developers.cloudflare.com/dev-products-preview.png
---
> Documentation Index
> Fetch the complete documentation index at: https://developers.cloudflare.com/workers/llms.txt
> Use this file to discover all available pages before exploring further.
[Skip to content](#%5Ftop)
# Send Emails With Resend
In this tutorial, you will learn how to send transactional emails from Workers using [Resend ↗](https://resend.com/). At the end of this tutorial, you’ll be able to:
* Create a Worker to send emails.
* Sign up and add a Cloudflare domain to Resend.
* Send emails from your Worker using Resend.
* Store API keys securely with secrets.
## Prerequisites
To continue with this tutorial, you’ll need:
* A [Cloudflare account ↗](https://dash.cloudflare.com/sign-up/workers-and-pages), if you don’t already have one.
* A [registered](https://developers.cloudflare.com/registrar/get-started/register-domain/) domain.
* Installed [npm ↗](https://docs.npmjs.com/getting-started).
* A [Resend account ↗](https://resend.com/signup).
## Create a Worker project
Start by using [C3](https://developers.cloudflare.com/pages/get-started/c3/) to create a Worker project in the command line, then, answer the prompts:
```sh
npm create cloudflare@latest
```
Alternatively, you can use CLI arguments to speed things up:
```sh
npm create cloudflare@latest email-with-resend -- --type=hello-world --ts=false --git=true --deploy=false
```
This creates a simple hello-world Worker having the following content:
**JavaScript**
```js
export default {
async fetch(request, env, ctx) {
return new Response("Hello World!");
},
};
```
## Add your domain to Resend
If you don’t already have a Resend account, you can sign up for a [free account here ↗](https://resend.com/signup). After signing up, go to `Domains` using the side menu, and click the button to add a new domain. On the modal, enter the domain you want to add and then select a region.
Next, you’re presented with a list of DNS records to add to your Cloudflare domain. On your Cloudflare dashboard, select the domain you entered earlier and navigate to `DNS` \> `Records`. Copy/paste the DNS records (DKIM, SPF, and DMARC records) from Resend to your Cloudflare domain.
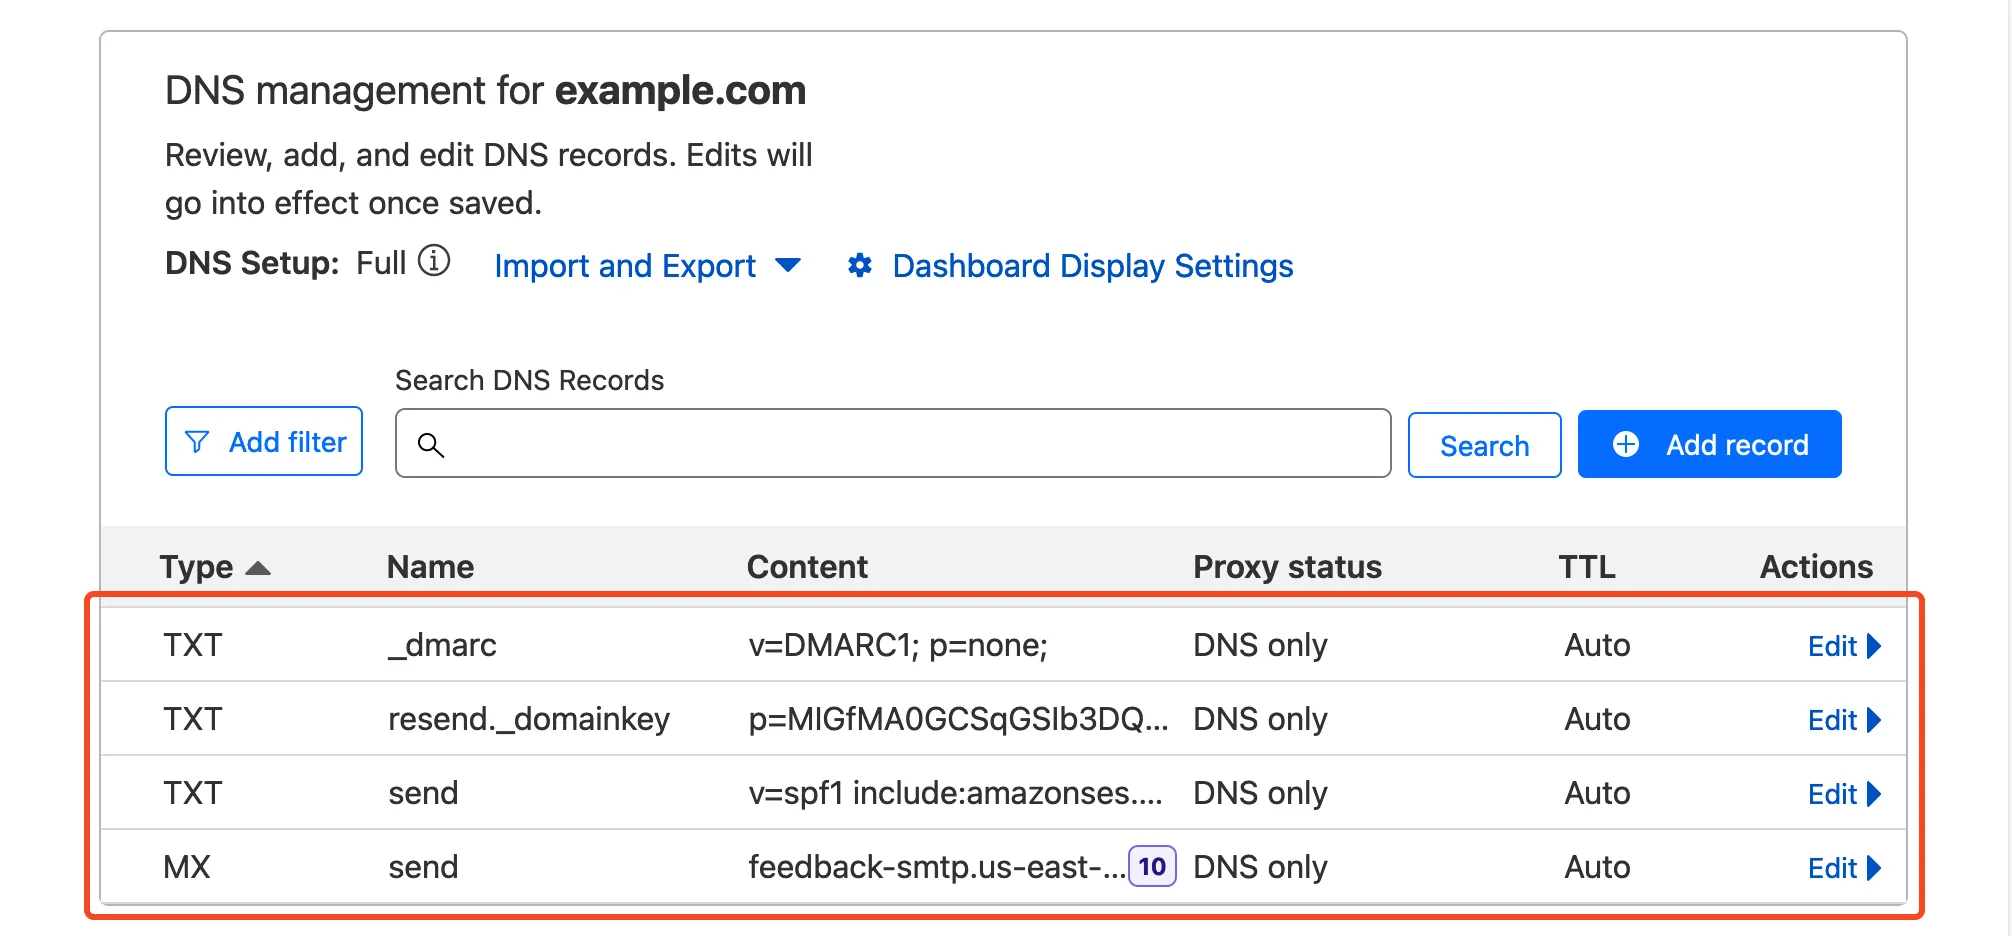
Note
If you need more help adding DNS records in Cloudflare, refer to [Manage DNS records](https://developers.cloudflare.com/dns/manage-dns-records/how-to/create-dns-records/).
When that’s done, head back to Resend and click on the `Verify DNS Records` button. If all records are properly configured, your domain status should be updated to `Verified`.
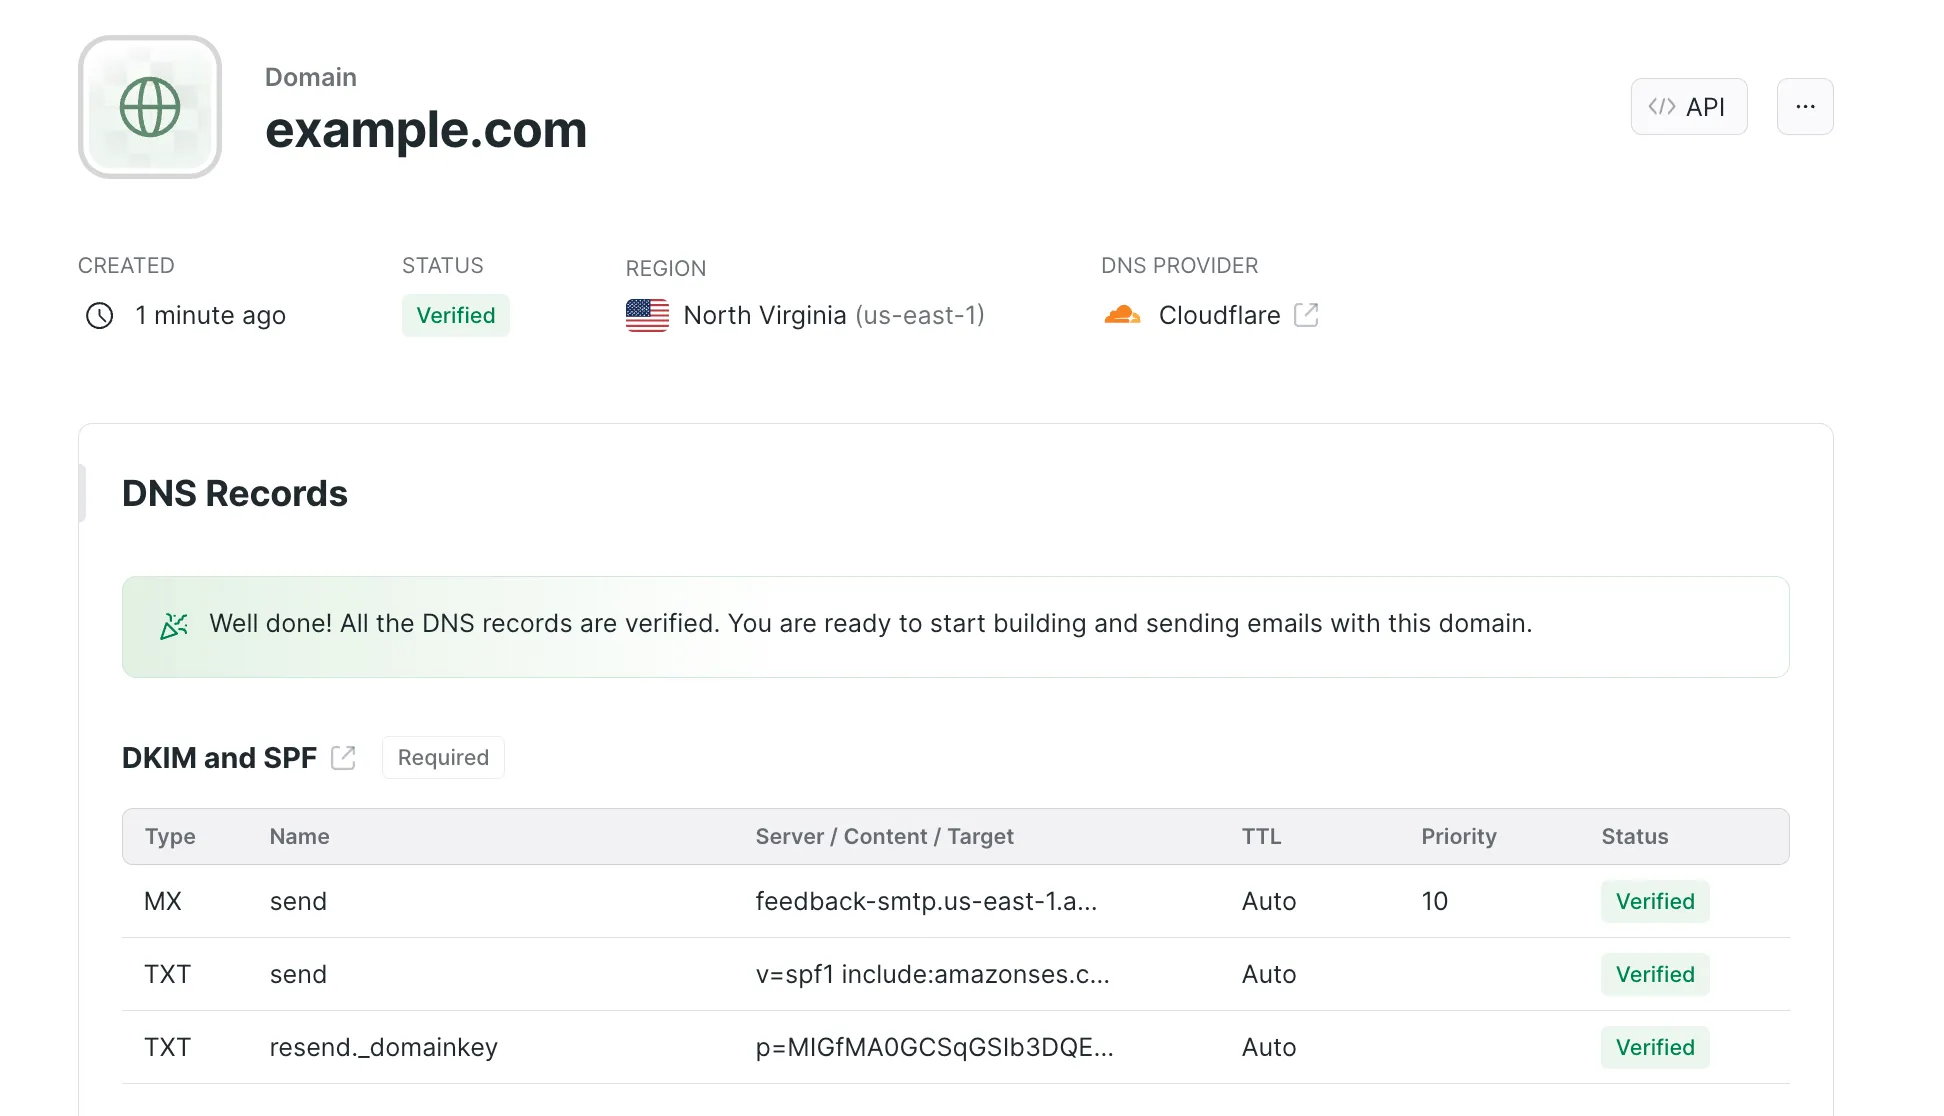
Lastly, navigate to `API Keys` with the side menu, to create an API key. Give your key a descriptive name and the appropriate permissions. Click the button to add your key and then copy your API key to a safe location.
## Send emails from your Worker
The final step is putting it all together in a Worker. Open up a terminal in the directory of the Worker you created earlier. Then, install the Resend SDK:
```sh
npm i resend
```
In your Worker, import and use the Resend library like so:
```jsx
import { Resend } from "resend";
export default {
async fetch(request, env, ctx) {
const resend = new Resend("your_resend_api_key");
const { data, error } = await resend.emails.send({
from: "hello@example.com",
to: "someone@example.com",
subject: "Hello World",
html: "
Hello from Workers
",
});
return Response.json({ data, error });
},
};
```
To test your code locally, run the following command and navigate to [http://localhost:8787/ ↗](http://localhost:8787/) in a browser:
```sh
npm start
```
Deploy your Worker with `npm run deploy`.
## Move API keys to Secrets
Sensitive information such as API keys and token should always be stored in secrets. All secrets are encrypted to add an extra layer of protection. That said, it’s a good idea to move your API key to a secret and access it from the environment of your Worker.
To add secrets for local development, create a `.dev.vars` file which works exactly like a `.env` file:
```txt
RESEND_API_KEY=your_resend_api_key
```
Also ensure the secret is added to your deployed worker by running:
**Add secret to deployed Worker**
```sh
npx wrangler secret put RESEND_API_KEY
```
The added secret can be accessed on via the `env` parameter passed to your Worker’s fetch event handler:
```jsx
import { Resend } from "resend";
export default {
async fetch(request, env, ctx) {
const resend = new Resend(env.RESEND_API_KEY);
const { data, error } = await resend.emails.send({
from: "hello@example.com",
to: "someone@example.com",
subject: "Hello World",
html: "
Hello from Workers
",
});
return Response.json({ data, error });
},
};
```
And finally, deploy this update with `npm run deploy`.
## Related resources
* [Storing API keys and tokens with Secrets](https://developers.cloudflare.com/workers/configuration/secrets/).
* [Transferring your domain to Cloudflare](https://developers.cloudflare.com/registrar/get-started/transfer-domain-to-cloudflare/).
* [Send emails from Workers](https://developers.cloudflare.com/email-service/api/send-emails/workers-api/)
```json
{"@context":"https://schema.org","@type":"TechArticle","@id":"https://developers.cloudflare.com/workers/tutorials/send-emails-with-resend/#page","headline":"Send Emails With Resend · Cloudflare Workers docs","description":"This tutorial explains how to send emails from Cloudflare Workers using Resend.","url":"https://developers.cloudflare.com/workers/tutorials/send-emails-with-resend/","inLanguage":"en","image":"https://developers.cloudflare.com/dev-products-preview.png","dateModified":"2026-06-09","publisher":{"@type":"Organization","name":"Cloudflare","url":"https://www.cloudflare.com/"},"isPartOf":{"@type":"WebSite","@id":"https://developers.cloudflare.com/#website","name":"Cloudflare Docs","url":"https://developers.cloudflare.com/"},"keywords":["JavaScript"]}
{"@context":"https://schema.org","@type":"BreadcrumbList","itemListElement":[{"@type":"ListItem","position":1,"item":{"@id":"/directory/","name":"Directory"}},{"@type":"ListItem","position":2,"item":{"@id":"/workers/","name":"Workers"}},{"@type":"ListItem","position":3,"item":{"@id":"/workers/tutorials/","name":"Tutorials"}},{"@type":"ListItem","position":4,"item":{"@id":"/workers/tutorials/send-emails-with-resend/","name":"Send Emails With Resend"}}]}
```
---
---
title: Securely access and upload assets with Cloudflare R2
description: This tutorial explains how to create a TypeScript-based Cloudflare Workers project that can securely access files from and upload files to a CloudFlare R2 bucket.
image: https://developers.cloudflare.com/dev-products-preview.png
---
> Documentation Index
> Fetch the complete documentation index at: https://developers.cloudflare.com/workers/llms.txt
> Use this file to discover all available pages before exploring further.
[Skip to content](#%5Ftop)
# Securely access and upload assets with Cloudflare R2
This tutorial explains how to create a TypeScript-based Cloudflare Workers project that can securely access files from and upload files to a [Cloudflare R2](https://developers.cloudflare.com/r2/) bucket. Cloudflare R2 allows developers to store large amounts of unstructured data without the costly egress bandwidth fees associated with typical cloud storage services.
## Prerequisites
To continue:
1. Sign up for a [Cloudflare account ↗](https://dash.cloudflare.com/sign-up/workers-and-pages) if you have not already.
2. Install [npm ↗](https://docs.npmjs.com/getting-started).
3. Install [Node.js ↗](https://nodejs.org/en/). Use a Node version manager like [Volta ↗](https://volta.sh/) or [nvm ↗](https://github.com/nvm-sh/nvm) to avoid permission issues and change Node.js versions. [Wrangler](https://developers.cloudflare.com/workers/wrangler/install-and-update/) requires a Node version of `16.17.0` or later.
## Create a Worker application
First, use the [create-cloudflare CLI ↗](https://github.com/cloudflare/workers-sdk/tree/main/packages/create-cloudflare) to create a new Worker. To do this, open a terminal window and run the following command:
npm yarn pnpm
```
npm create cloudflare@latest -- upload-r2-assets
```
```
yarn create cloudflare upload-r2-assets
```
```
pnpm create cloudflare@latest upload-r2-assets
```
For setup, select the following options:
* For _What would you like to start with?_, choose `Hello World example`.
* For _Which template would you like to use?_, choose `Worker only`.
* For _Which language do you want to use?_, choose `TypeScript`.
* For _Do you want to use git for version control?_, choose `Yes`.
* For _Do you want to deploy your application?_, choose `No` (we will be making some changes before deploying).
Move into your newly created directory:
```sh
cd upload-r2-assets
```
## Create an R2 bucket
Before you integrate R2 bucket access into your Worker application, an R2 bucket must be created:
```sh
npx wrangler r2 bucket create
```
Replace `` with the name you want to assign to your bucket. List your account's R2 buckets to verify that a new bucket has been added:
```sh
npx wrangler r2 bucket list
```
## Configure access to an R2 bucket
After your new R2 bucket is ready, use it inside your Worker application.
Use your R2 bucket inside your Worker project by modifying the [Wrangler configuration file](https://developers.cloudflare.com/workers/wrangler/configuration/) to include an R2 bucket [binding](https://developers.cloudflare.com/workers/runtime-apis/bindings/). Add the following R2 bucket binding to your Wrangler file:
* [ wrangler.jsonc ](#tab-panel-13093)
* [ wrangler.toml ](#tab-panel-13094)
**JSONC**
```jsonc
{
"r2_buckets": [
{
"binding": "MY_BUCKET",
"bucket_name": ""
}
]
}
```
**TOML**
```toml
[[r2_buckets]]
binding = "MY_BUCKET"
bucket_name = ""
```
Give your R2 bucket binding name. Replace `` with the name of the R2 bucket you created earlier.
Your Worker application can now access your R2 bucket using the `MY_BUCKET` variable. You can now perform CRUD (Create, Read, Update, Delete) operations on the contents of the bucket.
## Fetch from an R2 bucket
After setting up an R2 bucket binding, you will implement the functionalities for the Worker to interact with the R2 bucket, such as, fetching files from the bucket and uploading files to the bucket.
To fetch files from the R2 bucket, use the `BINDING.get` function. In the below example, the R2 bucket binding is called `MY_BUCKET`. Using `.get(key)`, you can retrieve an asset based on the URL pathname as the key. In this example, the URL pathname is `/image.png`, and the asset key is `image.png`.
**TypeScript**
```ts
interface Env {
MY_BUCKET: R2Bucket;
}
export default {
async fetch(request, env): Promise {
// For example, the request URL my-worker.account.workers.dev/image.png
const url = new URL(request.url);
const key = url.pathname.slice(1);
// Retrieve the key "image.png"
const object = await env.MY_BUCKET.get(key);
if (object === null) {
return new Response("Object Not Found", { status: 404 });
}
const headers = new Headers();
object.writeHttpMetadata(headers);
headers.set("etag", object.httpEtag);
return new Response(object.body, {
headers,
});
},
} satisfies ExportedHandler;
```
The code written above fetches and returns data from the R2 bucket when a `GET` request is made to the Worker application using a specific URL path.
## Upload securely to an R2 bucket
Next, you will add the ability to upload to your R2 bucket using authentication. To securely authenticate your upload requests, use [Wrangler's secret capability](https://developers.cloudflare.com/workers/wrangler/commands/general/#secret). Wrangler was installed when you ran the `create cloudflare@latest` command.
Create a secret value of your choice -- for instance, a random string or password. Using the Wrangler CLI, add the secret to your project as `AUTH_SECRET`:
```sh
npx wrangler secret put AUTH_SECRET
```
Now, add a new code path that handles a `PUT` HTTP request. This new code will check that the previously uploaded secret is correctly used for authentication, and then upload to R2 using `MY_BUCKET.put(key, data)`:
**TypeScript**
```ts
interface Env {
MY_BUCKET: R2Bucket;
AUTH_SECRET: string;
}
export default {
async fetch(request, env): Promise {
if (request.method === "PUT") {
// Note that you could require authentication for all requests
// by moving this code to the top of the fetch function.
const auth = request.headers.get("Authorization");
const expectedAuth = `Bearer ${env.AUTH_SECRET}`;
if (!auth || auth !== expectedAuth) {
return new Response("Unauthorized", { status: 401 });
}
const url = new URL(request.url);
const key = url.pathname.slice(1);
await env.MY_BUCKET.put(key, request.body);
return new Response(`Object ${key} uploaded successfully!`);
}
// include the previous code here...
},
} satisfies ExportedHandler;
```
This approach ensures that only clients who provide a valid bearer token, via the `Authorization` header equal to the `AUTH_SECRET` value, will be permitted to upload to the R2 bucket. If you used a different binding name than `AUTH_SECRET`, replace it in the code above.
## Deploy your Worker application
After completing your Cloudflare Worker project, deploy it to Cloudflare. Make sure you are in your Worker application directory that you created for this tutorial, then run:
```sh
npx wrangler deploy
```
Your application is now live and accessible at `..workers.dev`.
You have successfully created a Cloudflare Worker that allows you to interact with an R2 bucket to accomplish tasks such as uploading and downloading files. You can now use this as a starting point for your own projects.
## Next steps
To build more with R2 and Workers, refer to [Tutorials](https://developers.cloudflare.com/workers/tutorials/) and the [R2 documentation](https://developers.cloudflare.com/r2/).
If you have any questions, need assistance, or would like to share your project, join the Cloudflare Developer community on [Discord ↗](https://discord.cloudflare.com) to connect with fellow developers and the Cloudflare team.
```json
{"@context":"https://schema.org","@type":"TechArticle","@id":"https://developers.cloudflare.com/workers/tutorials/upload-assets-with-r2/#page","headline":"Securely access and upload assets with Cloudflare R2 · Cloudflare Workers docs","description":"This tutorial explains how to create a TypeScript-based Cloudflare Workers project that can securely access files from and upload files to a CloudFlare R2 bucket.","url":"https://developers.cloudflare.com/workers/tutorials/upload-assets-with-r2/","inLanguage":"en","image":"https://developers.cloudflare.com/dev-products-preview.png","dateModified":"2026-03-20","publisher":{"@type":"Organization","name":"Cloudflare","url":"https://www.cloudflare.com/"},"isPartOf":{"@type":"WebSite","@id":"https://developers.cloudflare.com/#website","name":"Cloudflare Docs","url":"https://developers.cloudflare.com/"},"keywords":["TypeScript"]}
{"@context":"https://schema.org","@type":"BreadcrumbList","itemListElement":[{"@type":"ListItem","position":1,"item":{"@id":"/directory/","name":"Directory"}},{"@type":"ListItem","position":2,"item":{"@id":"/workers/","name":"Workers"}},{"@type":"ListItem","position":3,"item":{"@id":"/workers/tutorials/","name":"Tutorials"}},{"@type":"ListItem","position":4,"item":{"@id":"/workers/tutorials/upload-assets-with-r2/","name":"Securely access and upload assets with Cloudflare R2"}}]}
```
---
---
title: Set up and use a Prisma Postgres database
description: This tutorial shows you how to set up a Cloudflare Workers project with Prisma ORM.
image: https://developers.cloudflare.com/dev-products-preview.png
---
> Documentation Index
> Fetch the complete documentation index at: https://developers.cloudflare.com/workers/llms.txt
> Use this file to discover all available pages before exploring further.
[Skip to content](#%5Ftop)
# Set up and use a Prisma Postgres database
[Prisma Postgres ↗](https://www.prisma.io/postgres) is a managed, serverless PostgreSQL database. It supports features like connection pooling, caching, real-time subscriptions, and query optimization recommendations.
In this tutorial, you will learn how to:
* Set up a Cloudflare Workers project with [Prisma ORM ↗](https://www.prisma.io/docs).
* Create a Prisma Postgres instance from the Prisma CLI.
* Model data and run migrations with Prisma Postgres.
* Query the database from Workers.
* Deploy the Worker to Cloudflare.
## Prerequisites
To follow this guide, ensure you have the following:
* Node.js `v18.18` or higher installed.
* An active [Cloudflare account ↗](https://dash.cloudflare.com/).
* A basic familiarity with installing and using command-line interface (CLI) applications.
## 1\. Create a new Worker project
Begin by using [C3](https://developers.cloudflare.com/pages/get-started/c3/) to create a Worker project in the command line:
```sh
npm create cloudflare@latest prisma-postgres-worker -- --type=hello-world --ts=true --git=true --deploy=false
```
Then navigate into your project:
```sh
cd ./prisma-postgres-worker
```
Your initial `src/index.ts` file currently contains a simple request handler:
**src/index.ts**
```ts
export default {
async fetch(request, env, ctx): Promise {
return new Response("Hello World!");
},
} satisfies ExportedHandler;
```
## 2\. Setup Prisma in your project
In this step, you will set up Prisma ORM with a Prisma Postgres database using the CLI. Then you will create and execute helper scripts to create tables in the database and generate a Prisma client to query it.
### 2.1\. Install required dependencies
Install Prisma CLI as a dev dependency:
npm yarn pnpm bun
```
npm i -D prisma
```
```
yarn add -D prisma
```
```
pnpm add -D prisma
```
```
bun add -d prisma
```
Install the [Prisma Accelerate client extension ↗](https://www.npmjs.com/package/@prisma/extension-accelerate) as it is required for Prisma Postgres:
npm yarn pnpm bun
```
npm i @prisma/extension-accelerate
```
```
yarn add @prisma/extension-accelerate
```
```
pnpm add @prisma/extension-accelerate
```
```
bun add @prisma/extension-accelerate
```
Install the [dotenv-cli package ↗](https://www.npmjs.com/package/dotenv-cli) to load environment variables from `.dev.vars`:
npm yarn pnpm bun
```
npm i -D dotenv-cli
```
```
yarn add -D dotenv-cli
```
```
pnpm add -D dotenv-cli
```
```
bun add -d dotenv-cli
```
### 2.2\. Create a Prisma Postgres database and initialize Prisma
Initialize Prisma in your application:
npm yarn pnpm
```
npx prisma@latest init --db
```
```
yarn dlx prisma@latest init --db
```
```
pnpx prisma@latest init --db
```
If you do not have a [Prisma Data Platform ↗](https://console.prisma.io/) account yet, or if you are not logged in, the command will prompt you to log in using one of the available authentication providers. A browser window will open so you can log in or create an account. Return to the CLI after you have completed this step.
Once logged in (or if you were already logged in), the CLI will prompt you to select a project name and a database region.
Once the command has terminated, it will have created:
* A project in your [Platform Console ↗](https://console.prisma.io/) containing a Prisma Postgres database instance.
* A `prisma` folder containing `schema.prisma`, where you will define your database schema.
* An `.env` file in the project root, which will contain the Prisma Postgres database url `DATABASE_URL=`.
Note that Cloudflare Workers do not support `.env` files. You will use a file called `.dev.vars` instead of the `.env` file that was just created.
### 2.3\. Prepare environment variables
Rename the `.env` file in the root of your application to `.dev.vars` file:
```sh
mv .env .dev.vars
```
### 2.4\. Apply database schema changes
Open the `schema.prisma` file in the `prisma` folder and add the following `User` model to your database:
**prisma/schema.prisma**
```prisma
generator client {
provider = "prisma-client-js"
}
datasource db {
provider = "postgresql"
url = env("DATABASE_URL")
}
model User {
id Int @id @default(autoincrement())
email String
name String
}
```
Next, add the following helper scripts to the `scripts` section of your `package.json`:
**package.json**
```json
"scripts": {
"migrate": "dotenv -e .dev.vars -- npx prisma migrate dev",
"generate": "dotenv -e .dev.vars -- npx prisma generate --no-engine",
"studio": "dotenv -e .dev.vars -- npx prisma studio",
// Additional worker scripts...
}
```
Run the migration script to apply changes to the database:
```sh
npm run migrate
```
When prompted, provide a name for the migration (for example, `init`).
After these steps are complete, Prisma ORM is fully set up and connected to your Prisma Postgres database.
## 3\. Develop the application
Modify the `src/index.ts` file and replace its contents with the following code:
**src/index.ts**
```ts
import { PrismaClient } from "@prisma/client/edge";
import { withAccelerate } from "@prisma/extension-accelerate";
export interface Env {
DATABASE_URL: string;
}
export default {
async fetch(request, env, ctx): Promise {
const path = new URL(request.url).pathname;
if (path === "/favicon.ico")
return new Response("Resource not found", {
status: 404,
headers: {
"Content-Type": "text/plain",
},
});
const prisma = new PrismaClient({
datasourceUrl: env.DATABASE_URL,
}).$extends(withAccelerate());
const user = await prisma.user.create({
data: {
email: `Jon${Math.ceil(Math.random() * 1000)}@gmail.com`,
name: "Jon Doe",
},
});
const userCount = await prisma.user.count();
return new Response(`\
Created new user: ${user.name} (${user.email}).
Number of users in the database: ${userCount}.
`);
},
} satisfies ExportedHandler;
```
Run the development server:
```sh
npm run dev
```
Visit [https://localhost:8787 ↗](https://localhost:8787) to see your app display the following output:
```sh
Number of users in the database: 1
```
Every time you refresh the page, a new user is created. The number displayed will increment by `1` with each refresh as it returns the total number of users in your database.
## 4\. Deploy the application to Cloudflare
When the application is deployed to Cloudflare, it needs access to the `DATABASE_URL` environment variable that is defined locally in `.dev.vars`. You can use the [npx wrangler secret put](https://developers.cloudflare.com/workers/configuration/secrets/#adding-secrets-to-your-project) command to upload the `DATABASE_URL` to the deployment environment:
```sh
npx wrangler secret put DATABASE_URL
```
When prompted, paste the `DATABASE_URL` value (from `.dev.vars`). If you are logged in via the Wrangler CLI, you will see a prompt asking if you'd like to create a new Worker. Confirm by choosing "yes":
```sh
✔ There doesn't seem to be a Worker called "prisma-postgres-worker". Do you want to create a new Worker with that name and add secrets to it? … yes
```
Then execute the following command to deploy your project to Cloudflare Workers:
```sh
npm run deploy
```
The `wrangler` CLI will bundle and upload your application.
If you are not already logged in, the `wrangler` CLI will open a browser window prompting you to log in to the Cloudflare dashboard.
Note
If you belong to multiple accounts, select the account where you want to deploy the project.
Once the deployment completes, verify the deployment by visiting the live URL provided in the deployment output, such as `https://{PROJECT_NAME}.workers.dev`. If you encounter any issues, ensure the secrets were added correctly and check the deployment logs for errors.
## Next steps
Congratulations on building and deploying a simple application with Prisma Postgres and Cloudflare Workers!
To enhance your application further:
* Add [caching ↗](https://www.prisma.io/docs/postgres/caching) to your queries.
* Explore the [Prisma Postgres documentation ↗](https://www.prisma.io/docs/postgres/getting-started).
To see how to build a real-time application with Cloudflare Workers and Prisma Postgres, read [this ↗](https://www.prisma.io/docs/guides/prisma-postgres-realtime-on-cloudflare) guide.
```json
{"@context":"https://schema.org","@type":"TechArticle","@id":"https://developers.cloudflare.com/workers/tutorials/using-prisma-postgres-with-workers/#page","headline":"Set up and use a Prisma Postgres database · Cloudflare Workers docs","description":"This tutorial shows you how to set up a Cloudflare Workers project with Prisma ORM.","url":"https://developers.cloudflare.com/workers/tutorials/using-prisma-postgres-with-workers/","inLanguage":"en","image":"https://developers.cloudflare.com/dev-products-preview.png","dateModified":"2026-04-23","publisher":{"@type":"Organization","name":"Cloudflare","url":"https://www.cloudflare.com/"},"isPartOf":{"@type":"WebSite","@id":"https://developers.cloudflare.com/#website","name":"Cloudflare Docs","url":"https://developers.cloudflare.com/"},"keywords":["TypeScript","SQL","Prisma ORM","PostgreSQL"]}
{"@context":"https://schema.org","@type":"BreadcrumbList","itemListElement":[{"@type":"ListItem","position":1,"item":{"@id":"/directory/","name":"Directory"}},{"@type":"ListItem","position":2,"item":{"@id":"/workers/","name":"Workers"}},{"@type":"ListItem","position":3,"item":{"@id":"/workers/tutorials/","name":"Tutorials"}},{"@type":"ListItem","position":4,"item":{"@id":"/workers/tutorials/using-prisma-postgres-with-workers/","name":"Set up and use a Prisma Postgres database"}}]}
```
---
---
title: Use Workers KV directly from Rust
description: This tutorial will teach you how to read and write to KV directly from Rust using workers-rs. You will use Workers KV from Rust to build an app to store and retrieve cities.
image: https://developers.cloudflare.com/dev-products-preview.png
---
> Documentation Index
> Fetch the complete documentation index at: https://developers.cloudflare.com/workers/llms.txt
> Use this file to discover all available pages before exploring further.
[Skip to content](#%5Ftop)
# Use Workers KV directly from Rust
This tutorial will teach you how to read and write to KV directly from Rust using [workers-rs ↗](https://github.com/cloudflare/workers-rs).
## Before you start
All of the tutorials assume you have already completed the [Get started guide](https://developers.cloudflare.com/workers/get-started/guide/), which gets you set up with a Cloudflare Workers account, [C3 ↗](https://github.com/cloudflare/workers-sdk/tree/main/packages/create-cloudflare), and [Wrangler](https://developers.cloudflare.com/workers/wrangler/install-and-update/).
## Prerequisites
To complete this tutorial, you will need:
* [Git ↗](https://git-scm.com/book/en/v2/Getting-Started-Installing-Git).
* [Wrangler](https://developers.cloudflare.com/workers/wrangler/) CLI.
* The [Rust ↗](https://www.rust-lang.org/tools/install) toolchain.
* And `cargo-generate` sub-command by running:
```sh
cargo install cargo-generate
```
## 1\. Create your Worker project in Rust
Open a terminal window, and run the following command to generate a Worker project template in Rust:
```sh
cargo generate cloudflare/workers-rs
```
Then select `template/hello-world-http` template, give your project a descriptive name and select enter. A new project should be created in your directory. Open the project in your editor and run `npx wrangler dev` to compile and run your project.
In this tutorial, you will use Workers KV from Rust to build an app to store and retrieve cities by a given country name.
## 2\. Create a KV namespace
In the terminal, use Wrangler to create a KV namespace for `cities`. This generates a configuration to be added to the project:
```sh
npx wrangler kv namespace create cities
```
To add this configuration to your project, open the Wrangler file and create an entry for `kv_namespaces` above the build command:
* [ wrangler.jsonc ](#tab-panel-13095)
* [ wrangler.toml ](#tab-panel-13096)
**JSONC**
```jsonc
{
"kv_namespaces": [
{
"binding": "cities",
"id": "e29b263ab50e42ce9b637fa8370175e8"
}
]
}
```
**TOML**
```toml
[[kv_namespaces]]
binding = "cities"
id = "e29b263ab50e42ce9b637fa8370175e8"
```
With this configured, you can access the KV namespace with the binding `"cities"` from Rust.
## 3\. Write data to KV
For this app, you will create two routes: A `POST` route to receive and store the city in KV, and a `GET` route to retrieve the city of a given country. For example, a `POST` request to `/France` with a body of `{"city": "Paris"}` should create an entry of Paris as a city in France. A `GET` request to `/France` should retrieve from KV and respond with Paris.
Install [Serde ↗](https://serde.rs/) as a project dependency to handle JSON `cargo add serde`. Then create an app router and a struct for `Country` in `src/lib.rs`:
```rust
use serde::{Deserialize, Serialize};
use worker::*;
#[event(fetch)]
async fn fetch(req: Request, env: Env, _ctx: Context) -> Result {
let router = Router::new();
#[derive(Serialize, Deserialize, Debug)]
struct Country {
city: String,
}
router
// TODO:
.post_async("/:country", |_, _| async move { Response::empty() })
// TODO:
.get_async("/:country", |_, _| async move { Response::empty() })
.run(req, env)
.await
}
```
For the post handler, you will retrieve the country name from the path and the city name from the request body. Then, you will save this in KV with the country as key and the city as value. Finally, the app will respond with the city name:
```rust
.post_async("/:country", |mut req, ctx| async move {
let country = ctx.param("country").unwrap();
let city = match req.json::().await {
Ok(c) => c.city,
Err(_) => String::from(""),
};
if city.is_empty() {
return Response::error("Bad Request", 400);
};
return match ctx.kv("cities")?.put(country, &city)?.execute().await {
Ok(_) => Response::ok(city),
Err(_) => Response::error("Bad Request", 400),
};
})
```
Save the file and make a `POST` request to test this endpoint:
```sh
curl --json '{"city": "Paris"}' http://localhost:8787/France
```
## 4\. Read data from KV
To retrieve cities stored in KV, write a `GET` route that pulls the country name from the path and searches KV. You also need some error handling if the country is not found:
```rust
.get_async("/:country", |_req, ctx| async move {
if let Some(country) = ctx.param("country") {
return match ctx.kv("cities")?.get(country).text().await? {
Some(city) => Response::ok(city),
None => Response::error("Country not found", 404),
};
}
Response::error("Bad Request", 400)
})
```
Save and make a curl request to test the endpoint:
```sh
curl http://localhost:8787/France
```
## 5\. Deploy your project
The source code for the completed app should include the following:
```rust
use serde::{Deserialize, Serialize};
use worker::*;
#[event(fetch)]
async fn fetch(req: Request, env: Env, _ctx: Context) -> Result {
let router = Router::new();
#[derive(Serialize, Deserialize, Debug)]
struct Country {
city: String,
}
router
.post_async("/:country", |mut req, ctx| async move {
let country = ctx.param("country").unwrap();
let city = match req.json::().await {
Ok(c) => c.city,
Err(_) => String::from(""),
};
if city.is_empty() {
return Response::error("Bad Request", 400);
};
return match ctx.kv("cities")?.put(country, &city)?.execute().await {
Ok(_) => Response::ok(city),
Err(_) => Response::error("Bad Request", 400),
};
})
.get_async("/:country", |_req, ctx| async move {
if let Some(country) = ctx.param("country") {
return match ctx.kv("cities")?.get(country).text().await? {
Some(city) => Response::ok(city),
None => Response::error("Country not found", 404),
};
}
Response::error("Bad Request", 400)
})
.run(req, env)
.await
}
```
To deploy your Worker, run the following command:
```sh
npx wrangler deploy
```
## Related resources
* [Rust support in Workers](https://developers.cloudflare.com/workers/languages/rust/).
* [Using KV in Workers](https://developers.cloudflare.com/kv/get-started/).
```json
{"@context":"https://schema.org","@type":"TechArticle","@id":"https://developers.cloudflare.com/workers/tutorials/workers-kv-from-rust/#page","headline":"Use Workers KV directly from Rust · Cloudflare Workers docs","description":"This tutorial will teach you how to read and write to KV directly from Rust using workers-rs. You will use Workers KV from Rust to build an app to store and retrieve cities.","url":"https://developers.cloudflare.com/workers/tutorials/workers-kv-from-rust/","inLanguage":"en","image":"https://developers.cloudflare.com/dev-products-preview.png","dateModified":"2026-01-29","publisher":{"@type":"Organization","name":"Cloudflare","url":"https://www.cloudflare.com/"},"isPartOf":{"@type":"WebSite","@id":"https://developers.cloudflare.com/#website","name":"Cloudflare Docs","url":"https://developers.cloudflare.com/"},"keywords":["Rust"]}
{"@context":"https://schema.org","@type":"BreadcrumbList","itemListElement":[{"@type":"ListItem","position":1,"item":{"@id":"/directory/","name":"Directory"}},{"@type":"ListItem","position":2,"item":{"@id":"/workers/","name":"Workers"}},{"@type":"ListItem","position":3,"item":{"@id":"/workers/tutorials/","name":"Tutorials"}},{"@type":"ListItem","position":4,"item":{"@id":"/workers/tutorials/workers-kv-from-rust/","name":"Use Workers KV directly from Rust"}}]}
```
---
---
title: Demos and architectures
description: Explore demo applications and reference architectures built with Cloudflare Workers.
image: https://developers.cloudflare.com/dev-products-preview.png
---
> Documentation Index
> Fetch the complete documentation index at: https://developers.cloudflare.com/workers/llms.txt
> Use this file to discover all available pages before exploring further.
[Skip to content](#%5Ftop)
# Demos and architectures
Learn how you can use Workers within your existing application and architecture.
## Reference architectures
Explore the following reference architectures that use Workers:
[Fullstack applicationsA practical example of how these services come together in a real fullstack application architecture.](https://developers.cloudflare.com/reference-architecture/diagrams/serverless/fullstack-application/)[Storing user generated contentStore user-generated content in R2 for fast, secure, and cost-effective architecture.](https://developers.cloudflare.com/reference-architecture/diagrams/storage/storing-user-generated-content/)[Optimizing and securing connected transportation systemsThis diagram showcases Cloudflare components optimizing connected transportation systems. It illustrates how their technologies minimize latency, ensure reliability, and strengthen security for critical data flow.](https://developers.cloudflare.com/reference-architecture/diagrams/iot/optimizing-and-securing-connected-transportation-systems/)[Ingesting BigQuery Data into Workers AIYou can connect a Cloudflare Worker to get data from Google BigQuery and pass it to Workers AI, to run AI Models, powered by serverless GPUs.](https://developers.cloudflare.com/reference-architecture/diagrams/ai/bigquery-workers-ai/)[Event notifications for storageUse Cloudflare Workers or an external service to monitor for notifications about data changes and then handle them appropriately.](https://developers.cloudflare.com/reference-architecture/diagrams/storage/event-notifications-for-storage/)[Extend ZTNA with external authorization and serverless computingCloudflare's ZTNA enhances access policies using external API calls and Workers for robust security. It verifies user authentication and authorization, ensuring only legitimate access to protected resources.](https://developers.cloudflare.com/reference-architecture/diagrams/sase/augment-access-with-serverless/)[Cloudflare Security ArchitectureThis document provides insight into how this network and platform are architected from a security perspective, how they are operated, and what services are available for businesses to address their own security challenges.](https://developers.cloudflare.com/reference-architecture/architectures/security/)[Composable AI architectureThe architecture diagram illustrates how AI applications can be built end-to-end on Cloudflare, or single services can be integrated with external infrastructure and services.](https://developers.cloudflare.com/reference-architecture/diagrams/ai/ai-composable/)[A/B-testing using WorkersCloudflare's low-latency, fully serverless compute platform, Workers offers powerful capabilities to enable A/B testing using a server-side implementation.](https://developers.cloudflare.com/reference-architecture/diagrams/serverless/a-b-testing-using-workers/)[Serverless global APIsAn example architecture of a serverless API on Cloudflare and aims to illustrate how different compute and data products could interact with each other.](https://developers.cloudflare.com/reference-architecture/diagrams/serverless/serverless-global-apis/)[Serverless ETL pipelinesCloudflare enables fully serverless ETL pipelines, significantly reducing complexity, accelerating time to production, and lowering overall costs.](https://developers.cloudflare.com/reference-architecture/diagrams/serverless/serverless-etl/)[Egress-free object storage in multi-cloud setupsLearn how to use R2 to get egress-free object storage in multi-cloud setups.](https://developers.cloudflare.com/reference-architecture/diagrams/storage/egress-free-storage-multi-cloud/)[Retrieval Augmented Generation (RAG)RAG combines retrieval with generative models for better text. It uses external knowledge to create factual, relevant responses, improving coherence and accuracy in NLP tasks like chatbots.](https://developers.cloudflare.com/reference-architecture/diagrams/ai/ai-rag/)[Automatic captioning for video uploadsBy integrating automatic speech recognition technology into video platforms, content creators, publishers, and distributors can reach a broader audience, including individuals with hearing impairments or those who prefer to consume content in different languages.](https://developers.cloudflare.com/reference-architecture/diagrams/ai/ai-video-caption/)[Serverless image content managementLeverage various components of Cloudflare's ecosystem to construct a scalable image management solution](https://developers.cloudflare.com/reference-architecture/diagrams/serverless/serverless-image-content-management/)[Enterprise AI agent workspaceReference architecture for building governed, stateful enterprise AI agent workspaces on Cloudflare.](https://developers.cloudflare.com/reference-architecture/diagrams/ai/enterprise-ai-agent-workspace/)
```json
{"@context":"https://schema.org","@type":"WebPage","@id":"https://developers.cloudflare.com/workers/demos/#page","headline":"Demos and architectures · Cloudflare Workers docs","description":"Explore demo applications and reference architectures built with Cloudflare Workers.","url":"https://developers.cloudflare.com/workers/demos/","inLanguage":"en","image":"https://developers.cloudflare.com/dev-products-preview.png","dateModified":"2026-05-19","publisher":{"@type":"Organization","name":"Cloudflare","url":"https://www.cloudflare.com/"},"isPartOf":{"@type":"WebSite","@id":"https://developers.cloudflare.com/#website","name":"Cloudflare Docs","url":"https://developers.cloudflare.com/"}}
{"@context":"https://schema.org","@type":"BreadcrumbList","itemListElement":[{"@type":"ListItem","position":1,"item":{"@id":"/directory/","name":"Directory"}},{"@type":"ListItem","position":2,"item":{"@id":"/workers/","name":"Workers"}},{"@type":"ListItem","position":3,"item":{"@id":"/workers/demos/","name":"Demos and architectures"}}]}
```
---
---
title: Build an Interactive ChatGPT App
description: Build and deploy an interactive ChatGPT App on Cloudflare Workers with real-time multiplayer state using MCP.
image: https://developers.cloudflare.com/dev-products-preview.png
---
> Documentation Index
> Fetch the complete documentation index at: https://developers.cloudflare.com/workers/llms.txt
> Use this file to discover all available pages before exploring further.
[Skip to content](#%5Ftop)
# Build an Interactive ChatGPT App
## Deploy your first ChatGPT App
This guide will show you how to build and deploy an interactive ChatGPT App on Cloudflare Workers that can:
* Render rich, interactive UI widgets directly in ChatGPT conversations
* Maintain real-time, multi-user state using Durable Objects
* Enable bidirectional communication between your app and ChatGPT
* Build multiplayer experiences that run entirely within ChatGPT
You will build a real-time multiplayer chess game that demonstrates these capabilities. Players can start or join games, make moves on an interactive chessboard, and even ask ChatGPT for strategic advice—all without leaving the conversation.
Your ChatGPT App will use the **Model Context Protocol (MCP)** to expose tools and UI resources that ChatGPT can invoke on your behalf.
You can view the full code for this example [here ↗](https://github.com/cloudflare/agents/tree/main/openai-sdk/chess-app).
## Prerequisites
Before you begin, you will need:
* A [Cloudflare account ↗](https://dash.cloudflare.com/sign-up)
* [Node.js ↗](https://nodejs.org/) installed (v18 or later)
* A [ChatGPT Plus or Team account ↗](https://chat.openai.com/) with developer mode enabled
* Basic knowledge of React and TypeScript
## 1\. Enable ChatGPT Developer Mode
To use ChatGPT Apps (also called connectors), you need to enable developer mode:
1. Open [ChatGPT ↗](https://chat.openai.com/).
2. Go to **Settings** \> **Apps & Connectors** \> **Advanced Settings**
3. Toggle **Developer mode ON**
Once enabled, you will be able to install custom apps during development and testing.
## 2\. Create your ChatGPT App project
1. Create a new project for your Chess App:
npm yarn pnpm
```
npm create cloudflare@latest -- my-chess-app
```
```
yarn create cloudflare my-chess-app
```
```
pnpm create cloudflare@latest my-chess-app
```
1. Navigate into your project:
```sh
cd my-chess-app
```
1. Install the required dependencies:
```sh
npm install agents @modelcontextprotocol/sdk chess.js react react-dom react-chessboard
```
1. Install development dependencies:
```sh
npm install -D @cloudflare/vite-plugin @vitejs/plugin-react vite vite-plugin-singlefile @types/react @types/react-dom
```
## 3\. Configure your project
1. Update your `wrangler.jsonc` to configure Durable Objects and assets:
* [ wrangler.jsonc ](#tab-panel-12425)
* [ wrangler.toml ](#tab-panel-12426)
**JSONC**
```jsonc
{
"name": "my-chess-app",
"main": "src/index.ts",
// Set this to today's date
"compatibility_date": "2026-07-20",
"compatibility_flags": ["nodejs_compat"],
"durable_objects": {
"bindings": [
{
"name": "CHESS",
"class_name": "ChessGame",
},
],
},
"migrations": [
{
"tag": "v1",
"new_sqlite_classes": ["ChessGame"],
},
],
"assets": {
"directory": "dist",
"binding": "ASSETS",
},
}
```
**TOML**
```toml
name = "my-chess-app"
main = "src/index.ts"
# Set this to today's date
compatibility_date = "2026-07-20"
compatibility_flags = [ "nodejs_compat" ]
[[durable_objects.bindings]]
name = "CHESS"
class_name = "ChessGame"
[[migrations]]
tag = "v1"
new_sqlite_classes = [ "ChessGame" ]
[assets]
directory = "dist"
binding = "ASSETS"
```
1. Create a `vite.config.ts` for building your React UI:
**TypeScript**
```ts
import { cloudflare } from "@cloudflare/vite-plugin";
import react from "@vitejs/plugin-react";
import { defineConfig } from "vite";
import { viteSingleFile } from "vite-plugin-singlefile";
export default defineConfig({
plugins: [react(), cloudflare(), viteSingleFile()],
build: {
minify: false,
},
});
```
1. Update your `package.json` scripts:
```json
{
"scripts": {
"dev": "vite",
"build": "vite build",
"deploy": "vite build && wrangler deploy"
}
}
```
## 4\. Create the Chess game engine
1. Create the game logic using Durable Objects at `src/chess.tsx`:
```tsx
import { Agent, callable, getCurrentAgent } from "agents";
import { Chess } from "chess.js";
type Color = "w" | "b";
type ConnectionState = {
playerId: string;
};
export type State = {
board: string;
players: { w?: string; b?: string };
status: "waiting" | "active" | "mate" | "draw" | "resigned";
winner?: Color;
lastSan?: string;
};
export class ChessGame extends Agent {
initialState: State = {
board: new Chess().fen(),
players: {},
status: "waiting",
};
game = new Chess();
constructor(
ctx: DurableObjectState,
public env: Env,
) {
super(ctx, env);
this.game.load(this.state.board);
}
private colorOf(playerId: string): Color | undefined {
const { players } = this.state;
if (players.w === playerId) return "w";
if (players.b === playerId) return "b";
return undefined;
}
@callable()
join(params: { playerId: string; preferred?: Color | "any" }) {
const { playerId, preferred = "any" } = params;
const { connection } = getCurrentAgent();
if (!connection) throw new Error("Not connected");
connection.setState({ playerId });
const s = this.state;
// Already seated? Return seat
const already = this.colorOf(playerId);
if (already) {
return { ok: true, role: already as Color, state: s };
}
// Choose a seat
const free: Color[] = (["w", "b"] as const).filter((c) => !s.players[c]);
if (free.length === 0) {
return { ok: true, role: "spectator" as const, state: s };
}
let seat: Color = free[0];
if (preferred === "w" && free.includes("w")) seat = "w";
if (preferred === "b" && free.includes("b")) seat = "b";
s.players[seat] = playerId;
s.status = s.players.w && s.players.b ? "active" : "waiting";
this.setState(s);
return { ok: true, role: seat, state: s };
}
@callable()
move(
move: { from: string; to: string; promotion?: string },
expectedFen?: string,
) {
if (this.state.status === "waiting") {
return {
ok: false,
reason: "not-in-game",
fen: this.game.fen(),
status: this.state.status,
};
}
const { connection } = getCurrentAgent();
if (!connection) throw new Error("Not connected");
const { playerId } = connection.state as ConnectionState;
const seat = this.colorOf(playerId);
if (!seat) {
return {
ok: false,
reason: "not-in-game",
fen: this.game.fen(),
status: this.state.status,
};
}
if (seat !== this.game.turn()) {
return {
ok: false,
reason: "not-your-turn",
fen: this.game.fen(),
status: this.state.status,
};
}
// Optimistic sync guard
if (expectedFen && expectedFen !== this.game.fen()) {
return {
ok: false,
reason: "stale",
fen: this.game.fen(),
status: this.state.status,
};
}
const res = this.game.move(move);
if (!res) {
return {
ok: false,
reason: "illegal",
fen: this.game.fen(),
status: this.state.status,
};
}
const fen = this.game.fen();
let status: State["status"] = "active";
if (this.game.isCheckmate()) status = "mate";
else if (this.game.isDraw()) status = "draw";
this.setState({
...this.state,
board: fen,
lastSan: res.san,
status,
winner:
status === "mate" ? (this.game.turn() === "w" ? "b" : "w") : undefined,
});
return { ok: true, fen, san: res.san, status };
}
@callable()
resign() {
const { connection } = getCurrentAgent();
if (!connection) throw new Error("Not connected");
const { playerId } = connection.state as ConnectionState;
const seat = this.colorOf(playerId);
if (!seat) return { ok: false, reason: "not-in-game", state: this.state };
const winner = seat === "w" ? "b" : "w";
this.setState({ ...this.state, status: "resigned", winner });
return { ok: true, state: this.state };
}
}
```
## 5\. Create the MCP server and UI resource
1. Create your main worker at `src/index.ts`:
**TypeScript**
```ts
import { createMcpHandler } from "agents/mcp";
import { routeAgentRequest } from "agents";
import { McpServer } from "@modelcontextprotocol/sdk/server/mcp.js";
import { env } from "cloudflare:workers";
const getWidgetHtml = async (host: string) => {
let html = await (await env.ASSETS.fetch("http://localhost/")).text();
html = html.replace(
"",
``,
);
return html;
};
function createServer() {
const server = new McpServer({ name: "Chess", version: "v1.0.0" });
// Register a UI resource that ChatGPT can render
server.registerResource(
"chess",
"ui://widget/index.html",
{},
async (_uri, extra) => {
return {
contents: [
{
uri: "ui://widget/index.html",
mimeType: "text/html+skybridge",
text: await getWidgetHtml(
extra.requestInfo?.headers.host as string,
),
},
],
};
},
);
// Register a tool that ChatGPT can call to render the UI
server.registerTool(
"playChess",
{
title: "Renders a chess game menu, ready to start or join a game.",
annotations: { readOnlyHint: true },
_meta: {
"openai/outputTemplate": "ui://widget/index.html",
"openai/toolInvocation/invoking": "Opening chess widget",
"openai/toolInvocation/invoked": "Chess widget opened",
},
},
async (_, _extra) => {
return {
content: [
{ type: "text", text: "Successfully rendered chess game menu" },
],
};
},
);
return server;
}
export default {
async fetch(req: Request, env: Env, ctx: ExecutionContext) {
const url = new URL(req.url);
if (url.pathname.startsWith("/mcp")) {
// Create a new server instance per request
const server = createServer();
return createMcpHandler(server)(req, env, ctx);
}
return (
(await routeAgentRequest(req, env)) ??
new Response("Not found", { status: 404 })
);
},
} satisfies ExportedHandler;
export { ChessGame } from "./chess";
```
## 6\. Build the React UI
1. Create the HTML entry point at `index.html`:
```html
```
1. Create the React app at `src/app.tsx`:
```tsx
import { useEffect, useRef, useState } from "react";
import { useAgent } from "agents/react";
import { createRoot } from "react-dom/client";
import { Chess, type Square } from "chess.js";
import { Chessboard, type PieceDropHandlerArgs } from "react-chessboard";
import type { State as ServerState } from "./chess";
function usePlayerId() {
const [pid] = useState(() => {
const existing = localStorage.getItem("playerId");
if (existing) return existing;
const id = crypto.randomUUID();
localStorage.setItem("playerId", id);
return id;
});
return pid;
}
function App() {
const playerId = usePlayerId();
const [gameId, setGameId] = useState(null);
const [gameIdInput, setGameIdInput] = useState("");
const [menuError, setMenuError] = useState(null);
const gameRef = useRef(new Chess());
const [fen, setFen] = useState(gameRef.current.fen());
const [myColor, setMyColor] = useState<"w" | "b" | "spectator">("spectator");
const [pending, setPending] = useState(false);
const [serverState, setServerState] = useState(null);
const [joined, setJoined] = useState(false);
const host = window.HOST ?? "http://localhost:5173/";
const { stub } = useAgent({
host,
name: gameId ?? "__lobby__",
agent: "chess",
onStateUpdate: (s) => {
if (!gameId) return;
gameRef.current.load(s.board);
setFen(s.board);
setServerState(s);
},
});
useEffect(() => {
if (!gameId || joined) return;
(async () => {
try {
const res = await stub.join({ playerId, preferred: "any" });
if (!res?.ok) return;
setMyColor(res.role);
gameRef.current.load(res.state.board);
setFen(res.state.board);
setServerState(res.state);
setJoined(true);
} catch (error) {
console.error("Failed to join game", error);
}
})();
}, [playerId, gameId, stub, joined]);
async function handleStartNewGame() {
const newId = crypto.randomUUID();
setGameId(newId);
setGameIdInput(newId);
setMenuError(null);
setJoined(false);
}
async function handleJoinGame() {
const trimmed = gameIdInput.trim();
if (!trimmed) {
setMenuError("Enter a game ID to join.");
return;
}
setGameId(trimmed);
setMenuError(null);
setJoined(false);
}
const handleHelpClick = () => {
window.openai?.sendFollowUpMessage?.({
prompt: `Help me with my chess game. I am playing as ${myColor} and the board is: ${fen}. Please only offer written advice.`,
});
};
function onPieceDrop({ sourceSquare, targetSquare }: PieceDropHandlerArgs) {
if (!gameId || !sourceSquare || !targetSquare || pending) return false;
const game = gameRef.current;
if (myColor === "spectator" || game.turn() !== myColor) return false;
const piece = game.get(sourceSquare as Square);
if (!piece || piece.color !== myColor) return false;
const prevFen = game.fen();
try {
const local = game.move({
from: sourceSquare,
to: targetSquare,
promotion: "q",
});
if (!local) return false;
} catch {
return false;
}
const nextFen = game.fen();
setFen(nextFen);
setPending(true);
stub
.move({ from: sourceSquare, to: targetSquare, promotion: "q" }, prevFen)
.then((r) => {
if (!r.ok) {
game.load(r.fen);
setFen(r.fen);
}
})
.finally(() => setPending(false));
return true;
}
return (
);
}
const root = createRoot(document.getElementById("root")!);
root.render();
```
Note
This is a simplified version of the UI. For the complete implementation with player slots, better styling, and game state management, check out the [full example on GitHub ↗](https://github.com/cloudflare/agents/tree/main/openai-sdk/chess-app/src/app.tsx).
## 7\. Build and deploy
1. Build your React UI:
```sh
npm run build
```
This compiles your React app into a single HTML file in the `dist` directory.
1. Deploy to Cloudflare:
```sh
npx wrangler deploy
```
After deployment, you will see your app URL:
```plaintext
https://my-chess-app.YOUR_SUBDOMAIN.workers.dev
```
## 8\. Connect to ChatGPT
Now connect your deployed app to ChatGPT:
1. Open [ChatGPT ↗](https://chat.openai.com/).
2. Go to **Settings** \> **Apps & Connectors** \> **Create**
3. Give your app a **name**, and optionally a **description** and **icon**.
4. Enter your MCP endpoint: `https://my-chess-app.YOUR_SUBDOMAIN.workers.dev/mcp`.
5. Select **"No authentication"**.
6. Select **"Create"**.
## 9\. Play chess in ChatGPT
Try it out:
1. In your ChatGPT conversation, type: "Let's play chess".
2. ChatGPT will call the `playChess` tool and render your interactive chess widget.
3. Select **"Start a new game"** to create a game.
4. Share the game ID with a friend who can join via their own ChatGPT conversation.
5. Make moves by dragging pieces on the board.
6. Select **"Ask for help"** to get strategic advice from ChatGPT
Note
You might need to manually select the connector in the prompt box the first time you use it. Select **"+"** \> **"More"** \> **\[App name\]**.
## Key concepts
### MCP Server
The Model Context Protocol (MCP) server defines tools and resources that ChatGPT can access. Note that we create a new server instance per request to prevent cross-client response leakage:
**TypeScript**
```ts
function createServer() {
const server = new McpServer({ name: "Chess", version: "v1.0.0" });
// Register a UI resource that ChatGPT can render
server.registerResource(
"chess",
"ui://widget/index.html",
{},
async (_uri, extra) => {
return {
contents: [
{
uri: "ui://widget/index.html",
mimeType: "text/html+skybridge",
text: await getWidgetHtml(
extra.requestInfo?.headers.host as string,
),
},
],
};
},
);
// Register a tool that ChatGPT can call to render the UI
server.registerTool(
"playChess",
{
title: "Renders a chess game menu, ready to start or join a game.",
annotations: { readOnlyHint: true },
_meta: {
"openai/outputTemplate": "ui://widget/index.html",
"openai/toolInvocation/invoking": "Opening chess widget",
"openai/toolInvocation/invoked": "Chess widget opened",
},
},
async (_, _extra) => {
return {
content: [
{ type: "text", text: "Successfully rendered chess game menu" },
],
};
},
);
return server;
}
```
### Game Engine with Agents
The `ChessGame` class extends `Agent` to create a stateful game engine:
```tsx
export class ChessGame extends Agent {
initialState: State = {
board: new Chess().fen(),
players: {},
status: "waiting"
};
game = new Chess();
constructor(
ctx: DurableObjectState,
public env: Env
) {
super(ctx, env);
this.game.load(this.state.board);
}
```
Each game gets its own Agent instance, enabling:
* **Isolated state** per game
* **Real-time synchronization** across players
* **Persistent storage** that survives worker restarts
### Callable methods
Use the `@callable()` decorator to expose methods that clients can invoke:
**TypeScript**
```ts
@callable()
join(params: { playerId: string; preferred?: Color | "any" }) {
const { playerId, preferred = "any" } = params;
const { connection } = getCurrentAgent();
if (!connection) throw new Error("Not connected");
connection.setState({ playerId });
const s = this.state;
// Already seated? Return seat
const already = this.colorOf(playerId);
if (already) {
return { ok: true, role: already as Color, state: s };
}
// Choose a seat
const free: Color[] = (["w", "b"] as const).filter((c) => !s.players[c]);
if (free.length === 0) {
return { ok: true, role: "spectator" as const, state: s };
}
let seat: Color = free[0];
if (preferred === "w" && free.includes("w")) seat = "w";
if (preferred === "b" && free.includes("b")) seat = "b";
s.players[seat] = playerId;
s.status = s.players.w && s.players.b ? "active" : "waiting";
this.setState(s);
return { ok: true, role: seat, state: s };
}
```
### React integration
The `useAgent` hook connects your React app to the Durable Object:
```tsx
const { stub } = useAgent({
host,
name: gameId ?? "__lobby__",
agent: "chess",
onStateUpdate: (s) => {
gameRef.current.load(s.board);
setFen(s.board);
setServerState(s);
},
});
```
Call methods on the agent:
```tsx
const res = await stub.join({ playerId, preferred: "any" });
await stub.move({ from: "e2", to: "e4" });
```
### Bidirectional communication
Your app can send messages to ChatGPT:
**TypeScript**
```ts
const handleHelpClick = () => {
window.openai?.sendFollowUpMessage?.({
prompt: `Help me with my chess game. I am playing as ${myColor} and the board is: ${fen}. Please only offer written advice as there are no tools for you to use.`,
});
};
```
This creates a new message in the ChatGPT conversation with context about the current game state.
## Next steps
Now that you have a working ChatGPT App, you can:
* Add more tools: Expose additional capabilities and UIs through MCP tools and resources.
* Enhance the UI: Build more sophisticated interfaces with React.
## Related resources
[ Agents API ](https://developers.cloudflare.com/agents/runtime/agents-api/) Complete API reference for the Agents SDK.
[ Durable Objects ](https://developers.cloudflare.com/durable-objects/) Learn about the underlying stateful infrastructure.
[ Model Context Protocol ](https://modelcontextprotocol.io/) MCP specification and documentation.
[ OpenAI Apps SDK ](https://developers.openai.com/apps-sdk/) Official OpenAI Apps SDK reference.
```json
{"@context":"https://schema.org","@type":"TechArticle","@id":"https://developers.cloudflare.com/workers/demos/chatgpt-app/#page","headline":"Build an Interactive ChatGPT App · Cloudflare Workers docs","description":"Build and deploy an interactive ChatGPT App on Cloudflare Workers with real-time multiplayer state using MCP.","url":"https://developers.cloudflare.com/workers/demos/chatgpt-app/","inLanguage":"en","image":"https://developers.cloudflare.com/dev-products-preview.png","dateModified":"2026-06-03","publisher":{"@type":"Organization","name":"Cloudflare","url":"https://www.cloudflare.com/"},"isPartOf":{"@type":"WebSite","@id":"https://developers.cloudflare.com/#website","name":"Cloudflare Docs","url":"https://developers.cloudflare.com/"}}
{"@context":"https://schema.org","@type":"BreadcrumbList","itemListElement":[{"@type":"ListItem","position":1,"item":{"@id":"/directory/","name":"Directory"}},{"@type":"ListItem","position":2,"item":{"@id":"/workers/","name":"Workers"}},{"@type":"ListItem","position":3,"item":{"@id":"/workers/demos/","name":"Demos and architectures"}},{"@type":"ListItem","position":4,"item":{"@id":"/workers/demos/chatgpt-app/","name":"Build an Interactive ChatGPT App"}}]}
```
---
---
title: Local development
description: Develop and test your Workers locally.
image: https://developers.cloudflare.com/dev-products-preview.png
---
> Documentation Index
> Fetch the complete documentation index at: https://developers.cloudflare.com/workers/llms.txt
> Use this file to discover all available pages before exploring further.
[Skip to content](#%5Ftop)
# Local development
You can build, run, and test your Worker code on your own local machine before deploying it to Cloudflare's network. This is made possible through [Miniflare](https://developers.cloudflare.com/workers/testing/miniflare/), a simulator that executes your Worker code using the same runtime used in production, [workerd ↗](https://github.com/cloudflare/workerd).
[By default](https://developers.cloudflare.com/workers/local-development/#defaults), your Worker's bindings [connect to locally simulated resources](https://developers.cloudflare.com/workers/local-development/#bindings-during-local-development), but can be configured to interact with the real, production resource with [remote bindings](https://developers.cloudflare.com/workers/local-development/#remote-bindings).
## Core concepts
### Worker execution vs Bindings
When developing Workers, it's important to understand two distinct concepts:
* **Worker execution**: Where your Worker code actually runs (on your local machine vs on Cloudflare's infrastructure).
* [**Bindings**](https://developers.cloudflare.com/workers/runtime-apis/bindings/): How your Worker interacts with Cloudflare resources (like [KV namespaces](https://developers.cloudflare.com/kv), [R2 buckets](https://developers.cloudflare.com/r2), [D1 databases](https://developers.cloudflare.com/d1), [Queues](https://developers.cloudflare.com/queues/), [Durable Objects](https://developers.cloudflare.com/durable-objects/), etc). In your Worker code, these are accessed via the `env` object (such as `env.MY_KV`).
## Start a local development server
You can start a local development server using:
1. The Cloudflare Workers CLI [**Wrangler**](https://developers.cloudflare.com/workers/wrangler/), using the built-in [wrangler dev](https://developers.cloudflare.com/workers/wrangler/commands/general/#dev) command.
npm yarn pnpm
```
npx wrangler dev
```
```
yarn wrangler dev
```
```
pnpm wrangler dev
```
1. [**Vite** ↗](https://vite.dev/), using the [**Cloudflare Vite plugin**](https://developers.cloudflare.com/workers/vite-plugin/).
npm yarn pnpm
```
npx vite dev
```
```
yarn vite dev
```
```
pnpm vite dev
```
Both Wrangler and the Cloudflare Vite plugin use [Miniflare](https://developers.cloudflare.com/workers/testing/miniflare/) under the hood, and are developed and maintained by the Cloudflare team. For guidance on choosing when to use Wrangler versus Vite, see our guide [Choosing between Wrangler & Vite](https://developers.cloudflare.com/workers/local-development/wrangler-vs-vite/).
* [Get started with Wrangler](https://developers.cloudflare.com/workers/wrangler/install-and-update/)
* [Get started with the Cloudflare Vite plugin](https://developers.cloudflare.com/workers/vite-plugin/get-started/)
### Defaults
By default, running `wrangler dev` / `vite dev` (when using the [Vite plugin](https://developers.cloudflare.com/workers/vite-plugin/get-started/)) means that:
* Your Worker code runs on your local machine.
* All resources your Worker is bound to in your [Wrangler configuration](https://developers.cloudflare.com/workers/wrangler/configuration/) are simulated locally.
* The local `workerd` runtime runs with `TZ=UTC` so that `Date` and `Intl` APIs inside your Worker observe UTC, matching the production Cloudflare runtime regardless of your machine's timezone.
### Bindings during local development
[Bindings](https://developers.cloudflare.com/workers/runtime-apis/bindings/) are interfaces that allow your Worker to interact with various Cloudflare resources (like [KV namespaces](https://developers.cloudflare.com/kv), [R2 buckets](https://developers.cloudflare.com/r2), [D1 databases](https://developers.cloudflare.com/d1), [Queues](https://developers.cloudflare.com/queues/), [Durable Objects](https://developers.cloudflare.com/durable-objects/), etc). In your Worker code, these are accessed via the `env` object (such as `env.MY_KV`).
During local development, your Worker code interacts with these bindings using the exact same API calls (such as `env.MY_KV.put()`) as it would in a deployed environment. These local resources are initially empty, but you can populate them with data, as documented in [Adding local data](https://developers.cloudflare.com/workers/local-development/local-data/).
* By default, bindings connect to **local resource simulations** (except for [AI bindings](https://developers.cloudflare.com/workers-ai/configuration/bindings/), as AI models always run remotely).
* You can override this default behavior and **connect to the remote resource** on a per-binding basis with [remote bindings](https://developers.cloudflare.com/workers/local-development/#remote-bindings). This lets you connect to real, production resources while still running your Worker code locally.
* When using `wrangler dev`, you can temporarily disable all [remote bindings](https://developers.cloudflare.com/workers/local-development/#remote-bindings) (and connect only to local resources) by providing the `--local` flag (i.e. `wrangler dev --local`)
## Remote bindings
**Remote bindings** are bindings that are configured to connect to the deployed, remote resource during local development _instead_ of the locally simulated resource. Remote bindings are supported by [**Wrangler**](https://developers.cloudflare.com/workers/wrangler/), the [**Cloudflare Vite plugin**](https://developers.cloudflare.com/workers/vite-plugin/), and the `@cloudflare/vitest-pool-workers` package. You can configure remote bindings by setting `remote: true` in the binding definition.
### Example configuration
* [ wrangler.jsonc ](#tab-panel-12702)
* [ wrangler.toml ](#tab-panel-12703)
**JSONC**
```jsonc
{
"name": "my-worker",
// Set this to today's date
"compatibility_date": "2026-07-20",
"r2_buckets": [
{
"bucket_name": "screenshots-bucket",
"binding": "screenshots_bucket",
"remote": true,
},
],
}
```
**TOML**
```toml
name = "my-worker"
# Set this to today's date
compatibility_date = "2026-07-20"
[[r2_buckets]]
bucket_name = "screenshots-bucket"
binding = "screenshots_bucket"
remote = true
```
When remote bindings are configured, your Worker still **executes locally**, only the underlying resources your bindings connect to change. For all bindings marked with `remote: true`, Miniflare will route its operations (such as `env.MY_KV.put()`) to the deployed resource. All other bindings not explicitly configured with `remote: true` continue to use their default local simulations.
### Integration with environments
Remote Bindings work well together with [Workers Environments](https://developers.cloudflare.com/workers/wrangler/environments). To protect production data, you can create a development or staging environment and specify different resources in your [Wrangler configuration](https://developers.cloudflare.com/workers/wrangler/configuration/) than you would use for production.
**For example:**
* [ wrangler.jsonc ](#tab-panel-12714)
* [ wrangler.toml ](#tab-panel-12715)
**JSONC**
```jsonc
{
"name": "my-worker",
// Set this to today's date
"compatibility_date": "2026-07-20",
"env": {
"production": {
"r2_buckets": [
{
"bucket_name": "screenshots-bucket",
"binding": "screenshots_bucket",
},
],
},
"staging": {
"r2_buckets": [
{
"bucket_name": "preview-screenshots-bucket",
"binding": "screenshots_bucket",
"remote": true,
},
],
},
},
}
```
**TOML**
```toml
name = "my-worker"
# Set this to today's date
compatibility_date = "2026-07-20"
[[env.production.r2_buckets]]
bucket_name = "screenshots-bucket"
binding = "screenshots_bucket"
[[env.staging.r2_buckets]]
bucket_name = "preview-screenshots-bucket"
binding = "screenshots_bucket"
remote = true
```
Running `wrangler dev -e staging` (or `CLOUDFLARE_ENV=staging vite dev`) with the above configuration means that:
* Your Worker code runs locally
* All calls made to `env.screenshots_bucket` will use the `preview-screenshots-bucket` resource, rather than the production `screenshots-bucket`.
### Recommended remote bindings
We recommend configuring specific bindings to connect to their remote counterparts. These services often rely on Cloudflare's network infrastructure or have complex backends that are not fully simulated locally.
The following bindings are recommended to have `remote: true` in your Wrangler configuration:
#### [Browser Run](https://developers.cloudflare.com/workers/wrangler/configuration/#browser-run):
To interact with a real headless browser for rendering. There is no current local simulation for Browser Run.
* [ wrangler.jsonc ](#tab-panel-12700)
* [ wrangler.toml ](#tab-panel-12701)
**JSONC**
```jsonc
{
"browser": {
"binding": "MY_BROWSER",
"remote": true
},
}
```
**TOML**
```toml
[browser]
binding = "MY_BROWSER"
remote = true
```
#### [Workers AI](https://developers.cloudflare.com/workers/wrangler/configuration/#workers-ai):
To utilize actual AI models deployed on Cloudflare's network for inference. There is no current local simulation for Workers AI.
* [ wrangler.jsonc ](#tab-panel-12704)
* [ wrangler.toml ](#tab-panel-12705)
**JSONC**
```jsonc
{
"ai": {
"binding": "AI",
"remote": true
},
}
```
**TOML**
```toml
[ai]
binding = "AI"
remote = true
```
#### [Vectorize](https://developers.cloudflare.com/workers/wrangler/configuration/#vectorize-indexes):
To connect to your production Vectorize indexes for accurate vector search and similarity operations. There is no current local simulation for Vectorize.
* [ wrangler.jsonc ](#tab-panel-12706)
* [ wrangler.toml ](#tab-panel-12707)
**JSONC**
```jsonc
{
"vectorize": [
{
"binding": "MY_VECTORIZE_INDEX",
"index_name": "my-prod-index",
"remote": true
}
],
}
```
**TOML**
```toml
[[vectorize]]
binding = "MY_VECTORIZE_INDEX"
index_name = "my-prod-index"
remote = true
```
#### [mTLS](https://developers.cloudflare.com/workers/wrangler/configuration/#mtls-certificates):
To verify that the certificate exchange and validation process work as expected. There is no current local simulation for mTLS bindings.
* [ wrangler.jsonc ](#tab-panel-12710)
* [ wrangler.toml ](#tab-panel-12711)
**JSONC**
```jsonc
{
"mtls_certificates": [
{
"binding": "MY_CLIENT_CERT_FETCHER",
"certificate_id": "",
"remote": true
}
]
}
```
**TOML**
```toml
[[mtls_certificates]]
binding = "MY_CLIENT_CERT_FETCHER"
certificate_id = ""
remote = true
```
#### [Images](https://developers.cloudflare.com/workers/wrangler/configuration/#images):
To connect to a high-fidelity version of the Images API, and verify that all transformations work as expected. Local simulation for Cloudflare Images is [limited with only a subset of features](https://developers.cloudflare.com/images/optimization/binding/#interact-with-your-images-binding-locally).
* [ wrangler.jsonc ](#tab-panel-12708)
* [ wrangler.toml ](#tab-panel-12709)
**JSONC**
```jsonc
{
"images": {
"binding": "IMAGES" ,
"remote": true
}
}
```
**TOML**
```toml
[images]
binding = "IMAGES"
remote = true
```
Note
If `remote: true` is not specified for Browser Run, Vectorize, mTLS, or Images, Cloudflare **will issue a warning**. This prompts you to consider enabling it for a more production-like testing experience.
If a Workers AI binding has `remote` set to `false`, Cloudflare will **produce an error**. If the property is omitted, Cloudflare will connect to the remote resource and issue a warning to add the property to configuration.
#### [Dispatch Namespaces](https://developers.cloudflare.com/cloudflare-for-platforms/workers-for-platforms/reference/local-development/):
Workers for Platforms users can configure `remote: true` in dispatch namespace binding definitions:
* [ wrangler.jsonc ](#tab-panel-12712)
* [ wrangler.toml ](#tab-panel-12713)
**JSONC**
```jsonc
{
"dispatch_namespaces": [
{
"binding": "DISPATCH_NAMESPACE",
"namespace": "testing",
"remote":true
}
]
}
```
**TOML**
```toml
[[dispatch_namespaces]]
binding = "DISPATCH_NAMESPACE"
namespace = "testing"
remote = true
```
This allows you to run your [dynamic dispatch Worker](https://developers.cloudflare.com/cloudflare-for-platforms/workers-for-platforms/how-workers-for-platforms-works/#dynamic-dispatch-worker) locally, while connecting it to your remote dispatch namespace binding. This allows you to test changes to your core dispatching logic against real, deployed [user Workers](https://developers.cloudflare.com/cloudflare-for-platforms/workers-for-platforms/how-workers-for-platforms-works/#user-workers).
### Unsupported remote bindings
Certain bindings are not supported for remote connections (i.e. with `remote: true`) during local development. These will always use local simulations or local values.
If `remote: true` is specified in Wrangler configuration for any of the following unsupported binding types, Cloudflare **will issue an error**. See [all supported and unsupported bindings for remote bindings](https://developers.cloudflare.com/workers/local-development/bindings-per-env/).
* [**Durable Objects**](https://developers.cloudflare.com/workers/wrangler/configuration/#durable-objects): Enabling remote connections for Durable Objects may be supported in the future, but currently will always run locally. However, using Durable Objects in combination with remote bindings is possible. Refer to [Using remote resources with Durable Objects and Workflows](#using-remote-resources-with-durable-objects-and-workflows) below.
* [**Workflows**](https://developers.cloudflare.com/workflows/): Enabling remote connections for Workflows may be supported in the future, but currently will only run locally. However, using Workflows in combination with remote bindings is possible. Refer to [Using remote resources with Durable Objects and Workflows](#using-remote-resources-with-durable-objects-and-workflows) below.
* [**Environment Variables (vars)**](https://developers.cloudflare.com/workers/wrangler/configuration/#environment-variables): Environment variables are intended to be distinct between local development and deployed environments. They are easily configurable locally (such as in a `.dev.vars` file or directly in Wrangler configuration).
* [**Secrets**](https://developers.cloudflare.com/workers/wrangler/configuration/#secrets): Like environment variables, secrets are expected to have different values in local development versus deployed environments for security reasons. Use `.dev.vars` for local secret management.
* [**Static Assets**](https://developers.cloudflare.com/workers/wrangler/configuration/#assets) Static assets are always served from your local disk during development for speed and direct feedback on changes.
* [**Version Metadata**](https://developers.cloudflare.com/workers/runtime-apis/bindings/version-metadata/): Since your Worker code is running locally, version metadata (like commit hash, version tags) associated with a specific deployed version is not applicable or accurate.
* [**Analytics Engine**](https://developers.cloudflare.com/analytics/analytics-engine/): Local development sessions typically don't contribute data directly to production Analytics Engine.
* [**Hyperdrive**](https://developers.cloudflare.com/workers/wrangler/configuration/#hyperdrive): This is being actively worked on, but is currently unsupported.
* [**Rate Limiting**](https://developers.cloudflare.com/workers/runtime-apis/bindings/rate-limit/#configuration): Local development sessions typically should not share or affect rate limits of your deployed Workers. Rate limiting logic should be tested against local simulations.
Note
If you have use-cases for connecting to any of the remote resources above, please [open a feature request ↗](https://github.com/cloudflare/workers-sdk/issues) in our [workers-sdk repository ↗](https://github.com/cloudflare/workers-sdk).
#### Using remote resources with Durable Objects and Workflows
While Durable Object and Workflow bindings cannot currently be remote, you can still use them during local development and have them interact with remote resources.
There are two recommended patterns for this:
* **Local Durable Objects/Workflows with remote bindings:**
When you enable remote bindings in your [Wrangler configuration](https://developers.cloudflare.com/workers/wrangler/configuration), your locally running Durable Objects and Workflows can access remote resources. This allows such bindings, although run locally, to interact with remote resources during local development.
* **Accessing remote Durable Objects/Workflows via service bindings:**
To interact with remote Durable Object or Workflow instances, deploy a Worker that defines those. Then, in your local Worker, configure a remote [service binding](https://developers.cloudflare.com/workers/runtime-apis/bindings/service-bindings/) pointing to the deployed Worker. Your local Worker will be then able to interact with the remote deployed Worker, which in turn can communicate with the remote Durable Objects/Workflows. Using this method, you can create a communication channel via the remote service binding, effectively using the deployed Worker as a proxy interface to the remote bindings during local development.
### Important Considerations
* **Cloudflare Access**: If your Worker is protected by [Cloudflare Access](https://developers.cloudflare.com/cloudflare-one/), Wrangler must authenticate with Access when connecting to remote bindings. Refer to [Connect to Access-protected Workers](#connect-to-access-protected-workers).
* **Data modification**: Operations (writes, deletes, updates) on bindings connected remotely will affect your actual data in the targeted Cloudflare resource (be it preview or production).
* **Billing**: Interactions with remote Cloudflare services through these connections will incur standard operational costs for those services (such as KV operations, R2 storage/operations, AI requests, D1 usage).
* **Network latency**: Expect network latency for operations on these remotely connected bindings, as they involve communication over the internet.
### Connect to Access-protected Workers
If your Worker is deployed behind a [Cloudflare Access](https://developers.cloudflare.com/cloudflare-one/) application — for example, if the `*.workers.dev` subdomain on your account is protected by Access, or if you have placed an Access policy on the custom route of the Worker — Wrangler must authenticate with Access when connecting to your remote bindings.
There are two ways you can authenticate against Access:
* **Interactive login** (local development): If you have a policy defined that accepts user login, then Wrangler launches the interactive `cloudflared access login` flow in your browser. No additional setup is required beyond being signed in to the correct account. If the policy only allows service token authentication, Wrangler will skip the interactive flow and throw an error indicating that service token credentials are required.
* **Service token** (CI / non-interactive environments): In CI/CD pipelines and other non-interactive contexts, or where the policy only allows service token authentication, Wrangler cannot trigger the interactive flow via the browser. Authentication must be via a [Cloudflare Access service token](https://developers.cloudflare.com/cloudflare-one/access-controls/service-credentials/service-tokens/) instead. If you do not configure a service token in a non-interactive environment, Wrangler will throw an error rather than attempting the interactive flow.
To set up service token authentication:
1. **Create a service token.**
In the Cloudflare dashboard, go to **Zero Trust** \> **Access** \> **Service Auth** \> **Service Tokens** and create a new token. Refer to [Service tokens](https://developers.cloudflare.com/cloudflare-one/access-controls/service-credentials/service-tokens/) for the full reference. You will be shown a Client ID and a Client Secret — save them somewhere safe, as the secret is not shown again.
2. **Add a Service Auth policy to the Access application that protects your Worker.**
Open the _existing_ Access application that already covers the hostname of the Worker — typically the wildcard application for `*..workers.dev`, or the application that protects your custom domain — and attach a new policy with:
* **Action**: Service Auth
* **Include**: The service token you created, or "Any Access Service Token" if you want to allow any service token to access the Worker.
Warning
Do not create a _separate_ Access application scoped only to the Worker's hostname. Doing so has been observed to block requests even when the existing wildcard application is left in place — refer to [opennextjs-cloudflare#1171 ↗](https://github.com/opennextjs/opennextjs-cloudflare/issues/1171). Attach the Service Auth policy to the existing application that already protects the hostname.
3. **Expose the credentials to Wrangler.**
Set the `CLOUDFLARE_ACCESS_CLIENT_ID` and `CLOUDFLARE_ACCESS_CLIENT_SECRET` [system environment variables](https://developers.cloudflare.com/workers/wrangler/system-environment-variables/) in the environment that runs Wrangler:
```sh
export CLOUDFLARE_ACCESS_CLIENT_ID=
export CLOUDFLARE_ACCESS_CLIENT_SECRET=
```
In CI, store the values as secrets and expose them as environment variables to the step that runs Wrangler.
### API
Wrangler provides programmatic utilities to help tooling authors support remote binding connections when running Workers code with [Miniflare](https://developers.cloudflare.com/workers/testing/miniflare/).
**Key APIs include:**
* [startRemoteProxySession](#startRemoteProxySession): Starts a proxy session that allows interaction with remote bindings.
* [unstable\_convertConfigBindingsToStartWorkerBindings](#unstable%5Fconvertconfigbindingstostartworkerbindings): Utility for converting binding definitions.
* [experimental\_maybeStartOrUpdateProxySession](#experimental%5Fmaybestartorupdatemixedmodesession): Convenience function to easily start or update a proxy session.
#### `startRemoteProxySession`
This function starts a proxy session for a given set of bindings. It accepts options to control session behavior, including an `auth` option with your Cloudflare account ID and API token for remote binding access.
It returns an object with:
* `ready` ` Promise `: Resolves when the session is ready.
* `dispose` ` () => Promise `: Stops the session.
* `updateBindings` ` (bindings: StartDevWorkerInput['bindings']) => Promise `: Updates session bindings.
* `remoteProxyConnectionString` ` remoteProxyConnectionString `: String to pass to Miniflare for remote binding access.
#### `unstable_convertConfigBindingsToStartWorkerBindings`
The `unstable_readConfig` utility returns an `Unstable_Config` object which includes the definition of the bindings included in the configuration file. These bindings definitions are however not directly compatible with `startRemoteProxySession`. It can be quite convenient to however read the binding declarations with `unstable_readConfig` and then pass them to `startRemoteProxySession`, so for this wrangler exposes `unstable_convertConfigBindingsToStartWorkerBindings` which is a simple utility to convert the bindings in an `Unstable_Config` object into a structure that can be passed to `startRemoteProxySession`.
Note
This type conversion is temporary. In the future, the types will be unified so you can pass the config object directly to `startRemoteProxySession`.
#### `maybeStartOrUpdateRemoteProxySession`
This wrapper simplifies proxy session management. It takes:
* An object that contains either:
* the path to a Wrangler configuration and a potential target environment
* the name of the Worker and the bindings it is using
* The current proxy session details (this parameter can be set to `null` or not being provided if none).
* Potentially the auth data to use for the remote proxy session.
It returns an object with the proxy session details if started or updated, or `null` if no proxy session is needed.
The function:
* Based on the first argument prepares the input arguments for the proxy session.
* If there are no remote bindings to be used (nor a pre-existing proxy session) it returns null, signaling that no proxy session is needed.
* If the details of an existing proxy session have been provided it updates the proxy session accordingly.
* Otherwise if starts a new proxy session.
* Returns the proxy session details (that can later be passed as the second argument to `maybeStartOrUpdateRemoteProxySession`).
#### Example
Here's a basic example of using Miniflare with `maybeStartOrUpdateRemoteProxySession` to provide a local dev session with remote bindings. This example uses a single hardcoded KV binding.
* [ JavaScript ](#tab-panel-12716)
* [ TypeScript ](#tab-panel-12717)
**JavaScript**
```js
import { Miniflare, MiniflareOptions } from "miniflare";
import { maybeStartOrUpdateRemoteProxySession } from "wrangler";
let mf;
let remoteProxySessionDetails = null;
async function startOrUpdateDevSession() {
remoteProxySessionDetails = await maybeStartOrUpdateRemoteProxySession(
{
bindings: {
MY_KV: {
type: "kv_namespace",
id: "kv-id",
remote: true,
},
},
},
remoteProxySessionDetails,
);
const miniflareOptions = {
scriptPath: "./worker.js",
kvNamespaces: {
MY_KV: {
id: "kv-id",
remoteProxyConnectionString:
remoteProxySessionDetails?.session.remoteProxyConnectionString,
},
},
};
if (!mf) {
mf = new Miniflare(miniflareOptions);
} else {
mf.setOptions(miniflareOptions);
}
}
// ... tool logic that invokes `startOrUpdateDevSession()` ...
// ... once the dev session is no longer needed run
// `remoteProxySessionDetails?.session.dispose()`
```
**TypeScript**
```ts
import { Miniflare, MiniflareOptions } from "miniflare";
import { maybeStartOrUpdateRemoteProxySession } from "wrangler";
let mf: Miniflare | null;
let remoteProxySessionDetails: Awaited<
ReturnType
> | null = null;
async function startOrUpdateDevSession() {
remoteProxySessionDetails = await maybeStartOrUpdateRemoteProxySession(
{
bindings: {
MY_KV: {
type: "kv_namespace",
id: "kv-id",
remote: true,
},
},
},
remoteProxySessionDetails,
);
const miniflareOptions: MiniflareOptions = {
scriptPath: "./worker.js",
kvNamespaces: {
MY_KV: {
id: "kv-id",
remoteProxyConnectionString:
remoteProxySessionDetails?.session.remoteProxyConnectionString,
},
},
};
if (!mf) {
mf = new Miniflare(miniflareOptions);
} else {
mf.setOptions(miniflareOptions);
}
}
// ... tool logic that invokes `startOrUpdateDevSession()` ...
// ... once the dev session is no longer needed run
// `remoteProxySessionDetails?.session.dispose()`
```
## `wrangler dev --remote` (Legacy)
Separate from Miniflare-powered local development, Wrangler also offers a fully remote development mode via [wrangler dev --remote](https://developers.cloudflare.com/workers/wrangler/commands/general/#dev). Remote development is [**not** supported in the Vite plugin](https://developers.cloudflare.com/workers/local-development/wrangler-vs-vite/).
npm yarn pnpm
```
npx wrangler dev --remote
```
```
yarn wrangler dev --remote
```
```
pnpm wrangler dev --remote
```
During **remote development**, all of your Worker code is uploaded to a temporary preview environment on Cloudflare's infrastructure, and changes to your code are automatically uploaded as you save.
When using remote development, all bindings automatically connect to their remote resources. Unlike local development, you cannot configure bindings to use local simulations - they will always use the deployed resources on Cloudflare's network.
### When to use Remote development
* For most development tasks, the most efficient and productive experience will be local development along with [remote bindings](https://developers.cloudflare.com/workers/local-development/#remote-bindings) when needed.
* You may want to use `wrangler dev --remote` for testing features or behaviors that are highly specific to Cloudflare's network and cannot be adequately simulated locally or tested via remote bindings.
### Considerations
* Iteration is significantly slower than local development due to the upload/deployment step for each change.
### Limitations
* When you run a remote development session using the `--remote` flag, a limit of 50 [routes](https://developers.cloudflare.com/workers/configuration/routing/routes/) per zone is enforced. Learn more in[ Workers platform limits](https://developers.cloudflare.com/workers/platform/limits/#routes-and-domains-when-using-wrangler-dev---remote).
```json
{"@context":"https://schema.org","@type":"WebPage","@id":"https://developers.cloudflare.com/workers/local-development/#page","headline":"Local development · Cloudflare Workers docs","description":"Develop and test your Workers locally.","url":"https://developers.cloudflare.com/workers/local-development/","inLanguage":"en","image":"https://developers.cloudflare.com/dev-products-preview.png","dateModified":"2026-06-25","publisher":{"@type":"Organization","name":"Cloudflare","url":"https://www.cloudflare.com/"},"isPartOf":{"@type":"WebSite","@id":"https://developers.cloudflare.com/#website","name":"Cloudflare Docs","url":"https://developers.cloudflare.com/"}}
{"@context":"https://schema.org","@type":"BreadcrumbList","itemListElement":[{"@type":"ListItem","position":1,"item":{"@id":"/directory/","name":"Directory"}},{"@type":"ListItem","position":2,"item":{"@id":"/workers/","name":"Workers"}},{"@type":"ListItem","position":3,"item":{"@id":"/workers/local-development/","name":"Local development"}}]}
```
---
---
title: Supported bindings per development mode
description: Supported bindings per development mode
image: https://developers.cloudflare.com/dev-products-preview.png
---
> Documentation Index
> Fetch the complete documentation index at: https://developers.cloudflare.com/workers/llms.txt
> Use this file to discover all available pages before exploring further.
[Skip to content](#%5Ftop)
# Supported bindings per development mode
## Local development
**Local simulations**: During local development, your Worker code always executes locally and bindings connect to locally simulated resources [by default](https://developers.cloudflare.com/workers/local-development/#remote-bindings). This is supported in [wrangler dev](https://developers.cloudflare.com/workers/wrangler/commands/general/#dev) and the [Cloudflare Vite plugin](https://developers.cloudflare.com/workers/vite-plugin/).
**Remote binding connections:**: Allows you to connect to remote resources on a [per-binding basis](https://developers.cloudflare.com/workers/local-development/#remote-bindings). This is supported in [wrangler dev](https://developers.cloudflare.com/workers/wrangler/commands/general/#dev) and the [Cloudflare Vite plugin](https://developers.cloudflare.com/workers/vite-plugin/).
| Binding | Local simulations | Remote binding connections |
| --------------------------------------- | ----------------- | -------------------------- |
| **AI** | ❌ | ✅ |
| **Assets** | ✅ | ❌ |
| **Analytics Engine** | ✅ | ❌ |
| **Browser Run** | ✅ | ✅ |
| **D1** | ✅ | ✅ |
| **Durable Objects** | ✅ | ❌ [1](#user-content-fn-1) |
| **Containers** | ✅ | ❌ |
| **Email Bindings** | ✅ | ✅ |
| **Hyperdrive** | ✅ | ❌ |
| **Images** | ✅ | ✅ |
| **KV** | ✅ | ✅ |
| **Media Transformations** | ❌ | ✅ |
| **mTLS** | ❌ | ✅ |
| **Queues** | ✅ | ✅ |
| **R2** | ✅ | ✅ |
| **Rate Limiting** | ✅ | ❌ |
| **Service Bindings (multiple Workers)** | ✅ | ✅ |
| **Vectorize** | ❌ | ✅ |
| **Workflows** | ✅ | ❌ |
## Remote development
During remote development, all of your Worker code is uploaded and executed on Cloudflare's infrastructure, and bindings always connect to remote resources. **We recommend using local development with remote binding connections instead** for faster iteration and debugging.
Supported only in [wrangler dev --remote](https://developers.cloudflare.com/workers/wrangler/commands/general/#dev) \- there is **no Vite plugin equivalent**.
| Binding | Remote development |
| --------------------------------------- | ------------------ |
| **AI** | ✅ |
| **Assets** | ✅ |
| **Analytics Engine** | ✅ |
| **Browser Run** | ✅ |
| **D1** | ✅ |
| **Durable Objects** | ✅ |
| **Containers** | ❌ |
| **Email Bindings** | ✅ |
| **Hyperdrive** | ✅ |
| **Images** | ✅ |
| **KV** | ✅ |
| **Media Transformations** | ✅ |
| **mTLS** | ✅ |
| **Queues** | ❌ |
| **R2** | ✅ |
| **Rate Limiting** | ✅ |
| **Service Bindings (multiple Workers)** | ✅ |
| **Vectorize** | ✅ |
| **Workflows** | ❌ |
## Footnotes
1. Refer to [Using remote resources with Durable Objects and Workflows](https://developers.cloudflare.com/workers/local-development/#using-remote-resources-with-durable-objects-and-workflows) for recommended workarounds. [↩](#user-content-fnref-1)
```json
{"@context":"https://schema.org","@type":"WebPage","@id":"https://developers.cloudflare.com/workers/local-development/bindings-per-env/#page","headline":"Supported bindings per development mode · Cloudflare Workers docs","description":"Supported bindings per development mode","url":"https://developers.cloudflare.com/workers/local-development/bindings-per-env/","inLanguage":"en","image":"https://developers.cloudflare.com/dev-products-preview.png","dateModified":"2026-06-25","publisher":{"@type":"Organization","name":"Cloudflare","url":"https://www.cloudflare.com/"},"isPartOf":{"@type":"WebSite","@id":"https://developers.cloudflare.com/#website","name":"Cloudflare Docs","url":"https://developers.cloudflare.com/"}}
{"@context":"https://schema.org","@type":"BreadcrumbList","itemListElement":[{"@type":"ListItem","position":1,"item":{"@id":"/directory/","name":"Directory"}},{"@type":"ListItem","position":2,"item":{"@id":"/workers/","name":"Workers"}},{"@type":"ListItem","position":3,"item":{"@id":"/workers/local-development/","name":"Local development"}},{"@type":"ListItem","position":4,"item":{"@id":"/workers/local-development/bindings-per-env/","name":"Supported bindings per development mode"}}]}
```
---
---
title: Environment variables and secrets
description: Configuring environment variables and secrets for local development
image: https://developers.cloudflare.com/dev-products-preview.png
---
> Documentation Index
> Fetch the complete documentation index at: https://developers.cloudflare.com/workers/llms.txt
> Use this file to discover all available pages before exploring further.
[Skip to content](#%5Ftop)
# Environment variables and secrets
Warning
Do not use `vars` to store sensitive information in your Worker's Wrangler configuration file. Use secrets instead.
Put secrets for use in local development in either a `.dev.vars` file or a `.env` file, in the same directory as the Wrangler configuration file.
Note
You can use the [secrets configuration property](https://developers.cloudflare.com/workers/wrangler/configuration/#secrets-configuration-property) to declare which secret names your Worker requires. When defined, only the keys listed in `secrets.required` are loaded from `.dev.vars` or `.env`. Additional keys are excluded and missing keys produce a warning.
Choose to use either `.dev.vars` or `.env` but not both. If you define a `.dev.vars` file, then values in `.env` files will not be included in the `env` object during local development.
These files should be formatted using the [dotenv ↗](https://hexdocs.pm/dotenvy/dotenv-file-format.html) syntax. For example:
**.dev.vars / .env**
```bash
SECRET_KEY="value"
API_TOKEN="eyJhbGciOiJIUzI1NiIsInR5cCI6IkpXVCJ9"
```
Do not commit secrets to git
The `.dev.vars` and `.env` files should not be committed to git. Add `.dev.vars*` and `.env*` to your project's `.gitignore` file.
To set different secrets for each Cloudflare environment, create files named `.dev.vars.` or `.env.`.
When you select a Cloudflare environment in your local development, the corresponding environment-specific file will be loaded ahead of the generic `.dev.vars` (or `.env`) file.
* When using `.dev.vars.` files, all secrets must be defined per environment. If `.dev.vars.` exists then only this will be loaded; the `.dev.vars` file will not be loaded.
* In contrast, all matching `.env` files are loaded and the values are merged. For each variable, the value from the most specific file is used, with the following precedence:
* `.env..local` (most specific)
* `.env.local`
* `.env.`
* `.env` (least specific)
Controlling `.env` handling
It is possible to control how `.env` files are loaded in local development by setting environment variables on the process running the tools.
* To disable loading local dev vars from `.env` files without providing a `.dev.vars` file, set the `CLOUDFLARE_LOAD_DEV_VARS_FROM_DOT_ENV` environment variable to `"false"`.
* To include every environment variable defined in your system's process environment as a local development variable, ensure there is no `.dev.vars` and then set the `CLOUDFLARE_INCLUDE_PROCESS_ENV` environment variable to `"true"`. This is not needed when using the [secrets configuration property](https://developers.cloudflare.com/workers/wrangler/configuration/#secrets-configuration-property), which loads from `process.env` automatically.
### Basic setup
Here are steps to set up environment variables for local development using either `.dev.vars` or `.env` files.
1. Create a `.dev.vars` / `.env` file in your project root.
2. Add key-value pairs:
**.dev.vars/.env**
```ini
API_HOST="localhost:3000"
DEBUG="true"
SECRET_TOKEN="my-local-secret-token"
```
3. Run your `dev` command
**Wrangler**
npm yarn pnpm
```
npx wrangler dev
```
```
yarn wrangler dev
```
```
pnpm wrangler dev
```
**Vite plugin**
npm yarn pnpm
```
npx vite dev
```
```
yarn vite dev
```
```
pnpm vite dev
```
## Multiple local environments
To simulate different local environments, you can provide environment-specific files. For example, you might have a `staging` environment that requires different settings than your development environment.
1. Create a file named `.dev.vars.`/`.env.`. For example, we can use `.dev.vars.staging`/`.env.staging`.
2. Add key-value pairs:
**.dev.vars.staging/.env.staging**
```ini
API_HOST="staging.localhost:3000"
DEBUG="false"
SECRET_TOKEN="staging-token"
```
3. Specify the environment when running the `dev` command:
**Wrangler**
npm yarn pnpm
```
npx wrangler dev --env staging
```
```
yarn wrangler dev --env staging
```
```
pnpm wrangler dev --env staging
```
**Vite plugin**
npm yarn pnpm
```
CLOUDFLARE_ENV=staging npx vite dev
```
```
CLOUDFLARE_ENV=staging yarn vite dev
```
```
CLOUDFLARE_ENV=staging pnpm vite dev
```
* If using `.dev.vars.staging`, only the values from that file will be applied instead of `.dev.vars`.
* If using `.env.staging`, the values will be merged with `.env` files, with the most specific file taking precedence.
## Learn more
* To learn how to configure multiple environments in Wrangler configuration, [read the documentation](https://developers.cloudflare.com/workers/wrangler/environments/#%5Ftop).
* To learn how to use Wrangler environments and Vite environments together, [read the Vite plugin documentation](https://developers.cloudflare.com/workers/vite-plugin/reference/cloudflare-environments/)
```json
{"@context":"https://schema.org","@type":"WebPage","@id":"https://developers.cloudflare.com/workers/local-development/environment-variables/#page","headline":"Environment variables and secrets · Cloudflare Workers docs","description":"Configuring environment variables and secrets for local development","url":"https://developers.cloudflare.com/workers/local-development/environment-variables/","inLanguage":"en","image":"https://developers.cloudflare.com/dev-products-preview.png","dateModified":"2026-06-25","publisher":{"@type":"Organization","name":"Cloudflare","url":"https://www.cloudflare.com/"},"isPartOf":{"@type":"WebSite","@id":"https://developers.cloudflare.com/#website","name":"Cloudflare Docs","url":"https://developers.cloudflare.com/"}}
{"@context":"https://schema.org","@type":"BreadcrumbList","itemListElement":[{"@type":"ListItem","position":1,"item":{"@id":"/directory/","name":"Directory"}},{"@type":"ListItem","position":2,"item":{"@id":"/workers/","name":"Workers"}},{"@type":"ListItem","position":3,"item":{"@id":"/workers/local-development/","name":"Local development"}},{"@type":"ListItem","position":4,"item":{"@id":"/workers/local-development/environment-variables/","name":"Environment variables and secrets"}}]}
```
---
---
title: Adding local data
description: Populating local resources with data
image: https://developers.cloudflare.com/dev-products-preview.png
---
> Documentation Index
> Fetch the complete documentation index at: https://developers.cloudflare.com/workers/llms.txt
> Use this file to discover all available pages before exploring further.
[Skip to content](#%5Ftop)
# Adding local data
Whether you are using Wrangler or the [Cloudflare Vite plugin ↗](https://developers.cloudflare.com/workers/vite-plugin/), your workflow for **accessing** data during local development remains the same. However, you can only [populate local resources with data](https://developers.cloudflare.com/workers/local-development/local-data/#populating-local-resources-with-data) via the Wrangler CLI.
### How it works
When you run either `wrangler dev` or [vite ↗](https://vite.dev/guide/cli#dev-server), [Miniflare](https://developers.cloudflare.com/workers/testing/miniflare/) automatically creates **local versions** of your resources (like [KV](https://developers.cloudflare.com/kv), [D1](https://developers.cloudflare.com/d1/), or [R2](https://developers.cloudflare.com/r2)). This means you **don’t** need to manually set up separate local instances for each service. However, newly created local resources **won’t** contain any data — you'll need to use Wrangler commands with the `--local` flag to populate them. Changes made to local resources won’t affect production data.
## Populating local resources with data
When you first start developing, your local resources will be empty. You'll need to populate them with data using the Wrangler CLI.
### KV namespaces
Syntax note
Since version 3.60.0, Wrangler supports the `kv ...` syntax. If you are using versions below 3.60.0, the command follows the `kv:...` syntax. Learn more in the [Wrangler commands for KV page](https://developers.cloudflare.com/kv/reference/kv-commands/).
#### [Add a single key-value pair](https://developers.cloudflare.com/workers/wrangler/commands/kv/#kv-key)
npm yarn pnpm
```
npx wrangler kv key put --binding= --local
```
```
yarn wrangler kv key put --binding= --local
```
```
pnpm wrangler kv key put --binding= --local
```
#### [Bulk upload](https://developers.cloudflare.com/workers/wrangler/commands/kv/#kv-bulk)
npm yarn pnpm
```
npx wrangler kv bulk put --binding= --local
```
```
yarn wrangler kv bulk put --binding= --local
```
```
pnpm wrangler kv bulk put --binding= --local
```
### R2 buckets
#### [Upload a file](https://developers.cloudflare.com/workers/wrangler/commands/r2/#r2-object)
npm yarn pnpm
```
npx wrangler r2 object put / --file= --local
```
```
yarn wrangler r2 object put /