Deploy to Cloudflare buttons
If you're building a Workers application and would like to share it with other developers, you can embed a Deploy to Cloudflare button in your README, blog post, or documentation to enable others to quickly deploy your application on their own Cloudflare account. Deploy to Cloudflare buttons eliminate the need for complex setup, allowing developers to get started with your public GitHub or GitLab repository in just a few clicks.
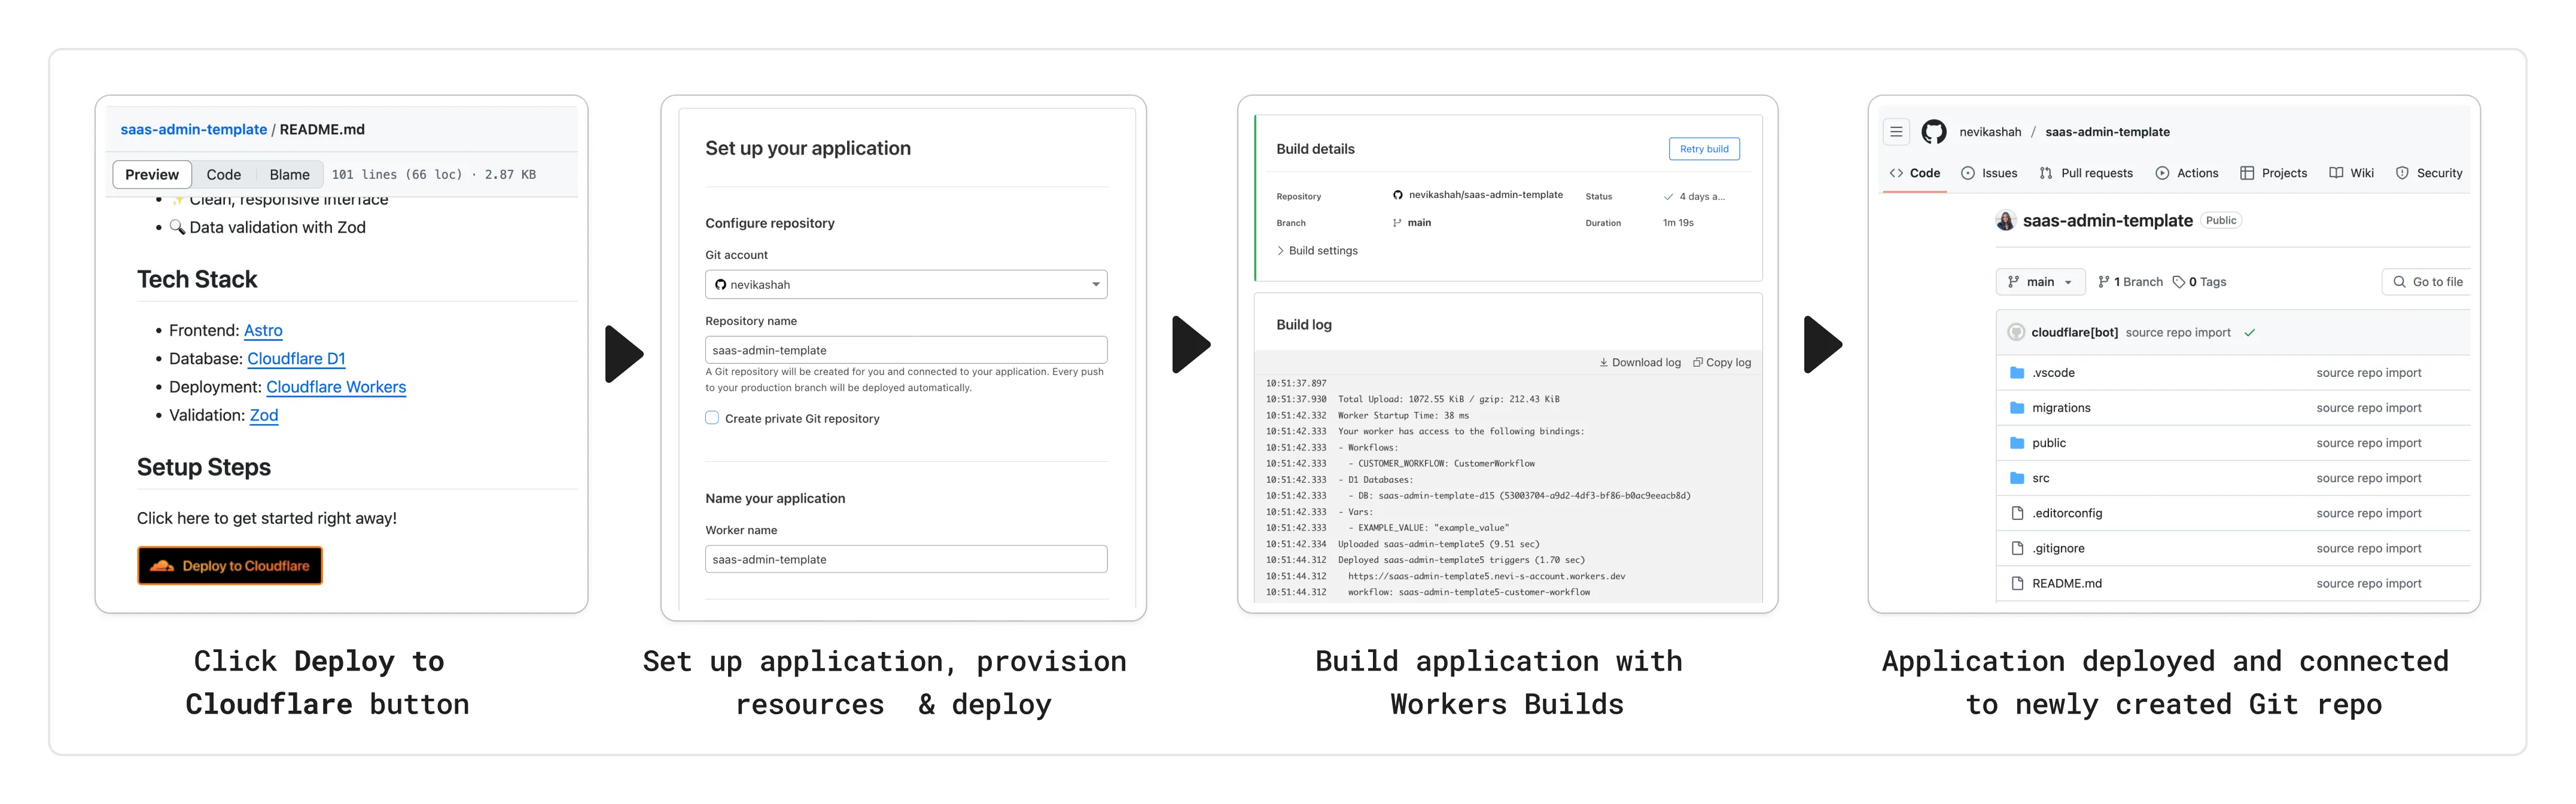
Deploy to Cloudflare buttons simplify the deployment of a Workers application by enabling Cloudflare to:
- Clone a Git repository: Cloudflare clones your source repository into the user's GitHub/GitLab account where they can continue development after deploying.
- Configure a project: Your users can customize key details such as repository name, Worker name, and required resource names in a single setup page with customizations reflected in the newly created Git repository.
- Build & deploy: Cloudflare builds the application using Workers Builds and deploys it to the Cloudflare network. Any required resources are automatically provisioned and bound to the Worker without additional setup.
Deploy to Cloudflare buttons can be embedded anywhere developers might want to launch your project. To add a Deploy to Cloudflare button, copy the following snippet and replace the Git repository URL with your project's URL. You can also optionally specify a subdirectory.
[](https://deploy.workers.cloudflare.com/?url=<your git repo URL>)<a href="https://deploy.workers.cloudflare.com/?url=<YOUR_REPO_URL>"><img src="https://deploy.workers.cloudflare.com/button" alt="Deploy to Cloudflare"/></a>https://deploy.workers.cloudflare.com/?url=<YOUR_REPO_URL>If you have already deployed your application using Workers Builds, you can generate a Deploy to Cloudflare button directly from the Cloudflare dashboard by selecting the share button (located within your Worker details) and copying the provided snippet.
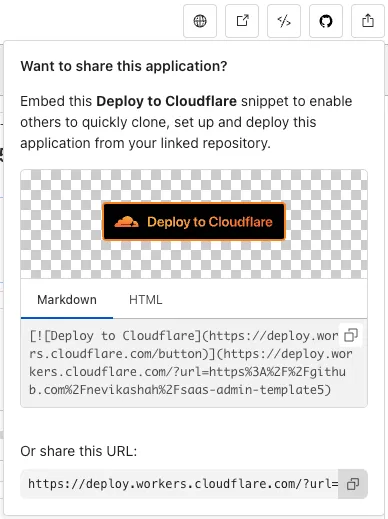
Once you have your snippet, you can paste this wherever you would like your button to be displayed.
If your Worker application requires Cloudflare resources, they will be automatically provisioned as part of the deployment. Currently, supported resources include:
- Storage: KV namespaces, D1 databases, R2 buckets, Hyperdrive, Vectorize databases, and Secrets Store Secrets
- Compute: Durable Objects, Workers AI, and Queues
Cloudflare will read the Wrangler configuration file of your source repo to determine resource requirements for your application. During deployment, Cloudflare will provision any necessary resources and update the Wrangler configuration where applicable for newly created resources (e.g. database IDs and namespace IDs). To ensure successful deployment, please make sure your source repository includes default values for resource names, resource IDs and any other properties for each binding.
Worker environment variables can be defined in your Wrangler configuration file as normal:
{ "name": "my-worker", "main": "./src/index.ts", // Set this to today's date "compatibility_date": "2026-07-20", "vars": { "API_HOST": "https://example.com", },}name = "my-worker"main = "./src/index.ts"# Set this to today's datecompatibility_date = "2026-07-20"
[vars]API_HOST = "https://example.com"Worker secrets can be defined in a .dev.vars.example or .env.example file with a dotenv ↗ format:
COOKIE_SIGNING_KEY=my-secret # commentSecrets Store secrets can be configured in the Wrangler configuration file as normal:
{ "name": "my-worker", "main": "./src/index.ts", // Set this to today's date "compatibility_date": "2026-07-20", "secrets_store_secrets": [ { "binding": "API_KEY", "store_id": "demo", "secret_name": "api-key" } ]}name = "my-worker"main = "./src/index.ts"# Set this to today's datecompatibility_date = "2026-07-20"
[[secrets_store_secrets]]binding = "API_KEY"store_id = "demo"secret_name = "api-key"Configuring Build/Deploy commands: If you are using custom build and deploy scripts in your package.json (for example, if using a full stack framework or running D1 migrations), Cloudflare will automatically detect and pre-populate the build and deploy fields. Users can choose to modify or accept the custom commands during deployment configuration.
If no deploy script is specified, Cloudflare will preconfigure npx wrangler deploy by default. If no build script is specified, Cloudflare will leave this field blank.
Running D1 Migrations: If you would like to run migrations as part of your setup, you can specify this in your package.json by running your migrations as part of your deploy script. The migration command should reference the binding name rather than the database name to ensure migrations are successful when users specify a database name that is different from that of your source repository. The following is an example of how you can set up the scripts section of your package.json:
{ "scripts": { "build": "astro build", "deploy": "npm run db:migrations:apply && wrangler deploy", "db:migrations:apply": "wrangler d1 migrations apply DB_BINDING --remote" }}Provide a description for bindings: If you wish to provide additional information about bindings, such as why they are required in this template, or suggestions for how to configure a value, you can provide a description in your package.json. This can be particularly useful for environment variables and secrets where users might need to find a value outside of Cloudflare.
Inline markdown `code`, **bold**, __italics__ and [links](https://example.com) are supported.
{ "name": "my-worker", "private": true, "cloudflare": { "bindings": { "API_KEY": { "description": "Select your company's [API key](https://example.com/) for connecting to the example service." }, "COOKIE_SIGNING_KEY": { "description": "Generate a random string using `openssl rand -hex 32`." } } }}- Monorepos: Cloudflare does not fully support monorepos
- If your repository URL contains a subdirectory, your application must be fully isolated within that subdirectory, including any dependencies. Otherwise, the build will fail. Cloudflare treats this subdirectory as the root of the new repository created as part of the deploy process.
- Additionally, if you have a monorepo that contains multiple Workers applications, they will not be deployed together. You must configure a separate Deploy to Cloudflare button for each application. The user will manually create a distinct Workers application for each subdirectory.
- Pages applications: Deploy to Cloudflare buttons only support Workers applications.
- Non-GitHub/GitLab repositories: Source repositories from anything other than github.com and gitlab.com are not supported. Self-hosted versions of GitHub and GitLab are also not supported.
- Private repositories: Repositories must be public in order for others to successfully use your Deploy to Cloudflare button.