Build a todo list Jamstack application
In this tutorial, you will build a todo list application using HTML, CSS, and JavaScript. The application data will be stored in Workers KV.
Before starting this project, you should have some experience with HTML, CSS, and JavaScript. You will learn:
- How building with Workers makes allows you to focus on writing code and ship finished products.
- How the addition of Workers KV makes this tutorial a great introduction to building full, data-driven applications.
If you would like to see the finished code for this project, find the project on GitHub ↗ and refer to the live demo ↗ to review what you will be building.
All of the tutorials assume you have already completed the Get started guide, which gets you set up with a Cloudflare Workers account, C3 ↗, and Wrangler.
First, use the create-cloudflare ↗ CLI tool to create a new Cloudflare Workers project named todos. In this tutorial, you will use the default Hello World template to create a Workers project.
npm create cloudflare@latest -- todosyarn create cloudflare todospnpm create cloudflare@latest todosFor setup, select the following options:
- For What would you like to start with?, choose
Hello World example. - For Which template would you like to use?, choose
Worker only. - For Which language do you want to use?, choose
JavaScript. - For Do you want to use git for version control?, choose
Yes. - For Do you want to deploy your application?, choose
No(we will be making some changes before deploying).
Move into your newly created directory:
cd todosInside of your new todos Worker project directory, index.js represents the entry point to your Cloudflare Workers application.
All incoming HTTP requests to a Worker are passed to the fetch() handler as a request object. After a request is received by the Worker, the response your application constructs will be returned to the user. This tutorial will guide you through understanding how the request/response pattern works and how you can use it to build fully featured applications.
export default { async fetch(request, env, ctx) { return new Response("Hello World!"); },};In your default index.js file, you can see that request/response pattern in action. The fetch constructs a new Response with the body text 'Hello World!'.
When a Worker receives a request, the Worker returns the newly constructed response to the client. Your Worker will serve new responses directly from Cloudflare's global network ↗ instead of continuing to your origin server. A standard server would accept requests and return responses. Cloudflare Workers allows you to respond by constructing responses directly on the Cloudflare global network.
Any project you deploy to Cloudflare Workers can make use of modern JavaScript tooling like ES modules, npm packages, and async/await ↗ functions to build your application. In addition to writing Workers, you can use Workers to build full applications using the same tooling and process as in this tutorial.
In this tutorial, you will build a todo list application running on Workers that allows reading data from a KV store and using the data to populate an HTML response to send to the client.
The work needed to create this application is split into three tasks:
- Write data to KV.
- Rendering data from KV.
- Adding todos from the application UI.
For the remainder of this tutorial you will complete each task, iterating on your application, and then publish it to your own domain.
To begin, you need to understand how to populate your todo list with actual data. To do this, use Cloudflare Workers KV — a key-value store that you can access inside of your Worker to read and write data.
To get started with KV, set up a namespace. All of your cached data will be stored inside that namespace and, with configuration, you can access that namespace inside the Worker with a predefined variable. Use Wrangler to create a new namespace called TODOS with the kv namespace create command and get the associated namespace ID by running the following command in your terminal:
npx wrangler kv namespace create "TODOS" --previewThe associated namespace can be combined with a --preview flag to interact with a preview namespace instead of a production namespace. Namespaces can be added to your application by defining them inside your Wrangler configuration. Copy your newly created namespace ID, and in your Wrangler configuration file, define a kv_namespaces key to set up your namespace:
{ "kv_namespaces": [ { "binding": "TODOS", "id": "<YOUR_ID>", "preview_id": "<YOUR_PREVIEW_ID>" } ]}[[kv_namespaces]]binding = "TODOS"id = "<YOUR_ID>"preview_id = "<YOUR_PREVIEW_ID>"The defined namespace, TODOS, will now be available inside of your codebase. With that, it is time to understand the KV API. A KV namespace has three primary methods you can use to interface with your cache: get, put, and delete.
Start storing data by defining an initial set of data, which you will put inside of the cache using the put method. The following example defines a defaultData object instead of an array of todo items. You may want to store metadata and other information inside of this cache object later on. Given that data object, use JSON.stringify to add a string into the cache:
export default { async fetch(request, env, ctx) { const defaultData = { todos: [ { id: 1, name: "Finish the Cloudflare Workers blog post", completed: false, }, ], }; await env.TODOS.put("data", JSON.stringify(defaultData)); return new Response("Hello World!"); },};Workers KV is an eventually consistent, global datastore. Any writes within a region are immediately reflected within that same region but will not be immediately available in other regions. However, those writes will eventually be available everywhere and, at that point, Workers KV guarantees that data within each region will be consistent.
Given the presence of data in the cache and the assumption that your cache is eventually consistent, this code needs a slight adjustment: the application should check the cache and use its value, if the key exists. If it does not, you will use defaultData as the data source for now (it should be set in the future) and write it to the cache for future use. After breaking out the code into a few functions for simplicity, the result looks like this:
export default {  async fetch(request, env, ctx) {    const defaultData = {      todos: [        {          id: 1,          name: "Finish the Cloudflare Workers blog post",          completed: false,        },      ],    };    const setCache = (data) => env.TODOS.put("data", data);    const getCache = () => env.TODOS.get("data");
    let data;
    const cache = await getCache();    if (!cache) {      await setCache(JSON.stringify(defaultData));      data = defaultData;    } else {      data = JSON.parse(cache);    }
return new Response(JSON.stringify(data)); },};Given the presence of data in your code, which is the cached data object for your application, you should take this data and render it in a user interface.
To do this, make a new html variable in your Workers script and use it to build up a static HTML template that you can serve to the client. In fetch, construct a new Response with a Content-Type: text/html header and serve it to the client:
const html = `<!DOCTYPE html><html>  <head>    <meta charset="UTF-8" />    <meta name="viewport" content="width=device-width,initial-scale=1" />    <title>Todos</title>  </head>  <body>    <h1>Todos</h1>  </body></html>`;
async fetch (request, env, ctx) {  // previous code  return new Response(html, {      headers: {        'Content-Type': 'text/html'      }    });}
You have a static HTML site being rendered and you can begin populating it with data. In the body, add a div tag with an id of todos:
const html = `<!DOCTYPE html><html> <head> <meta charset="UTF-8" /> <meta name="viewport" content="width=device-width,initial-scale=1" /> <title>Todos</title> </head> <body> <h1>Todos</h1> <div id="todos"></div> </body></html>`;Add a <script> element at the end of the body content that takes a todos array. For each todo in the array, create a div element and appends it to the todos HTML element:
const html = `<!DOCTYPE html><html> <head> <meta charset="UTF-8" /> <meta name="viewport" content="width=device-width,initial-scale=1" /> <title>Todos</title> </head> <body> <h1>Todos</h1> <div id="todos"></div> </body> <script> window.todos = [] var todoContainer = document.querySelector("#todos") window.todos.forEach(todo => { var el = document.createElement("div") el.textContent = todo.name todoContainer.appendChild(el) }) </script></html>`;Your static page can take in window.todos and render HTML based on it, but you have not actually passed in any data from KV. To do this, you will need to make a few changes.
First, your html variable will change to a function. The function will take in a todos argument, which will populate the window.todos variable in the above code sample:
const html = (todos) => `<!doctype html><html> <!-- existing content --> <script> window.todos = ${todos} var todoContainer = document.querySelector("#todos") // ... <script></html>`;In fetch, use the retrieved KV data to call the html function and generate a Response based on it:
async fetch (request, env, ctx) { const body = html(JSON.stringify(data.todos).replace(/</g, '\\u003c')); return new Response(body, { headers: { 'Content-Type': 'text/html' }, });}At this point, you have built a Cloudflare Worker that takes data from Cloudflare KV and renders a static page based on that Worker. That static page reads data and generates a todo list based on that data. The remaining task is creating todos from inside the application UI. You can add todos using the KV API — update the cache by running env.TODOS.put(newData).
To update a todo item, you will add a second handler in your Workers script, designed to watch for PUT requests to /. When a request body is received at that URL, the Worker will send the new todo data to your KV store.
Add this new functionality in fetch: if the request method is a PUT, it will take the request body and update the cache.
export default {  async fetch(request, env, ctx) {    const setCache = (data) => env.TODOS.put("data", data);
    if (request.method === "PUT") {      const body = await request.text();      try {        JSON.parse(body);        await setCache(body);        return new Response(body, { status: 200 });      } catch (err) {        return new Response(err, { status: 500 });      }    }    // previous code  },};
Check that the request is a PUT and wrap the remainder of the code in a try...catch block. First, parse the body of the request coming in, ensuring that it is JSON, before you update the cache with the new data and return it to the user. If anything goes wrong, return a 500 status code. If the route is hit with an HTTP method other than PUT — for example, POST or DELETE — return a 404 error.
With this script, you can now add some dynamic functionality to your HTML page to actually hit this route. First, create an input for your todo name and a button for submitting the todo.
const html = (todos) => `<!doctype html><html> <!-- existing content --> <div> <input type="text" name="name" placeholder="A new todo"></input> <button id="create">Create</button> </div> <!-- existing script --></html>`;Given that input and button, add a corresponding JavaScript function to watch for clicks on the button — once the button is clicked, the browser will PUT to / and submit the todo.
const html = (todos) => `<!doctype html><html>  <!-- existing content -->  <script>    // Existing JavaScript code
    var createTodo = function() {      var input = document.querySelector("input[name=name]")      if (input.value.length) {        todos = [].concat(todos, {          id: todos.length + 1,          name: input.value,          completed: false,        })        fetch("/", {          method: "PUT",          body: JSON.stringify({ todos: todos }),        })      }    }
    document.querySelector("#create").addEventListener("click", createTodo)  </script></html>`;
This code updates the cache. Remember that the KV cache is eventually consistent — even if you were to update your Worker to read from the cache and return it, you have no guarantees it will actually be up to date. Instead, update the list of todos locally, by taking your original code for rendering the todo list, making it a reusable function called populateTodos, and calling it when the page loads and when the cache request has finished:
const html = (todos) => `<!doctype html><html> <!-- existing content --> <script> var populateTodos = function() { var todoContainer = document.querySelector("#todos") todoContainer.innerHTML = null window.todos.forEach(todo => { var el = document.createElement("div") el.textContent = todo.name todoContainer.appendChild(el) }) }
populateTodos()
var createTodo = function() { var input = document.querySelector("input[name=name]") if (input.value.length) { todos = [].concat(todos, { id: todos.length + 1, name: input.value, completed: false, }) fetch("/", { method: "PUT", body: JSON.stringify({ todos: todos }), }) populateTodos() input.value = "" } }
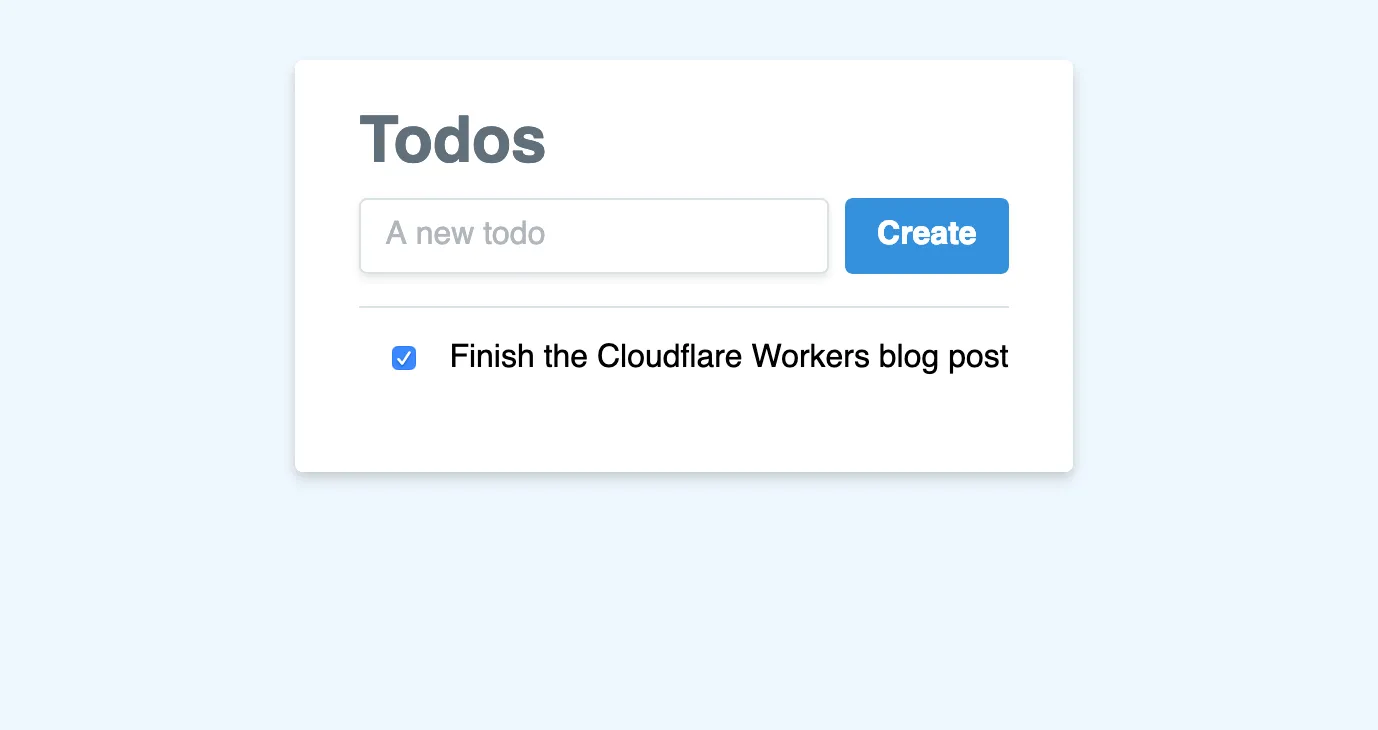
document.querySelector("#create").addEventListener("click", createTodo) </script>`;With the client-side code in place, deploying the new version of the function should put all these pieces together. The result is an actual dynamic todo list.
For the final piece of your todo list, you need to be able to update todos — specifically, marking them as completed.
Luckily, a great deal of the infrastructure for this work is already in place. You can update the todo list data in the cache, as evidenced by your createTodo function. Performing updates on a todo is more of a client-side task than a Worker-side one.
To start, the populateTodos function can be updated to generate a div for each todo. In addition, move the name of the todo into a child element of that div:
const html = (todos) => `<!doctype html><html> <!-- existing content --> <script> var populateTodos = function() { var todoContainer = document.querySelector("#todos") todoContainer.innerHTML = null window.todos.forEach(todo => { var el = document.createElement("div") var name = document.createElement("span") name.textContent = todo.name el.appendChild(name) todoContainer.appendChild(el) }) } </script>`;You have designed the client-side part of this code to handle an array of todos and render a list of HTML elements. There is a number of things that you have been doing that you have not quite had a use for yet – specifically, the inclusion of IDs and updating the todo's completed state. These things work well together to actually support updating todos in the application UI.
To start, it would be useful to attach the ID of each todo in the HTML. By doing this, you can then refer to the element later in order to correspond it to the todo in the JavaScript part of your code. Data attributes and the corresponding dataset method in JavaScript are a perfect way to implement this. When you generate your div element for each todo, you can attach a data attribute called todo to each div:
const html = (todos) => `<!doctype html><html>  <!-- existing content -->  <script>    var populateTodos = function() {      var todoContainer = document.querySelector("#todos")      todoContainer.innerHTML = null      window.todos.forEach(todo => {        var el = document.createElement("div")        el.dataset.todo = todo.id
        var name = document.createElement("span")        name.textContent = todo.name
        el.appendChild(name)        todoContainer.appendChild(el)      })    }  </script>`;
Inside your HTML, each div for a todo now has an attached data attribute, which looks like:
<div data-todo="1"></div><div data-todo="2"></div>You can now generate a checkbox for each todo element. This checkbox will default to unchecked for new todos but you can mark it as checked as the element is rendered in the window:
const html = (todos) => `<!doctype html><html>  <!-- existing content -->  <script>    window.todos.forEach(todo => {      var el = document.createElement("div")      el.dataset.todo = todo.id
      var name = document.createElement("span")      name.textContent = todo.name
      var checkbox = document.createElement("input")      checkbox.type = "checkbox"      checkbox.checked = todo.completed ? 1 : 0
      el.appendChild(checkbox)      el.appendChild(name)      todoContainer.appendChild(el)    })  </script>`;
The checkbox is set up to correctly reflect the value of completed on each todo but it does not yet update when you actually check the box. To do this, attach the completeTodo function as an event listener on the click event. Inside the function, inspect the checkbox element, find its parent (the todo div), and use its todo data attribute to find the corresponding todo in the data array. You can toggle the completed status, update its properties, and rerender the UI:
const html = (todos) => `<!doctype html><html>  <!-- existing content -->  <script>    var populateTodos = function() {      window.todos.forEach(todo => {        // Existing todo element set up code        checkbox.addEventListener("click", completeTodo)      })    }
    var completeTodo = function(evt) {      var checkbox = evt.target      var todoElement = checkbox.parentNode
      var newTodoSet = [].concat(window.todos)      var todo = newTodoSet.find(t => t.id == todoElement.dataset.todo)      todo.completed = !todo.completed      todos = newTodoSet      updateTodos()    }  </script>`;
The final result of your code is a system that checks the todos variable, updates your Cloudflare KV cache with that value, and then does a re-render of the UI based on the data it has locally.
By completing this tutorial, you have built a static HTML, CSS, and JavaScript application that is transparently powered by Workers and Workers KV, which take full advantage of Cloudflare's global network.
If you would like to keep improving on your project, you can implement a better design (you can refer to a live version available at todos.signalnerve.workers.dev ↗), or make additional improvements to security and speed.
You may also want to add user-specific caching. Right now, the cache key is always data – this means that any visitor to the site will share the same todo list with other visitors. Within your Worker, you could use values from the client request to create and maintain user-specific lists. For example, you may generate a cache key based on the requesting IP:
export default {  async fetch(request, env, ctx) {    const defaultData = {      todos: [        {          id: 1,          name: "Finish the Cloudflare Workers blog post",          completed: false,        },      ],    };    const setCache = (key, data) => env.TODOS.put(key, data);    const getCache = (key) => env.TODOS.get(key);
    const ip = request.headers.get("CF-Connecting-IP");    const myKey = `data-${ip}`;
    if (request.method === "PUT") {      const body = await request.text();      try {        JSON.parse(body);        await setCache(myKey, body);        return new Response(body, { status: 200 });      } catch (err) {        return new Response(err, { status: 500 });      }    }
    let data;
    const cache = await getCache();    if (!cache) {      await setCache(myKey, JSON.stringify(defaultData));      data = defaultData;    } else {      data = JSON.parse(cache);    }
    const body = html(JSON.stringify(data.todos).replace(/</g, "\\u003c"));
    return new Response(body, {      headers: {        "Content-Type": "text/html",      },    });  },};
After making these changes and deploying the Worker one more time, your todo list application now includes per-user functionality while still taking full advantage of Cloudflare's global network.
The final version of your Worker script should look like this:
const html = (todos) => `<!DOCTYPE html><html>  <head>    <meta charset="UTF-8">    <meta name="viewport" content="width=device-width,initial-scale=1">    <title>Todos</title>    <link href="https://cdn.jsdelivr.net/npm/tailwindcss/dist/tailwind.min.css" rel="stylesheet"></link>  </head>
  <body class="bg-blue-100">    <div class="w-full h-full flex content-center justify-center mt-8">      <div class="bg-white shadow-md rounded px-8 pt-6 py-8 mb-4">        <h1 class="block text-grey-800 text-md font-bold mb-2">Todos</h1>        <div class="flex">          <input class="shadow appearance-none border rounded w-full py-2 px-3 text-grey-800 leading-tight focus:outline-none focus:shadow-outline" type="text" name="name" placeholder="A new todo"></input>          <button class="bg-blue-500 hover:bg-blue-800 text-white font-bold ml-2 py-2 px-4 rounded focus:outline-none focus:shadow-outline" id="create" type="submit">Create</button>        </div>        <div class="mt-4" id="todos"></div>      </div>    </div>  </body>
  <script>    window.todos = ${todos}
    var updateTodos = function() {      fetch("/", { method: "PUT", body: JSON.stringify({ todos: window.todos }) })      populateTodos()    }
    var completeTodo = function(evt) {      var checkbox = evt.target      var todoElement = checkbox.parentNode      var newTodoSet = [].concat(window.todos)      var todo = newTodoSet.find(t => t.id == todoElement.dataset.todo)      todo.completed = !todo.completed      window.todos = newTodoSet      updateTodos()    }
    var populateTodos = function() {      var todoContainer = document.querySelector("#todos")      todoContainer.innerHTML = null
      window.todos.forEach(todo => {        var el = document.createElement("div")        el.className = "border-t py-4"        el.dataset.todo = todo.id
        var name = document.createElement("span")        name.className = todo.completed ? "line-through" : ""        name.textContent = todo.name
        var checkbox = document.createElement("input")        checkbox.className = "mx-4"        checkbox.type = "checkbox"        checkbox.checked = todo.completed ? 1 : 0        checkbox.addEventListener("click", completeTodo)
        el.appendChild(checkbox)        el.appendChild(name)        todoContainer.appendChild(el)      })    }
    populateTodos()
    var createTodo = function() {      var input = document.querySelector("input[name=name]")      if (input.value.length) {        window.todos = [].concat(todos, { id: window.todos.length + 1, name: input.value, completed: false })        input.value = ""        updateTodos()      }    }
    document.querySelector("#create").addEventListener("click", createTodo)  </script></html>`;
export default {  async fetch(request, env, ctx) {    const defaultData = {      todos: [        {          id: 1,          name: "Finish the Cloudflare Workers blog post",          completed: false,        },      ],    };    const setCache = (key, data) => env.TODOS.put(key, data);    const getCache = (key) => env.TODOS.get(key);
    const ip = request.headers.get("CF-Connecting-IP");    const myKey = `data-${ip}`;
    if (request.method === "PUT") {      const body = await request.text();      try {        JSON.parse(body);        await setCache(myKey, body);        return new Response(body, { status: 200 });      } catch (err) {        return new Response(err, { status: 500 });      }    }
    let data;
    const cache = await getCache();    if (!cache) {      await setCache(myKey, JSON.stringify(defaultData));      data = defaultData;    } else {      data = JSON.parse(cache);    }
    const body = html(JSON.stringify(data.todos).replace(/</g, "\\u003c"));
    return new Response(body, {      headers: {        "Content-Type": "text/html",      },    });  },};
You can find the source code for this project, as well as a README with deployment instructions, on GitHub ↗.