Microsoft 365 journaling setup
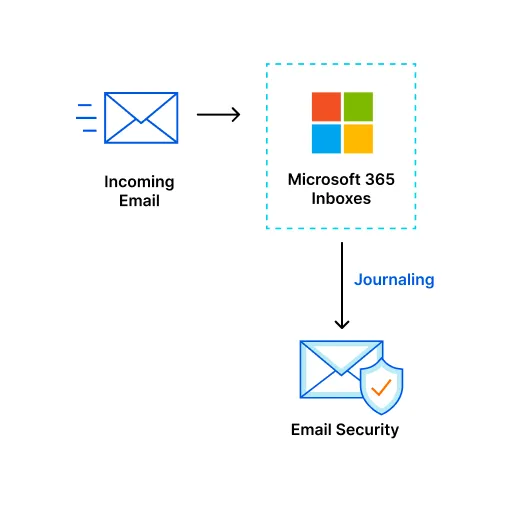
When you receive an email, the email lands on your Microsoft 365 inbox, and then Email Security receives a copy of that email. The following email flow shows how this works:
To enable Microsoft 365 journaling deployment:
- Log in to Zero Trust ↗ > Email Security.
- Select Overview. If you have not purchased Email Security, select Contact Sales. Otherwise, select Set up > BCC/Journaling.
- Select Integrate with MS > Authorize.
- Continue with Integrate with Microsoft 365 to connect your Microsoft integration.
To integrate with Microsoft 365:
- Name integration: Add your integration name, then select Continue.
- Authorize integration:
- Select Authorize. Selecting Authorize will take you to the Microsoft Sign in page where you will have to enter your email address.
- Once you enter your email address, select Next.
- After selecting Next, the dashboard will show you a dialog box with a list of requested permissions. Select Accept to authorize Email Security. Upon authorization, you will be redirected to a page where you can review details and enroll the integration.
- Review details: Review your integration details, then:
- Select Complete Email Security set up where you will be able to connect your domains and configure auto-moves.
- Select Continue to Email Security.
Continue with Connect your domains for the next steps.
On the Set up Email Security page:
- Connect domains: Select at least one domain. Then, select Continue.
- (Optional) Add manual domains: Select Add domain name to manually enter additional domains. Then, select Continue.
- (Optional) Adjust hop count: Enter the number of hops. Then, select Continue.
- (Optional, select Skip for now to skip this step) Move messages: Refer to Auto-moves to configure auto-moves. Then, select Continue.
- Select your processing location: Configure where you want Cloudflare to process your email. Global will be the default option. If you choose Global,
<account tag>@CF-emailsecurity.comwill be your regional service address. Once you have chosen your processing location, select Continue. - Review details: Review your connected domains and service addresses. Then, select Go to domains.
Your domains are now added successfully.
To view your connected domains:
- Go to Settings.
- Locate your domain, select the three dots > View domain. Selecting View domain will display information about your domain.
-
Log in to the Microsoft Purview compliance portal ↗.
-
On the sidebar, go to Settings (the gear icon) > Data Lifecycle Management > Exchange (legacy).
-
In Send undeliverable journal reports to enter the email address of a valid user account. Note that you cannot use a team or group address. Select Save once you entered the email address.
-
On the sidebar, go to Solutions > Data Lifecycle Management > Exchange (legacy).
-
Select Journal rules.
-
Select New rule to configure a journaling rule, and configure it as follows:
- Send journal reports to: This is the address you copied and pasted in step 5 of Connect your domains.
- Journal rule name:
Journal Messages to Email Security - Journal messages sent or received from: Everyone
- Type of message to journal: External messages only
-
Select Next.
-
Verify the information is correct, and select Submit > Done.
Once saved, the rule is automatically active. However, it may take a few minutes for the configuration to propagate and start pushing messages to Email Security. After it propagates, you can monitor your inbox in the Cloudflare dashboard to check the number of messages processed. This number will grow as journaled messages are sent to Email Security from your Exchange server.
Enable logs to send detection data to an endpoint of your choice.
Was this helpful?
- Resources
- API
- New to Cloudflare?
- Directory
- Sponsorships
- Open Source
- Support
- Help Center
- System Status
- Compliance
- GDPR
- Company
- cloudflare.com
- Our team
- Careers
- © 2025 Cloudflare, Inc.
- Privacy Policy
- Terms of Use
- Report Security Issues
- Trademark
-
