Clientless Web Isolation
Clientless Web Isolation allows users to securely browse high risk or sensitive websites in a remote browser without having to install the Cloudflare One Client on their device. Use Clientless Web Isolation when you need to provide isolated browsing to unmanaged devices (for example, contractor laptops or personal phones) where you cannot install software.
- In Cloudflare One ↗, go to Browser isolation > Browser isolation settings.
- Turn on Allow users to open a remote browser without the device client.
-
To configure permissions, in Browser isolation > Browser isolation settings > select Manage next to Manage remote browser permissions. You can add authentication methods and rules to control who can access the remote browser.
-
Under Policies > Access Policies > select Create new policy.
-
Name your policy and define who will have access to your isolated application. Refer to the Access policy documentation to construct your policy.
-
Select Save.
-
Under Policies > Access Policies > select Select existing policies and select the policy or policies you created in the previous step > select Confirm.
-
At the bottom of the page, select Save.
Your application will now be served in an isolated browser for users matching your policies.
To open links using Browser Isolation:
- In Cloudflare One ↗, go to Browser isolation > Browser isolation settings.
- Turn on Allow users to open a remote browser without the device client.
- In Launch browser, enter the URL link, and then select Launch. Your URL will open in a secure isolated browser.
When users browse through Clientless Web Isolation, their DNS queries (the lookups that translate domain names to IP addresses) are handled by Gateway. You can use DNS policies to control which domains the remote browser can resolve. Enterprise users can resolve domains available only through private DNS servers by creating resolver policies.
Gateway DNS and resolver policies will always apply to Clientless Web Isolation traffic, regardless of device configuration.
Clientless Web Isolation is implemented through a prefixed URL — the target website's address is appended to a Cloudflare-hosted base URL. <your-team-name> is your organization's team name.
https://<your-team-name>.cloudflareaccess.com/browser/<URL>For example, to isolate www.example.com, users would visit https://<your-team-name>.cloudflareaccess.com/browser/https://www.example.com/ in their preferred browser.
If <url> is not provided, users are presented with a Cloudflare Zero Trust landing page where they can input a target URL or search for a website.
When users visit a website through the Clientless Web Isolation URL, the traffic passes through Cloudflare Gateway. This allows you to apply HTTP policies to control what websites the remote browser can connect to, even if the user's device does not have the Cloudflare One Client installed.
For example, if you use a third-party Secure Web Gateway to block example.com, users can still access the page in the remote browser by visiting https://<your-team-name>.cloudflareaccess.com/browser/https://www.example.com/. To block https://<your-team-name>.cloudflareaccess.com/browser/https://www.example.com/, create a Cloudflare Gateway HTTP policy to block example.com:
| Selector | Operator | Value | Action |
|---|---|---|---|
| Domain | in | example.com | Block |
TLS decryption allows Gateway to inspect the contents of HTTPS traffic by decrypting it, applying policies, and re-encrypting it. If TLS decryption is turned on, Gateway will decrypt all sites accessed through the Clientless Web Isolation URL. Some sites are incompatible with this process (for example, sites that use certificate pinning). To connect to those sites, add a Do Not Inspect HTTP policy for the application or domain.
| Selector | Operator | Value | Action |
|---|---|---|---|
| Domain | is | mysite.com | Do Not Inspect |
With Clientless Web Isolation, users can reach any internal web server you have connected through Cloudflare Tunnel. For more information, refer to Connect private networks.
For example, if you added 192.168.2.1 to your tunnel, users can connect to your application through the remote browser by going to https://<your-team-name>.cloudflareaccess.com/browser/http://192.168.2.1. Clientless Web Isolation also supports connecting over private ports, for example https://<your-team-name>.cloudflareaccess.com/browser/http://192.168.2.1:7148.
You can configure remote browser controls such as disabling copy/paste, printing, or keyboard input. These settings display in the Gateway HTTP policy builder when you select the Isolate action.
The Cloudflare One Chrome extension allows a user to seamlessly access isolated and non-isolated applications without needing to re-authenticate. The user can log in once to their identity provider (whether through a Clientless Web Isolation link or their local browser) and gain access to all applications behind the SSO login.
Clientless Web Isolation has an embedded address bar. This feature is designed to improve the user's experience while visiting isolated pages with prefixed URLs.
The clientless address bar has three views: hostname notch, full address bar and hidden. The user's selected view is remembered across domains and remote browsing sessions.
By default the isolated domain name appears in the notch positioned at the top and center of an isolated page.
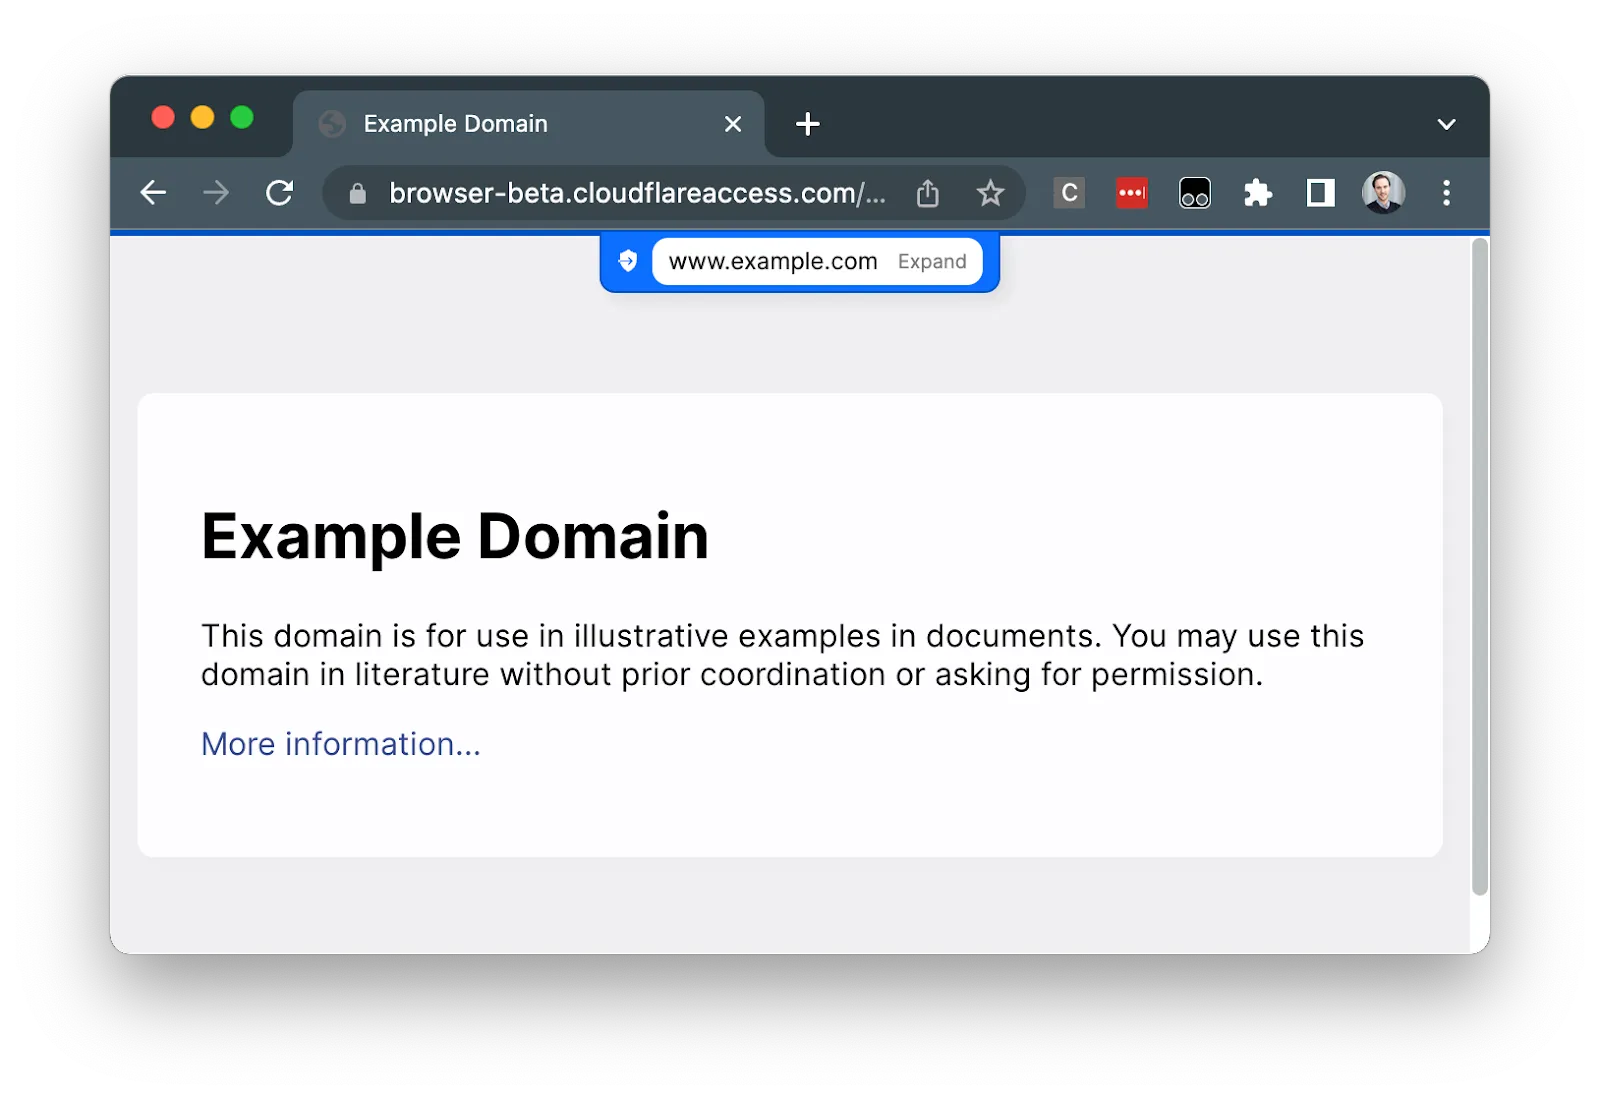
Selecting Expand or the hostname text will expand the notch to the full address bar view. If isolated page content is obscured by the notch, expanding to the full address bar view will make the content accessible.
The full address bar allows users to search and go to isolated websites. Users can jump to the address bar at any time by pressing CTRL + L on the keyboard.
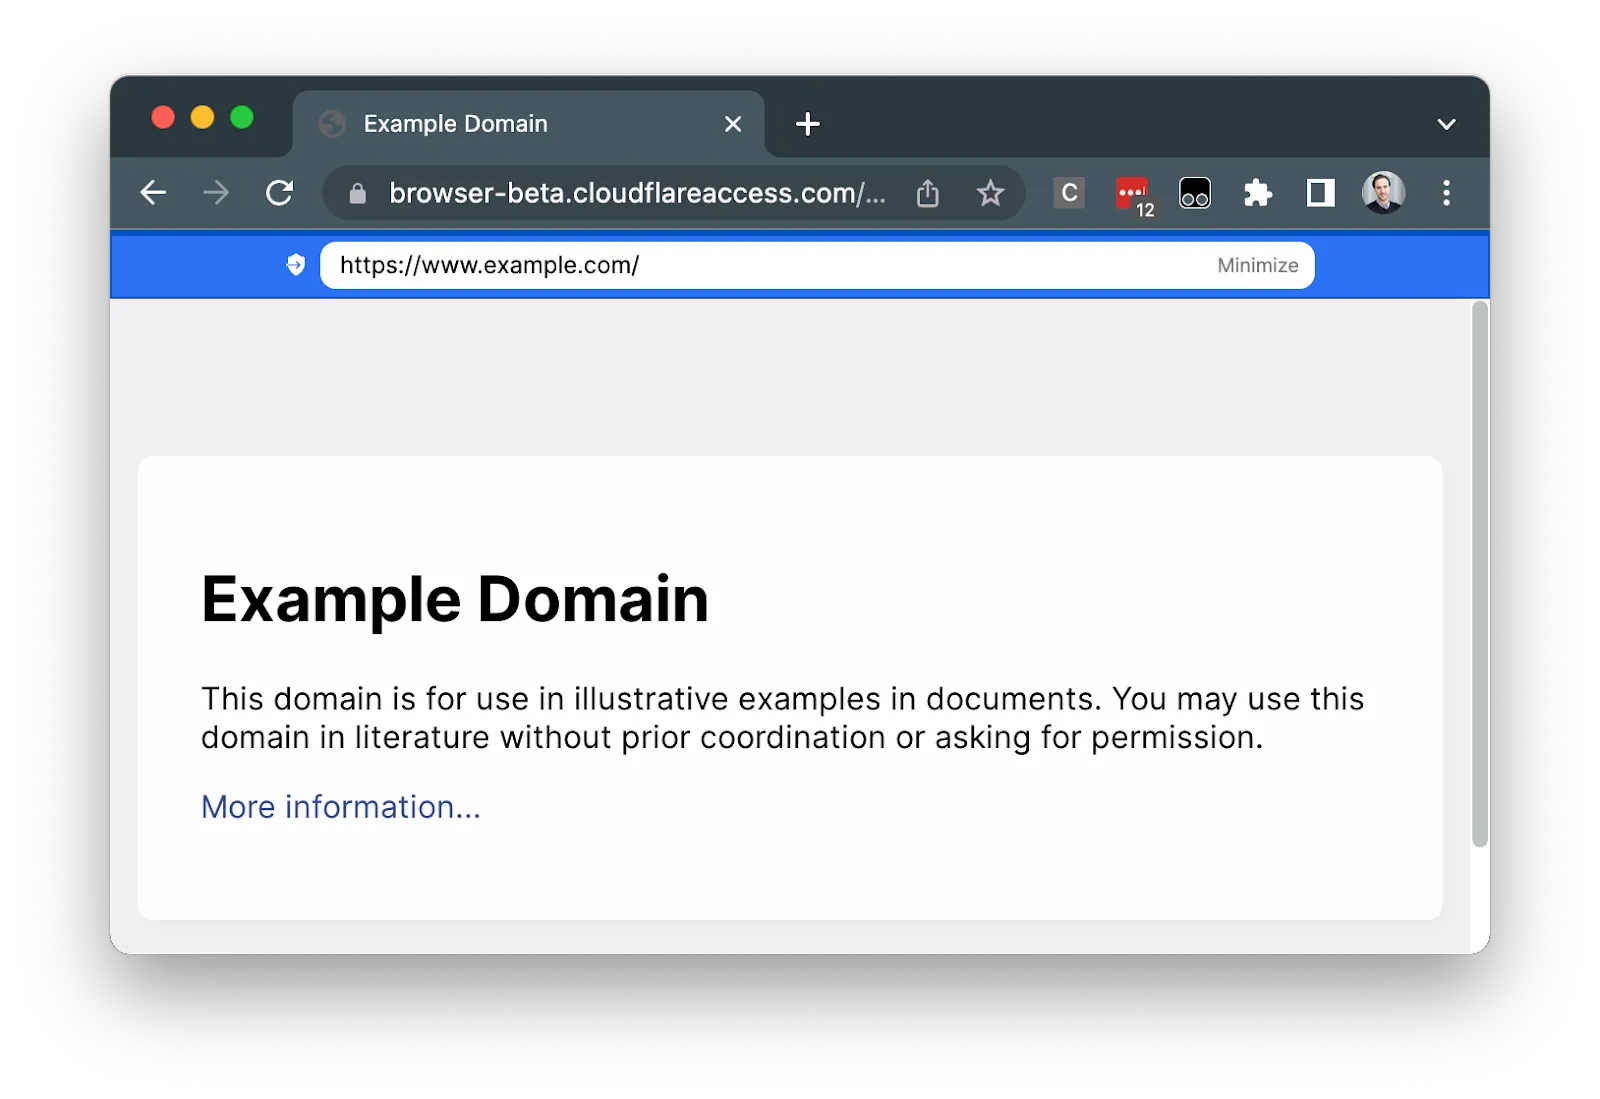
To turn on or off the address bar, users can right-click on any isolated page and select Show / Hide address bar.
- Authentication events: User login events are available in Access authentication logs.
- HTTP requests: Traffic from the remote browser to the Internet is logged in Gateway activity logs.
- DNS queries: DNS queries from the remote browser are shown in Gateway activity logs.
- Network sessions: Egress traffic from the remote browser generates Zero Trust Network Session Logs, available via Logpush and Log Explorer.
- User actions: Track copy/paste, download/upload, and print actions initiated by users in the remote browser (only available in Logpush).
If you want to isolate a website without the Cloudflare One Client installed, you will need to redirect traffic to the Clientless Web Isolation prefixed URL. One way to do this is through a third-party Secure Web Gateway. To redirect users to the remote browser, you can implement a custom block page similar to the example shown below.
<!DOCTYPE html><html> <head> <title>Redirecting website to a remote browser</title> <script> window.location.href = "https://<your-team-name>.cloudflareaccess.com/browser/<URL>}"; </script> <noscript> <meta http-equiv="refresh" content="0; url=https://<your-team-name>.cloudflareaccess.com/browser/<URL>" /> </noscript> </head> <body> <p> This website is being redirected to a remote browser. Select <a href="https://<your-team-name>.cloudflareaccess.com/browser/<URL>" >here</a > if you are not automatically redirected. </p> </body></html>Review troubleshooting guidance related to Clientless Web Isolation.