Okta (SAML)
Cloudflare One can integrate SAML with Okta as an identity provider.
To set up SAML with Okta as your identity provider:
-
On your Okta admin dashboard, go to Applications > Applications.
-
Select Create App Integration.
-
In the pop-up dialog, select SAML 2.0 and then elect Next.
-
Enter an app name and select Next.
-
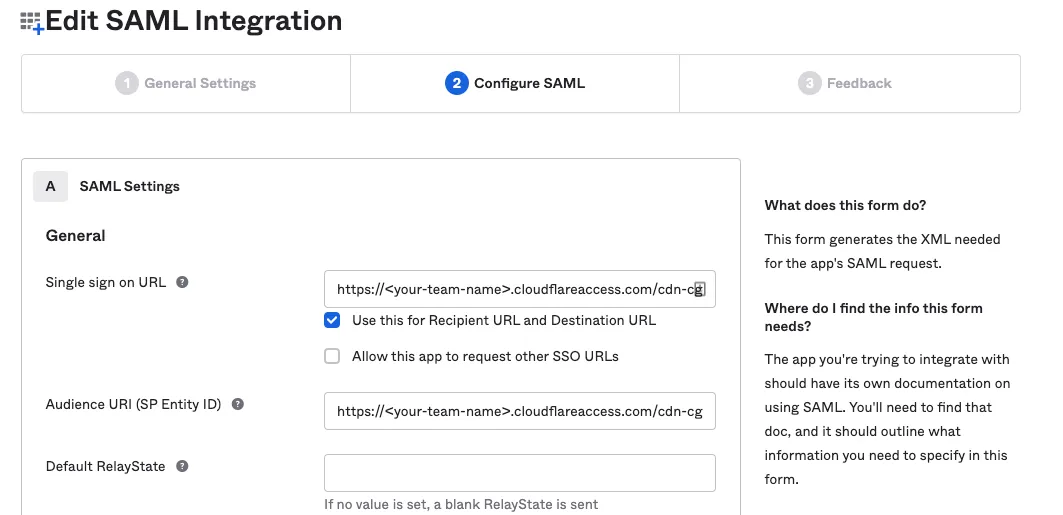
In the Single sign on URL and the Audience URI (SP Entity ID) fields, enter the following URL:
https://<your-team-name>.cloudflareaccess.com/cdn-cgi/access/callbackYou can find your team name in the Cloudflare dashboard ↗ under Settings > Team name and domain > Team name.
-
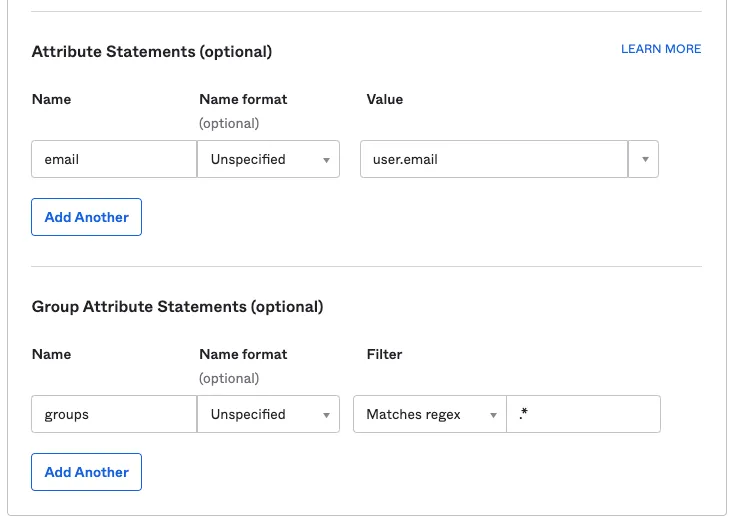
In the Attribute Statements section, enter the following information:
- Name: Enter
email. - Value: Enter
user.email.
- Name: Enter
-
(Optional) If you are using Okta groups, create a Group Attribute Statement with the following information:
- Name: Enter
groups. - Filter: Select Matches regex and enter
.*.
- Name: Enter
-
Select Next.
-
Select I'm an Okta customer adding an internal app and check This is an internal app that we have created.

-
Select Finish.
-
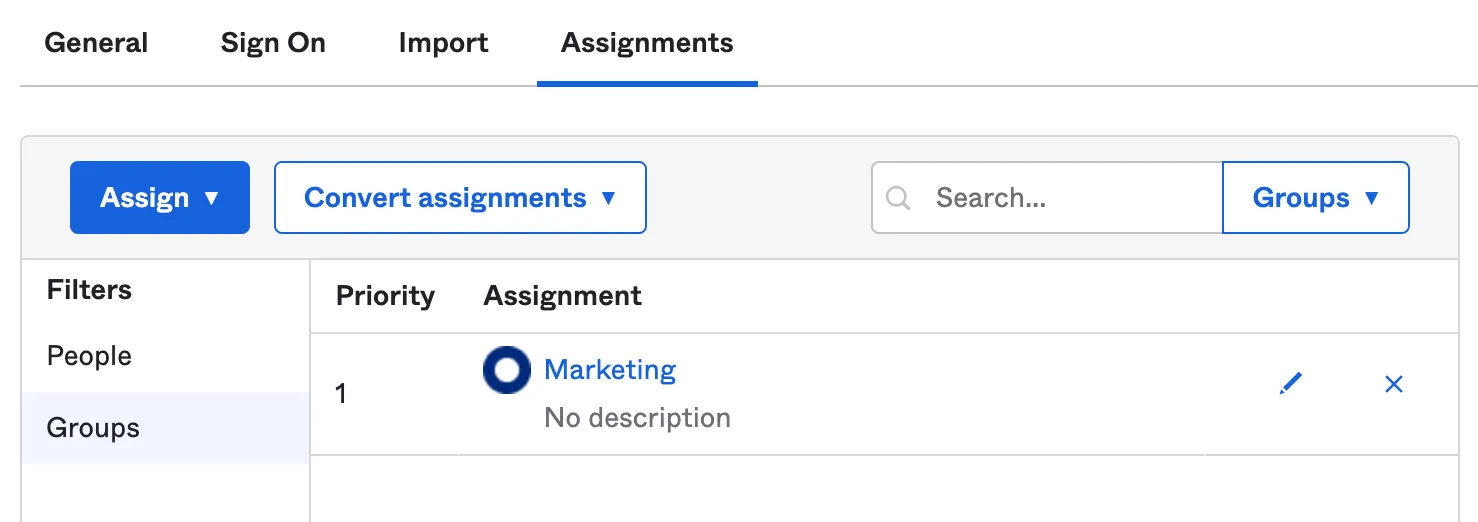
In the Assignments tab, select Assign and assign individuals or groups you want to grant access to.
-
Select Done. The assigned individuals and groups will display in the Assignments tab.
- To retrieve the SAML provider information, go to the Sign On tab and select View Setup Instructions. A new page will open showing the Identity Provider Single Sign-on URL, Identity Provider Issuer, and X.509 Certificate. Save this information for configuring your Cloudflare One settings.

-
In the Cloudflare dashboard ↗, go to Zero Trust > Integrations > Identity provider.
-
Under Your identity providers, select Add new identity provider, and select SAML.
-
Fill in the following information:
- Name: Name your identity provider.
- Single Sign On URL: Enter the Identity Provider Single-Sign-On URL from Okta.
- Issuer ID: Enter the Identity Provider Issuer from Okta, for example
http://www.okta.com/<your-okta-entity-id>. - Signing Certificate: Copy-paste the X.509 Certificate from Okta.
-
(Recommended) Enable Sign SAML authentication request.
-
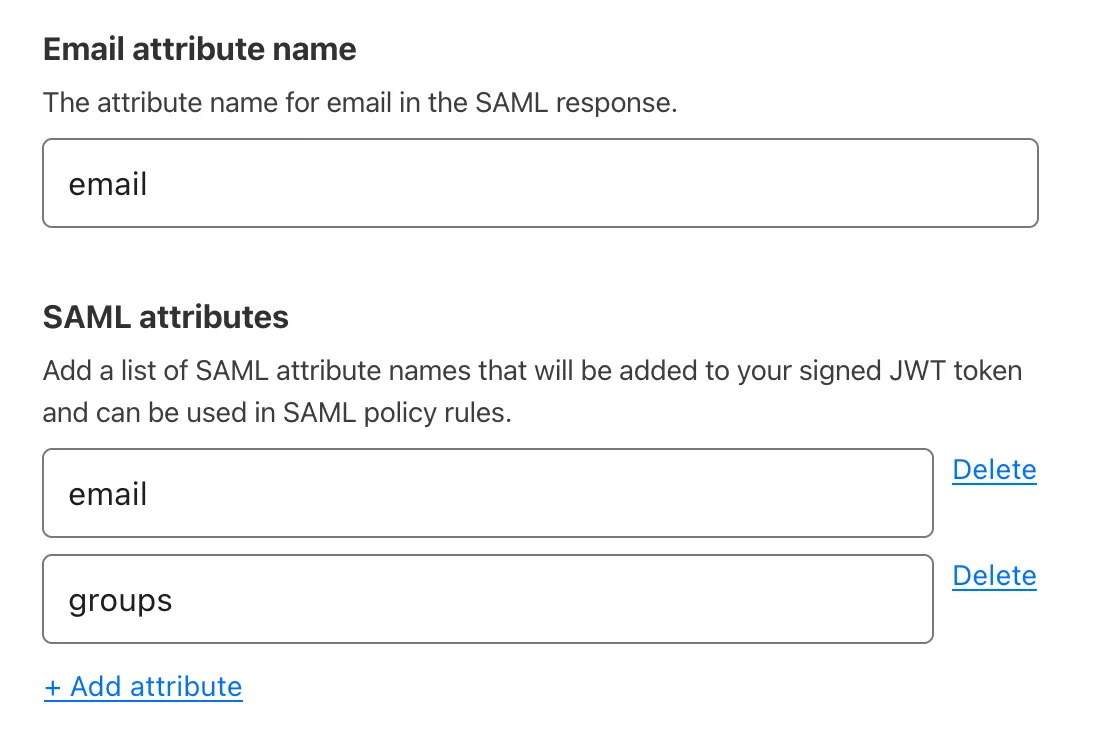
(Recommended) Under SAML attributes, add the
emailandgroupsattributes. Thegroupsattribute is required if you want to create policies based on Okta groups.
- Select Save.
To test that your connection is working, go to Integrations > Identity providers and select Test next to Okta. A success response should return the configured SAML attributes.
{ "config": { "issuer_url": "http://www.okta.com/exkbhqj29iGxT7GwT0h7", "sso_target_url": "https://dev-abc123.oktapreview.com/app/myapp/exkbhqj29iGxT7GwT0h7/sso/saml", "attributes": ["email", "group"], "email_attribute_name": "", "sign_request": false, "idp_public_certs": [ "MIIDpDCCAoygAwIBAgIGAV2ka+55MA0GCSqGSIb3DQEBCwUAMIGSMQswCQYDVQQGEwJVUzETMBEG\nA1UEC.....GF/Q2/MHadws97cZg\nuTnQyuOqPuHbnN83d/2l1NSYKCbHt24o" ] }, "type": "saml", "name": "okta saml example"}