JumpCloud
-
Log in to the JumpCloud Admin Portal ↗.
-
Go to Device Management > Software Management.
-
Select the Windows tab, then select (+).
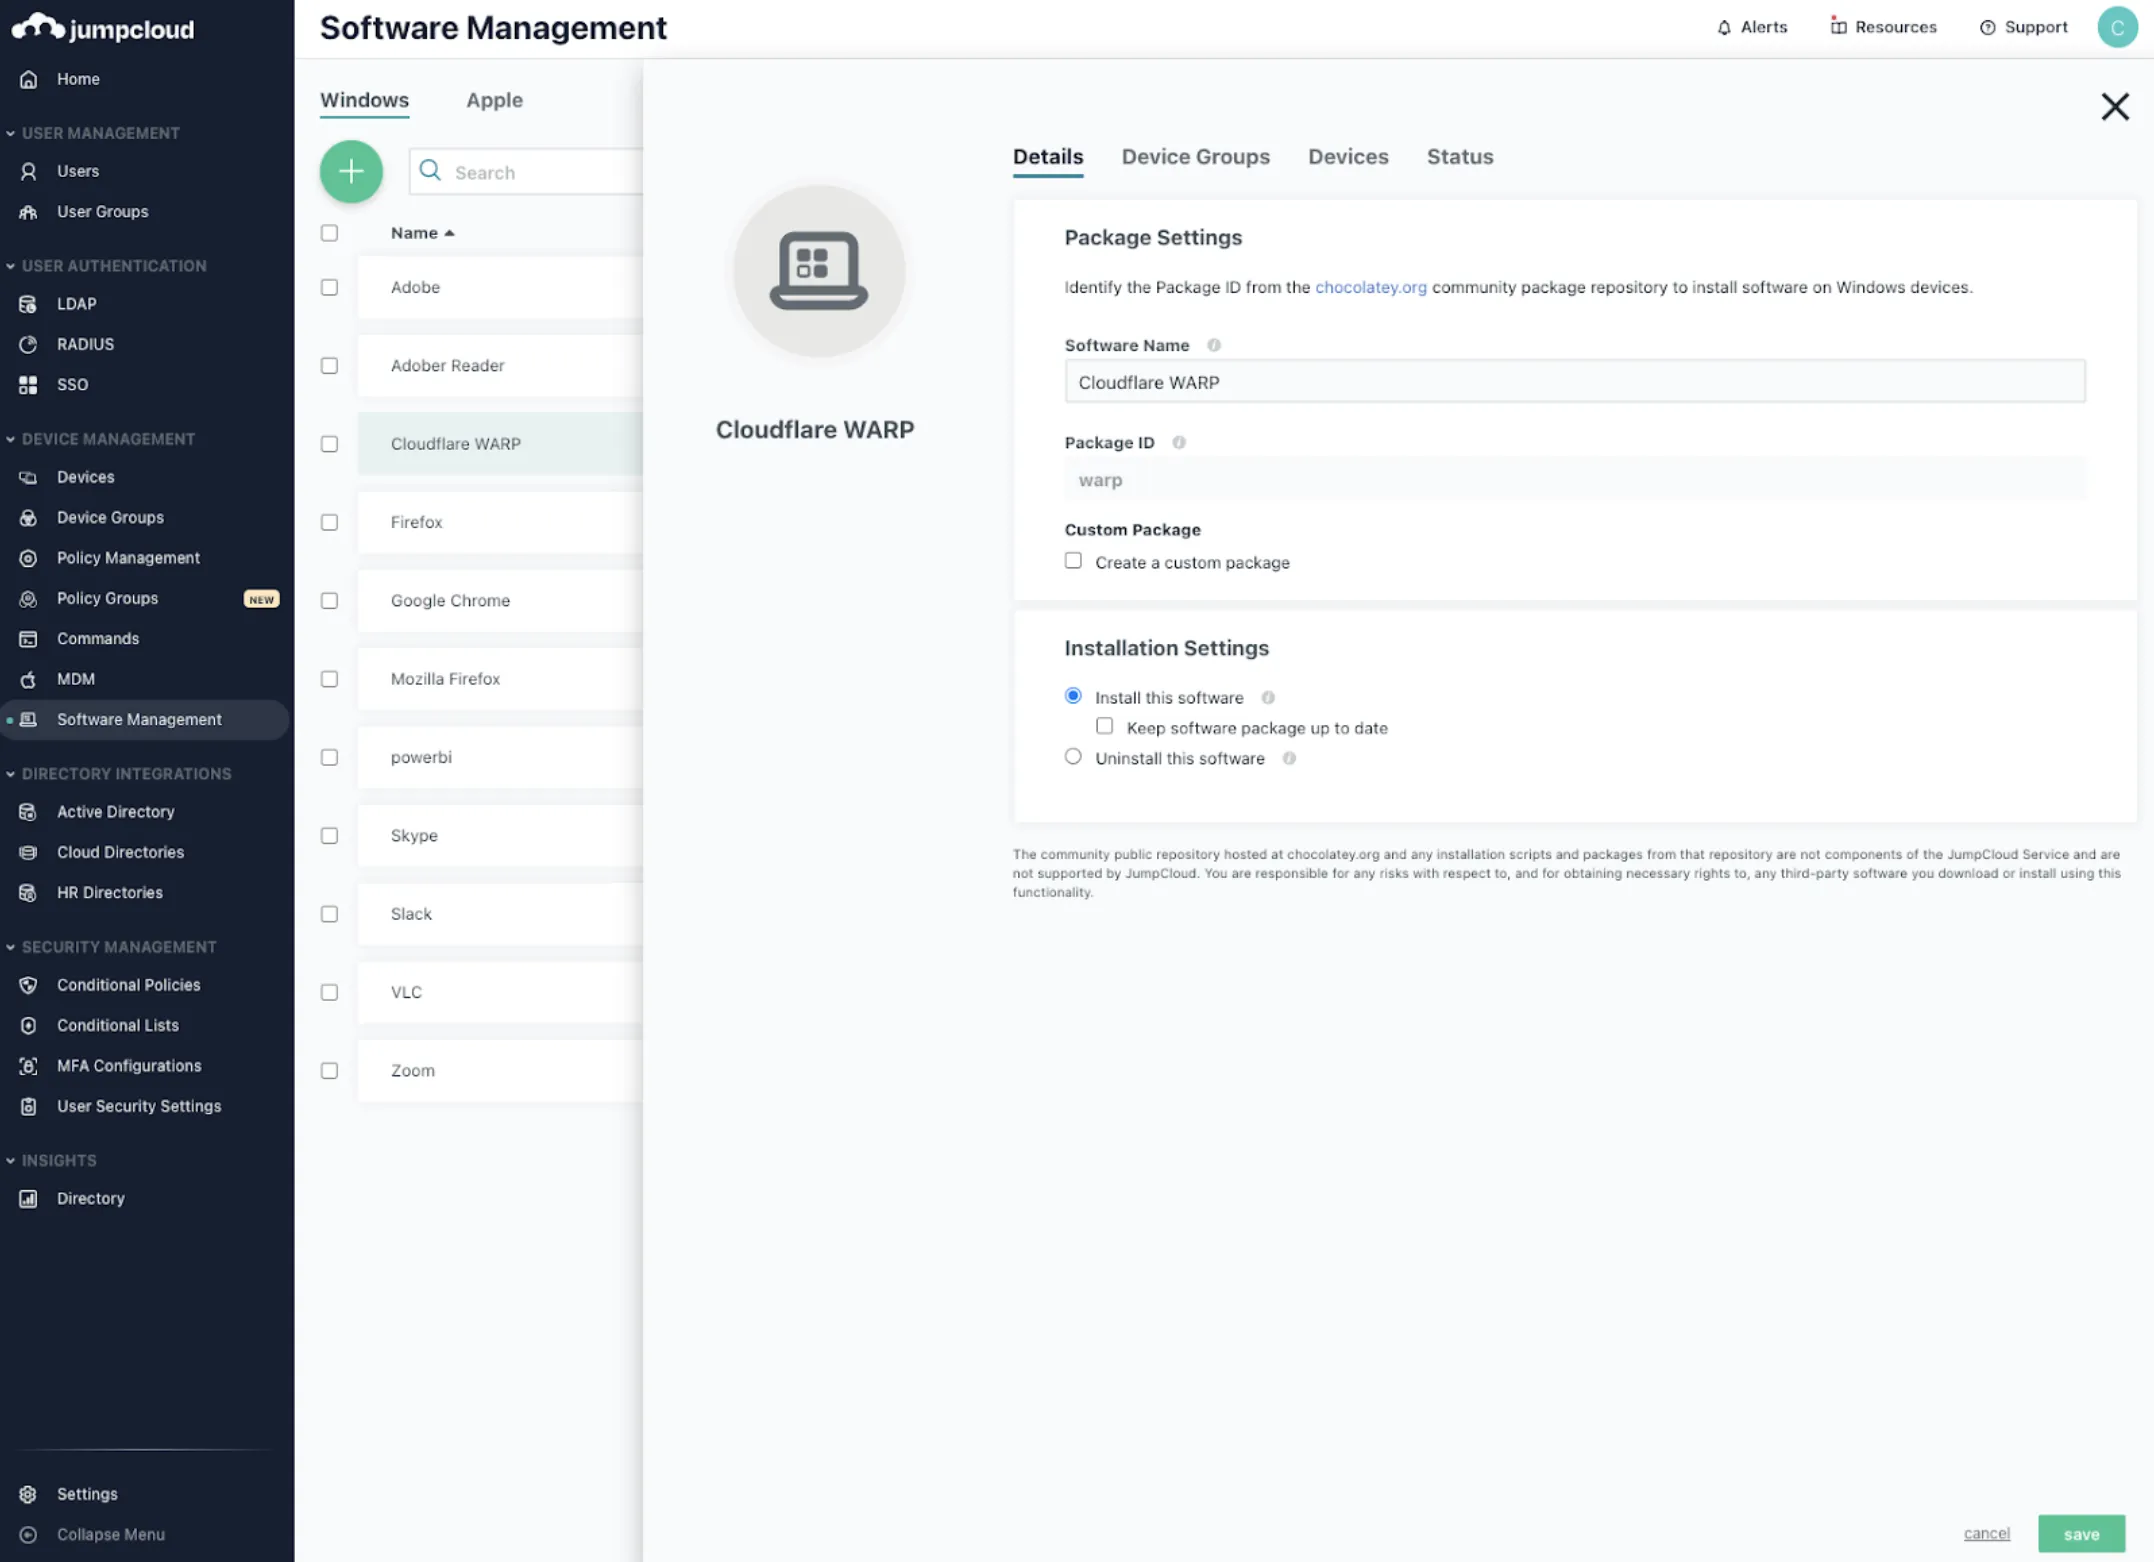
Note: Labels in this image may reflect a previous product name.
-
In the Software Name field, enter a unique display name.
-
In the Package ID field, enter
warp. -
Select Install this software.
-
(Optional) Select Keep software package up to date to automatically update this app as updates become available.
-
(Optional) Select Allow end users to delay updates for up to one week to avoid updates during a busy time.
-
Select save.
-
Select the device(s) you want to deploy the app to:
- Single device: Go to the Devices tab and select the target device.
- Device group: Go to the Device Groups tab and select the target device group.
-
Select save.
-
Select save again.
Verify that the Cloudflare One Client was installed by selecting the app and viewing the Status tab.
After deploying the Cloudflare One Client, you can check its connection progress using the Connectivity status messages displayed in the Cloudflare One Client GUI.
-
Log in to the JumpCloud Admin Portal ↗.
-
Go to Device Management > Software Management.
-
Select the Apple tab, then select (+).

Note: Labels in this image may reflect a previous product name.
-
In the Software Description field, enter a unique display name.
-
In the Software Package URL, enter the URL location of the
Cloudflare_WARP_<VERSION>.pkgfile. If you do not already have the installer package, download it here. -
Select the device(s) you want to deploy the app to:
- Single device: Go to the Devices tab and select the target device. To select all devices, select the checkbox next to Type.
- Device group: Go to the Device Groups tab and select the target device group. To select all device groups, select the checkbox next to Type.
-
Select save to install the client.
Verify that the Cloudflare One Client was installed by selecting the app and viewing the Status tab.
After deploying the Cloudflare One Client, you can check its connection progress using the Connectivity status messages displayed in the Cloudflare One Client GUI.