Cloudflare Tunnel
Cloudflare Tunnel provides you with a secure way to connect your resources to Cloudflare without a publicly routable IP address. With Tunnel, you do not send traffic to an external IP — instead, a lightweight daemon in your infrastructure (cloudflared) creates outbound-only connections to Cloudflare's global network. Cloudflare Tunnel can connect HTTP web servers, SSH servers, remote desktops, and other protocols safely to Cloudflare. This way, your origins can serve traffic through Cloudflare without being vulnerable to attacks that bypass Cloudflare.
Refer to our reference architecture for details on how to implement Cloudflare Tunnel into your existing infrastructure.
cloudflared establishes outbound connections (tunnels) between your resources and Cloudflare's global network. A tunnel is a persistent object identified by a UUID — it serves as the logical link between your origin and Cloudflare. Within the same tunnel, you can run as many cloudflared processes (connectors) as needed. Each connector sends traffic to the nearest Cloudflare data center.
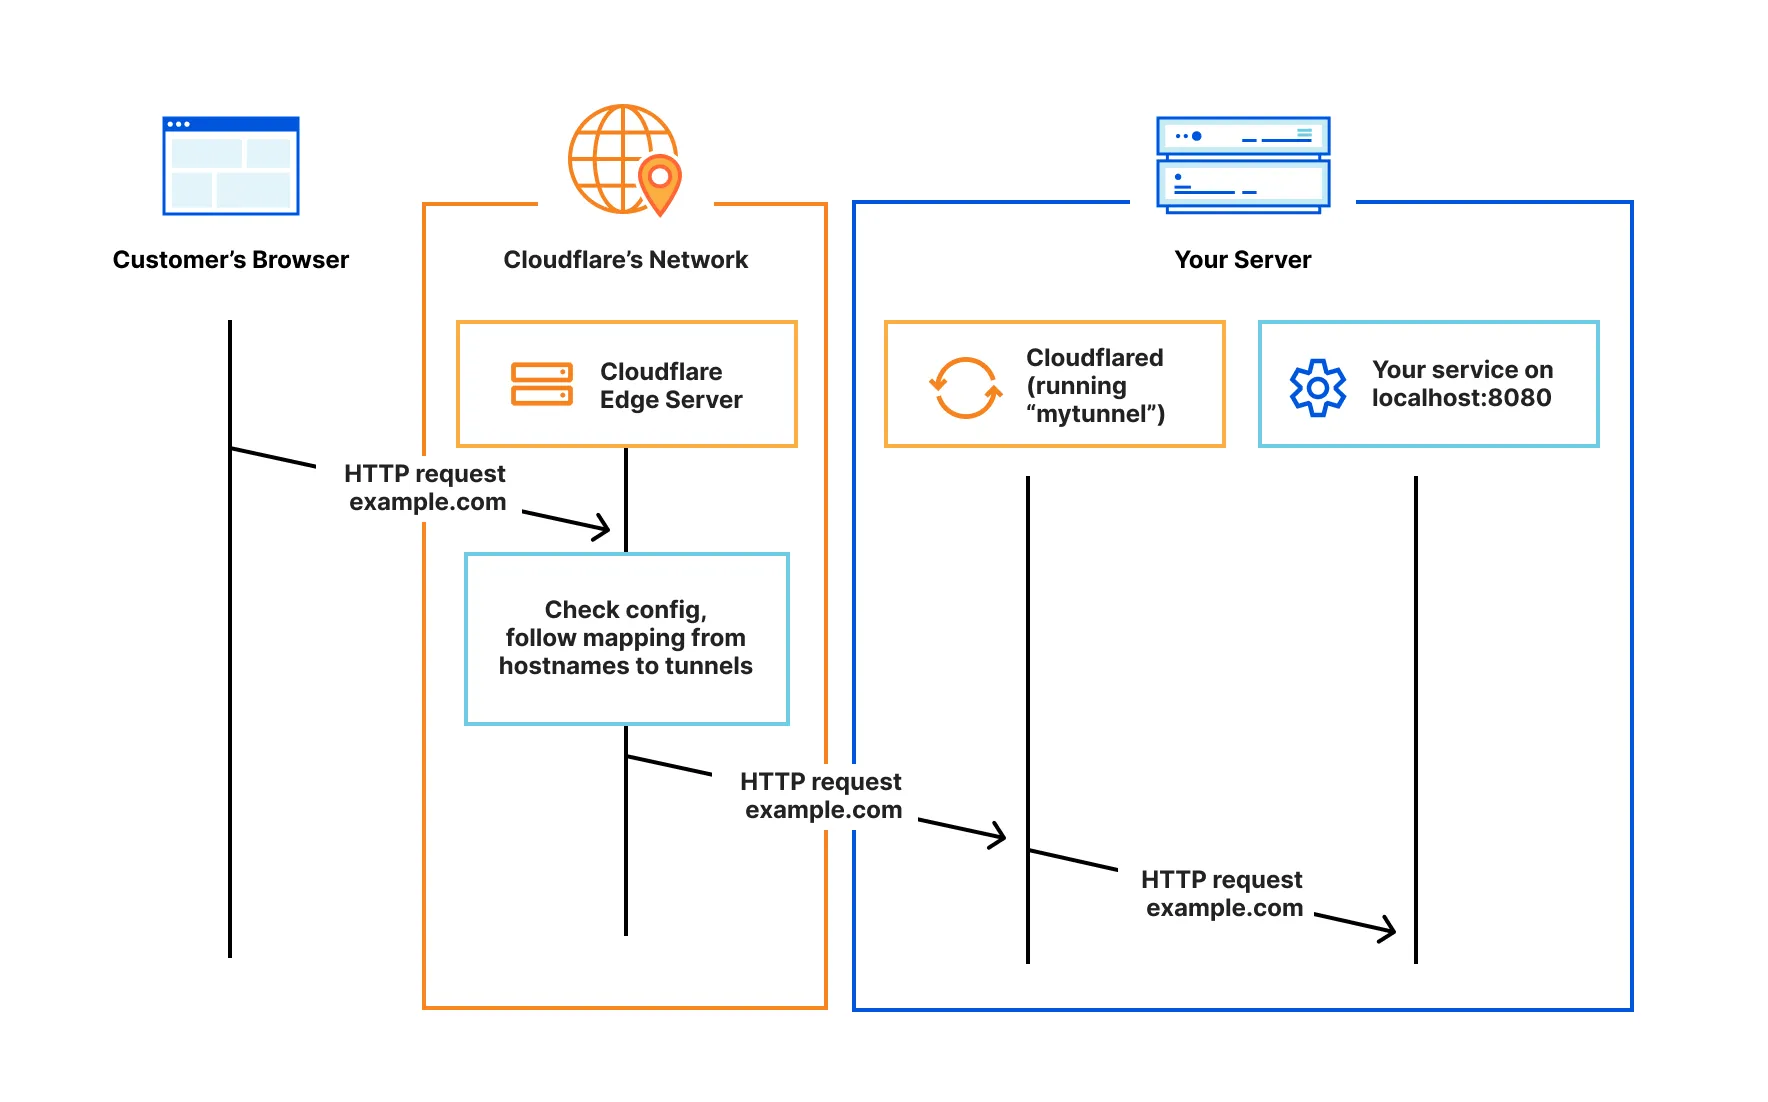
Cloudflare Tunnel uses an outbound-only connection model to enable bidirectional communication. When you install and run cloudflared, cloudflared initiates an outbound connection through your firewall from the origin to the Cloudflare global network.
Once the connection is established, traffic flows in both directions over the tunnel between your origin and Cloudflare. Most firewalls allow outbound traffic by default. cloudflared takes advantage of this standard by connecting out to the Cloudflare network from the server you installed cloudflared on. You can then configure your firewall to allow only these outbound connections and block all inbound traffic, effectively blocking access to your origin from anything other than Cloudflare. This setup ensures that all traffic to your origin is securely routed through the tunnel.
- Create a tunnel using the Cloudflare dashboard or API.
- Download
cloudflared, the server-side daemon that connects your infrastructure to Cloudflare. - Review useful Tunnel terms to familiarize yourself with the concepts used in Tunnel documentation.