CORS
Cross-Origin Resource Sharing (CORS ↗) is a mechanism that uses HTTP headers to grant a web application running on one origin permission to reach selected resources in a different origin. The web application executes a cross-origin HTTP request when it requests a resource that has a different origin from its own, including domain, protocol, or port.
For a CORS request to reach a site protected by Access, the request must include a valid CF-Authorization cookie. This may require additional configuration depending on the type of request:
-
Simple requests ↗ are sent directly to the origin, without triggering a preflight request. For configuration instructions, refer to Allow simple requests.
-
Preflighted requests ↗ cause the browser to send an OPTIONS request before sending the actual request. The OPTIONS request checks which methods and headers are allowed by the origin. For configuration instructions, refer to Allow preflighted requests.
If you make a simple CORS request to an Access-protected domain and have not yet logged in, the request will return a CORS error. There are two ways you can resolve this error:
- Option 1 — Log in and refresh the page.
- Option 2 — Create a Cloudflare Worker which automatically sends an authentication token. This method only works if both sites involved in the CORS exchange are behind Access.
- Visit the target domain in your browser. You will see the Access login page.
- Log in to the target domain. This generates a
CF-Authorizationcookie. - Refresh the page that made the CORS request. The refresh resends the request with the newly generated cookie.
If you make a preflighted cross-origin request to an Access-protected domain, the OPTIONS request will return a 403 error. This error occurs regardless of whether you have logged in to the domain. This is because the browser never includes cookies with OPTIONS requests, by design. Cloudflare will therefore block the preflight request, causing the CORS exchange to fail.
There are three ways you can resolve this error:
- Option 1 — Bypass OPTIONS requests to origin.
- Option 2 — Configure Cloudflare to respond to the OPTIONS request.
- Option 3 — Create a Cloudflare Worker which automatically sends an authentication token. This method only works if both sites involved in the CORS exchange are behind Access.
You can configure Cloudflare to send OPTIONS requests directly to your origin server. To bypass Access for OPTIONS requests:
- In Zero Trust ↗, go to Access > Applications.
- Locate the origin that will be receiving OPTIONS requests and select Configure.
- Go to Advanced settings > Cross-Origin Resource Sharing (CORS) settings.
- Turn on Bypass options requests to origin. This will remove all existing CORS settings for this application.
It is still important to enforce CORS for the Access JWT -- this option should only be used if you have CORS enforcement established in your origin server.
You can configure Cloudflare to respond to the OPTIONS request on your behalf. The OPTIONS request never reaches your origin. After the preflight exchange resolves, the browser will then send the main request which does include the authentication cookie (assuming you have logged into the Access-protected domain).
To configure how Cloudflare responds to preflight requests:
-
In Zero Trust ↗, go to Access > Applications.
-
Locate the origin that will be receiving OPTIONS requests and select Configure.
-
Go to Advanced settings > Cross-Origin Resource Sharing (CORS) settings.
-
Configure these CORS settings ↗ to match the response headers sent by your origin.
For example, if you have configured
api.mysite.comto return the following headers:headers: {'Access-Control-Allow-Origin': 'https://example.com','Access-Control-Allow-Credentials' : true,'Access-Control-Allow-Methods': 'GET, OPTIONS','Access-Control-Allow-Headers': 'office','Content-Type': 'application/json',}then go to
api.mysite.comin Access and configure Access-Control-Allow-Origin, Access-Control-Allow-Credentials, Access-Control-Allow-Methods, and Access-Control-Allow-Headers.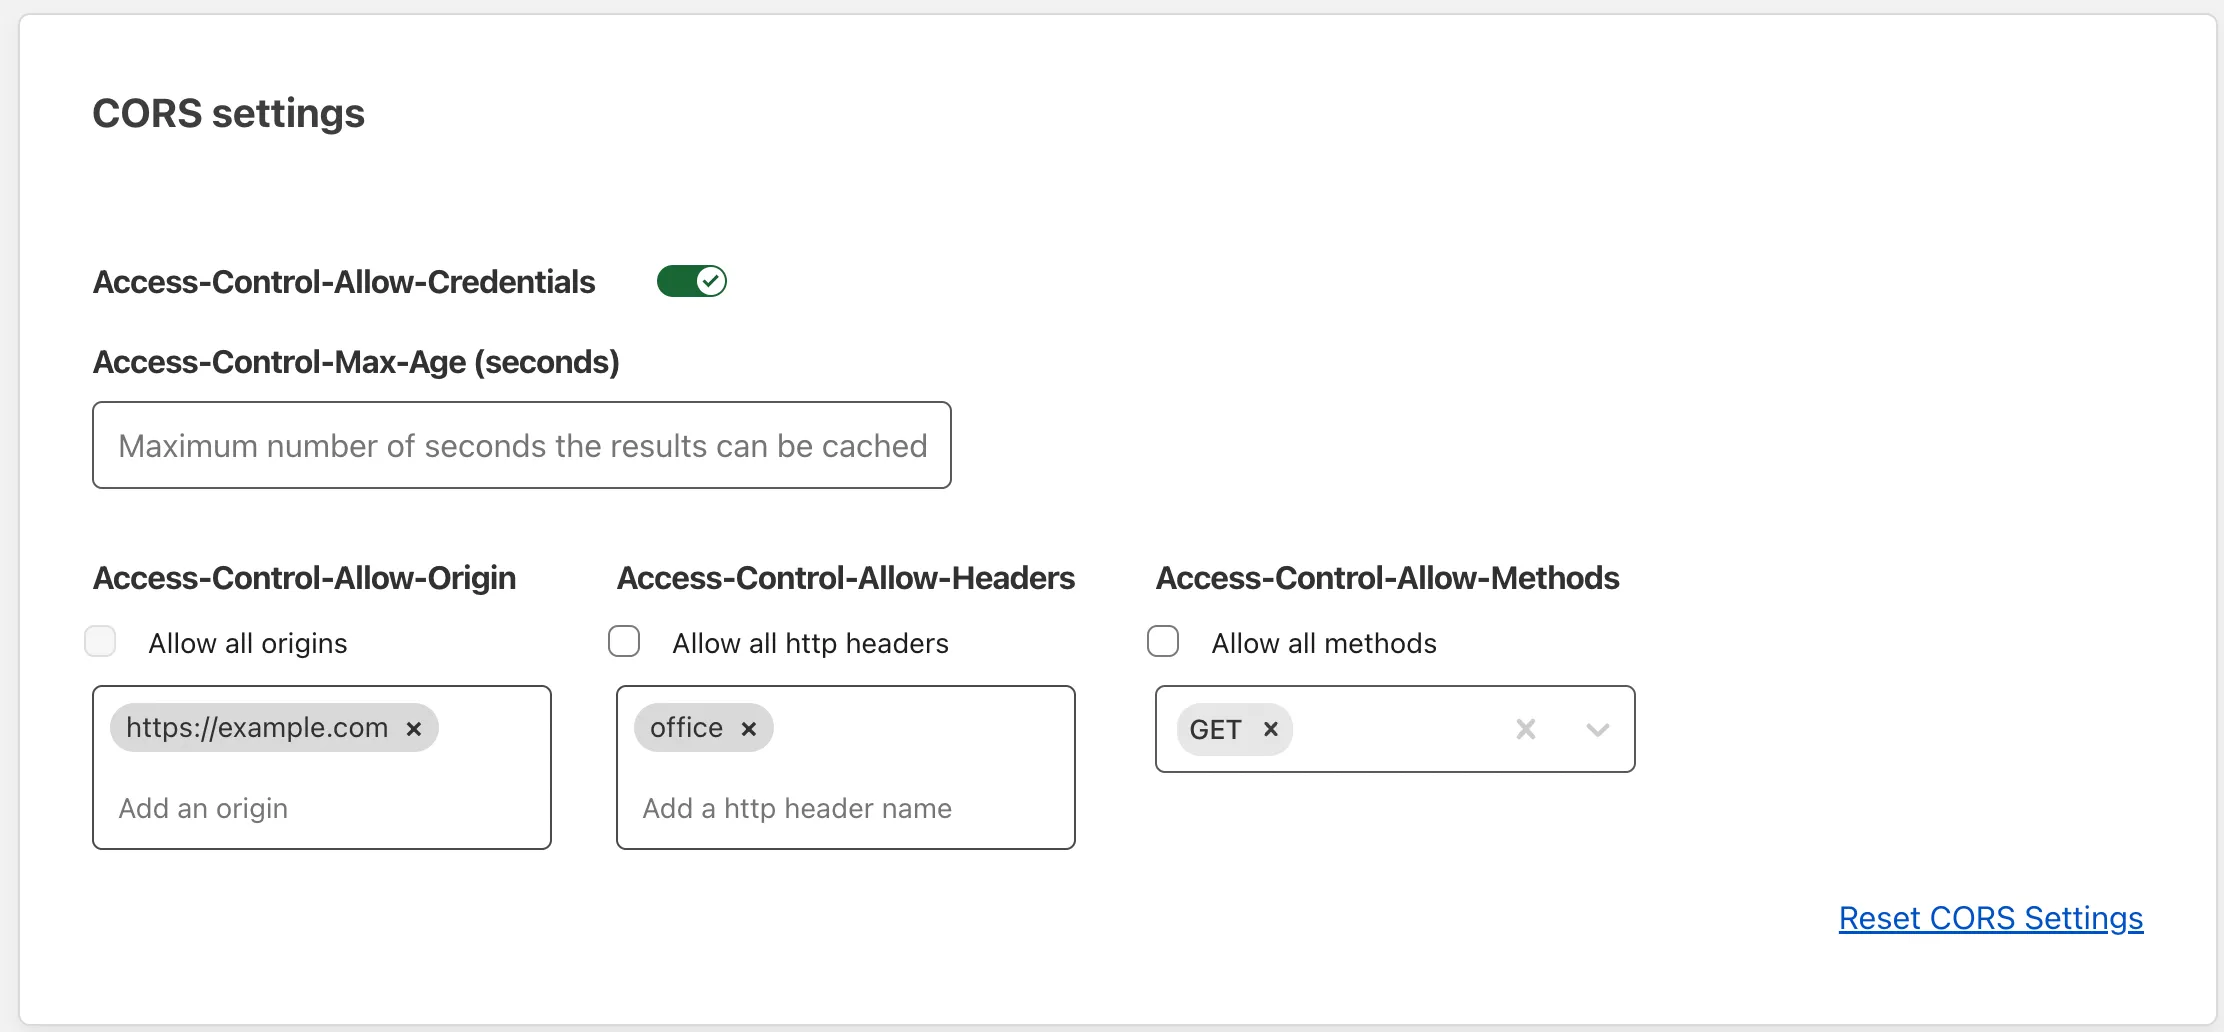
-
Select Save application.
-
(Optional) You can check your configuration by sending an OPTIONS request to the origin with
curl. For example,Terminal window curl --head --request OPTIONS https://api.mysite.com \--header 'origin: https://example.com' \--header 'access-control-request-method: GET'should return a response similar to:
HTTP/2 200date: Tue, 24 May 2022 21:51:21 GMTvary: Origin, Access-Control-Request-Method, Access-Control-Request-Headersaccess-control-allow-origin: https://example.comaccess-control-allow-methods: GETaccess-control-allow-credentials: trueexpect-ct: max-age=604800, report-uri="https://report-uri.cloudflare.com/cdn-cgi/beacon/expect-ct"report-to: {"endpoints":[{"url":"https:\/\/a.nel.cloudflare.com\/report\/v3?s=A%2FbOOWJio%2B%2FjuJv5NC%2FE3%2Bo1zBl2UdjzJssw8gJLC4lE1lzIUPQKqJoLRTaVtFd21JK1d4g%2BnlEGNpx0mGtsR6jerNfr2H5mlQdO6u2RdOaJ6n%2F%2BS%2BF9%2Fa12UromVLcHsSA5Y%2Fj72tM%3D"}],"group":"cf-nel","max_age":604800}nel: {"success_fraction":0.01,"report_to":"cf-nel","max_age":604800}server: cloudflarecf-ray: 7109408e6b84efe4-EWR
If you have two sites protected by Cloudflare Access, example.com and api.mysite.com, requests made between the two will be subject to CORS checks. Users who log in to example.com will be issued a cookie for example.com. When the user's browser requests api.mysite.com, Cloudflare Access looks for a cookie specific to api.mysite.com. The request will fail if the user has not already logged in to api.mysite.com.
To avoid having to log in twice, you can create a Cloudflare Worker that automatically sends authentication credentials to api.mysite.com.
- Workers account
wranglerinstallationexample.comandapi.mysite.comdomains protected by Access
Follow these instructions to generate a new Access service token. Copy the Client ID and Client Secret to a safe place, as you will use them in a later step.
-
In Zero Trust ↗, go to Access > Applications.
-
Find your
api.mysite.comapplication and select Edit. -
Select the Policies tab.
-
Add the following policy:
Action Rule type Selector Service Auth Include Service Token
Open a terminal and run the following command:
npm create cloudflare@latest -- authentication-workeryarn create cloudflare authentication-workerpnpm create cloudflare@latest authentication-workerThis will prompt you to install the create-cloudflare ↗ package and lead you through setup.
For setup, select the following options:
- For What would you like to start with?, choose
Hello World example. - For Which template would you like to use?, choose
Worker only. - For Which language do you want to use?, choose
JavaScript. - For Do you want to use git for version control?, choose
Yes. - For Do you want to deploy your application?, choose
No(we will be making some changes before deploying).
Go to your project directory.
cd authentication-workerOpen /src/index.js and delete the existing code and paste in the following example:
// The hostname where your API livesconst originalAPIHostname = "api.mysite.com";
export default {  async fetch(request, env) {    // Change just the host. If the request comes in on example.com/api/name, the new URL is api.mysite.com/api/name    const url = new URL(request.url);    url.hostname = originalAPIHostname;
    // If your API is located on api.mysite.com/anyname (without "api/" in the path),    // remove the "api/" part of example.com/api/name
    // url.pathname = url.pathname.substring(4)
    // Best practice is to always use the original request to construct the new request    // to clone all the attributes. Applying the URL also requires a constructor    // since once a Request has been constructed, its URL is immutable.    const newRequest = new Request(url.toString(), request);
    newRequest.headers.set("cf-access-client-id", env.CF_ACCESS_CLIENT_ID);    newRequest.headers.set("cf-access-client-secret", env.CF_ACCESS_CLIENT_SECRET);    try {      const response = await fetch(newRequest);
      // Copy over the response      const modifiedResponse = new Response(response.body, response);
      // Delete the set-cookie from the response so it doesn't override existing cookies      modifiedResponse.headers.delete("set-cookie");
      return modifiedResponse;    } catch (e) {      return new Response(JSON.stringify({ error: e.message }), {        status: 500,      });    }  },};
Then, deploy the Worker to your Cloudflare account:
npx wrangler deploy-
In the Cloudflare dashboard ↗, go to the Workers & Pages page.
Go to Workers & Pages -
Select your newly created Worker.
-
In the Triggers tab, go to Routes and add
example.com/api/*. The Worker is placed on a subpath ofexample.comto avoid making a cross-origin request. -
In the Settings tab, select Variables.
-
Under Environment Variables, add the following secret variables:
CF_ACCESS_CLIENT_ID=<service token Client ID>CF_ACCESS_CLIENT_SECRET=<service token Client Secret>
The Client ID and Client Secret are copied from your service token.
- Enable the Encrypt option for each variable and select Save.
Modify your example.com application to send all requests to example.com/api/ instead of api.mysite.com.
HTTP requests should now work seamlessly between two different Access-protected domains. When a user logs in to example.com, the browser makes a request to the Worker instead of to api.mysite.com. The Worker adds the Access service token to the request headers and then forwards the request to api.mysite.com. Since the service token matches a Service Auth policy, the user no longer needs to log in to api.mysite.com.
In general, we recommend the following steps when troubleshooting CORS issues:
- Capture a HAR file with the issue described, as well as the JS console log output recorded simultaneously. This is because the HAR file alone will not give full visibility on the reason behind cross-origin issues.
- Ensure that the application has set
credentials: 'same-origin'in all fetch or XHR requests. - If you are using the cross-origin setting ↗ on script tags, these must be set to "use-credentials".
Was this helpful?
- Resources
- API
- New to Cloudflare?
- Directory
- Sponsorships
- Open Source
- Support
- Help Center
- System Status
- Compliance
- GDPR
- Company
- cloudflare.com
- Our team
- Careers
- © 2025 Cloudflare, Inc.
- Privacy Policy
- Terms of Use
- Report Security Issues
- Trademark
-
