You can use Cloudflare Access to add Zero Trust rules to a self-hosted instance of GitLab. Combined with Cloudflare Tunnel, users can connect through HTTP and SSH and authenticate with your team's identity provider.
This walkthrough covers how to:
- Deploy an instance of GitLab
- Lock down all inbound connections to that instance and use Cloudflare Tunnel to set outbound connections to Cloudflare
- Build policies with Cloudflare Access to control who can reach GitLab
- Connect over HTTP and SSH through Cloudflare
Time to complete:
1 hour
This section walks through deploying GitLab in DigitalOcean. If you have already deployed GitLab, you can skip this section.
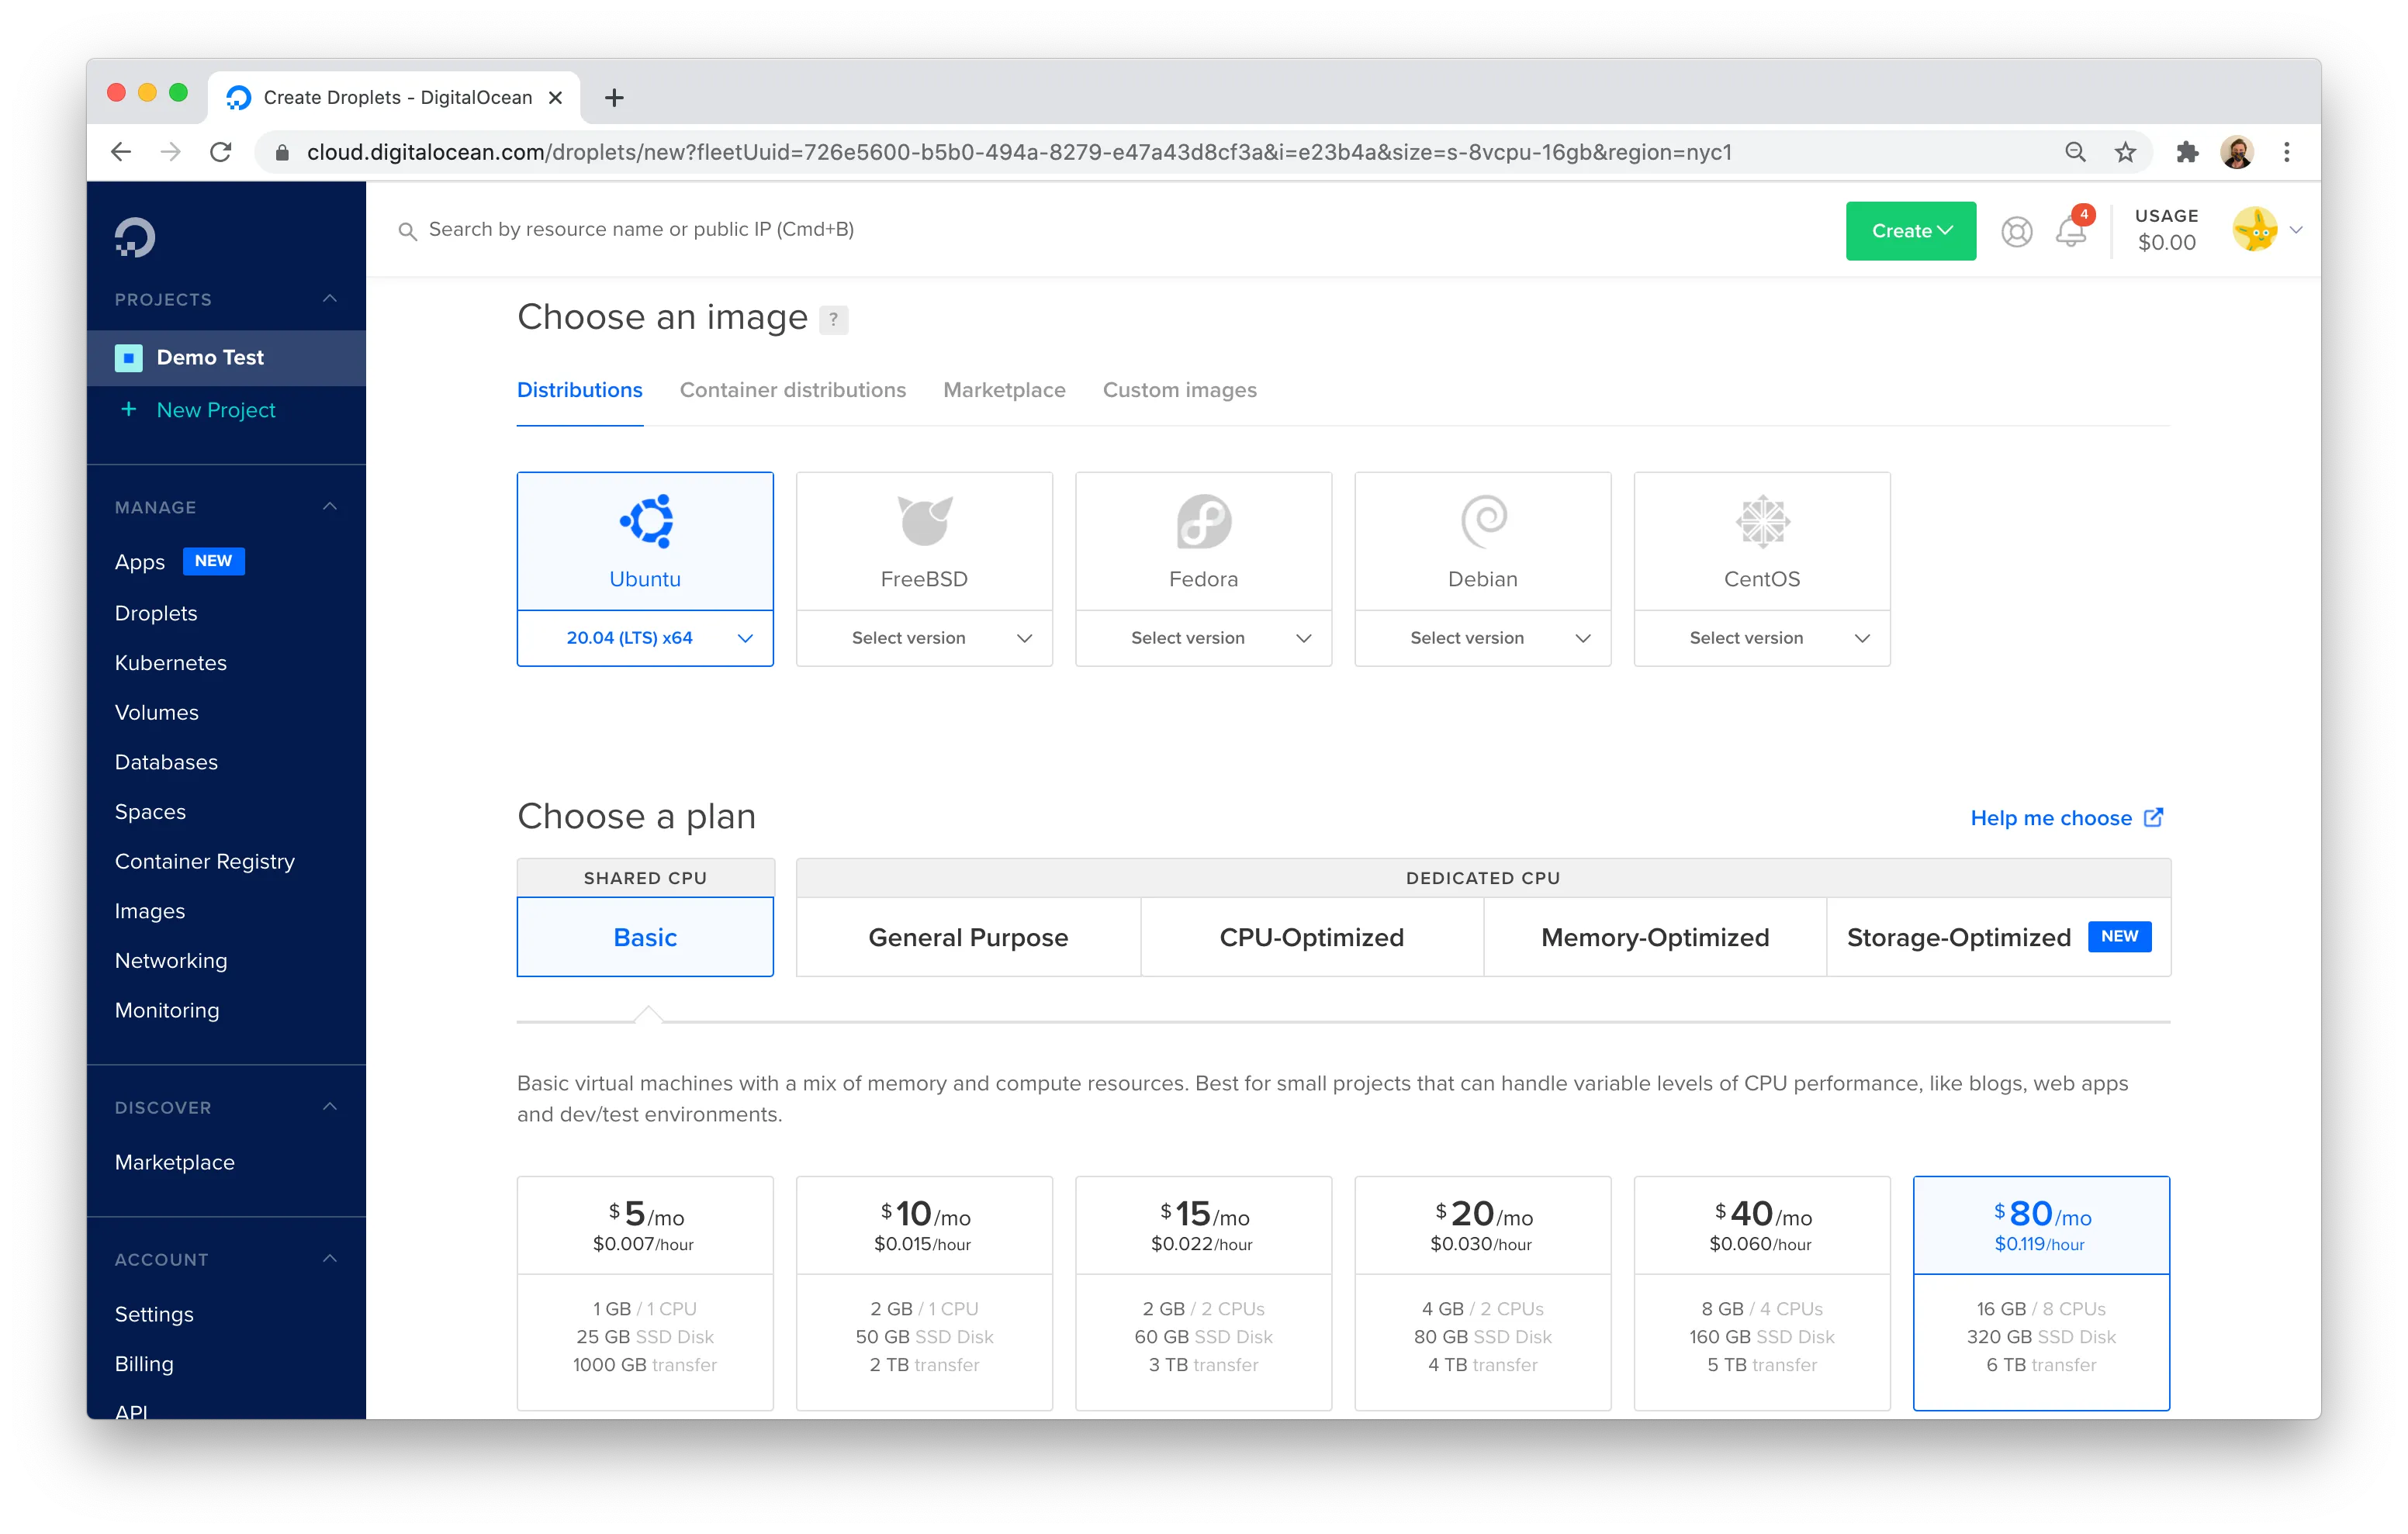
Create a Droplet that has 16 GB of RAM and 6 CPUs. This should make it possible to support 500 users, based on GitLab's resource recommendations ↗.
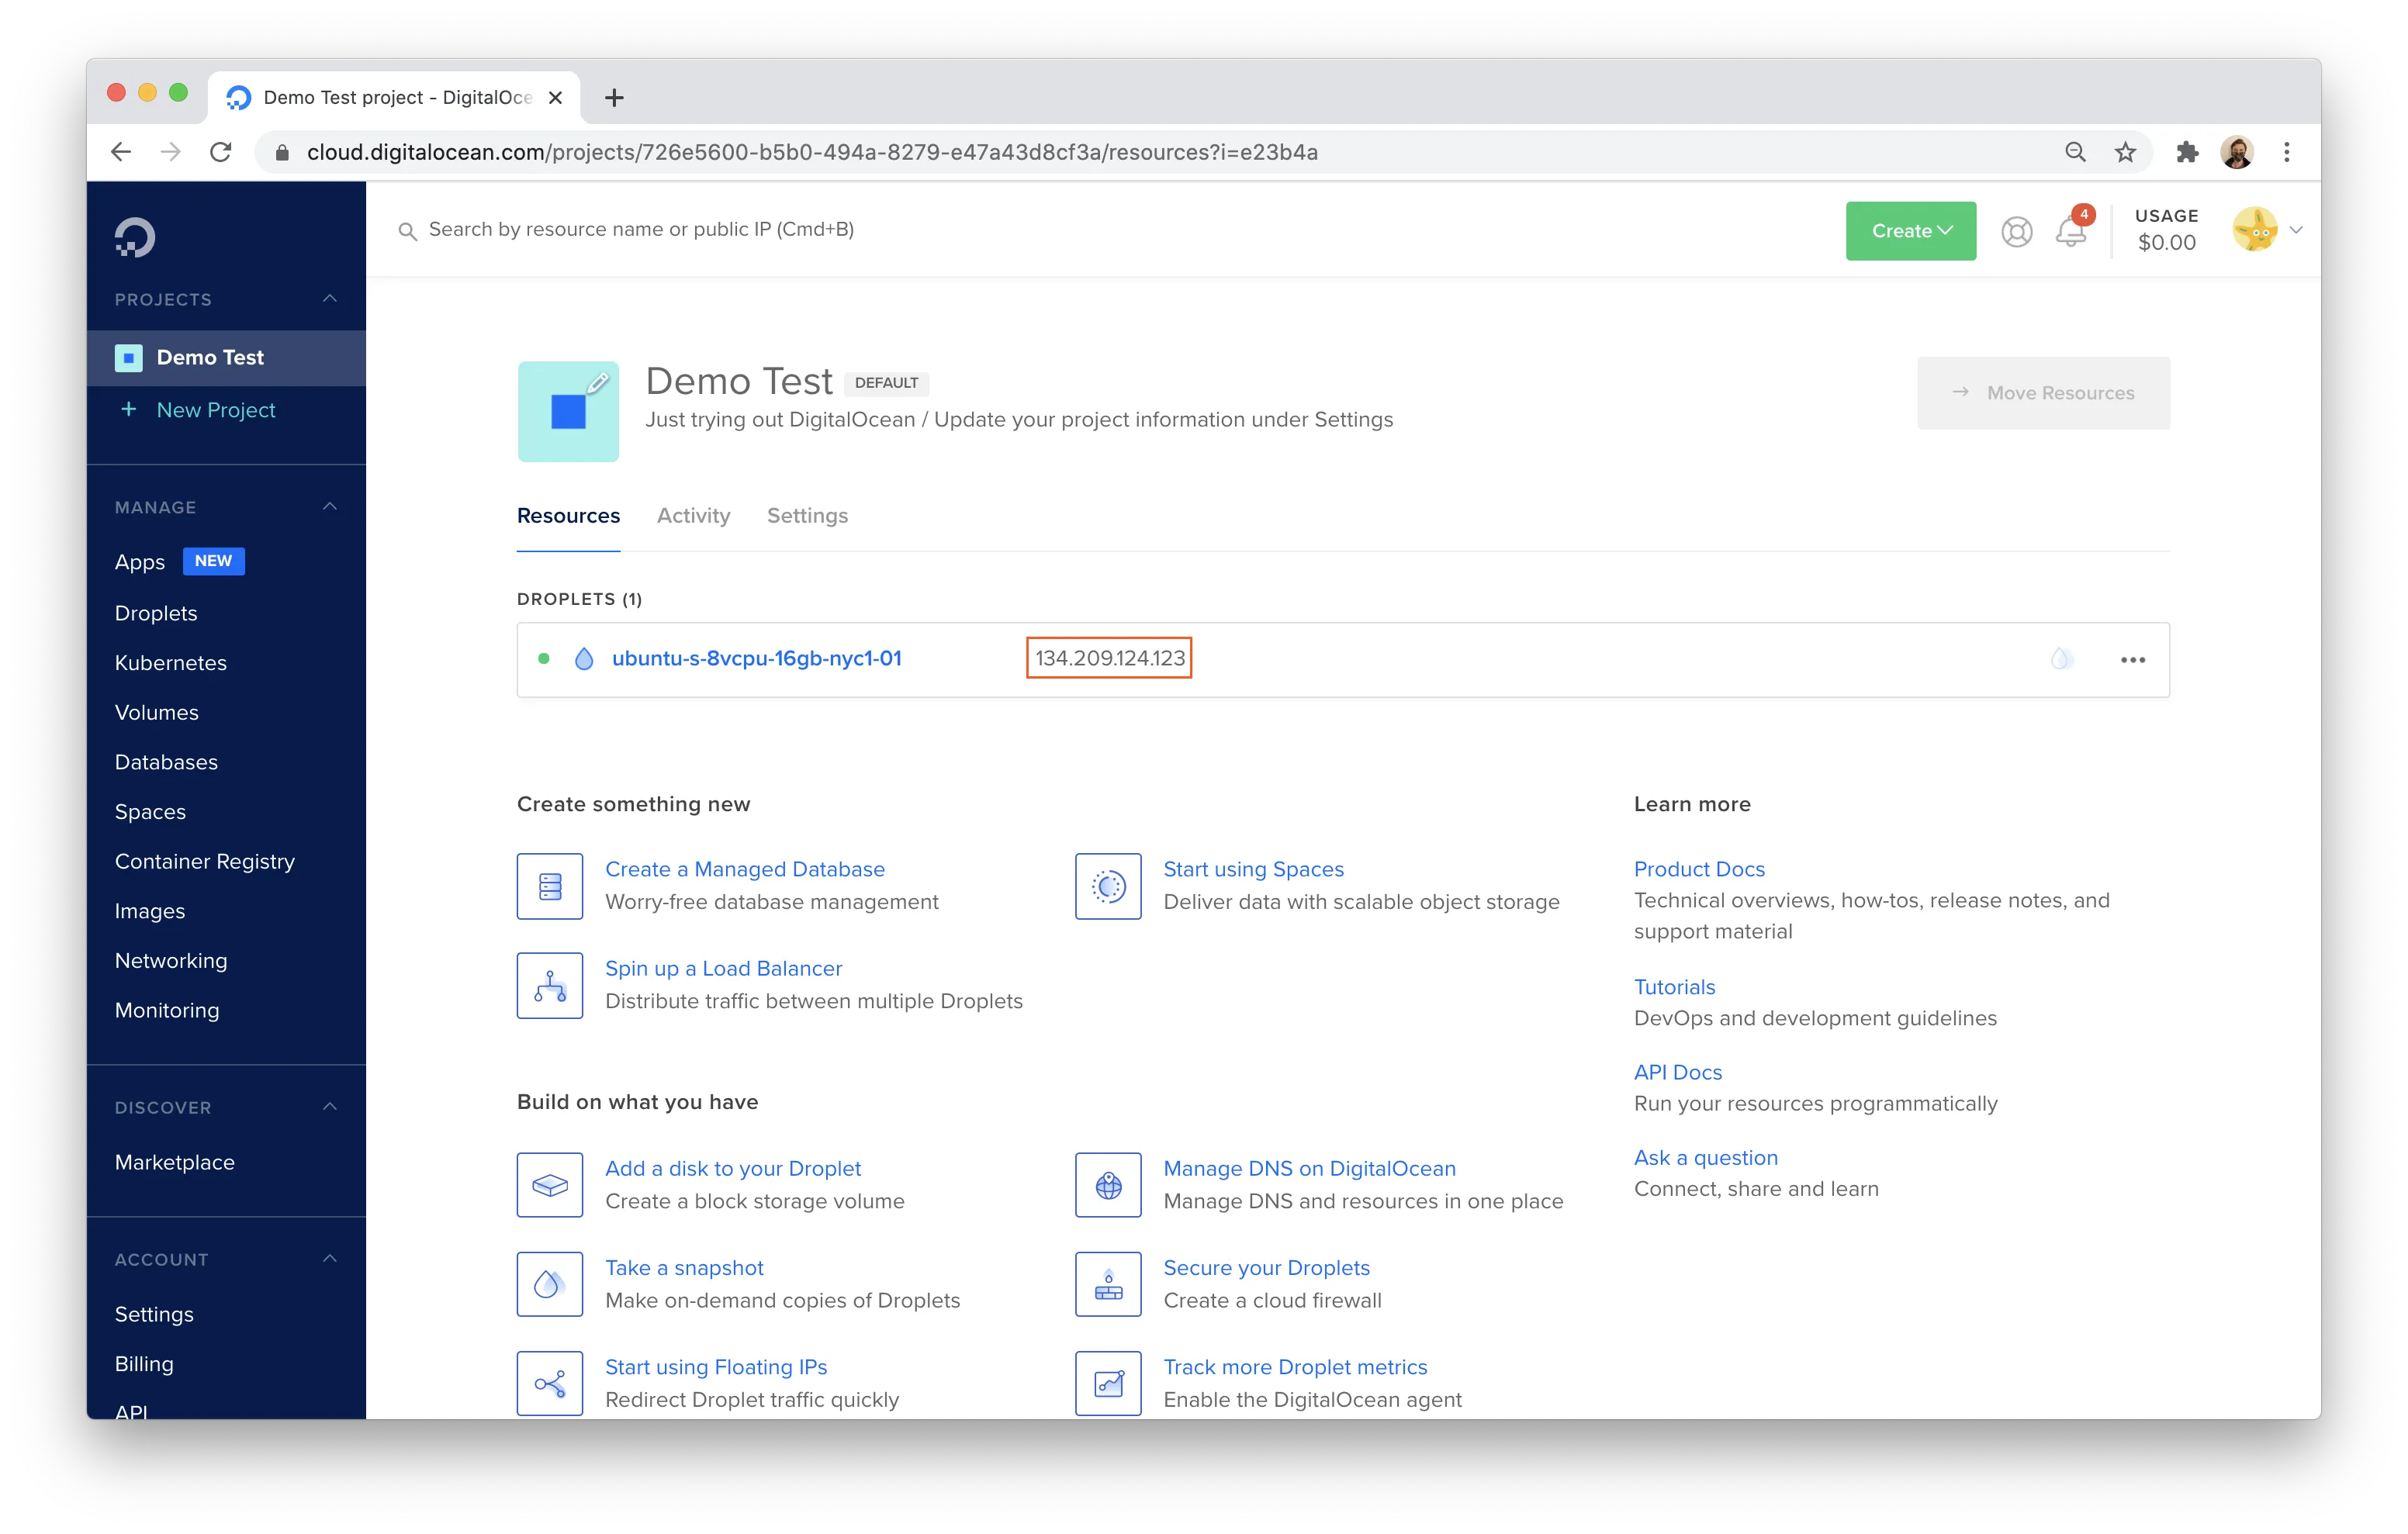
GitLab will provide an external IP that is exposed to the Internet (for now). You will need to connect to the deployed server using this external IP for the initial configuration. You can secure connections to the IP by adding SSH keys ↗ to your DigitalOcean account.
This example uses a macOS machine to configure the Droplet. Copy the IP address assigned to the machine from DigitalOcean.
Open Terminal and run the following command, replacing the IP address with the IP assigned by DigitalOcean.
ssh root@134.209.124.123Next, install GitLab. This example uses the Ubuntu package ↗ and the steps in the GitLab documentation, with a few exceptions called out below.
Run the following commands to begin.
sudo apt-get update

sudo apt-get install -y curl openssh-server ca-certificates
curl https://packages.gitlab.com/install/repositories/gitlab/gitlab-ee/script.deb.sh | sudo bash
The commands above download the GitLab software to this machine. You must now install it. This is the first place this tutorial will diverge from the operations in the GitLab documentation. The next step in the GitLab-provided tutorial sets an external hostname. Instead, you can just install the software.
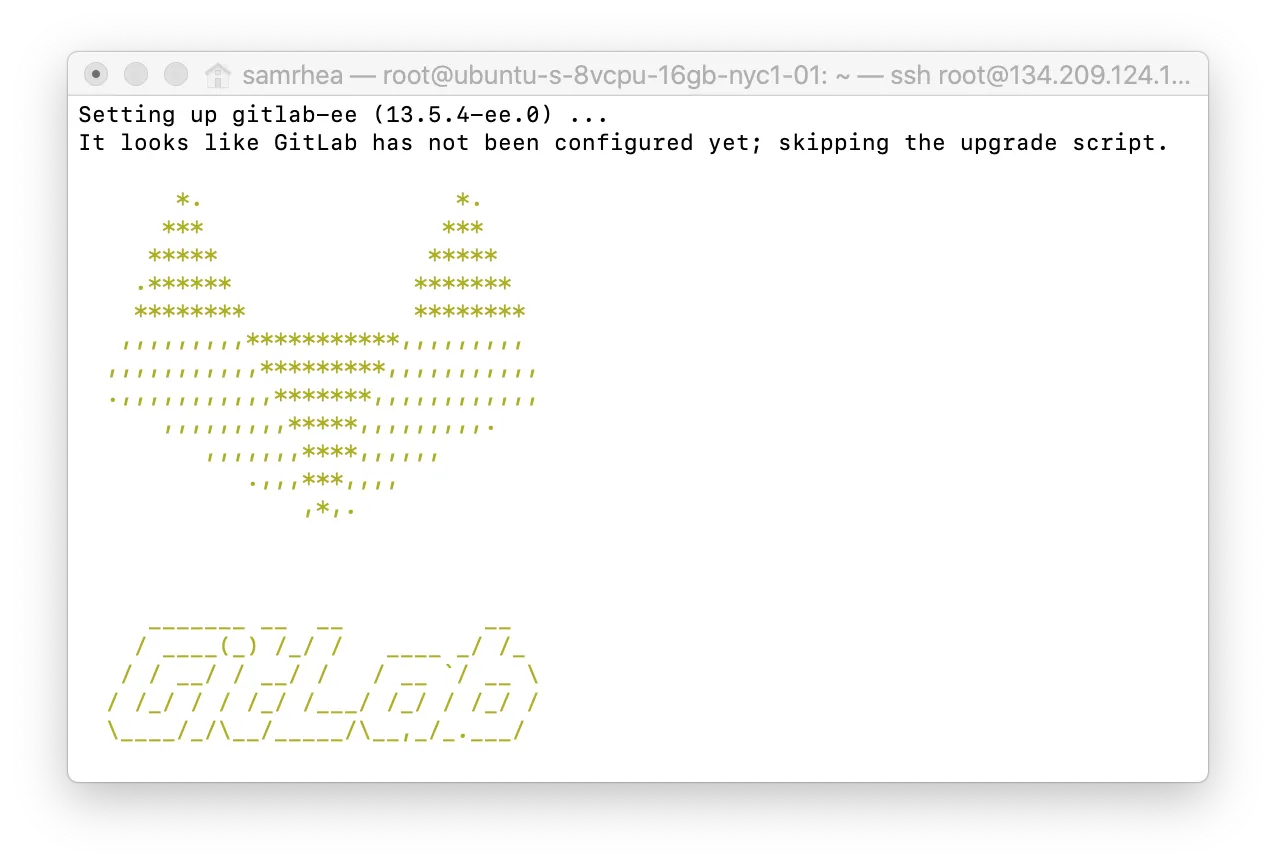
sudo apt-get install gitlab-eeAfter a minute or so, GitLab will be installed.
However, the application is not running yet. You can check to see what ports are listening to confirm by using ss.
sudo ss -lntupThe result should be only the services currently active on the machine:
sudo ss -lntupNetid State Recv-Q Send-Q Local Address:Port Peer Address:Port Process
udp UNCONN 0 0 *:9094 *:*
tcp LISTEN 0 128 0.0.0.0:22 0.0.0.0:* users:(("sshd",pid=29,fd=3))
tcp LISTEN 0 128 [::]:22 [::]:* users:(("sshd",pid=29,fd=4))To start GitLab, run the software's reconfigure command.
sudo gitlab-ctl reconfigureGitLab will launch its component services. Once complete, confirm that GitLab is running and listening on both ports 22 and 80.
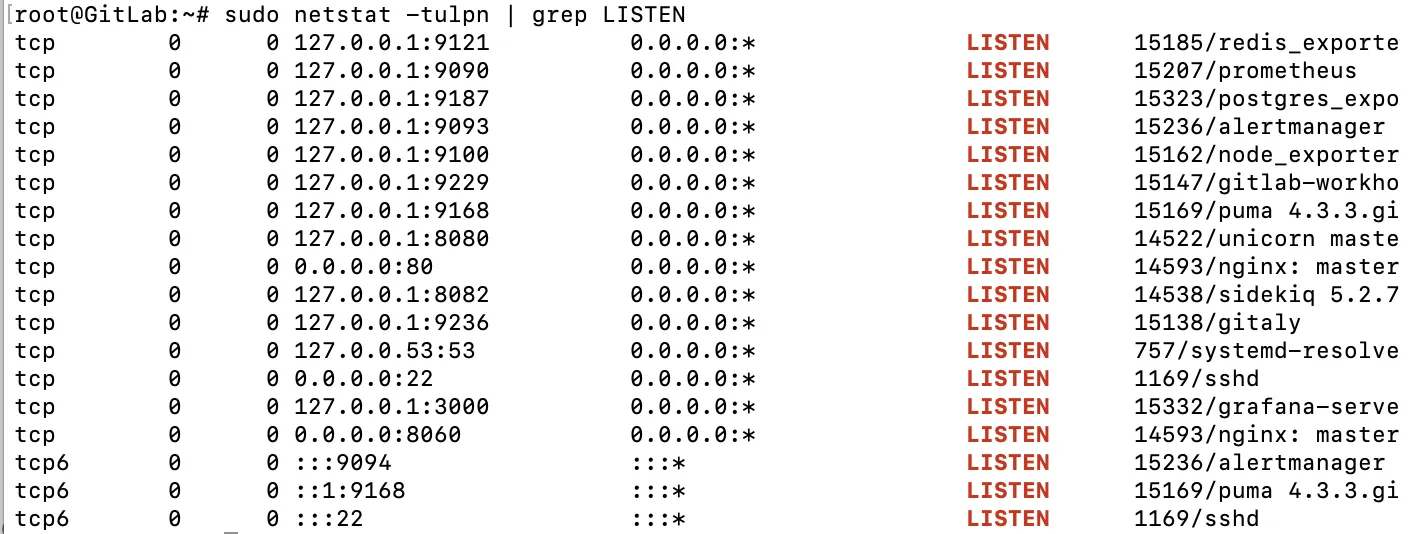
sudo ss -lntupNetid State Recv-Q Send-Q Local Address:Port Peer Address:Port Process
udp UNCONN 0 0 *:9094 *:*
tcp LISTEN 0 4096 127.0.0.1:9236 0.0.0.0:*
tcp LISTEN 0 4096 127.0.0.1:8150 0.0.0.0:*
tcp LISTEN 0 128 0.0.0.0:22 0.0.0.0:* users:(("sshd",pid=29,fd=3))
tcp LISTEN 0 4096 127.0.0.1:8151 0.0.0.0:*
tcp LISTEN 0 4096 127.0.0.1:3000 0.0.0.0:*
tcp LISTEN 0 4096 127.0.0.1:8153 0.0.0.0:*
tcp LISTEN 0 4096 127.0.0.1:8154 0.0.0.0:*
tcp LISTEN 0 4096 127.0.0.1:8155 0.0.0.0:*
tcp LISTEN 0 511 0.0.0.0:8060 0.0.0.0:* users:(("nginx",pid=324,fd=8))
tcp LISTEN 0 4096 127.0.0.1:9121 0.0.0.0:*
tcp LISTEN 0 4096 127.0.0.1:9090 0.0.0.0:*
tcp LISTEN 0 4096 127.0.0.1:9187 0.0.0.0:*
tcp LISTEN 0 4096 127.0.0.1:9093 0.0.0.0:*
tcp LISTEN 0 4096 127.0.0.1:9229 0.0.0.0:*
tcp LISTEN 0 1024 127.0.0.1:8080 0.0.0.0:*
tcp LISTEN 0 511 0.0.0.0:80 0.0.0.0:* users:(("nginx",pid=324,fd=7))
tcp LISTEN 0 4096 127.0.0.1:9168 0.0.0.0:*
tcp LISTEN 0 4096 127.0.0.1:8082 0.0.0.0:*
tcp LISTEN 0 128 [::]:22 [::]:* users:(("sshd",pid=29,fd=4))
tcp LISTEN 0 4096 *:9094 *:*Users connect to GitLab over SSH (port 22 here) and HTTP for the web app (port 80). In the next step, you will make it possible for users to try both through Cloudflare Access. I'll leave this running and head over to the Cloudflare dashboard.
You can use Cloudflare Access to build Zero Trust rules to determine who can connect to both the web application of GitLab (HTTP) and who can connect over SSH.
When a user makes a request to a site protected by Access, that request hits Cloudflare's network first. Access can then check if the user is allowed to reach the application. When integrated with Cloudflare Tunnel, the Zero Trust architecture looks like this:
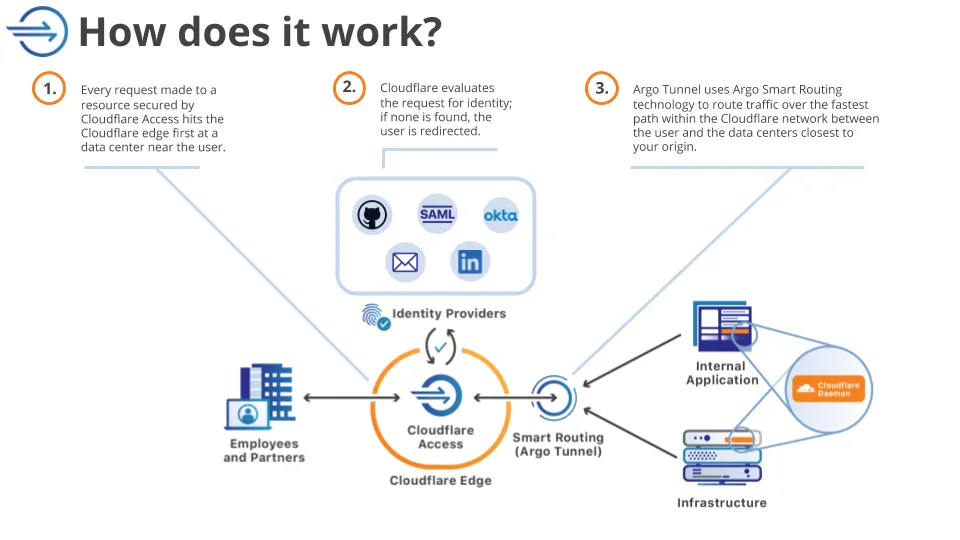
To determine who can reach the application, Cloudflare Access relies on integration with identity providers like Okta, Microsoft Entra ID, or Google to issue the identity cards that get checked at the door. While a VPN allows users free range on a private network unless someone builds an active rule to stop them, Access enforces that identity check on every request (and at any granularity configured).
For GitLab, start by building two policies. Users will connect to GitLab in a couple of methods: in the web app and over SSH. Create policies to secure a subdomain for each. First, the web app.
Before you build the rule, you'll need to follow these instructions to set up Cloudflare Access in your account.
Once enabled, go to the Applications page in Zero Trust. Select Create new application.
Select Self-hosted and private.
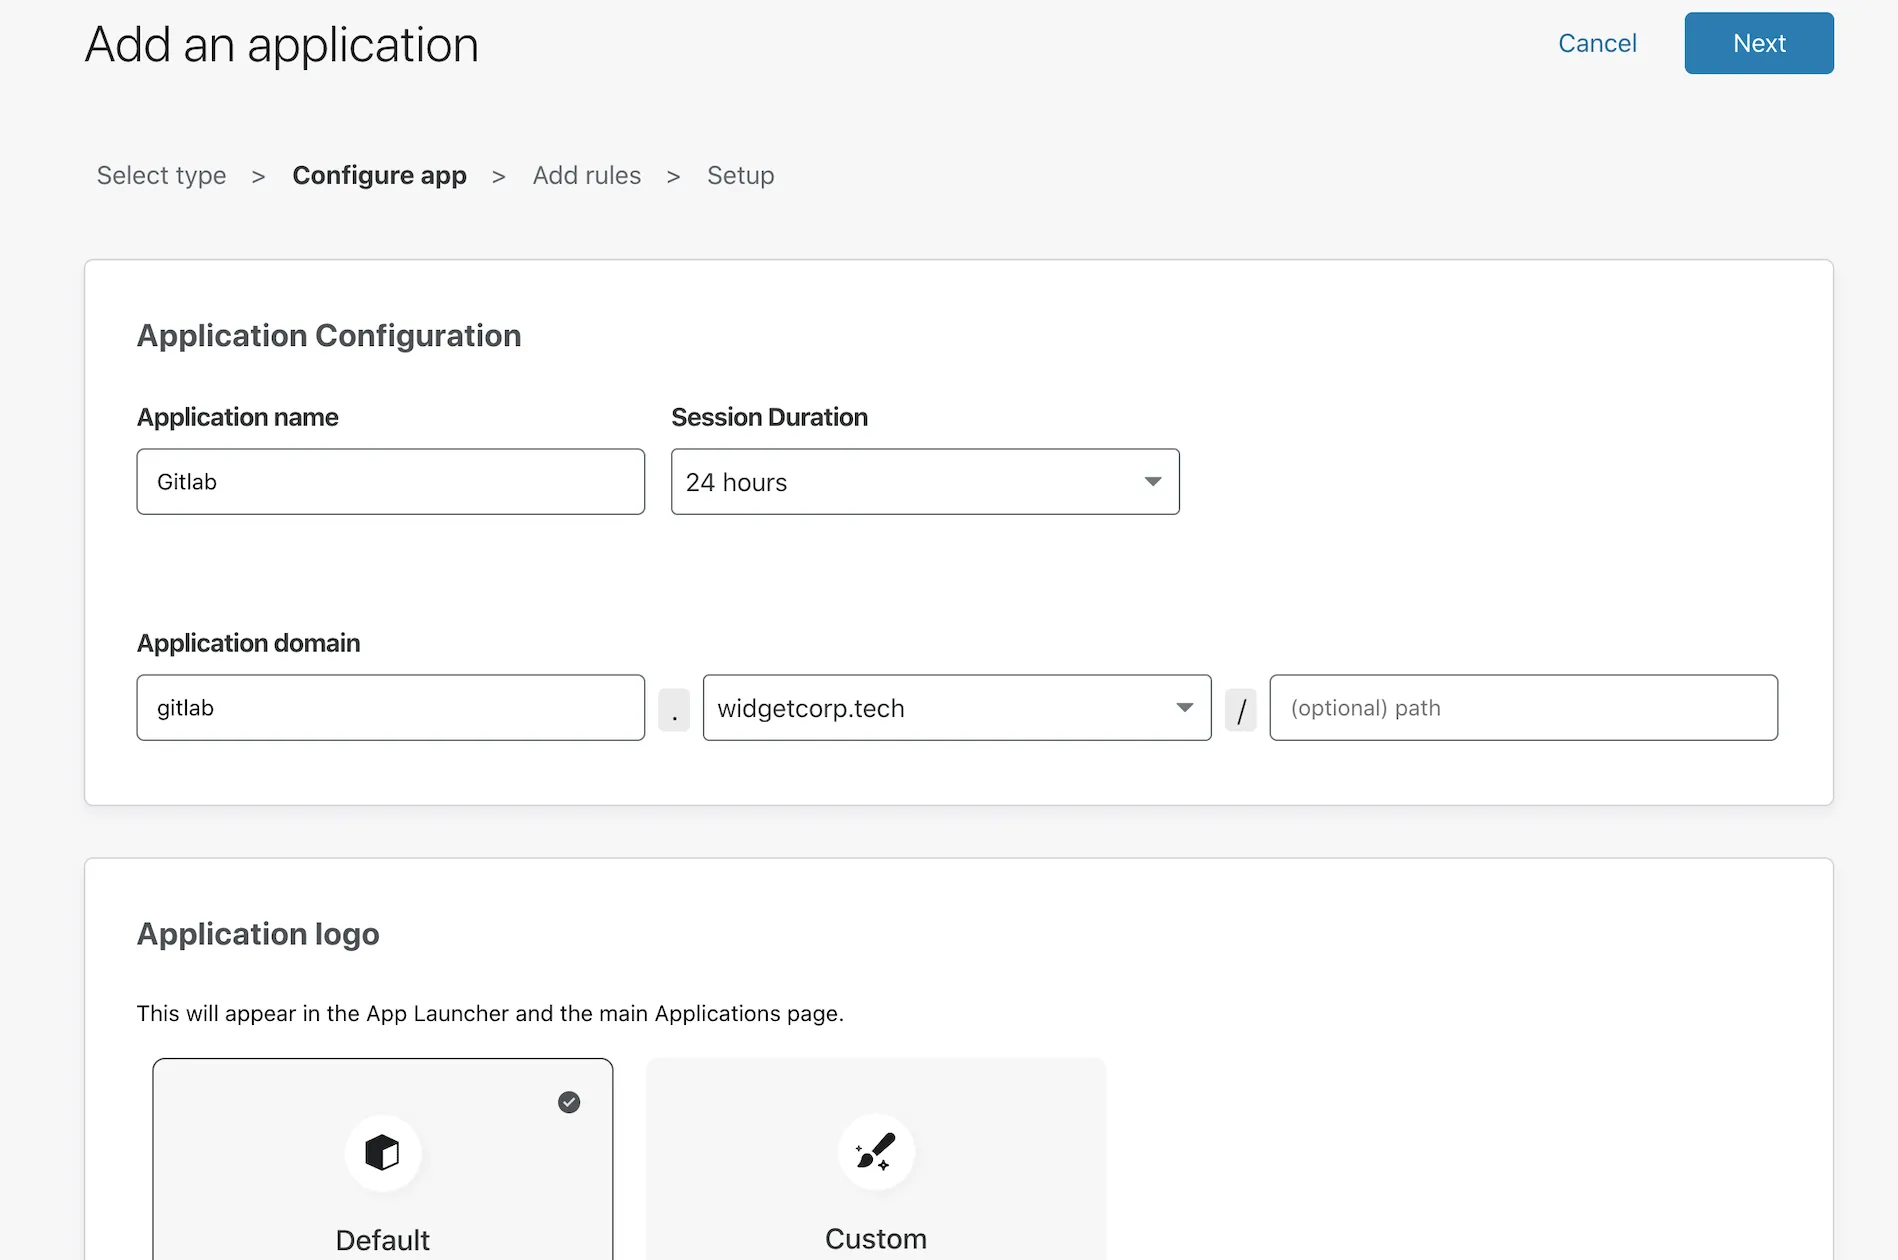
You will be prompted to add a subdomain that will represent the resource. This must be a subdomain of a domain in your Cloudflare account. You will need separate subdomains for the web application and SSH flows.
This example uses gitlab.widgetcorp.tech for the web application and gitlab-ssh.widgetcorp.tech for SSH connectivity.
You can decide which identity providers will be allowed to authenticate. By default, all configured providers are allowed. Add rules to determine who can reach the site.
Select Create to publish the application. Repeat these steps for the second application, gitlab-ssh.widgetcorp.tech.
Cloudflare Tunnel creates a secure, outbound-only, connection between this machine and Cloudflare's network. With an outbound-only model, you can prevent any direct access to this machine and lock down any externally exposed points of ingress. And with that, no open firewall ports.
Cloudflare Tunnel is made possible through a lightweight daemon from Cloudflare called cloudflared. Download and install cloudflared on the DigitalOcean machine by following the instructions listed on the Downloads page.
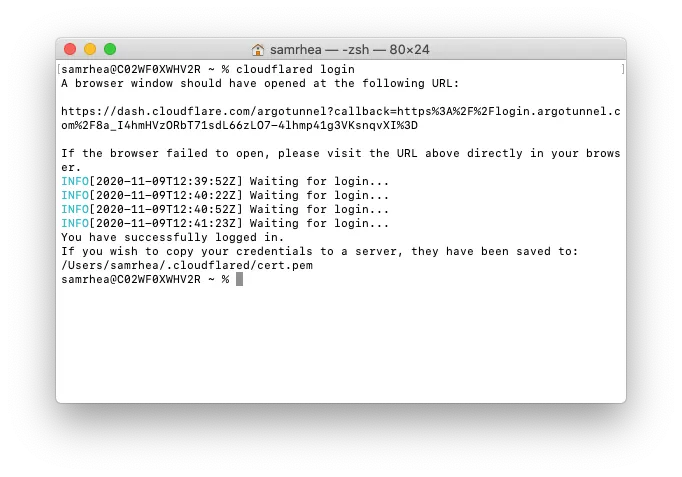
Once installed, authenticate the instance of cloudflared with the following command.
cloudflared loginThe command will print a URL that you must visit to login with your Cloudflare account.
Choose a website that you have added into your account.
Once you select one of the sites in your account, Cloudflare will download a certificate file to authenticate this instance of cloudflared. You can now use cloudflared to control Cloudflare Tunnel connections in your Cloudflare account.
You can now connect GitLab to Cloudflare using Cloudflare Tunnel.
- Create a new Tunnel by running the following command.
cloudflared tunnel create gitlabcloudflared will generate a unique ID for this Tunnel, for example 6ff42ae2-765d-4adf-8112-31c55c1551ef. You can use this Tunnel both for SSH and HTTP traffic.
- You will need to configure Cloudflare Tunnel to proxy traffic to both destinations. The configuration below will take traffic bound for the DNS record that will be created for the web app and the DNS record to represent SSH traffic to the right port.
You use the text editor of your choice to edit the configuration file. The example relies on Vi.
vim ~/.cloudflared/config.yml- Configure the Tunnel to serve traffic.
tunnel: 6ff42ae2-765d-4adf-8112-31c55c1551ef
credentials-file: /root/.cloudflared/6ff42ae2-765d-4adf-8112-31c55c1551ef.json

ingress:
  - hostname: gitlab.widgetcorp.tech
    service: http://localhost:80
  - hostname: gitlab-ssh.widgetcorp.tech
    service: ssh://localhost:22
  # Catch-all rule, which just responds with 404 if traffic doesn't match any of
  # the earlier rules
  - service: http_status:404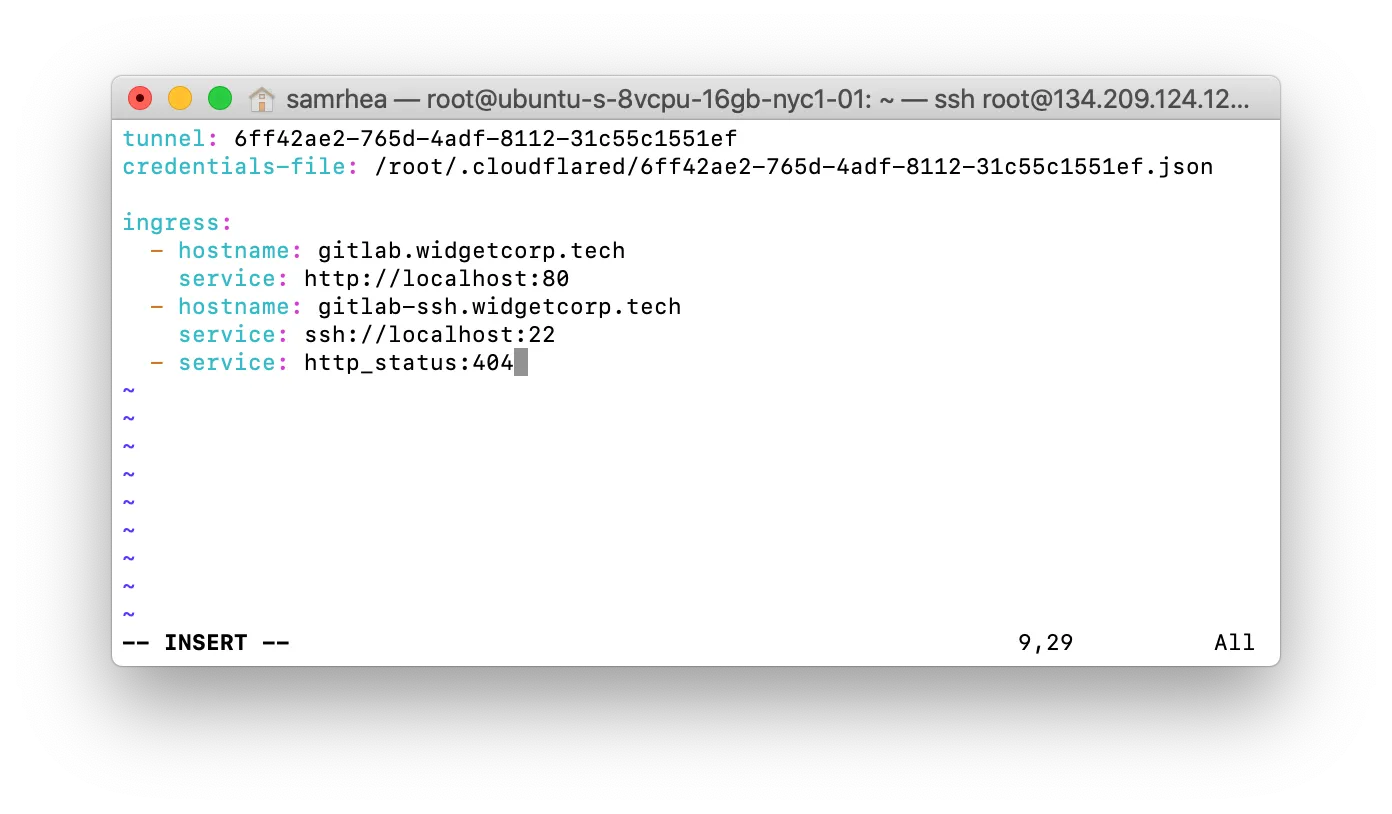
- You can test that the configuration file is set correctly with the following command:
cloudflared tunnel ingress validatecloudflared should indicate the Tunnel is okay. You can now begin running the Tunnel.
cloudflared tunnel run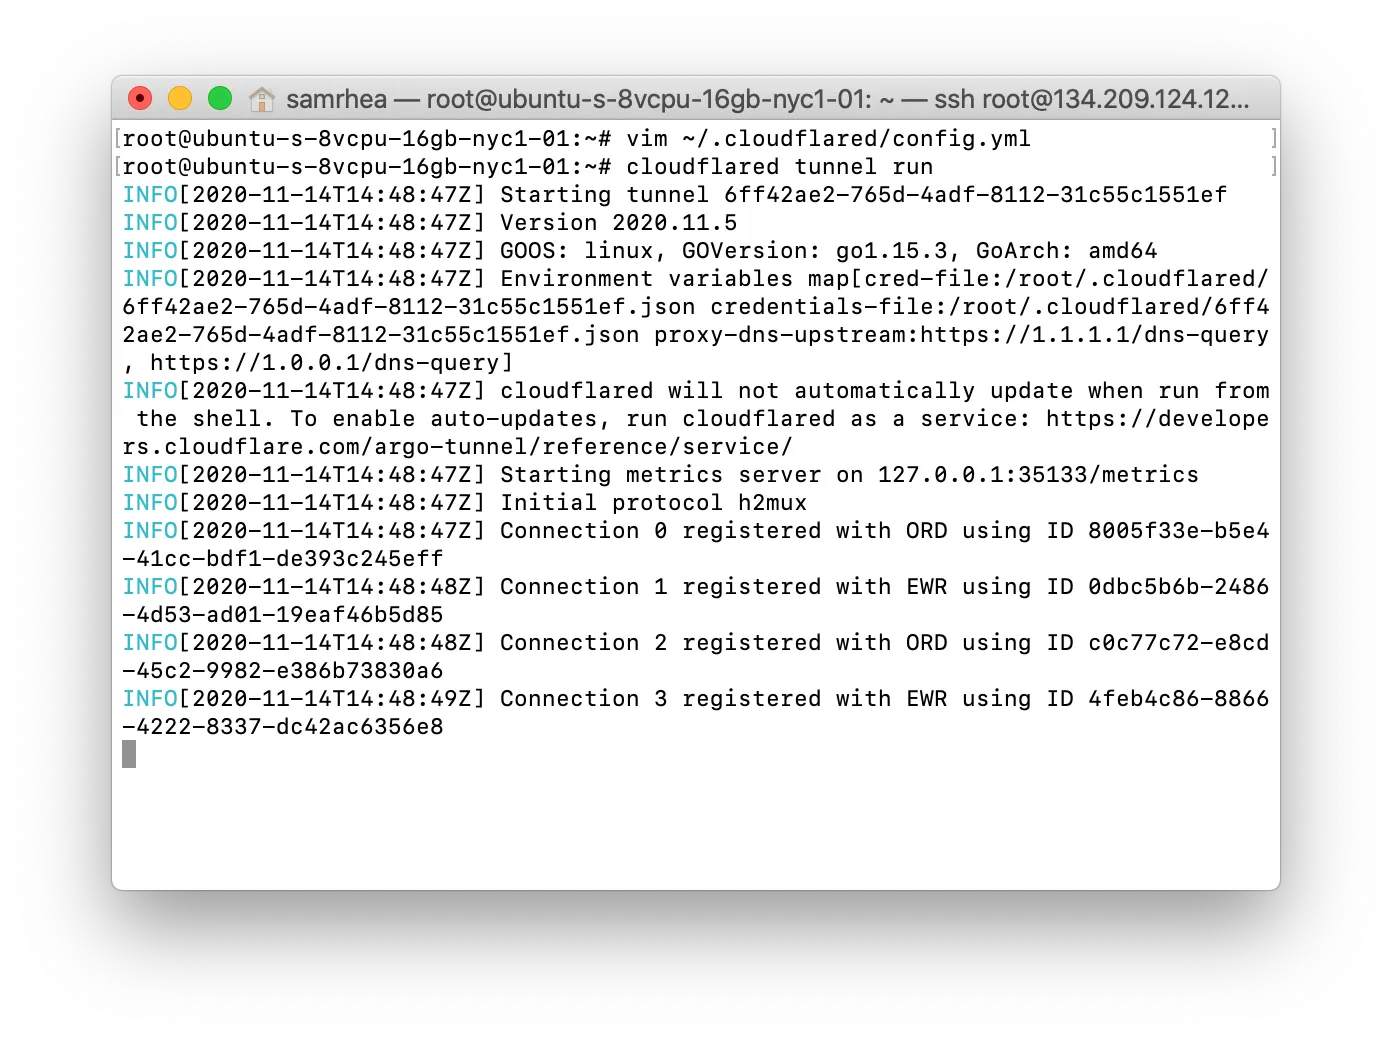
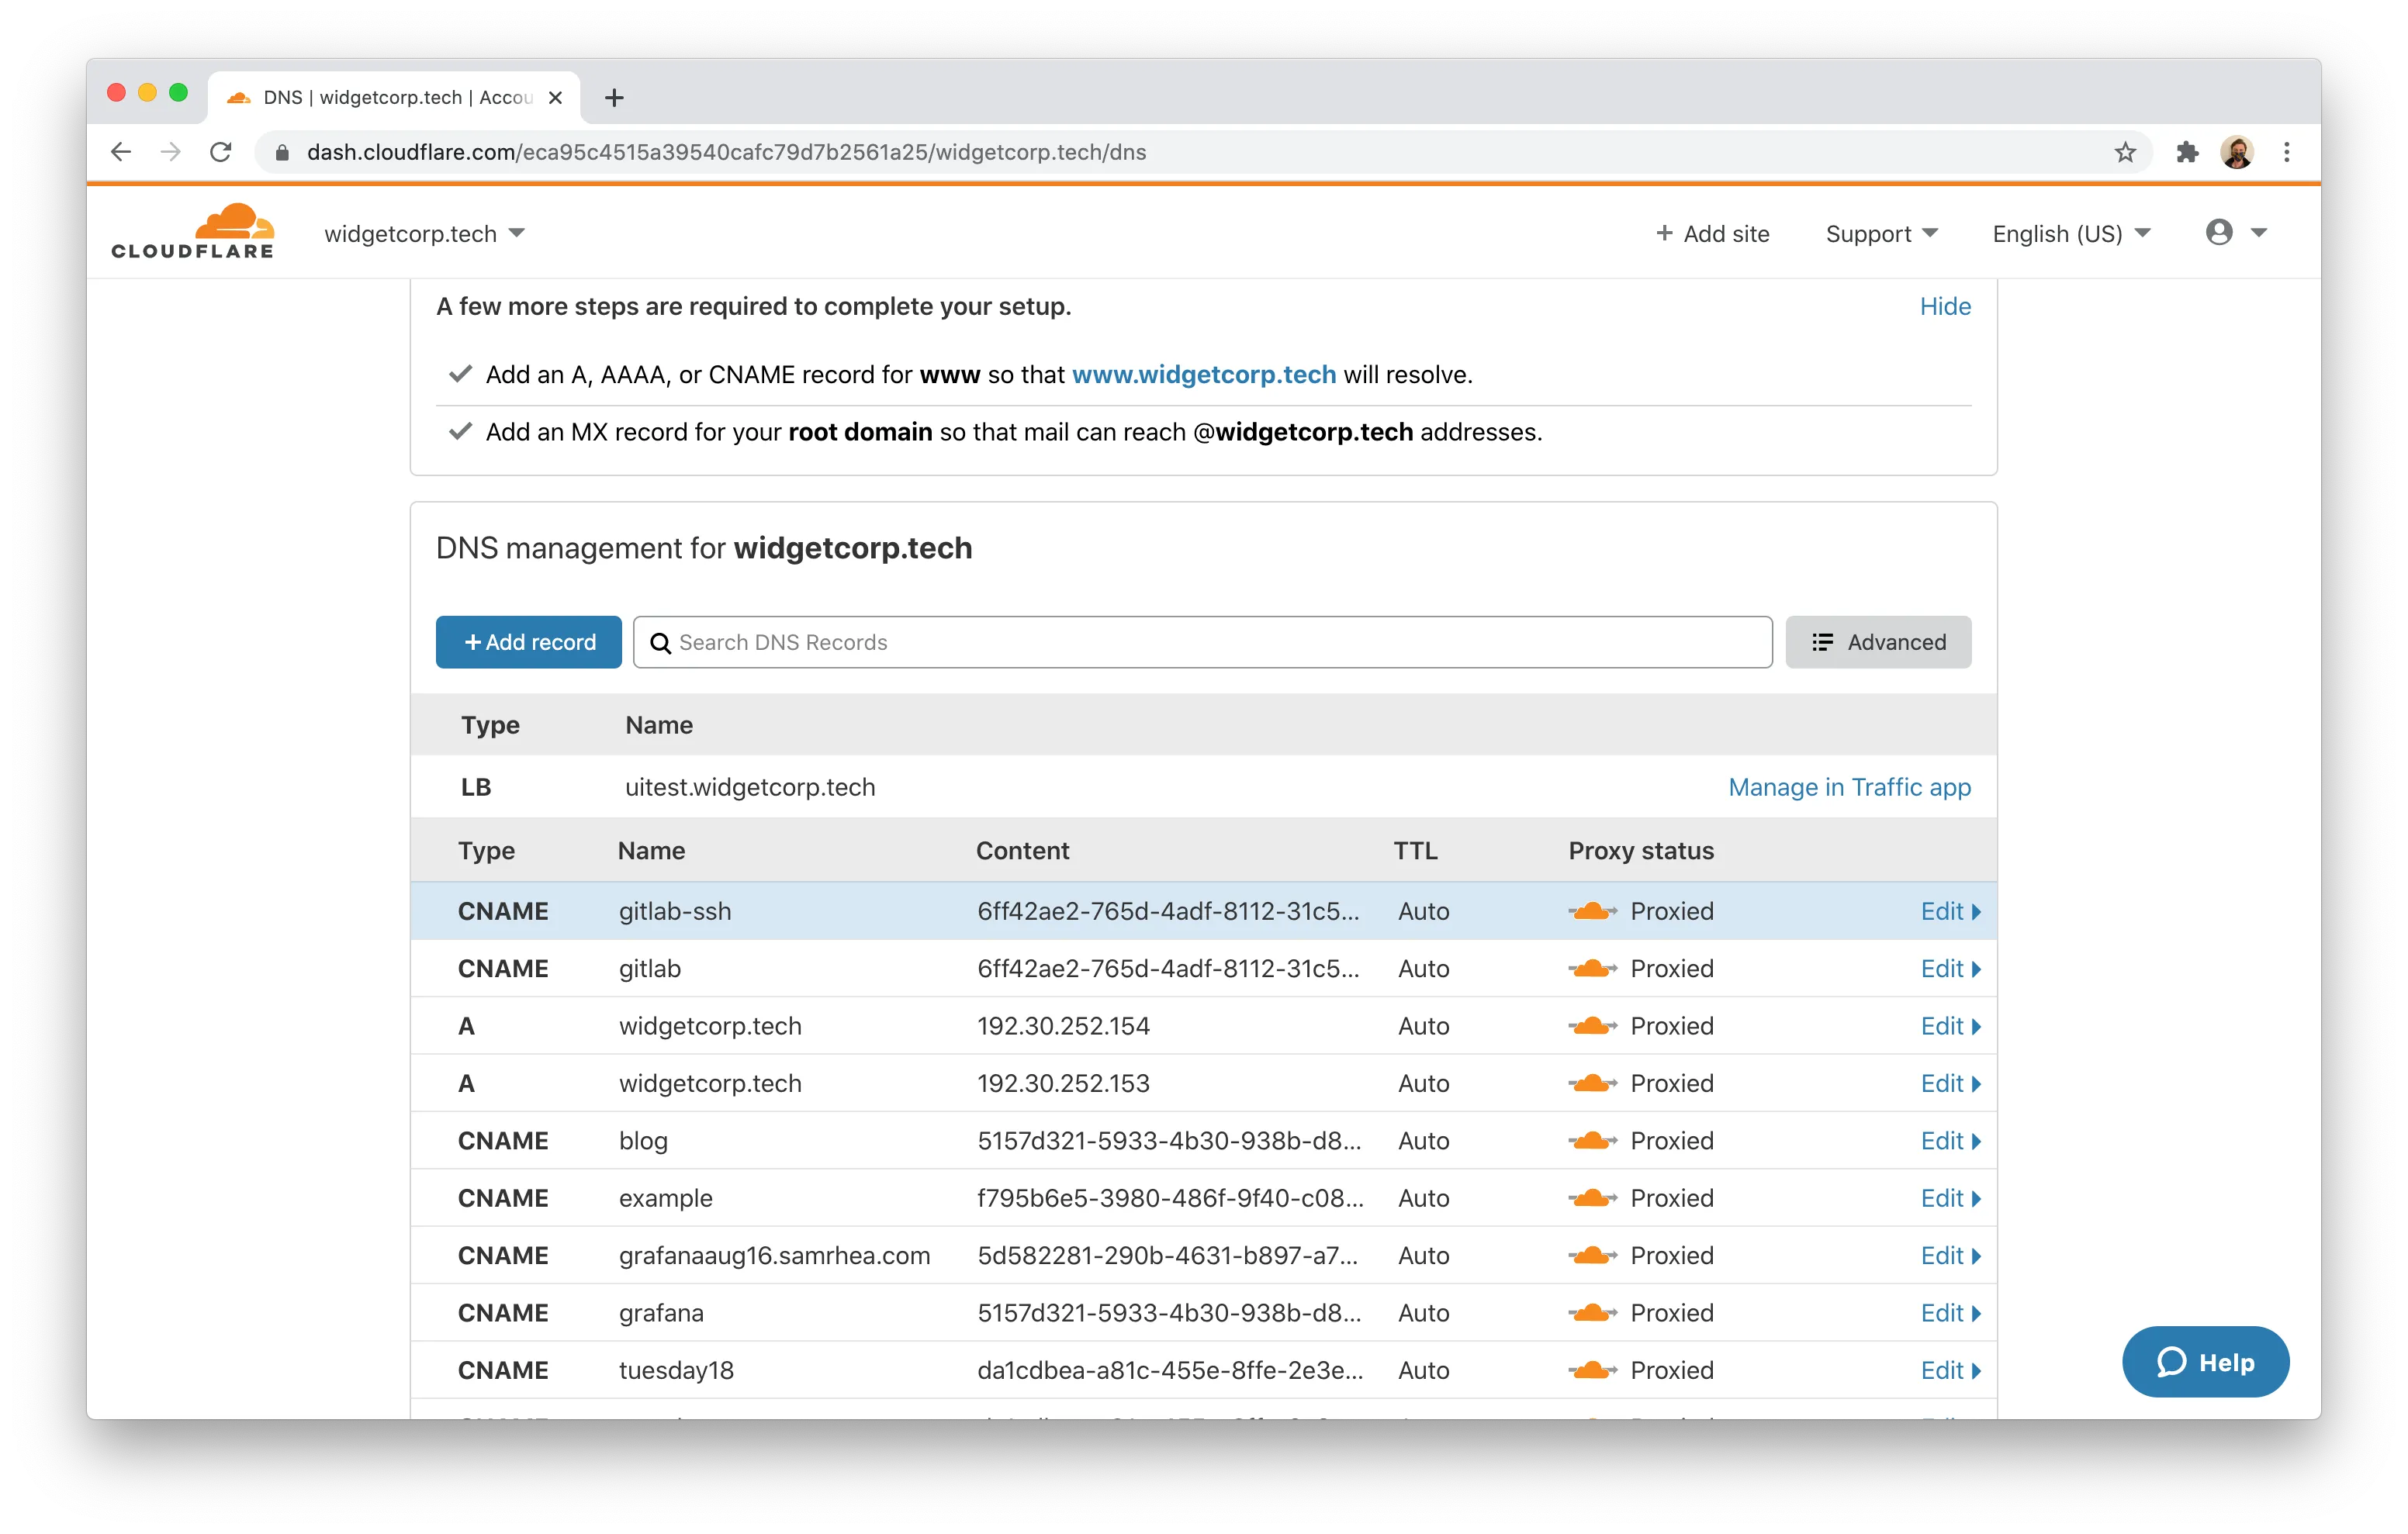
You can now create DNS records for GitLab in the Cloudflare dashboard. Remember, you will still need two records - one for the web application and one for SSH traffic.
-
Log in to the Cloudflare dashboard ↗ and go to the DNS Records page for your domain.
Go to Records ↗ -
Select Add record. Choose
CNAMEas the record type. -
In the Name field, input
gitlab. -
In the Target field, input the ID of the Tunnel created followed by
cfargotunnel.com. In this example, that value is:
6ff42ae2-765d-4adf-8112-31c55c1551ef.cfargotunnel.com- Select Save.
- Repeat the process again by creating a second
CNAMErecord, with the same Target, but inputgitlab-sshfor the Name. Both records should then appear, pointing to the same Tunnel. The ingress rules defined in the configuration file above will direct traffic to the appropriate port.
You can now test the end-to-end configuration for the web application. Visit the subdomain created for the web application. Cloudflare Access will prompt you to authenticate. Login with your provider.
Once authenticated, you should see the GitLab web application.
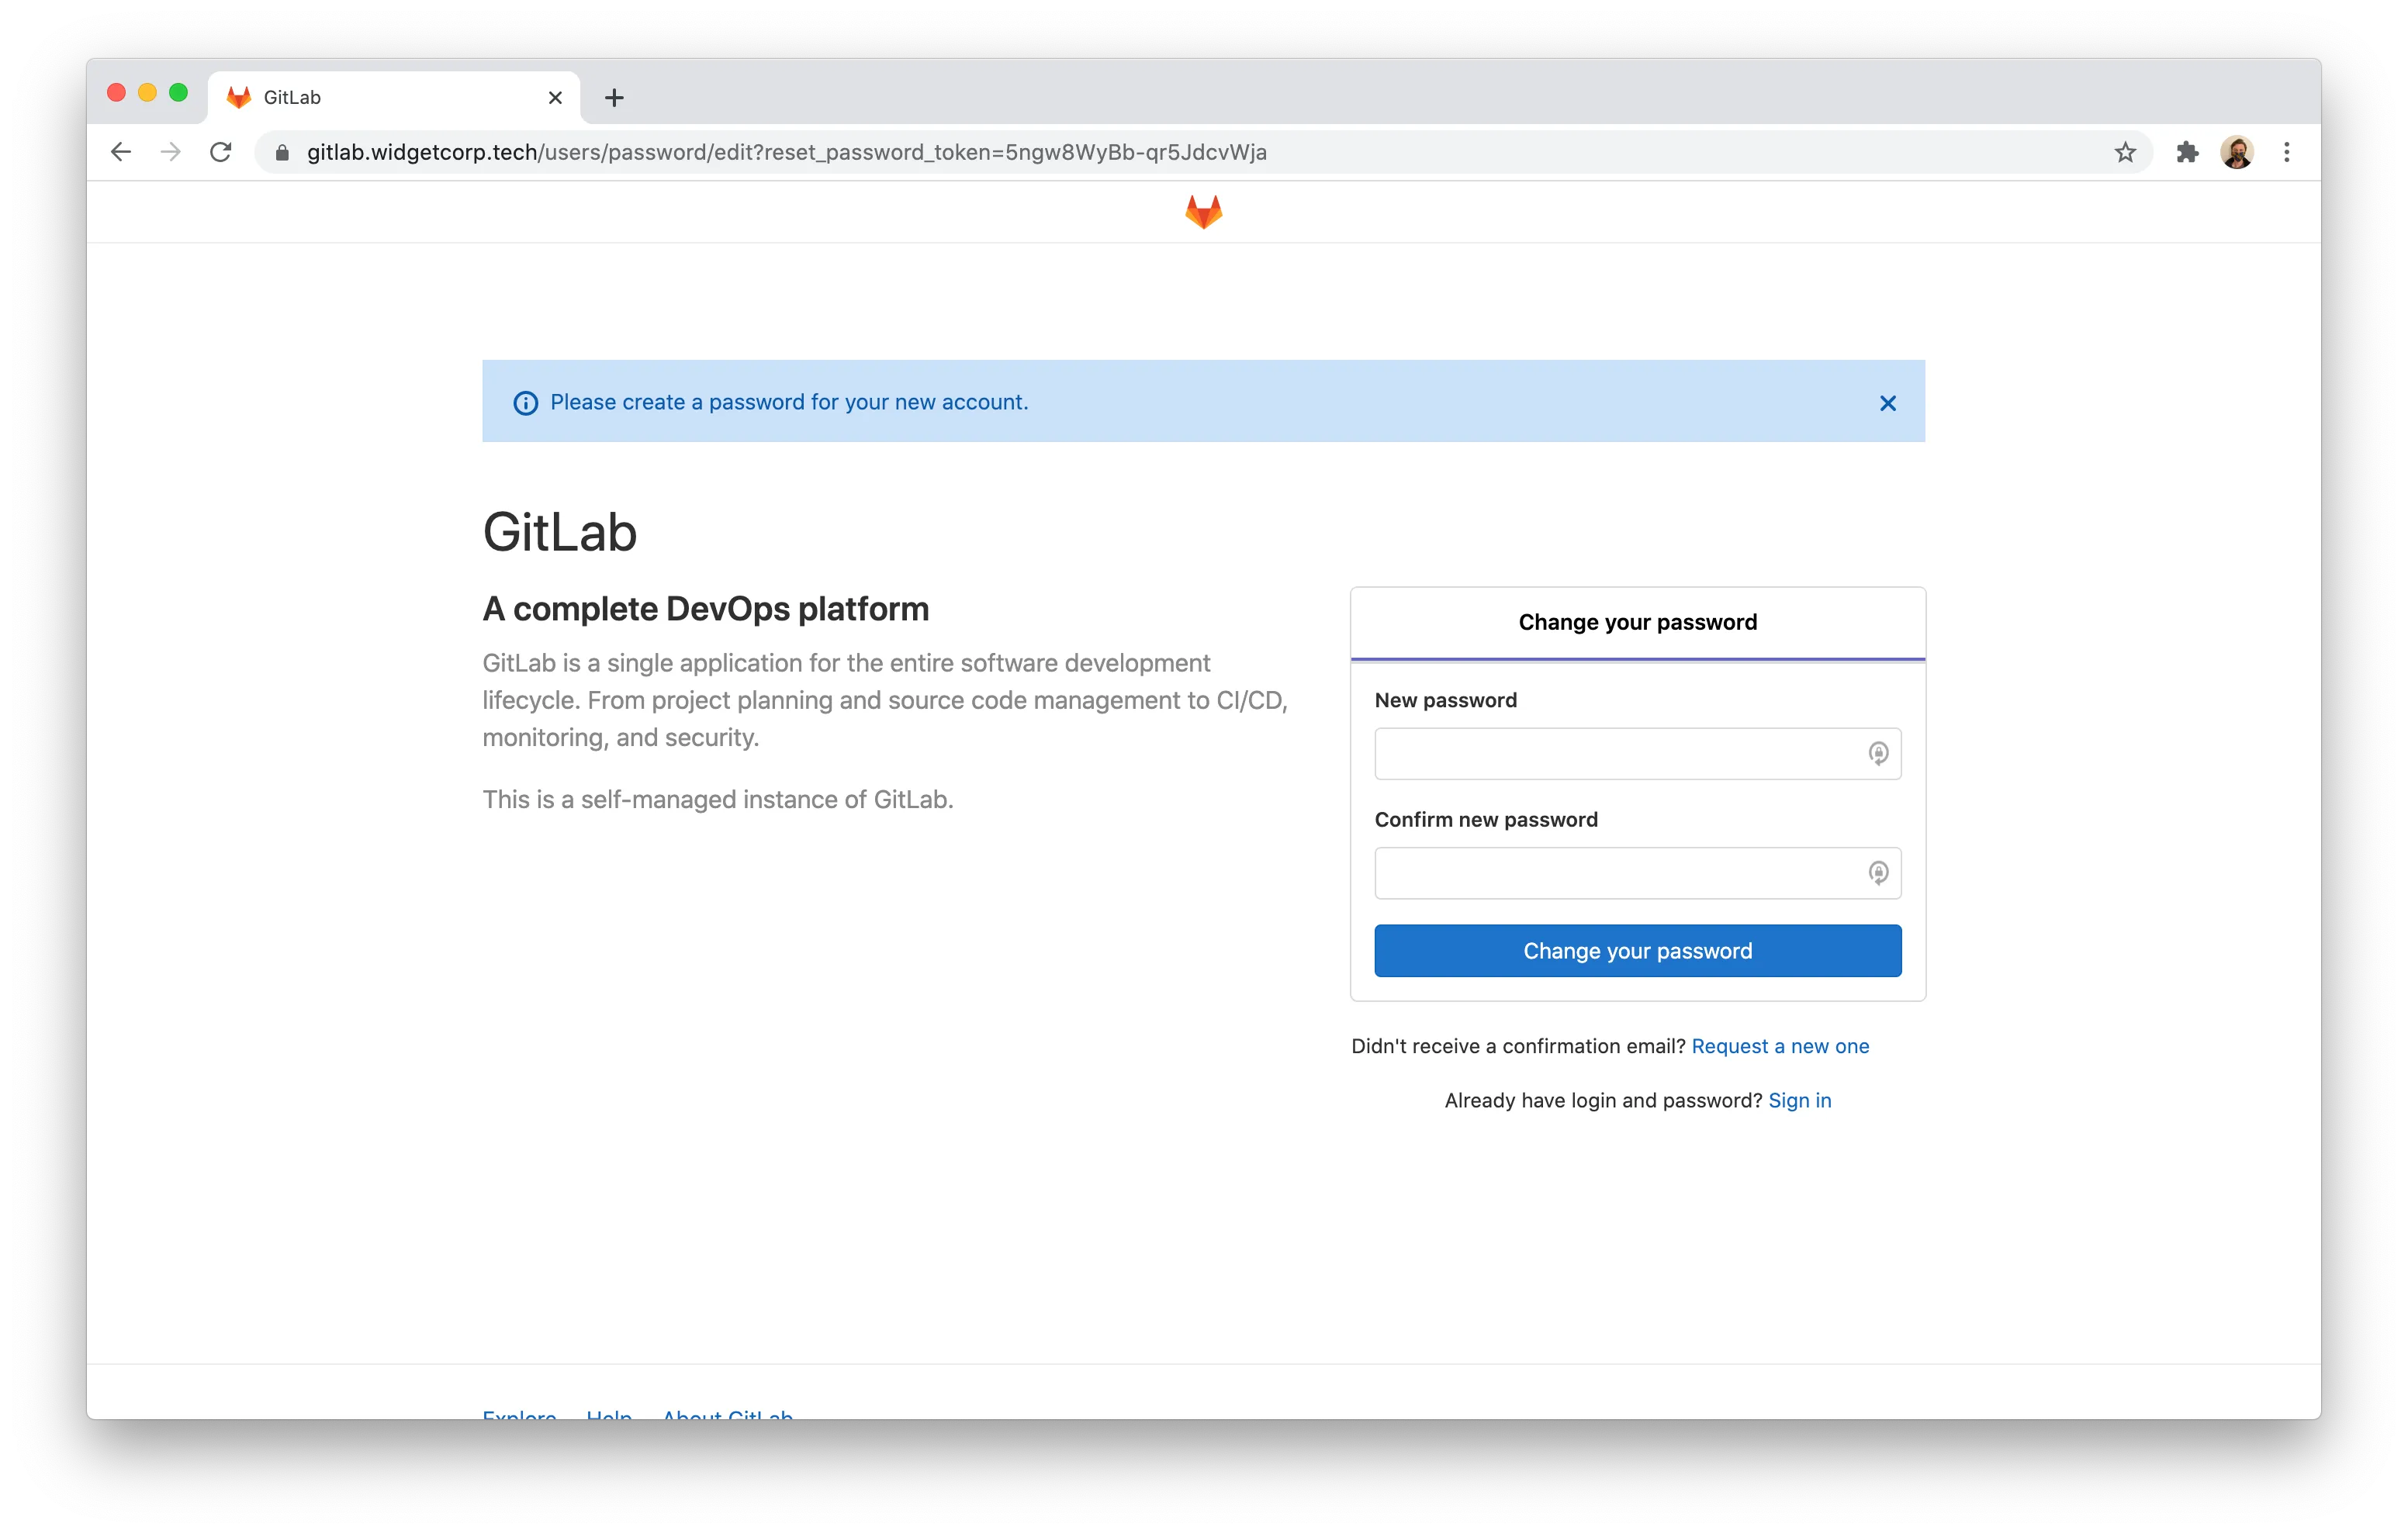
Register your own account and create a Blank project to test SSH in the next step.
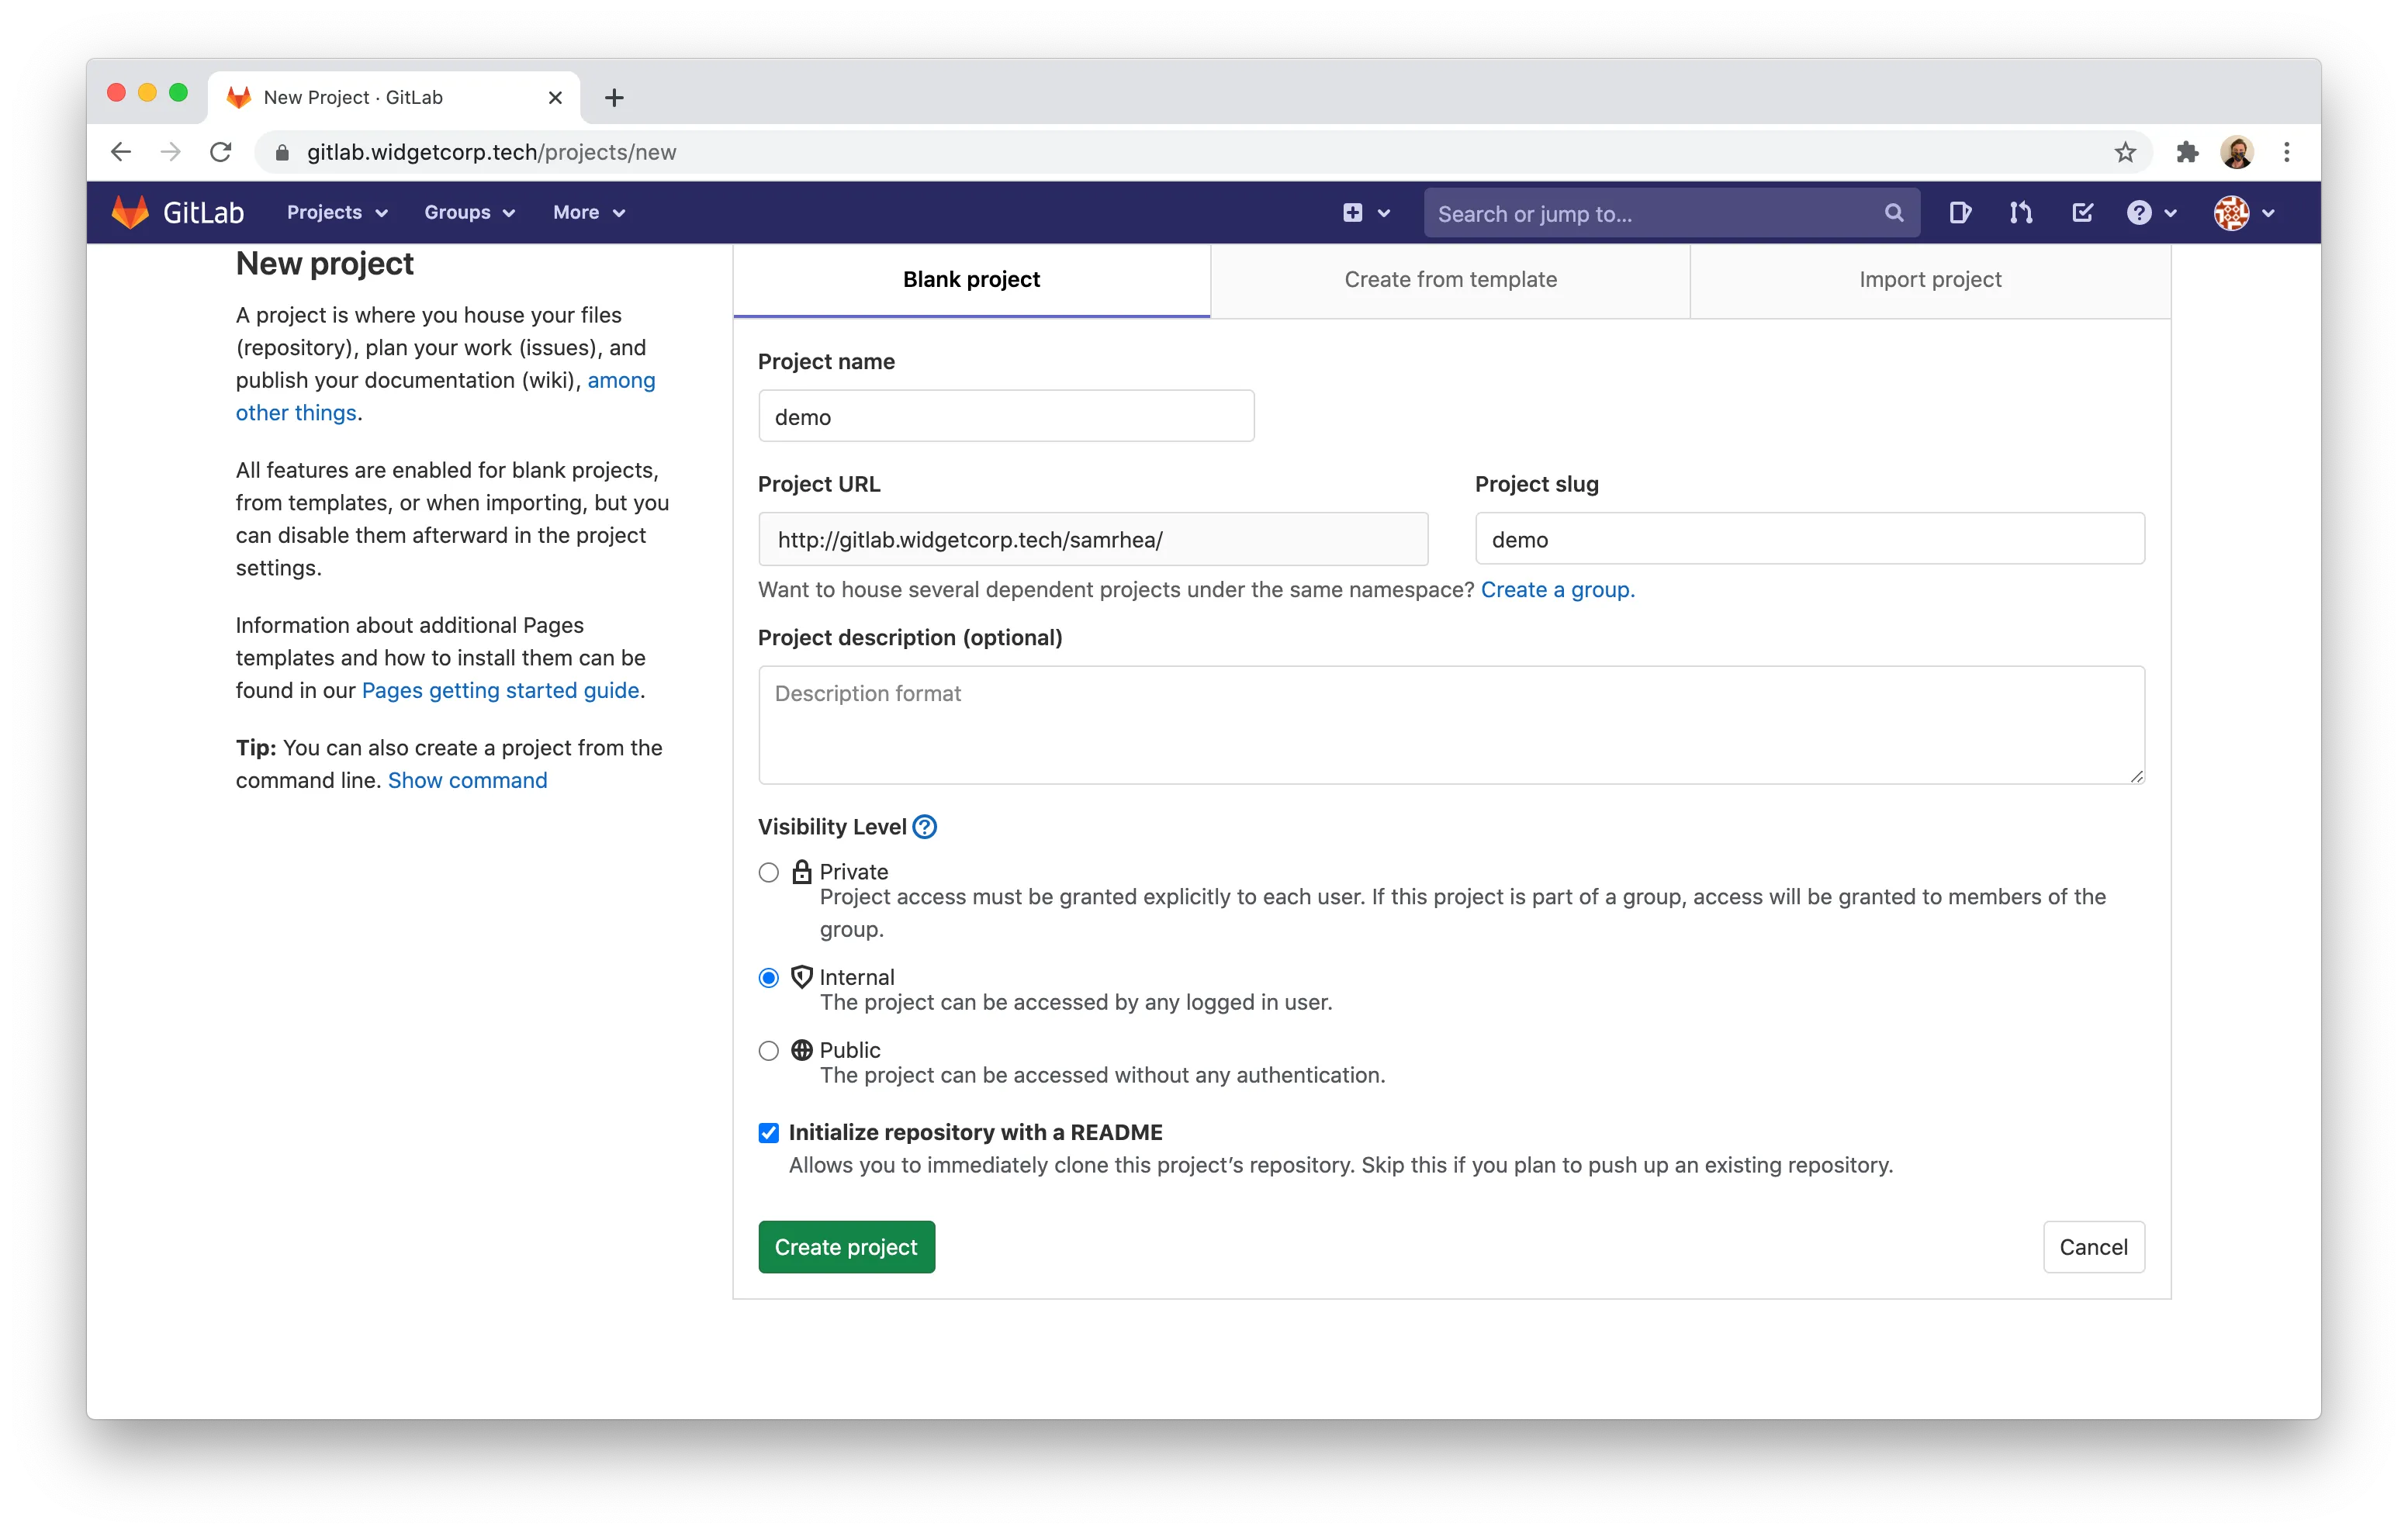
GitLab will create a new project and repository.
To push and pull code over SSH, you will need to install cloudflared on the client machine as well. This example uses a macOS laptop. On macOS, you can install cloudflared with the following command.
brew install cloudflaredWhile you need to install cloudflared, you do not need to wrap your SSH commands in any unique way. Instead, you will need to make a one-time change to your SSH configuration file.
vim /Users/samrhea/.ssh/configInput the following values; replacing gitlab-ssh.widgetcorp.tech with the hostname you created.
Host gitlab-ssh.widgetcorp.tech
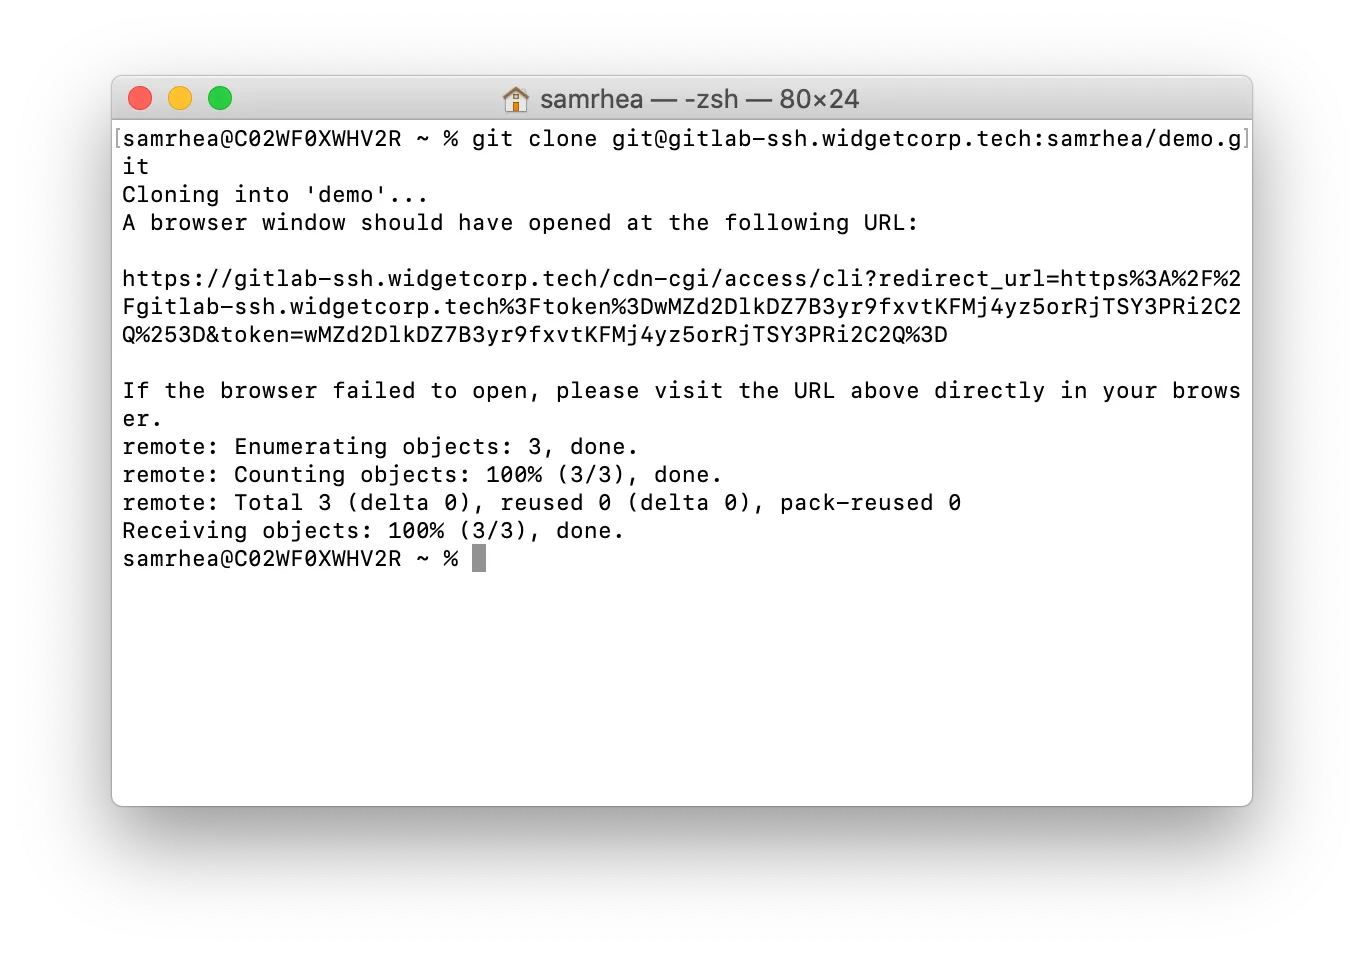
ProxyCommand /usr/local/bin/cloudflared access ssh --hostname %hYou can now test the SSH flow by attempting to clone the project created earlier.
git clone git@gitlab-ssh.widgetcorp.tech:samrhea/democloudflared will prompt you to login with my identity provider and, once successful, issue a token to your device to allow you to authenticate.
You can now configure your DigitalOcean firewall with a single rule, block any inbound traffic, to prevent direct access.
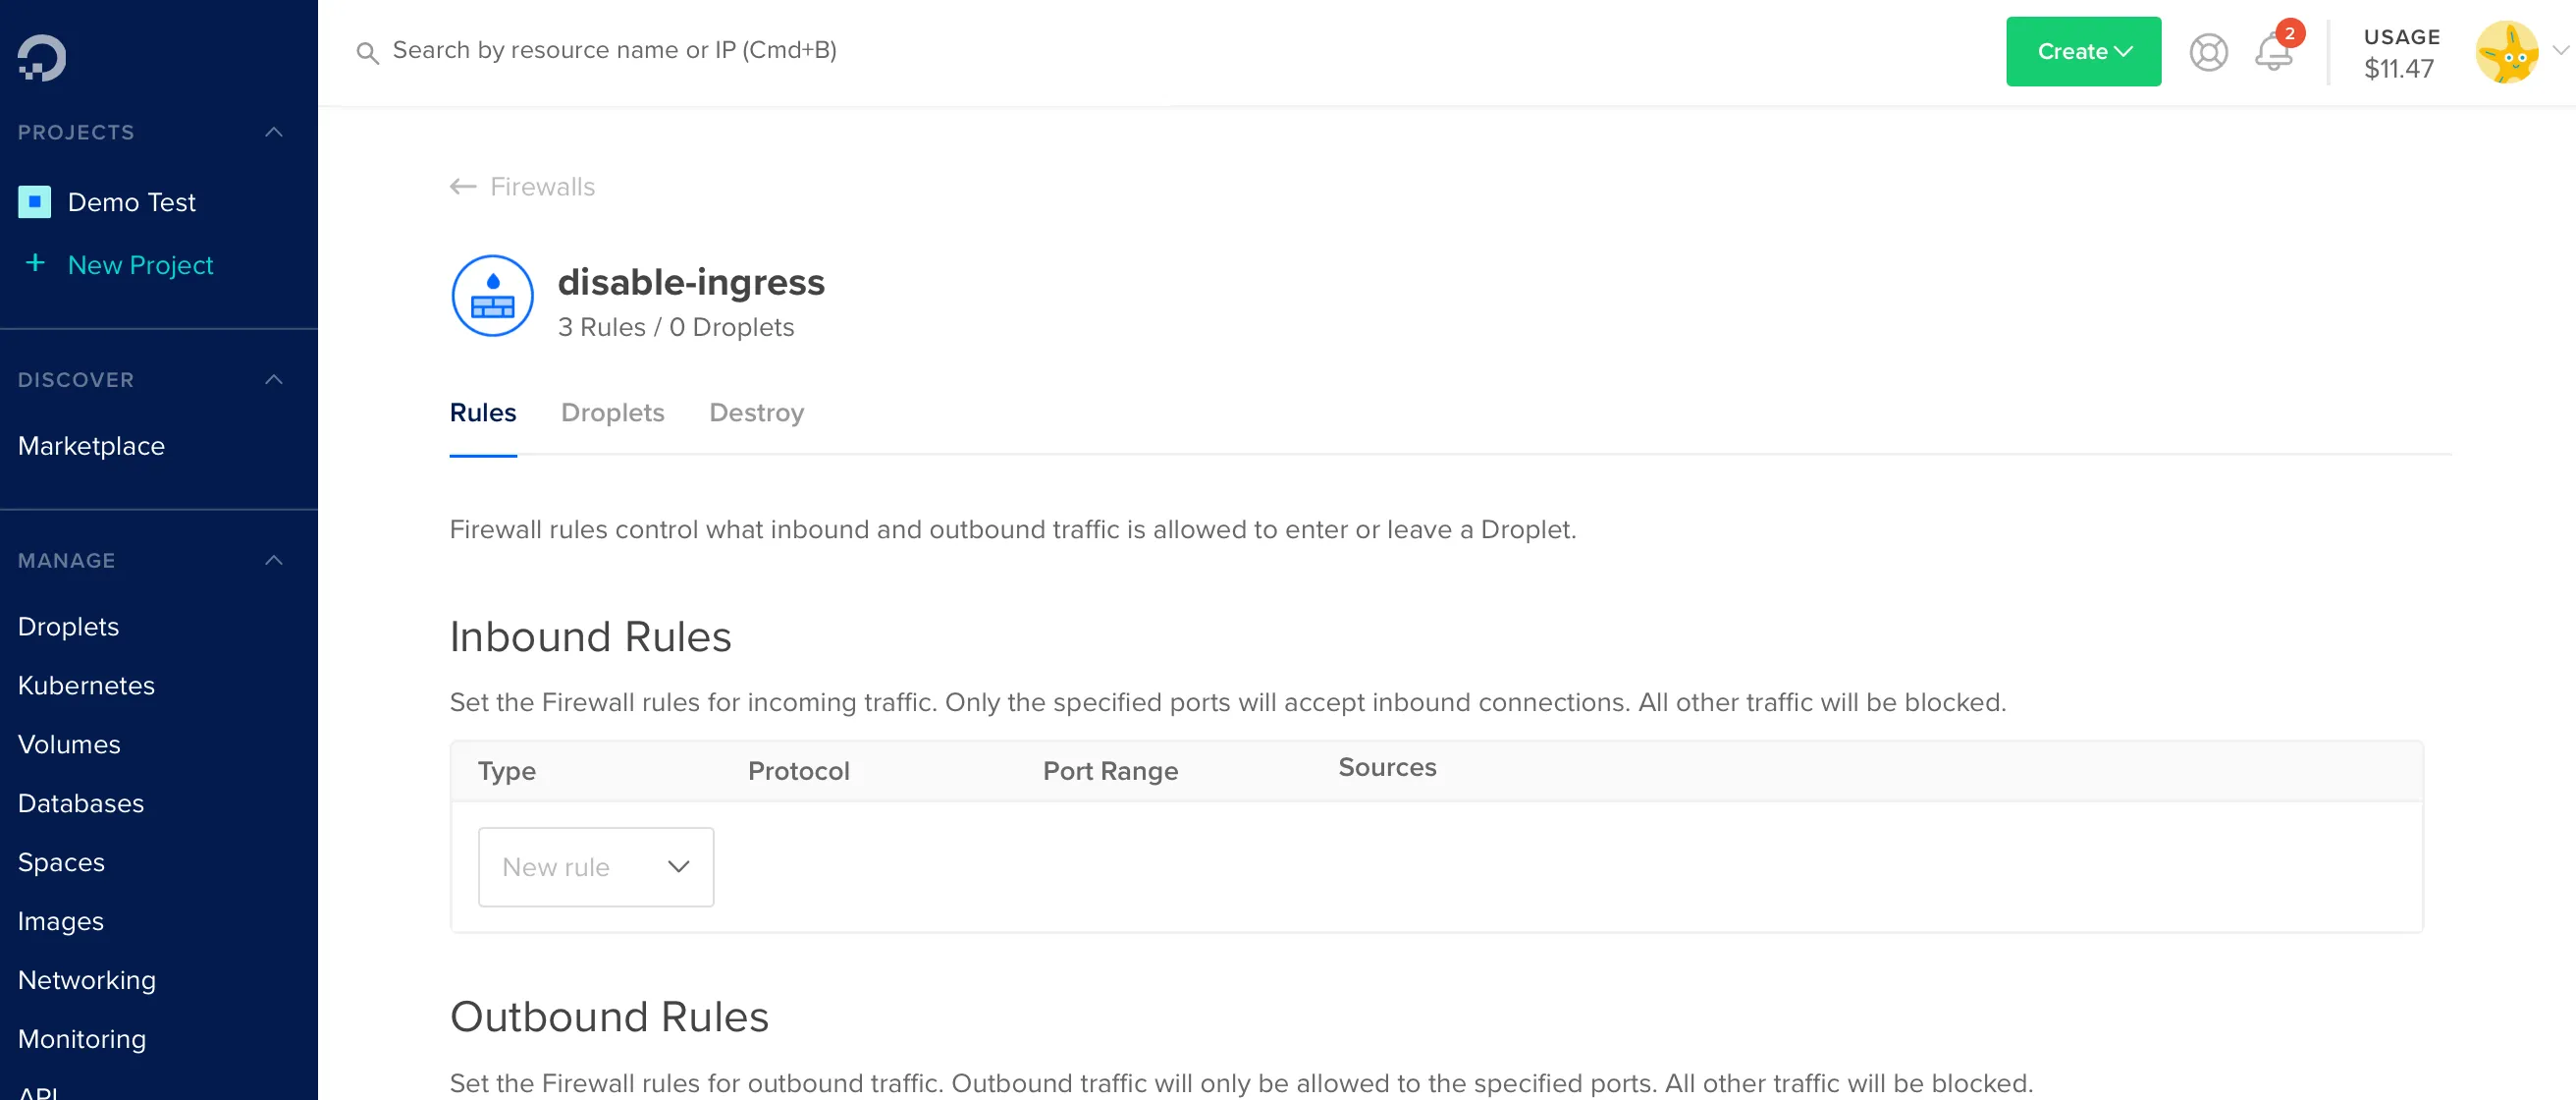
Cloudflare Tunnel will continue to run outbound-only connections and I can avoid this machine getting caught up in a crypto mining operation, or something worse.
You can also view logs of the events that are allowed and blocked. Open the Access page of the Logs section in Zero Trust.
If you are using Git Large File Storage (LFS), note that Git LFS is not automatically supported by cloudflared. To access repositories protected by Cloudflare Access, you need to authenticate manually by running:
cloudflared access login <your-git-access-url>Replace <your-git-access-url> with the Cloudflare Access-protected URL.