Connect with cloudflared
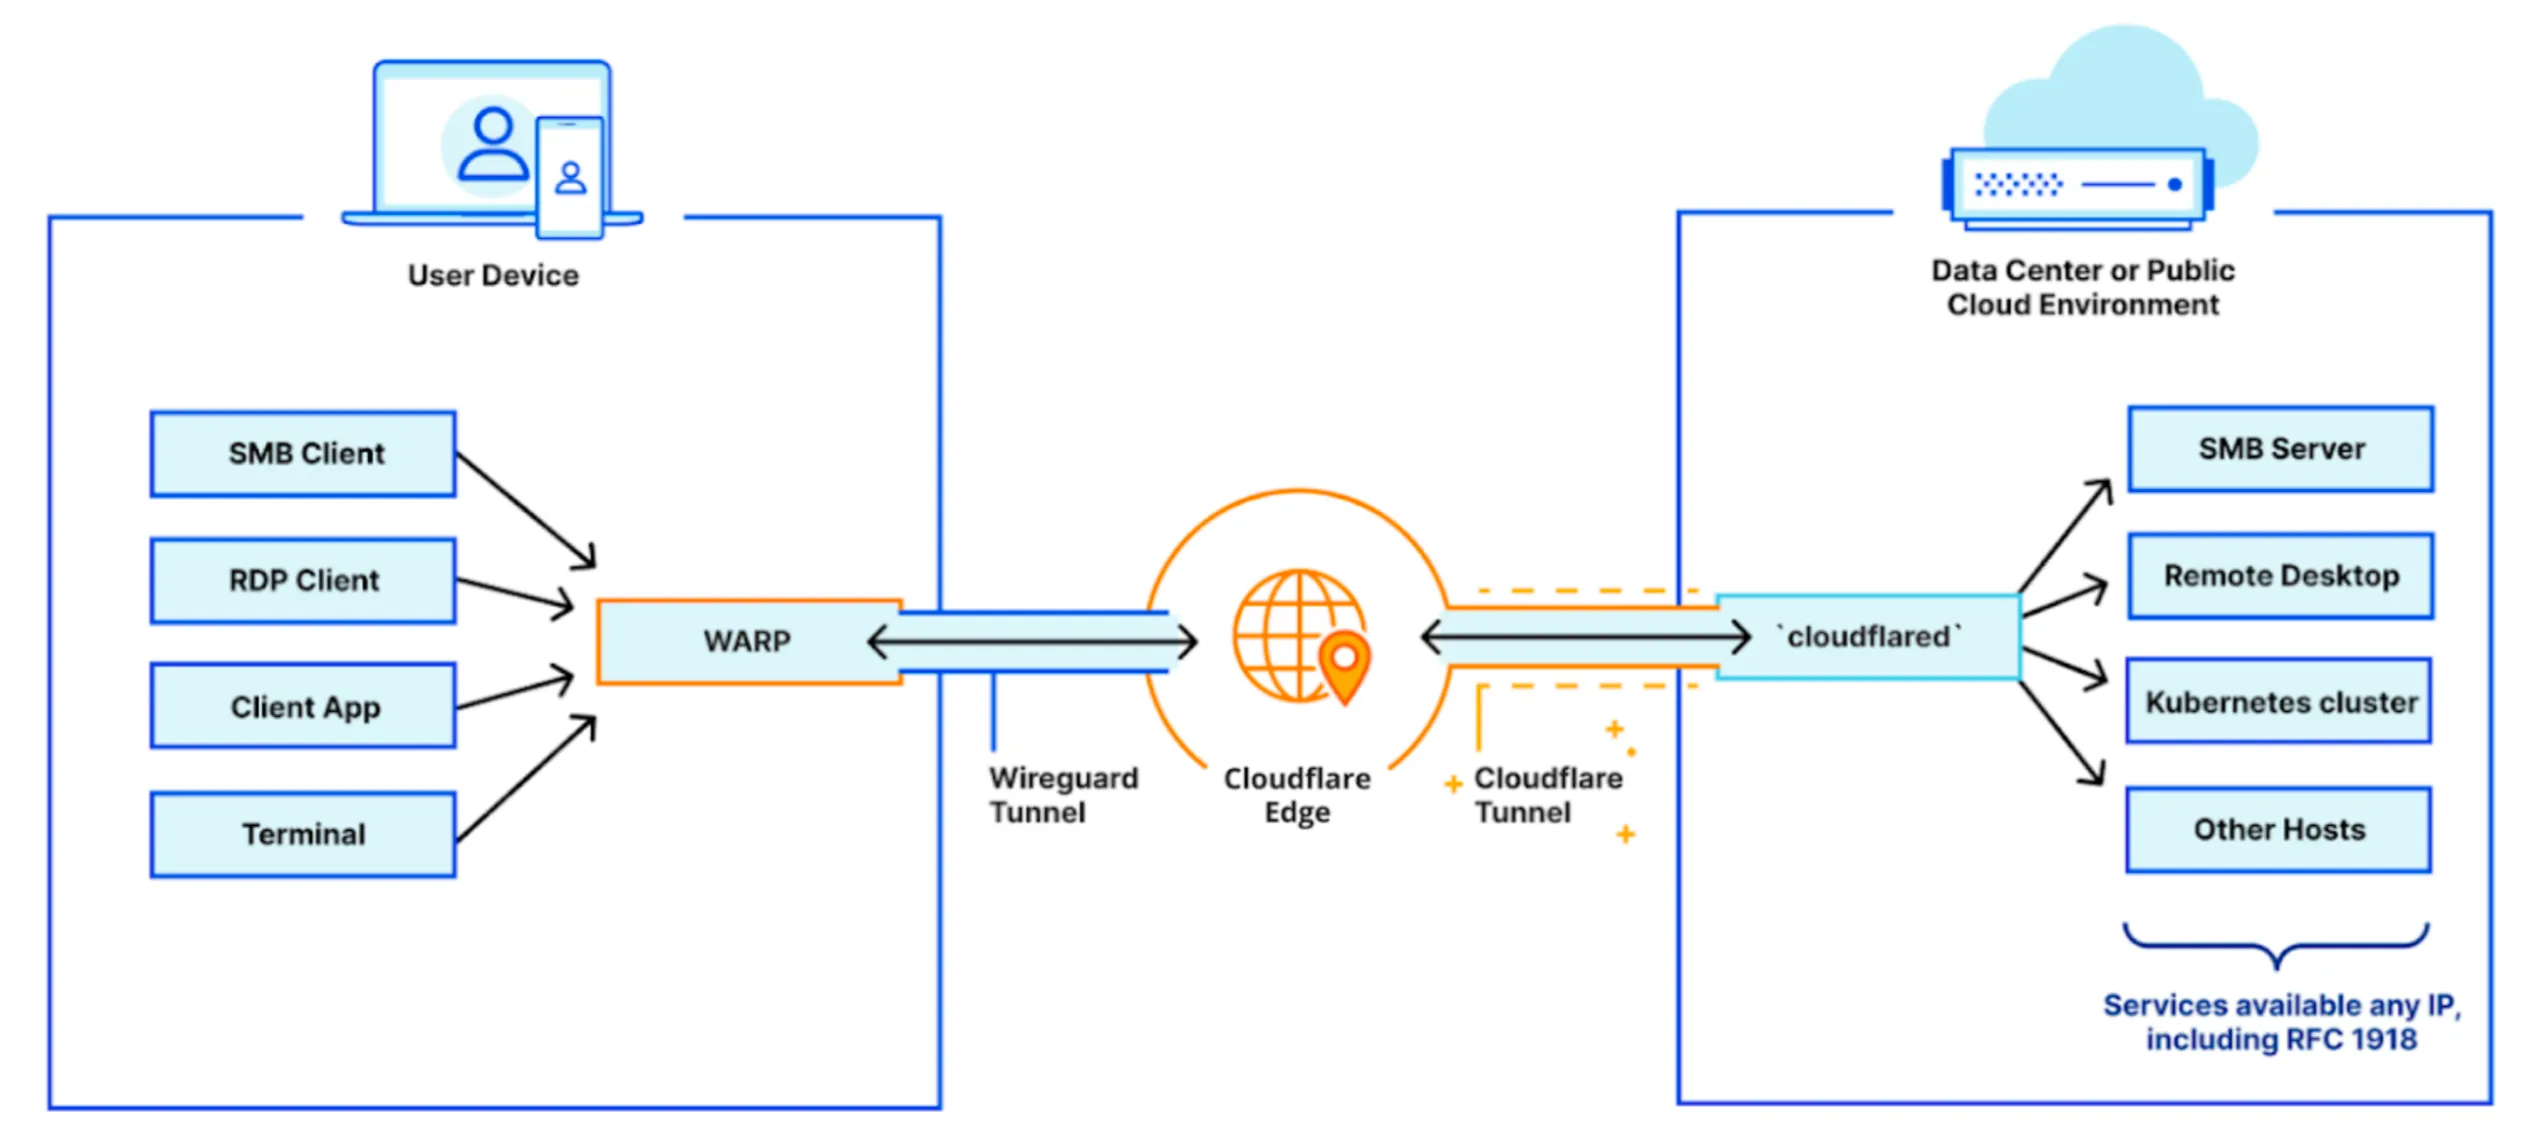
cloudflared is a daemon that runs on a host machine in your private network and proxies traffic from Cloudflare to local services. The tunnel created by cloudflared is outbound-only, meaning it only handles requests initiated from a user to your private network. Server-initiated requests (from applications behind the tunnel) use the server's default routing table and do not pass through the tunnel.
On the client side, end users connect to Cloudflare's global network using the Cloudflare One Client. The Cloudflare One Client can be rolled out to your entire organization in just a few minutes using your in-house MDM tooling. When users connect to an IP address or hostname made available through Cloudflare Tunnel, WARP sends their connection through Cloudflare's network and down the corresponding tunnel to the internal service. Traffic to services behind the tunnel will carry the local source IP address of the host machine running the cloudflared daemon.
To enable remote access to your private network, refer to the following guides:
- Connect a private hostname: Route network traffic to an internal application using its hostname.
- Connect an IP/CIDR: Route traffic to an internal IP address or CIDR range.