Azure
This guide covers how to connect an Azure Virtual Machine to Cloudflare using our lightweight connector, cloudflared.
We will deploy:
- An Azure VM that runs a basic HTTP server.
- A Cloudflare Tunnel that allows users to connect to the service via either a public hostname or a private IP address.
To complete the following procedure, you will need to:
- Add a website to Cloudflare
- Deploy the Cloudflare One Client on an end-user device
-
In the Azure portal, go to Virtual Machines > Create > Azure virtual machine.
-
Select a Resource group or create a new one.

-
Enter a name for the VM and select a region. For Image, select Ubuntu Server 24.04 LTS. For Size, select an appropriate size (for example, Standard_B1s).
-
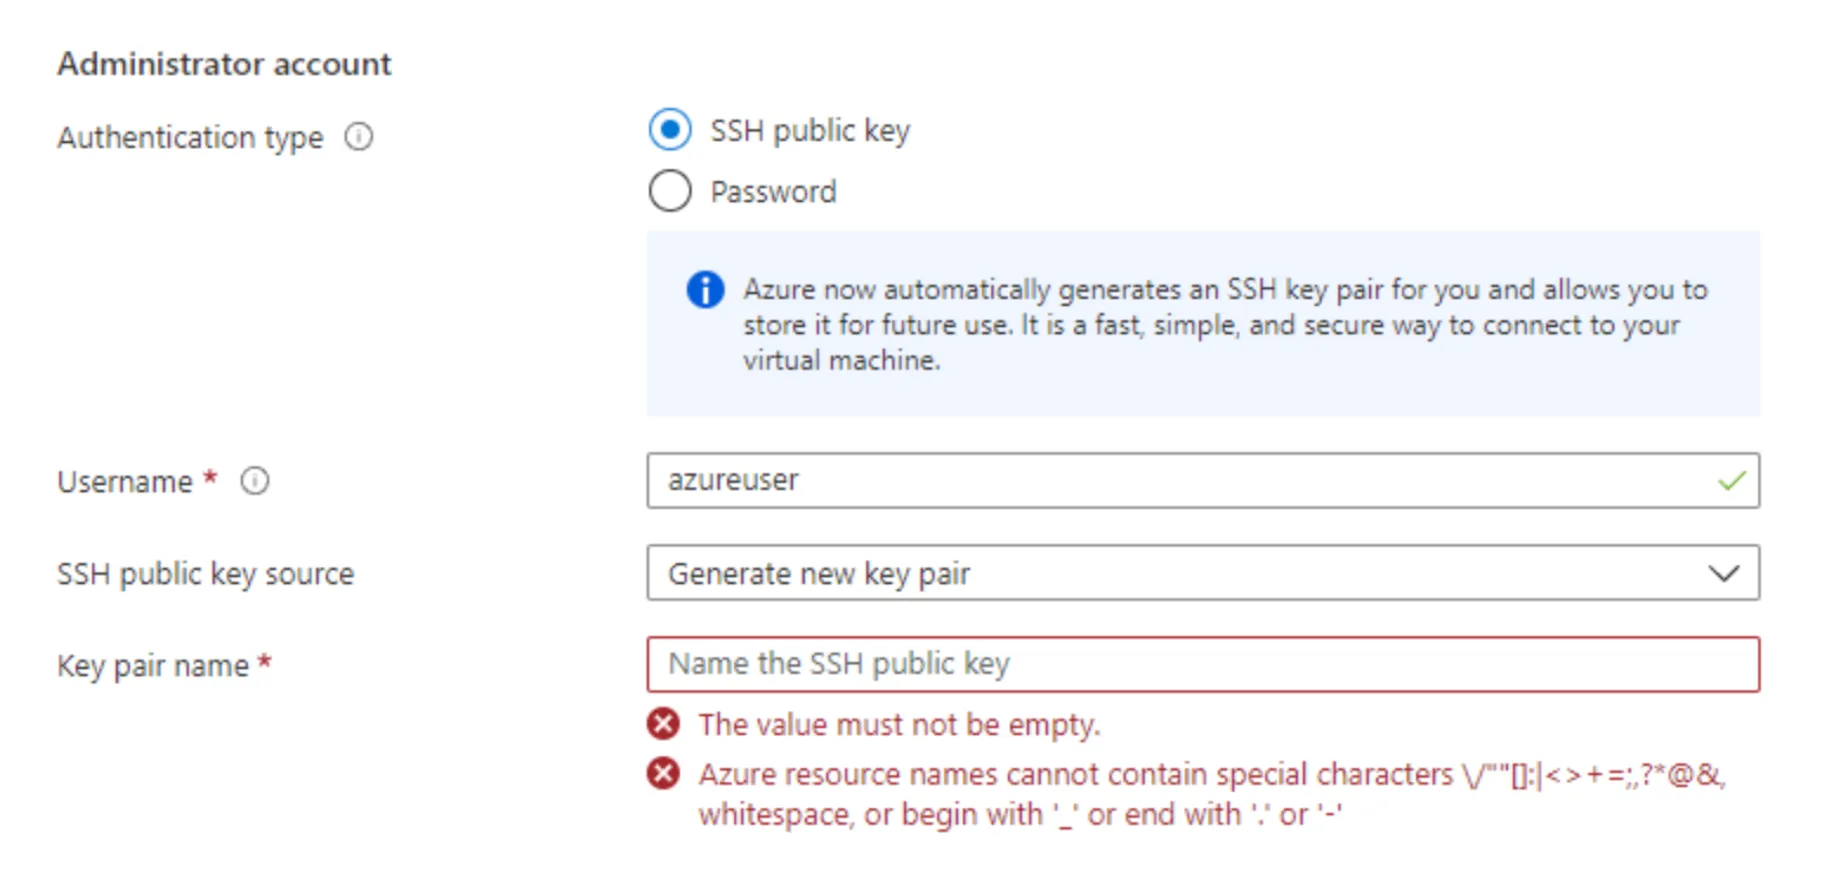
Under Administrator account, select SSH public key and enter your key pair.
-
Under Inbound port rules, allow SSH (
22). For testing purposes, also allow HTTP (80) and HTTPS (443).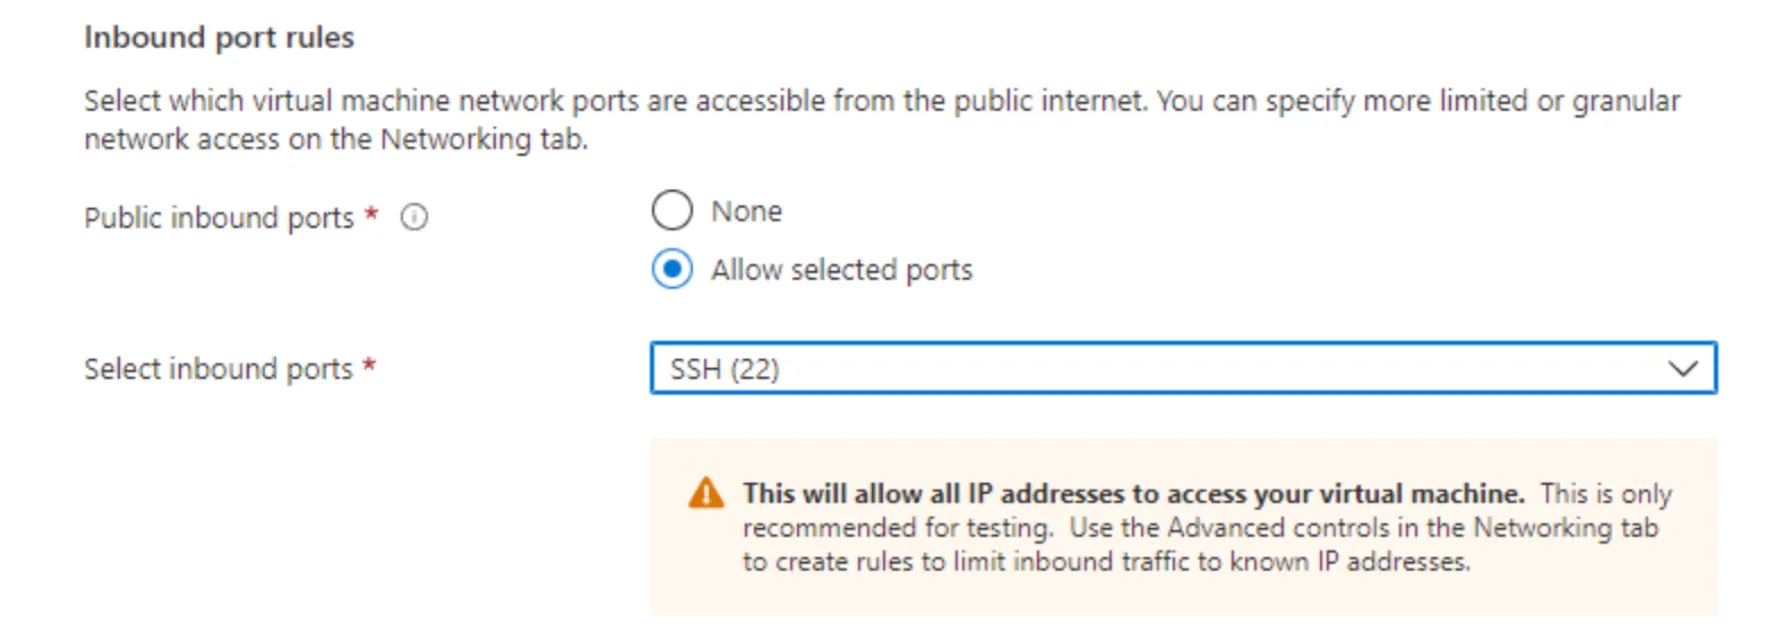
-
Select Review + create, then Create.
-
Once the VM is running, copy its Public IP address from the VM overview page. Also record the Private IP address — Azure by default uses the
10.0.0.0/8subnet. -
SSH into the instance:
Terminal window ssh -i "your-key.pem" azureuser@<PUBLIC_IP> -
Run
sudo suto gain full admin rights to the VM. -
For testing purposes, you can deploy a basic Apache web server on port
80:Terminal window apt updateapt -y install apache2cat <<EOF > /var/www/html/index.html<html><body><h1>Hello Cloudflare!</h1><p>This page was created for a Cloudflare demo.</p></body></html>EOF -
To verify that the Apache server is running, open a browser and go to
http://<PUBLIC_IP>(make sure to connect overhttp, nothttps). You should see the Hello Cloudflare! test page.
Create a Cloudflare Tunnel in Cloudflare One and run the tunnel on the Azure VM.
-
Log in to the Cloudflare dashboard ↗ and go to Zero Trust > Networks > Connectors > Cloudflare Tunnels.
-
Select Create a tunnel.
-
Choose Cloudflared for the connector type and select Next.
-
Enter a name for your tunnel (for example,
azure-tunnel). -
Select Save tunnel.
-
Under Choose your environment, select Debian. Copy the command shown in the dashboard and run it on your Azure VM.
-
Once the command has finished running, your connector will appear in Cloudflare One.
-
Select Next.
Published applications allow anyone on the Internet to connect to HTTP resources hosted on your virtual private cloud (VPC). To add a published application for your Cloudflare Tunnel:
- In the Published application routes tab, enter a hostname for the application (for example,
hellocloudflare.<your-domain>.com). - Under Service, enter
http://localhost:80. - Select Save.
- To test, open a browser and go to
http://hellocloudflare.<your-domain>.com. You should see the Hello Cloudflare! test page.
You can optionally create an Access application to control who can access the service.
Private network routes allow users to connect to your Azure Virtual Network (VNet) using the Cloudflare One Client. To add a private network route for your Cloudflare Tunnel:
-
In the Cloudflare dashboard ↗, go to Zero Trust > Networks > Routes.
-
In the CIDR tab, enter the Private IP address of your Azure VM (for example,
10.0.0.4). You can expand the IP range later if necessary. -
In your Split Tunnel configuration, make sure the private IP is routing through the Cloudflare One Client. For example, if you are using Split Tunnels in Exclude mode, delete
10.0.0.0/8. We recommend re-adding the IPs that are not explicitly used by your Azure VM.To determine which IP addresses to re-add, subtract your Azure VM IPs from
10.0.0.0/8:Add the results back to your Split Tunnel Exclude mode list.
-
To test on a user device:
- Log in to the Cloudflare One Client.
- Open a terminal window and connect to the service using its private IP:
Terminal window curl 10.0.0.4<html><body><h1>Hello Cloudflare!</h1><p>This page was created for a Cloudflare demo.</p></body></html>
You can optionally create Gateway network policies to control who can access the Azure VM via its private IP.
To secure your Azure VM, you can configure your Network Security Group (NSG) ↗ to deny all inbound traffic and allow only outbound traffic to the Cloudflare Tunnel IP addresses. All NSG rules are evaluated by priority; traffic that does not match an allow rule is blocked by the default deny rules. Therefore, you can delete all custom inbound rules and leave only the relevant outbound rules.
After configuring your NSG rules, verify that you can still access the service through Cloudflare Tunnel via its public hostname or private IP. The service should no longer be accessible from outside Cloudflare Tunnel — for example, direct access to the VM's public IP should no longer work.