WordPress.com and Cloudflare
Cloudflare and WordPress.com are partnering to offer customers Cloudflare's performance and security solutions with WordPress.com's web-hosting platform. Getting started is easy.
1. Add your WordPress site to Cloudflare. Do the following:
- Create a Cloudflare account.
- Onboard your domain to Cloudflare.
During this process, Cloudflare scans your existing WordPress.com DNS records and displays them. The records will look similar to the examples below.
A example.com 192.0.78.12A example.com 192.0.78.13
WordPress.com does not guarantee the IP address will never change. For maximum uptime, you should complete the following:
2. Find your <site>.wordpress.com domain from the Manage Domains ↗ page. The domain will look like examplecom.wordpress.com, i.e. your domain with non-alphanumeric characters removed.
3. Enter the domain into your browser's address bar to make sure the domain is correct.
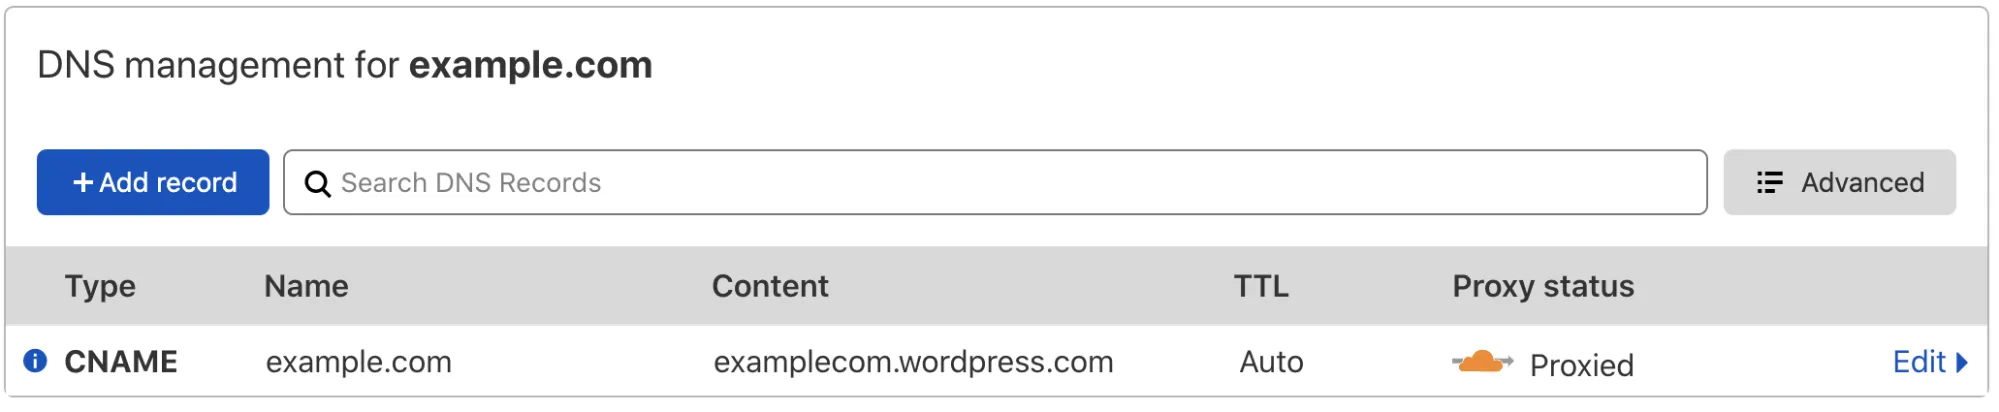
4. Add the record CNAME @ examplecom.wordpress.com.
5. Remove the A records.
Congratulations! Your site is now accelerated and protected by Cloudflare.
Cloudflare Web Analytics gives web creators the information they need in a simple, clean way that doesn't sacrifice their visitors' privacy. One of the goals of the partnership is to bring a privacy-first analytics solution to WordPress.com sites.
1. Open your dashboard ↗ and select the Account menu > Account Home.
2. On the Account homepage, select Analytics & Logs > Web Analytics.
3. Enter the hostname to use with Web Analytics. Typically the hostname is your top-level domain, like example.com.
4. Click Next.
5. Select Click to copy under Copy JS Snippet.
1. Open WordPress and select your site.
2. Select Tools > Marketing.
3. Locate the Cloudflare section.
4. Paste the code snippet you copied from Cloudflare into the Tracking ID field. The field will extract the Tracking ID from the snippet.
5. Toggle Add to Cloudflare to enable the tracking.
WordPress.com automatically adds the javascript to each page of your site. You can view the new insights from your Cloudflare dashboard under Web Analytics.
Cloudflare's Automatic Platform Optimization ↗ for WordPress.com is the easiest way to drastically speed up your WordPress.com site. With the APO plugin ↗, Cloudflare accelerates your WordPress.com site by intelligently caching dynamic content, which means fast performance for your visitors no matter where they are. For more information, refer to Automatic Platform Optimization and to the blog ↗.
- Cloudflare free plan + $5/month APO add-on or a Pro or Business plan subscription (includes APO)
- WordPress.com Business plan or above (requires plugins)
1. From WordPress, install the Cloudflare WordPress plugin ↗ on your WordPress website or update to the latest version (3.8.2 or higher).
2. Authenticate the plugin ↗ to connect to Cloudflare if you have not already done so.
3. From the Home screen of the Cloudflare section, turn on Automatic Platform Optimization.
For more details, refer to Understanding Automatic Platform Optimization (APO) with WordPress.
1. Visit https://dnschecker.org ↗.
2. From the dropdown under DNS Check, select NS record.
3. In the text field, enter your domain name and click Search.
4. Verify that your Cloudflare nameservers display.
In a terminal, use the following cURL. The header 'accept: text/html' is important
curl -svo /dev/null -A "CF" 'https://example.com/' -H 'accept: text/html' 2>&1 | grep 'cf-cache-status\|cf-edge\|cf-apo-via'< cf-cache-status: HIT< cf-apo-via: cache< cf-edge-cache: cache,platform=wordpressAs always, cf-cache-status displays if the asset hit the cache or was considered dynamic and served from the origin.
- The
cf-apo-viaheader returns the APO status for the given request. - The
cf-edge-cacheheader means the WordPress plugin is installed and enabled.
1. Publish a change on your WordPress website.
2. Refresh the page twice.
3. You should see a change. The page should be cached with cf-cache-status: HIT and cf-apo-via: cache in a response header.