

A new GA release for the Windows Cloudflare One Client is now available on the stable releases downloads page.
This hotfix addresses a Windows authentication issue in the embedded WebView2 browser. Single sign-on could fail to use the Windows primary account, causing users to be prompted for an interactive sign-in. The embedded authentication browser now allows SSO providers to use the OS primary account when available.
Workflows pricing now includes per-step billing. Requests and CPU time billing have been enabled since the initial public beta and is not changing.
A step is each unit of work executed by a Workflow, including step operations such as sleeping or waiting for events.
You can query Workflows analytics, including
stepCountfor a Workflow instance, with the GraphQL Analytics API.Starting no earlier than August 10th, 2026, Cloudflare will begin billing for step and storage usage on Workers Paid plans.
Storage pricing has been published since Workflows became generally available and is not changing. Storage is measured as persisted Workflow state in GB-months.
Dimension Workers Free Workers Paid Steps 3,000 included per day 500,000 included per month, then $0.80 per additional 100,000 steps Storage 1 GB-month included 1 GB-month included, then $0.20 per additional GB-month Developers on the Workers Free plan will not be charged for steps or storage beyond the included amounts.
Cloudflare will not bill step and storage usage before August 10, 2026.
You can review Workflows usage in the Cloudflare dashboard ↗ before this change takes effect. To reduce costs, consider reducing the number of steps per Workflow or improving the memory efficiency of your stored state.
Refer to the Workflows pricing page for full details.
You can now configure file transfer controls for browser-based RDP with Cloudflare Access, allowing you to restrict whether users can upload or download files between their local machine and the remote Windows server.

This feature is useful for organizations that support bring-your-own-device (BYOD) policies or third-party contractors using unmanaged devices. By restricting file transfers, you can prevent sensitive data from being moved out of the remote session to a user's personal device.
File transfer controls are configured per policy within your Access application, alongside existing text clipboard controls. For each policy, you can select one of the following options:
- Client to remote RDP session allowed — Users can upload files from their local machine into the browser-based RDP session.
- Remote RDP session to client allowed — Users can download files from the browser-based RDP session to their local machine.
- Both directions allowed — Users can upload and download files between their local machine and the browser-based RDP session.
- Disable copying/pasting — Users are not allowed to transfer files between their local machine and the browser-based RDP session.
By default, file transfer is denied for new policies. For existing Access applications created before this feature was available, file transfer remains denied.
To upload, drag files into the browser window or select the settings gear icon on the left side of the RDP session. To download, copy a file in the remote session and select the settings gear to download it, download multiple files as a zip, or print PDFs to a local printer.


This feature is in beta and available on all Zero Trust plans. For more information, refer to File transfer for browser-based RDP.
Browser Isolation now supports Gateway authorization proxy endpoints. You can apply HTTP Isolate policies to traffic routed through authorization proxy endpoints, the same way you can for traffic from the Cloudflare One Client.
Previously, only source IP proxy endpoints supported Browser Isolation, and only with non-identity policies. Because authorization proxy endpoints authenticate users through an identity provider, you can now apply identity-based Isolate policies to PAC file-proxied traffic without requiring the Cloudflare One Client.
To get started, create an authorization proxy endpoint and build an Isolate policy.
Browser Run now supports a standalone
/accessibilityTreeendpoint, giving agent and automation workflows direct access to the browser's accessibility tree for a rendered webpage.An accessibility tree is the browser's structured view of a rendered page: roles, names, states, values, and hierarchy. It is useful for accessibility tooling, but also for AI agents and automation workflows that need page structure without the noise of raw HTML or the cost of screenshots.
For AI agents, this means less inference from pixels and less parsing HTML. You can provide the page structure directly, helping agents identify available elements and determine which actions they can take.
With the new
/accessibilityTreeendpoint, you can request the accessibility tree directly when you only need the semantic structure of a page. If you need multiple page formats in a single API call, you can use the/snapshotendpoint, which also returns Markdown, HTML, and screenshots.Terminal window curl -X POST 'https://api.cloudflare.com/client/v4/accounts/<accountId>/browser-run/accessibilityTree' \-H 'Authorization: Bearer <apiToken>' \-H 'Content-Type: application/json' \-d '{"url": "https://example.com/"}'{"success": true,"result": {"accessibilityTree": {"role": "RootWebArea","name": "Example Domain","children": [{"role": "heading","name": "Example Domain","level": 1},{"role": "link","name": "Learn more"}]}}}Use
interestingOnlyto return only semantically meaningful nodes, orrootto capture the accessibility tree for a specific subtree.Refer to the
/accessibilityTreedocumentation for usage examples and supported parameters.
R2 Data Catalog is a managed Apache Iceberg ↗ catalog built directly into your R2 bucket. Iceberg tracks your data through a tree of metadata files, so every insert, update, and delete must go through a catalog transaction. Manually adding, modifying, or deleting objects outside the catalog can leave pointers referencing files that no longer exist, corrupting the table into an inconsistent state that is difficult to recover from.
To help prevent this, the R2 dashboard and Wrangler now warn you when you attempt a manual delete operation on a Data Catalog-enabled bucket.
When you try to delete objects from a bucket that has R2 Data Catalog enabled, the dashboard displays a warning explaining that the operation could leave the catalog in an invalid state, with a link to the documentation for deleting data correctly. You can cancel the operation or choose to proceed anyway.
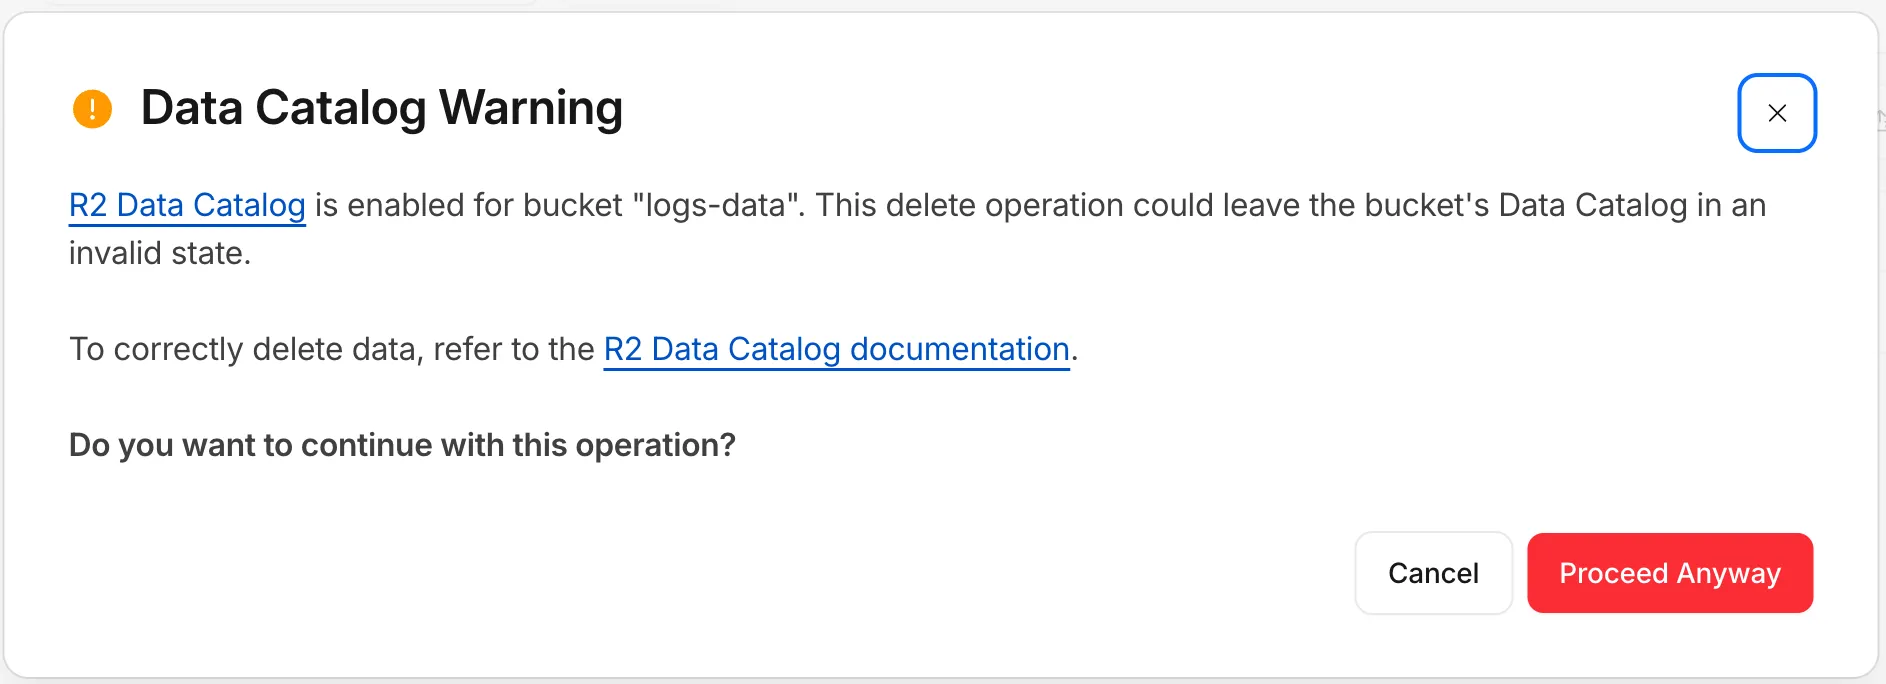
Wrangler now checks whether a bucket is Data Catalog-enabled before running a delete and warns you before continuing:
Data Catalog is enabled for this bucket.Proceeding may leave the data catalog in an invalid state. Continue?To learn how to safely manage and delete data in your tables, refer to the R2 Data Catalog documentation.
You can now register a Cloudflare One Virtual Appliance and generate its license key directly from the dashboard, without contacting your account team.

- On the Connectors page, select Add an appliance and choose Virtual appliance to register a virtual appliance and generate its authentication key.
- Use Regenerate authentication key from a virtual appliance connector's menu to rotate its key. The previous key is immediately and irrevocably revoked.
- The authentication key is shown only once — copy and store it securely.
This complements the existing API and Terraform self-serve workflow for provisioning virtual appliances. Hardware appliances continue to use the existing account-team fulfillment workflow.
For details, refer to Configure a Cloudflare One Virtual Appliance.
Announcement Date Release Date Release Behavior Legacy Rule ID Rule ID Description Comments 2026-07-06 2026-07-13 Log N/A Citrix Netscaler ADC - Insufficient Input Validation - CVE:CVE-2026-8451 This is a new detection.
2026-07-06 2026-07-13 Log N/A Progress Kemp LoadMaster - Remote Code Execution - CVE:CVE-2026-8037 This is a new detection.
We have released version 5 of
@cloudflare/workers-types↗. This release simplifies the package to expose only the latest runtime types.We still recommend that you generate types for your Worker using
wrangler types, but if you want to use the package directly, you can install it with your package manager of choice:npm i -D @cloudflare/workers-types@latestyarn add -D @cloudflare/workers-types@latestpnpm add -D @cloudflare/workers-types@latestbun add -d @cloudflare/workers-types@latestThe package now exposes two entrypoints:
@cloudflare/workers-typesreflects the latest compatibility date, using the latest stable compatibility flags.@cloudflare/workers-types/experimentalreflects APIs behind experimental compatibility flags.
The dated entrypoints, such as
@cloudflare/workers-types/2022-11-30and@cloudflare/workers-types/2023-03-01, are removed. With runtime type generation in Wrangler v4, you can generate these with thewrangler typescommand to create types locked to your Worker's compatibility date.For more information, refer to TypeScript language support.
When you connect a data source to your AI Search instance, AI Search runs sync jobs to keep your index up to date with your content. You can now manage those jobs directly from Wrangler.
For example, you can trigger a sync job from your CI/CD or automated pipelines with the
jobs createcommand so your index refreshes when you push a change:Terminal window wrangler ai-search jobs create my-instanceThis creates an asynchronous sync job that checks for changes in your data source, and sends new, modified, or deleted files to be indexed. The following commands are available:
Command Description wrangler ai-search jobs createTrigger a new sync job wrangler ai-search jobs listList sync jobs for an instance wrangler ai-search jobs getGet details for a job wrangler ai-search jobs cancelCancel a running job wrangler ai-search jobs logsView log entries for a job All commands accept
--namespace/-n(defaults todefault) and--jsonfor structured output that automation and AI agents can parse directly. Thelistandlogscommands also support--pageand--per-pagefor pagination, andcancelprompts for confirmation unless you pass-y/--force.For full usage details, refer to the AI Search Wrangler commands documentation.
Your origin can serve different responses for the same URL — different languages based on
Accept-Language, or different formats based onAccept— by returning aVary↗ response header. Cloudflare's cache now honors that header directly in Cache Rules, so the same URL can hold multiple cached versions and each request is matched to the right one. Content that previously had to bypass cache to stay correct can now be cached, following standard HTTP caching behavior ↗.Your origin now decides which request headers matter by listing them in its
Varyresponse, and you control how Cloudflare treats each one. When you have enabled Vary using a cache rule and a response includes aVaryheader, the request headers listed become part of the cache key.For each header your origin varies on, choose one of three actions:
Action Behavior Best for normalizeConverts equivalent header values to the same cache key value before matching, collapsing redundant versions. Most Accept,Accept-Language, andAccept-Encodinguse cases.passthroughUses the raw header value to select the cached version and forwards it to the origin unchanged. When byte-for-byte differences in the header value should create versions. bypassBypasses cache whenever this header name appears in the origin's Varyresponse.Per-user values, or headers with too many possible values to cache safely. - Higher cache hit ratios:
normalizetreats semantically equivalent headers as one version. For example,Accept-Language: en-US, fr;q=0.8andAccept-Language: fr;q=0.8, en-GBboth resolve to the same cache key, so you serve more requests from cache instead of the origin. - Correct content negotiation: Requests always receive the cached version that matches their headers, so language and format variants stay accurate.
- No origin or Worker changes required: If your origin already sends
Vary, you configure the behavior entirely in Cache Rules. - Standards-aligned: Cache key calculation follows RFC 9111, and
Vary: *continues to bypass cache as required by RFC 9110.
Vary in Cache Rules is available on all plans (Free, Pro, Business, and Enterprise). For per-request control in Workers subrequests, use the
cf.varyproperty.Configure Vary in the Cloudflare dashboard ↗ under Caching > Cache Rules, or through the Rulesets API. To learn how Vary affects cache keys and how each action works, refer to Vary and the Cache Rules Vary setting.
- Higher cache hit ratios:
You can now add hostname routes to a Cloudflare Mesh node, in addition to CIDR routes.
-
Requests
wiki.internal.local - DNS query
-
Returns a token IP, then rewrites the destination to the real private IP.
100.80.0.0/16 - Hostname route
-
Forwards traffic to the host on the local network
- Private host
wiki.internal.local·10.0.0.50
Instead of managing IP ranges, you can attract traffic for a hostname to a Mesh node:
- Private hostname (for example,
wiki.internal.local) — reach an internal application by name, which is useful when it has an unknown or ephemeral IP. On Mesh you do not need to run a DNS server; a local hosts-file entry on the node is enough, or you can use a Gateway resolver policy for split DNS. - Public hostname (for example,
www.example.com) — route that hostname's traffic through the node and egress via the node's public IP.
For setup steps, prerequisites, and DNS options, refer to Hostname routes.
-
Wrangler CLI now supports auth profiles: named logins that you scope to specific Cloudflare accounts and switch between automatically, based on the directory you are working in.
A profile is a named OAuth login bound to a directory. Commands run in that directory, and its subdirectories, use the matching account — so you can move between accounts without re-running
wrangler login.Use profiles to keep a separate login for each client when working at an agency, or to separate staging and production into different accounts. Pair a profile with an
account_idin your Wrangler configuration file so a command cannot reach the wrong account.Terminal window # Create a profile for each account, choosing which accounts it can reachwrangler auth create client-awrangler auth activate client-a ~/clients/client-awrangler auth create client-bwrangler auth activate client-b ~/clients/client-bUse the
--profileflag to run a single command with a specific profile:Terminal window wrangler deploy --profile personalIn CI and other automated environments,
CLOUDFLARE_API_TOKENstill takes precedence over all profiles.For setup, the resolution order, and the full command reference, refer to Authentication profiles.
A new GA release for the Linux Cloudflare One Client is now available on the stable releases downloads page.
This package is the same release as 2026.6.822.0, with a fix for our RPM package. Previously the repository served a single build to every OS version, so an install could pull a dependency that isn't available on that release. The repository now serves the correct build for each operating system version, so installs automatically pull the dependencies that version requires. Debian and Ubuntu were not affected.
If you installed version 2026.6.822.0 on an RPM-based distribution, we recommend refreshing your repository configuration:
sudo curl -fsSL https://pkg.cloudflareclient.com/cloudflare-warp-ascii.repo | sudo tee /etc/yum.repos.d/cloudflare-warp.repo
sudo dnf clean all
sudo dnf install cloudflare-warp
Access now correctly preserves URL fragment characters (
/,?,=,&,;) when redirecting users back to an application after login. Previously, these characters were encoded withencodeURIComponent, which mangled fragment-based routes used by single-page applications (SPAs).For example, an SPA URL like
https://app.example.com/#/dashboard?tab=settings&view=advancedwould previously redirect to a broken URL after login. This is now handled correctly.If your SPA users were experiencing broken navigation after authenticating through Access, this fix resolves the issue without any configuration changes.
Access for Infrastructure now supports independent multi-factor authentication (MFA) for SSH connections using YubiKey PIV keys. This adds a hardware-backed second factor to SSH access, ensuring that a compromised device session alone is not sufficient to reach your servers.
With per-application and per-policy configuration, you can enforce PIV key authentication for sensitive usernames (for example,
root) while applying different requirements for other usernames. You can also set an MFA session duration to control how often users must re-authenticate.Users enroll their YubiKey PIV key through the App Launcher. For enrollment instructions and SSH client setup, refer to Enroll a PIV key for infrastructure apps.
For setup instructions, refer to Enforce MFA for infrastructure applications.
Not all AI traffic is the same. Now, all customers — including those on the Free plan — can manage AI crawlers based on what they actually do on your site. Cloudflare groups AI traffic into three behaviors you can control independently: Search, Agent, and Training. This lets you keep the automated traffic that sends readers and revenue back to you, while blocking the traffic that only takes from your content.
Each behavior maps to a real use case. Search covers crawlers that index your content so they can answer questions about it later, where you should expect referral traffic or other equitable compensation in return. Agent covers automated activity acting in real time on a person's behalf, such as chat fetch bots and browser-use agents. Training covers crawlers that take your content to train or fine-tune a model. For each preset you can choose to block on all pages, block only on pages that display ads, or choose not to block.

Starting September 15, 2026, new domains onboarding to Cloudflare receive updated defaults: Bots classified as Training or as Agent are blocked on pages that display ads, while Search remains allowed. On that date, multi-purpose crawlers that combine Search and Training will be affected by the new defaults to block Training. All customers can opt out of the new defaults ↗ at any time before September 15.
With Content Independence Day 2026, Enterprise Bot Management customers get two new tools that make bot traffic far easier to see and reason about: BotBase, a searchable directory of every bot Cloudflare tracks, and Attribution Business Insights, a dashboard that shows how much value each crawler sends back to your business.
BotBase is Cloudflare's directory of all known bots and agents, available directly in the dashboard. It shows how Cloudflare classifies each bot by behavior — Search, Agent, Training, and other categories such as Transact, Data Collection, SEO, and Ads Verification — so you can understand why a given crawler is visiting you. You can search and filter the full catalogue, filter your own traffic down to a single bot to investigate its activity on your zone, and copy any bot's detection ID to target it precisely in Security rules. Every tracked bot in BotBase is also published in Cloudflare Radar's bots and agents directory ↗.
Attribution Business Insights is built for content owners and business decision-makers who want to know which bots help or harm their business, without reading rule syntax. The dashboard reports crawl-to-referral ratios both site-wide and per bot operator — comparing how often a company crawls your content against how many visitors it actually refers back — over the last 24 hours, 7 days, or 30 days. Each operator is labeled with Cloudflare's updated classification and an action status of Allowed, Blocked, or Partially blocked, giving stakeholders a shared, at-a-glance view of the AI traffic reaching your site.

Containers now support Google Artifact Registry ↗ images. After you configure credentials, you can use a fully qualified Google Artifact Registry image reference in your Wrangler configuration instead of first pushing the image to Cloudflare Registry.
Provide the service account email with
--gar-emailand pipe the service account JSON key throughstdin:Terminal window cat <PATH_TO_KEY> | npx wrangler containers registries configure <REGION>-docker.pkg.dev --gar-email=<SERVICE_ACCOUNT_EMAIL> --secret-name=<SECRET_NAME>JSONC {"$schema": "./node_modules/wrangler/config-schema.json","containers": [{"image": "<REGION>-docker.pkg.dev/<PROJECT_ID>/<REPOSITORY>/<IMAGE>:<TAG>"}]}TOML # Example: us-central1-docker.pkg.dev/my-project/my-repo/my-image:latest[[containers]]image = "<REGION>-docker.pkg.dev/<PROJECT_ID>/<REPOSITORY>/<IMAGE>:<TAG>"Only
*-docker.pkg.devhosts are supported. To configure credentials, refer to Use private Google Artifact Registry images.For more information, refer to Image management.
We have greatly improved the throughput of the Vectorize write-ahead log (WAL) ↗. As a result, we have significantly reduced the end-to-end latency for a vector change to become queryable: median latency has dropped from 2 minutes to under 30 seconds, and p99 latency from 5 minutes to under 2 minutes.

This means inserts, upserts, and deletes are reflected in query results faster, improving the freshness of semantic search, recommendation, and retrieval-augmented generation (RAG) workloads. You do not need to change your code or configuration to benefit from this improvement.
For more information, refer to the Vectorize documentation.
This release adds targeted coverage for a path traversal flaw in Fortinet FortiSandbox (CVE-2026-39813) and transitions the Anomaly:Header:User-Agent - Fake Bing or MSN Bot rule action from Block to Disabled.
Key Findings
- CVE-2026-39813: A path traversal vulnerability in Fortinet FortiSandbox allows remote, unauthenticated attackers to read arbitrary files from the underlying filesystem due to insufficient validation of user-supplied input paths.
Ruleset Rule ID Legacy Rule ID Description Previous Action New Action Comments Cloudflare Managed Ruleset N/A Fortinet FortiSandbox - Path Traversal - CVE:CVE-2026-39813 Log Block This is a new detection.
Cloudflare Managed Ruleset N/A Anomaly:Header:User-Agent - Fake Bing or MSN Bot Enabled Disabled We are changing the action for this rule from BLOCK to Disabled
You can now assign granular, resource-scoped roles for Cloudflare Gateway firewall policies and Zero Trust lists. Administrators can delegate access to specific policy types or list management without granting account-wide or product-wide control.
When you add a member or create a permission policy, the following resource-scoped roles are now available:
Role Description Zero Trust Gateway Firewall Policies Admin Can view and edit all Gateway firewall policies, including DNS, HTTP, and Network policies. Zero Trust Gateway DNS Policies Admin Can view and edit Gateway DNS policies. Zero Trust Gateway HTTP Policies Admin Can view and edit Gateway HTTP policies. Zero Trust Gateway Network Policies Admin Can view and edit Gateway Network policies. Zero Trust Gateway Egress Policies Admin Can view and edit Gateway Egress policies. Zero Trust Gateway Resolver Policies Admin Can view and edit Gateway Resolver policies. Zero Trust Gateway Policies Admin Can view and edit all Gateway policies. Zero Trust Gateway Policies Read Can view all Gateway policies. Zero Trust Gateway Read Only Can view all Gateway resources. Zero Trust DNS Locations Admin Can view and edit DNS locations. Zero Trust Proxy Endpoints Admin Can view and edit Gateway Proxy Endpoints. Zero Trust Account Lists Admin Can view and edit all Gateway and Access lists. Zero Trust Account Lists Read Can view all Gateway and Access lists. These roles allow you to:
- Grant a network engineer write access to Network policies only, without exposing DNS or HTTP policy configuration.
- Allow a security analyst to view all Gateway policies in read-only mode for auditing purposes.
- Delegate list management to a team that maintains block and allow lists without giving them access to policy configuration.
You can also now assign Resource-scoped roles. These roles are complementary to existing account-level roles, and allow you to grant access to a specific resource, like an individual Gateway policy or Cloudflare One list. Existing account-level roles continue to work. A member with the
Cloudflare GatewayorCloudflare Zero Trustrole retains full access to all Gateway resources. This ensures backward compatibility for existing automation and API tokens.- Review the resource-scoped roles on the Cloudflare role reference.
- Learn how to create permission policies that use these roles.
Cloudflare Logpush now supports firewall events as an account-scoped dataset. Configure a single Logpush job at the account level to receive firewall events for every zone in the account, instead of creating and maintaining a separate job per zone.
The dataset includes a new
ZoneNamefield so you can identify which zone each event came from when consuming logs in your downstream pipeline.- A new account-scoped
firewall_eventsdataset, configurable via the Logpush API or the Cloudflare dashboard. - The same fields and filter expressions supported by the existing zone-scoped firewall events dataset, plus the new
ZoneNamefield. - Support for all existing Logpush destinations.
- A new account-scoped
You can now monitor how much memory your Workers and Durable Objects consume across invocations with the new Memory Usage chart in the Workers Metrics tab, broken down by P50, P90, P99, and P999 percentiles.

Memory usage measures the V8 isolate memory at the time of each invocation, subject to the 128 MB per-isolate limit — a single isolate can handle many concurrent requests and shares memory across them.
Use the Memory Usage chart to:
- Track memory trends — Spot gradual increases that may indicate a memory leak before they cause
Exceeded Memoryerrors. - Correlate with deployments — Deployment markers on the chart help you identify whether a new version introduced a memory regression.
- Right-size your Worker — Understand your baseline memory footprint and how much headroom you have before hitting the 128 MB limit.
For Durable Objects, memory usage reflects the in-memory state an object holds (class properties, caches, active WebSocket connections), which persists across invocations until the object is hibernated or evicted. This state is not preserved across eviction, hibernation, or a crash, so persist anything important to storage.
To view memory usage, open the Metrics tab for your Worker ↗ or Durable Object namespace ↗. For Durable Objects, you can filter by DO ID or name to drill down into memory usage for a specific object. You can also query memory usage programmatically via the GraphQL Analytics API using the
workersInvocationsAdaptivedataset — thequantiles.memoryUsageBytesP50throughquantiles.memoryUsageBytesP999fields return percentile values in bytes.For local memory debugging, you can also profile memory with DevTools to take heap snapshots and identify specific objects causing high memory usage.
- Track memory trends — Spot gradual increases that may indicate a memory leak before they cause
A new GA release for the Windows Cloudflare One Client is now available on the stable releases downloads page.
This release introduces multiple features from our previous beta release into stable release, including:
- The client now applies DNS search suffixes configured in your device profile / network policy. Administrators can push a list of DNS search domains that the client appends to single-label queries, alongside any system-configured suffixes. See DNS search suffixes for details.
- Added mandatory authentication. When enabled via MDM, the Cloudflare One Client blocks all Internet traffic from the moment the machine boots until the user authenticates, closing the visibility gap on newly deployed devices and during re-authentication. See the announcement blog and documentation for details.
- Upgraded security of device registration to be hardware-backed. Registration tokens can now be generated in the TPM (with TPM 2.0+) whenever it is available to provide stronger protection against device impersonation. See Hardware-backed registration for details.
- Added a local-file signal source for Emergency Disconnect. In addition to the existing HTTPS polling mechanism, administrators can now configure WARP to monitor for a file on disk; the presence of the file triggers an emergency disconnect even if both Cloudflare and your own infrastructure are unreachable. Either signal being asserted triggers disconnect; both must be cleared for normal operation to resume.
- Added new warp-cli debug commands for interactive connection diagnosis. See Extra debug logging for details.
- The local DNS proxy now supports DNSSEC passthrough. DNSSEC-signed responses are forwarded to the application intact (including DO/AD bits and RRSIG records), so applications that validate DNSSEC locally — including resolvers and the dig/drill tooling — work correctly through the client.
- Added a new MDM format for organization-wide settings, including a cleaner way to configure the compliance environment (e.g. FedRAMP). The previous per-configuration approach still works, but the new format is now recommended. See the updated Cloudflare One MDM documentation for details.
- Added support for dashboard-managed client version deployments. Administrators can now upgrade or downgrade the client version on enrolled devices directly from the Zero Trust dashboard. See Client version assignments for details.
Additional Changes and improvements
- Starting with 2026.6.822.0, the client unifies all API requests under the
api.devices.cloudflare.comSNI, where previously bothzero-trust-client.cloudflareclient.comandnotifications.cloudflareclient.comwere used. Review Cloudflare One Client with firewall to ensure systems that rely on SNI inspection do not block the API traffic. The behavior of previous client versions is unaffected. - Client Certificate device-posture checks now support template variables (e.g.
${serial_number},${device_uuid}) in the Subject Alternative Name field. Previously only the Common Name field accepted variables, which broke posture rules that pinned identity to a SAN entry. - Improved accessibility by using high contrast colors and more defined color boundaries when high contrast is enabled in Windows Accessibility settings.
- Path MTU Discovery (PMTUD) is now enabled by default.
- The UseWebView2 registry value (HKLM\SOFTWARE\Cloudflare\CloudflareWARP\UseWebView2 = y) is once again honored by the new GUI for authentication, so administrators who prefer the embedded WebView2 browser for sign-in can opt back in. This setting was effectively ignored in the previous release; the default browser was always used. This key is now also honored for re-authentications.
- Fixed a crash in the authentication browser when navigating to a site that prompts for browser permissions (microphone, camera, notifications, etc.). The same fix had previously landed for the captive-portal browser; this extends it to the auth browser.
- Fixed an issue in proxy mode where hostnames containing underscores (e.g. ai_app.com) were rejected, breaking apps that depend on such hostnames (notably ChatGPT sandbox apps). The local proxy now accepts underscore-containing hostnames in CONNECT requests.
- Fixed an issue where DNS queries would fail after the connection was idle, requiring users to retry.
- Fixed a high CPU issue when the device wakes from sleep.
- Users can now register with team names in any case format without errors.
- New UI fixes
- Fixed an issue where users with invalid MDM configurations were returned to the onboarding screen after successful authentication.
- Added a re-auth button and banner to the home screen so users don't miss it when their session expires.
- Added clear error messaging when the Cloudflare certificate needs to be installed.
- Brought back support for pausing the tunnel when connected to user-specified Wi-Fi networks for consumer users.
- New client UI now surfaces Split tunnel configuration and Local Domain Fallback configuration.
- Added ability to configure proxy mode for consumer users.
- Added back the option to quit for consumer users.
Known issues
- Single sign-on in the embedded WebView2 authentication browser may fail to use the Windows primary account, prompting for an interactive sign-in.
- An error indicating that Microsoft Edge can't read and write to its data directory may be displayed during captive portal login; this error is benign and can be dismissed.
- In rare cases, a registration may hang at "Checking your organization configuration" due to IPC errors. A system reboot should resolve the error, allowing registration to proceed.
- Windows ARM may prompt the user to close running applications while trying to install this version. Simply click "Ok" with the default highlighted option.