Use Direct Upload with continuous integration
Cloudflare Pages supports directly uploading prebuilt assets, allowing you to use custom build steps for your applications and deploy to Pages with Wrangler. This guide will teach you how to deploy your application to Pages, using continuous integration.
In your project directory, install Wrangler so you can deploy a folder of prebuilt assets by running the following command:
# Publish created project$ CLOUDFLARE_ACCOUNT_ID=<ACCOUNT_ID> npx wrangler pages deploy <DIRECTORY> --project-name=<PROJECT_NAME>To generate an API token:
-
In the Cloudflare dashboard, go to the API Tokens page.
Go to Account API tokens -
Select Create Token.
-
Under Custom Token, select Get started.
-
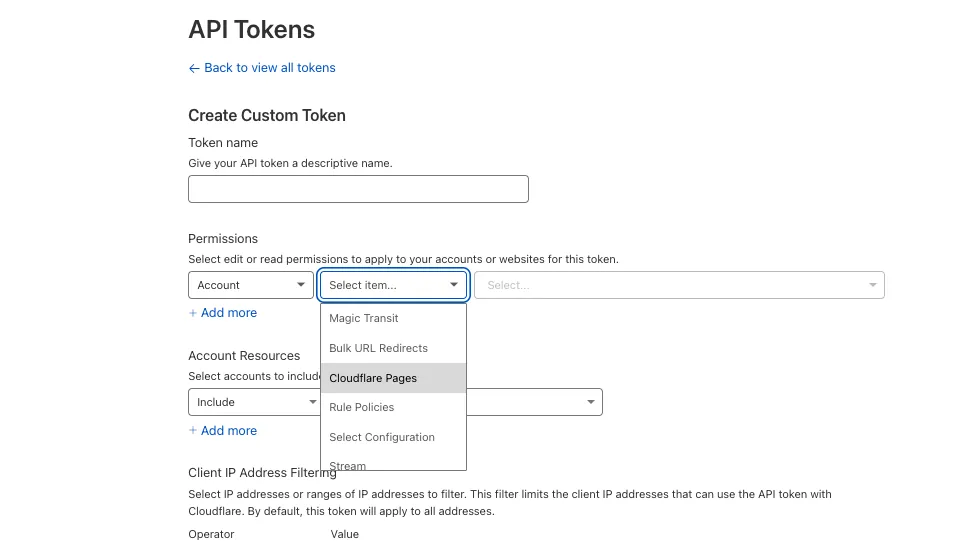
Name your API Token in the Token name field.
-
Under Permissions, select Account, Cloudflare Pages and Edit:
-
Select Continue to summary > Create Token.
Now that you have created your API token, you can use it to push your project from continuous integration platforms.
To find your account ID, go to the Zone Overview page in the Cloudflare dashboard.
Go to OverviewFind your account ID in the API section on the right-hand side menu.
If you have not added a zone, add one by selecting Add > Connect a domain. You can purchase a domain from Cloudflare's registrar.
GitHub Actions ↗ is a continuous integration and continuous delivery (CI/CD) platform that allows you to automate your build, test, and deployment pipeline when using GitHub. You can create workflows that build and test every pull request to your repository or deploy merged pull requests to production.
After setting up your project, you can set up a GitHub Action to automate your subsequent deployments with Wrangler.
In the GitHub Action you have set up, environment variables are needed to push your project up to Cloudflare Pages. To add the values of these environment variables in your project's GitHub repository:
- Go to your project's repository in GitHub.
- Under your repository's name, select Settings.
- Select Secrets > Actions > New repository secret.
- Create one secret and put CLOUDFLARE_ACCOUNT_ID as the name with the value being your Cloudflare account ID.
- Create another secret and put CLOUDFLARE_API_TOKEN as the name with the value being your Cloudflare API token.
Add the value of your Cloudflare account ID and Cloudflare API token as CLOUDFLARE_ACCOUNT_ID and CLOUDFLARE_API_TOKEN, respectively. This will ensure that these secrets are secure, and each time your Action runs, it will access these secrets.
Create a .github/workflows/pages-deployment.yaml file at the root of your project. The .github/workflows/pages-deployment.yaml file will contain the jobs you specify on the request, that is: on: [push] in this case. It can also be on a pull request. For a detailed explanation of GitHub Actions syntax, refer to the official documentation ↗.
In your pages-deployment.yaml file, copy the following content:
on: [push]jobs: deploy: runs-on: ubuntu-latest permissions: contents: read deployments: write name: Deploy to Cloudflare Pages steps: - name: Checkout uses: actions/checkout@v6 # Run your project's build step # - name: Build # run: npm install && npm run build - name: Deploy uses: cloudflare/wrangler-action@v3 with: apiToken: ${{ secrets.CLOUDFLARE_API_TOKEN }} accountId: ${{ secrets.CLOUDFLARE_ACCOUNT_ID }} command: pages deploy YOUR_DIRECTORY_OF_STATIC_ASSETS --project-name=YOUR_PROJECT_NAME gitHubToken: ${{ secrets.GITHUB_TOKEN }}In the above code block, you have set up an Action that runs when you push code to the repository. Replace YOUR_PROJECT_NAME with your Cloudflare Pages project name and YOUR_DIRECTORY_OF_STATIC_ASSETS with your project's output directory, respectively.
The ${{ secrets.GITHUB_TOKEN }} will be automatically provided by GitHub Actions with the contents: read and deployments: write permission. This will enable our Cloudflare Pages action to create a Deployment on your behalf.
CircleCI ↗ is another continuous integration and continuous delivery (CI/CD) platform that allows you to automate your build, test, and deployment pipeline. It can be configured to efficiently run complex pipelines with caching, docker layer caching, and resource classes.
Similar to GitHub Actions, CircleCI can use Wrangler to continuously deploy your projects each time to push to your code.
After you have generated your Cloudflare API token and found your account ID in the dashboard, you will need to add them to your CircleCI dashboard to use your environment variables in your project.
To add environment variables, in the CircleCI web application:
- Go to your Pages project > Settings.
- Select Projects in the side menu.
- Select the ellipsis (...) button in the project's row. You will see the option to add environment variables.
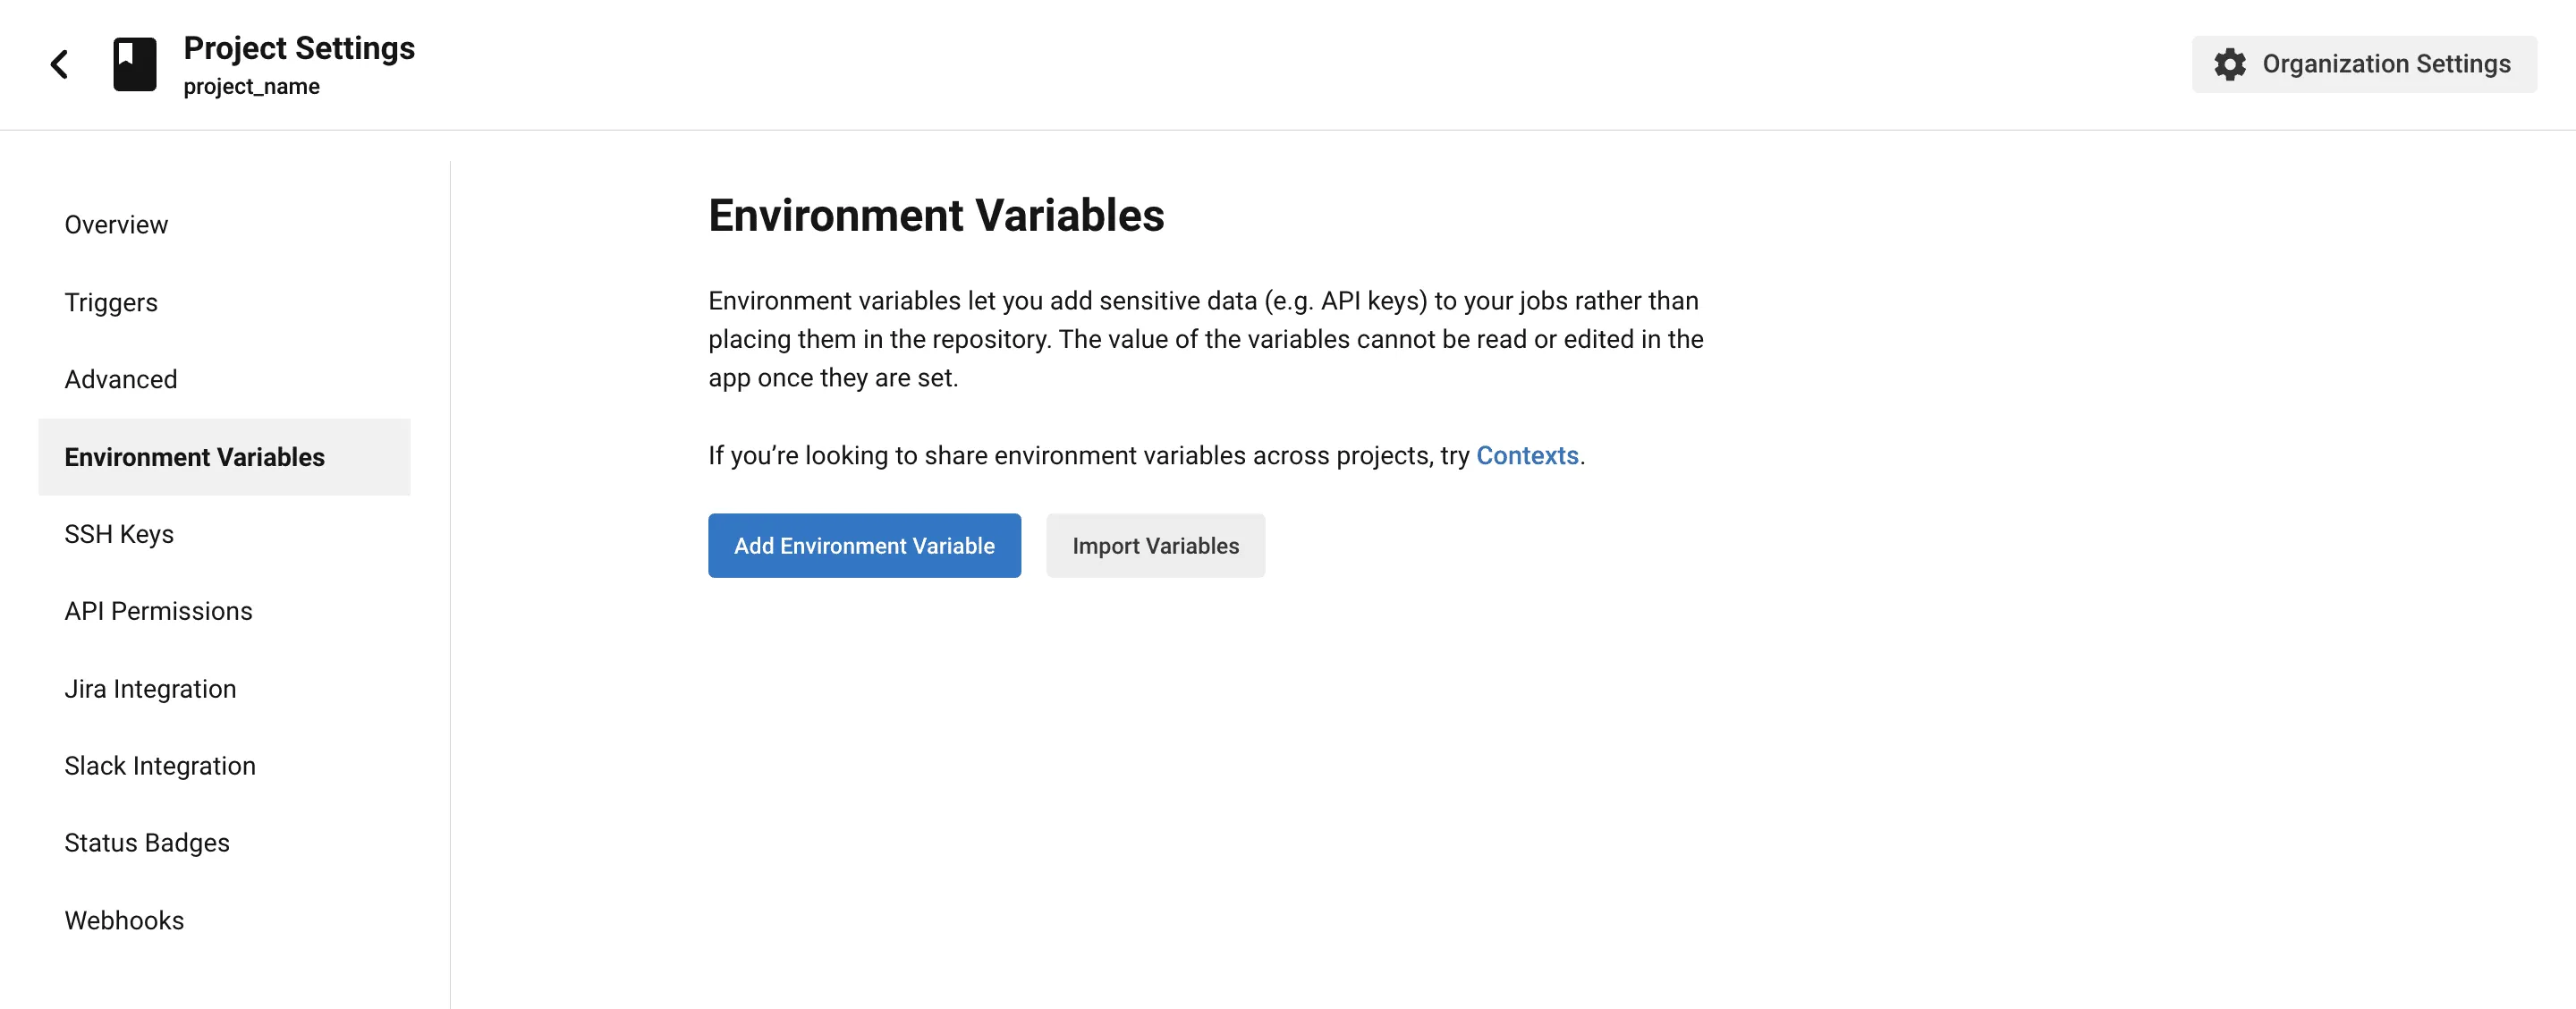
- Select Environment Variables > Add Environment Variable.
- Enter the name and value of the new environment variable, which is your Cloudflare credentials (
CLOUDFLARE_ACCOUNT_IDandCLOUDFLARE_API_TOKEN).
Create a .circleci/config.yml file at the root of your project. This file contains the jobs that will be executed based on the order of your workflow. In your config.yml file, copy the following content:
version: 2.1jobs:  Publish-to-Pages:    docker:      - image: cimg/node:18.7.0
    steps:      - checkout      # Run your project's build step      - run: npm install && npm run build      # Publish with wrangler      - run: npx wrangler pages deploy dist --project-name=<PROJECT NAME> # Replace dist with the name of your build folder and input your project name
workflows:  Publish-to-Pages-workflow:    jobs:      - Publish-to-Pages
Your continuous integration workflow is broken down into jobs when using CircleCI. From the code block above, you can see that you first define a list of jobs that run on each commit. For example, your repository will run on a prebuilt docker image cimg/node:18.7.0. It first checks out the repository with the Node version specified in the image.
You can modify the Wrangler command with any wrangler pages deploy options.
After all the specified steps, define a workflow at the end of your file. You can learn more about creating a custom process with CircleCI from the official documentation ↗.
Travis CI is an open-source continuous integration tool that handles specific tasks, such as pull requests and code pushes for your project workflow. Travis CI can be integrated into your GitHub projects, databases, and other preinstalled services enabled in your build configuration. To use Travis CI, you should have A GitHub, Bitbucket, GitLab or Assembla account.
In your Travis project, add the Cloudflare credentials you have generated from the Cloudflare dashboard to access them in your travis.yml file. Go to your Travis CI dashboard and select your current project > More options > Settings > Environment Variables.
Set the environment variable's name and value and the branch you want it to be attached to. You can also set the privacy of the value.
Go to Travis-ci.com ↗ and enable your repository by login in with your preferred provider. This guide uses GitHub. Next, create a .travis.yml file and copy the following into the file:
language: node_jsnode_js:  - "18.0.0" # You can specify more versions of Node you want your CI process to supportbranches:  only:    - travis-ci-test # Specify what branch you want your CI process to run oninstall:  - npm install
script:  - npm run build # Switch this out with your build command or remove it if you don't have a build step  - npx wrangler pages deploy dist --project-name=<PROJECT NAME>
env:  - CLOUDFLARE_ACCOUNT_ID: { $CLOUDFLARE_ACCOUNT_ID }  - CLOUDFLARE_API_TOKEN: { $CLOUDFLARE_API_TOKEN }
This will set the Node.js version to 18. You have also set branches you want your continuous integration to run on. Finally, input your PROJECT NAME in the script section and your CI process should work as expected.
You can also modify the Wrangler command with any wrangler pages deploy options.