Build a blog using Nuxt.js and Sanity.io on Cloudflare Pages
In this tutorial, you will build a blog application using Nuxt.js and Sanity.io and deploy it on Cloudflare Pages. Nuxt.js is a powerful static site generator built on the front-end framework Vue.js. Sanity.io is a headless CMS tool built for managing your application's data without needing to maintain a database.
- A recent version of npm ↗ on your computer
- A Sanity.io ↗ account
To begin, create a new Sanity project, using one of Sanity's templates, the blog template. If you would like to customize your configuration, you can modify the schema or pick a custom template.
Create your new Sanity project by installing the @sanity/cli client from npm, and running sanity init in your terminal:
npm i @sanity/cliyarn add @sanity/clipnpm add @sanity/clibun add @sanity/clinpx sanity inityarn sanity initpnpm sanity initWhen you create a Sanity project, you can choose to use one of their pre-defined schemas. Schemas describe the shape of your data in your Sanity dataset -- if you were to start a brand new project, you may choose to initialize the schema from scratch, but for now, select the Blog schema.
With your project created, you can navigate into the folder and start up the studio locally:
cd my-sanity-projectnpx sanity startyarn sanity startpnpm sanity startThe Sanity studio is where you can create new records for your dataset. By default, running the studio locally makes it available at localhost:3333– go there now and create your author record. You can also create blog posts here.

When you are ready to deploy your studio, run sanity deploy to choose a unique URL for your studio. This means that you (or anyone else you invite to manage your blog) can access the studio at a yoururl.sanity.studio domain.
npx sanity deployyarn sanity deploypnpm sanity deployOnce you have deployed your Sanity studio:
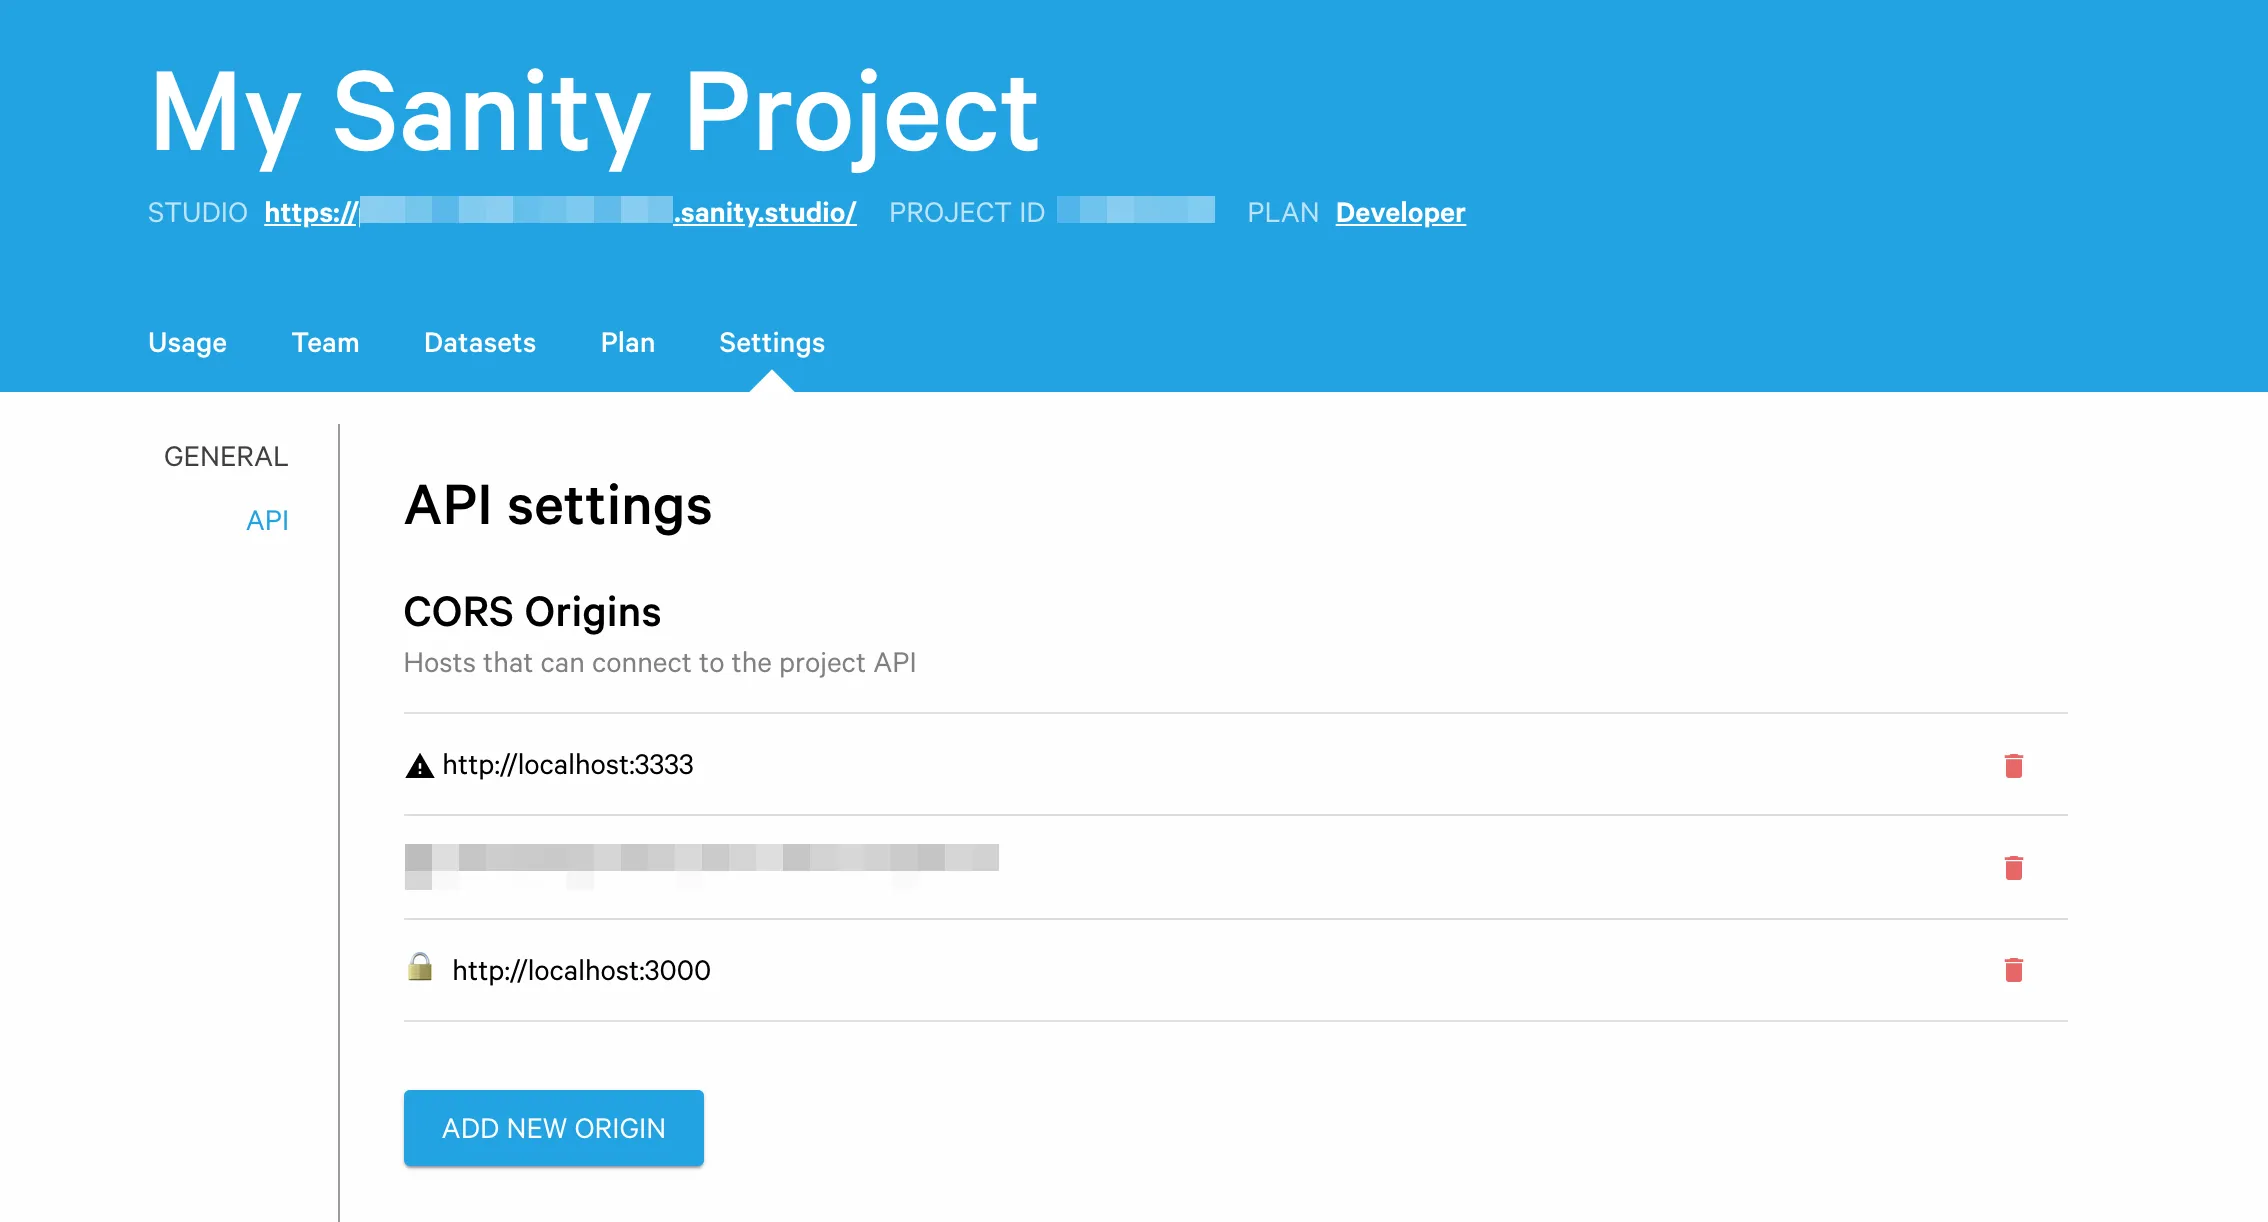
- Go into Sanity's management panel (manage.sanity.io ↗).
- Find your project.
- Select API.
- Add
http://localhost:3000as an allowed CORS origin for your project.
This means that requests that come to your Sanity dataset from your Nuxt application will be allowlisted.
Next, create a Nuxt.js project. In a new terminal, use create-nuxt-app to set up a new Nuxt project:
npx create-nuxt-app blogyarn dlx create-nuxt-app blogpnpx create-nuxt-app blogImportantly, ensure that you select a rendering mode of Universal (SSR / SSG) and a deployment target of Static (Static/JAMStack hosting), while going through the setup process.
After you have completed your project, cd into your new project, and start a local development server by running yarn dev (or, if you chose npm as your package manager, npm run dev):
cd blognpm run devyarn run devpnpm run devAfter your Nuxt.js application is set up, add Sanity's @sanity/nuxt plugin to your Nuxt project:
npm i @nuxtjs/sanity @sanity/clientyarn add @nuxtjs/sanity @sanity/clientpnpm add @nuxtjs/sanity @sanity/clientbun add @nuxtjs/sanity @sanity/clientTo configure the plugin in your Nuxt.js application, you will need to provide some configuration details. The easiest way to do this is to copy the sanity.json folder from your studio into your application directory (though there are other methods, too: refer to the @nuxt/sanity documentation ↗.
cp ../my-sanity-project/sanity.json .Finally, add @nuxtjs/sanity as a build module in your Nuxt configuration:
{ buildModules: ["@nuxtjs/sanity"];}With Sanity configured in your application, you can begin using it to render your blog. You will now set up a few pages to pull data from your Sanity API and render it. Note that if you are not familiar with Nuxt, it is recommended that you review the Nuxt guide ↗, which will teach you some fundamentals concepts around building applications with Nuxt.
To begin, update the index page, which will be rendered when you visit the root route (/). In pages/index.vue:
<template>  <div class="container">    <div>      <h1 class="title">My Blog</h1>    </div>    <div class="posts">      <div v-for="post in posts" :key="post._id">        <h2><a v-bind:href="post.slug.current" v-text="post.title" /></h2>      </div>    </div>  </div></template>
<script>  import { groq } from "@nuxtjs/sanity";
  export default {    async asyncData({ $sanity }) {      const query = groq`*[_type == "post"]`;      const posts = await $sanity.fetch(query);      return { posts };    },  };</script>
<style>  .container {    margin: 2rem;    min-height: 100vh;  }  .posts {    margin: 2rem 0;  }</style>
Vue SFCs, or single file components, are a unique Vue feature that allow you to combine JavaScript, HTML and CSS into a single file. In pages/index.vue, a template tag is provided, which represents the Vue component.
Importantly, v-for is used as a directive to tell Vue to render HTML for each post in an array of posts:
<div v-for="post in posts" :key="post._id"> <h2><a v-bind:href="post.slug.current" v-text="post.title" /></h2></div>To populate that posts array, the asyncData function is used, which is provided by Nuxt to make asynchronous calls (for example, network requests) to populate the page's data.
The $sanity object is provided by the Nuxt and Sanity.js integration as a way to make requests to your Sanity dataset. By calling $sanity.fetch, and passing a query, you can retrieve specific data from our Sanity dataset, and return it as your page's data.
If you have not used Sanity before, you will probably be unfamiliar with GROQ, the GRaph Oriented Query language provided by Sanity for interfacing with your dataset. GROQ is a powerful language that allows you to tell the Sanity API what data you want out of your dataset. For our first query, you will tell Sanity to retrieve every object in the dataset with a _type value of post:
const query = groq`*[_type == "post"]`;const posts = await $sanity.fetch(query);Our index page renders a link for each blog post in our dataset, using the slug value to set the URL for a blog post. For example, if I create a blog post called "Hello World" and set the slug to hello-world, my Nuxt application should be able to handle a request to the page /hello-world, and retrieve the corresponding blog post from Sanity.
Nuxt has built-in support for these kind of pages, by creating a new file in pages in the format _slug.vue. In the asyncData function of your page, you can then use the params argument to reference the slug:
<script> export default { async asyncData({ params, $sanity }) { console.log(params); // { slug: "hello-world" } }, };</script>With that in mind, you can build pages/_slug.vue to take the incoming slug value, make a query to Sanity to find the matching blog post, and render the post title for the blog post:
<template>  <div class="container">    <div v-if="post">      <h1 class="title" v-text="post.title" />      <div class="content"></div>    </div>    <h4><a href="/">← Go back</a></h4>  </div></template>
<script>  import { groq } from "@nuxtjs/sanity";
  export default {    async asyncData({ params, $sanity }) {      const query = groq`*[_type == "post" && slug.current == "${params.slug}"][0]`;      const post = await $sanity.fetch(query);      return { post };    },  };</script>
<style>  .container {    margin: 2rem;    min-height: 100vh;  }
  .content {    margin: 2rem 0;    max-width: 38rem;  }
  p {    margin: 1rem 0;  }</style>
When visiting, for example, /hello-world, Nuxt will take the incoming slug hello-world, and make a GROQ query to Sanity for any objects with a _type of post, as well as a slug that matches the value /hello-world. From that set, you can get the first object in the array (using the array index operator you would find in JavaScript – [0]) and set it as post in your page data.
You have rendered the post title for our blog, but you are still missing the content of the blog post itself. To render this, import the sanity-blocks-vue-component ↗ package, which takes Sanity's Portable Text ↗ format and renders it as a Vue component.
First, install the npm package:
npm i sanity-blocks-vue-componentyarn add sanity-blocks-vue-componentpnpm add sanity-blocks-vue-componentbun add sanity-blocks-vue-componentAfter the package is installed, create plugins/sanity-blocks.js, which will import the component and register it as the Vue component block-content:
import Vue from "vue";import BlockContent from "sanity-blocks-vue-component";Vue.component("block-content", BlockContent);In your Nuxt configuration, nuxt.config.js, import that file as part of the plugins directive:
{ plugins: ["@/plugins/sanity-blocks.js"];}In pages/_slug.vue, you can now use the <block-content> component to render your content. This takes the format of a custom HTML component, and takes three arguments: :blocks, which indicates what to render (in our case, child), v-for, which accepts an iterator of where to get child from (in our case, post.body), and :key, which helps Vue keep track of state rendering ↗ by providing a unique value for each post: that is, the _id value.
<template>  <div class="container">    <div v-if="post">      <h1 class="title" v-text="post.title" />      <div class="content">        <block-content          :blocks="child"          v-for="child in post.body"          :key="child._id"        />      </div>    </div>    <h4><a href="/">← Go back</a></h4>  </div></template>
<script>  import { groq } from "@nuxtjs/sanity";
  export default {    async asyncData({ params, $sanity }) {      const query = groq`*[_type == "post" && slug.current == "${params.slug}"][0]`;      const post = await $sanity.fetch(query);      return { post };    },  };</script>
<style>  .container {    margin: 2rem;    min-height: 100vh;  }
  .content {    margin: 2rem 0;    max-width: 38rem;  }
  p {    margin: 1rem 0;  }</style>
In pages/index.vue, you can use the block-content component to render a summary of the content, by taking the first block in your blog post content and rendering it:
<template>  <div class="container">    <div>      <h1 class="title">My Blog</h1>    </div>    <div class="posts">      <div v-for="post in posts" :key="post._id">        <h2><a v-bind:href="post.slug.current" v-text="post.title" /></h2>        <div class="summary">          <block-content            :blocks="post.body[0]"            v-bind:key="post.body[0]._id"            v-if="post.body.length"          />        </div>      </div>    </div>  </div></template>
<script>  import { groq } from "@nuxtjs/sanity";
  export default {    async asyncData({ $sanity }) {      const query = groq`*[_type == "post"]`;      const posts = await $sanity.fetch(query);      return { posts };    },  };</script>
<style>  .container {    margin: 2rem;    min-height: 100vh;  }  .posts {    margin: 2rem 0;  }  .summary {    margin-top: 0.5rem;  }</style>
There are many other things inside of your blog schema that you can add to your project. As an exercise, consider one of the following to continue developing your understanding of how to build with a headless CMS:
- Create
pages/authors.vue, and render a list of authors (similar topages/index.vue, but for objects with_type == "author") - Read the Sanity docs on using references in GROQ ↗, and use it to render author information in a blog post page
Publishing your project with Cloudflare Pages is a two-step process: first, push your project to GitHub, and then in the Cloudflare Pages dashboard, set up a new project based on that GitHub repository. Pages will deploy a new version of your site each time you publish, and will even set up preview deployments whenever you open a new pull request.
To push your project to GitHub, create a new repository ↗, and follow the instructions to push your local Git repository to GitHub.
After you have pushed your project to GitHub, deploy your site to Pages:
-
In the Cloudflare dashboard, go to the Workers & Pages page.
Go to Workers & Pages -
Select Create application > Pages > Import an existing Git repository.
-
Select the new GitHub repository that you created and select Begin setup.
-
In the Set up builds and deployments section, under Build settings > Framework preset, choose Nuxt. Pages will set the correct fields for you automatically.
When your site has been deployed, you will receive a unique URL to view it in production.
In order to automatically deploy your project when your Sanity.io data changes, you can use Deploy Hooks. Create a new Deploy Hook URL in your Pages project > Settings. In your Sanity project's Settings page, find the Webhooks section, and add the Deploy Hook URL, as seen below:
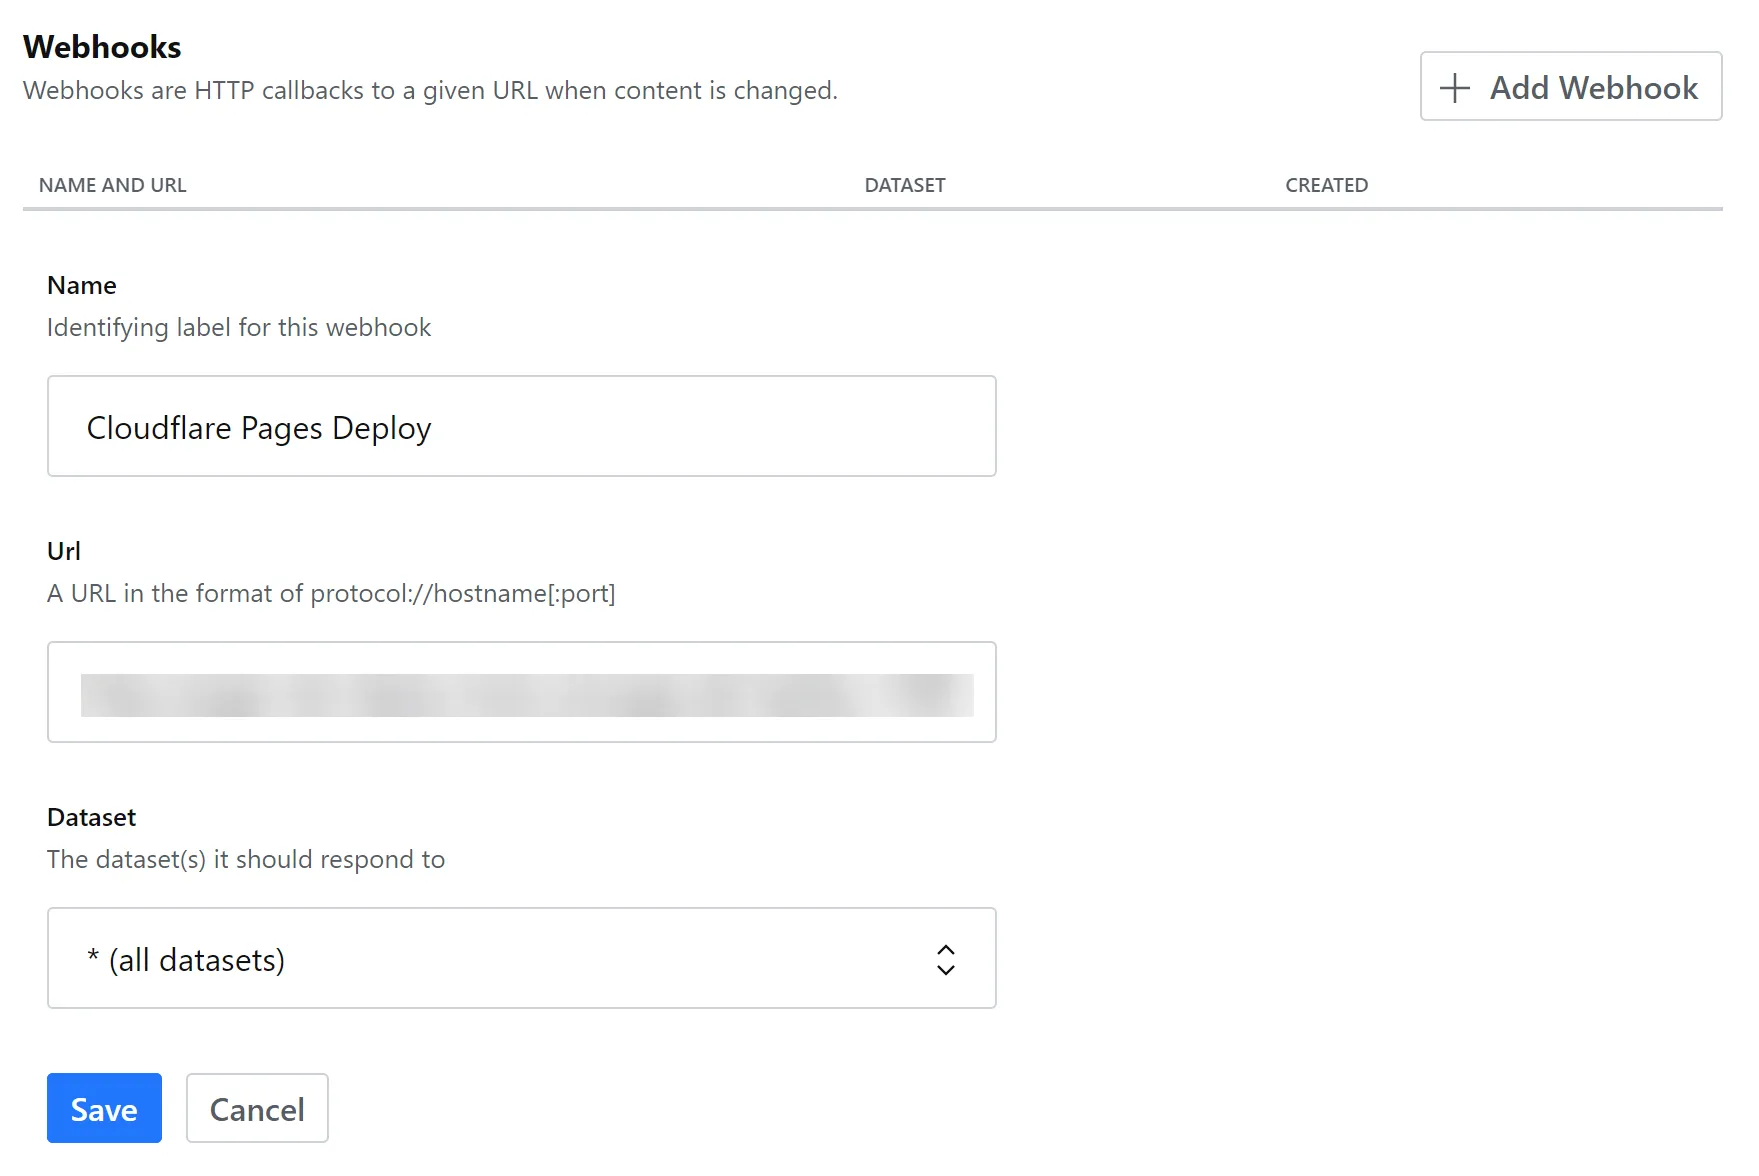
Now, when you make a change to your Sanity.io dataset, Sanity will make a request to your unique Deploy Hook URL, which will begin a new Cloudflare Pages deploy. By doing this, your Pages application will remain up-to-date as you add new blog posts, or edit existing ones.
By completing this guide, you have successfully deployed your own blog, powered by Nuxt, Sanity.io, and Cloudflare Pages. You can find the source code for both codebases on GitHub:
- Blog front end: https://github.com/signalnerve/nuxt-sanity-blog ↗
- Sanity dataset: https://github.com/signalnerve/sanity-blog-schema ↗
If you enjoyed this tutorial, you may be interested in learning how you can use Cloudflare Workers, our powerful serverless function platform, to augment your existing site. Refer to the Build an API for your front end using Pages Functions tutorial to learn more.