Add an HTML form with Formspree
Almost every website, whether it is a simple HTML portfolio page or a complex JavaScript application, will need a form to collect user data. Formspree ↗ is a back-end service that handles form processing and storage, allowing developers to include forms on their website without writing server-side code or functions.
In this tutorial, you will create a <form> using plain HTML and CSS and add it to a static HTML website hosted on Cloudflare Pages. Refer to the Get started guide to familiarize yourself with the platform. You will use Formspree to collect the submitted data and send out email notifications when new submissions arrive, without requiring any JavaScript or back-end coding.
To begin, create a new GitHub repository ↗. Then create a new local directory on your machine, initialize git, and attach the GitHub location as a remote destination:
# create new directorymkdir new-project# enter new directorycd new-project# initialize gitgit init# attach remotegit remote add origin git@github.com:<username>/<repo>.git# change default branch namegit branch -M mainYou may now begin working in the new-project directory you created.
You will only be using plain HTML for this example project. The home page will include a Contact Us form that accepts a name, email address, and message.
The form code:
<form method="POST" action="/">  <label for="name">Full Name</label>  <input id="name" type="text" name="name" pattern="[A-Za-z]+" required />
  <label for="email">Email Address</label>  <input id="email" type="email" name="email" required />
  <label for="message">Message</label>  <textarea id="message" name="message" required></textarea>
  <button type="submit">Submit</button></form>
The action attribute determines where the form data is sent. You will update this later to send form data to Formspree. All <input> tags must have a unique name in order to capture the user's data. The for and id values must match in order to link the <label> with the corresponding <input> for accessibility tools like screen readers.
To add this form to your website, first, create a public/index.html in your project directory. The public directory should contain all front-end assets, and the index.html file will serve as the home page for the website.
Copy and paste the following content into your public/index.html file, which includes the above form:
<html lang="en">  <head>    <meta charset="utf8" />    <title>Form Demo</title>    <meta name="viewport" content="width=device-width,initial-scale=1" />  </head>  <body>    <!-- the form from above -->
    <form method="POST" action="/">      <label for="name">Full Name</label>      <input id="name" type="text" name="name" pattern="[A-Za-z]+" required />
      <label for="email">Email Address</label>      <input id="email" type="email" name="email" required />
      <label for="message">Message</label>      <textarea id="message" name="message" required></textarea>
      <button type="submit">Submit</button>    </form>  </body></html>
Now you have an HTML document containing a Contact Us form with several fields for the user to fill out. However, you have not yet set the action attribute to a server that can handle the form data. You will do this in the next section of this tutorial.
The HTML form is complete, however, when the user submits this form, the data will be sent in a POST request to the / URL. No server exists to process the data at that URL, so it will cause an error. To fix that, create a new Formspree form, and copy its unique URL into the form's action.
To create a Formspree form, sign up for an account on Formspree ↗.
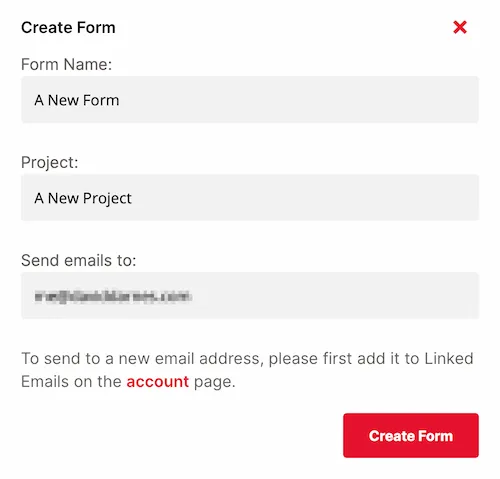
Next, create a new form with the + New form button. Name it Contact-us form and update the recipient email to an email where you wish to receive your form submissions. Then select Create Form.
You will then be presented with instructions on how to integrate your new form.

Copy the Form Endpoint URL and paste it into the action attribute of the form you created above.
<form method="POST" action="https://formspree.io/f/mqldaqwx"> <!-- replace with your own formspree endpoint --></form>Now when you submit your form, you should be redirected to a Thank You page. The form data will be submitted to your account on Formspree.io ↗.
You can now adjust your form processing logic to change the redirect page ↗, update the notification email address ↗, or add plugins like Google Sheets ↗, Slack ↗ and more.
For more help setting up Formspree, refer to the following resources:
- For general help with Formspree, refer to the Formspree help site ↗.
- For examples and inspiration for your own HTML forms, review the Formspree form library ↗.
- For tips on integrating Formspree with popular platforms like Next.js, Gatsby and Eleventy, refer to the Formspree guides ↗.
You are now ready to deploy your project.
If you have not already done so, save your progress within git and then push the commit(s) to the GitHub repository:
# Add all filesgit add -A# Commit w/ messagegit commit -m "working example"# Push commit(s) to remotegit push -u origin mainYour work now resides within the GitHub repository, which means that Pages is able to access it too.
If this is your first Cloudflare Pages project, refer to Get started for a complete setup guide. After selecting the appropriate GitHub repository, you must configure your project with the following build settings:
- Project name – Your choice
- Production branch –
main - Framework preset – None
- Build command – None / Empty
- Build output directory –
public
After selecting Save and Deploy, your Pages project will begin its first deployment. When successful, you will be presented with a unique *.pages.dev subdomain and a link to your live demo.
In this tutorial, you built and deployed a website using Cloudflare Pages and Formspree to handle form submissions. You created a static HTML document with a form that communicates with Formspree to process and store submission requests and send notifications.
If you would like to review the full source code for this application, you can find it on GitHub ↗.