In this guide, you will get started with Cloudflare Pages and deploy your first website to the Pages platform through Git integration. The Git integration enables automatic builds and deployments every time you push a change to your connected GitHub or GitLab repository.
Pages offers support for GitHub ↗ and GitLab ↗. To create your first Pages project:
-
In the Cloudflare dashboard, go to the Workers & Pages page.
Go to Workers & Pages ↗ -
Select Create application > Pages > Connect to Git.
You will be prompted to sign in with your preferred Git provider. This allows Cloudflare Pages to deploy your projects, and update your PRs with preview deployments.
You can select a GitHub project from your personal account or an organization you have given Pages access to. This allows you to choose a GitHub repository to deploy using Pages. Both private and public repositories are supported.
If using GitLab, you can select a project from your personal account or from a GitLab group you belong to. This allows you to choose a GitLab repository to deploy using Pages. Both private and public repositories are supported.
Once you have selected a Git repository, select Install & Authorize and Begin setup. You can then customize your deployment in Set up builds and deployments.
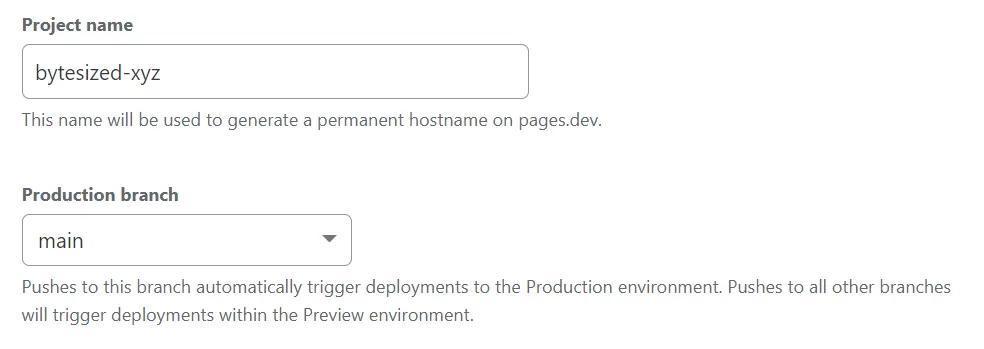
Your project name will be used to generate your project's hostname. By default, this matches your Git project name.
Production branch indicates the branch that Cloudflare Pages should use to deploy the production version of your site. For most projects, this is the main or master branch. All other branches that are not your production branch will be used for preview deployments.
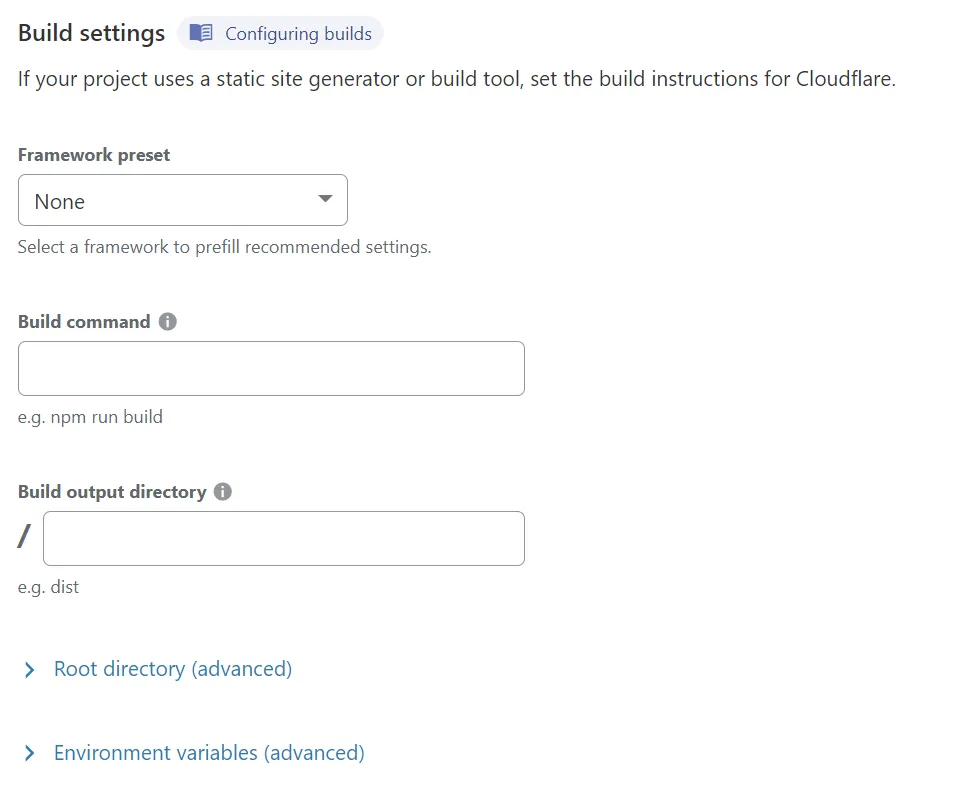
Depending on the framework, tool, or project you are deploying to Cloudflare Pages, you will need to specify the site's build command and build output directory to tell Cloudflare Pages how to deploy your site. The content of this directory is uploaded to Cloudflare Pages as your website's content.
The dashboard provides a number of framework-specific presets. These presets provide the default build command and build output directory values for the selected framework. If you are unsure what the correct values are for this section, refer to Build configuration. If you do not need a build step, leave the Build command field blank.
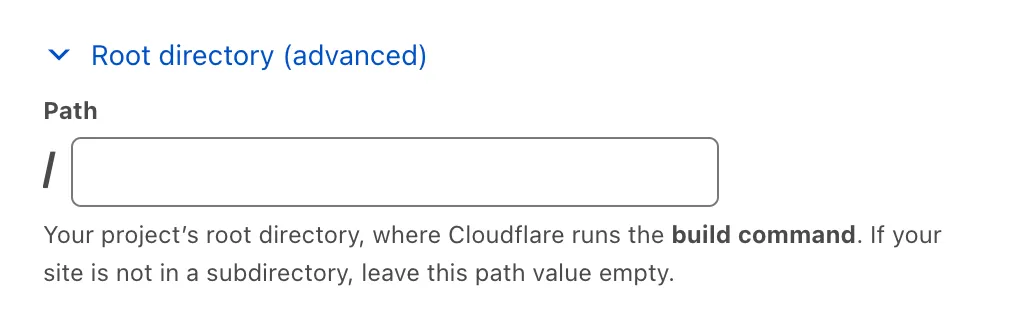
Cloudflare Pages begins by working from your repository's root directory. The entire build pipeline, including the installation steps, will begin from this location. If you would like to change this, specify a new root directory location through the Root directory (advanced) > Path field.
Understanding your build configuration
The build command is provided by your framework. For example, the Gatsby framework uses gatsby build as its build command. When you are working without a framework, leave the Build command field blank.
The build output directory is generated from the build command. Each framework has its own naming convention, for example, the build output directory is named /public for many frameworks.
The root directory is where your site's content lives. If not specified, Cloudflare assumes that your linked Git repository is the root directory. The root directory needs to be specified in cases like monorepos, where there may be multiple projects in one repository.
Refer to Build configuration for more information.
Environment variables are a common way of providing configuration to your build workflow. While setting up your project, you can specify a number of key-value pairs as environment variables. These can be further customized once your project has finished building for the first time.
Refer to the Hexo framework guide for more information on how to set up a Node.js version environment variable.
After you have chosen your Framework preset or left this field blank if you are working without a framework, configured Root directory (advanced), and customized your Environment variables (optional), you are ready to deploy.
After you have finished setting your build configuration, select Save and Deploy. Your project build logs will output as Cloudflare Pages installs your project dependencies, builds the project, and deploys it to Cloudflare's global network.
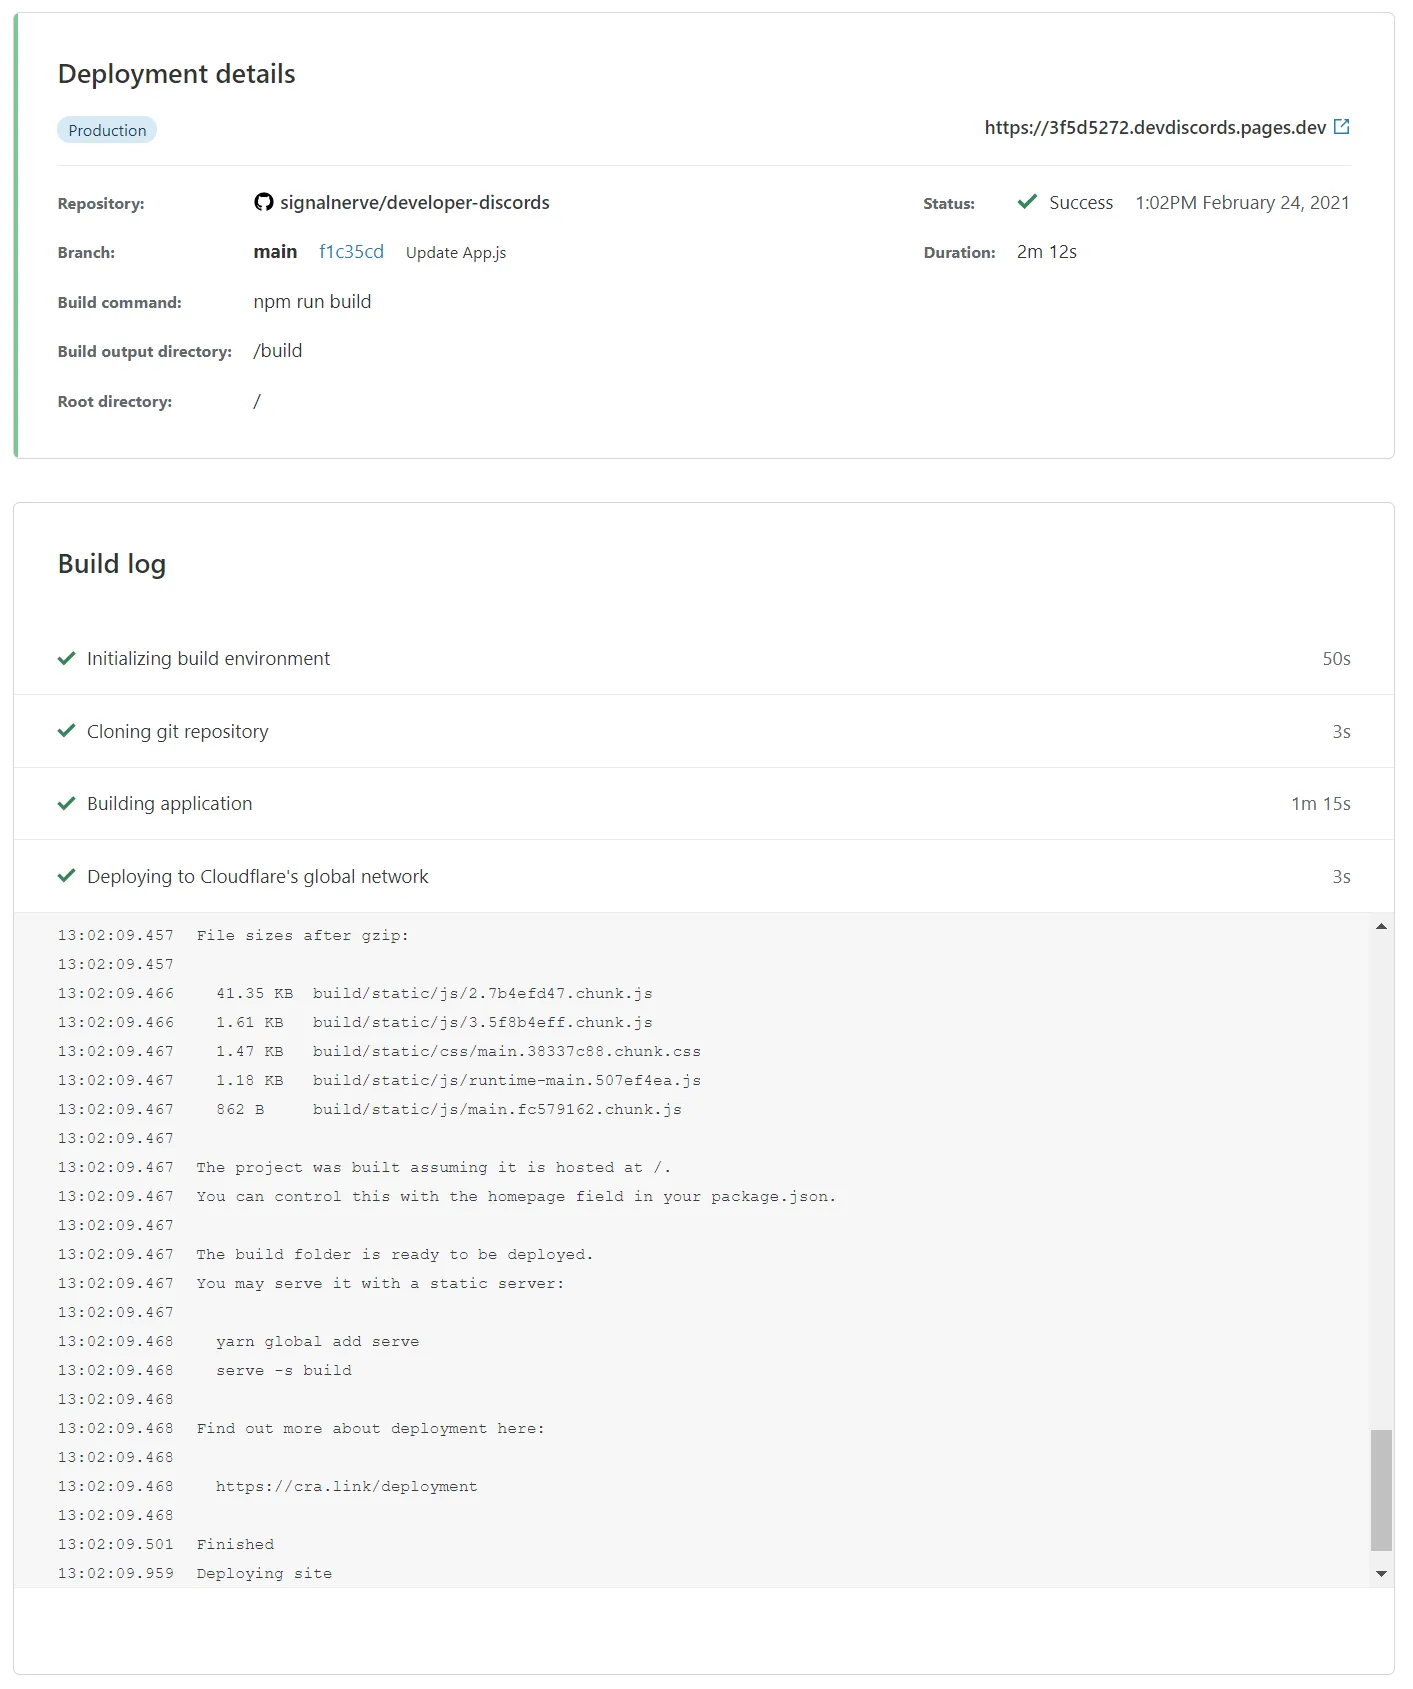
When your project has finished deploying, you will receive a unique URL to view your deployed site.
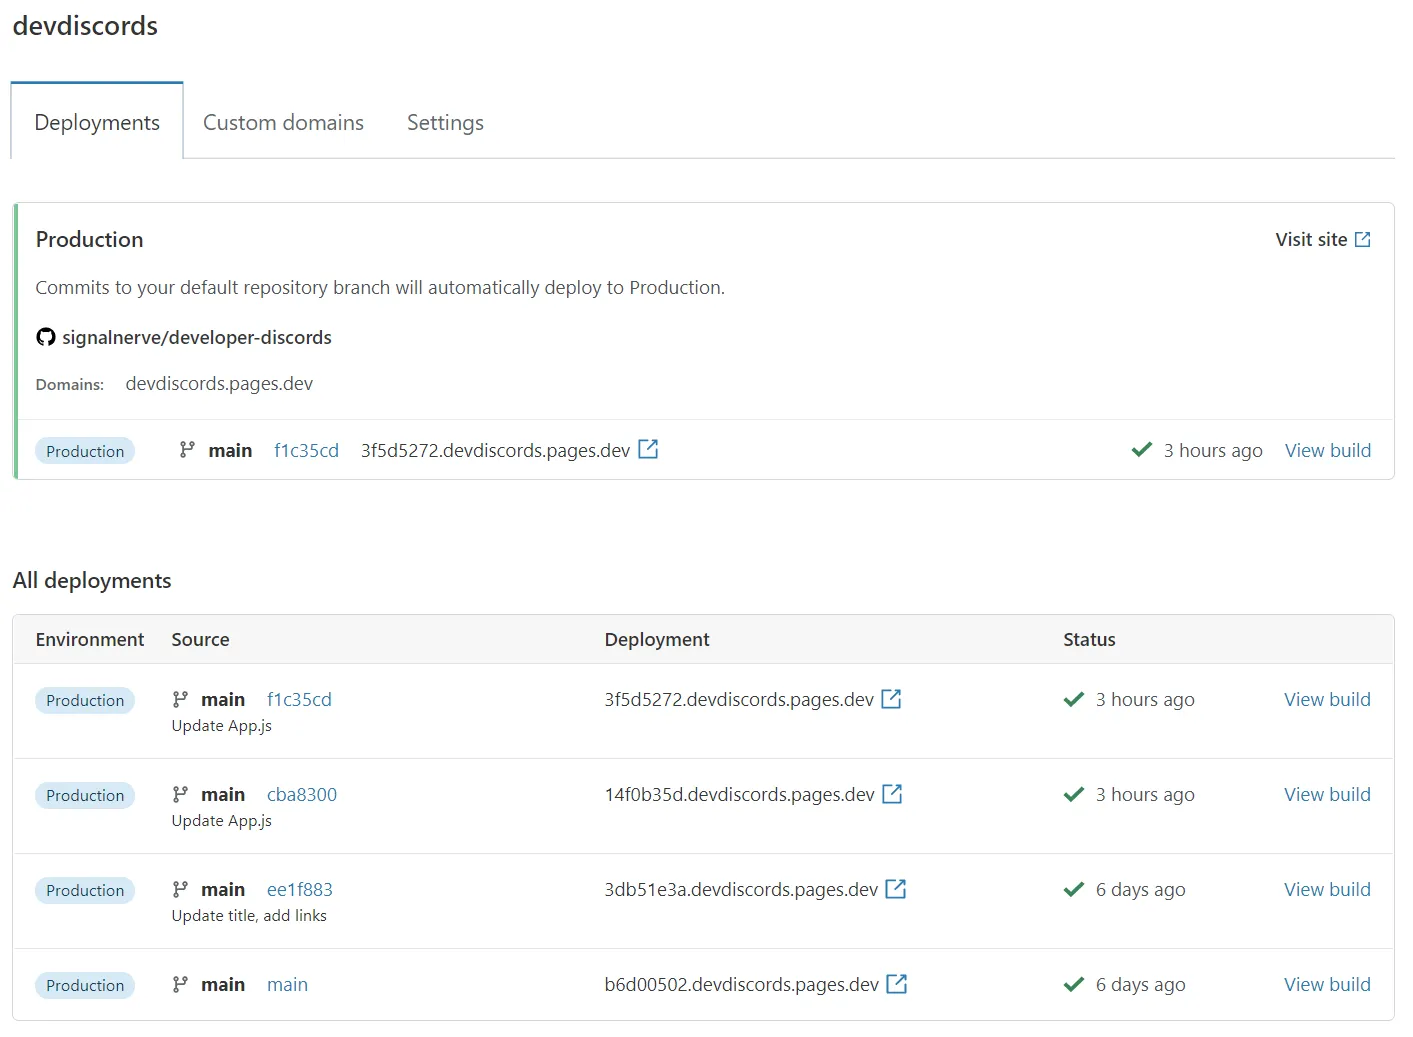
After your first deploy, select Continue to project to see your project's configuration in the Cloudflare Pages dashboard. On this page, you can see your project's current deployment status, the production URL and associated commit, and all past deployments.
To delete your Pages project:
-
In the Cloudflare dashboard, go to the Workers & Pages page.
Go to Workers & Pages ↗ -
Select your Pages project > Settings > Delete project.
In the Settings section, you can configure advanced settings, such as changing your project name, updating your Git configuration, or updating your build command, build directory or environment variables.
- Set up a custom domain for your Pages project.
- Enable Cloudflare Web Analytics.
- Set up Access policies to manage who can view your deployment previews.