
Changelog
New updates and improvements at Cloudflare.

Markdown for Agents now preserves security- and cache-relevant response headers from your origin when converting HTML to Markdown:
- Markdown for Agents preserves security headers such as
Strict-Transport-Security(HSTS),Content-Security-Policy(CSP),X-Frame-Options,Set-Cookie, and CORS headers (for example,Access-Control-Allow-Origin) on the converted response. - Caching headers (
Cache-Control,Expires,Age) continue to pass through.
Your origin's Content Signals ↗ policy is now authoritative. If your origin sets a
content-signalheader, Markdown for Agents preserves it. When the origin does not send one, Cloudflare adds the defaultContent-Signal: ai-train=yes, search=yes, ai-input=yes.This release also fixes relative link resolution for directory-style base URLs (those ending in a trailing slash). Previously, relative links such as
../page/could resolve one path segment too high and return a404. Links are now resolved correctly per RFC 3986 ↗.Refer to our developer documentation for more details.
- Markdown for Agents preserves security headers such as
You can now assign granular, resource-scoped roles for Cloudflare Gateway firewall policies and Zero Trust lists. Administrators can delegate access to specific policy types or list management without granting account-wide or product-wide control.
When you add a member or create a permission policy, the following resource-scoped roles are now available:
Role Description Zero Trust Gateway Firewall Policies Admin Can view and edit all Gateway firewall policies, including DNS, HTTP, and Network policies. Zero Trust Gateway DNS Policies Admin Can view and edit Gateway DNS policies. Zero Trust Gateway HTTP Policies Admin Can view and edit Gateway HTTP policies. Zero Trust Gateway Network Policies Admin Can view and edit Gateway Network policies. Zero Trust Gateway Egress Policies Admin Can view and edit Gateway Egress policies. Zero Trust Gateway Resolver Policies Admin Can view and edit Gateway Resolver policies. Zero Trust Gateway Policies Admin Can view and edit all Gateway policies. Zero Trust Gateway Policies Read Can view all Gateway policies. Zero Trust Gateway Read Only Can view all Gateway resources. Zero Trust DNS Locations Admin Can view and edit DNS locations. Zero Trust Proxy Endpoints Admin Can view and edit Gateway Proxy Endpoints. Zero Trust Account Lists Admin Can view and edit all Gateway and Access lists. Zero Trust Account Lists Read Can view all Gateway and Access lists. These roles allow you to:
- Grant a network engineer write access to Network policies only, without exposing DNS or HTTP policy configuration.
- Allow a security analyst to view all Gateway policies in read-only mode for auditing purposes.
- Delegate list management to a team that maintains block and allow lists without giving them access to policy configuration.
You can also now assign Resource-scoped roles. These roles are complementary to existing account-level roles, and allow you to grant access to a specific resource, like an individual Gateway policy or Cloudflare One list. Existing account-level roles continue to work. A member with the
Cloudflare GatewayorCloudflare Zero Trustrole retains full access to all Gateway resources. This ensures backward compatibility for existing automation and API tokens.- Review the resource-scoped roles on the Cloudflare role reference.
- Learn how to create permission policies that use these roles.
You can now search API tokens by name, making it easier to find specific tokens across large token lists without manually paginating.
- Dashboard search: Both account API tokens ↗ and user API tokens ↗ pages now include a search bar. Type a name to filter results.
- API search support: The
/user/tokensand/accounts/{account_id}/tokensendpoints now accept anamequery parameter to filter tokens by name.
For more information, refer to Create an API token and Account API tokens.
Pay-as-you-go customers can now view billable usage and create budget alerts directly from the product overview pages for Workers & Pages, D1, R2, Workers KV, Queues, Vectorize, Durable Objects, and Containers. A new sidebar widget shows current-period spend and the billing cycle date range, alongside a button to create a budget alert.
The widget pulls from the same data as the Billable Usage dashboard and aligns to your billing cycle (or the current day on Free plans), so the numbers match your invoice. Enterprise contract accounts are not yet supported.

Selecting Create budget alert opens the budget alert flow inline so you can set a dollar threshold in the same place you are reviewing usage. Budget alerts apply to your total account-level spend across all products, not just the product page you create them from.
For more information, refer to the Usage-based billing documentation.
Today we are launching self-managed OAuth, enabling developers to build third-party applications that integrate with Cloudflare via OAuth. This provides a more secure, user-friendly, and manageable alternative to API tokens.
OAuth lets third-party applications act on behalf of a user to access their Cloudflare account. For example, after a user grants consent, Wrangler can deploy Workers into that account.
Cloudflare Developers can now create and manage their own OAuth applications to integrate with Cloudflare.
To create an application, go to Manage account > OAuth clients in your account on the Cloudflare dashboard.
Go to OAuth clientsIf you have used an API token to call Cloudflare APIs, OAuth client scopes will look familiar. Select only the scopes your application needs during application creation, and include that scope list when sending users to Cloudflare for consent.
Users can review the requested scopes before they consent.
Applications start with
privatevisibility. Private applications can only be used by members of the account where the application was created.To make an application available to any Cloudflare user, complete the prerequisites for
publicvisibility.For more information, refer to client visibility.
Before an application can be made public, you must verify the client domain. Domain verification helps users confirm that the application owner controls the domain shown on the consent page.
After verification, users see a verified badge on the consent page.
For more information, refer to domain verification.
For more information, refer to OAuth clients.
You can now scope Cloudflare permissions to individual Cloudflare Tunnel instances and Cloudflare Mesh nodes. Administrators can delegate access to specific Tunnels or Mesh nodes without granting account-wide control over private networking.
When you add a member or create a permission policy, the resource picker now lists Cloudflare Tunnel instances and Cloudflare Mesh nodes as scopable resource types. You can:
- Grant a read-only role on a single Cloudflare Tunnel instance to a support operator for log streaming and diagnostics — without exposing other Tunnels or destructive actions.
- Grant a write role on a specific Cloudflare Mesh node to an application team — without giving them access to the rest of your private network.
- Scope a single policy to one or many Tunnels and Mesh nodes at once.
Granular permissions are a parallel layer to existing account-level roles — they do not replace them.
- Existing account-level roles continue to work. A member with
Cloudflare AccessorCloudflare Zero Trustretains write access to every Tunnel and Mesh node in the account. This ensures backward compatibility for existing automation and tokens. - Granular permissions are additive. For any API request on a specific Tunnel or Mesh node, access is granted if the principal has either the account-level role or a granular permission for that resource.
- Resource enumeration is authorization-aware. Listing endpoints (
GET /accounts/{id}/cfd_tunnel,GET /accounts/{id}/warp_connector) return only the resources the principal has at least read access to.
- Configure granular permissions for Cloudflare Tunnel.
- Configure granular permissions for Cloudflare Tunnel and Cloudflare Mesh in Cloudflare One.
- Review the resource-scoped roles on the Cloudflare role reference.
You can now navigate, switch context, and take common actions in the Cloudflare dashboard without leaving your keyboard. Press
?anywhere to see the full list. Keyboard shortcuts can be disabled by visiting your profile settings ↗.Shortcut Action g hGo to Home g aGo to account overview g zGo to zone overview g pGo to your profile g wGo to Workers & Pages g oGo to Zero Trust g bGo to billing g 1–g 5Go to a recent or pinned item (by position in sidebar) t →Move to the next tab t ←Move to the previous tab p →Move to the next page of a table p ←Move to the previous page of a table Shortcut Action /Open quick search ?Show keyboard shortcuts s aSwitch account s zSwitch zone s .Star or unstar the current zone p .Pin or unpin the current page t sToggle the sidebar open or closed t mExpand or collapse all sidebar menus t aToggle Ask AI sidebar d .Toggle dark mode c uCopy the current URL c dCopy a deep link URL
You can now pay for Cloudflare services directly from your bank account using Instant Bank Payments via Link.
Link ↗ now supports bank account payments in addition to cards. If you have a bank account saved in Link, it appears as a payment option at checkout. If not, you can connect one during the checkout flow.
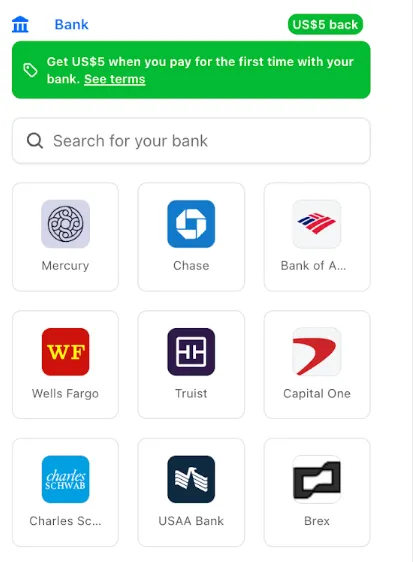
- During checkout, select your bank account from your saved Link payment methods.
- Confirm the payment.
After your first Link authentication, your bank account is available for future purchases without re-entering details.
Instant Bank Payments via Link is available to US-based self-serve accounts across all Cloudflare products. Your existing cards remain available at checkout.
Bank-based Link payments appear in your billing history with the payment method shown as
linkand last four digits as0000. For details, refer to the Instant Bank Payments via Link documentation.
-
The Support button in the dashboard global navigation header now takes you directly to the Cloudflare Support Portal ↗, eliminating the previous dropdown menu.
This change ensures that when you need help, you spend less time navigating the UI and more time getting the answers you need.
- Previous behavior: Selecting ? Support opened a dropdown menu with various links (Help Center, Cloudflare Community, etc.).
- New behavior: Selecting Support immediately redirects your current tab to the Support Portal.
To learn more about the resources available to you, refer to the Cloudflare Support documentation ↗.
Cloudflare-generated 5xx error responses now return structured JSON and Markdown when agents request them, matching the format already available for 1xxx errors. Responses follow RFC 9457 (Problem Details for HTTP APIs) ↗ and include a
Retry-AfterHTTP header on retryable codes.5xx coverage. Ten Cloudflare-generated error codes (500, 502, 504, 520-526) now serve structured responses. These are errors Cloudflare itself generates when it cannot reach or understand the origin server. Origin-generated 5xx responses that Cloudflare passes through are not affected.
Fault attribution. The
error_categoryfield tells agents where the fault lies:origin(502, 504, 520-524) — the origin server is responsible. Transient; retry with the backoff inretry_after.cloudflare(500) — Cloudflare's fault, not the website or the request. Short retry.ssl(525, 526) — the origin's TLS configuration is broken. Do not retry.
Retry-After header. Retryable codes (500, 502, 504, 520-524) include a
Retry-AfterHTTP header matching theretry_afterbody field. Non-retryable codes (525, 526) do not include the header.Request header sent Response format Accept: application/jsonJSON ( application/jsoncontent type)Accept: application/problem+jsonJSON ( application/problem+jsoncontent type)Accept: application/json, text/markdown;q=0.9JSON Accept: text/markdownMarkdown Accept: text/markdown, application/jsonMarkdown (equal q, first-listed wins)Accept: */*HTML (default) Available now for all zones on all plans.
Get JSON response for error 522:
Terminal window curl -s --compressed -H "Accept: application/json" -A "TestAgent/1.0" -H "Accept-Encoding: gzip, deflate" "<YOUR_DOMAIN>/cdn-cgi/error/522" | jq .Check presence of the
Retry-AfterHTTP header associated with the JSON response for error 521:Terminal window curl -s --compressed -D - -o /dev/null -H "Accept: application/json" -A "TestAgent/1.0" -H "Accept-Encoding: gzip, deflate" "<YOUR_DOMAIN>/cdn-cgi/error/521" | grep -i retry-afterReferences:
Resource Tagging is now in public beta and rolling out to all Cloudflare accounts over the coming days. You can attach custom key-value metadata to your Cloudflare resources and query across your entire account to find what you need.
- Broad resource type support — Tag zones, custom hostnames, Cloudflare Tunnels, Workers, D1 databases, R2 buckets, KV namespaces, Durable Object namespaces, Queues, Stream videos, Images, Access applications, Gateway rules, AI Gateways, and more. Refer to the full list of supported resource types.
- Powerful filtering — Query tagged resources using AND/OR logic, negation, and key-only matching. Combine up to 20 filters per query to build precise resource views.
- Account and zone-level endpoints — Full CRUD operations across both scopes.
- Token-based authentication — Tagging supports Account Owned Tokens that persist independently of individual users, so your automation keeps running through credential rotations and team changes.
- Flexible role support — Super Administrators, Workers Admins, and Tag Admins can all manage tags.
The API is the primary interface for Resource Tagging and the recommended path for all workflows — scripting tag assignments, building CI/CD pipelines, or integrating with your infrastructure-as-code toolchain.
You can also view and manage tagged resources directly in the Cloudflare dashboard. Navigate to Manage Account > Resource Tagging to see all tagged resources across your account, filter by resource name or tag, and add or edit tags inline.
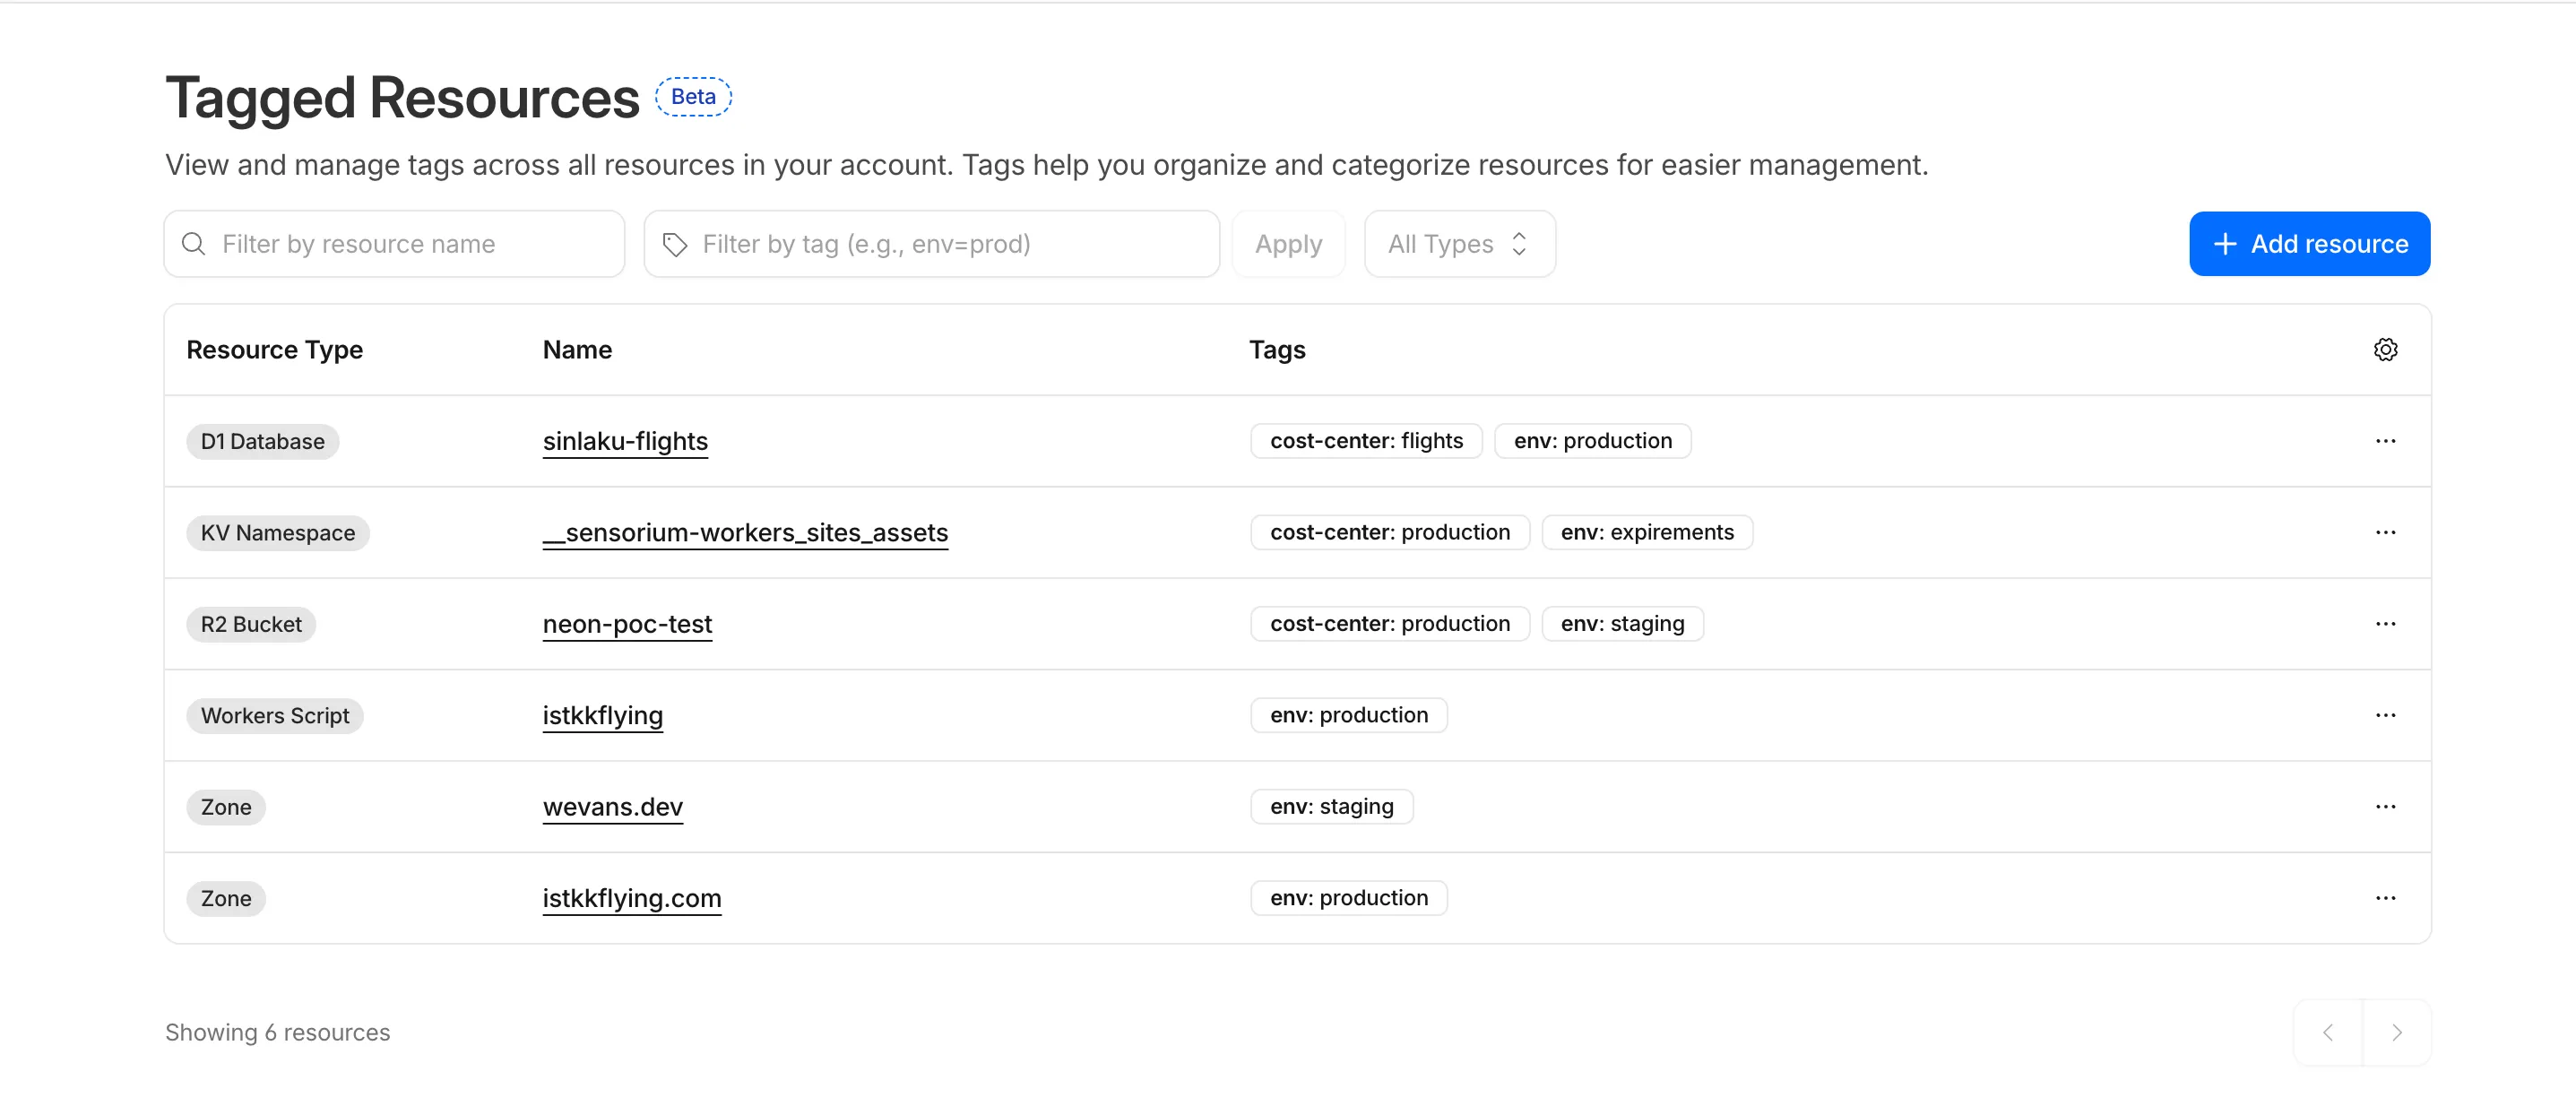
In future releases, expect support for additional resource types across the Cloudflare platform, tag-based access control policies for scoping user permissions to tagged resources, billing and usage attribution by tag for breaking down costs by team, project, or environment, and Terraform provider support for managing tags declaratively.
PUTreplaces all tags on a resource (no partial update). Use the GET, merge, PUT workflow to modify individual tags safely.DELETEremoves all tags from a resource. To remove a single tag, PUT the remaining tags back.- Querying tags for a resource that has never been tagged returns
500instead of404. This is a known beta limitation.
To get started, refer to the Resource Tagging documentation.
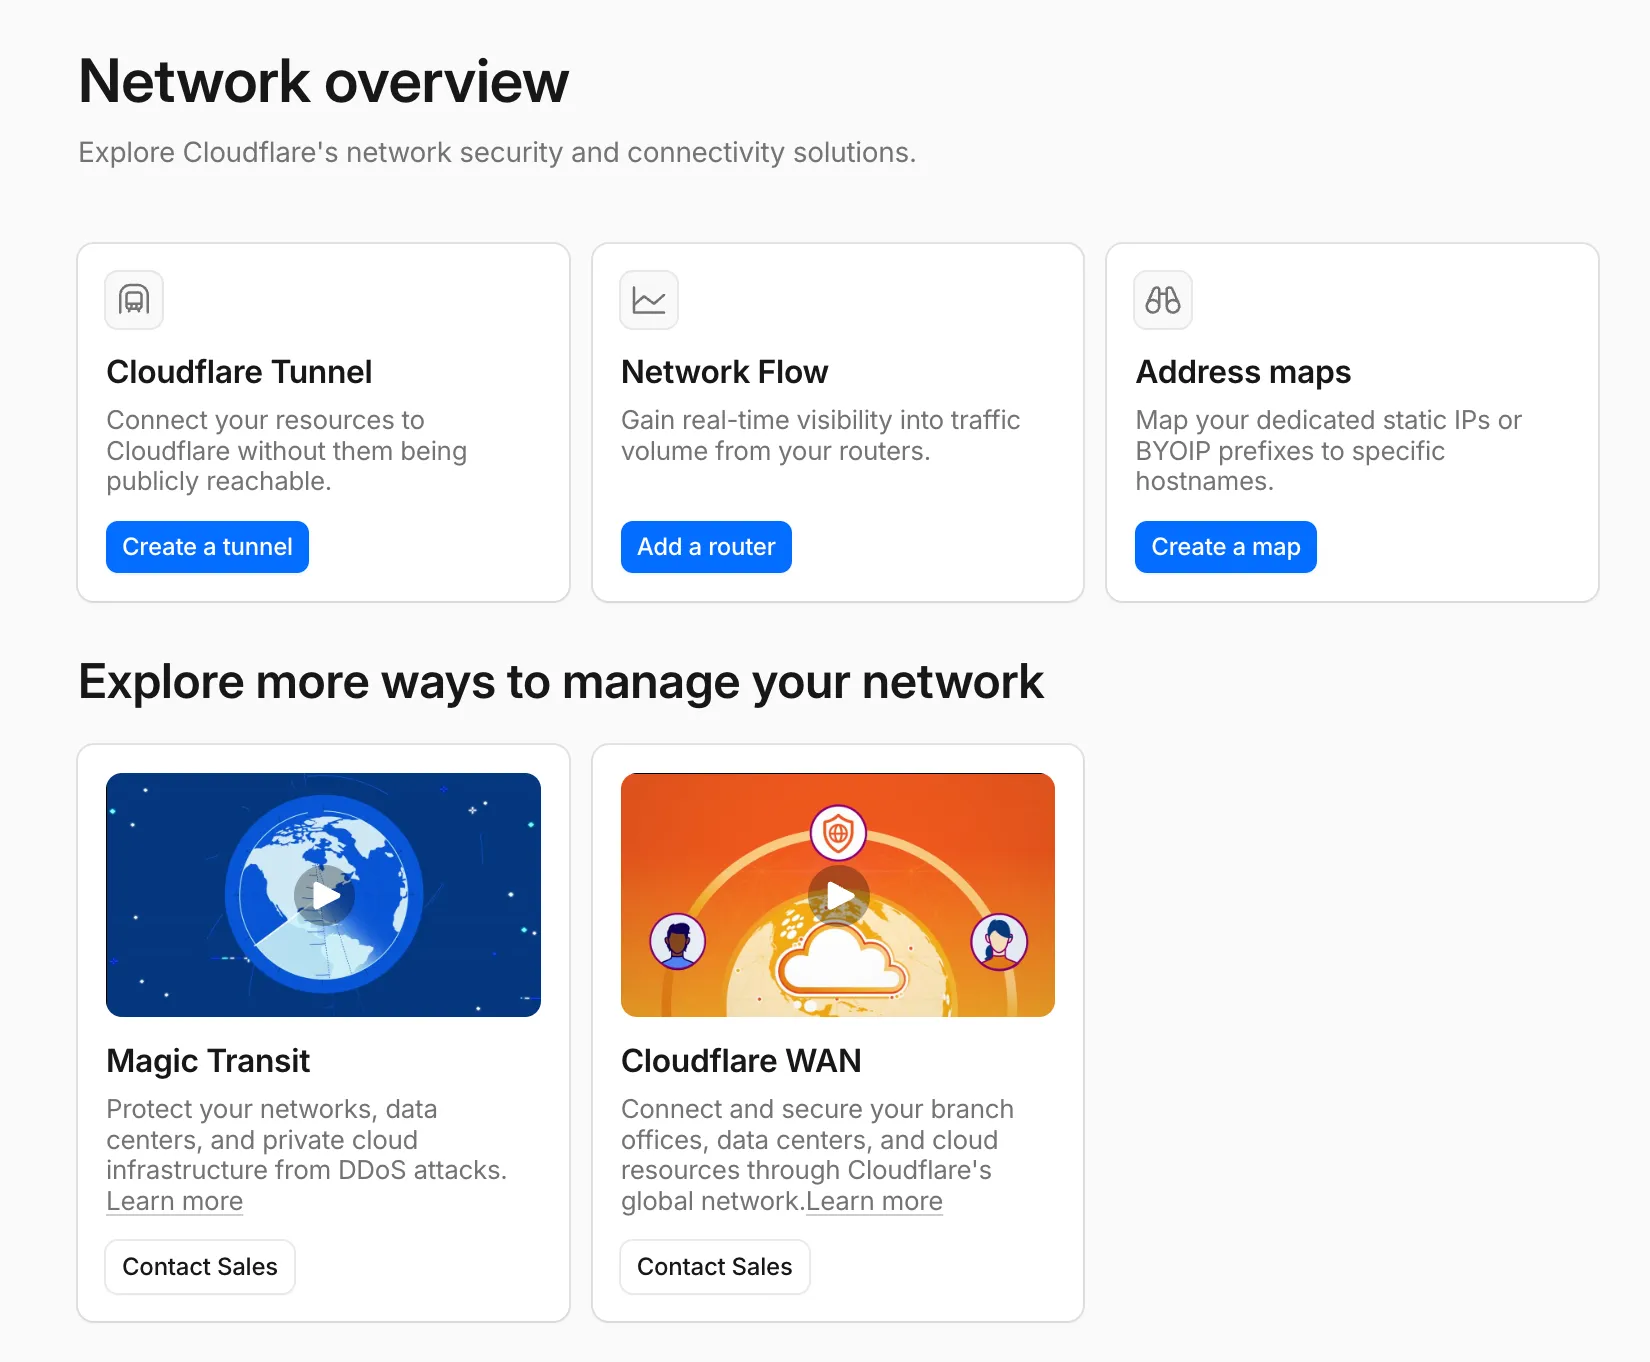
A new Network Overview page in the Cloudflare dashboard gives you a single starting point for network security and connectivity products.
From the Network Overview page, you can:
- Connect resources with Cloudflare Tunnel - Create tunnels to connect your infrastructure to Cloudflare without exposing it to the public Internet.
- Monitor traffic with Network Flow - Get real-time visibility into traffic volume from your routers.
- Configure Address Maps - Map dedicated static IPs or BYOIP prefixes to specific hostnames.
- Explore Magic Transit and Cloudflare WAN - Set up DDoS protection for your networks and connectivity for your branch offices and data centers.
To find it, go to Networking ↗ in the dashboard sidebar.
If you already use Magic Transit, Cloudflare WAN, or other Cloudflare network services products, your existing experience is unchanged.
Pay-as-you-go customers can now monitor usage-based costs and configure spend alerts through two new features: the Billable Usage dashboard and Budget alerts.
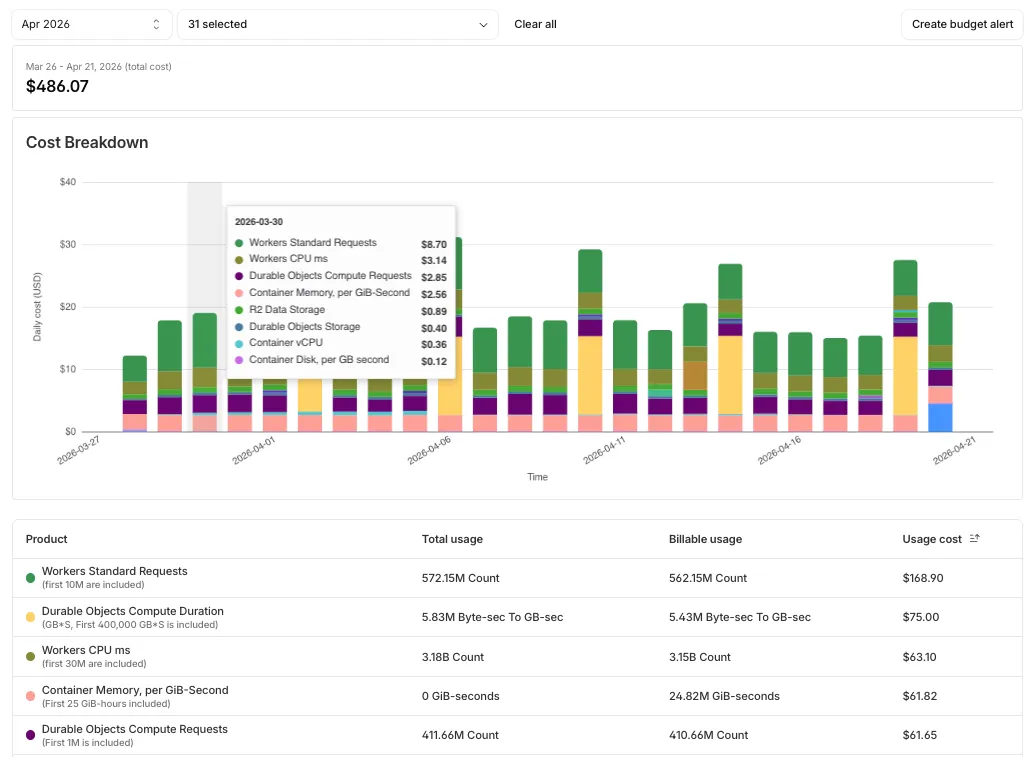
The Billable Usage dashboard provides daily visibility into usage-based costs across your Cloudflare account. The data comes from the same system that generates your monthly invoice, so the figures match your bill.
The dashboard displays:
- A bar chart showing daily usage charges for your billing period
- A sortable table breaking down usage by product, including total usage, billable usage, and cumulative costs
- Ability to view previous billing periods
Usage data aligns to your billing cycle, not the calendar month. The total usage cost shown at the end of a completed billing period matches the usage overage charges on your corresponding invoice.
To access the dashboard, go to Manage Account > Billing > Billable Usage.
Budget alerts allow you to set dollar-based thresholds for your account-level usage spend. You receive an email notification when your projected monthly spend reaches your configured threshold, giving you proactive visibility into your bill before month-end.
To configure a budget alert:
- Go to Manage Account > Billing > Billable Usage.
- Select Set Budget Alert.
- Enter a budget threshold amount greater than $0.
- Select Create.
Alternatively, configure alerts via Notifications > Add > Budget Alert.
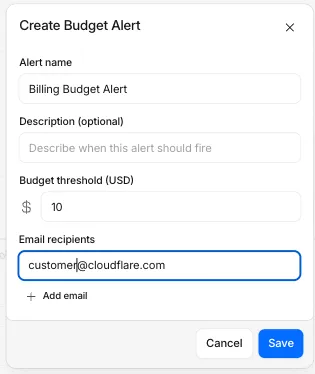
You can create multiple budget alerts at different dollar amounts. The notifications system automatically deduplicates alerts if multiple thresholds trigger at the same time. Budget alerts are calculated daily based on your usage trends and fire once per billing cycle when your projected spend first crosses your threshold.
Both features are available to Pay-as-you-go accounts with usage-based products (Workers, R2, Images, etc.). Enterprise contract accounts are not supported.
For more information, refer to the Usage based billing documentation.
OAuth allows third-party applications to access your Cloudflare account on your behalf — like when Wrangler deploys Workers or when monitoring tools read your analytics. You now have granular control over which accounts these applications can access, plus the ability to revoke access anytime.
When authorizing an OAuth application, you can now select specific accounts instead of granting access to all your accounts:
- Account-by-account selection — Choose exactly which accounts the application can access
- "All accounts" option — Still available for trusted tools like Wrangler This gives you precise control who can access your data.
The OAuth consent screen now shows:
- What the application can access — Explicit list of permissions being requested
- Who created the application — Application owner and contact information
- Which accounts you're authorizing — Checkboxes for account selection
Manage authorized OAuth applications from your profile:
- See all connected apps — View every OAuth application with access to your accounts
- Review permissions and scope — Check what each application can do and which accounts it can access
- Revoke instantly — Remove access with one click when you no longer need it To manage your OAuth applications, navigate to Profile > Access Management > Connected Applications ↗.
These updates give you:
- Granular control — Authorize apps per-account instead of all-or-nothing
- Transparency — Know exactly what you're authorizing before you consent
- Security — Limit blast radius by restricting access to only necessary accounts
- Easy cleanup — Revoke access when applications are no longer needed
Read more about these improvements in our blog post: Improving the OAuth consent experience ↗.
Cloudflare API tokens now include identifiable patterns that enable secret scanning tools to automatically detect them when leaked in code repositories, configuration files, or other public locations.
API tokens generated by Cloudflare now follow a standardized format that secret scanning tools can recognize. When a Cloudflare token is accidentally committed to GitHub, GitLab, or another platform with secret scanning enabled, the tool will flag it and alert you.
Leaked credentials are a common security risk. By making Cloudflare tokens detectable by scanning tools, you can:
- Detect leaks faster — Get notified immediately when a token is exposed.
- Reduce risk window — Exposed tokens are deactivated immediately, before they can be exploited.
- Automate security — Leverage existing secret scanning infrastructure without additional configuration.
When a third-party secret scanning tool detects a leaked Cloudflare API token:
- Cloudflare immediately deactivates the token to prevent unauthorized access.
- The token creator receives an email notification alerting them to the leak.
- The token is marked as "Exposed" in the Cloudflare dashboard.
- You can then roll or delete the token from the token management pages.
- GitHub Secret Scanning — Automatically enabled for public repositories
For more information on token formats and secret scanning, refer to API token formats.
-
Cloudflare has officially launched a redesigned "Get Help" Support Portal to eliminate friction and get you to a resolution faster. Previously, navigating support meant clicking through multiple tiles, categorizing your own technical issues across 50+ conditional fields, and translating your problem into Cloudflare's internal taxonomy.
The new experience replaces that complexity with a personalized front door built around your specific account plan. Whether you are under a DDoS attack or have a simple billing question, the portal now presents a single, clean page that surfaces the direct paths available to you — such as "Ask AI", "Chat with a human", or "Community" — without the manual triage.
- One Page, Clear Choices: No more navigating a grid of overlapping categories. The portal now uses action cards tailored to your plan (Free, Pro, Business, or Enterprise), ensuring you only see the support channels you can actually use.
- A Radically Simpler Support Form: We've reduced the ticket submission process from four+ screens and 50+ fields to a single screen with five critical inputs. You describe the issue in your own words, and our backend handles the categorization.
- AI-Driven Triage: Using Cloudflare Workers AI ↗ and Vectorize ↗, the portal now automatically generates case subjects and predicts product categories.
Behind the scenes, we've moved the complexity from the user to our own developer stack. When you describe an issue, we use semantic embeddings to capture intent rather than just keywords.
By leveraging case-based reasoning, our system compares your request against millions of resolved cases to route your inquiry to the specialist best equipped to help. This ensures that while the front-end experience is simpler for you, the back-end routing is more accurate than ever.
To learn more, refer to the Support documentation or select Get Help directly in the Cloudflare Dashboard ↗.
We're announcing the public beta of Organizations for enterprise customers, a new top-level Cloudflare container that lets Cloudflare customers manage multiple accounts, members, analytics, and shared policies from one centralized location.
What's New
Organizations [BETA]: Organizations are a new top-level container for centrally managing multiple accounts. Each Organization supports up to 500 accounts and 5000 zones, giving larger teams a single place to administer resources at scale.
Self-serve onboarding: Enterprise customers can create an Organization in the dashboard and assign accounts where they are already Super Administrators.
Centralized Account Management: At launch, every Organization member has the Organization Super Admin role. Organization Super Admins can invite other users and manage any child account under the Organization implicitly. Shared policies: Share WAF or Gateway policies across multiple accounts within your Organization to simplify centralized policy management. Implicit access: Members of an Organization automatically receive Super Administrator permissions across child accounts, removing the need for explicit membership on each account. Additional Org-level roles will be available over the course of the year.
Unified analytics: View, filter, and download aggregate HTTP analytics across all Organization child accounts from a single dashboard for centralized visibility into traffic patterns and security events.
Terraform provider support: Manage Organizations with infrastructure as code from day one. Provision organizations, assign accounts, and configure settings programmatically with the Cloudflare Terraform provider ↗.
Shared policies: Share WAF or Gateway policies across multiple accounts within your Organization to simplify centralized policy management.
For more info:
Service Key authentication for the Cloudflare API is deprecated. Service Keys will stop working on September 30, 2026.
API Tokens replace Service Keys with fine-grained permissions, expiration, and revocation.
Replace any use of the
X-Auth-User-Service-Keyheader with an API Token scoped to the permissions your integration requires.If you use
cloudflared, update to a version from November 2022 or later. These versions already use API Tokens.If you use origin-ca-issuer ↗, update to a version that supports API Token authentication.
For more information, refer to API deprecations.
Cloudflare dashboard SCIM provisioning now supports Authentik ↗ as an identity provider, joining Okta and Microsoft Entra ID as explicitly supported providers.
Customers can now sync users and group information from Authentik to Cloudflare, apply Permission Policies to those groups, and manage the lifecycle of users & groups directly from your Authentik Identity Provider.
For more information:
Cloudflare dashboard SCIM provisioning operations are now captured in Audit Logs v2, giving you visibility into user and group changes made by your identity provider.
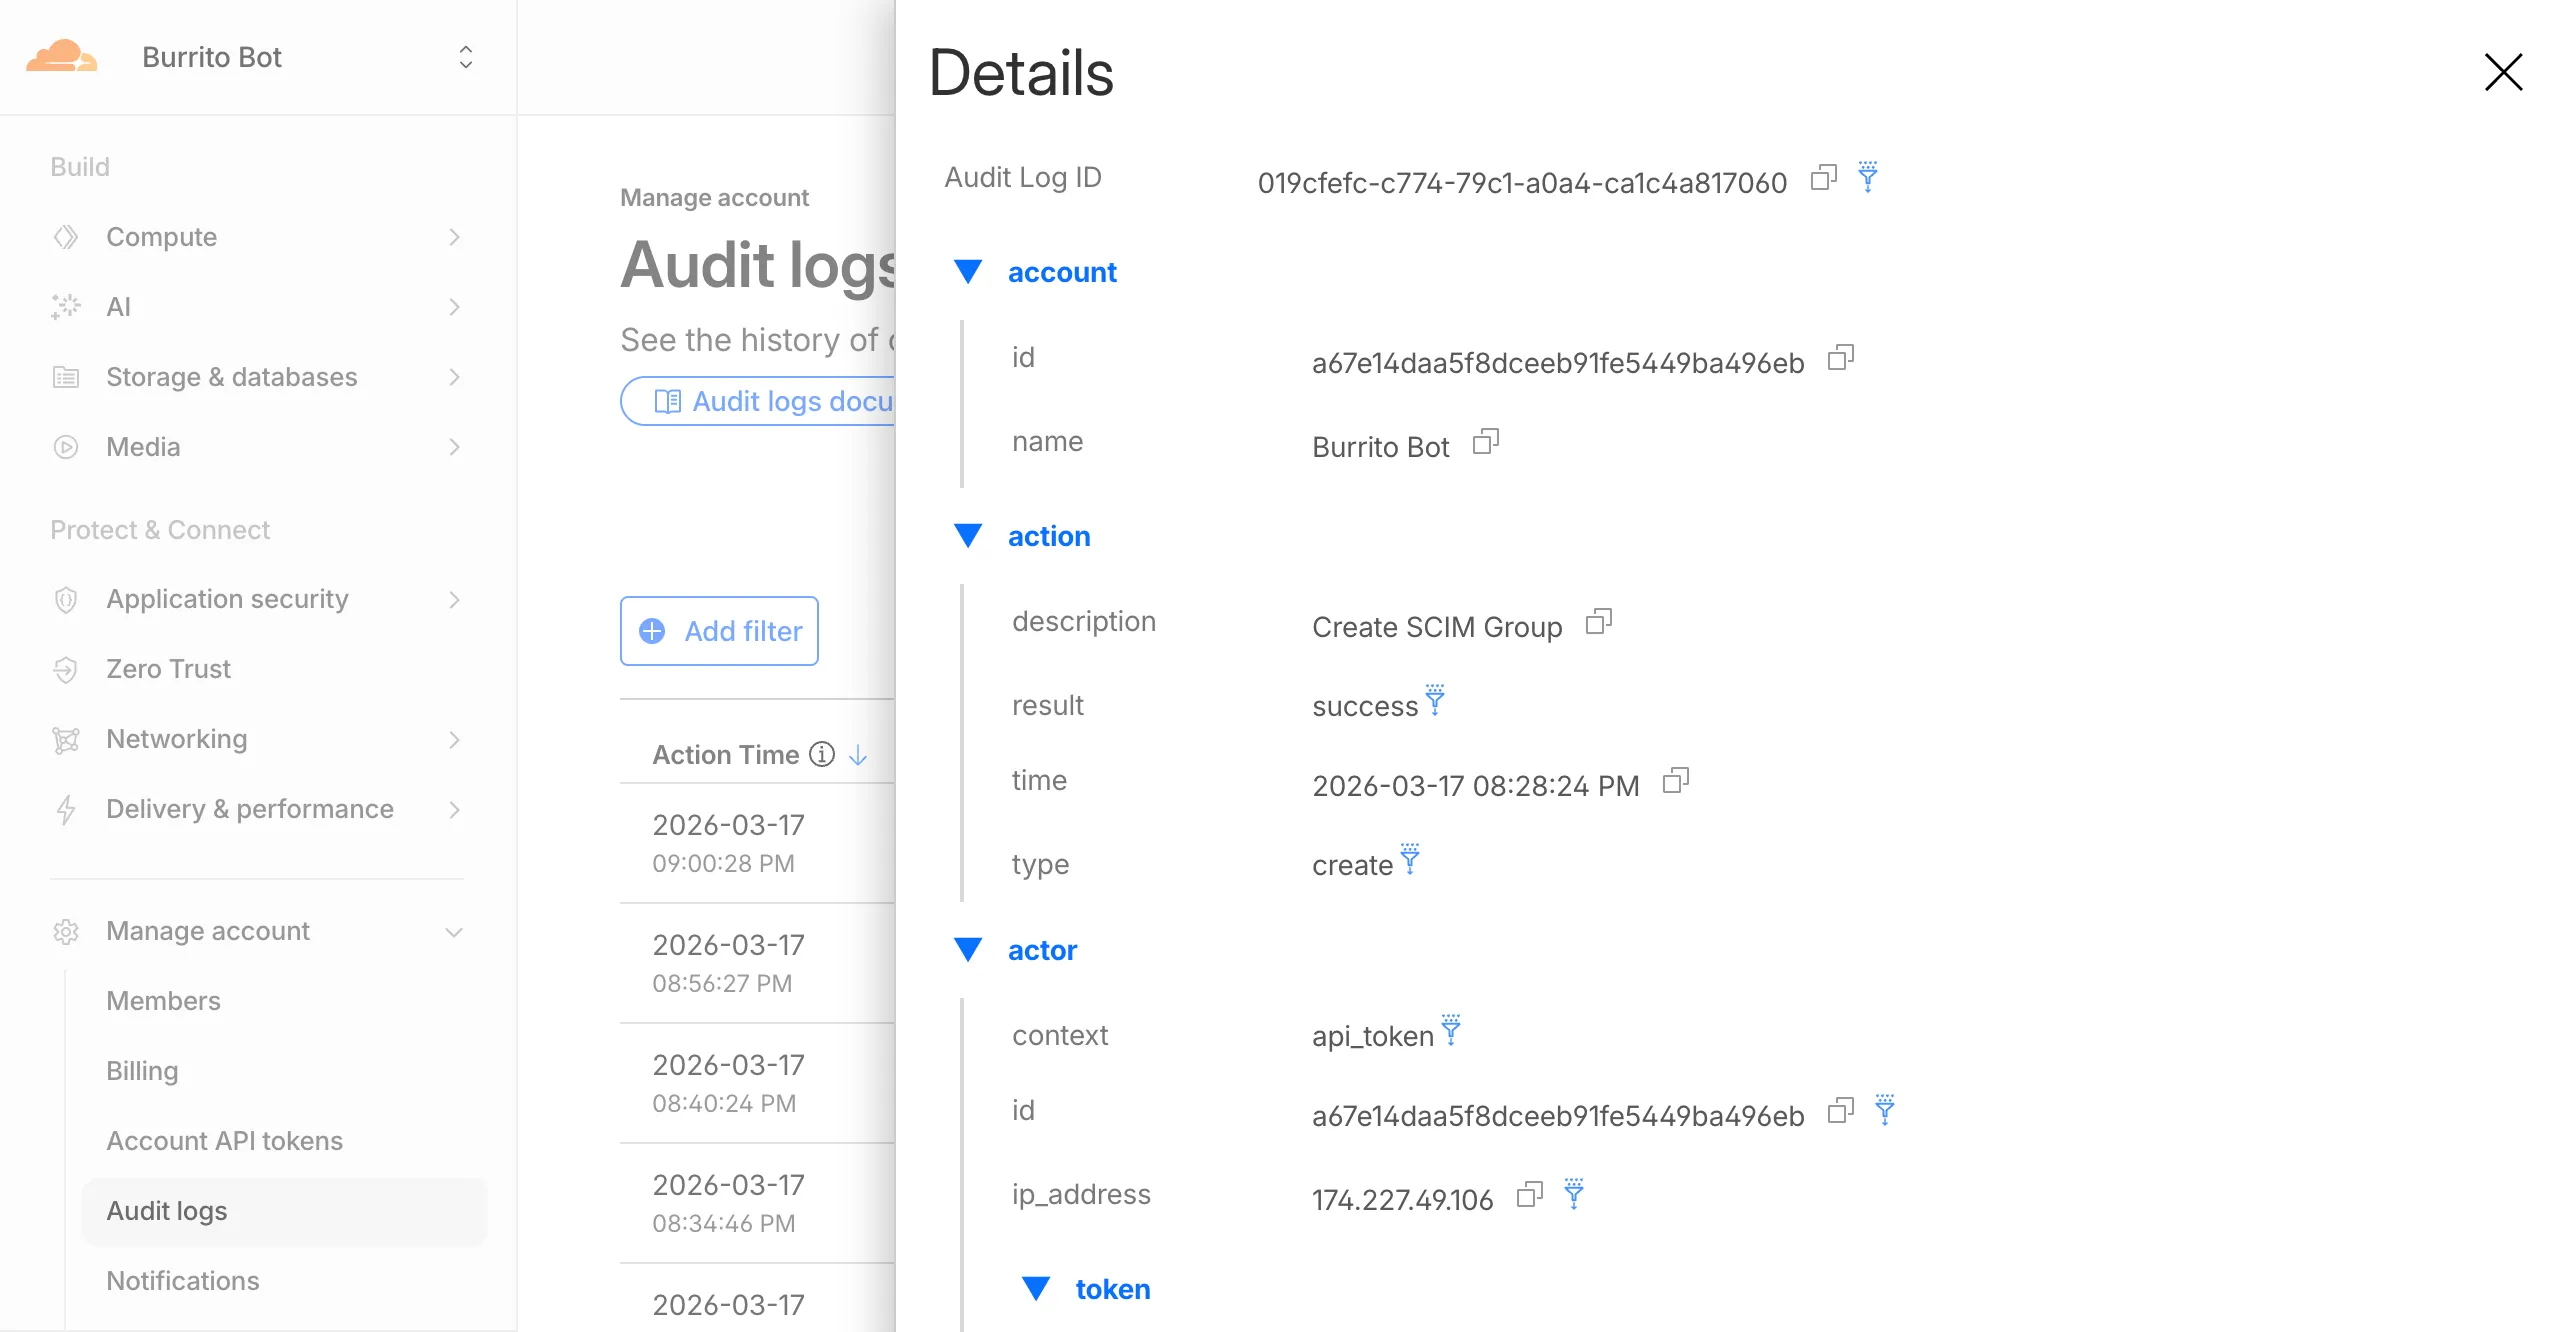
Logged actions:
Action Type Description Create SCIM User User provisioned from IdP Replace SCIM User User fully replaced (PUT) Update SCIM User User attributes modified (PATCH) Delete SCIM User Member deprovisioned Create SCIM Group Group provisioned from IdP Update SCIM Group Group membership or attributes modified Delete SCIM Group Group deprovisioned For more details, refer to the Audit Logs v2 documentation.
Cloudflare-generated 1xxx error responses now include a standard
Retry-AfterHTTP header when the error is retryable. Agents and HTTP clients can read the recommended wait time from response headers alone — no body parsing required.Seven retryable error codes now emit
Retry-After:Error code Retry-After (seconds) Error name 1004 120 DNS resolution error 1005 120 Banned zone 1015 30 Rate limited 1033 120 Argo Tunnel error 1038 60 HTTP headers limit exceeded 1200 60 Cache connection limit 1205 5 Too many redirects The header value matches the existing
retry_afterbody field in JSON and Markdown responses.If a WAF rate limiting rule has already set a dynamic
Retry-Aftervalue on the response, that value takes precedence.Available for all zones on all plans.
Check for the header on any retryable error:
Terminal window curl -s --compressed -D - -o /dev/null -H "Accept: application/json" -A "TestAgent/1.0" -H "Accept-Encoding: gzip, deflate" "<YOUR_DOMAIN>/cdn-cgi/error/1015" | grep -i retry-afterReferences:
Cloudflare-generated 1xxx errors now return structured JSON when clients send
Accept: application/jsonorAccept: application/problem+json. JSON responses follow RFC 9457 (Problem Details for HTTP APIs) ↗, so any HTTP client that understands Problem Details can parse the base members without Cloudflare-specific code.The Markdown frontmatter field
http_statushas been renamed tostatus. Agents consuming Markdown frontmatter should update parsers accordingly.JSON format. Clients sending
Accept: application/jsonorAccept: application/problem+jsonnow receive a structured JSON object with the same operational fields as Markdown frontmatter, plus RFC 9457 standard members.RFC 9457 standard members (JSON only):
type— URI pointing to Cloudflare documentation for the specific error codestatus— HTTP status code (matching the response status)title— short, human-readable summarydetail— human-readable explanation specific to this occurrenceinstance— Ray ID identifying this specific error occurrence
Field renames:
http_status->status(JSON and Markdown)what_happened->detail(JSON only — Markdown prose sections are unchanged)
Content-Type mirroring. Clients sending
Accept: application/problem+jsonreceiveContent-Type: application/problem+json; charset=utf-8back;Accept: application/jsonreceivesapplication/json; charset=utf-8. Same body in both cases.Request header sent Response format Accept: application/jsonJSON ( application/jsoncontent type)Accept: application/problem+jsonJSON ( application/problem+jsoncontent type)Accept: application/json, text/markdown;q=0.9JSON Accept: text/markdownMarkdown Accept: text/markdown, application/jsonMarkdown (equal q, first-listed wins)Accept: */*HTML (default) Available now for Cloudflare-generated 1xxx errors.
Terminal window curl -s --compressed -H "Accept: application/json" -A "TestAgent/1.0" -H "Accept-Encoding: gzip, deflate" "<YOUR_DOMAIN>/cdn-cgi/error/1015" | jq .Terminal window curl -s --compressed -H "Accept: application/problem+json" -A "TestAgent/1.0" -H "Accept-Encoding: gzip, deflate" "<YOUR_DOMAIN>/cdn-cgi/error/1015" | jq .References:
Cloudflare now returns structured Markdown responses for Cloudflare-generated 1xxx errors when clients send
Accept: text/markdown.Each response includes YAML frontmatter plus guidance sections (
What happened/What you should do) so agents can make deterministic retry and escalation decisions without parsing HTML.In measured 1,015 comparisons, Markdown reduced payload size and token footprint by over 98% versus HTML.
Included frontmatter fields:
error_code,error_name,error_category,http_statusray_id,timestamp,zonecloudflare_error,retryable,retry_after(when applicable),owner_action_required
Default behavior is unchanged: clients that do not explicitly request Markdown continue to receive HTML error pages.
Cloudflare uses standard HTTP content negotiation on the
Acceptheader.Accept: text/markdown-> MarkdownAccept: text/markdown, text/html;q=0.9-> MarkdownAccept: text/*-> MarkdownAccept: */*-> HTML (default browser behavior)
When multiple values are present, Cloudflare selects the highest-priority supported media type using
qvalues. If Markdown is not explicitly preferred, HTML is returned.Available now for Cloudflare-generated 1xxx errors.
Terminal window curl -H "Accept: text/markdown" https://<your-domain>/cdn-cgi/error/1015Reference: Cloudflare 1xxx error documentation
When AI systems request pages from any website that uses Cloudflare and has Markdown for Agents enabled, they can express the preference for
text/markdownin the request: our network will automatically and efficiently convert the HTML to markdown, when possible, on the fly.This release adds the following improvements:
- The origin response limit was raised from 1 MB to 2 MB (2,097,152 bytes).
- We no longer require the origin to send the
content-lengthheader. - We now support content encoded responses from the origin.
If you haven’t enabled automatic Markdown conversion yet, visit the AI Crawl Control ↗ section of the Cloudflare dashboard and enable Markdown for Agents.
Refer to our developer documentation for more details.
Fine-grained permissions for Access policies and Access service tokens are available. These new resource-scoped roles expand the existing RBAC model, enabling administrators to grant permissions scoped to individual resources.
- Cloudflare Access policy admin: Can edit a specific Access policy in an account.
- Cloudflare Access service token admin: Can edit a specific Access service token in an account.
These roles complement the existing resource-scoped roles for Access applications, identity providers, and infrastructure targets.
For more information: