Deploy and configure Microsoft Office 365 with Cloud Email Security (formerly Area 1) as the MX Record
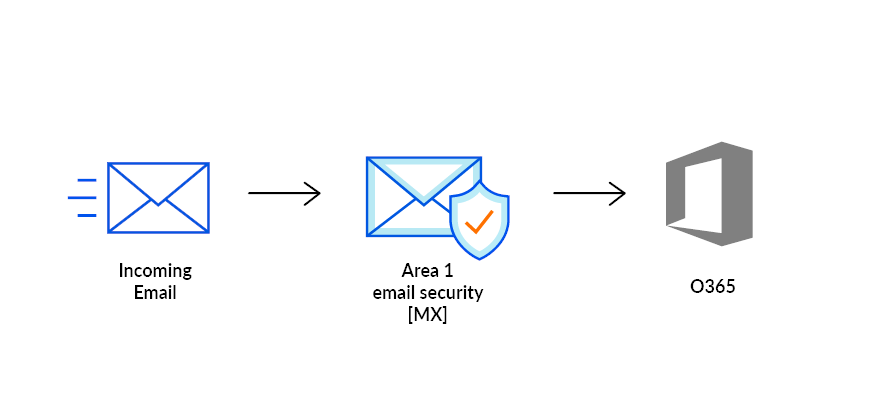
In this tutorial, you will learn how to configure Microsoft Office 365 with Cloud Email Security as its MX record. This tutorial is broken down into several steps. If at any steps during this tutorial you receive a message saying that you need to run the Enable-OrganizationCustomization cmdlet, refer to section 6.
For the purposes of this guide, Office 365 and Microsoft 365 are equivalent.
Prerequisites
To ensure changes made in this tutorial take effect quickly, update the Time to Live (TTL) value of the existing MX records on your domains to five minutes. Do this on all the domains you will be deploying.
Changing the TTL value instructs DNS servers on how long to cache this value before requesting an update from the responsible nameserver. You need to change the TTL value before changing your MX records to Cloudflare Cloud Email Security (formerly Area 1). This will ensure that changes take effect quickly and can also be reverted quickly if needed. If your DNS manager does not allow for a TTL of five minutes, set it to the lowest possible setting.
To check your existing TTL, open a terminal window and run the following command against your domain:
$ dig mx <YOUR_DOMAIN>

; <<>> DiG 9.10.6 <<>> mx <YOUR_DOMAIN>;; global options: +cmd;; Got answer:;; ->>HEADER<<- opcode: QUERY, status: NOERROR, id: 39938;; flags: qr rd ra; QUERY: 1, ANSWER: 5, AUTHORITY: 0, ADDITIONAL: 1
;; OPT PSEUDOSECTION:; EDNS: version: 0, flags:; udp: 4096;; QUESTION SECTION:;domain.		IN	MX
;; ANSWER SECTION:<YOUR_DOMAIN>.	300	IN	MX	5 mailstream-central.mxrecord.mx.<YOUR_DOMAIN>.	300	IN	MX	10 mailstream-east.mxrecord.io.<YOUR_DOMAIN>.	300	IN	MX	10 mailstream-west.mxrecord.io.
In the above example, TTL is shown in seconds as 300 (or five minutes).
If you are using Cloudflare for DNS, you can leave the TTL setting as Auto.
Below is a list with instructions on how to edit MX records for some popular services:
- Cloudflare: Set up email records
- GoDaddy: Edit an MX Record
- AWS: Creating records by using the Amazon Route 53 console
- Azure: Create DNS records in a custom domain for a web app
1. Add Cloud Email Security IP addresses to Allow List
Go to the Microsoft Security admin center.
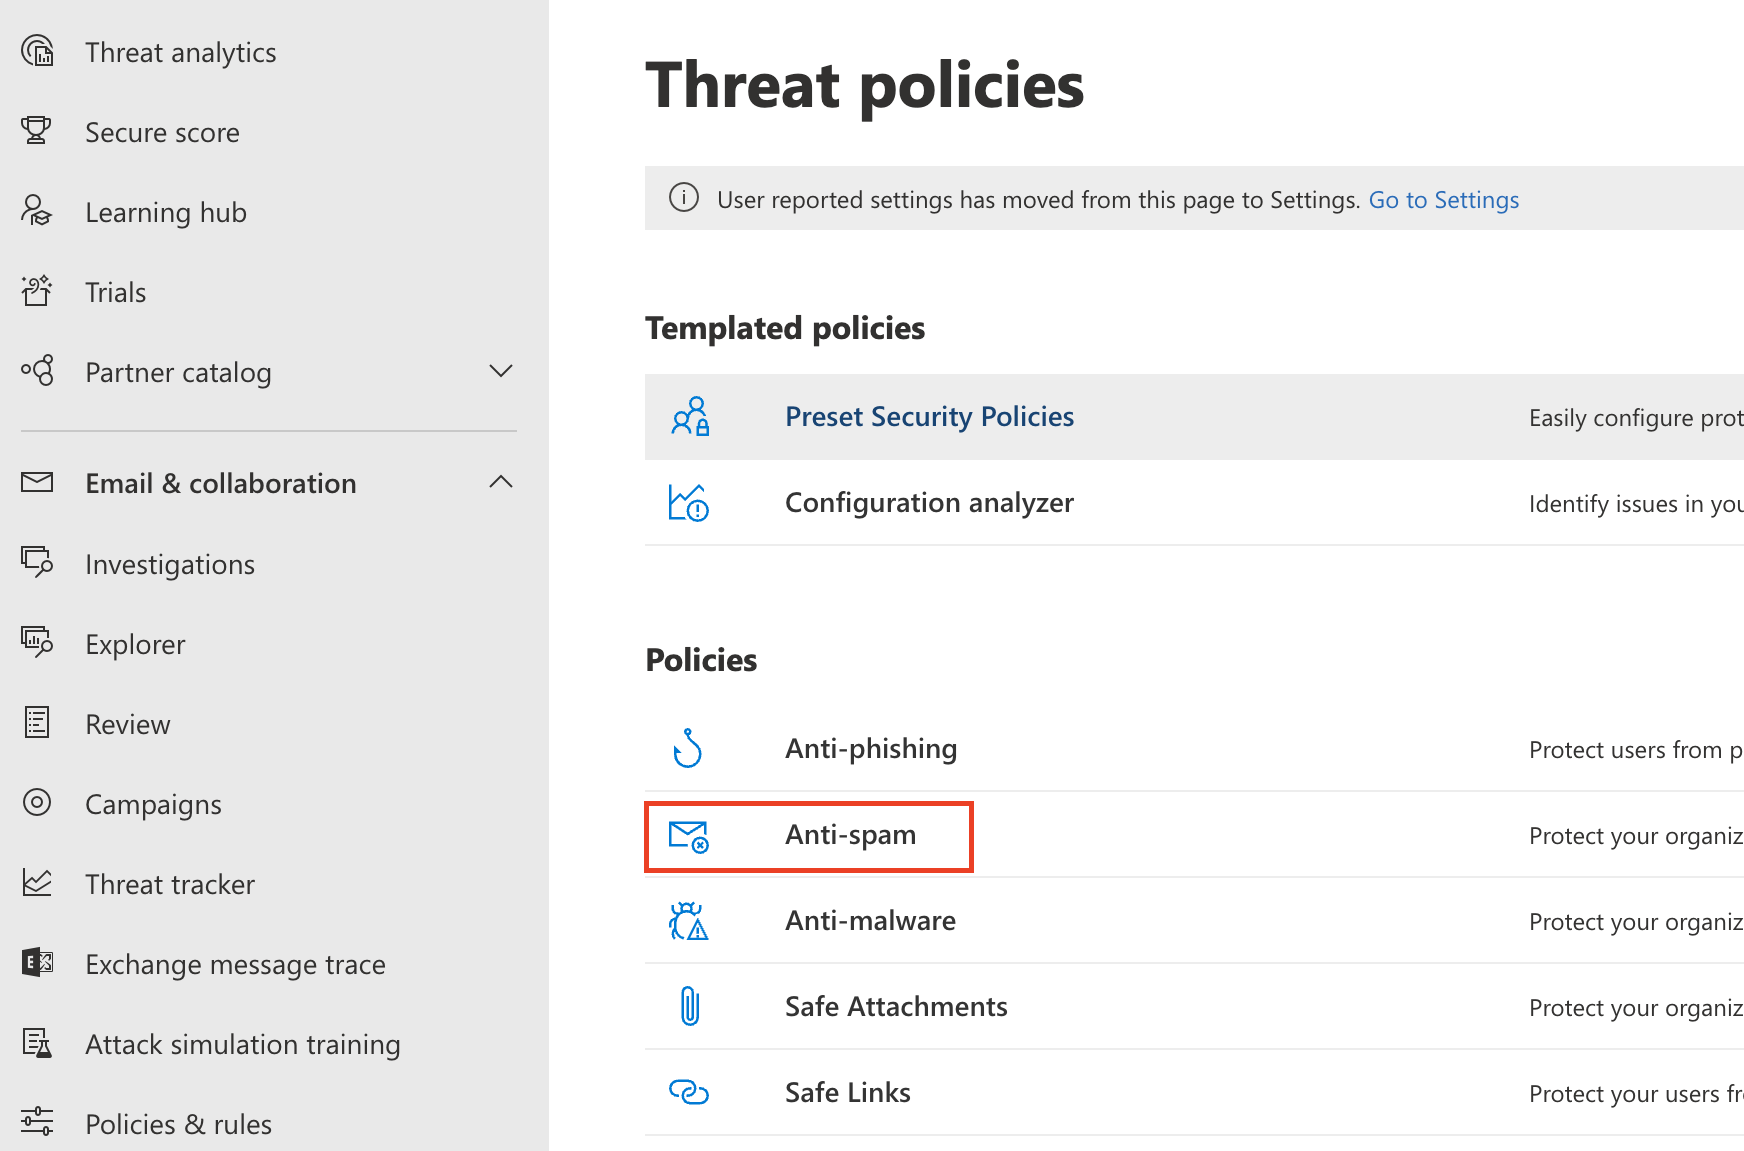
Go to Email & collaboration > Policies & Rules > Threat policies.
Select the Anti-spam option.
Select Connection filter policy (Default) > Edit connection filter policy.
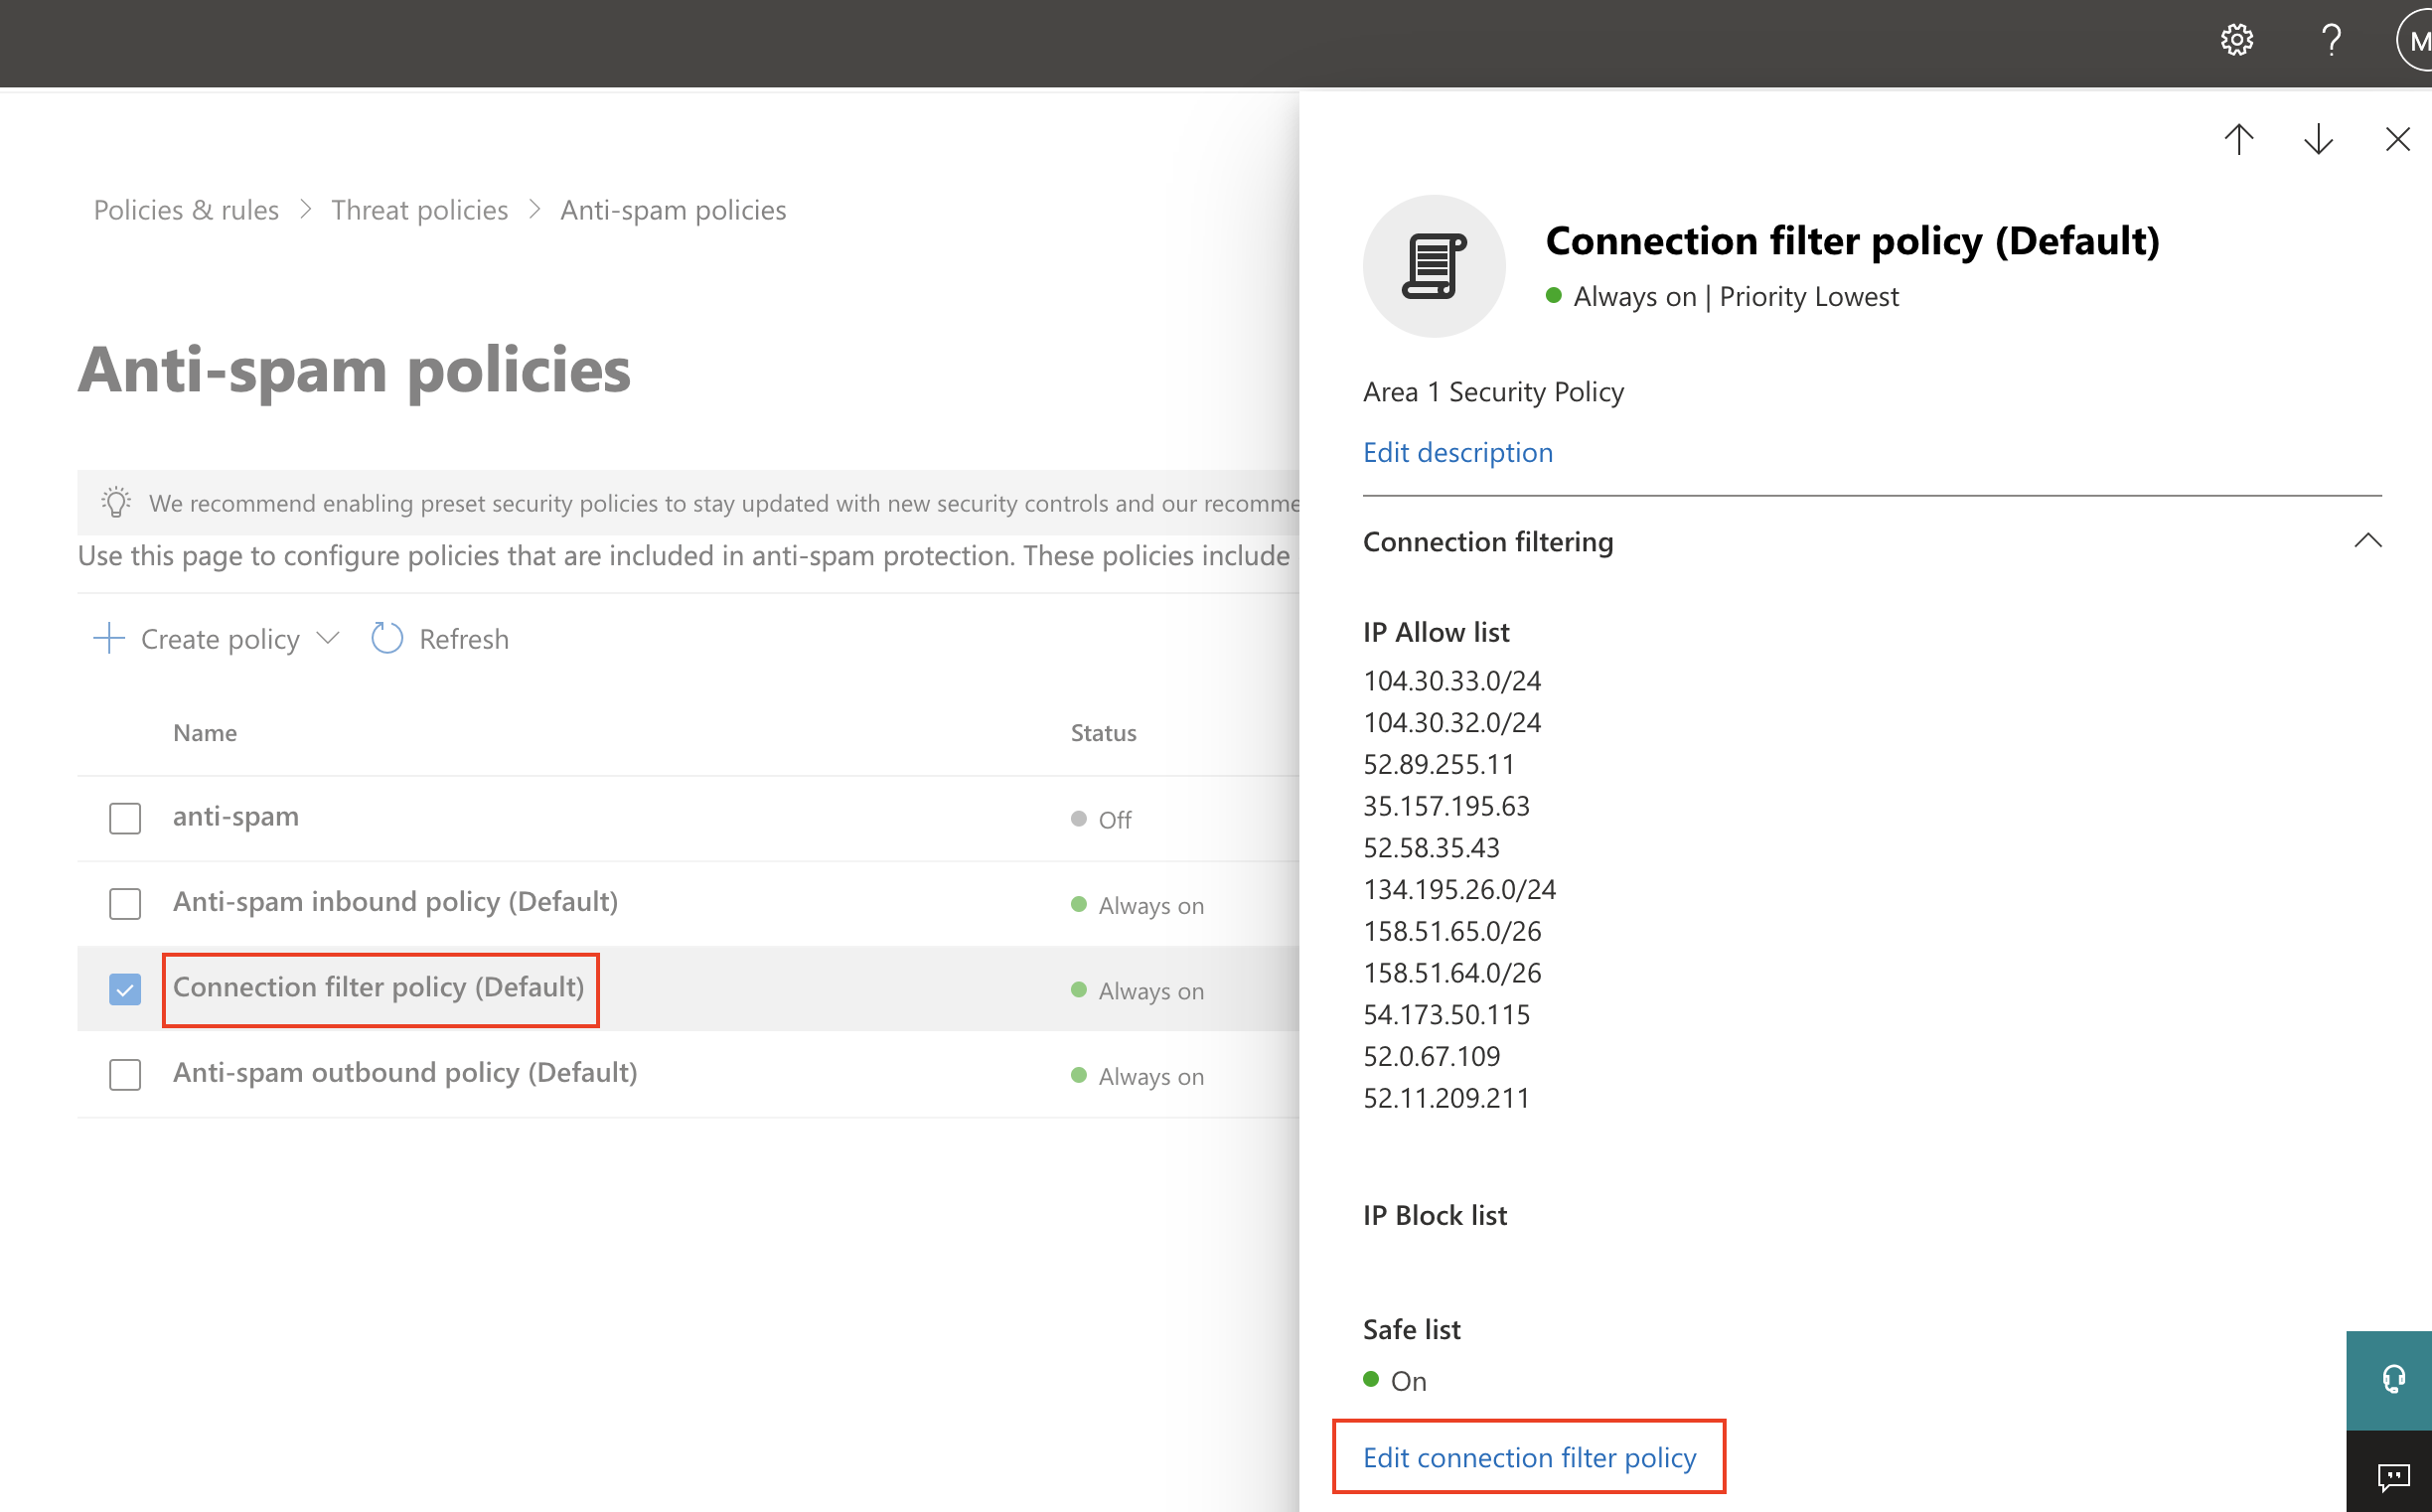
In Always allow messages from the following IP addresses or address range add the IP addresses and CIDR blocks mentioned in Egress IPs.
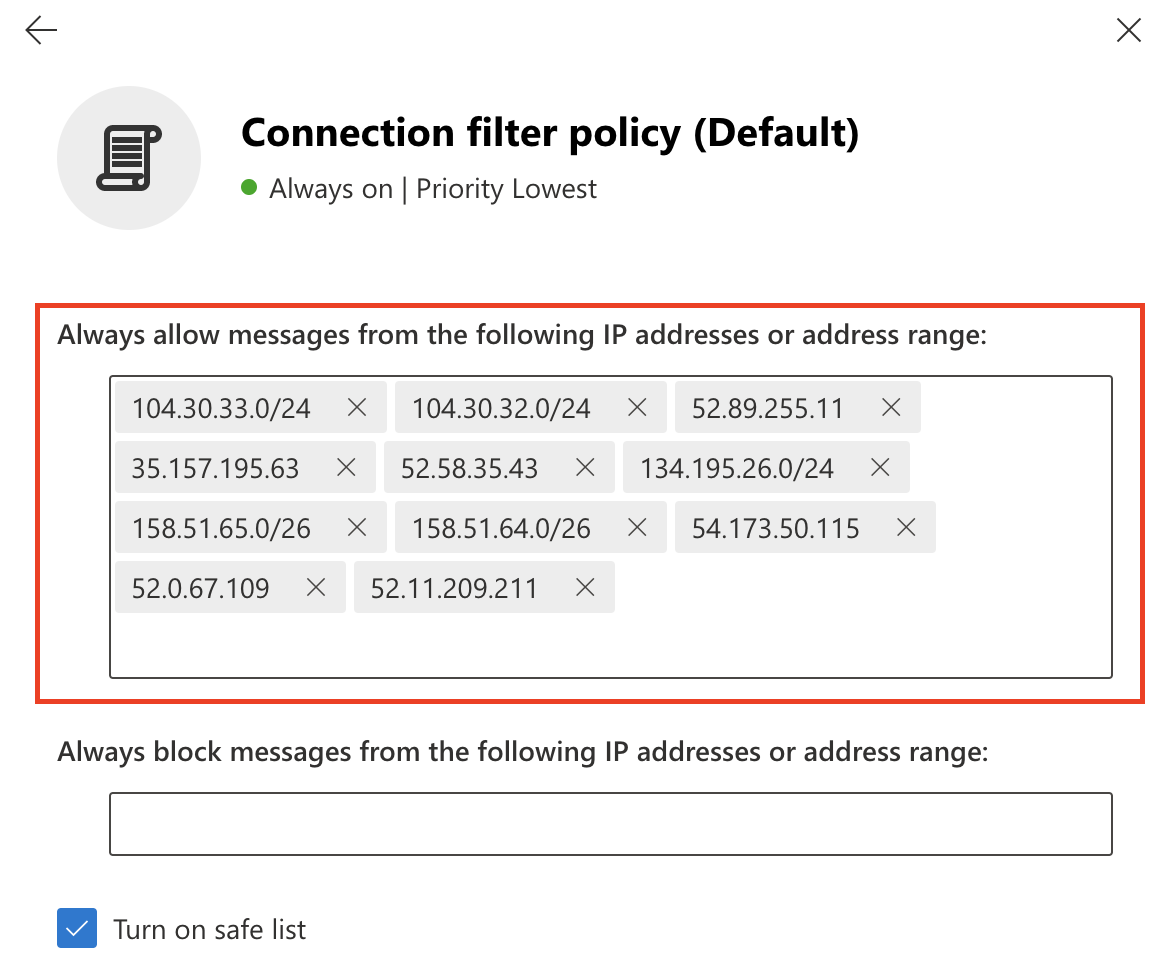
Select Save.
Microsoft recommends disabling SPF Hard fail when an email solution is placed in front of it. Return to the Anti-spam option.
Select Anti-spam inbound policy (Default).
At the end of the Bulk email threshold & spam properties section, select Edit spam threshold and properties.
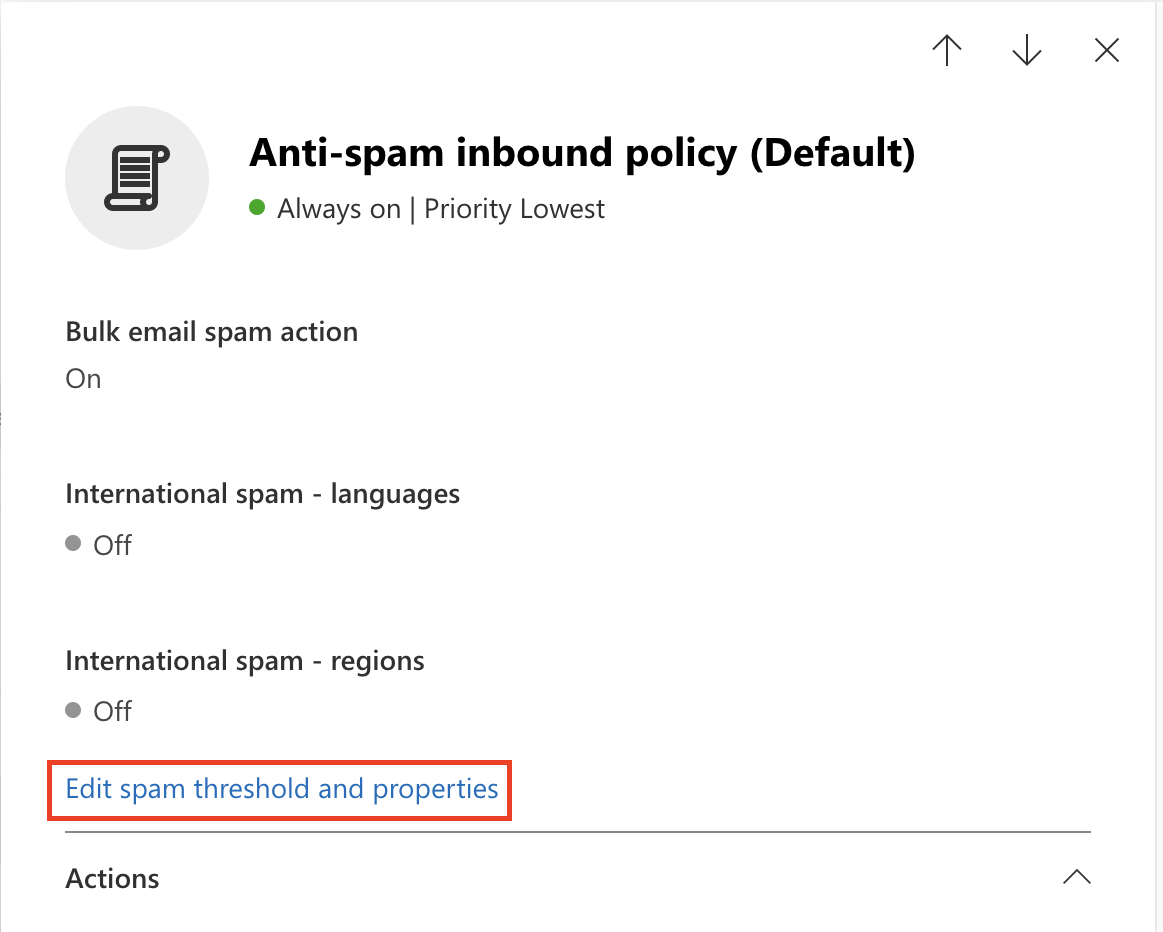
Scroll to Mark as spam > SPF record: hard fail, and ensure it is set to Off.

Select Save.
2. Enhanced Filtering configuration
This option will allow Office 365 to properly identify the original connecting IP before the message was received by Cloud Email Security (formerly Area 1). This helps with SPF analysis. This has two steps:
- Creating an inbound connector.
- Enabling the enhanced filtering configuration of the connector.
Create an inbound connector
Go to the new Exchange admin center.
Select Mail flow > Connectors.
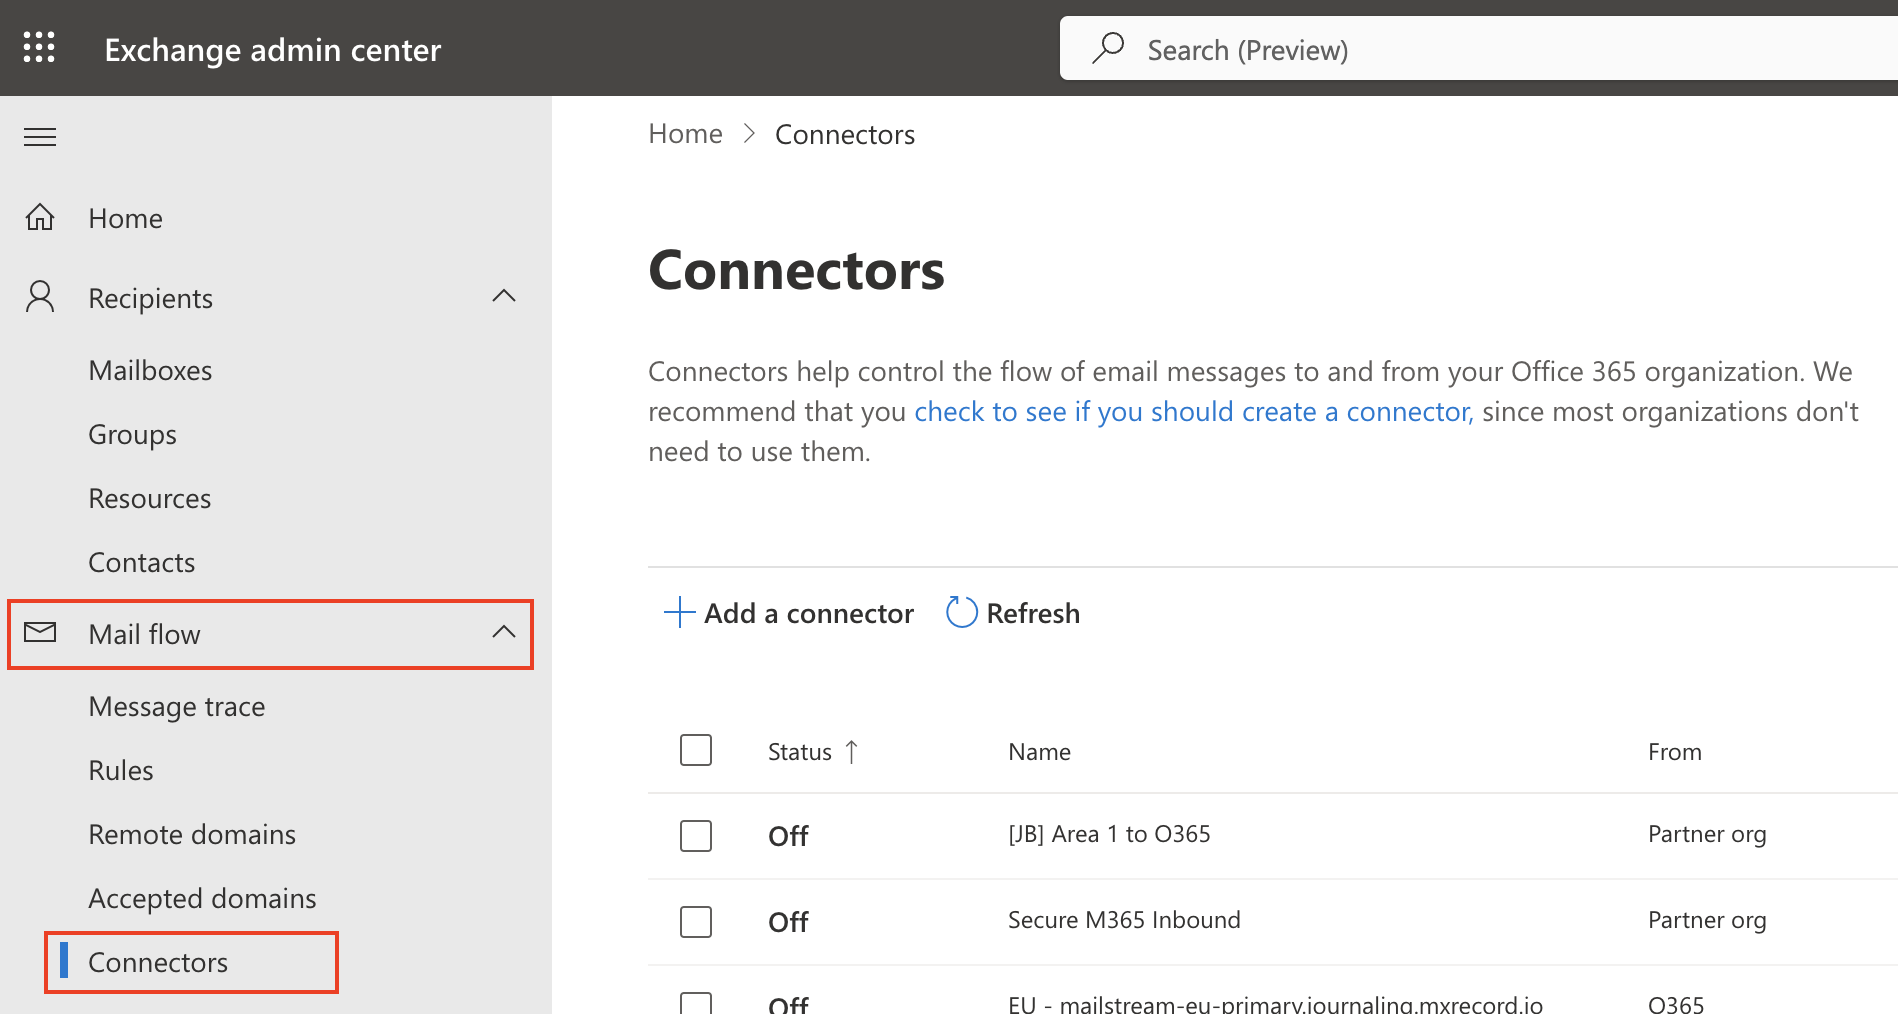
Select Add a connector.
In Connection from, select Partner organization.
Select Next.
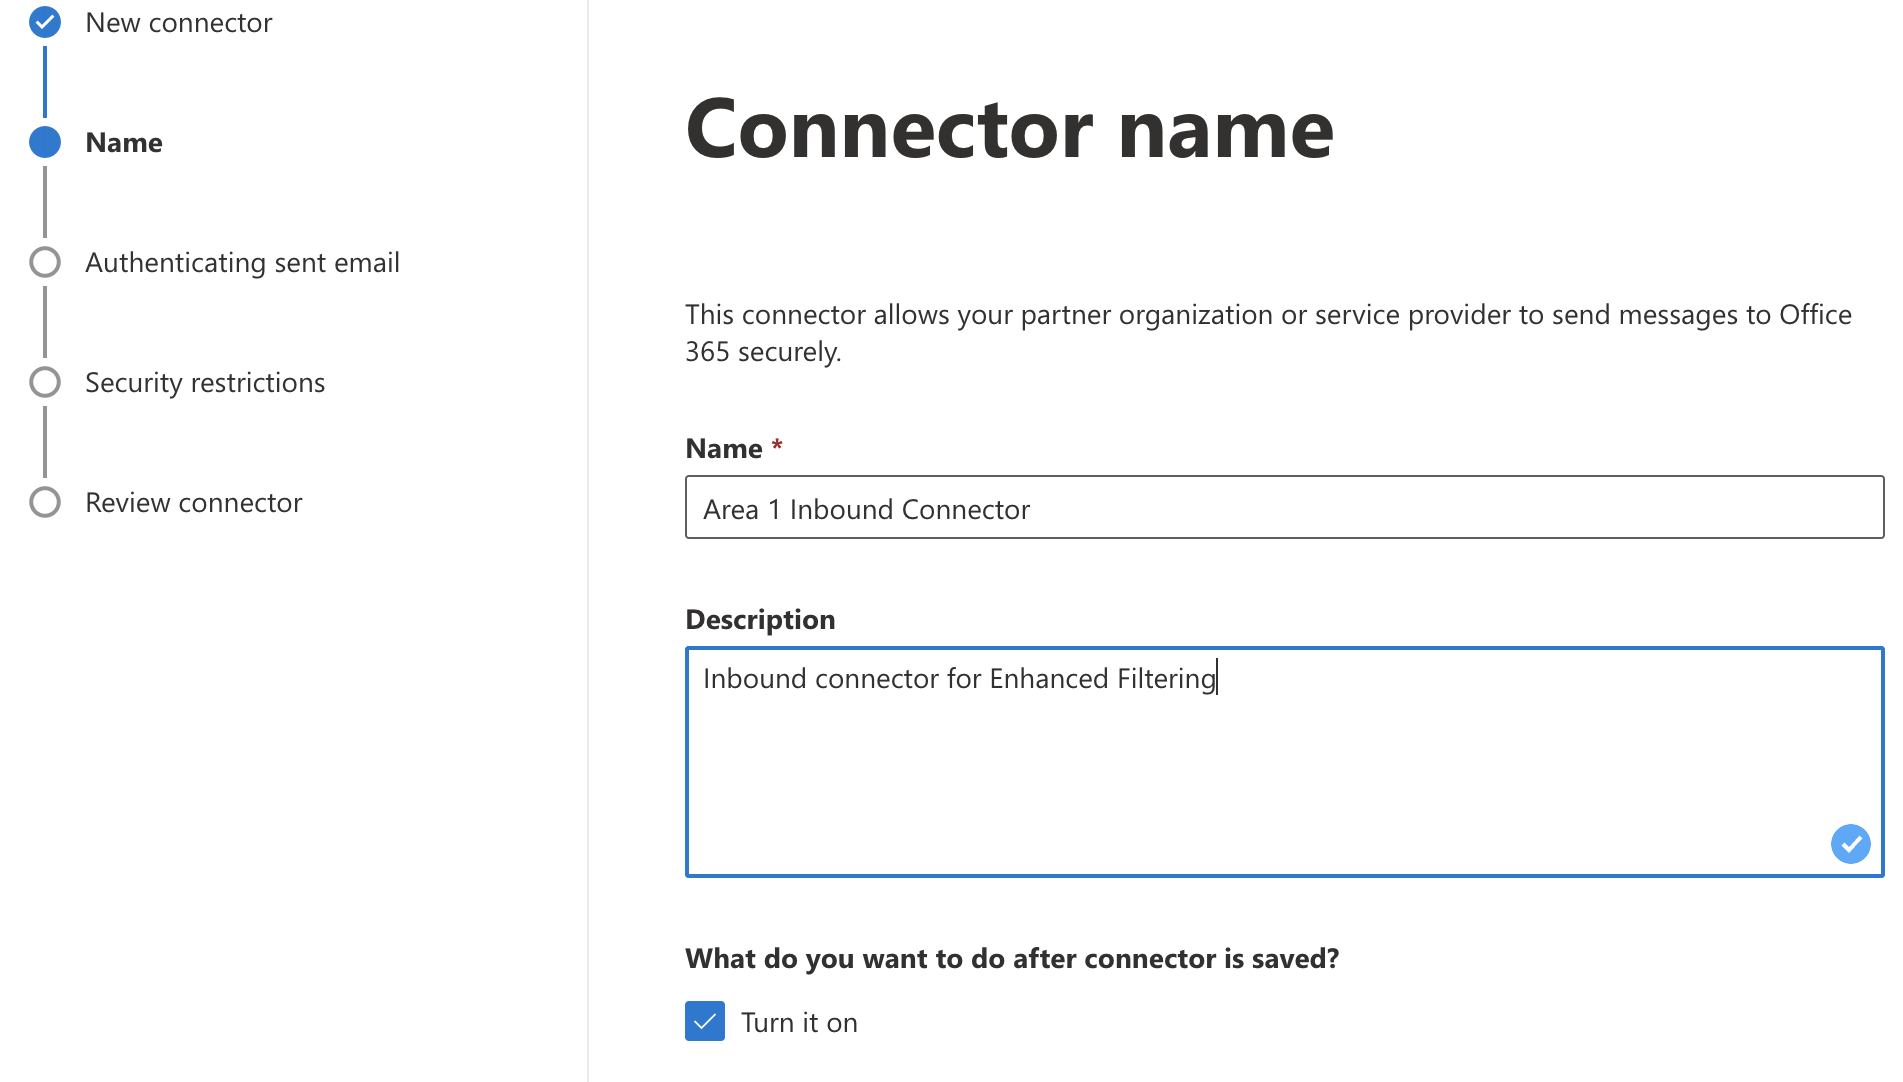
Set the following options:
- Name -
Cloud Email Security Inbound Connector - Description -
Inbound connector for Enhanced Filtering
- Name -
Select Next.
In Authenticating sent email, select By verifying that the IP address of the sending server matches one of the following IP addresses, which belongs to your partner organization.
Enter all of the egress IPs in the Egress IPs page.
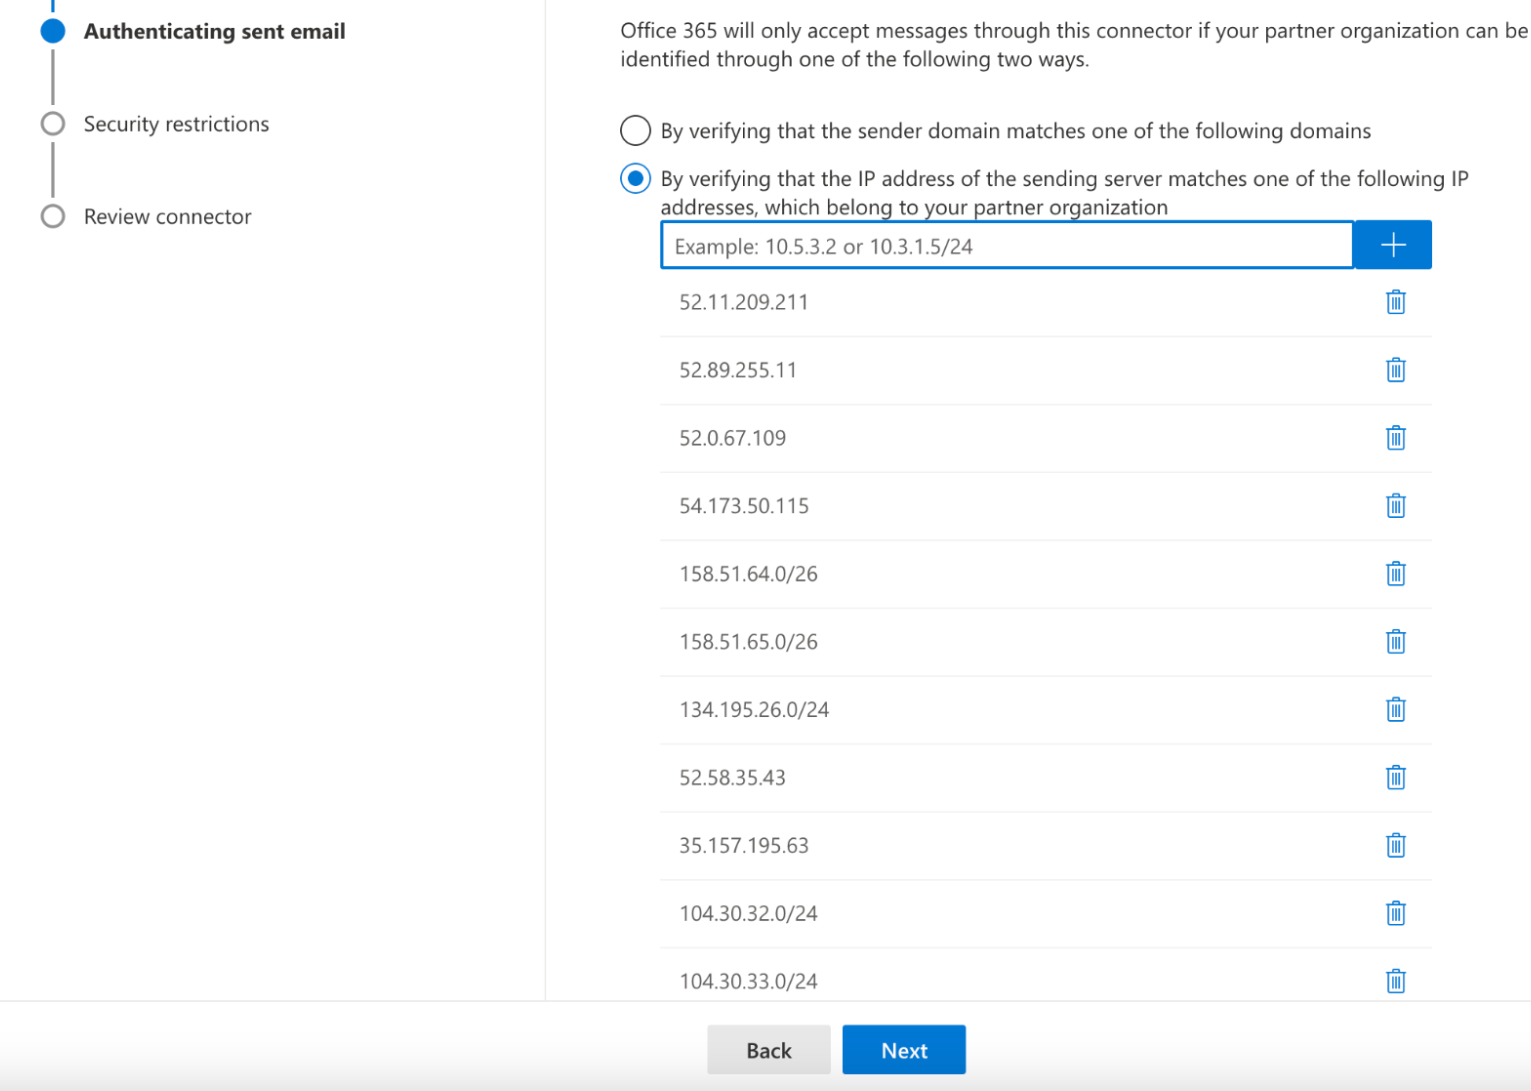
Select Next.
In Security restrictions, accept the default Reject email messages if they aren’t sent over TLS setting.
Select Next.
Review your settings and select Create connector.
Enable enhanced filtering
Now that the inbound connector has been configured, you will need to enable the enhanced filtering configuration of the connector in the Security admin console.
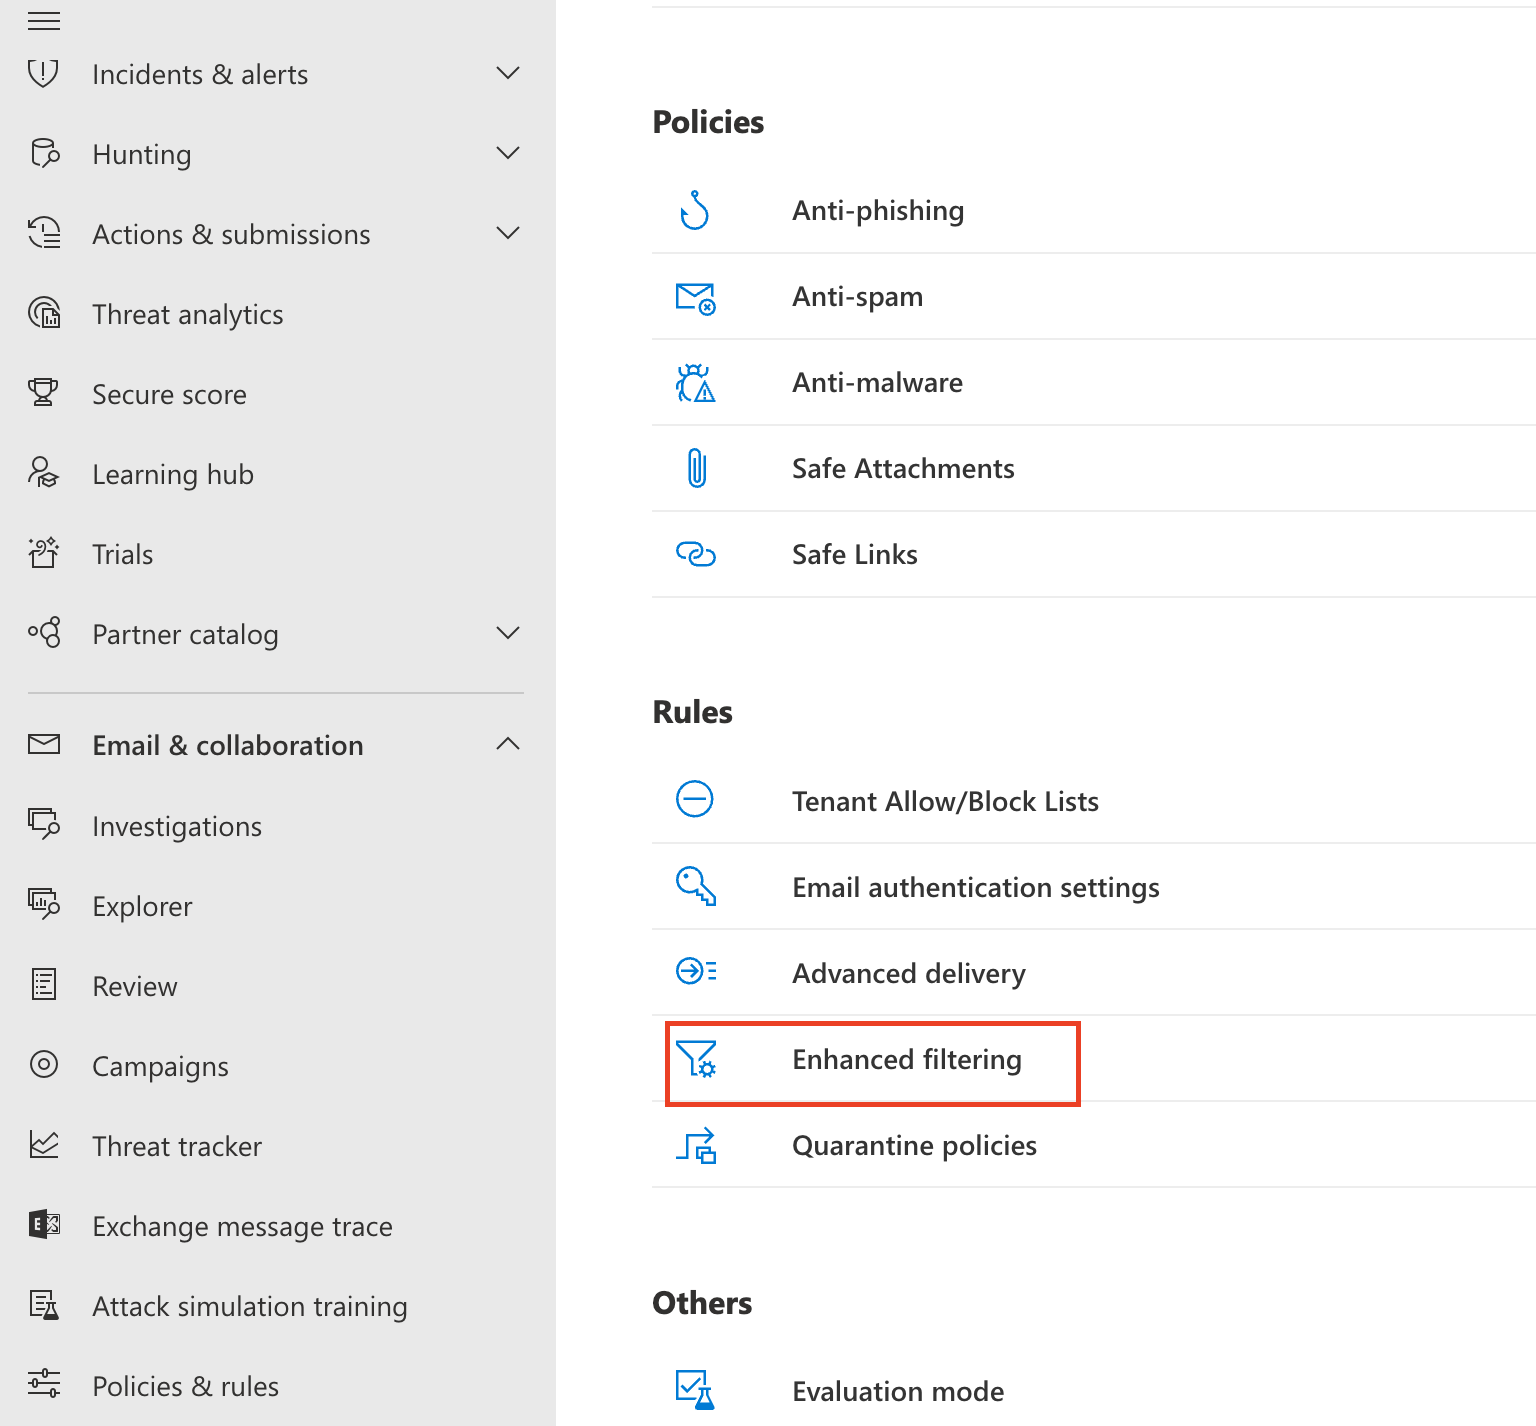
Go to Security Admin console > Email & collaboration > Policy & Rules.
Go to Threat policies > Rules, and select Enhanced filtering.
Select the
Cloud Email Security Inbound Connectorthat you configured previously to edit its configuration parameters.Select Automatically detect and skip the last IP address and Apply to entire organization.
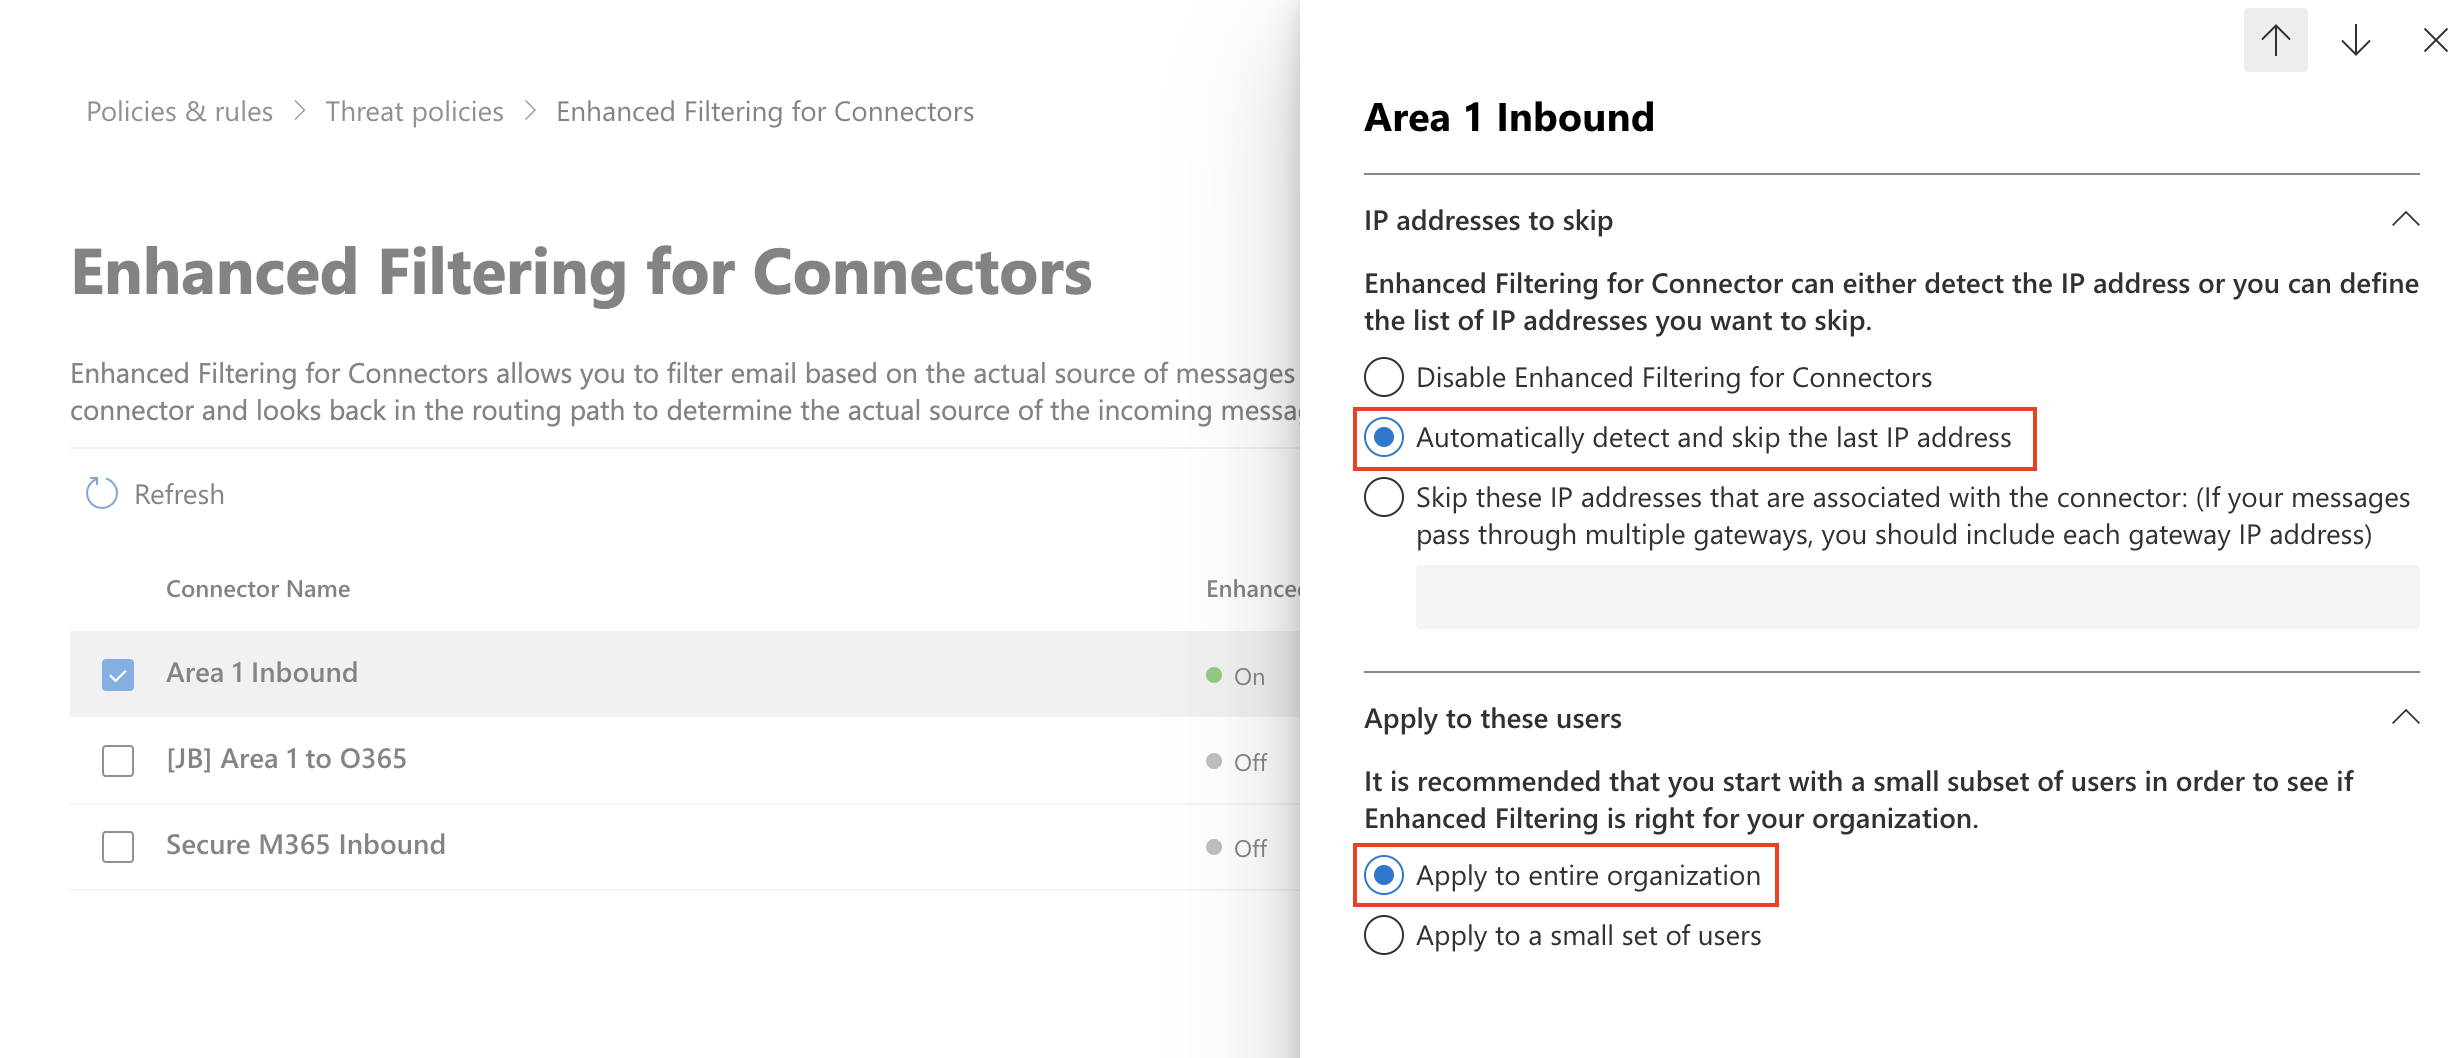
Select Save.
3. Configure Cloud Email Security quarantine policies
Select the disposition you want to quarantine
Quarantining messages is a per domain configuration. To modify which domains will have their messages quarantined, access the domain configuration:
Log in to the Cloud Email Security dashboard.
Go to Settings (the gear icon) > Domains.
Locate the domain you want to edit.
Select the … > Edit.
Select the additional dispositions you want to quarantine.
Manage the Admin Quarantine
Log in to the Cloud Email Security dashboard.
Go to Email > Admin Quarantine.
Locate the message you want to manage, and select the
...icon next to it. This will let you preview, download, or release the quarantined message.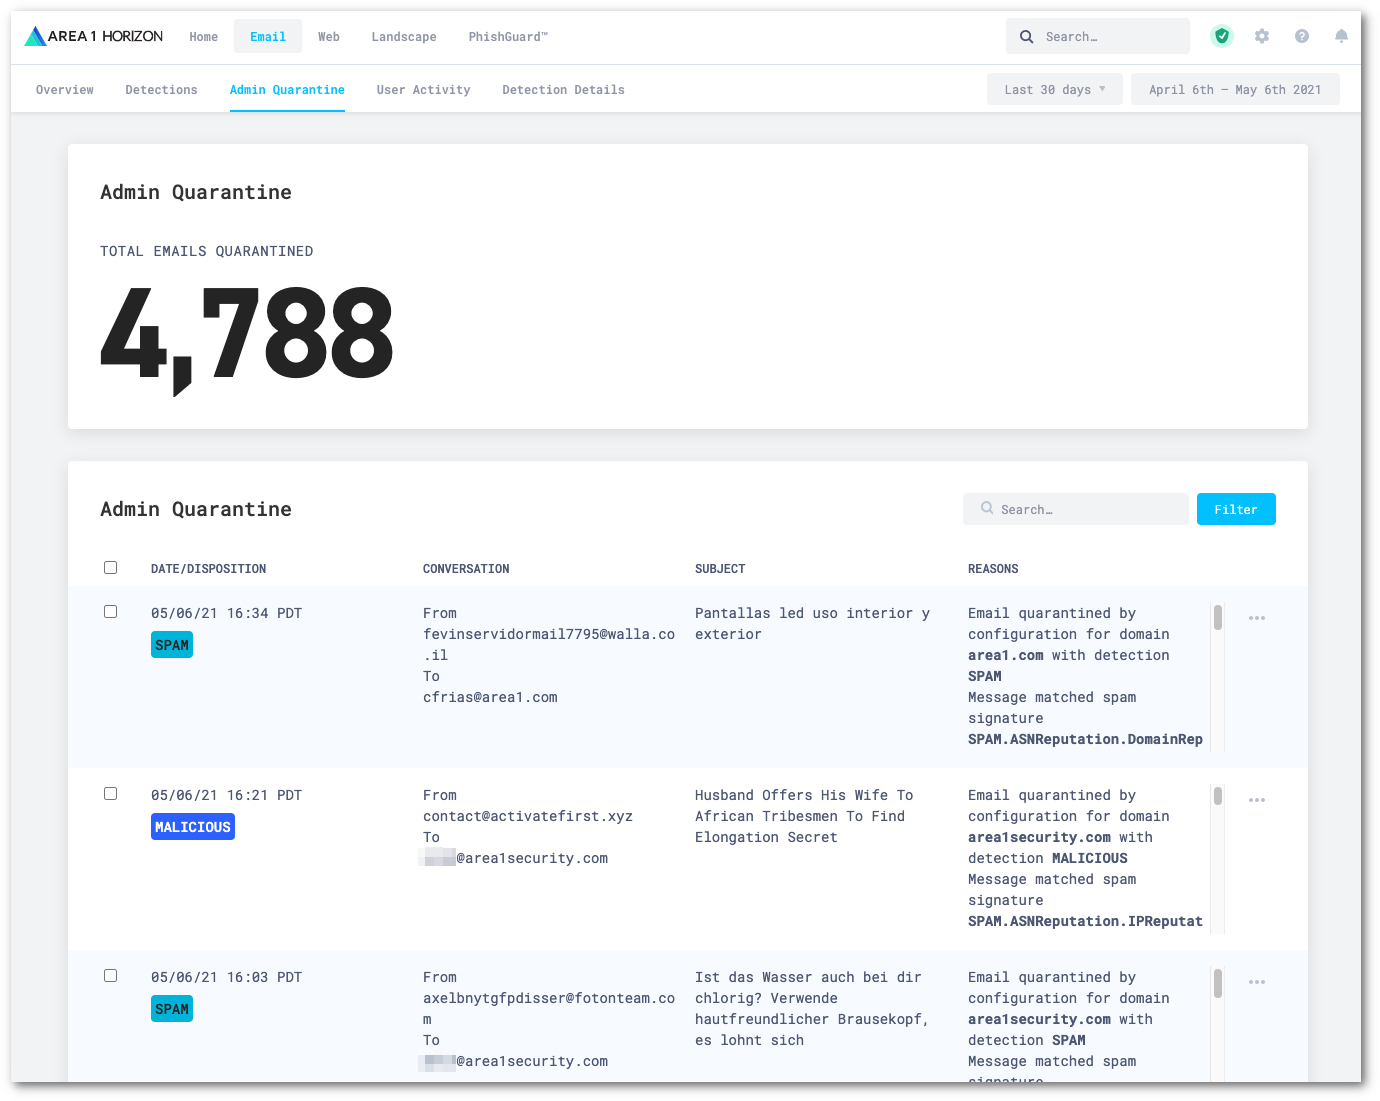
4. Message handling
There may be scenarios where use of the Office 365 (O365) email quarantine or a combination with Cloud Email Security is preferred. The following are the best practices for using the O365 quarantine by disposition:
Disposition| Action | MALICIOUSShould always be quarantined. If the user requires notification, they should require administrator approval to release messages. Users should never have the ability to self remediate | MALICIOUS emails without approval from an administrator. Emails should be body and subject tagged.SUSPICIOUSShould not be quarantined. Emails should be body and subject tagged, and delivered to the user’s inbox or junk mail folder. Advantage customers should use | URL defang with this disposition, while all Enterprise customers should always enable Email Link Isolation.SPAMShould always be quarantined. If the user requires notification, they may or may not require administrator approval to release emails. Emails should be subject tagged. | BULKShould not be quarantined. Emails should be subject tagged and delivered to the inbox or junk mail folder. | SPOOFIf | SPOOF detections are clean and well managed in the Allow List, emails should always be quarantined. If the SPOOF detections are not clean, they should have the same treatment as SPAM dispositions if you have Enhanced Detections configured. If not, SPOOF detections should be treated as BULK. Emails should be body and subject tagged. |
|---|
Office 365 (O365) has various options, as well as limitations, as to how quarantine email messages. Refer to Office 365 use cases for more information.
The Cloud Email Security dashboard has an Admin quarantine, and you can also use the Office 365 quarantine for when a user quarantine is needed. While there are many quarantine options, the following are the primary use cases the Office 365 example tutorials will cover:
- Use case 1: Deliver emails to Office 365 junk email folder and Admin Quarantine in Cloud Email Security (Recommended)
- Use case 2: Deliver emails to junk email folder and user managed quarantine (this use case requires that
MALICIOUSemails be quarantined within the Cloud Email Security dashboard) - Use case 3: Deliver emails to junk email and administrative quarantine
- Use case 4: Deliver emails to the user managed quarantine and administrative quarantine
- Use case 5: Deliver emails to the user junk email folder and administrative quarantine
5. Update your domain MX records
Instructions to update your MX records will depend on the DNS provider you are using. You will need to update and replace your existing MX record with the Cloud Email Security hosts. For example:
| MX Priority | Host |
|---|---|
5 | mailstream-eu1.mxrecord.io |
10 | mailstream-central.mxrecord.mx |
20 | mailstream-east.mxrecord.io |
20 | mailstream-west.mxrecord.io |
When configuring the Cloud Email Security (formerly Area 1) MX records, it is important to configure hosts with the correct MX priority. This will allow mail flows to the preferred hosts and fail over as needed.
Choose from the following Cloud Email Security MX hosts, and order them by priority. For example, if you are located outside the US and want to prioritize email processing in the EU, add mailstream-eu1.mxrecord.io as your first host, and then the US servers.
Host| Location | Note | mailstream-central.mxrecord.mxmailstream-east.mxrecord.iomailstream-west.mxrecord.ioUS | Best option to ensure all email traffic processing happens in the US. | mailstream-eu1.mxrecord.ioEU | Best option to ensure all email traffic processing happens in Germany, with fallback to US data centers. | mailstream-bom.mxrecord.mxIndia | Best option to ensure all email traffic processing happens within India. For compliance purposes use this MX record. Note, however, there is no redundancy should something go wrong. | mailstream-india-primary.mxrecord.mxIndia | Same as | mailstream-bom.mxrecord.mx, with fallback to US data centers.mailstream-asia.mxrecord.mxIndia | Best option for companies with a broader Asia presence. | mailstream-syd.area1.cloudflare.netAustralia / New Zealand | Best option to ensure all email traffic processing happens within Australia. | mailstream-australia-primary.area1.cloudflare.netAustralia / New Zealand | Best option to ensure all email traffic processing happens in Australia, with India and US data centers as backup. | |
|---|
DNS changes will reach the major DNS servers in about an hour or follow the TTL value as described in the Prerequisites section.
Secure Office 365 from MX records bypass (recommended)
One method of DNS attacks is to search for old MX records and send phishing emails directly to the mail server. To secure the email flow, you will want to enforce an email flow where inbound messages are accepted by Office 365 only when they originate from Cloud Email Security. This can be done by adding a connector to only allow email from Cloud Email Security with TLS encryption. This step is optional but recommended.
Configure domains
Log in to the Cloud Email Security (formerly Area 1) dashboard.
Go to Settings (the gear icon).
In Email Configuration > Domains, make sure each domain you are onboarding has been added.
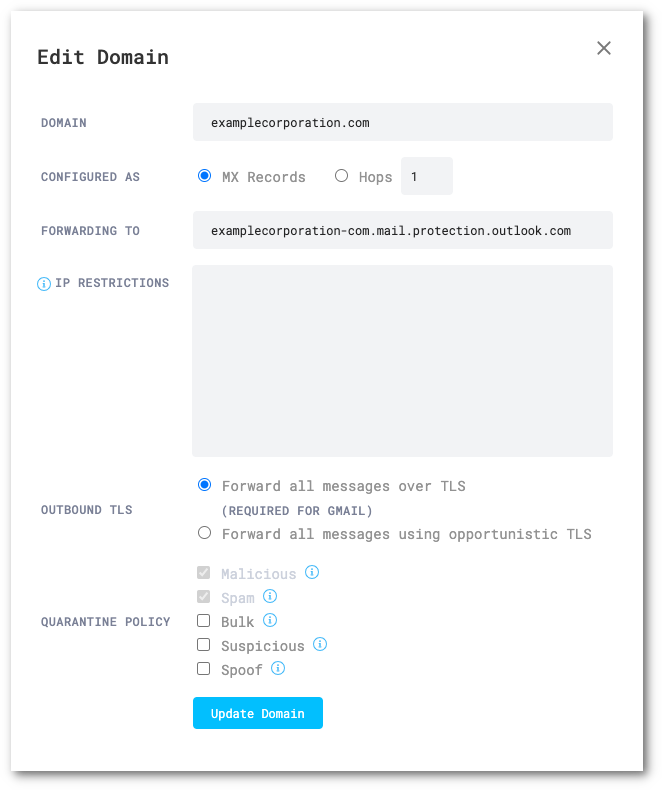
Set the following options for each domain:
- Domain:
<YOUR_DOMAIN> - Configured as:
MX Records - Forwarding to: This should match the expected MX record for each domain in the Domains section of Office 365
- IP Restrictions: Leave empty
- Outbound TLS:
Forward all messages over TLS - Quarantine Policy: Varies by deployment.
- Domain:
Create Connector
Go to the new Exchange admin center.
Go to Mail flow > Connectors.
Select Add a connector.
Select Connection from > Partner organization.
Select Next.
Set the following options:
- Name -
Secure O365 Inbound - Description -
Only accept inbound email from Cloud Email Security (formerly Area 1)
- Name -
Select Next.
Make sure By Verifying that the sender domain matches one of the following domains is selected.
Enter
*in the text field, and select +.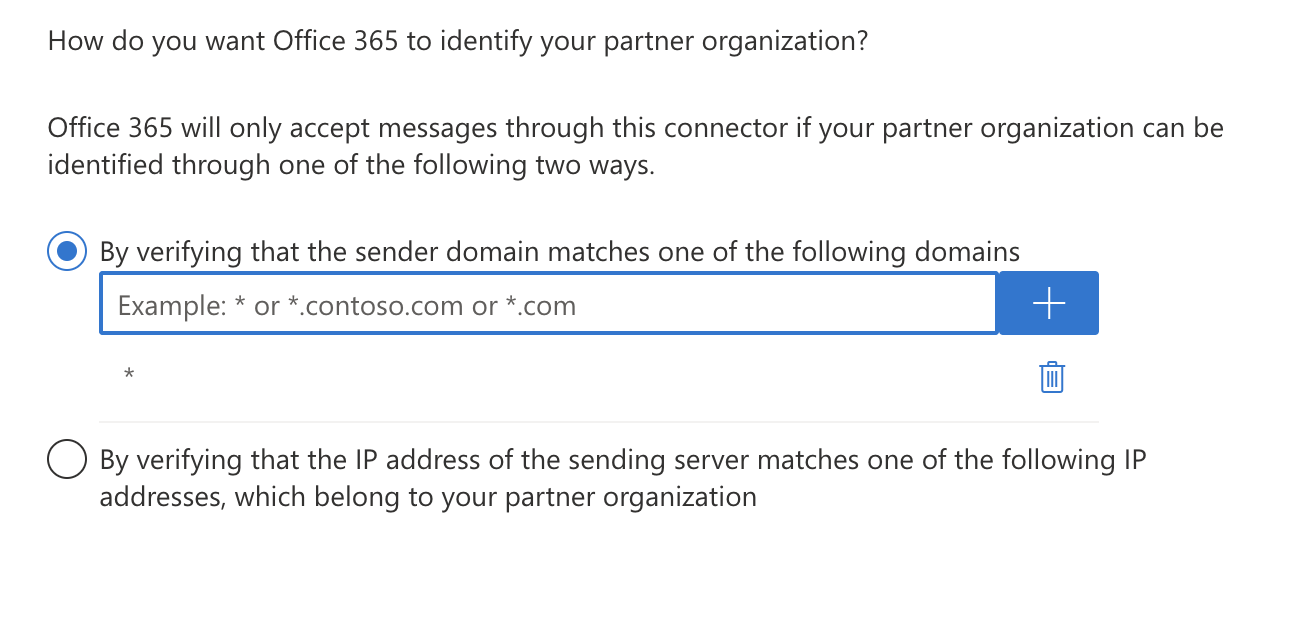
Select Next.
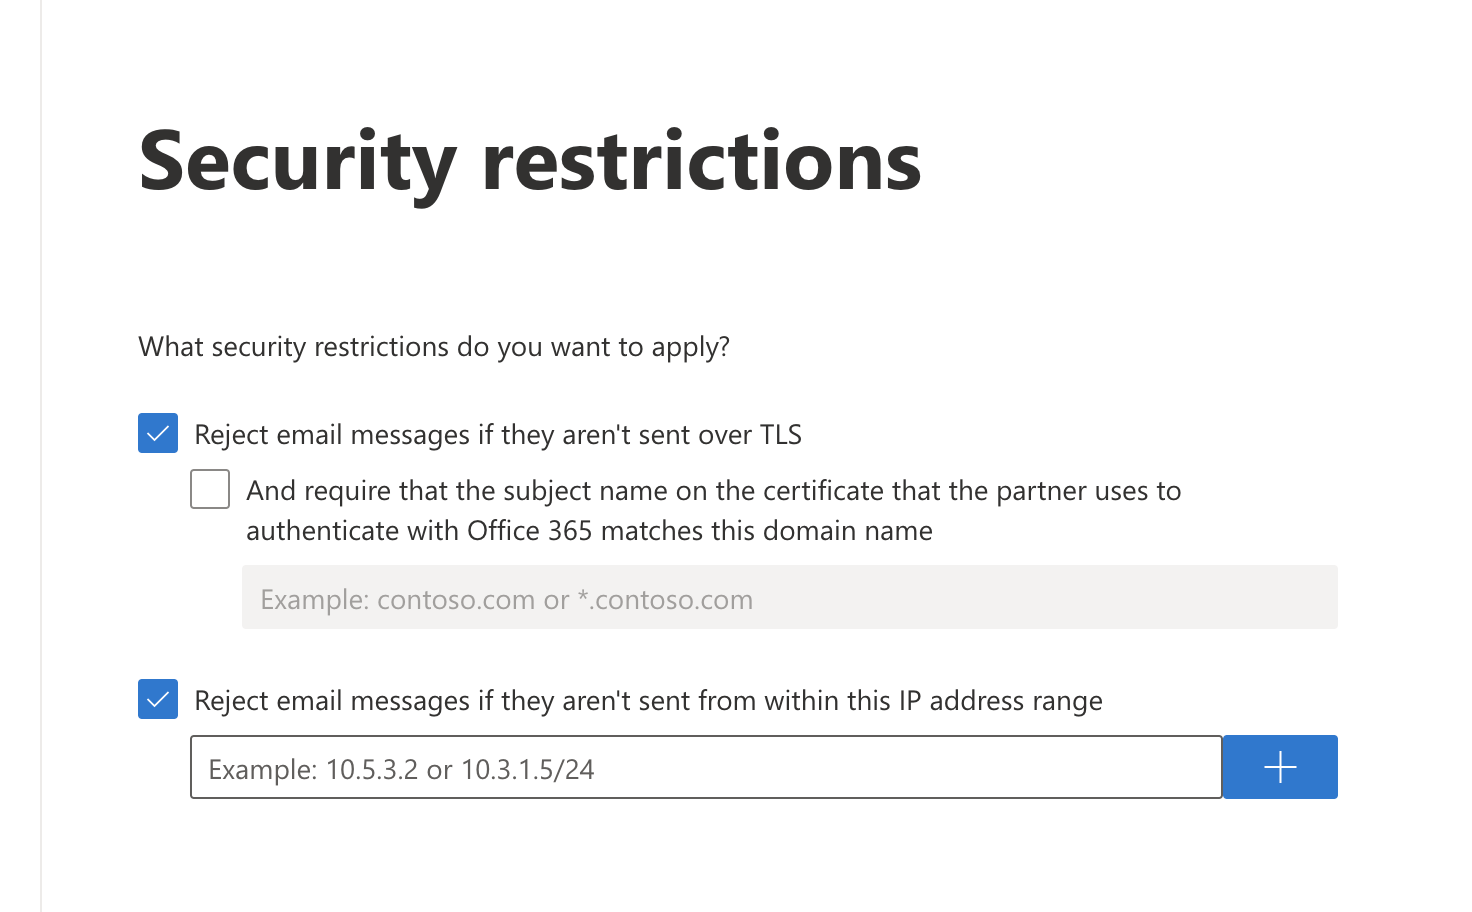
Make sure Reject email messages if they aren’t sent over TLS is selected.
Still in the same screen, select Reject email messages if they aren’t sent from within this IP address range, and enter all the egress IPs in the Egress IPs page.
Select Next.
Review your settings and select Create connector.
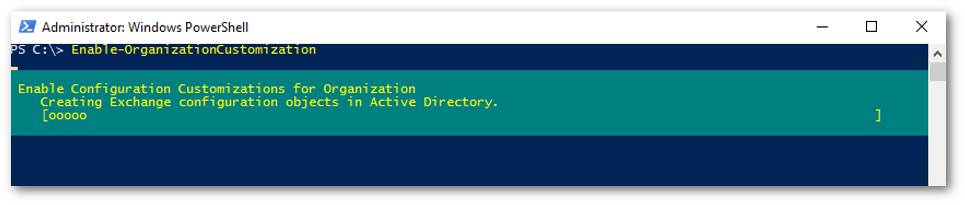
6 Execute Enable-OrganizationCustomization (if required)
The following steps are only required if you have not previously customized your Office 365 instance. If you received the message to run this cmdlet in any of the previous steps, you will need to execute it in order to proceed with the configuration. This change may take as long as 24 hours to take effect.
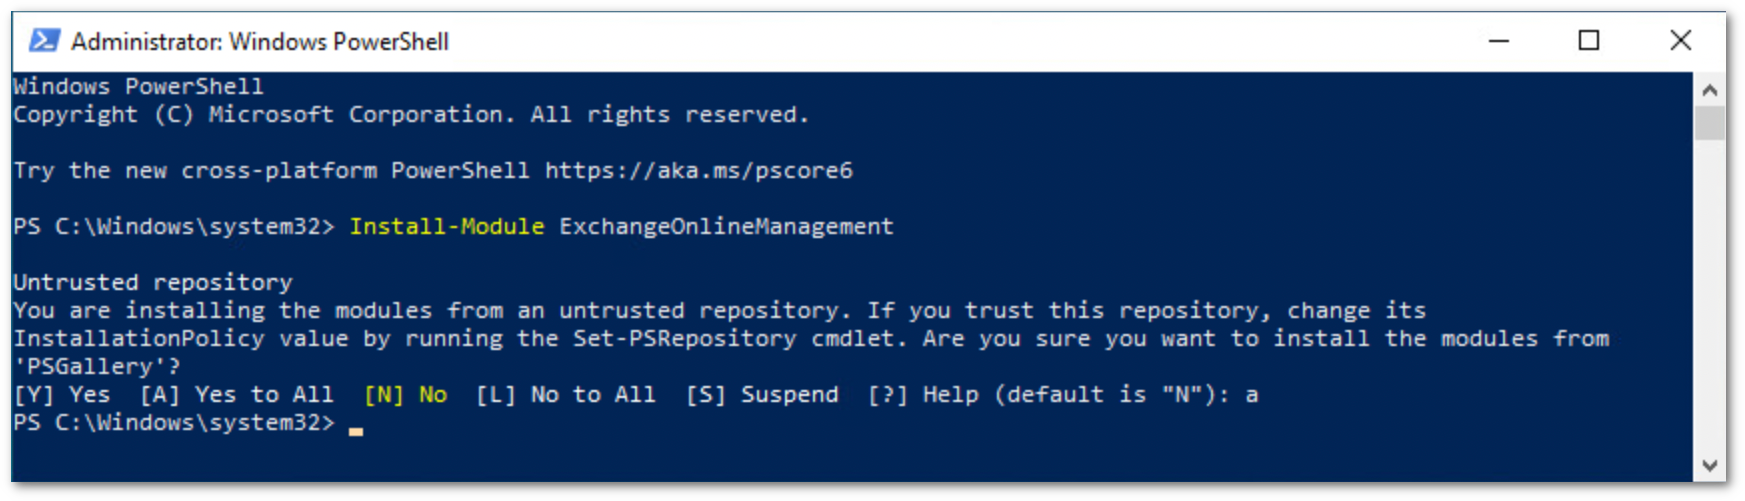
- Run PowerShell as administrator, and execute the following command. Reply
Yeswhen prompted:
PS C:\Windows\system32> Install-Module ExchangeOnlineManagement
Run the following commands to execute the policy change and connect to the Office 365 instance:
PS C:\Windows\system32> set-executionpolicy remotesignedConfirm that you want to execute the policy change, and then run the following command:
PS C:\Windows\system32> Import-Module ExchangeOnlineManagementFinally, run the following to authenticate against your Office 365 instance:
PS C:\Windows\system32> Connect-ExchangeOnline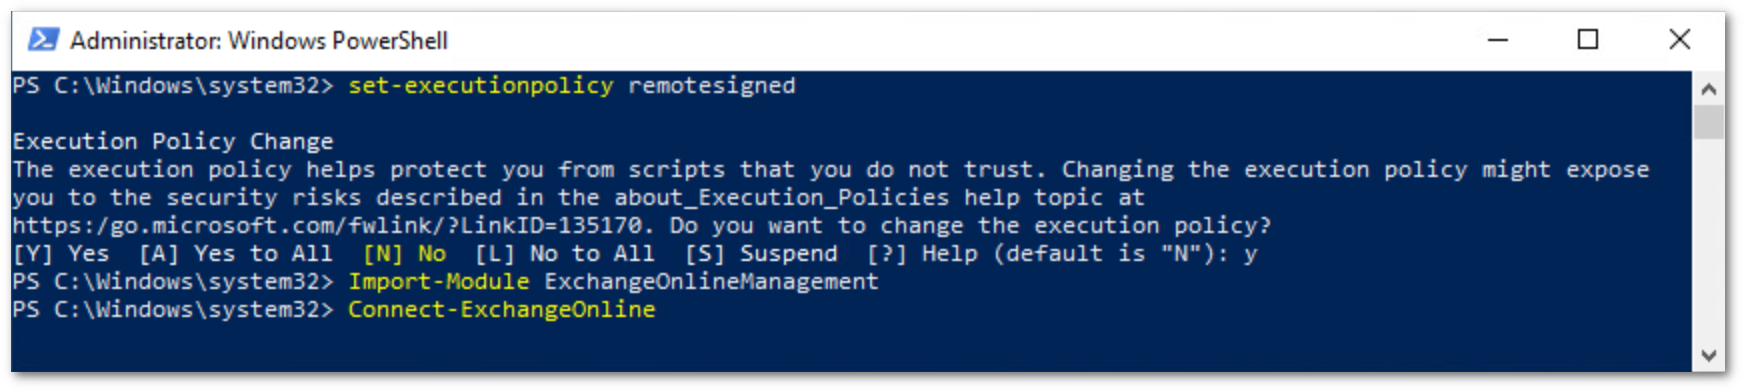
The
Connect-ExchangeOnlinecmdlet will prompt you to login. Log in using an Office 365 administrator account. Once authenticated, you will be returned to the PowerShell prompt.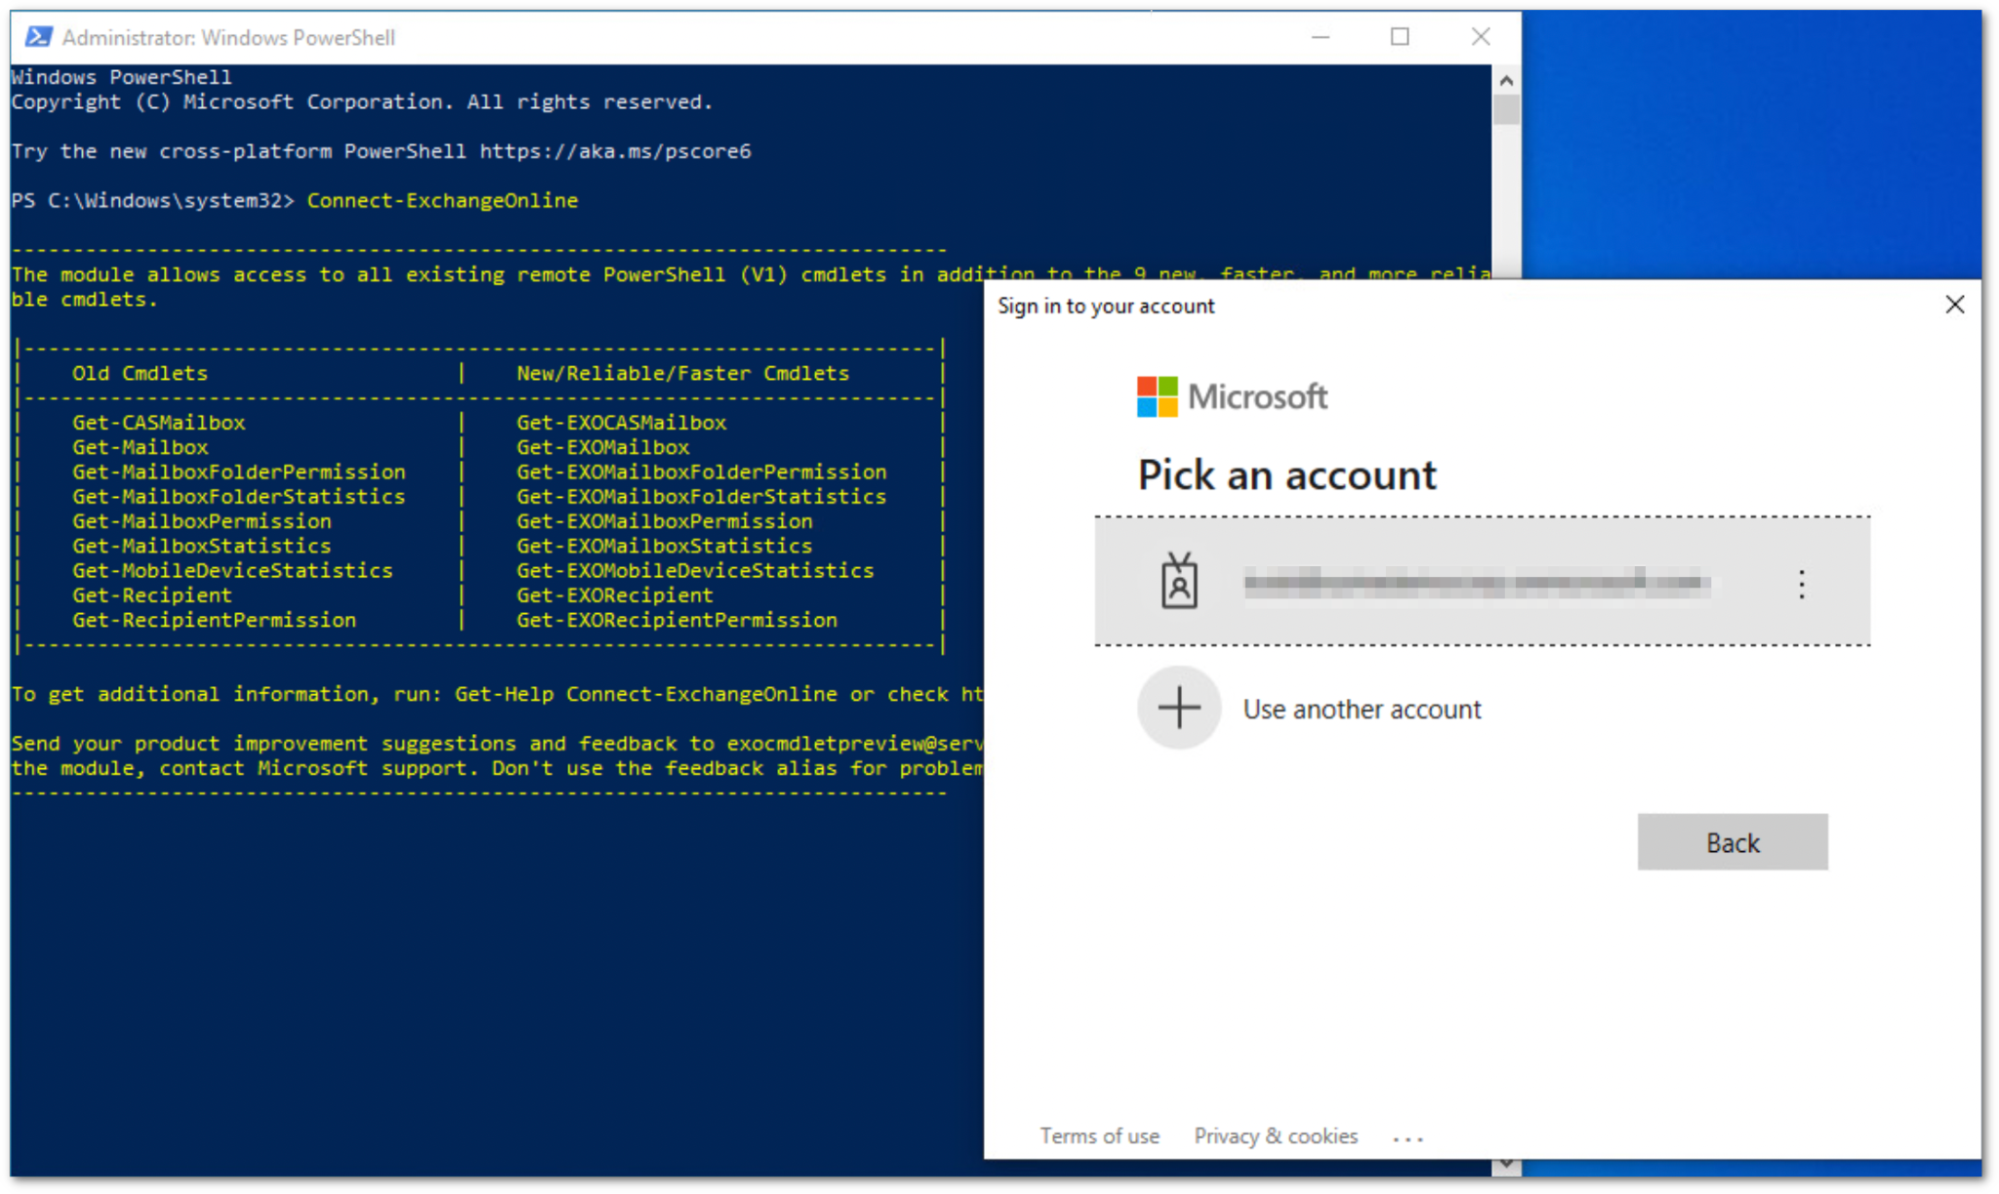
You can verify that the
OrganizationCustomizationis enabled by running the command:
PS C:\Windows\system32> Get-OrganizationConfig | FL isDehydrated

If the result is false, OrganizationCustomization is already enabled and no further actions are required. If it is true, you need to enable it:
PS C:\> Enable-OrganizationCustomization