Office 365 directory integration
Cloudflare Cloud Email Security (formerly Area 1) can integrate with Office 365 to retrieve user and group information. This can be used to enforce the Business Email Compromise configuration to prevent user impersonation.
1. Authorize Cloud Email Security with Office 365 for Directory Access
You need to authorize Cloudflare Cloud Email Security to make connections into your Office 365 tenant to retrieve your directory details. The account used to authorize will require the Privileged authentication admin and Privileged role admin roles.
How does the authorization work?
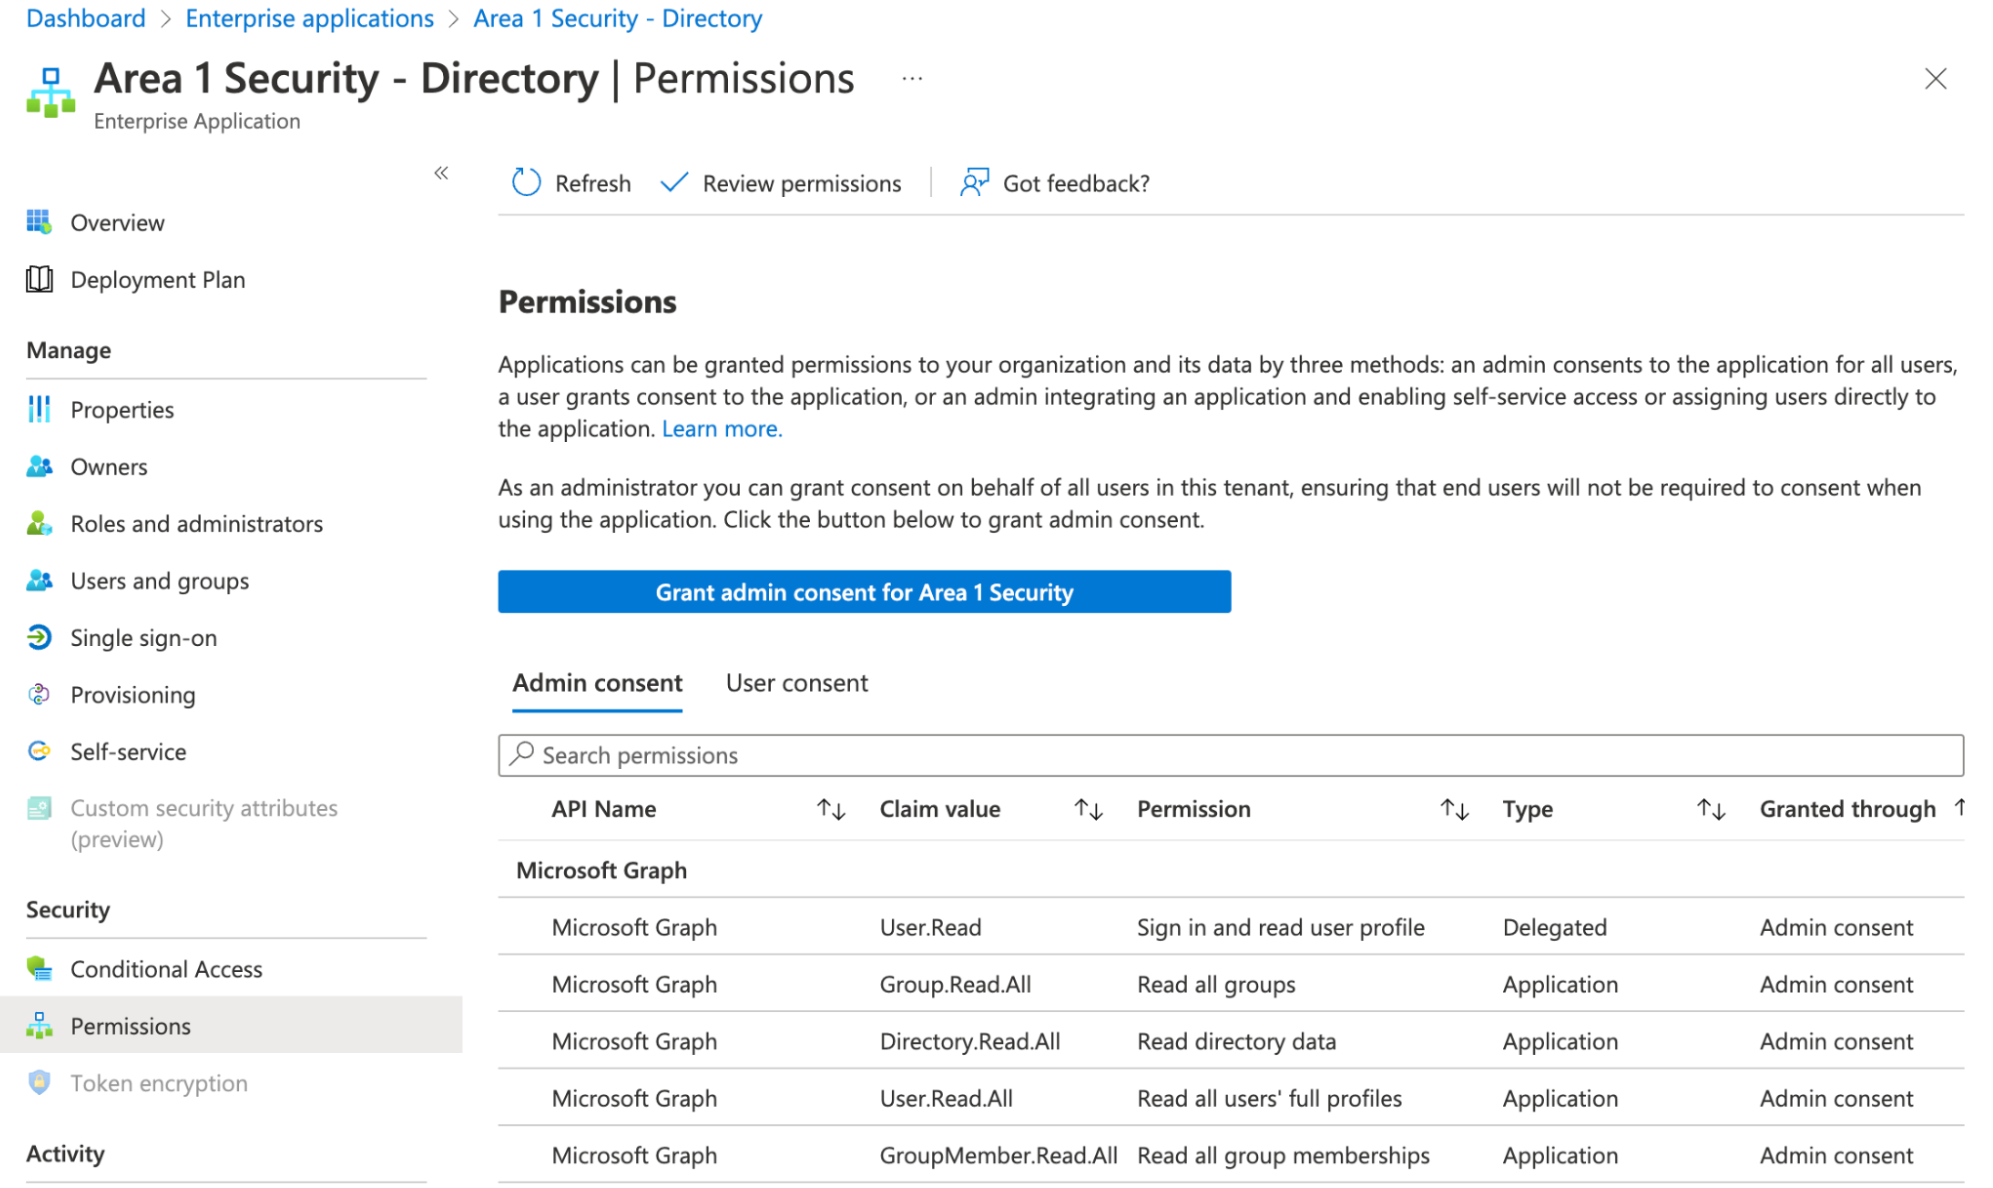
The authorization process grants Cloud Email Security access to the Azure environment with the least applicable privileges required to function. The Enterprise Application that Cloud Email Security registers is not tied to any administrator account. Inside of the Azure Active Directory admin center you can review the permissions granted to the application in the Enterprise Application section.
When assigning user roles in the Office 365 console, you will find these roles in User permissions > Roles configuration > Identity admin roles.
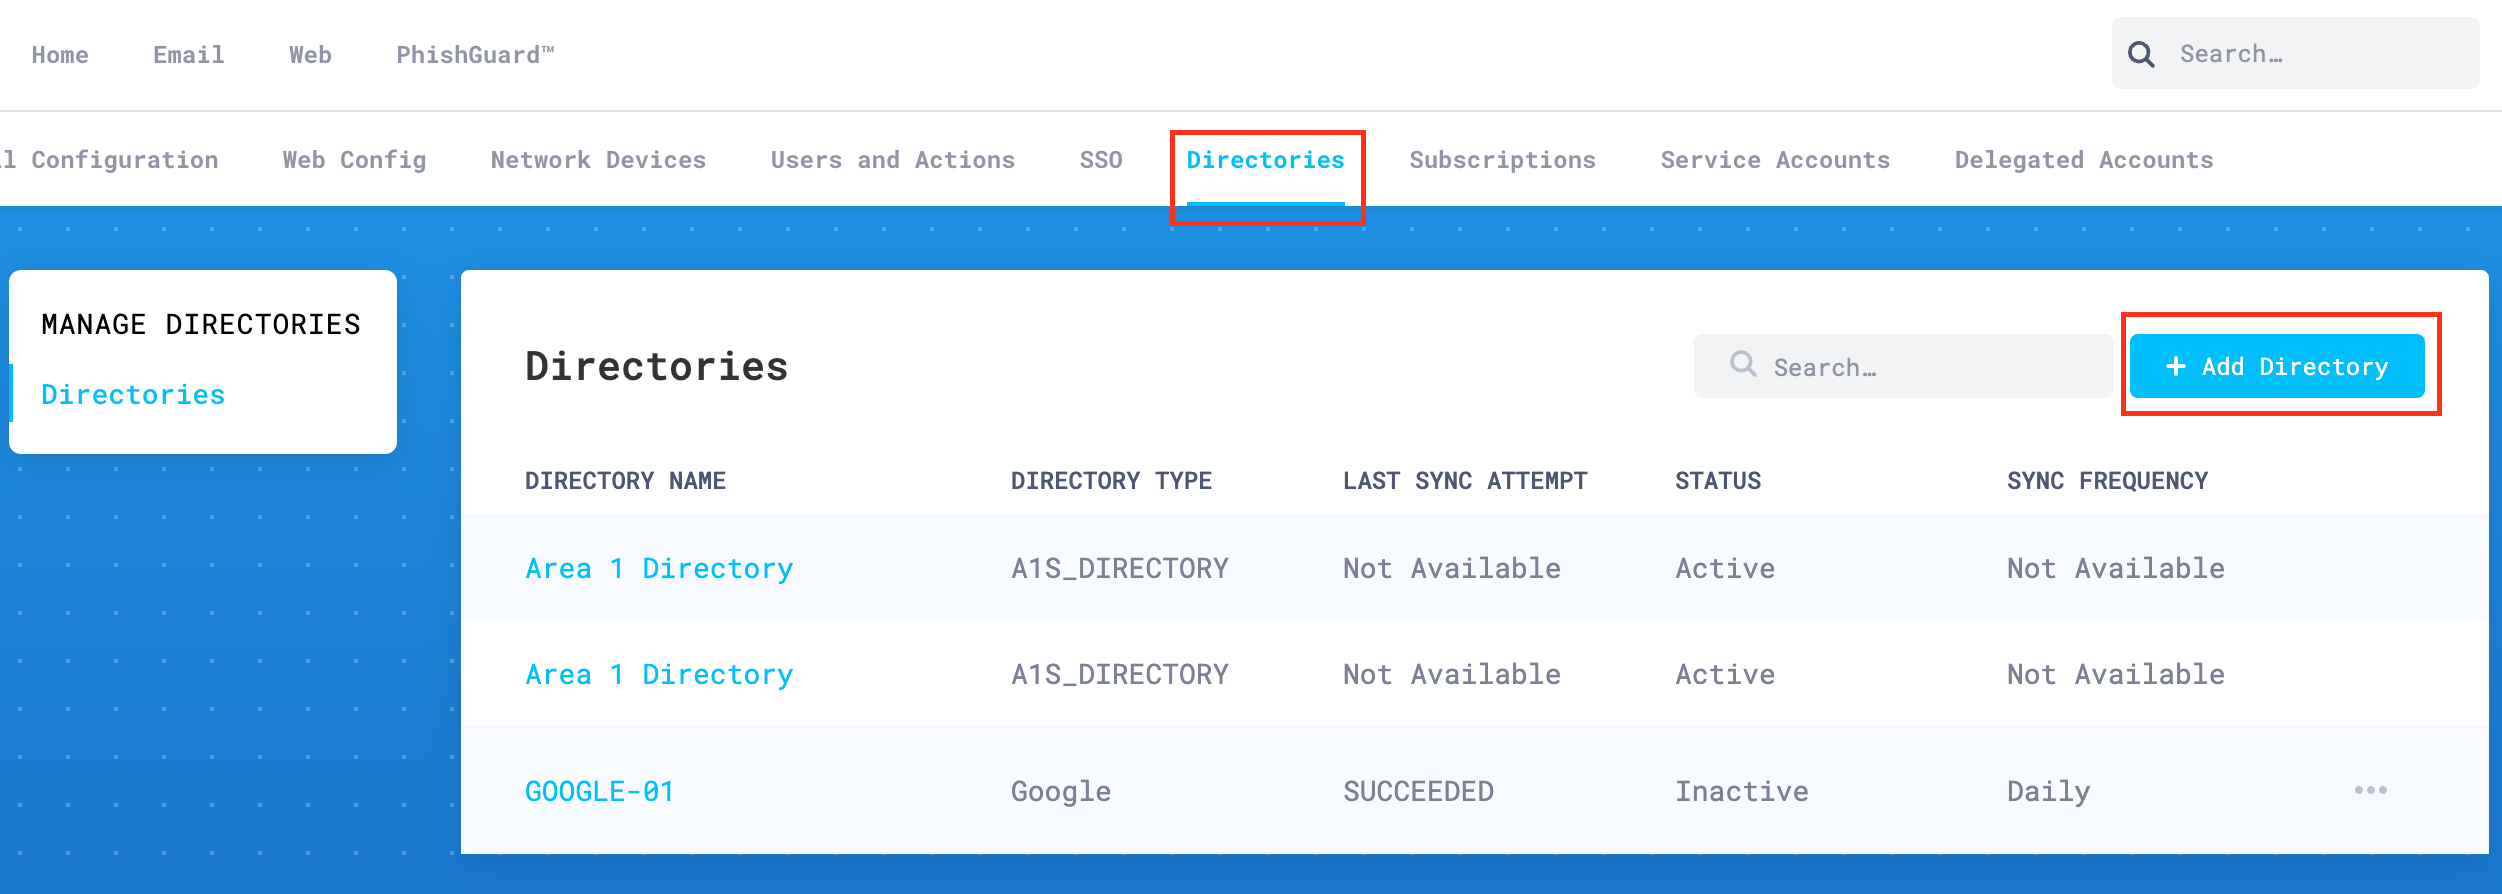
Log in to the Cloud Email Security (formerly Area 1) dashboard, and select Settings (the gear icon).
Go to Directories, and select Add Directory to start the authorization process.
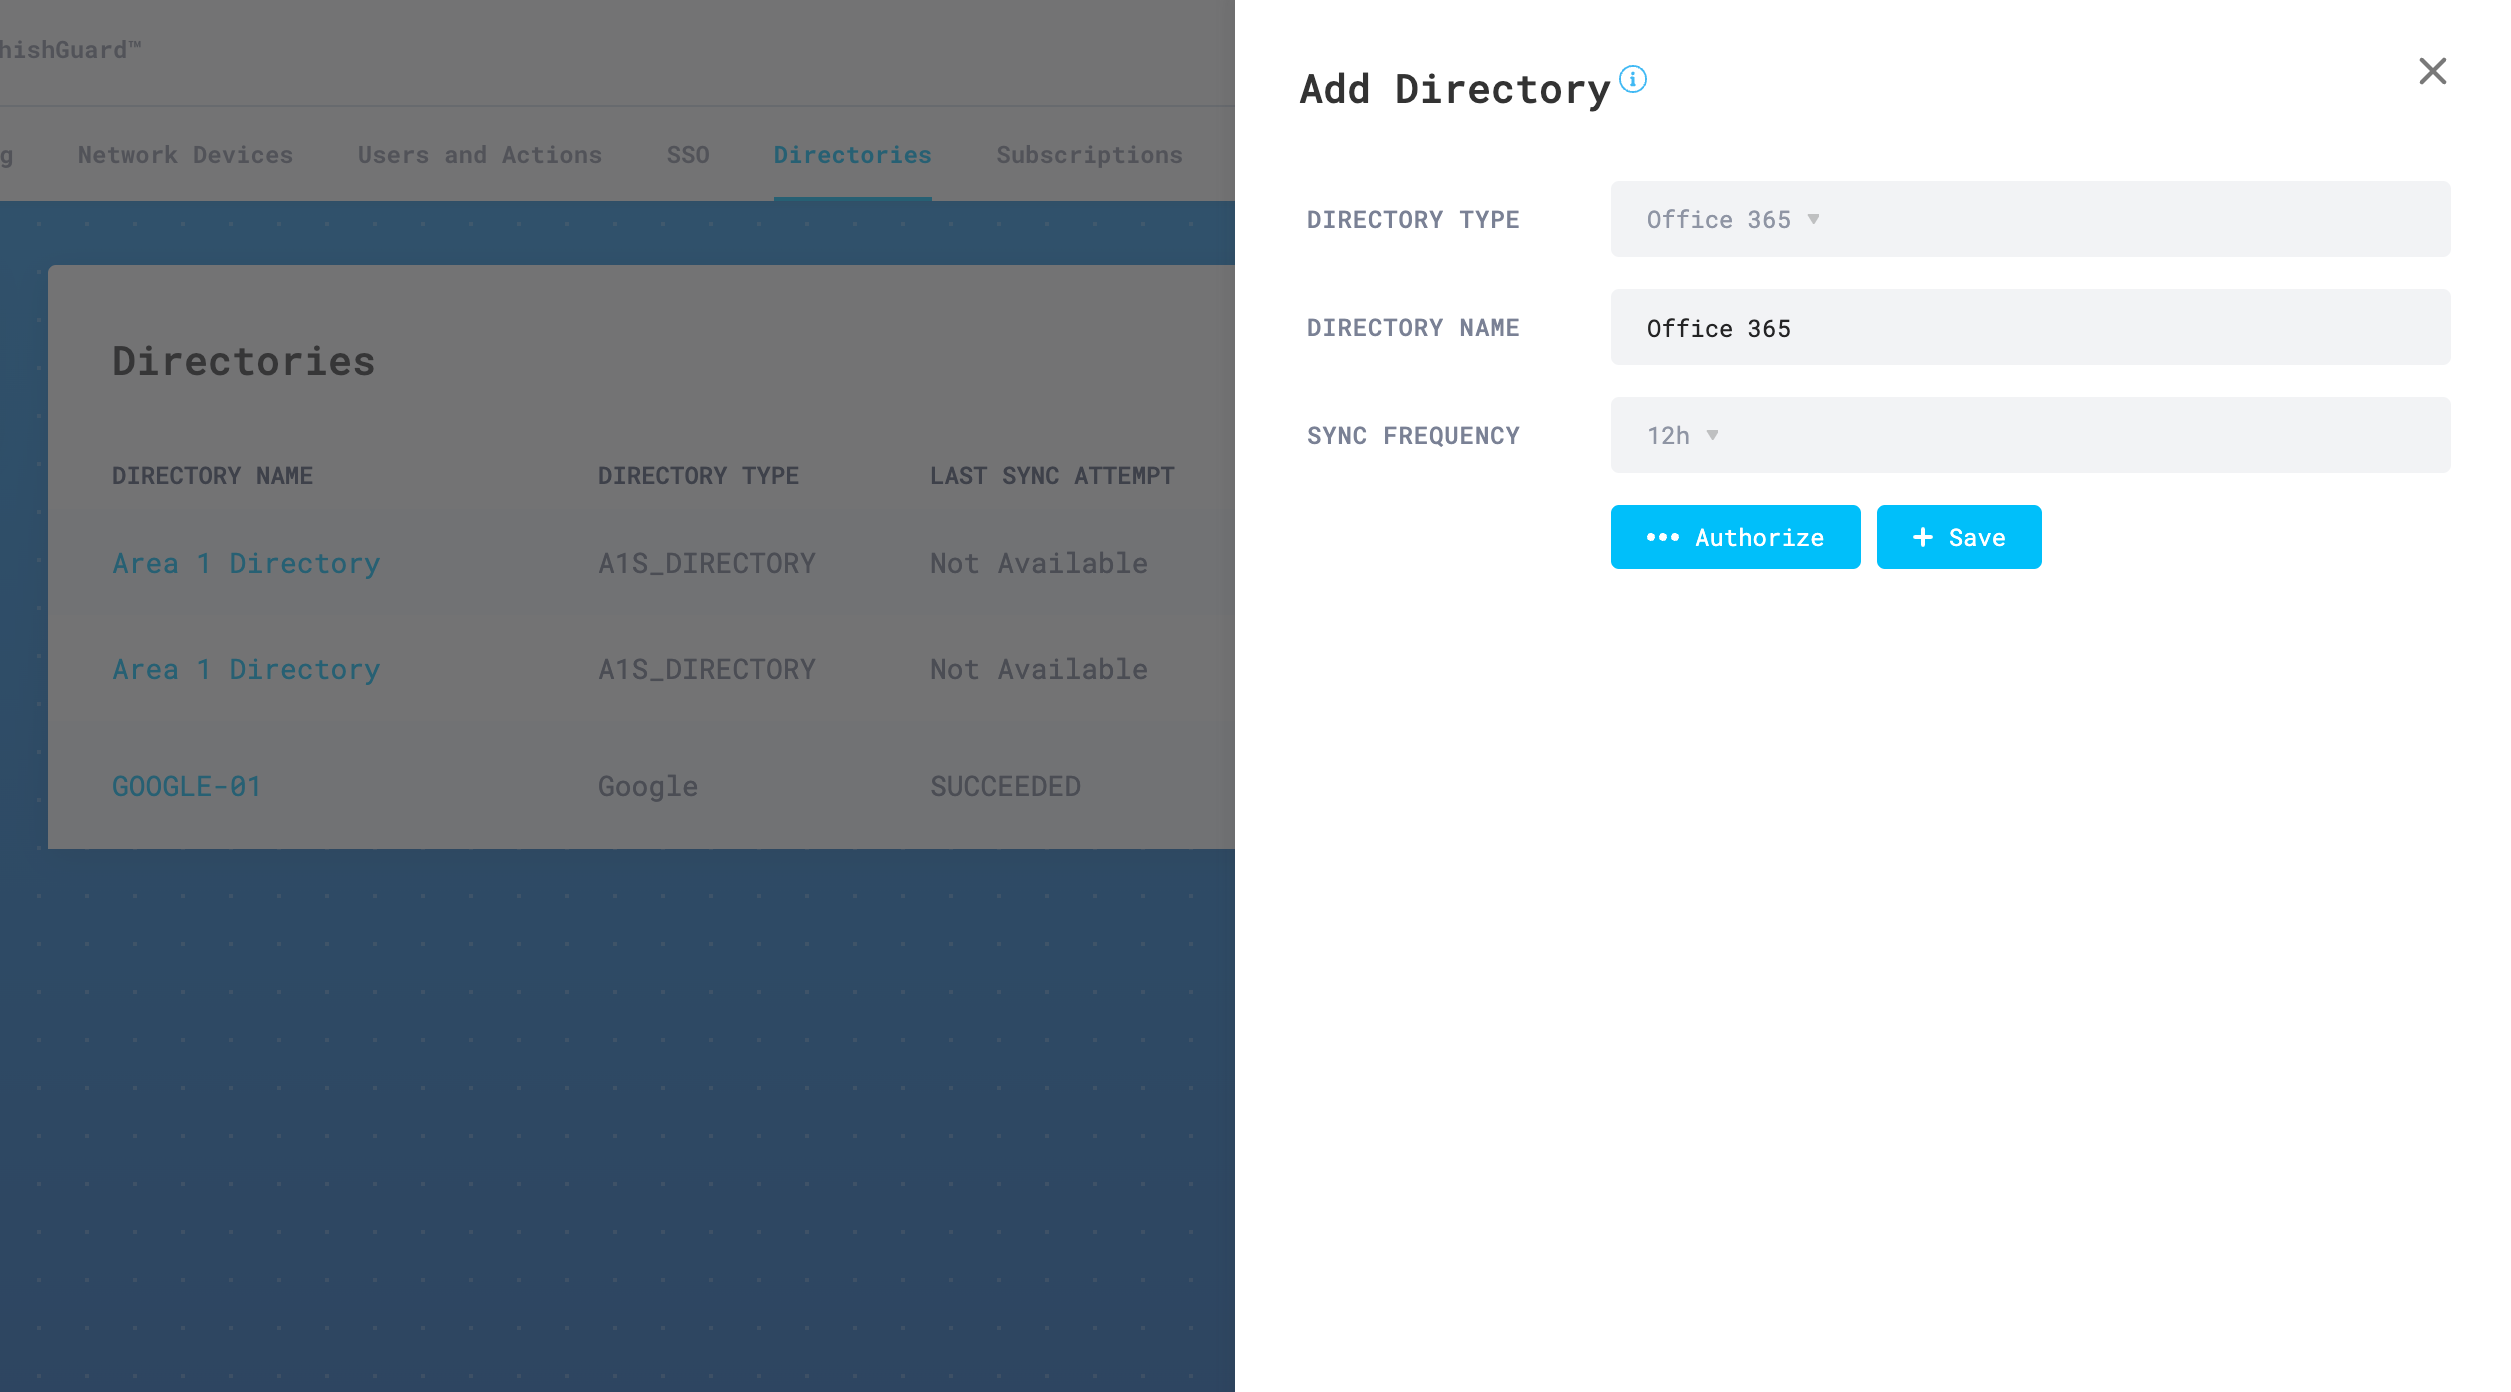
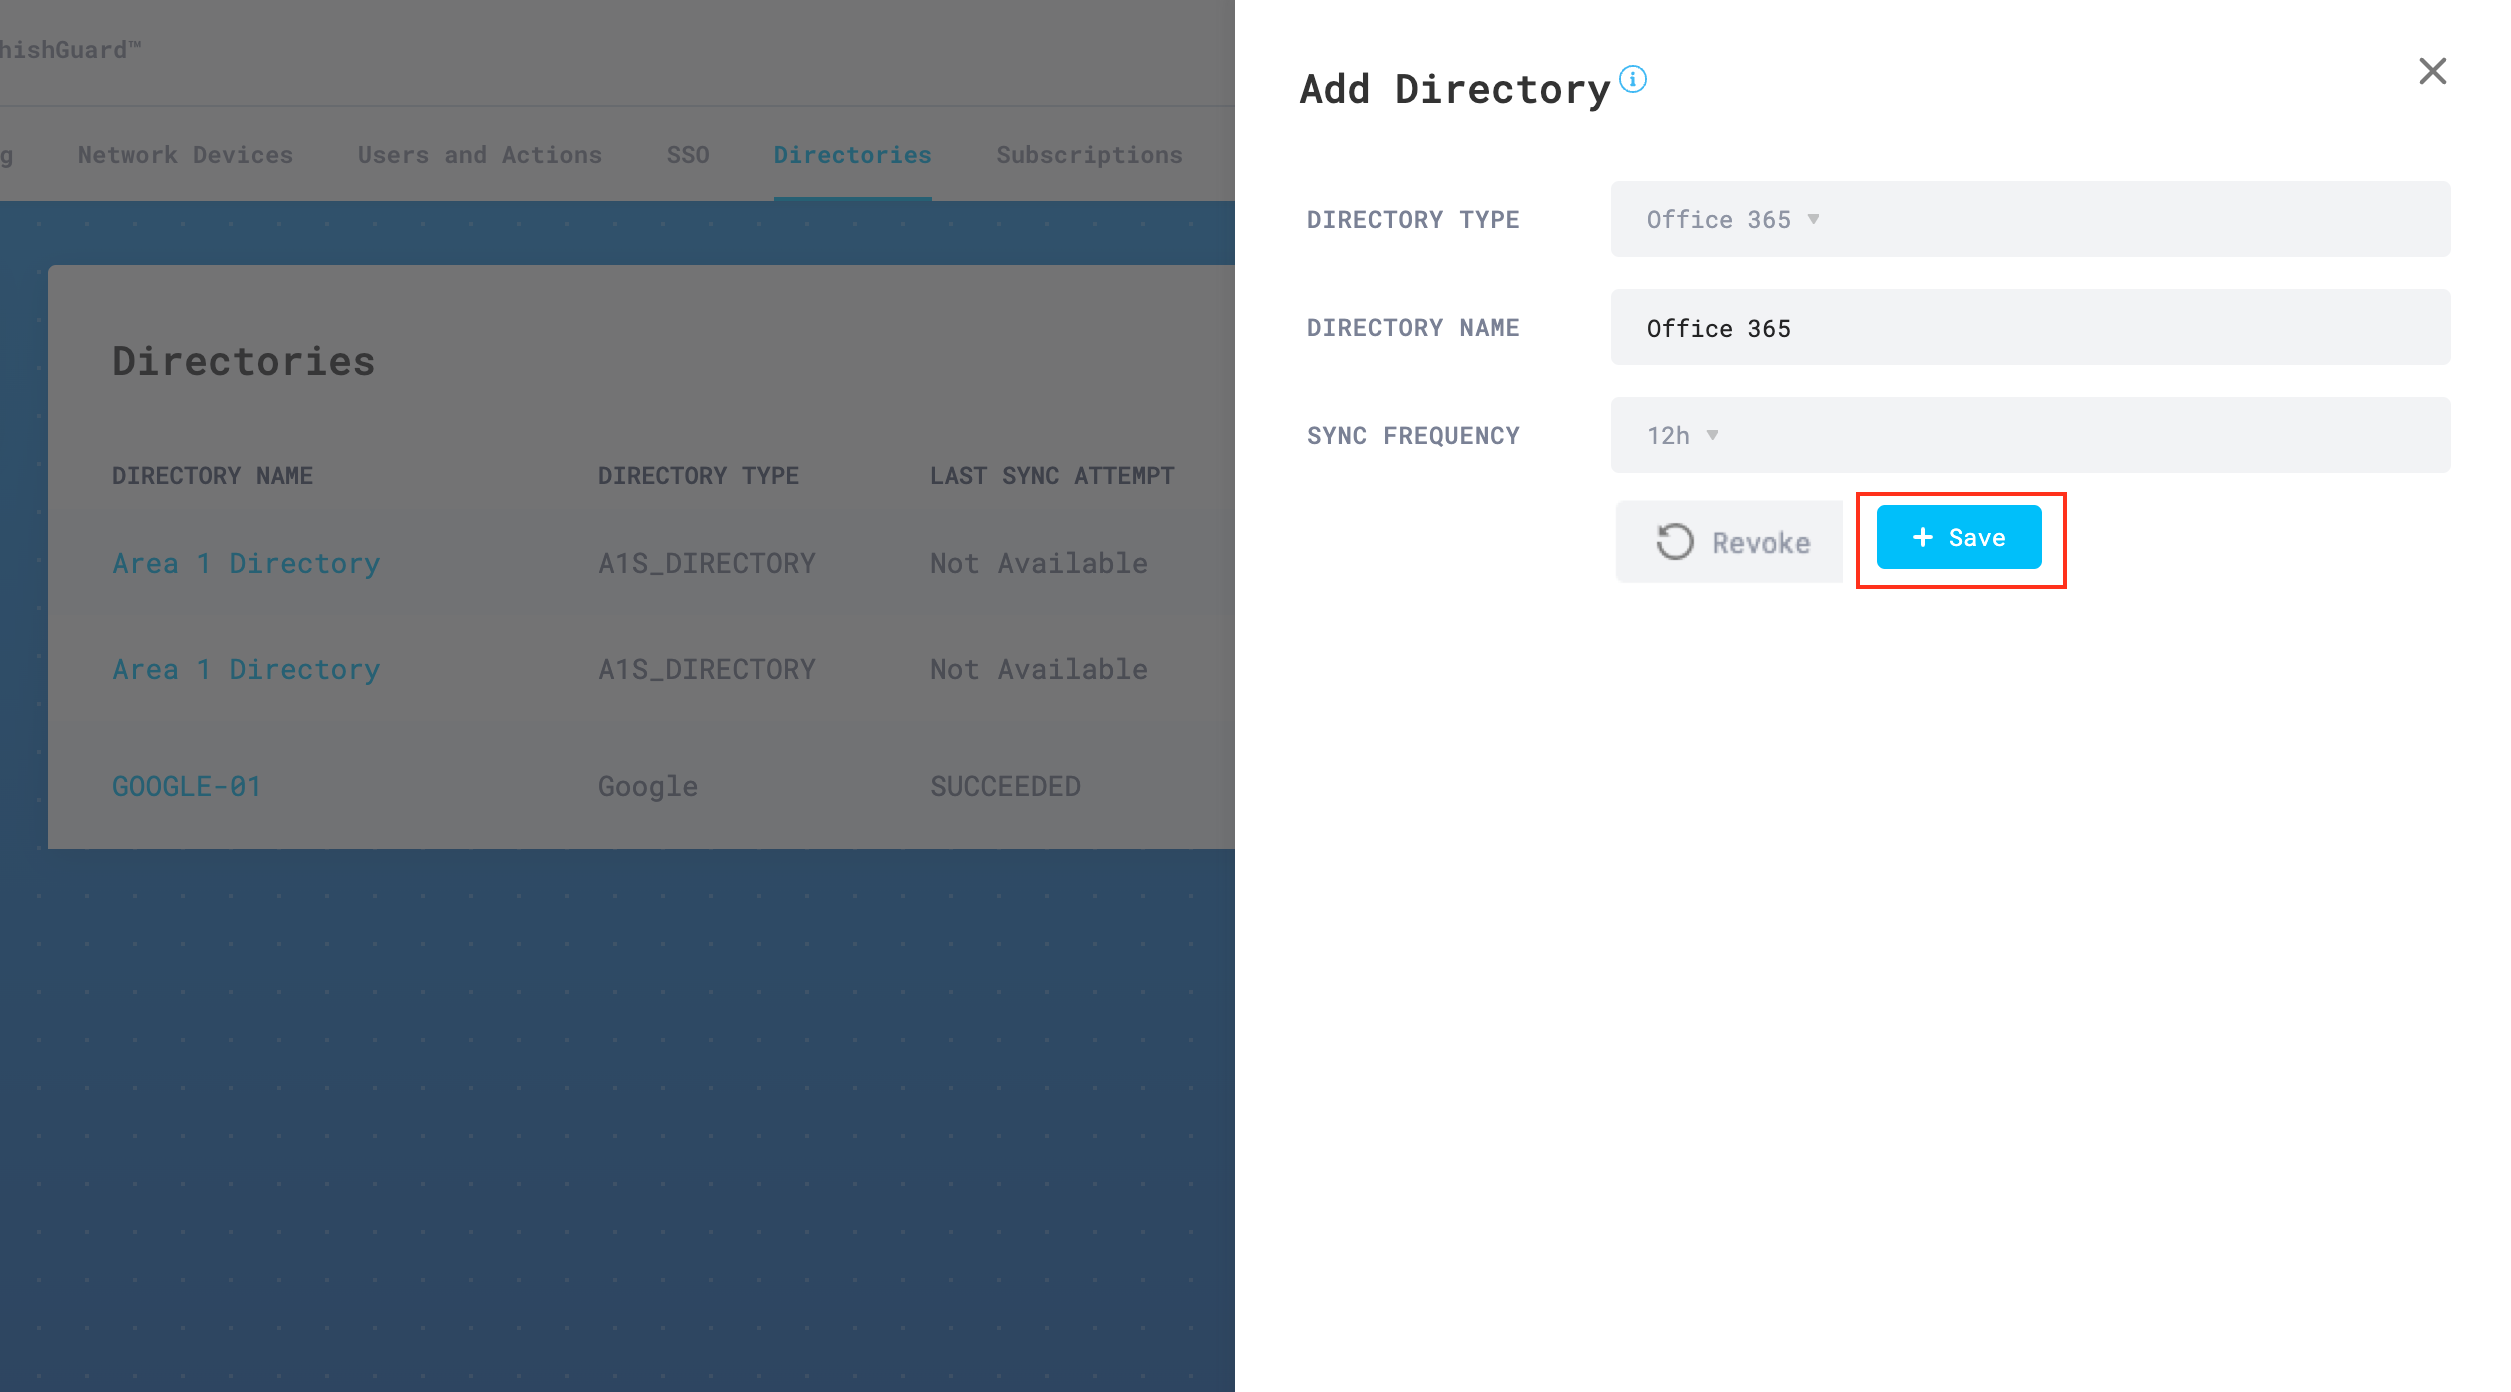
In the Add Directory configuration panel, enter the following details:
- Directory Type: Open the drop-down menu and select Office 365.
- Directory Name: Enter a string that represents the directory. This value will be referenced in the Business Email Compromise List configuration section. For example,
Office 365. - Sync Frequency: Update the value to your preference.
Select Authorize when you are done.
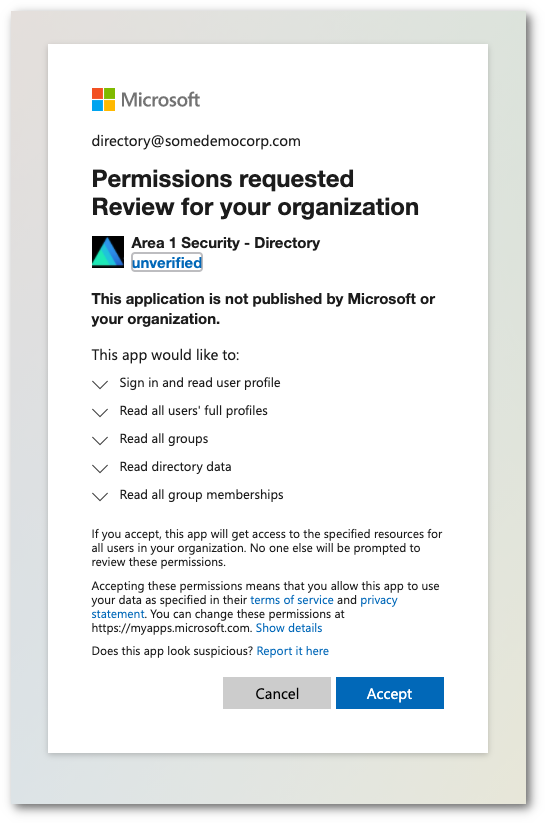
The Cloud Email Security dashboard will redirect you to a Microsoft login page. Select or enter the appropriate account to initiate the authentication process.

Once authenticated, the system will show a dialog box with a list of the requested permissions. Select Accept to authorize the change.
Upon authorization, you will be automatically redirected back to the Add Directory configuration panel. Select Save to complete the authorization process.
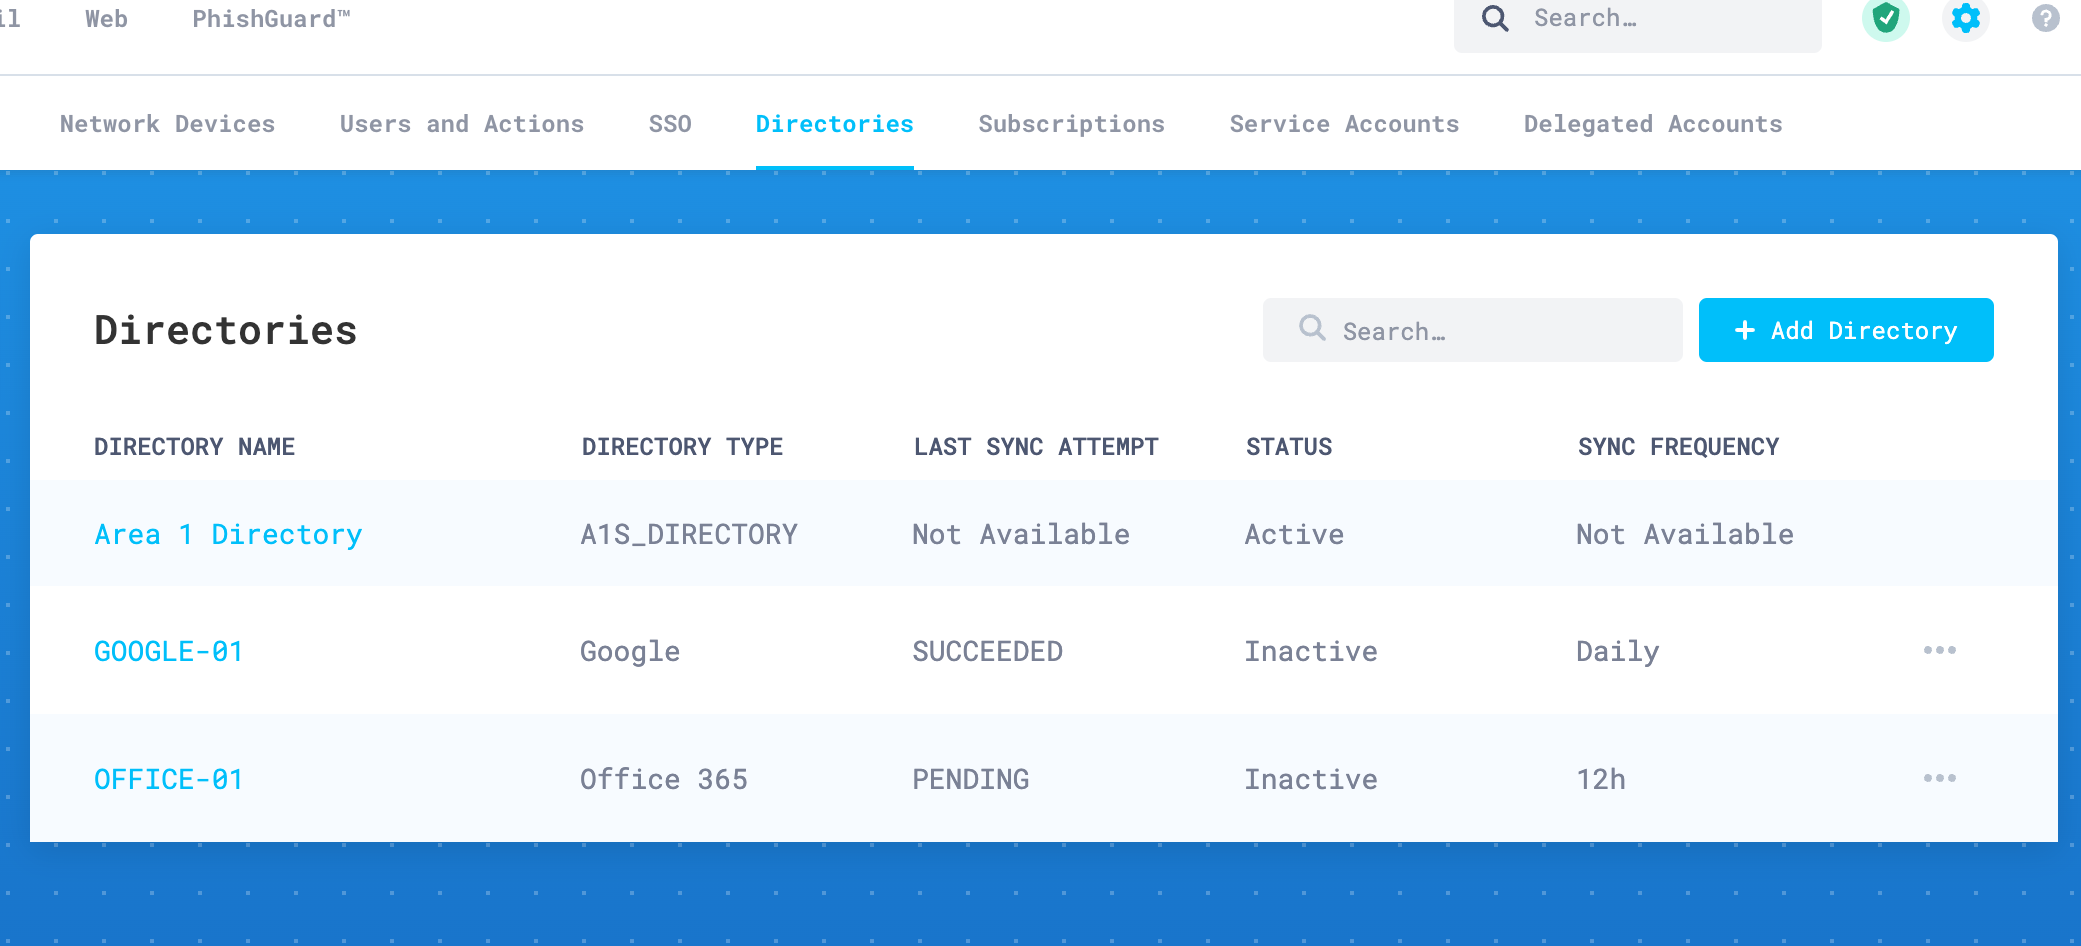
Once saved, your newly configured directory will appear in the configured directories table.
2. Configure the Business Email Compromise list
Now that Cloud Email Security (formerly Area 1) has been authorized to access and retrieve directory information, you will need to configure the Business Email Compromise list.
Log in to the Cloud Email Security dashboard, and select Settings (the gear icon).
Go to Email Configuration > Enhanced Detections > Business Email Compromise.
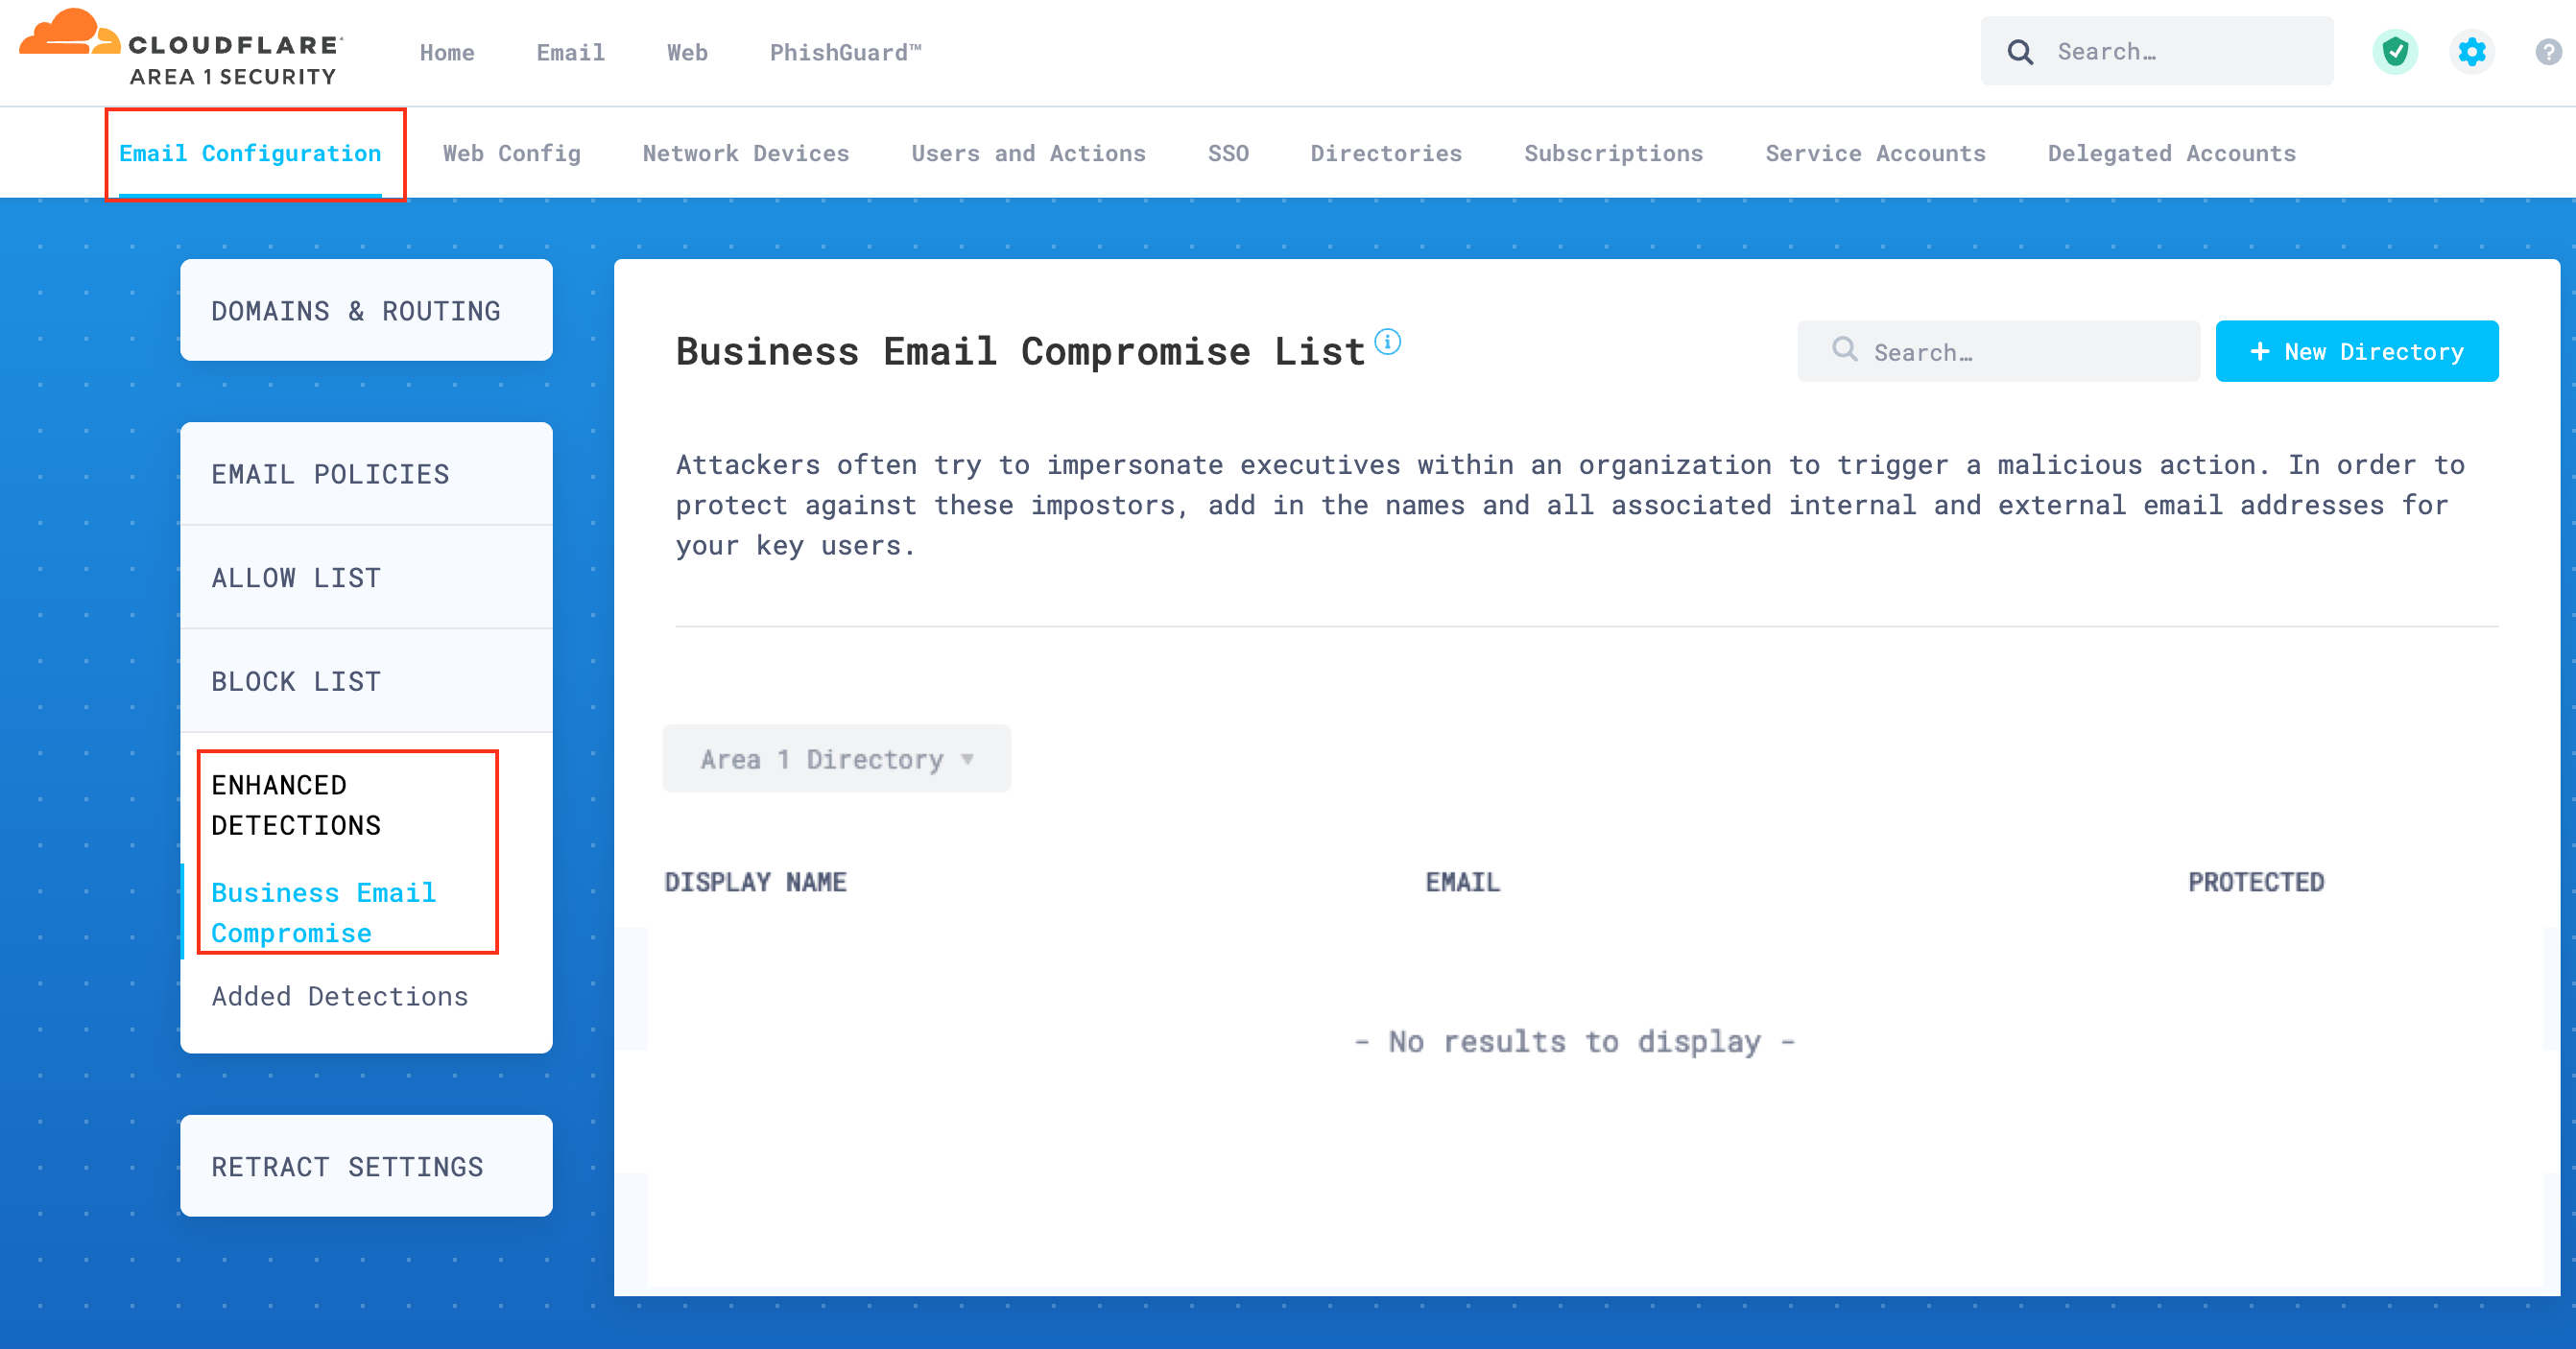
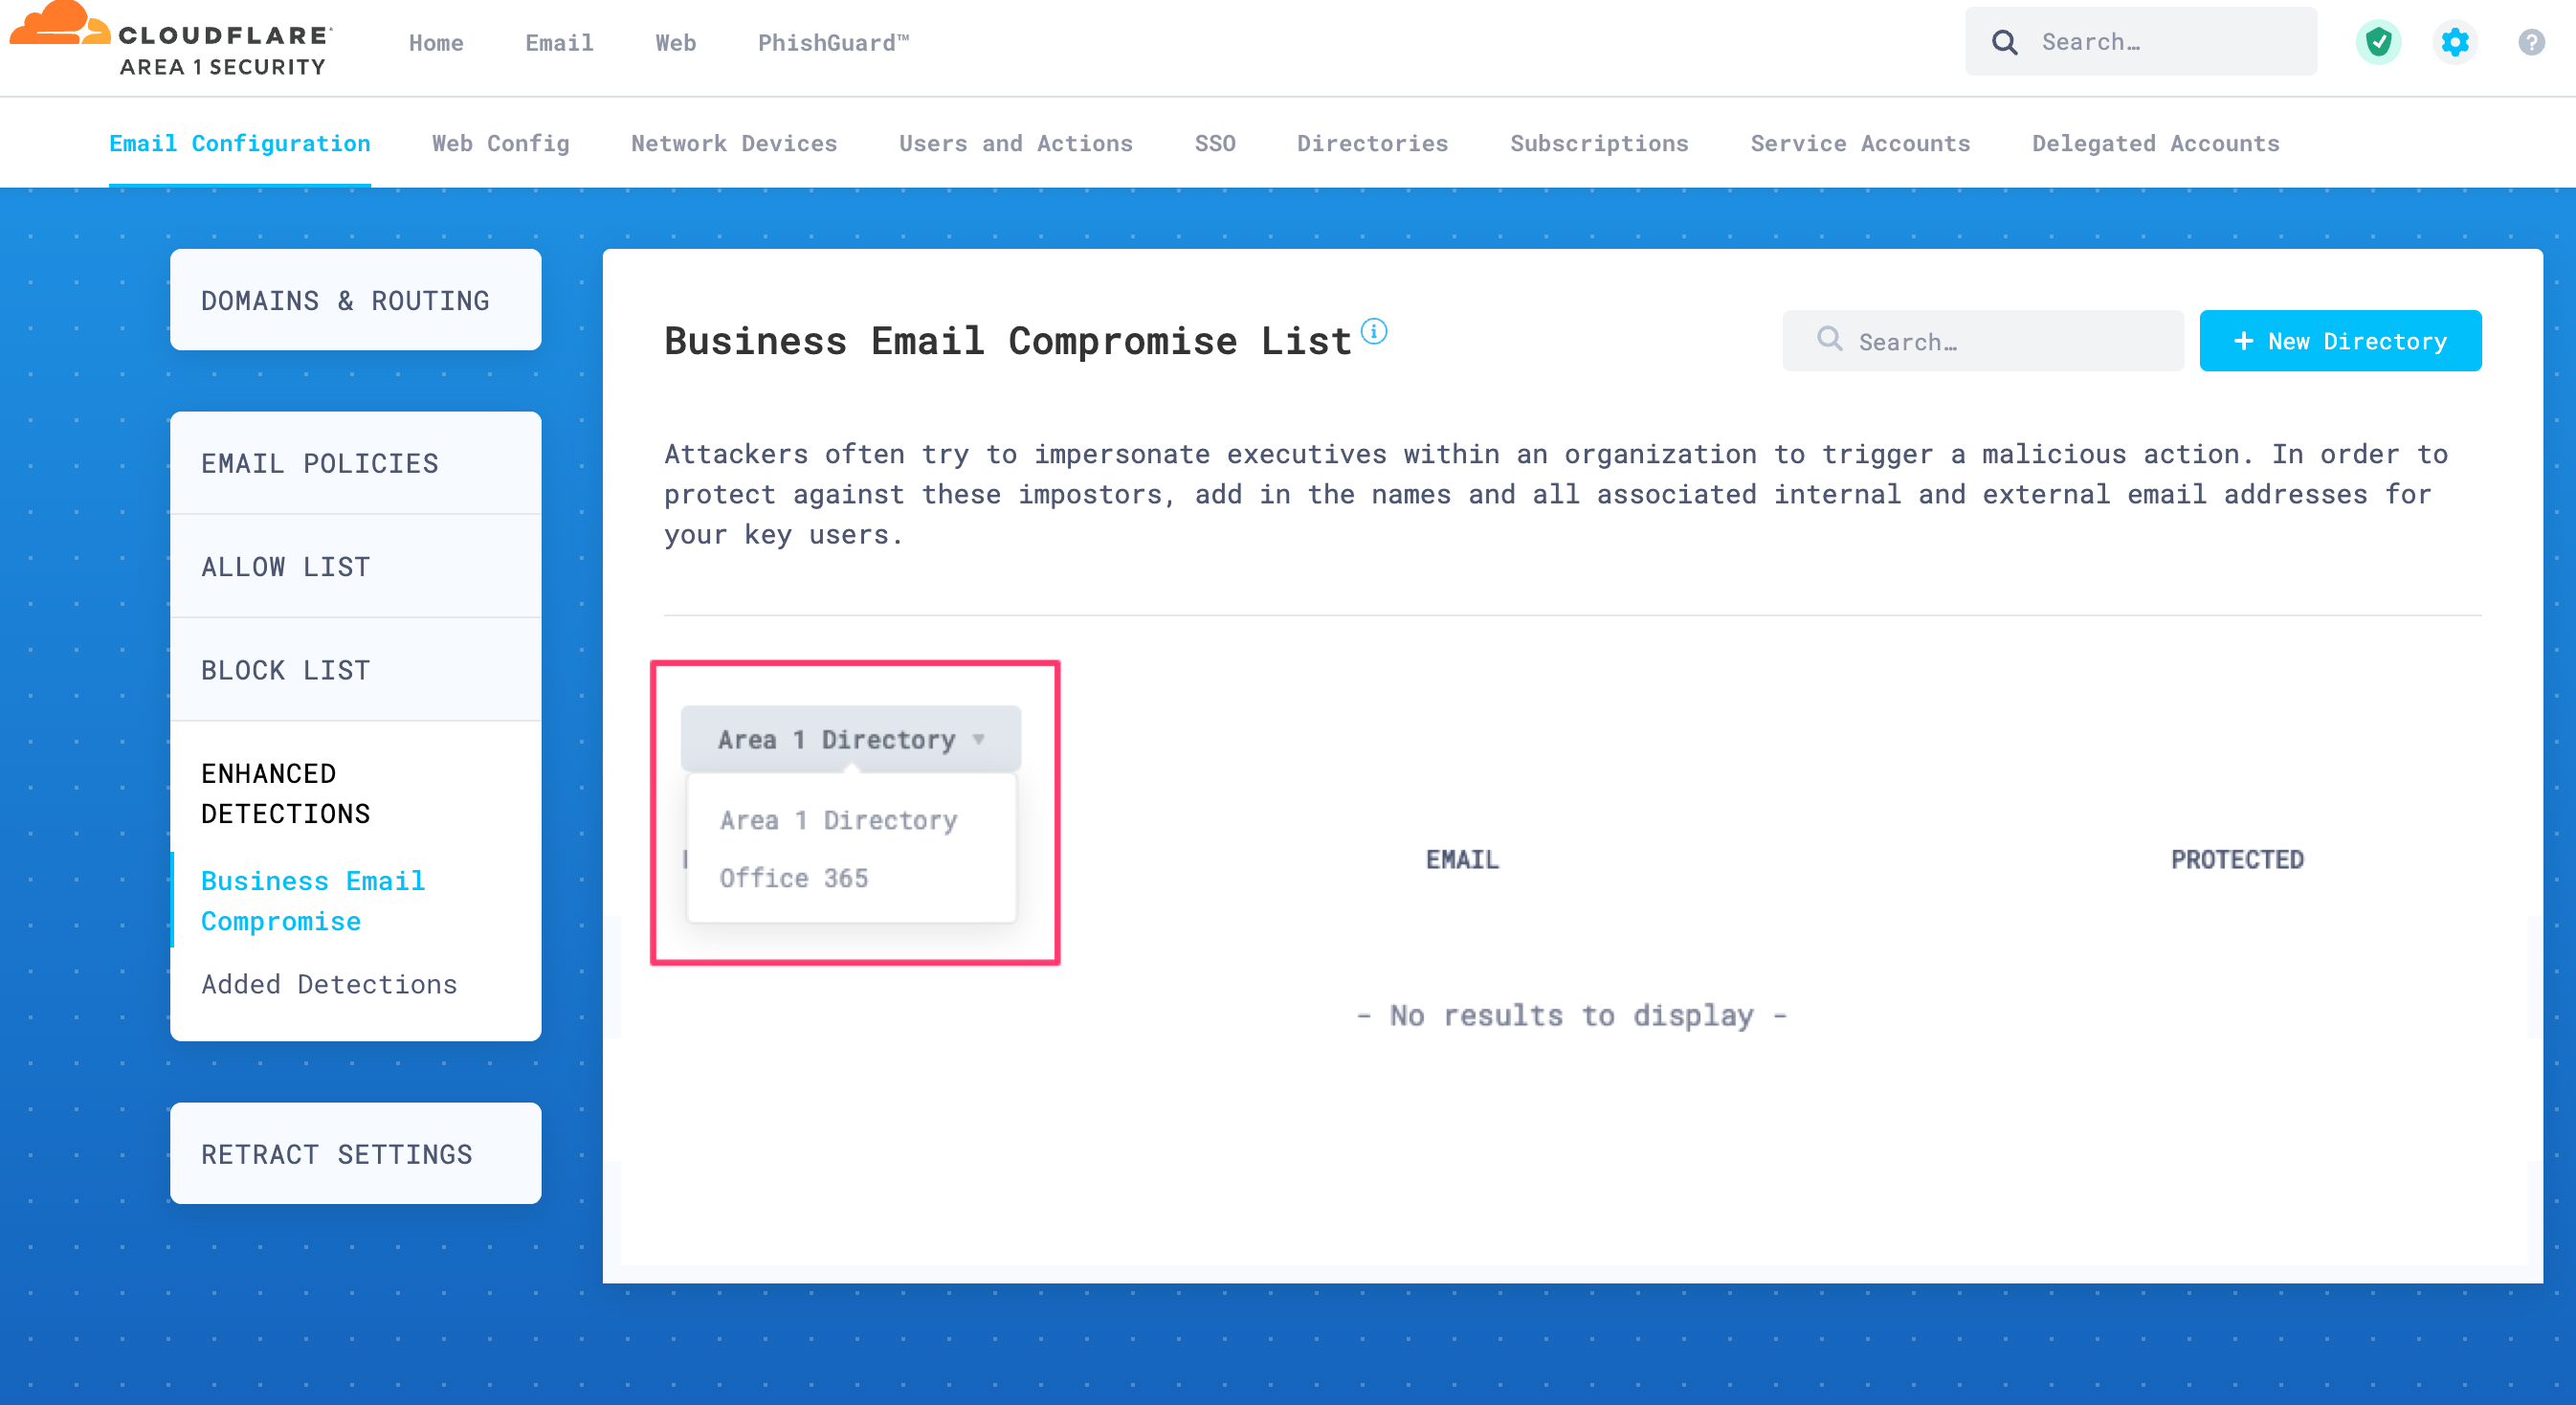
Open the drop-down menu and select the directory you have created in the previous step 3.
If the initial directory synchronization has completed, the page will refresh and list groups and users. If you do not see any information, wait a few minutes as the system completes processing the initial synchronization.
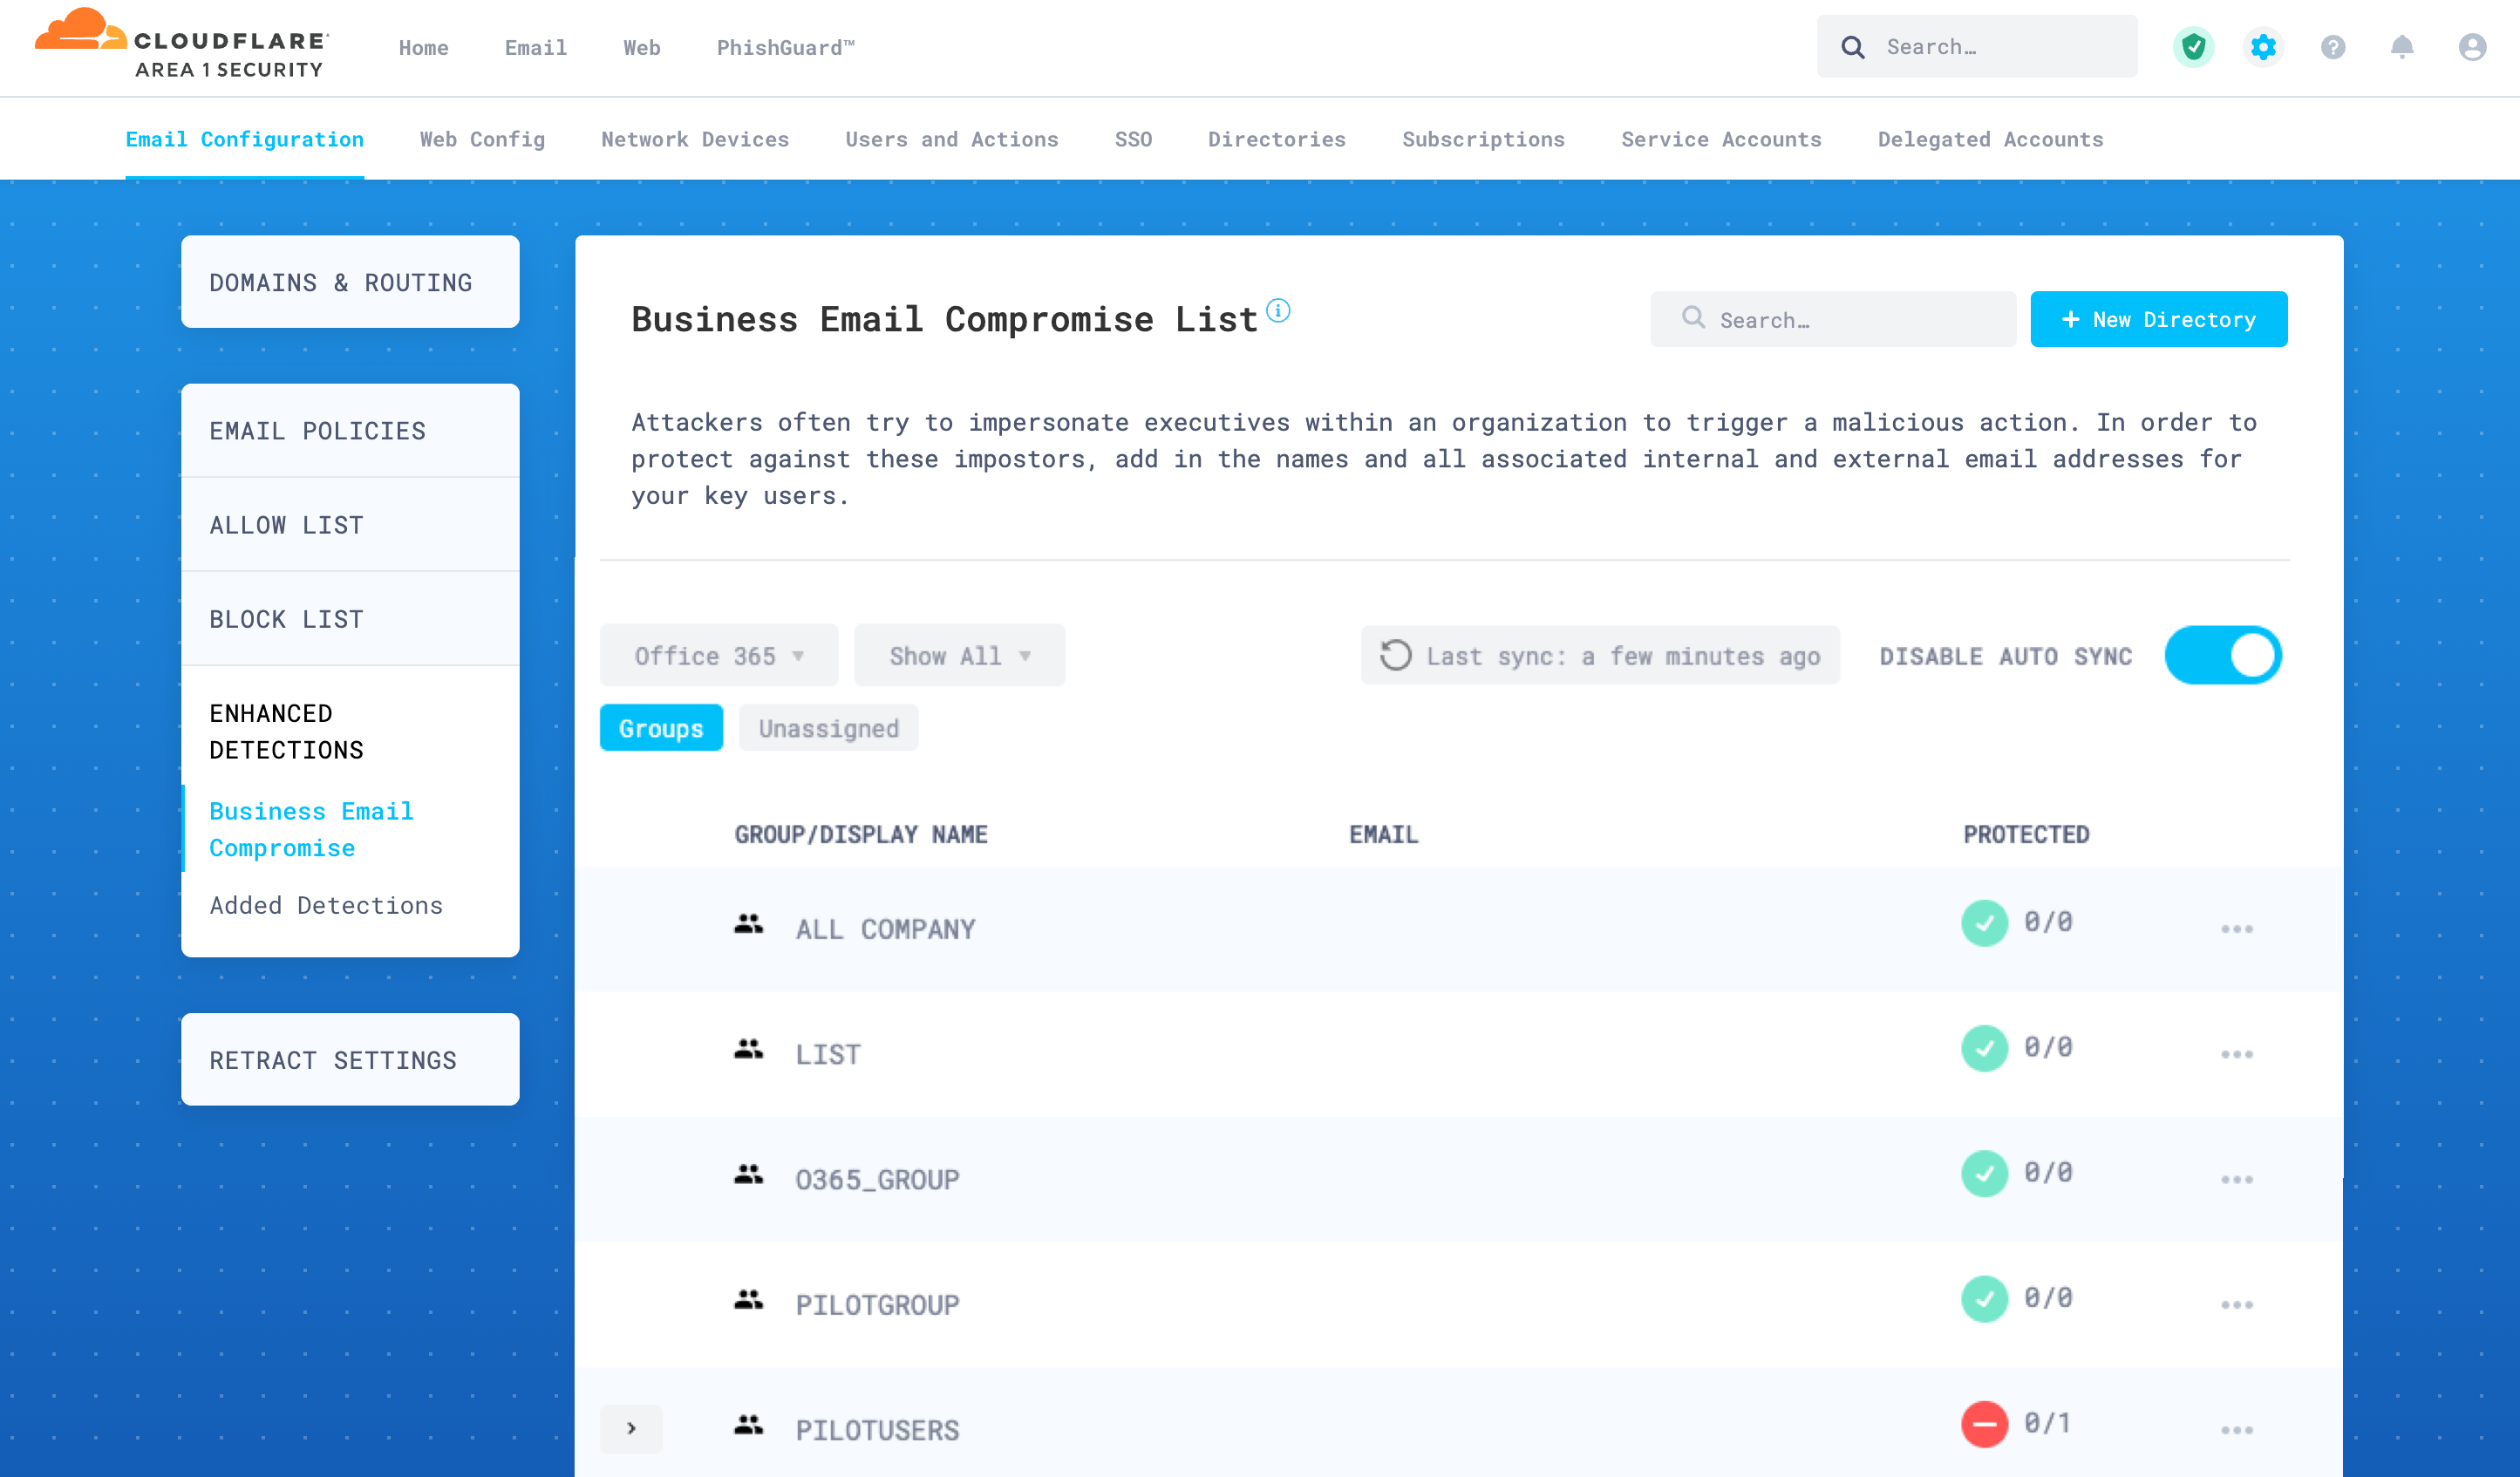
Select the arrow next to a group to expand it and show its members.
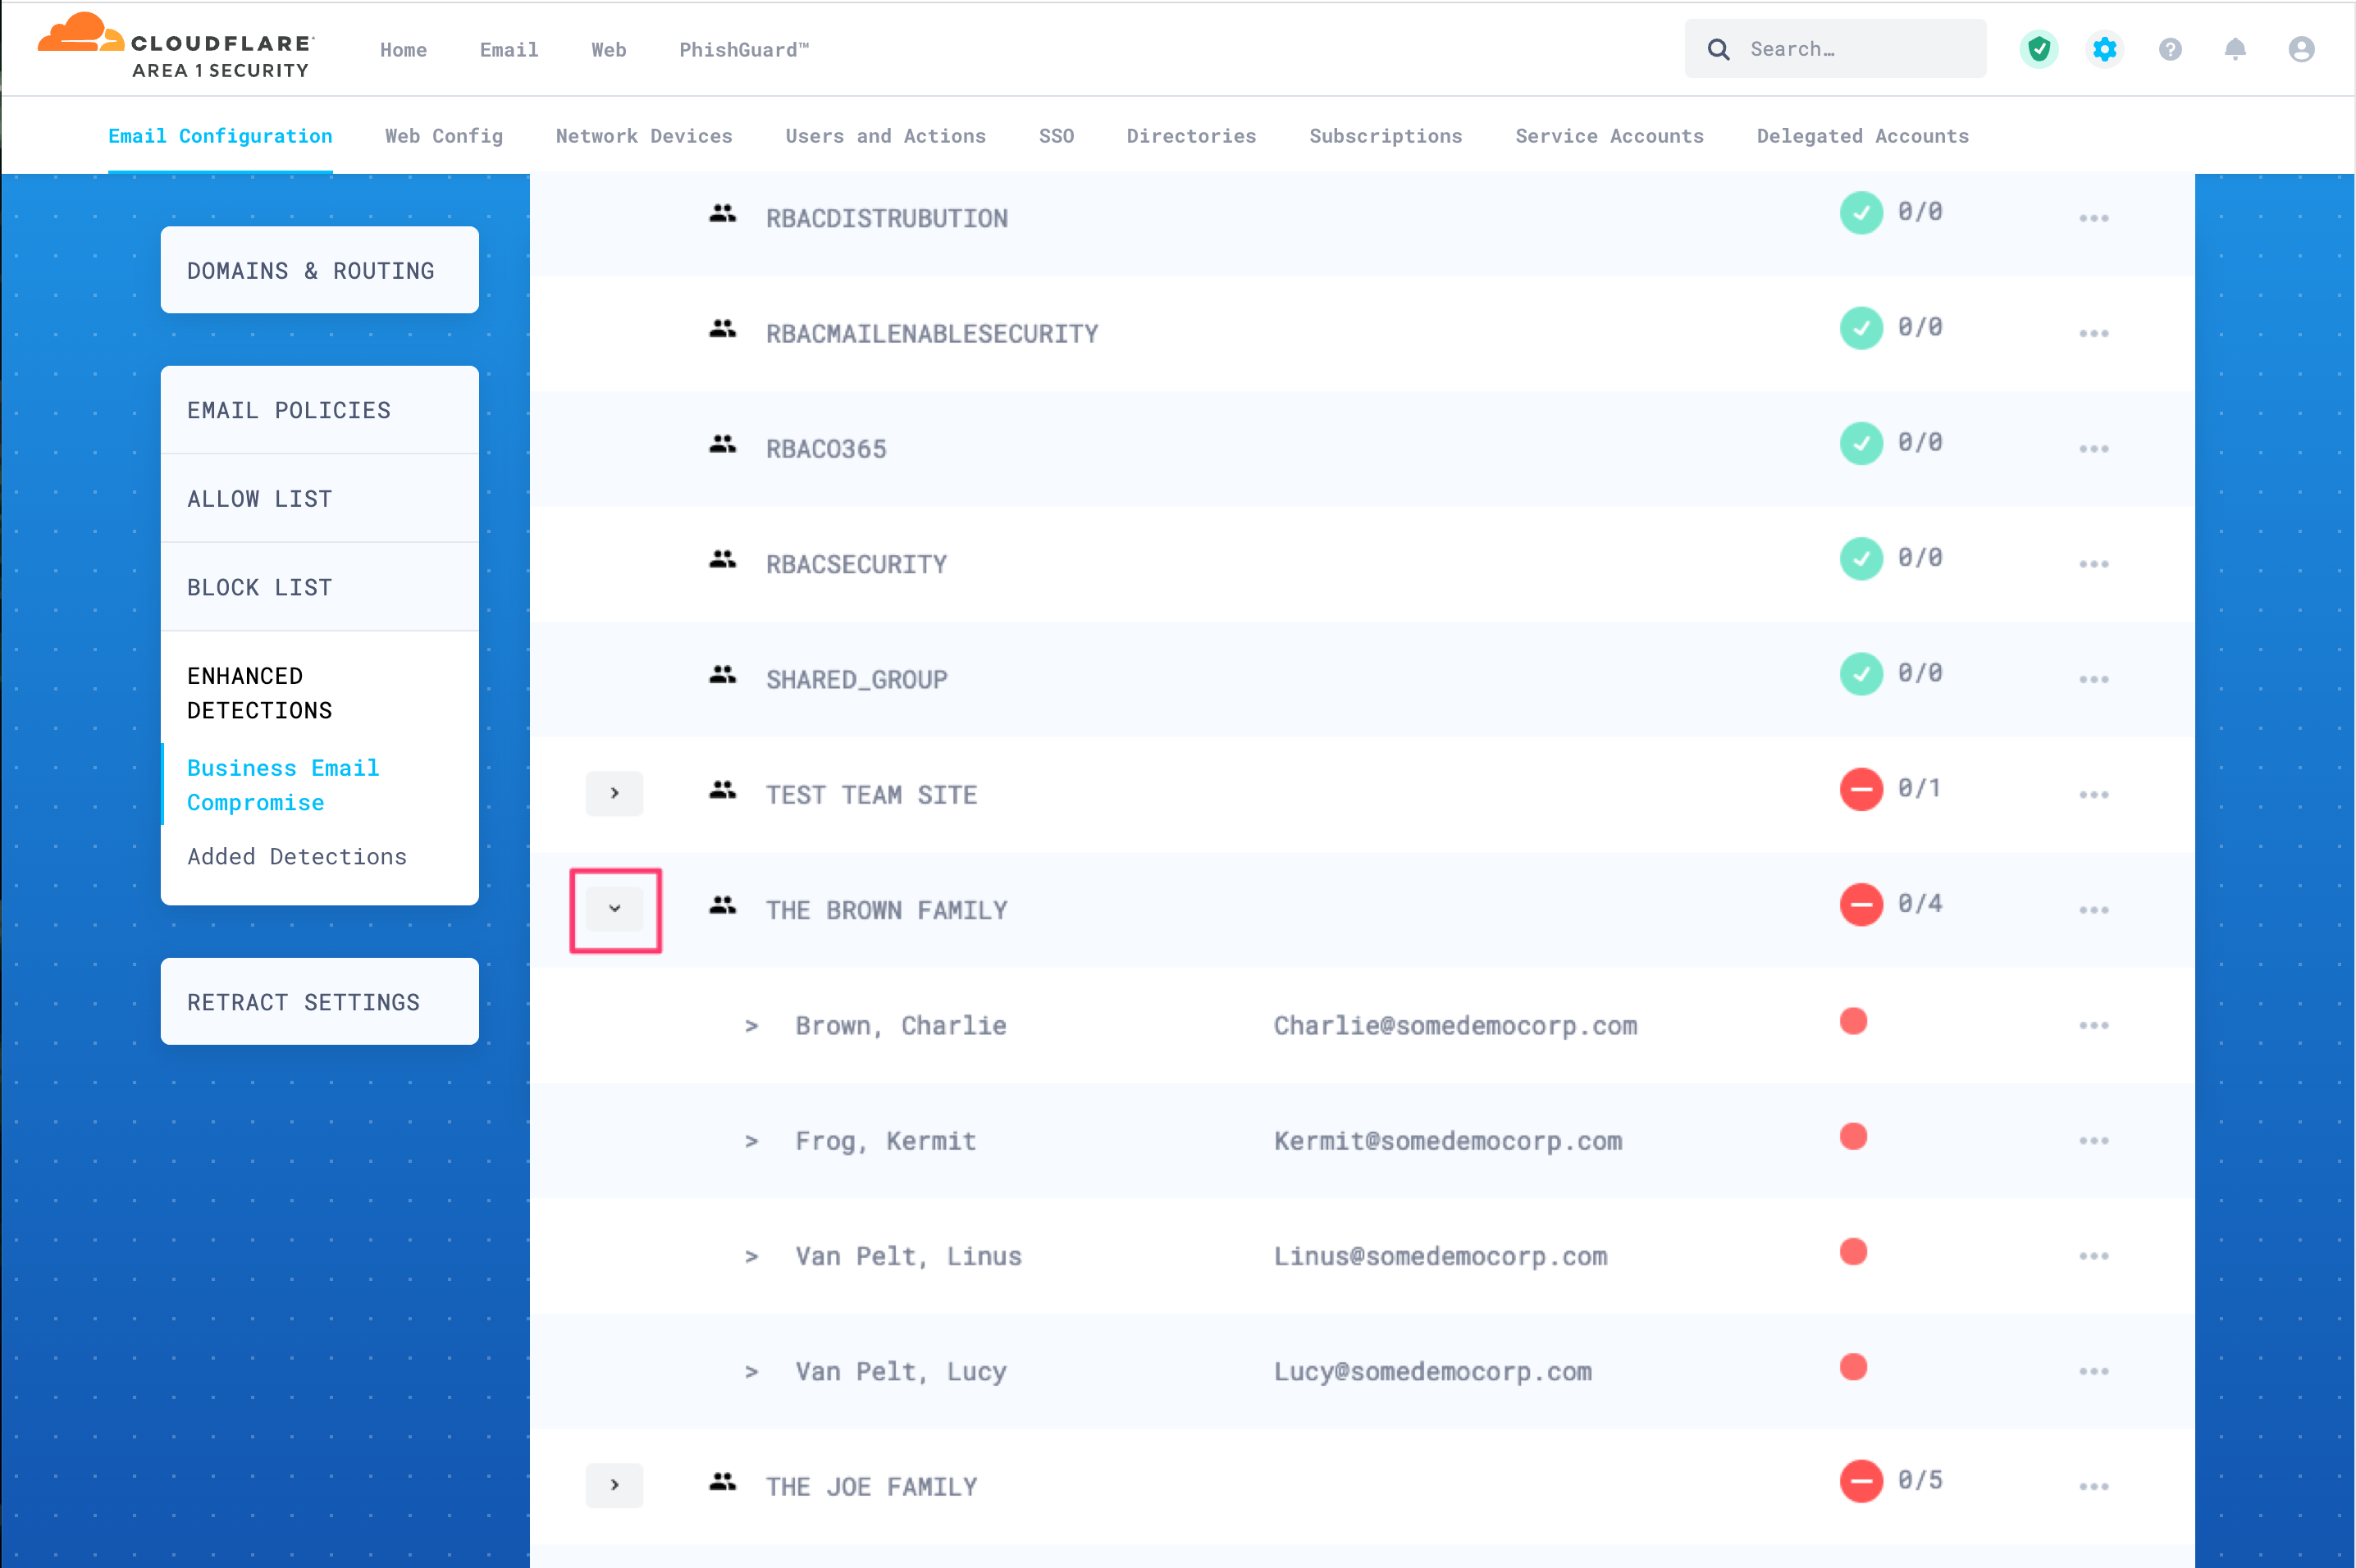
To protect an entire group, select the three-dots button next to it, and then select Protect. When you protect a group, all of its members will be automatically protected. The protection markers will turn green to indicate that protection is active.
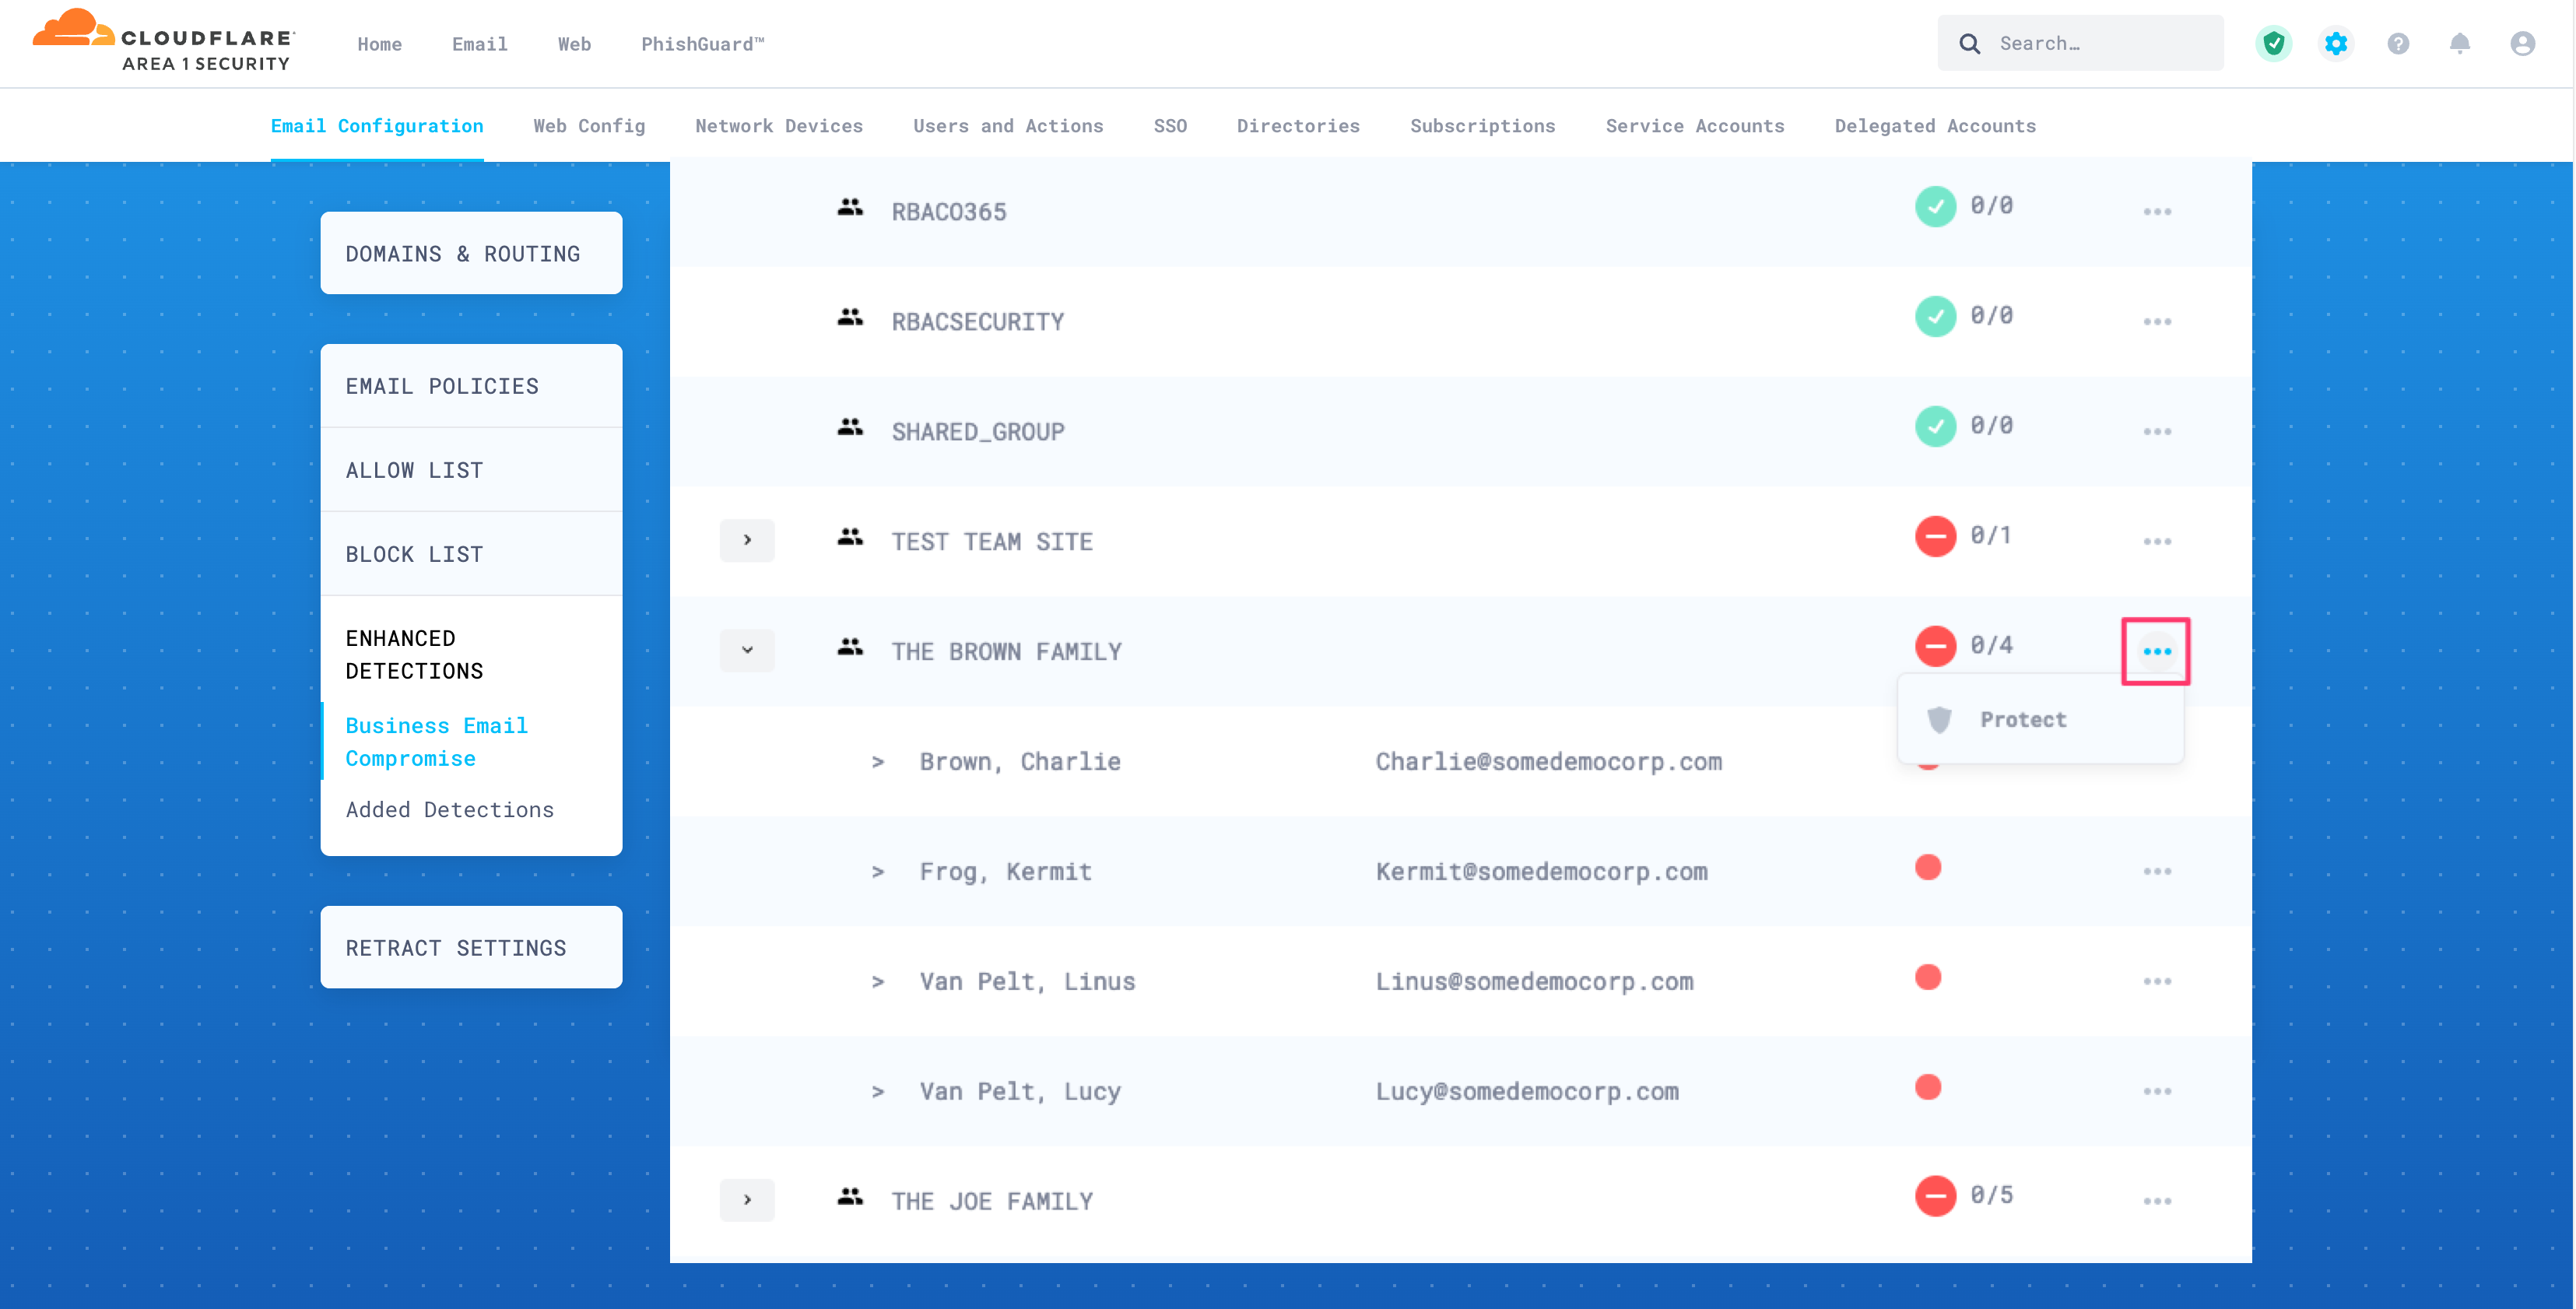
You can also protect individual users. Select the three-dots button next to each user you want to protect, and then select Protect.
3. Configure secondary email address (if required)
When the Business Email Compromise list is configured, Cloud Email Security (formerly Area 1) will enforce the proper match of the sender’s display name and email address. Any variation from this strict requirement will raise a detection event. The reason of detection will be Protected Name <NAME> should not appear as <non-configured email address>.
In some instances, you may want to allow your protected users to send emails from an alternate email address (like their personal email address). To configure this alternate address, you will have to add it to their directory entry.
Log in to the Cloud Email Security dashboard, and select Settings (the gear icon).
Go to Email Configuration > Enhanced Detections > Business Email Compromise.
Search for the user you want to allow an alternate email address.
Select the three-dots button > Edit.

In Secondary Emails add the additional email addresses. Place each entry on a new line.

Select Save to finish.