Generic single sign-on integration guide
Below is a generic guide to successfully set up an identity provider based SAML. These options might change depending on your identity provider (IDP). However, make sure you set up the options below or their equivalent.
1. Identity Provider SAML setup
Log in to your SAML provider and access its setup section.
Enter the following values to configure your IDP provider:
Single sign on URL https://horizon.area1security.com/api/users/samlAudience URI (SP Entity ID) https://horizon.area1security.comName ID format Email Address Application username Email Response Signed Assertion signature Unsigned Signature Algorithm RSA-SHA1 Digest Algorithm SHA1 In the Attribute Statements, add your application users. Emails you add here should match emails users already have in the Cloud Email Security dashboard.
After finishing the setup, download the IDP metadata file. Copy and paste it into the METADATA XML field in the SSO section of Cloud Email Security’s dashboard. Refer to step 4 in the guide below for more details.
2. Cloud Email Security SAML setup
After configuring settings in your SSO provider, log in to the Cloud Email Security dashboard to finish setting up.
Log in to the Cloud Email Security (formerly Area 1) dashboard.
Go to Settings (the gear icon).
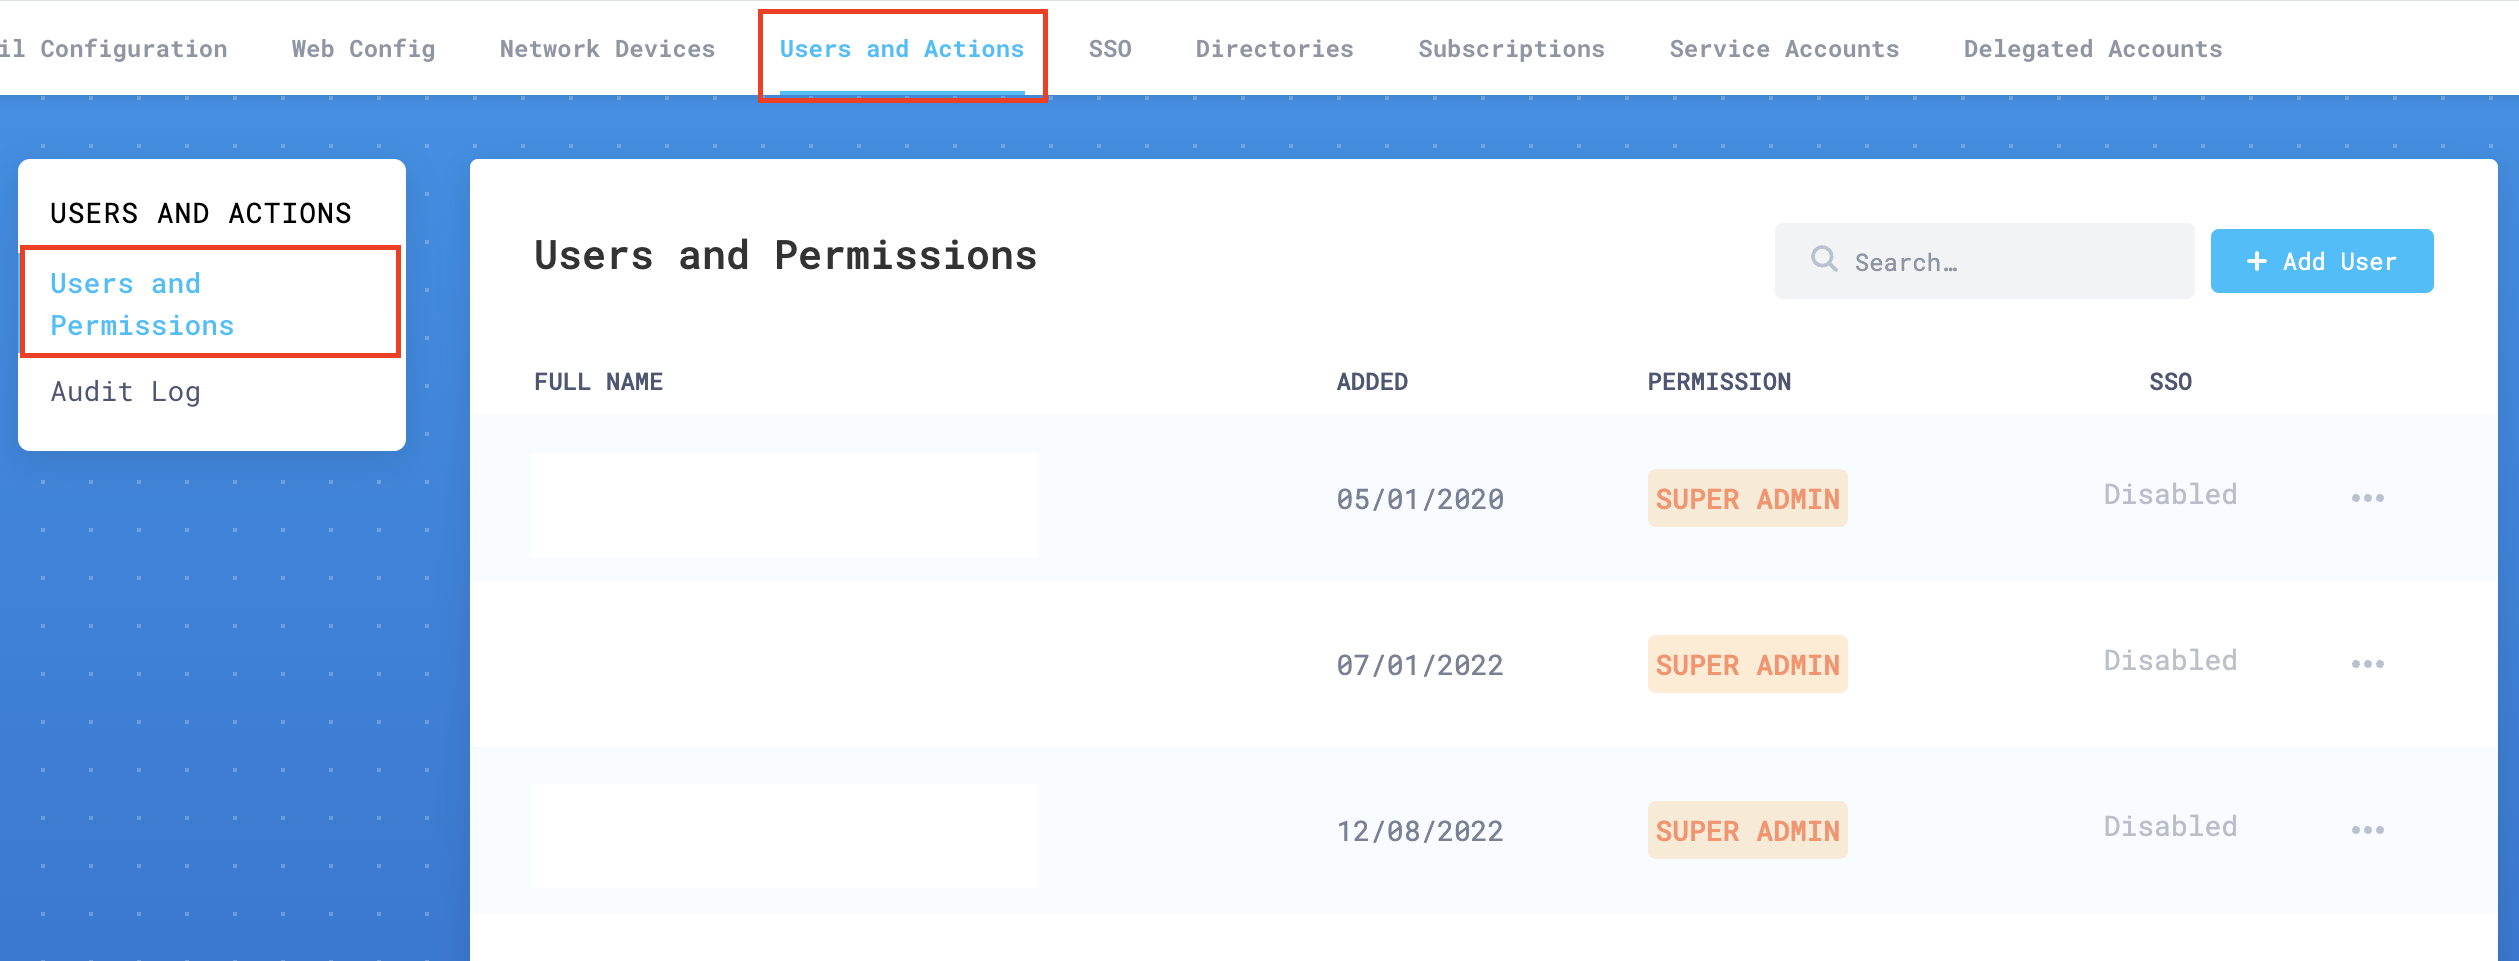
In Users and Actions > Users and Permissions add the email addresses of all your authorized administrators.
Go to SSO, and enable Single Sign on.
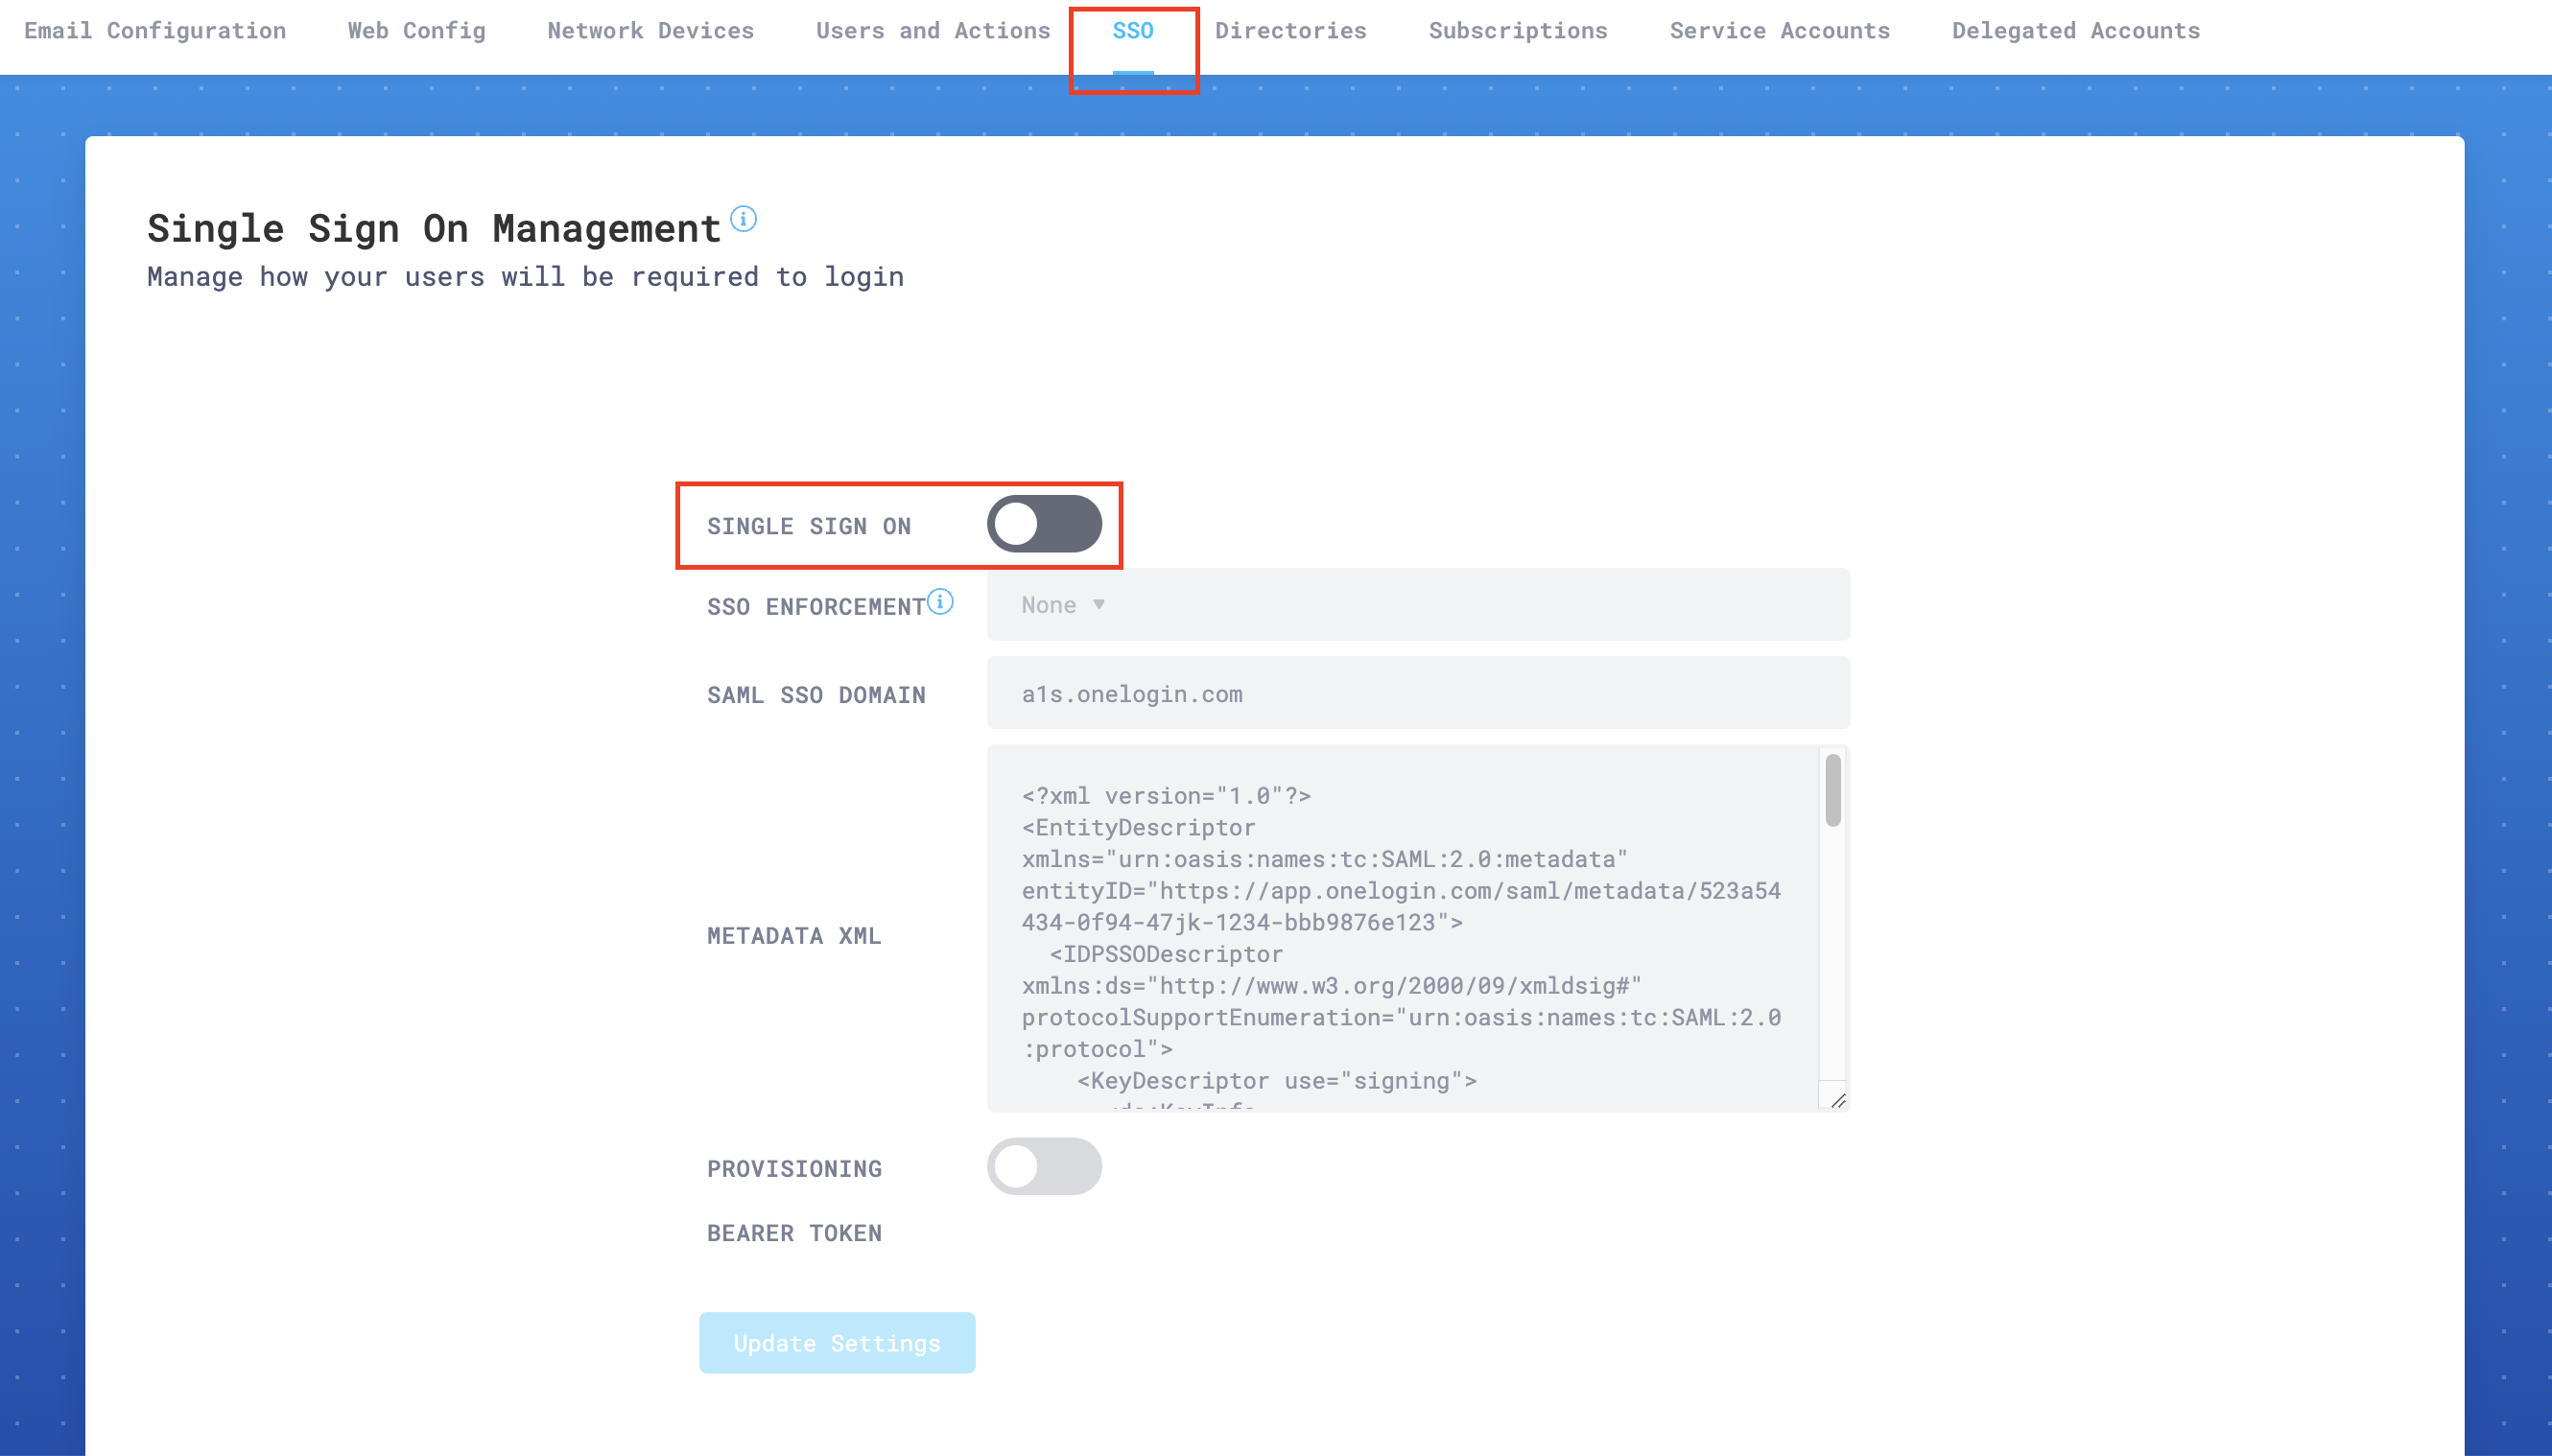
In SSO Enforcement, choose one of the settings, according to your specific needs:
- None: This setting allows each user to choose SSO, or username and password plus 2FA (this is the recommended setting while testing SSO).
- Admin: This setting will force only the administrator account to use SSO. The user that enables this setting will still be able to log in using username and password plus 2FA. This is a backup, so that your organization does not get locked out of the portal in emergencies.
- Non-Admin Only: This option will require that all
Read onlyandRead & Writeusers use SSO to access the portal. Admins will still have the option to use either SSO or username and password plus 2FA.
In SAML SSO Domain enter the domain that points to your SSO provider.
In METADATA XML paste the SAML XML metadata settings from your provider. These settings (and even their exact text descriptions) are in different locations depending on your SSO provider.
Select Update Settings to save your configuration.
Troubleshooting
If you have trouble connecting your SAML provider to Cloud Email Security, make sure that:
- The users you have configured in your SAML provider exist in the Cloud Email Security dashboard.
- You are using email address as an attribute (in step 2, refer to Name ID format and Application username).
- You are using the SHA-1 algorithm.
- Your encryption is set to 2048 bits.
If all else fails, enable Chrome browser debug logs. Then, log your activity when SSO is initiated, and contact Cloudflare support.