Office 365 use cases
Before following our use case tutorials, read through this how-to guide related to best practices. This will show you how to prepare your Cloud Email Security dashboard and enable options such as tagging and defanging emails, as well as Email Link Isolation, before setting up Office 365.
Log in to the Cloud Email Security (formerly Area 1) dashboard.
Go to Settings (the gear icon).
Go to Email Configuration > Email Policies > Link Actions.
What you do next depends on if you are an Advantage or Enterprise customer:
If you are an Advantage customer:
- In Disposition Actions, select Edit.
- In the
SUSPICIOUSdisposition drop-down menu, change the action toURL Defang.
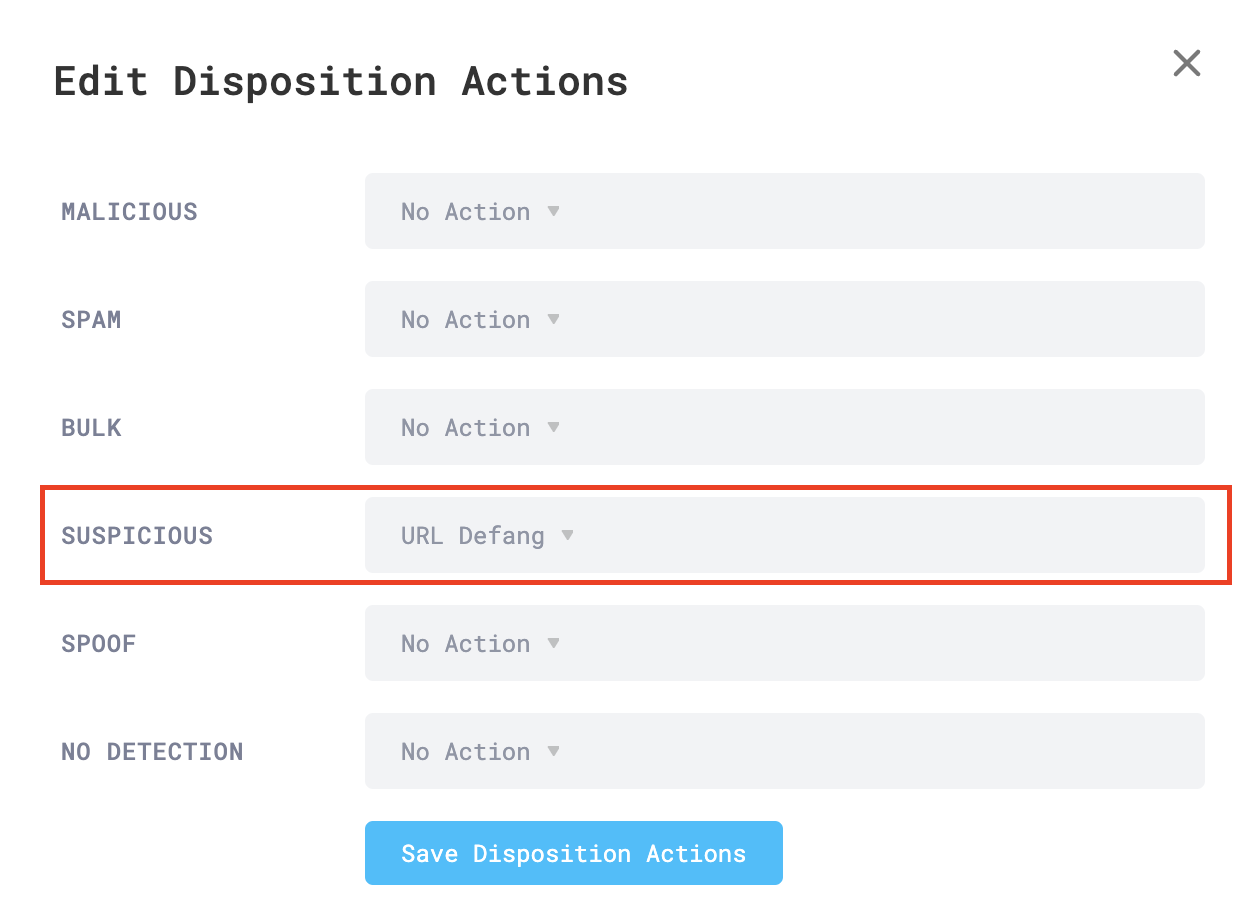
- Select Save Disposition Actions.
If you are an Enterprise customer:
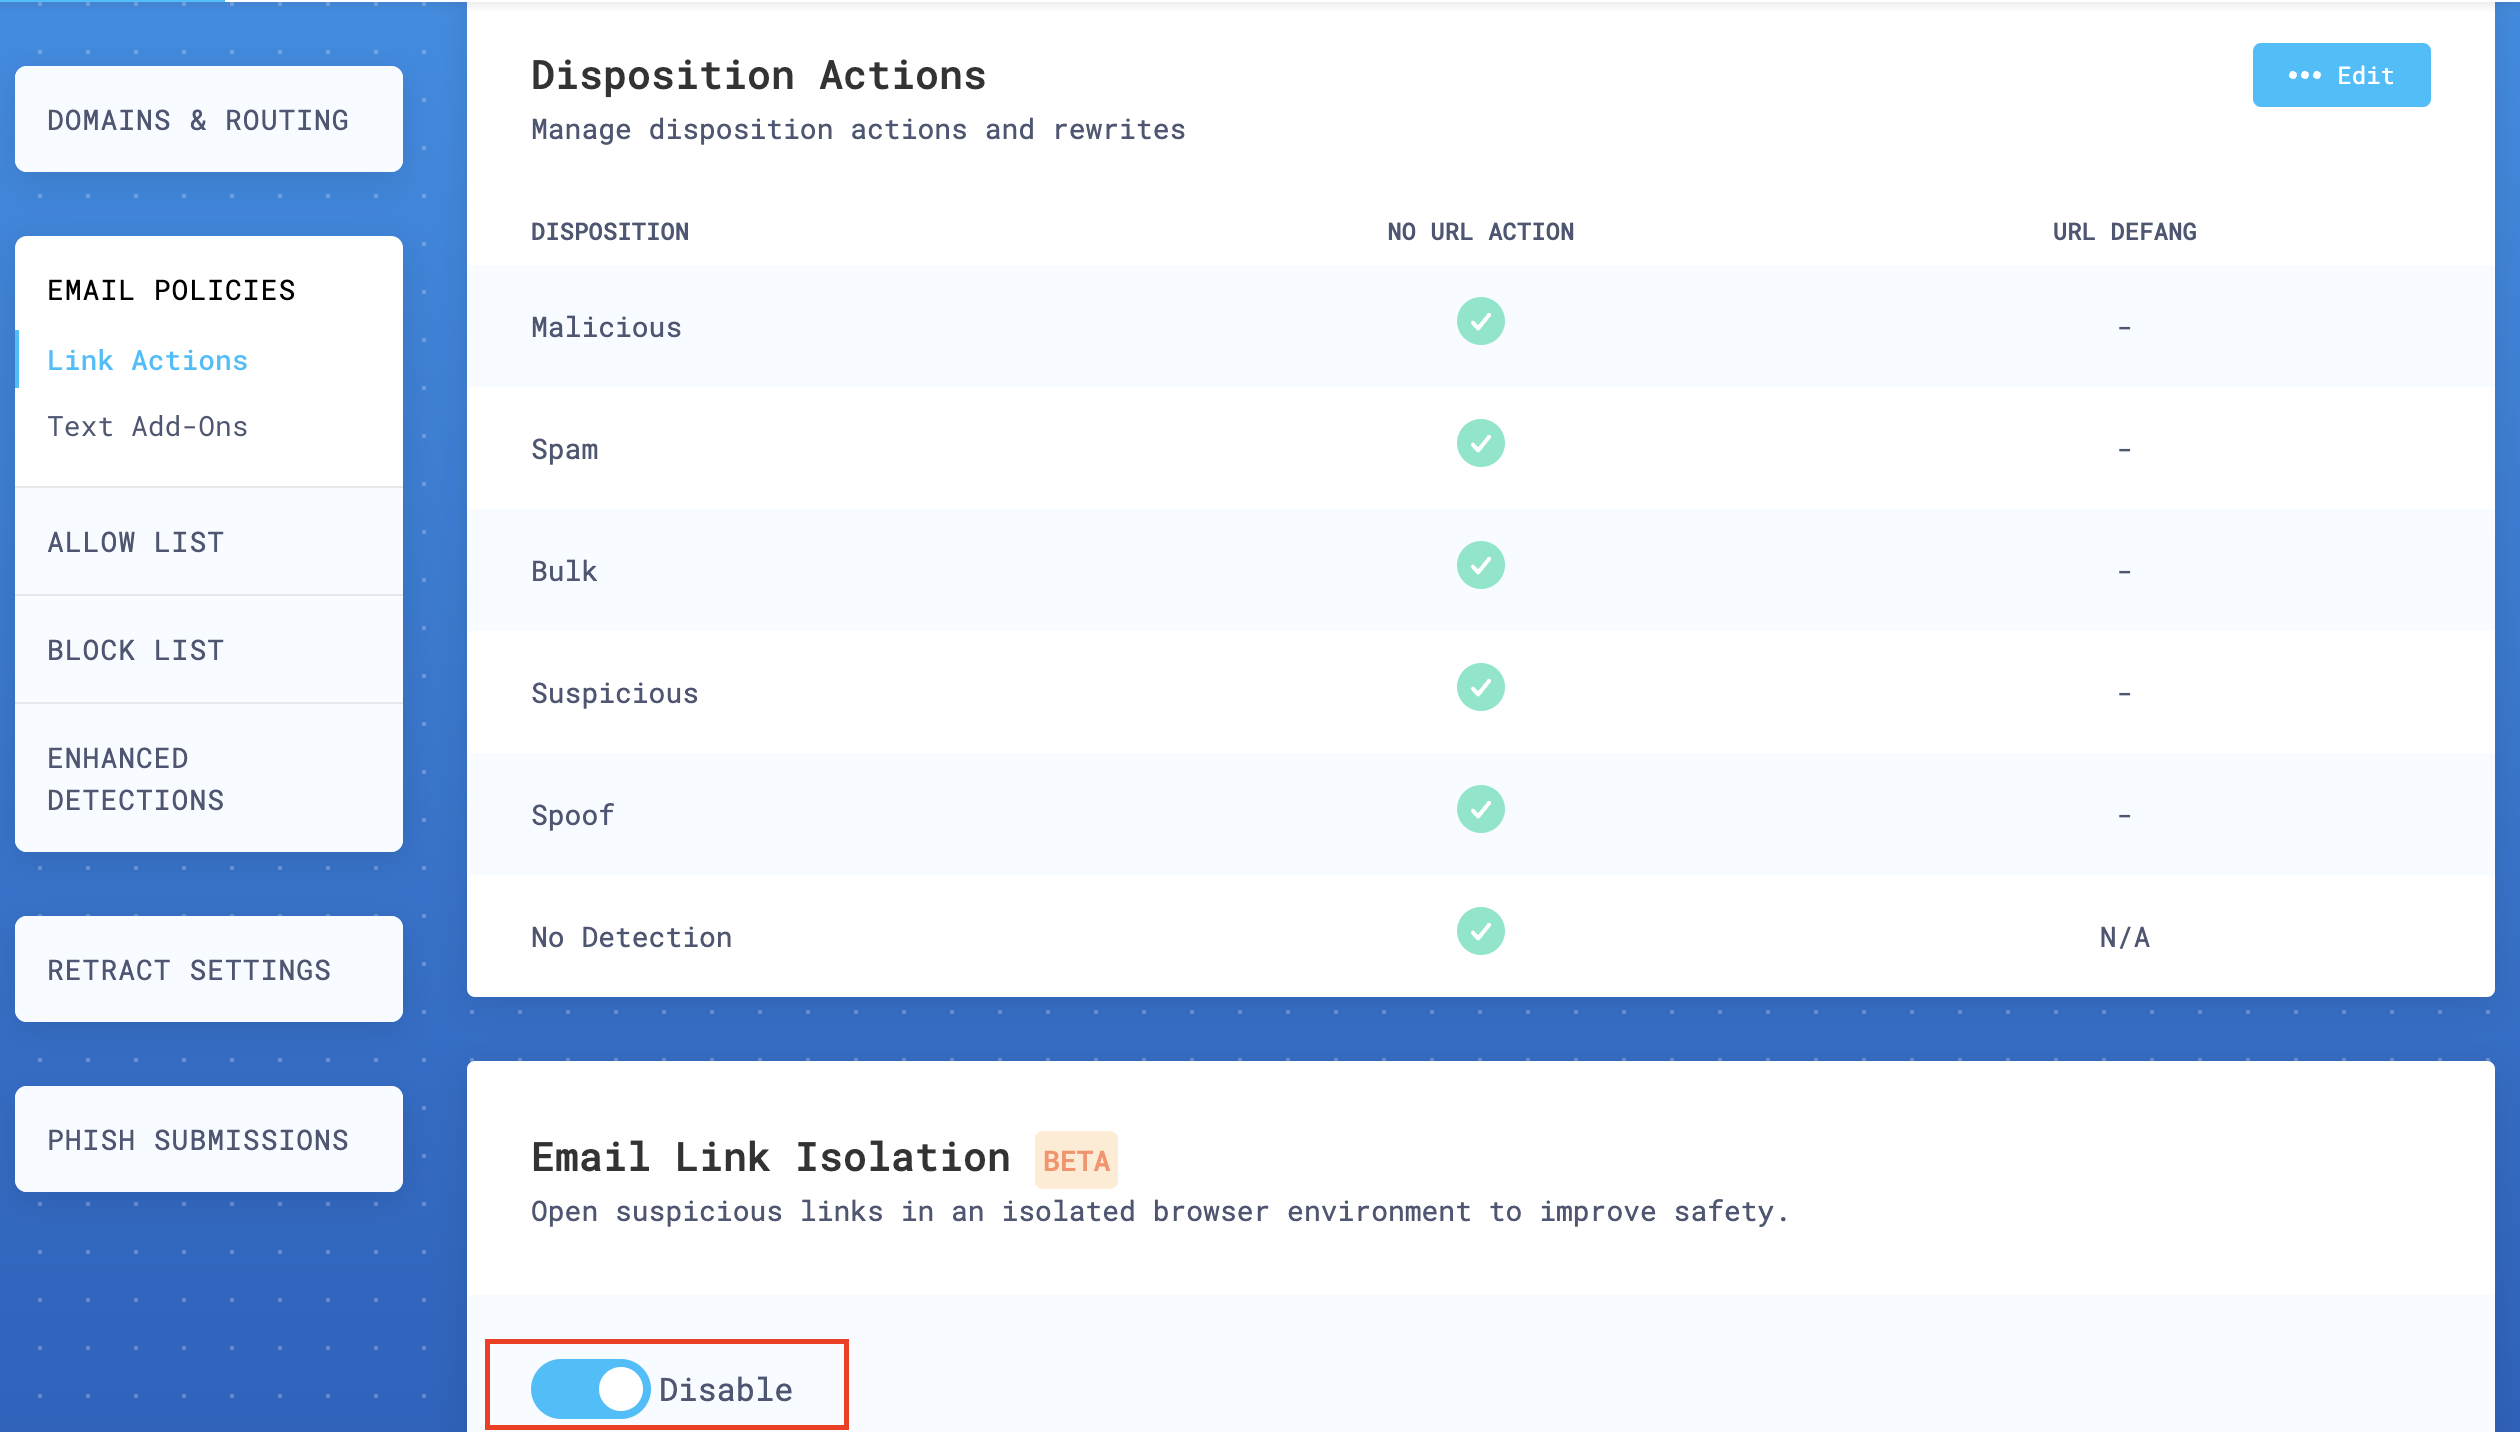
- Enable Email Link Isolation.
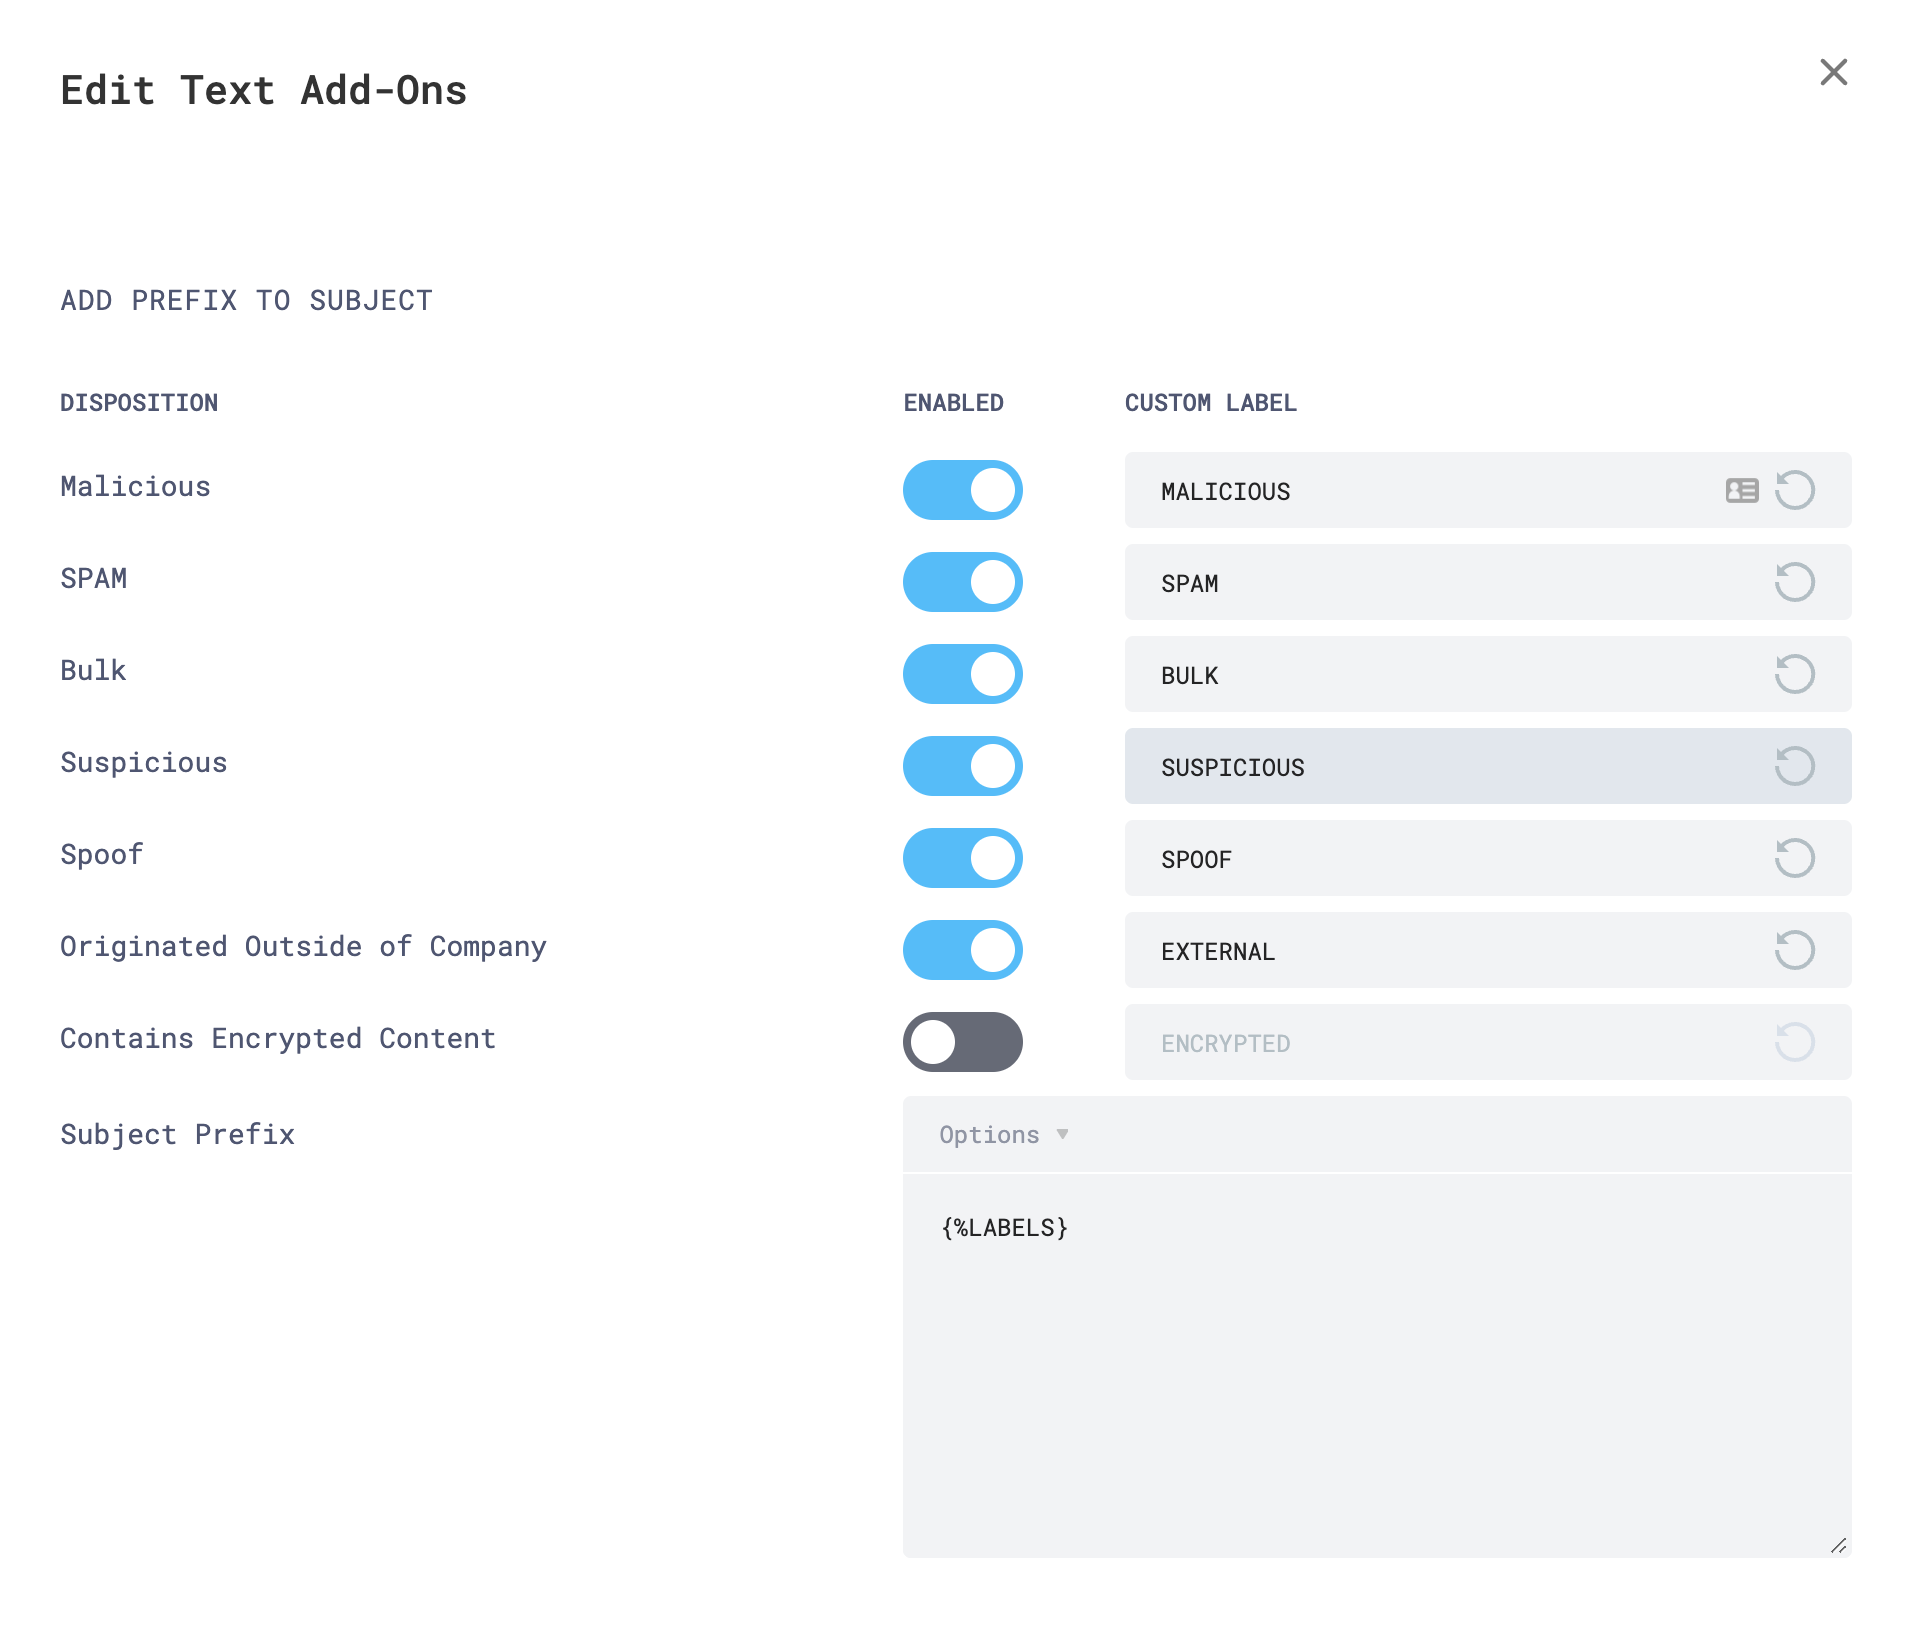
Under Email Policies, select Text add-Ons.
Select Edit.
Enable the following options under Add Prefix To Subject:
- Malicious - Enabled.
- Suspicious - Enabled.
- Spam - Enabled.
- Bulk - Enabled.
- Spoof - Enabled.
- Originated Outside of Company - Optional.
- Contains Encrypted Content - Optional.
- Subject Prefix - Format as desired.
In the same window, scroll down and enable the following options under Add Prefix To Body:
- Malicious - Enabled.
- Suspicious - Enabled.
- Spam - Disabled.
- Bulk - Disabled.
- Spoof - Enabled.
- Originated Outside of Company - Optional.
- Body Prefix - Format as desired. You can use the default settings. The body prefix supports HTML tags for formatting.
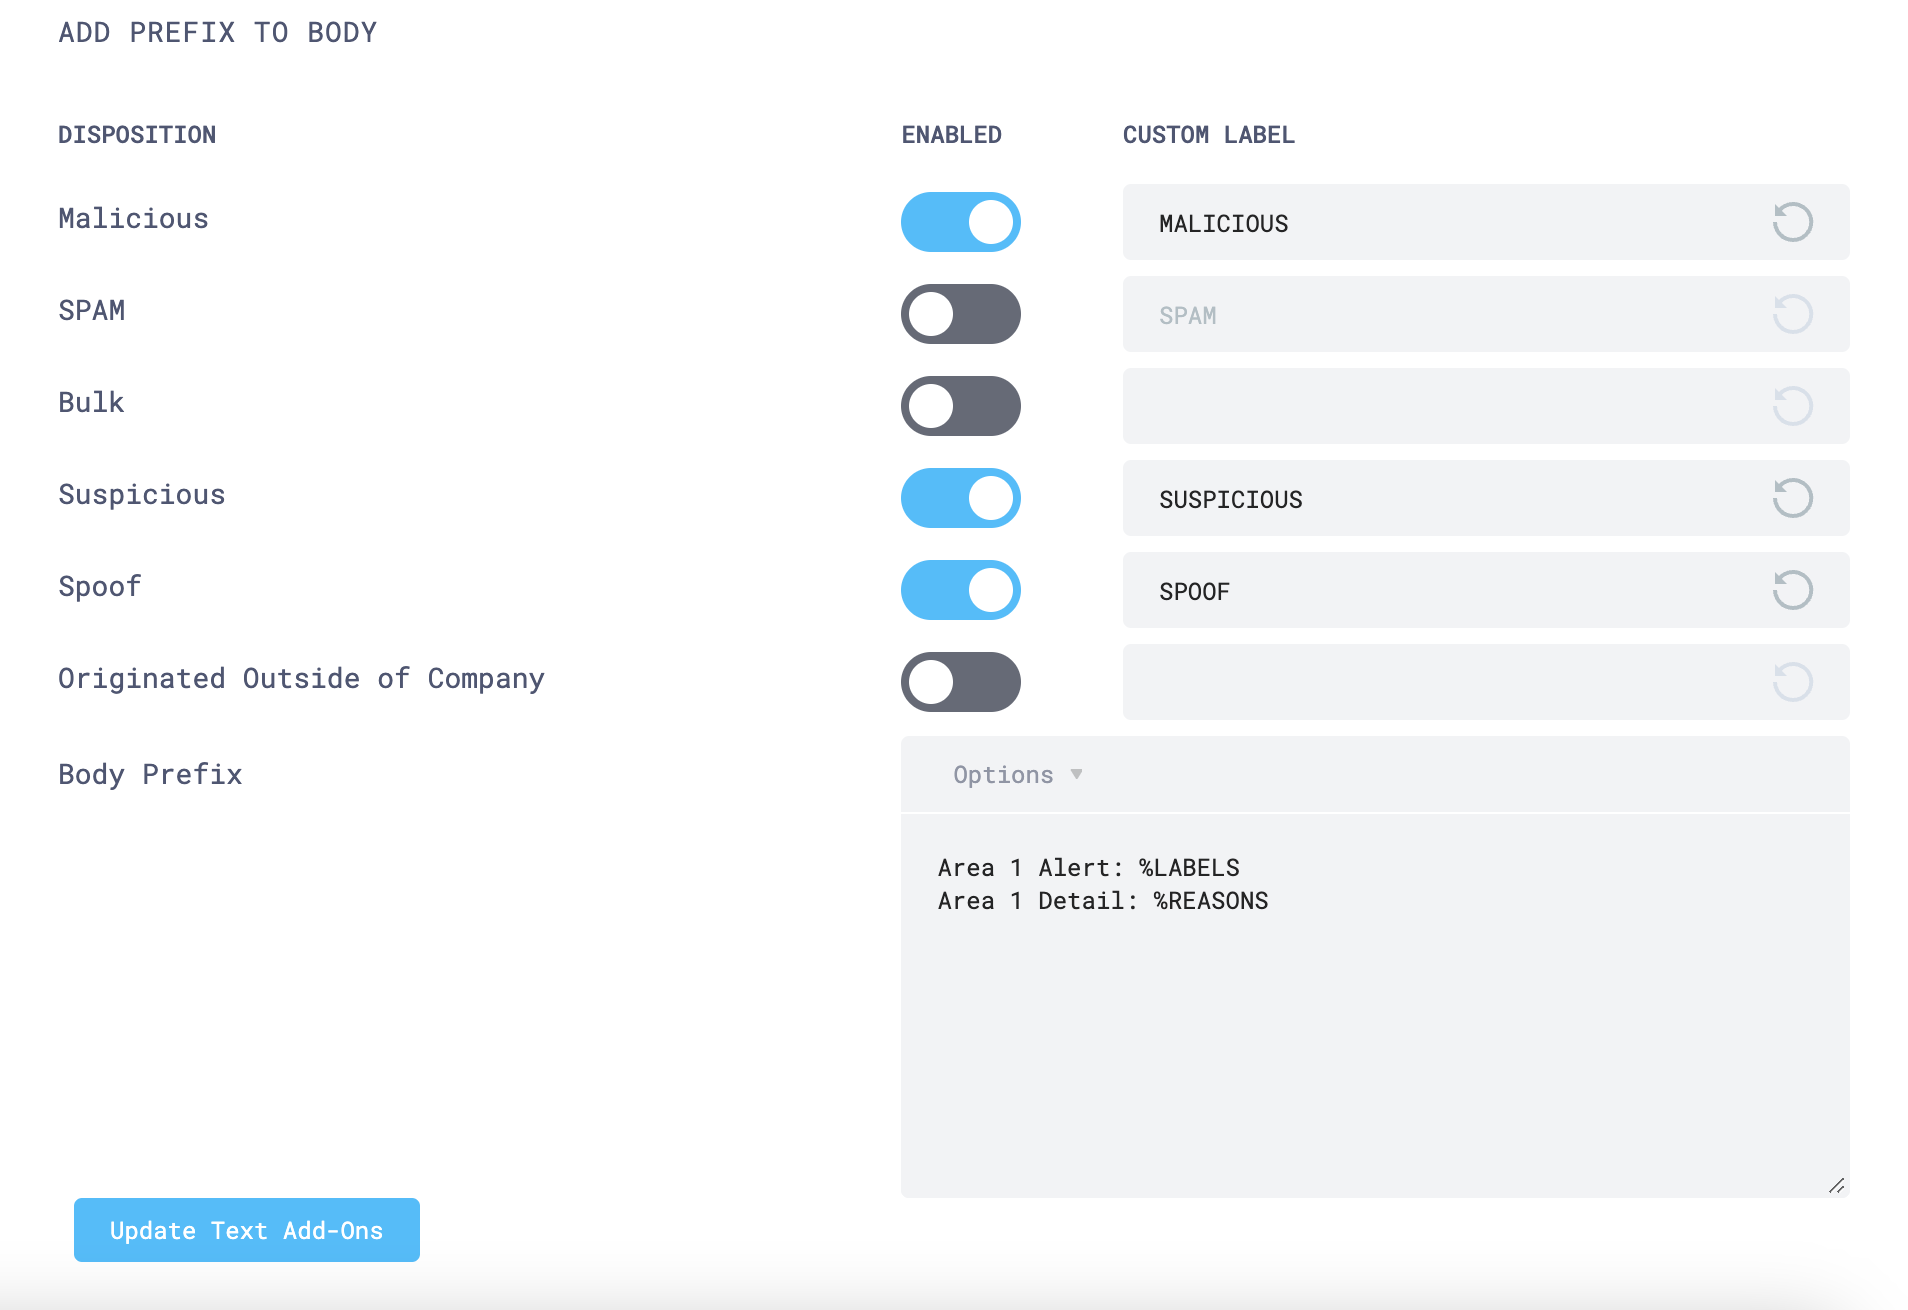
Select Update Text Add-Ons.
Use cases
Refer to the following use cases to learn how to set up your environment for different scenarios.