Azure integration guide
This tutorial will walk you through the steps for configuring a non-gallery enterprise application within Azure Active Directory to establish a SAML SSO connection with Cloud Email Security (formerly Area 1).
1. Azure Active Directory configuration
Log in to Azure portal and open Enterprise Applications.
Select New Application.

Select Create your own application.
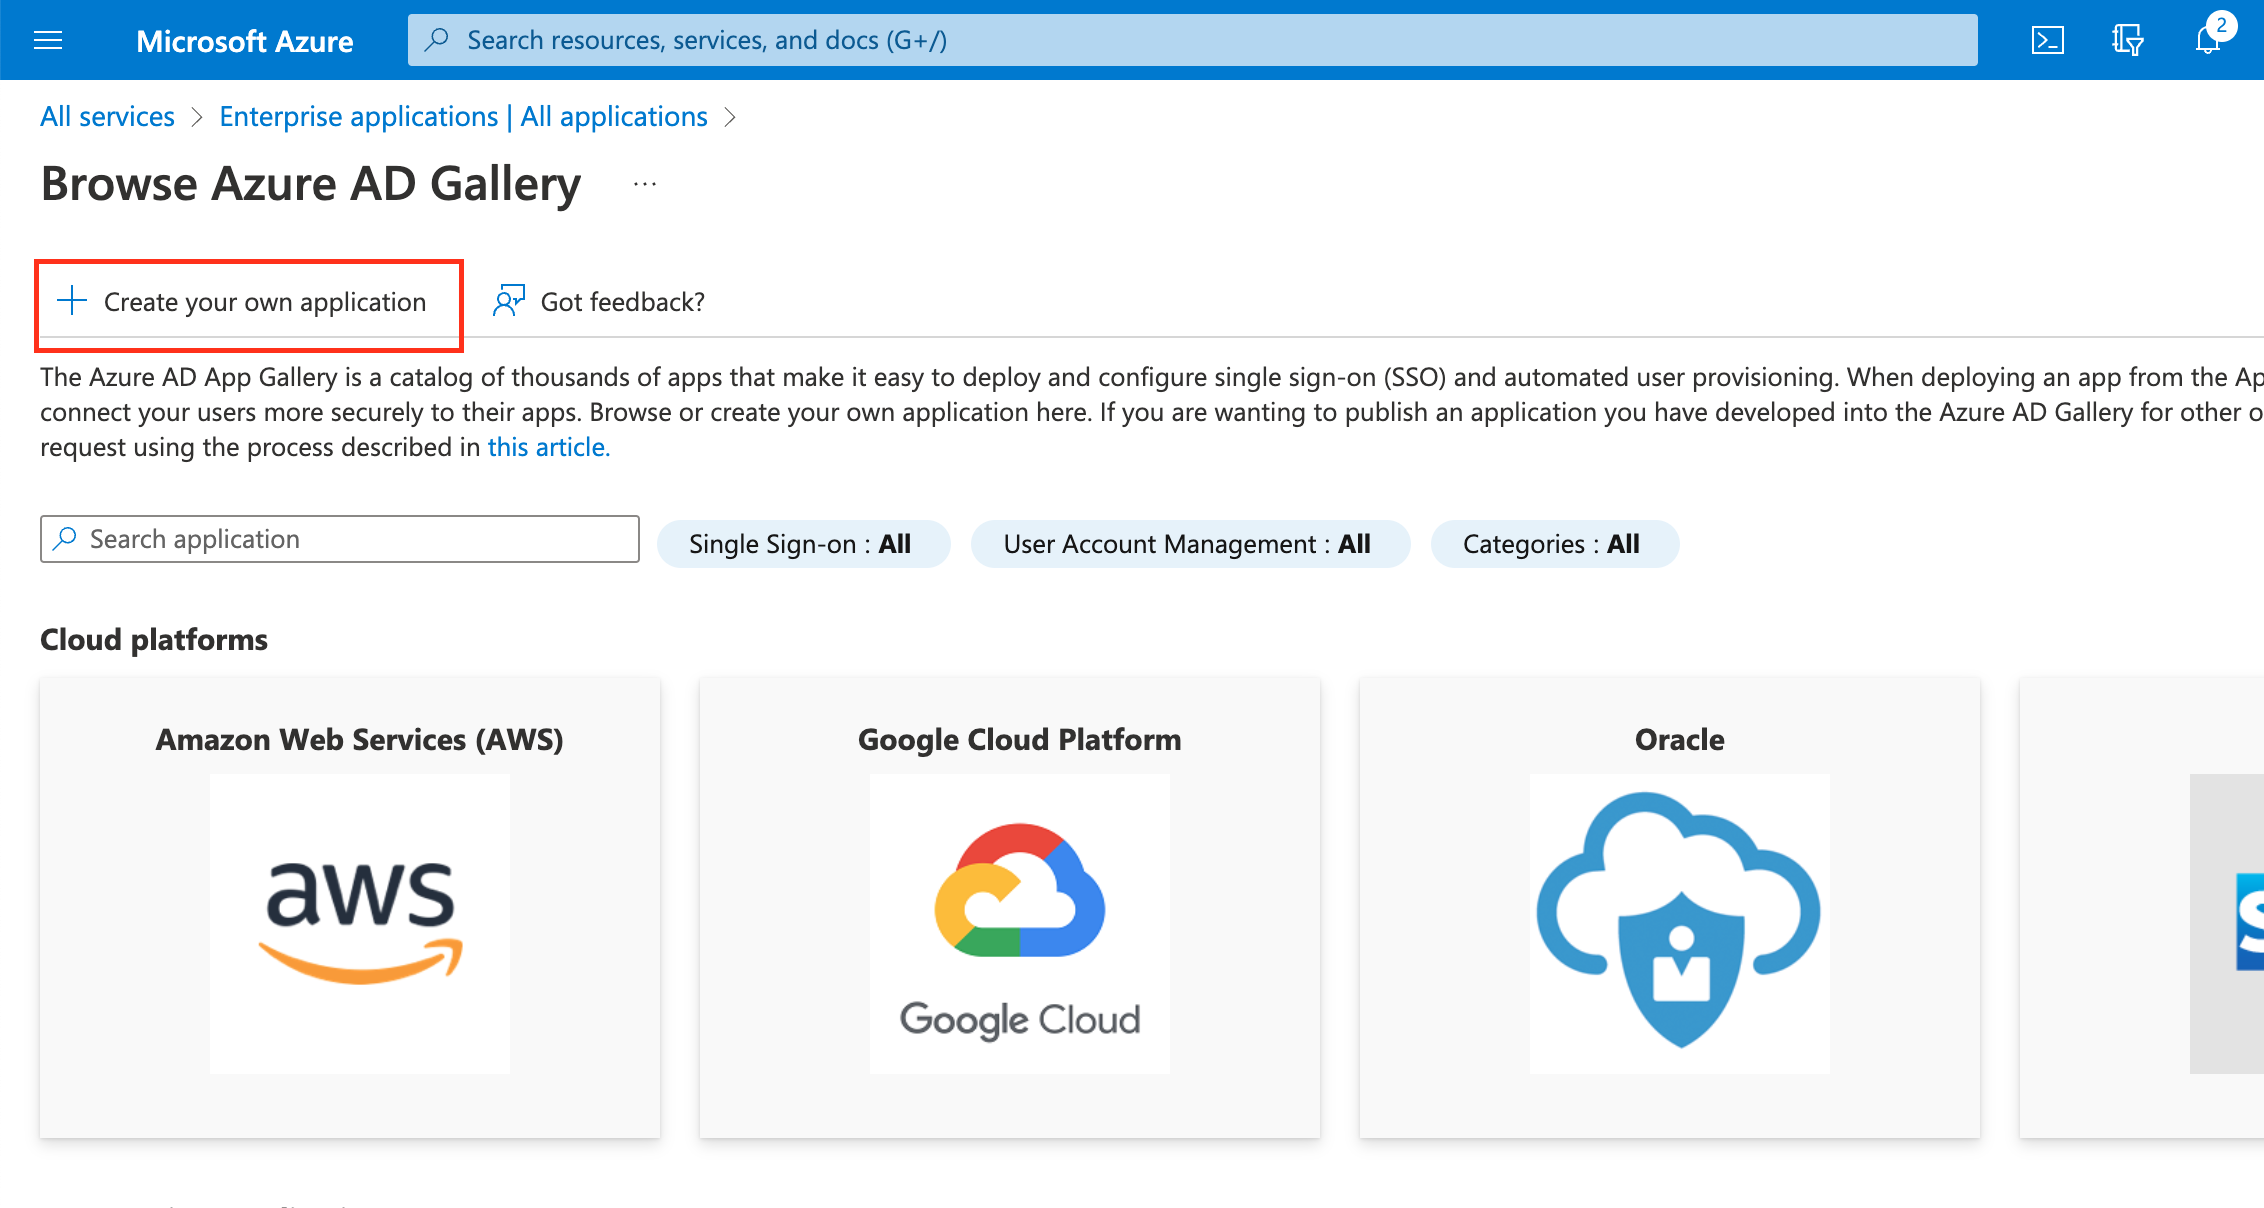
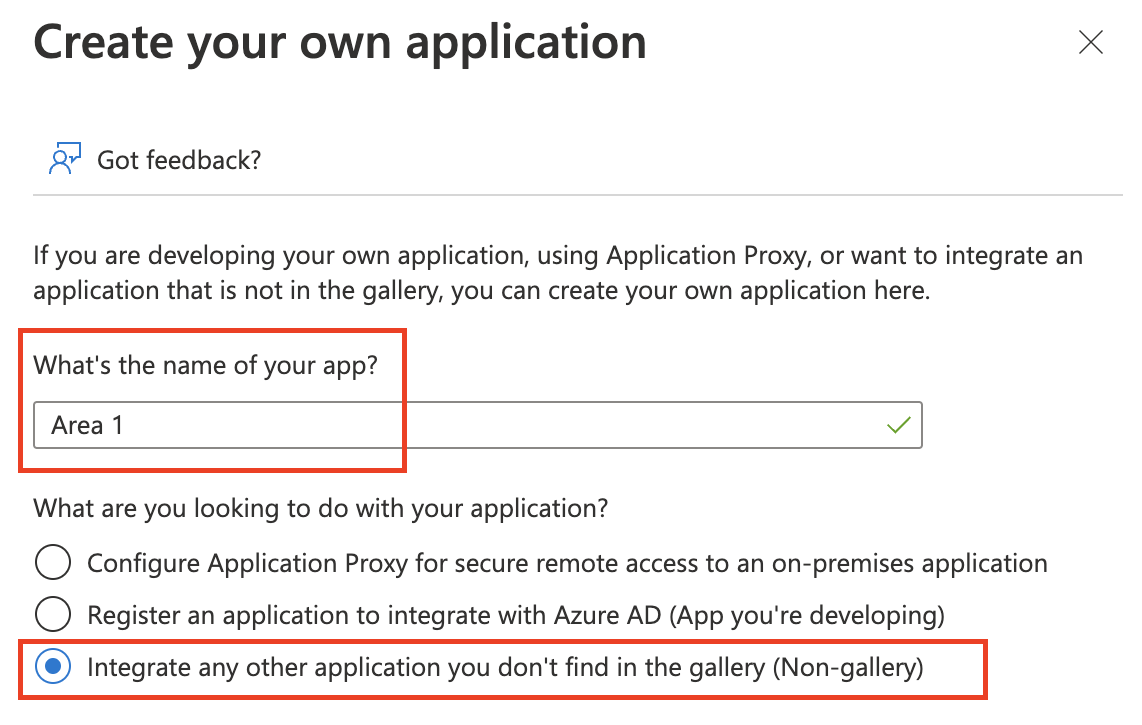
Input a descriptive name for your app and select Integrate any other application you don’t find in the gallery (Non-gallery) > Create.
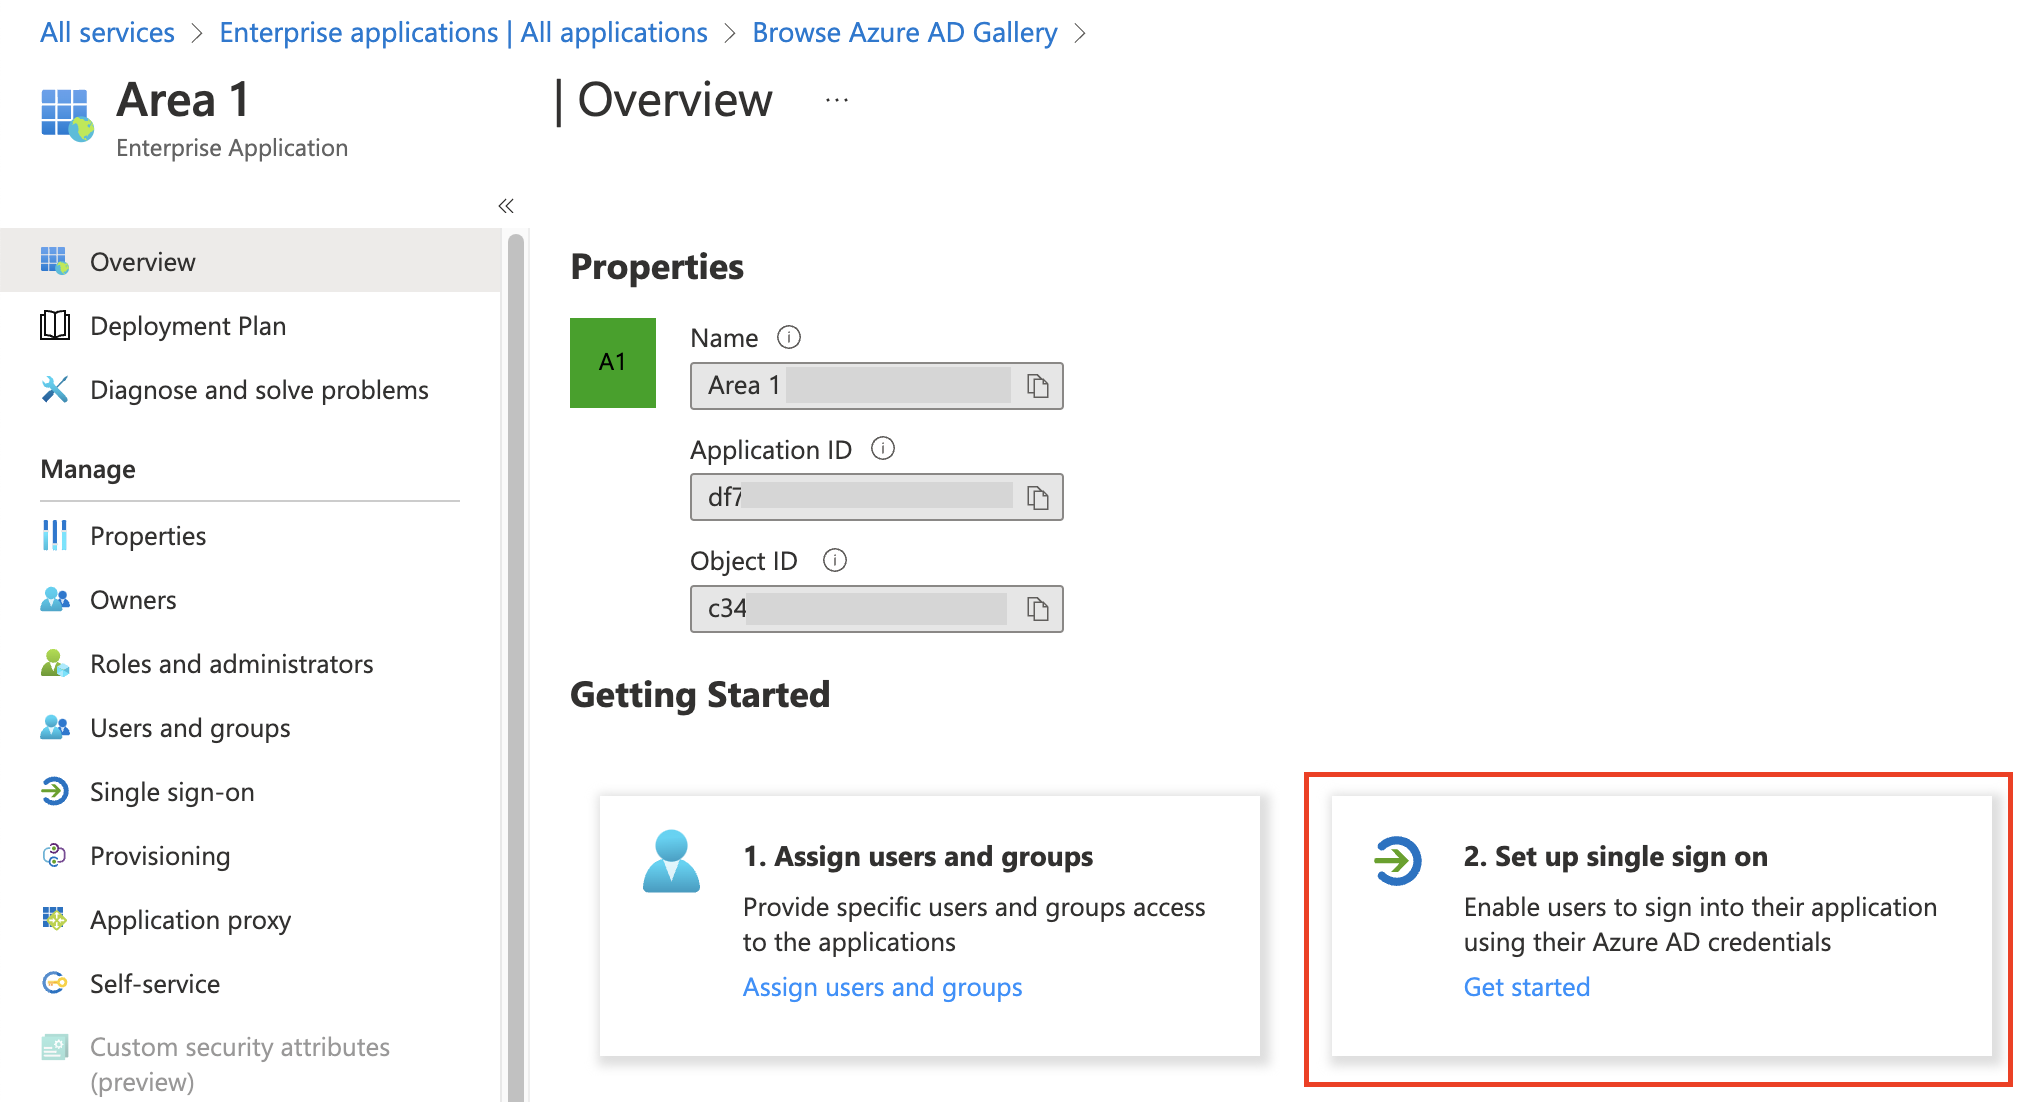
On the application Overview page that opens, select 2. Set up single sign on.
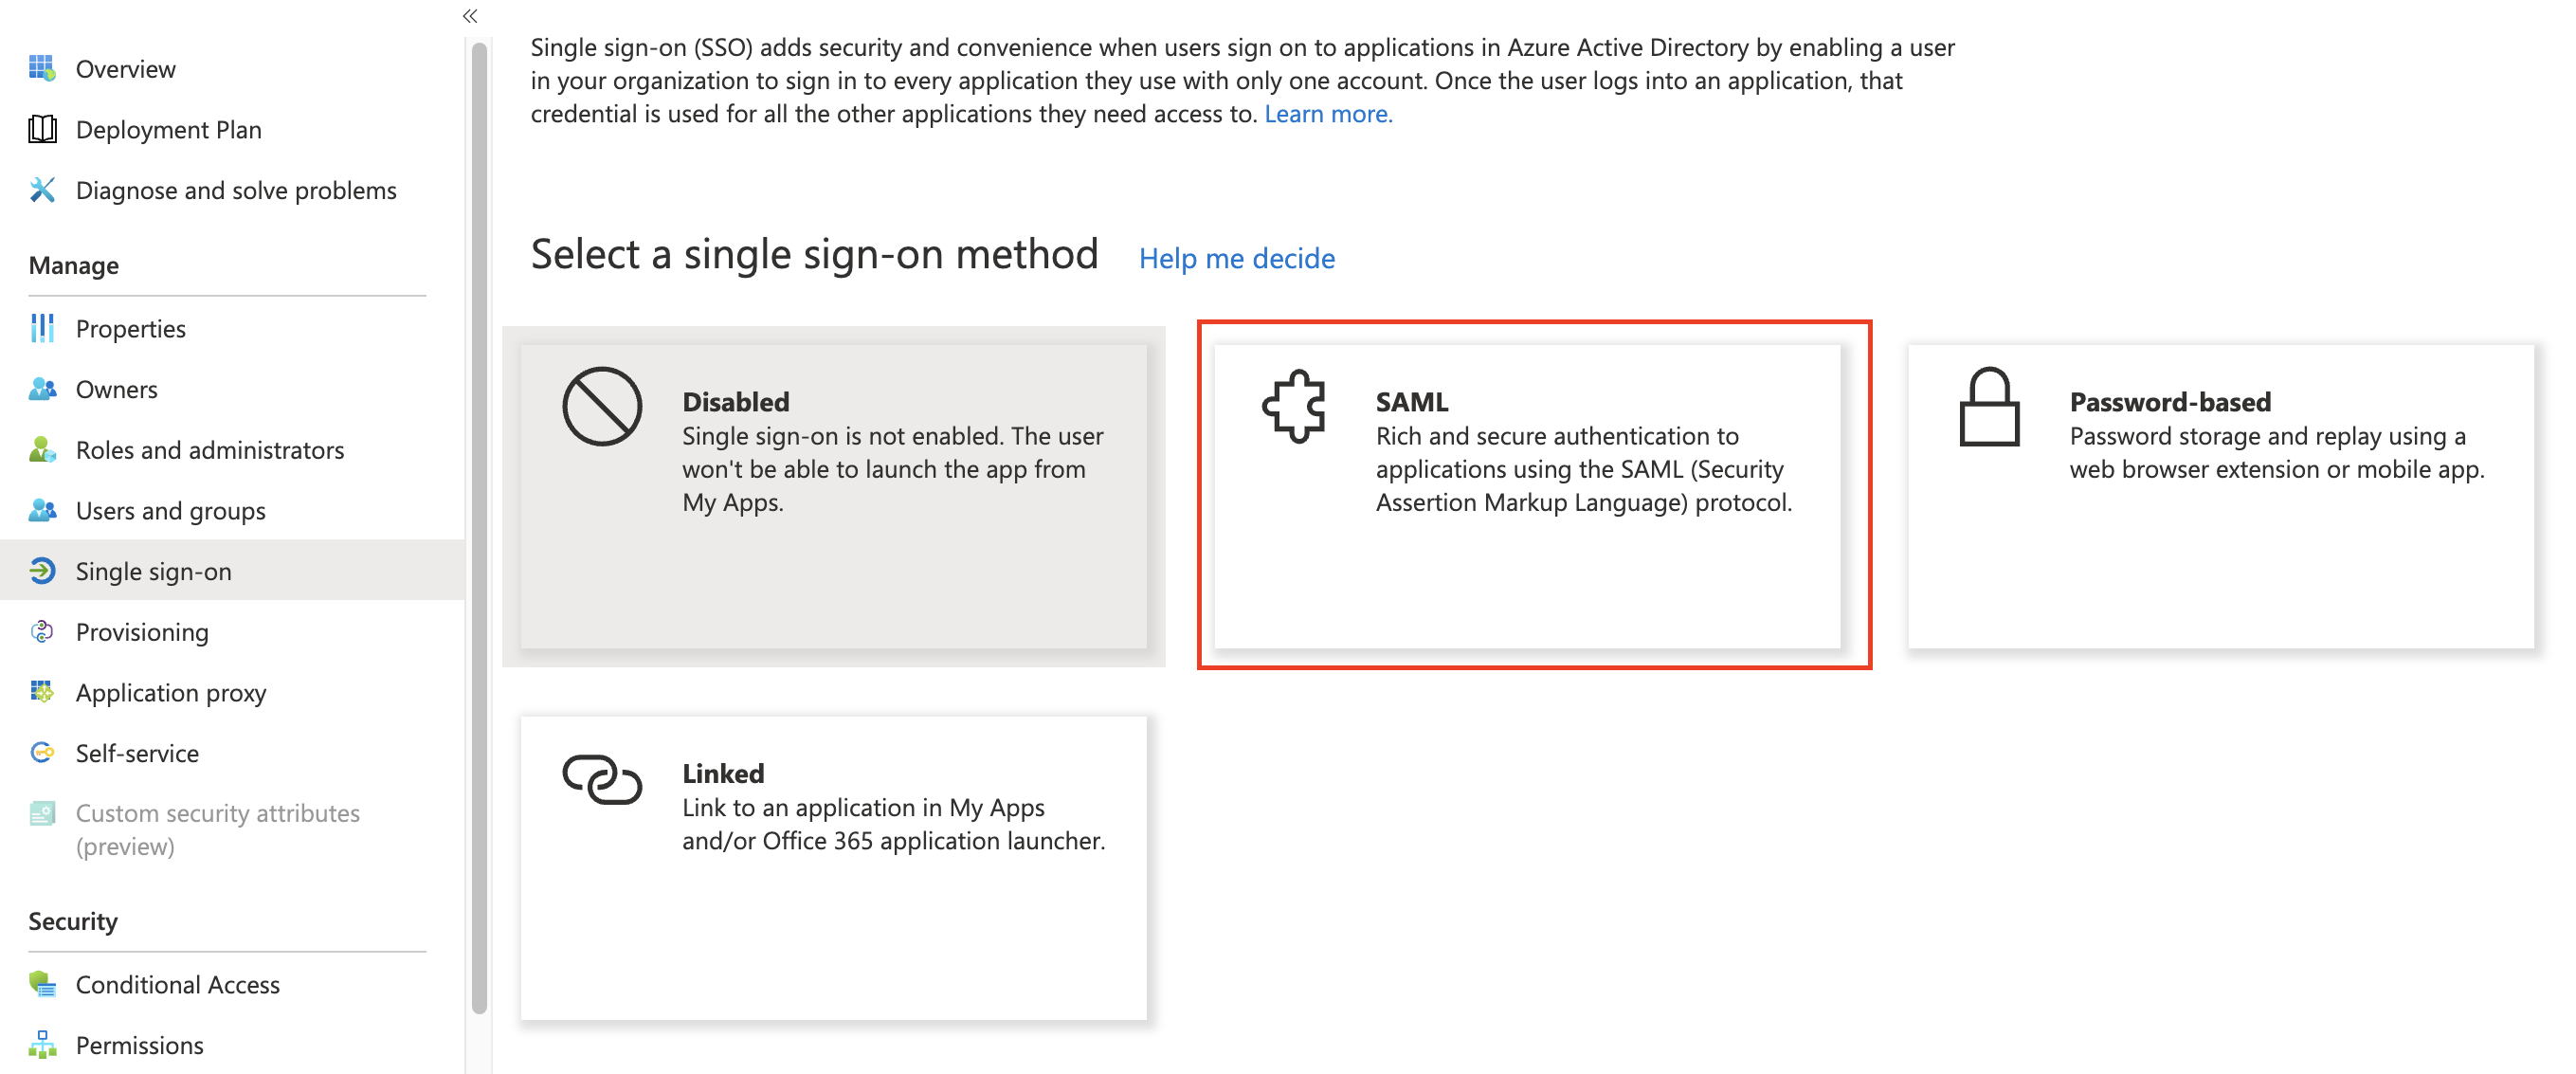
Select SAML as your single sign-on method.
Select the pencil icon to edit the Basic SAML Configuration.
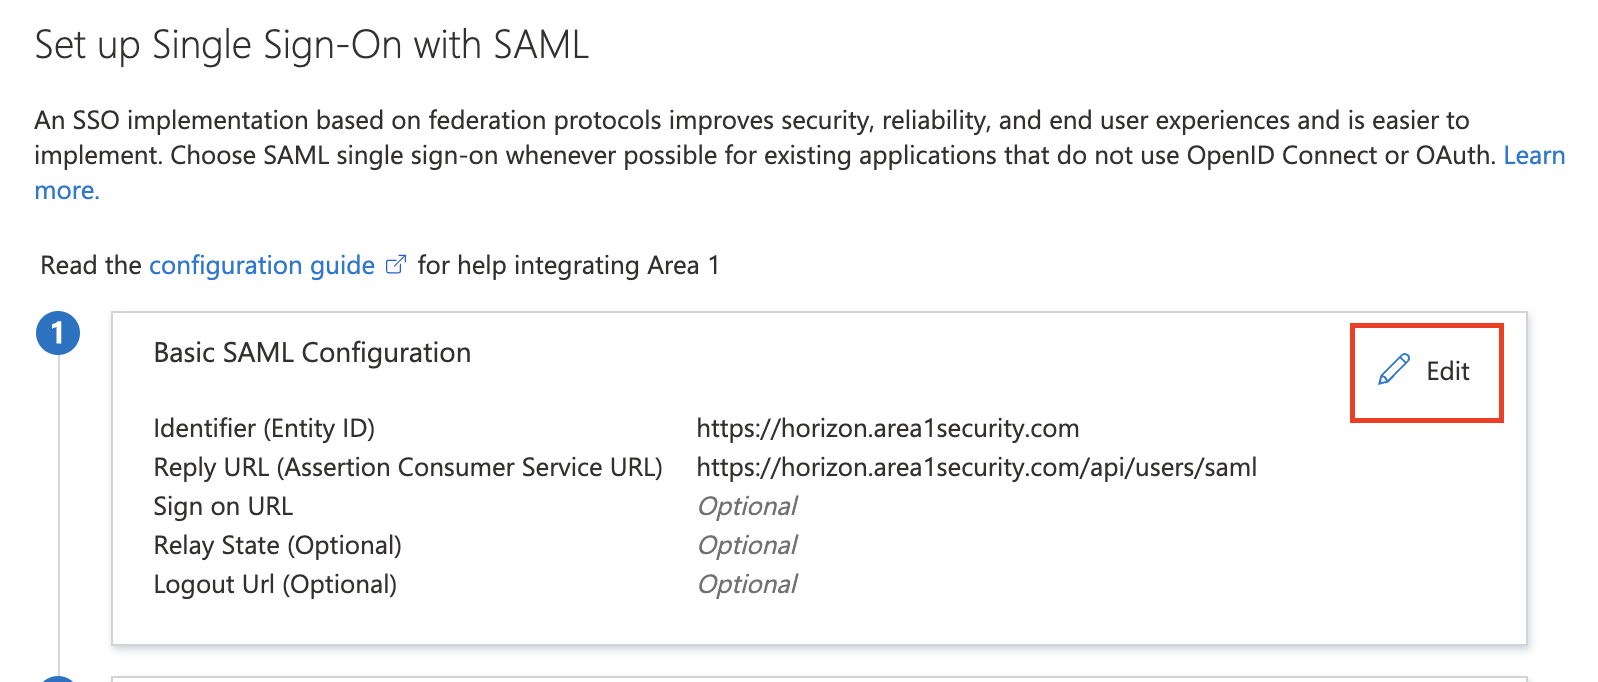
Enter the following configuration settings:
Identifier (Entity ID) https://horizon.area1security.comReply URL (Assertion Consumer Service URL) https://horizon.area1security.com/api/users/samlSign-On URL Leave blank Relay State Leave blank Logout URL Leave blank Select Save and the cross button to exit Basic SAML Configuration.
Select the pencil icon to edit SAML Certificates and make the following changes:
- Signing Option: Select Sign SAML response from the drop-down menu.
- Signing Algorithm: Select SHA-1 from the drop-down menu.

Select Save and the cross button to exit SAML Certificates.
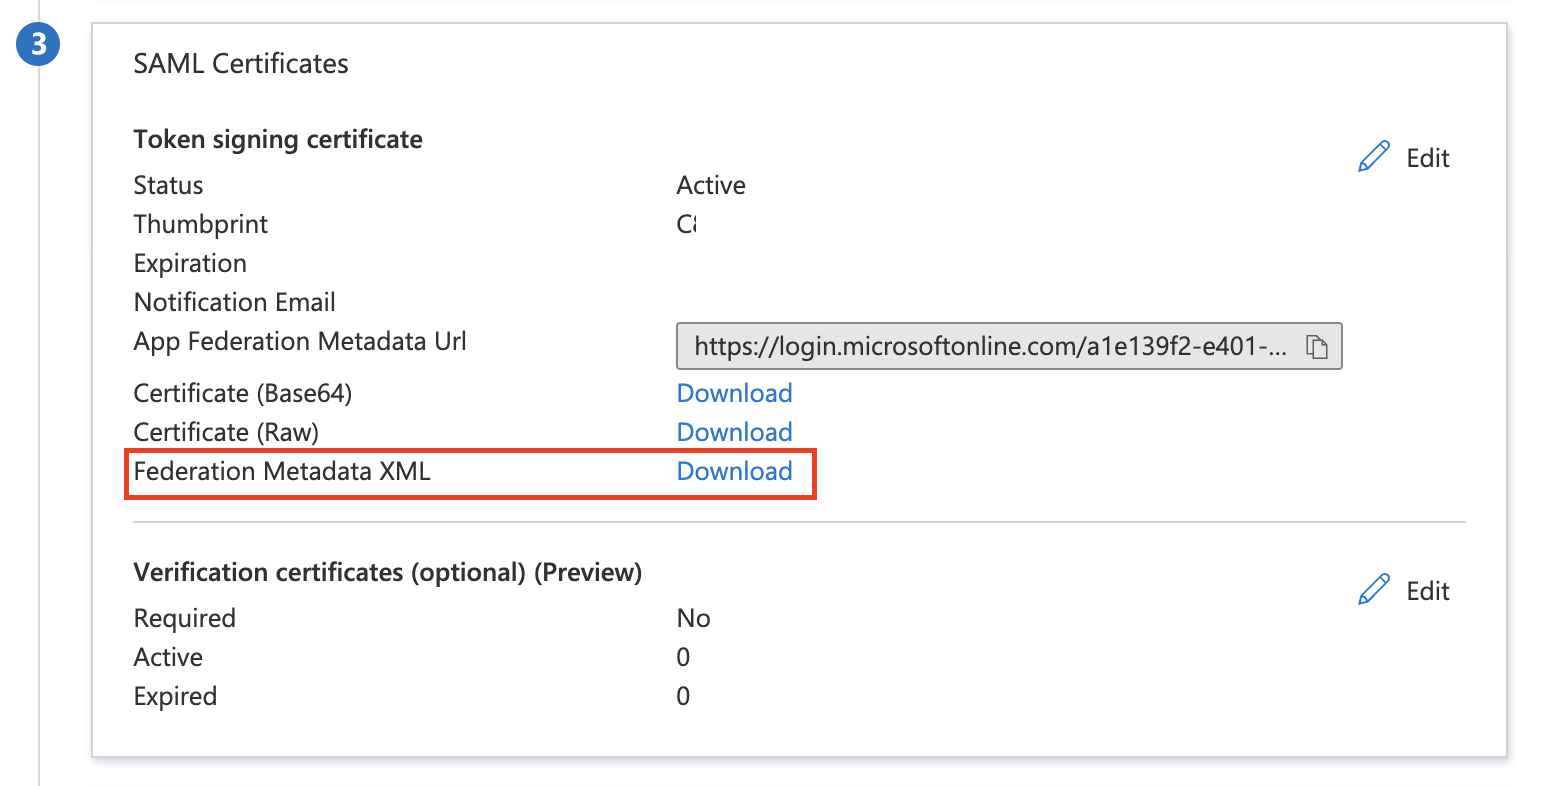
Still in the SAML Certificates section, find Federation Metadata XML and select Download. You will need this information for the SSO Configuration in the Cloud Email Security dashboard.
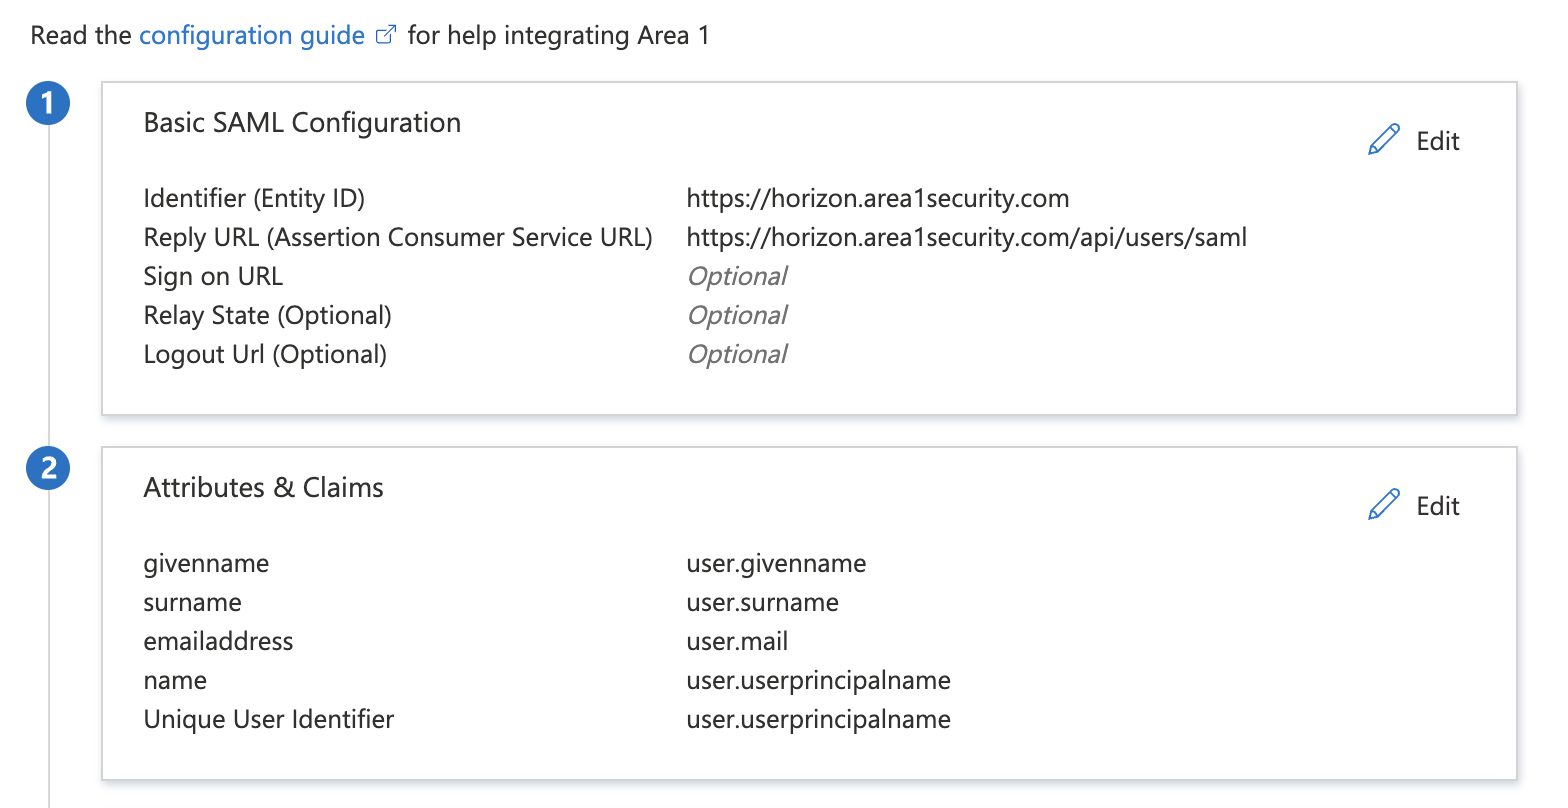
Your Azure configuration is now complete. It should look similar to this:
2. Configure Cloud Email Security to connect to Azure
Log in to the Cloud Email Security dashboard.
Go to Settings (the gear icon).
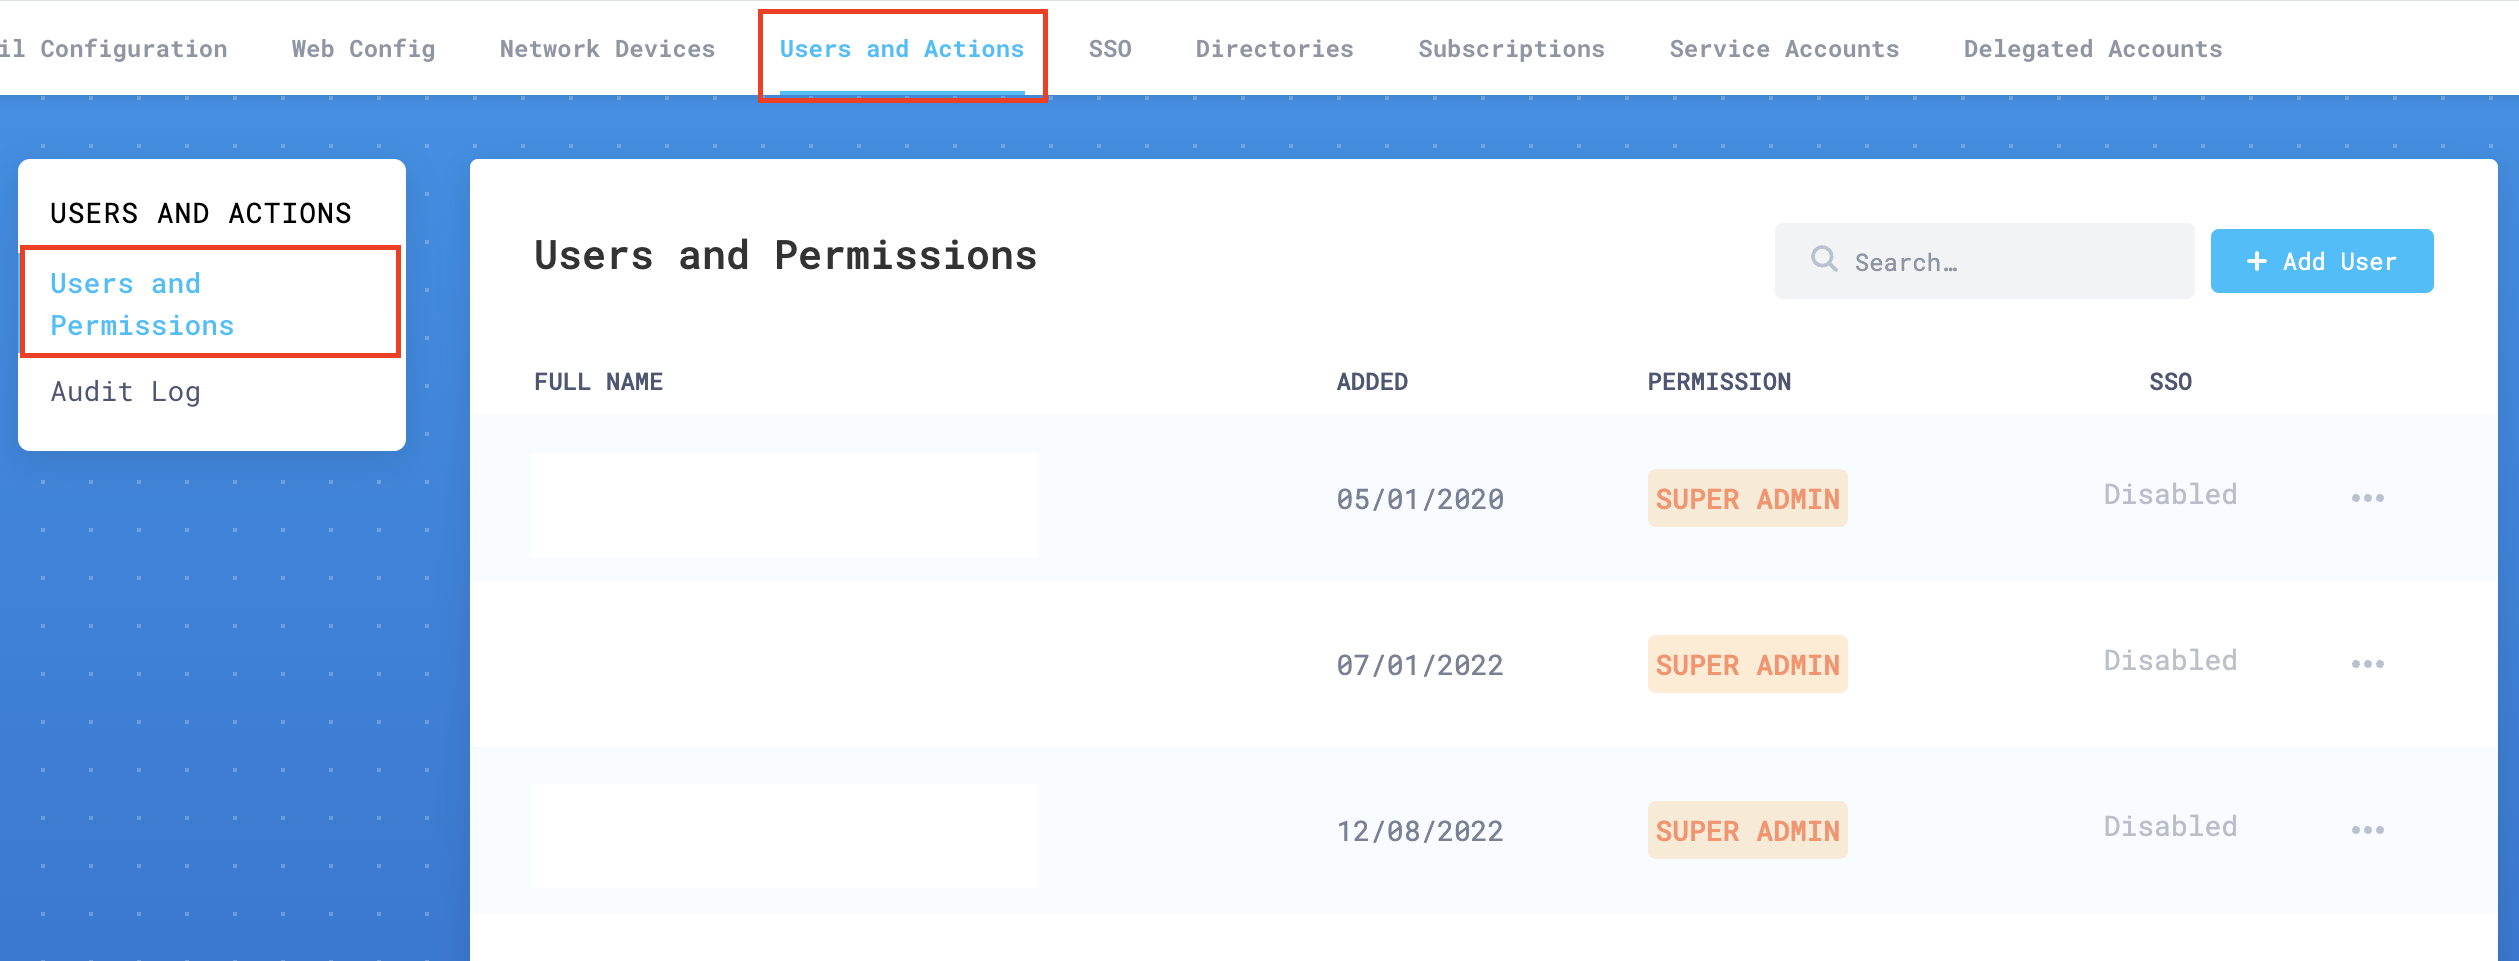
In Users and Actions > Users and Permissions add the email addresses of all your authorized administrators.
Go to SSO Settings, and enable Single Sign On.
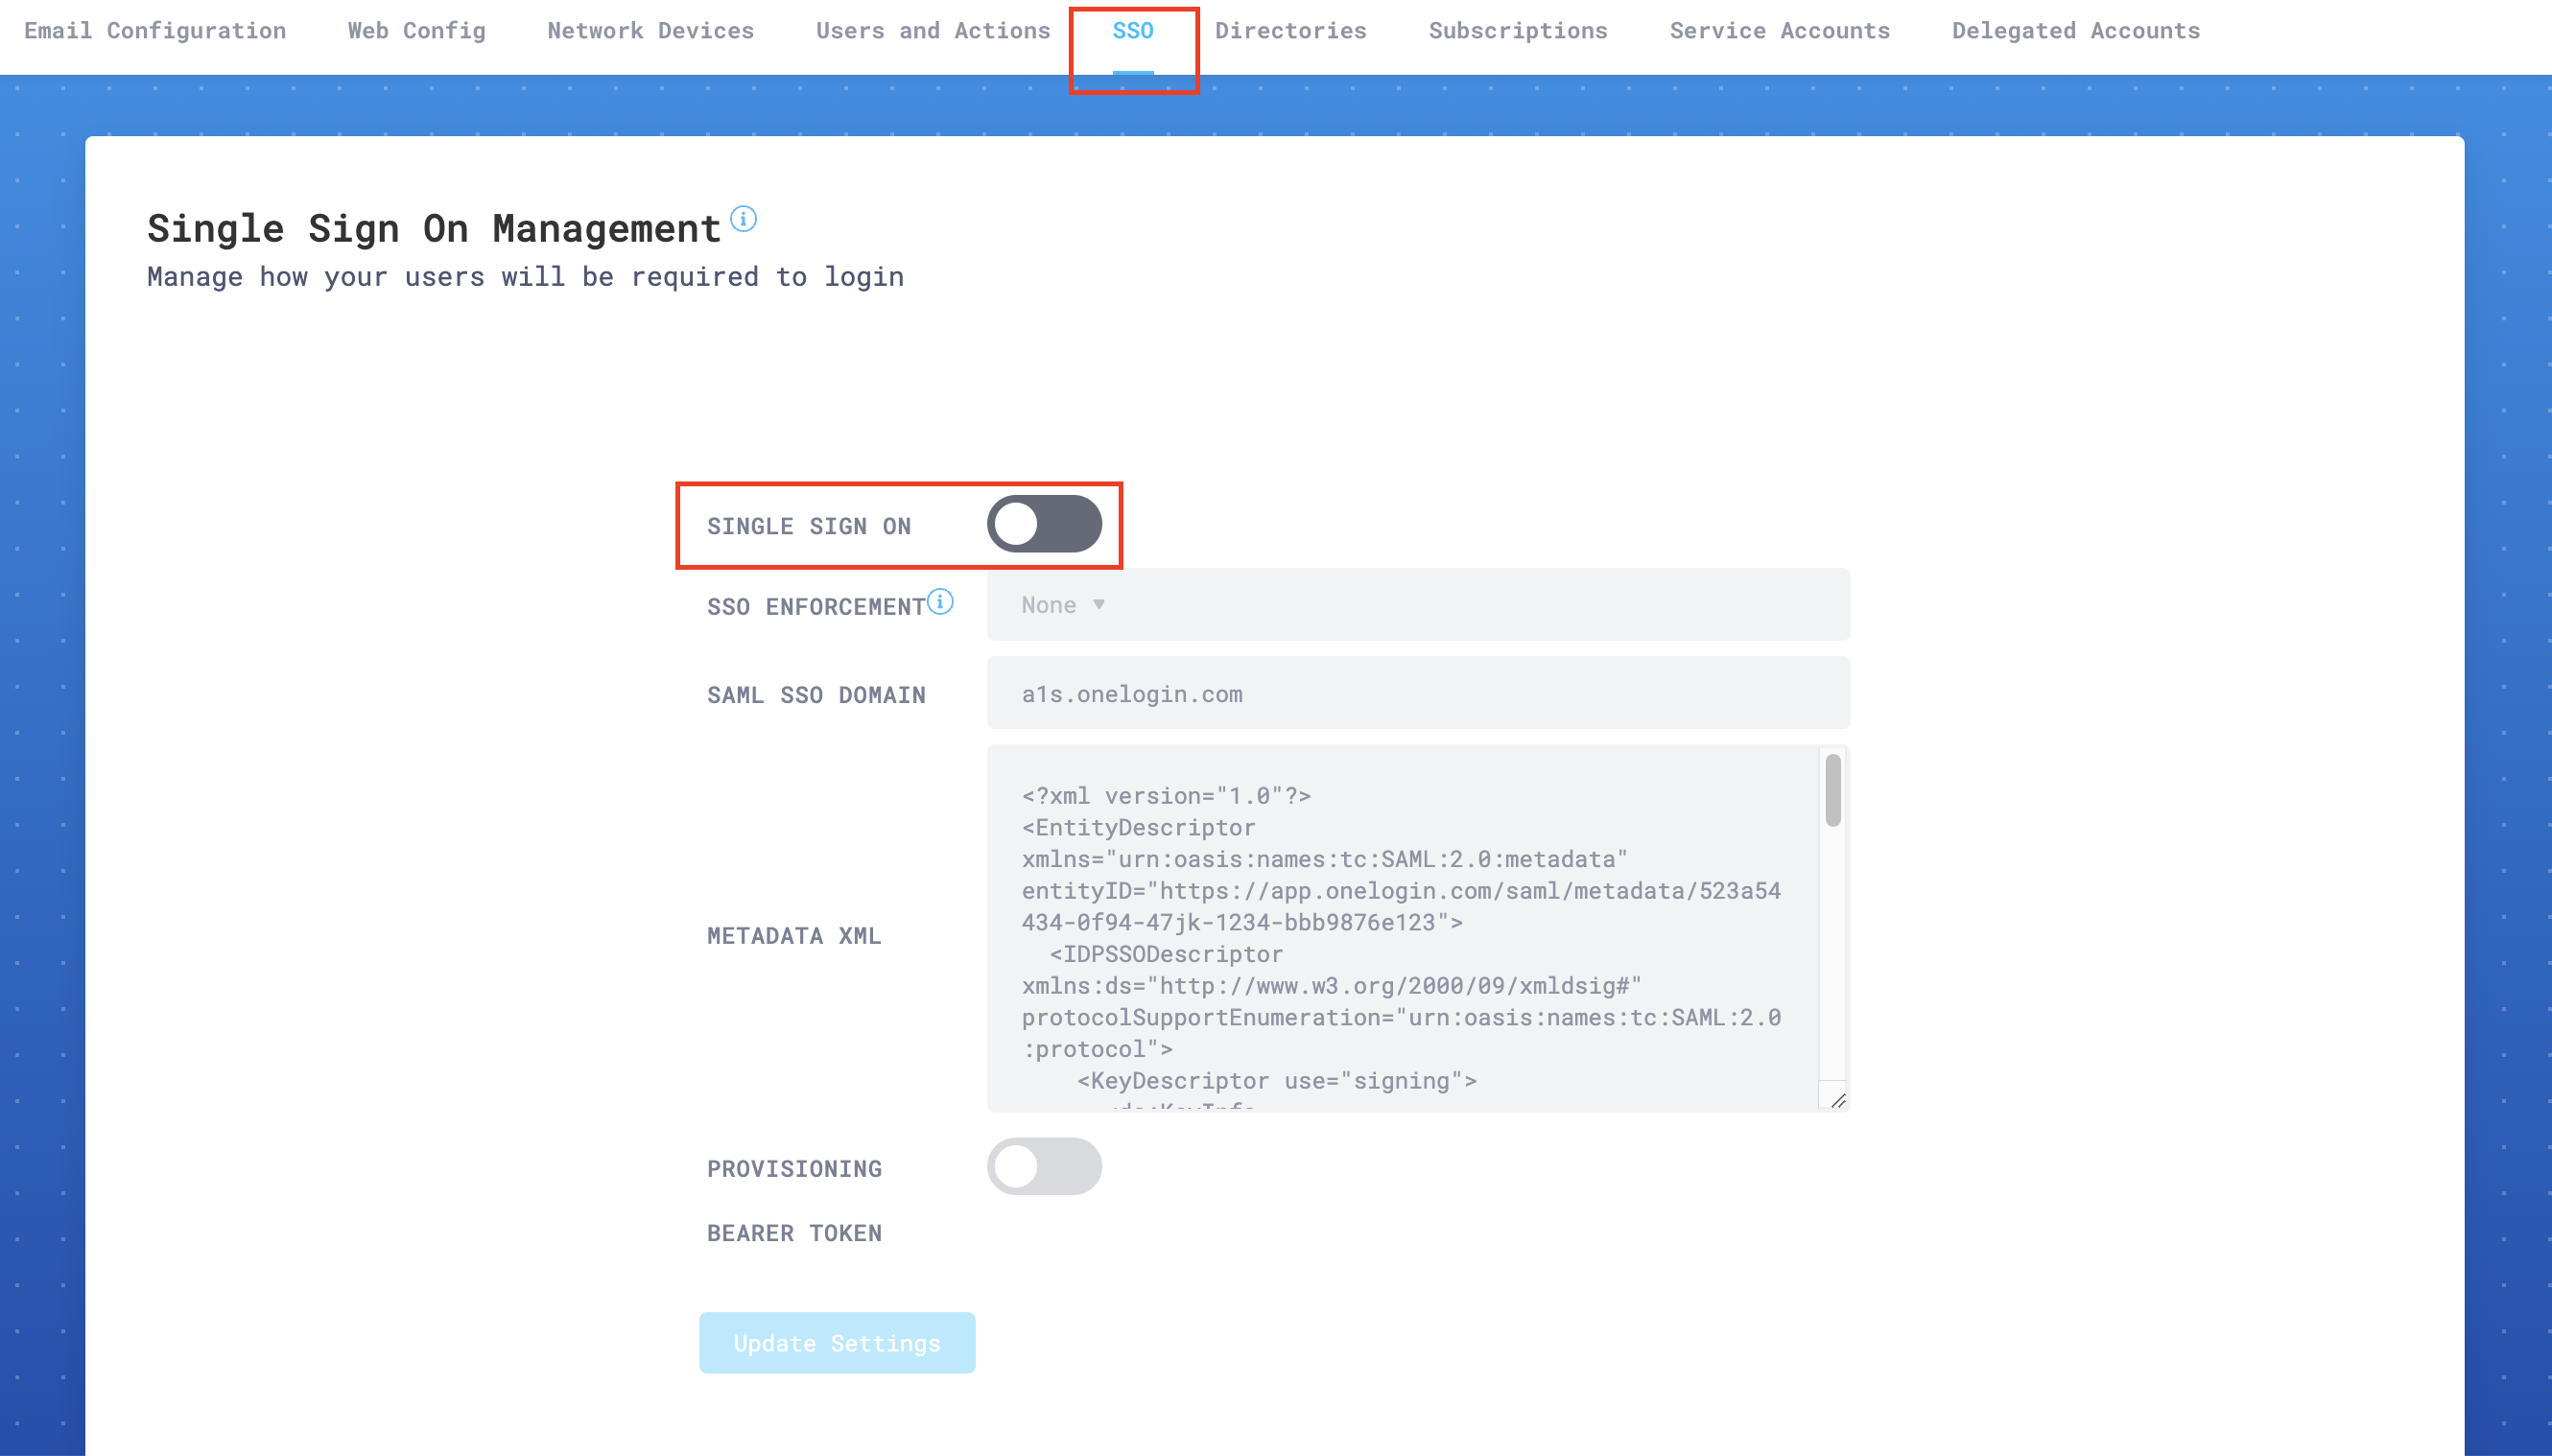
In SSO Enforcement, choose one of the settings according to your specific needs:
- None: This setting allows each user to choose SSO, or username and password plus 2FA (this is the recommended setting while testing SSO).
- Admin: This setting will force only the administrator account to use SSO. The user that enables this setting will still be able to log in using username and password plus 2FA. This is a backup, so that your organization does not get locked out of the portal in emergencies.
- Non-Admin Only: This option will require that all
Read onlyandRead & Writeusers use SSO to access the portal. Admins will still have the option to use either SSO or username and password plus 2FA.
For SAML SSO Domain, enter
login.microsoftonline.com.In Metadata XML paste the XML metadata you downloaded in the previous step 11. You can open the downloaded file with a text editor to copy all the text. Make sure there are no leading carriage returns or spaces when you copy the text. Your copied text should begin with:
<?xml version="1.0" encoding="utf-8"?><EntityDescriptor ID="_<YOUR_DESCRIPTOR_ID>" entityID="https://<YOUR_ENTITY_ID> " xmlns="urn:oasis:names:tc:SAML:2.0:metadata">...Select Update Settings to save your configuration.
3. Test SSO configuration
After completing both the Azure and Cloud Email Security set ups, you can test your SSO access. In this example, the logo for Cloud Email Security has been updated.
Log in to your Office 365 portal.
Select All Apps.
Go to Settings > SSO.
Locate the Cloud Email Security Horizon application (or whichever name you gave your application), and select it to initiate your SSO login with Cloud Email Security.
If you configured everything correctly, you should be signed in to the Cloud Email Security Portal and redirected to the dashboard.
Troubleshooting
If you have trouble connecting your Azure account to Cloud Email Security, make sure that:
- The user exists in the Cloud Email Security dashboard.
- The Identifier and Reply URLs in Azure AD are correct (refer to Basic SAML Configuration in step 7 of Azure Active Directory configuration).
- Sign SAML response and SHA-1 are selected in Azure AD (refer to SAML Certificates in step 9 of Azure Active Directory configuration).
- The SAML SSO Domain is set correctly in the Cloud Email Security dashboard (refer to step 6 in Configure Cloud Email Security to connect to Azure).
- The name ID identifier is set to Email Address.
If all else fails, enable Chrome browser debug logs. Then, log your activity when SSO is initiated, and contact Cloudflare support.