Deploy and configure Google Workspace with Cloud Email Security as MX Record
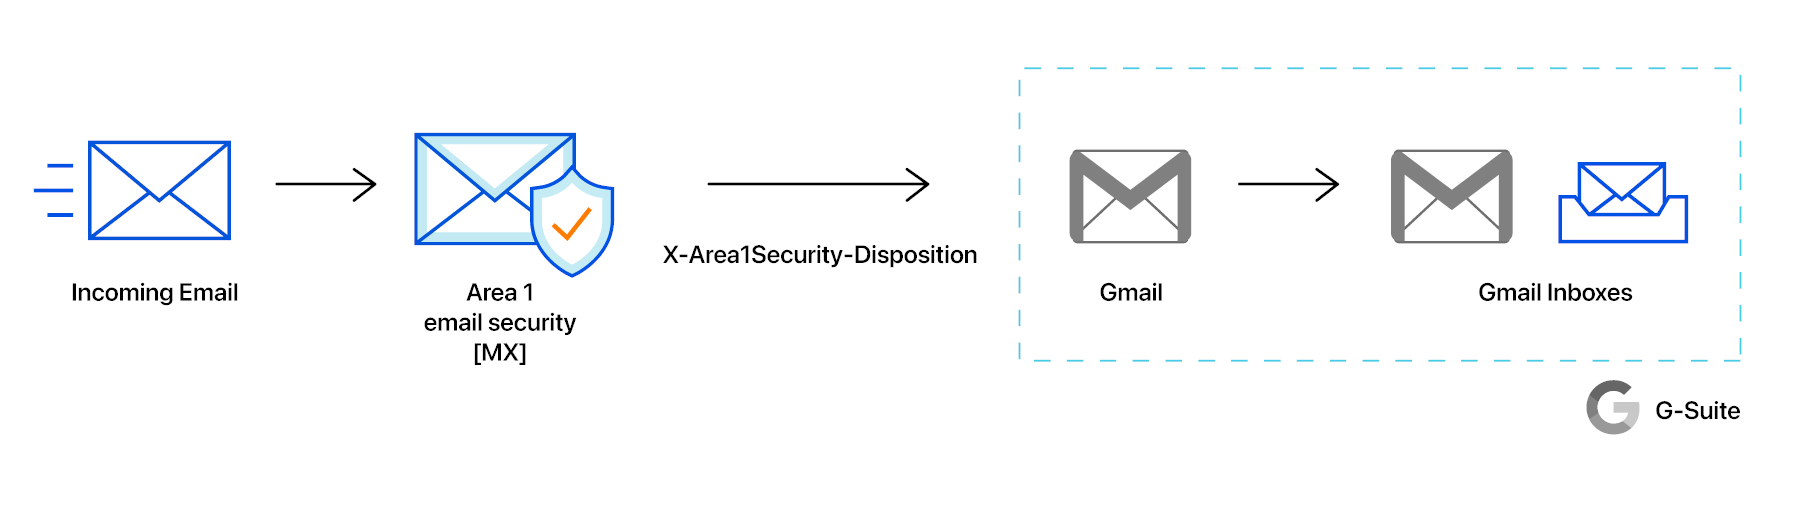
In this tutorial, you will learn how to configure Google Workspace with Cloud Email Security as MX record. This tutorial is broken down into several steps.
Requirements
- Provisioned Cloud Email Security account.
- Access to the Google administrator console ( Google administrator console > Apps > Google Workspace > Gmail).
- Access to the domain nameserver hosting the MX records for the domains that will be processed by Cloud Email Security.
Prerequisites
To ensure changes made in this tutorial take effect quickly, update the Time to Live (TTL) value of the existing MX records on your domains to five minutes. Do this on all the domains you will be deploying.
Changing the TTL value instructs DNS servers on how long to cache this value before requesting an update from the responsible nameserver. You need to change the TTL value before changing your MX records to Cloudflare Cloud Email Security (formerly Area 1). This will ensure that changes take effect quickly and can also be reverted quickly if needed. If your DNS manager does not allow for a TTL of five minutes, set it to the lowest possible setting.
To check your existing TTL, open a terminal window and run the following command against your domain:
$ dig mx <YOUR_DOMAIN>

; <<>> DiG 9.10.6 <<>> mx <YOUR_DOMAIN>;; global options: +cmd;; Got answer:;; ->>HEADER<<- opcode: QUERY, status: NOERROR, id: 39938;; flags: qr rd ra; QUERY: 1, ANSWER: 5, AUTHORITY: 0, ADDITIONAL: 1
;; OPT PSEUDOSECTION:; EDNS: version: 0, flags:; udp: 4096;; QUESTION SECTION:;domain.		IN	MX
;; ANSWER SECTION:<YOUR_DOMAIN>.	300	IN	MX	5 mailstream-central.mxrecord.mx.<YOUR_DOMAIN>.	300	IN	MX	10 mailstream-east.mxrecord.io.<YOUR_DOMAIN>.	300	IN	MX	10 mailstream-west.mxrecord.io.
In the above example, TTL is shown in seconds as 300 (or five minutes).
If you are using Cloudflare for DNS, you can leave the TTL setting as Auto.
Below is a list with instructions on how to edit MX records for some popular services:
- Cloudflare: Set up email records
- GoDaddy: Edit an MX Record
- AWS: Creating records by using the Amazon Route 53 console
- Azure: Create DNS records in a custom domain for a web app
1. Add Cloud Email Security IP addresses to the Inbound gateway configuration
When Cloud Email Security is deployed as the MX record for Google Workspace, the Inbound gateway needs to be configured such that Google Workspace is aware that it is no longer the MX record for the domain. This is a critical step as it will allow Google Workspace to accept messages from Cloud Email Security.
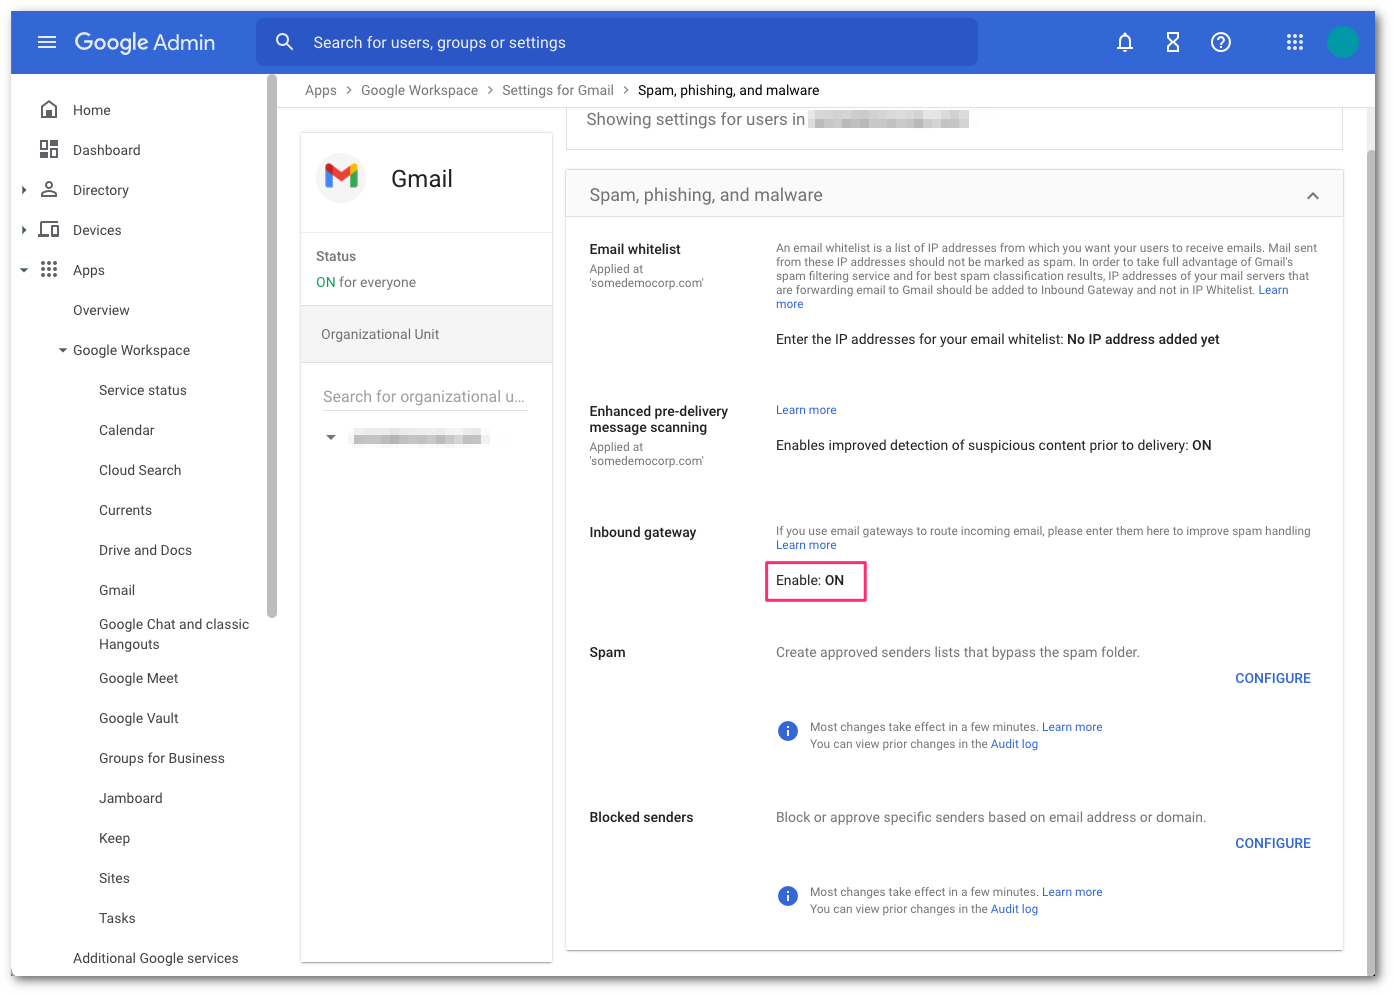
Go to the Google Administrative Console.
Go to Apps > Google Workspace > Gmail.
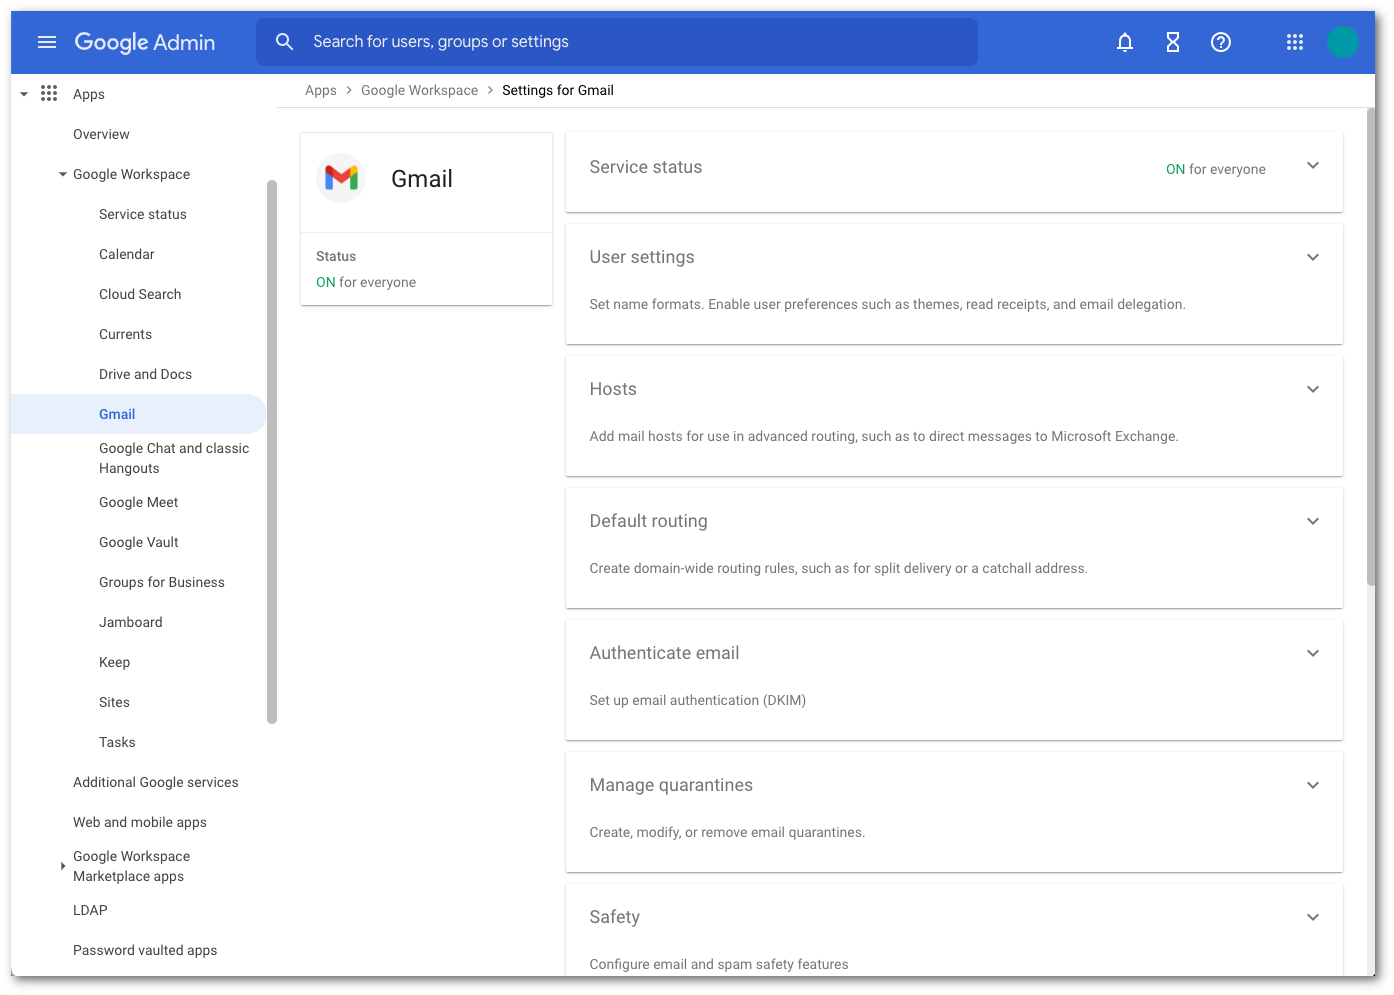
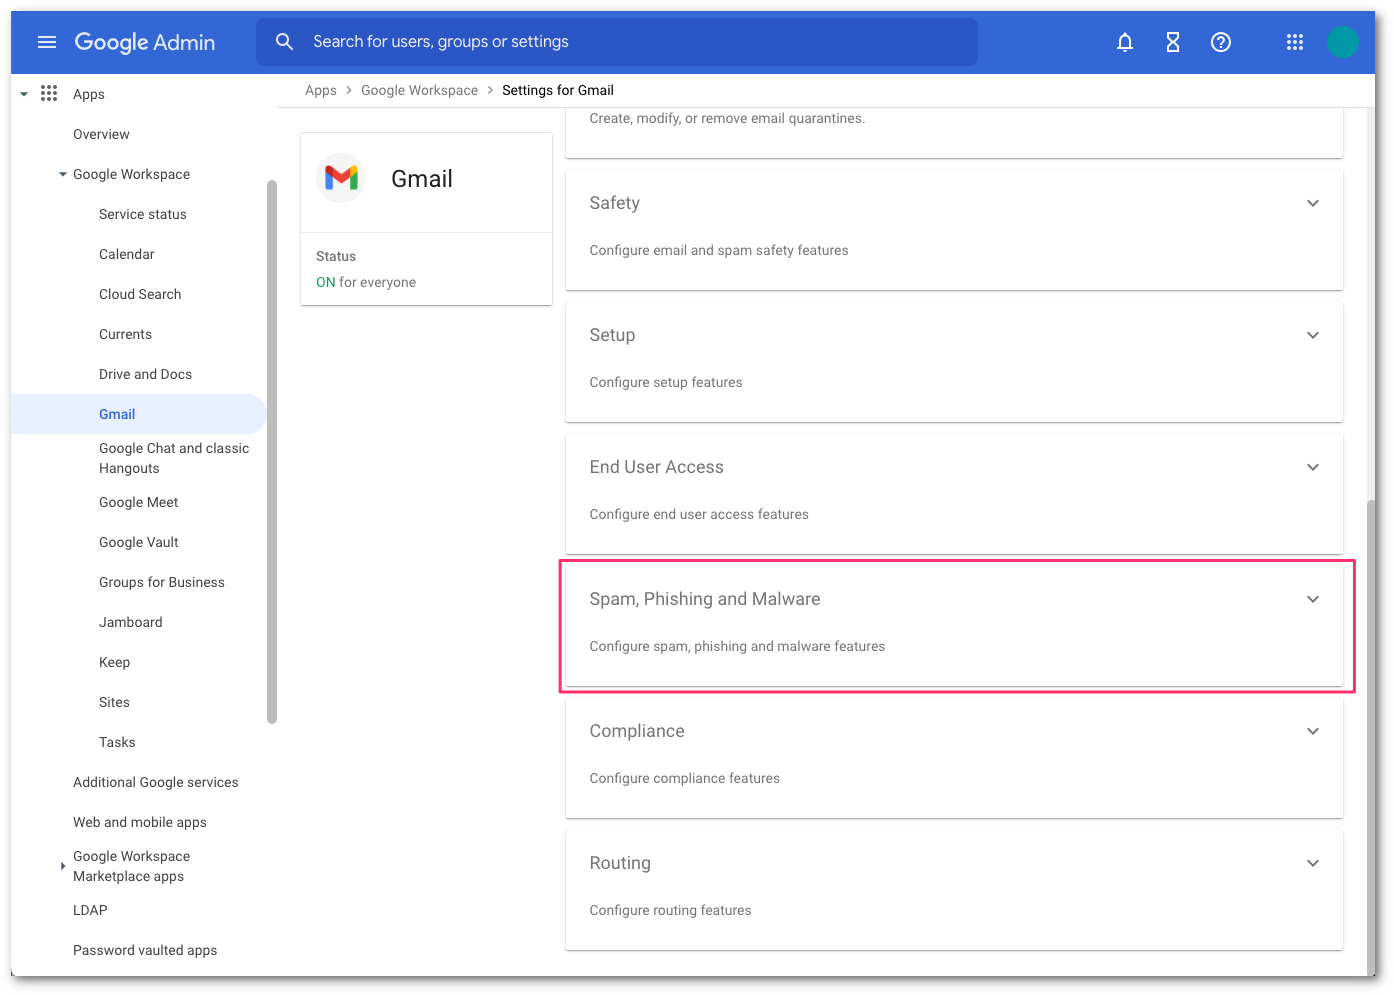
Select Spam, Phishing, and Malware and scroll to Inbound Gateway configuration.
Enable Inbound Gateway, and configure it with the following details:
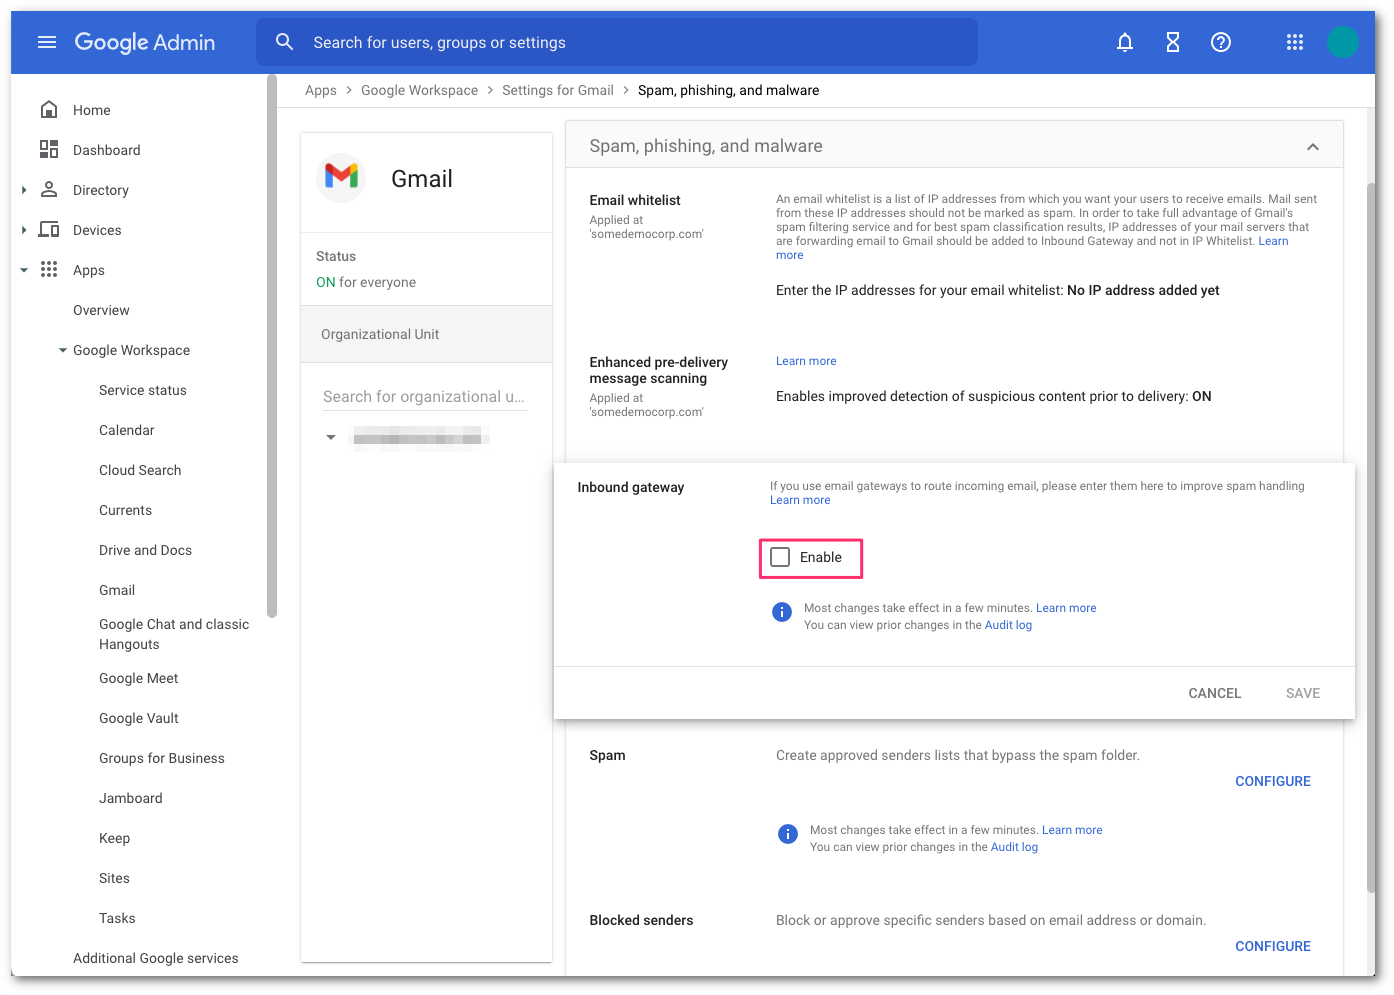
- In Gateway IPs, select the Add link, and add the IPs mentioned in Egress IPs.
- Select Automatically detect external IP (recommended).
- Select Require TLS for connections from the email gateways listed above.
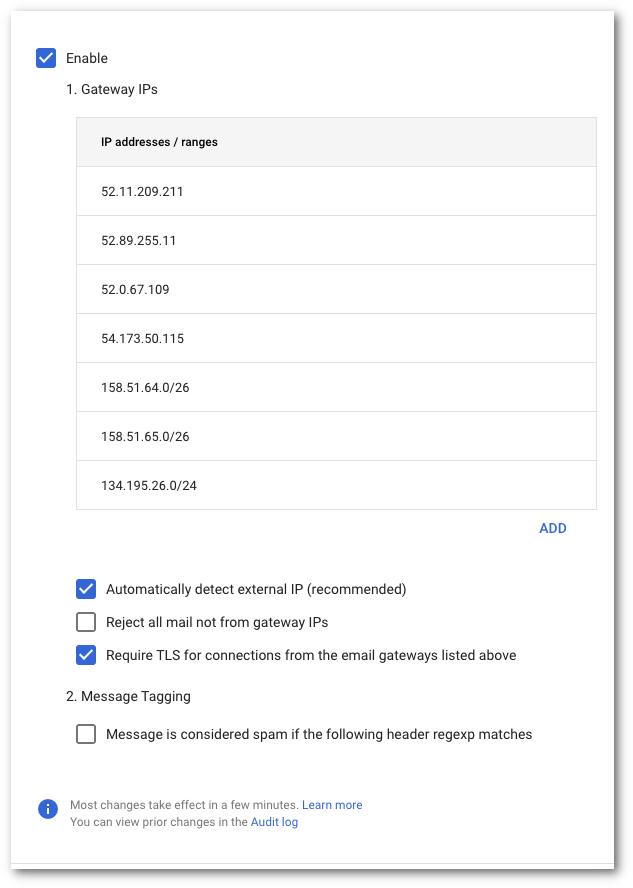
Select the Save button at the bottom of the dialog box to save the configuration once the details have been entered. Once saved, the administrator console will show the Inbound Gateway as enabled.
2. Quarantine malicious detections
This optional step is highly recommended to prevent users from being exposed to malicious messages.
When messages are identified as malicious, Cloud Email Security will insert the X-header X-Area1Security-Disposition into the message with the corresponding disposition. Based on the value of the X-Area1Security-Disposition, a content compliance filter can be configured to send malicious detections to an administrative quarantine. This section will outline the steps required to:
- Create an Cloud Email Security Malicious quarantine.
- Create the content compliance filter to send malicious messages to quarantine.
Create Cloud Email Security Malicious Quarantine
If you would like to send Cloud Email Security malicious detection to a separate quarantine other than the default quarantine, you will need to create a new quarantine.
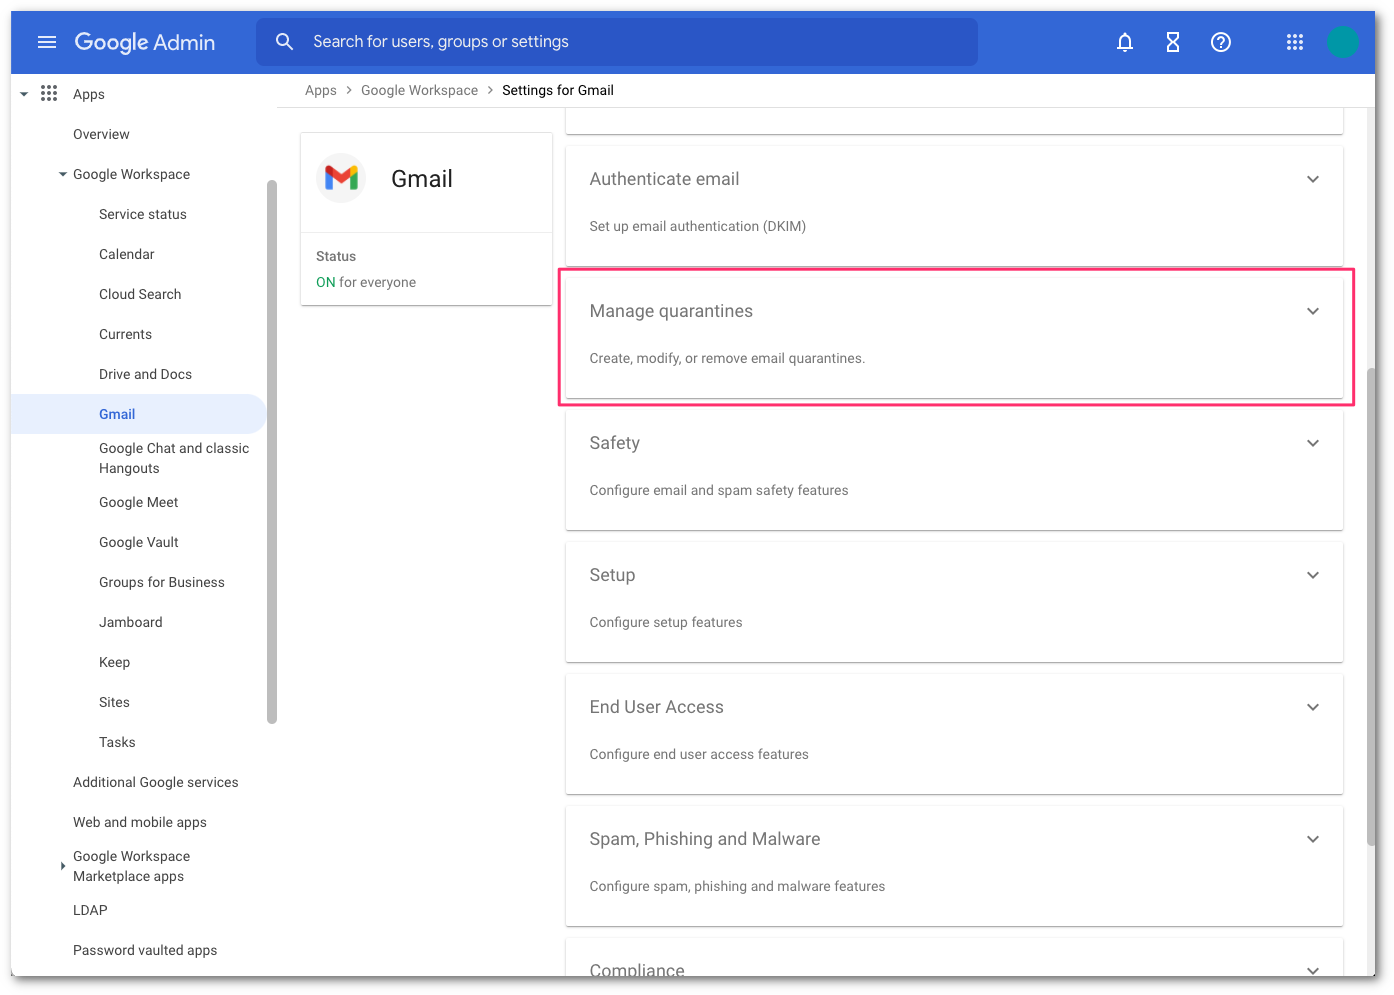
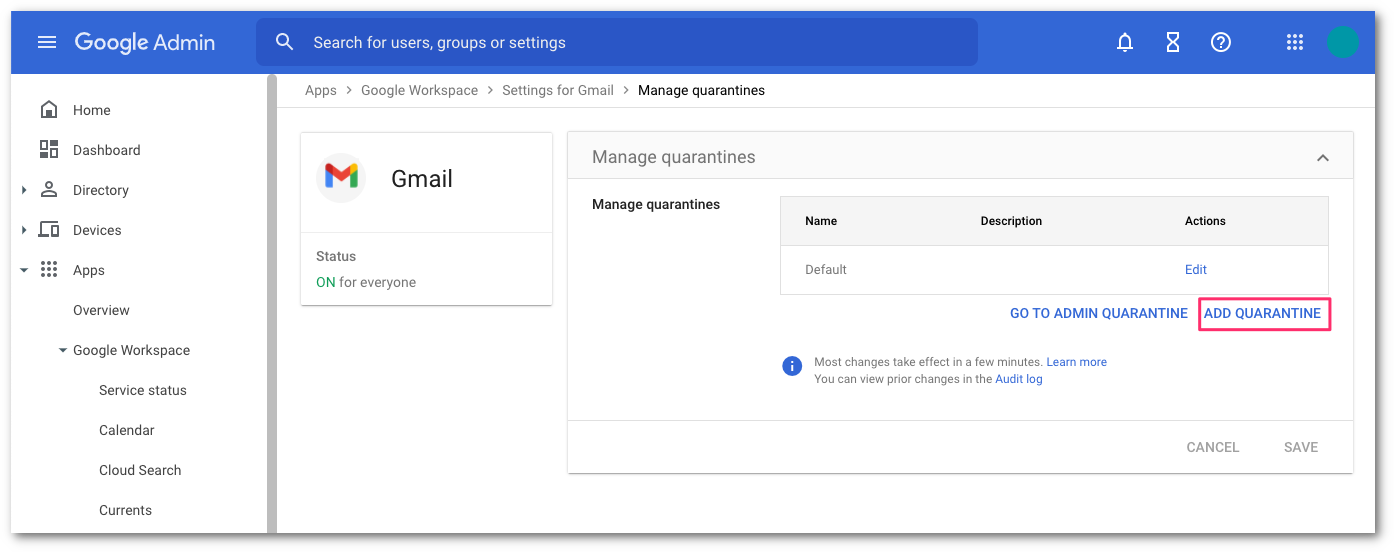
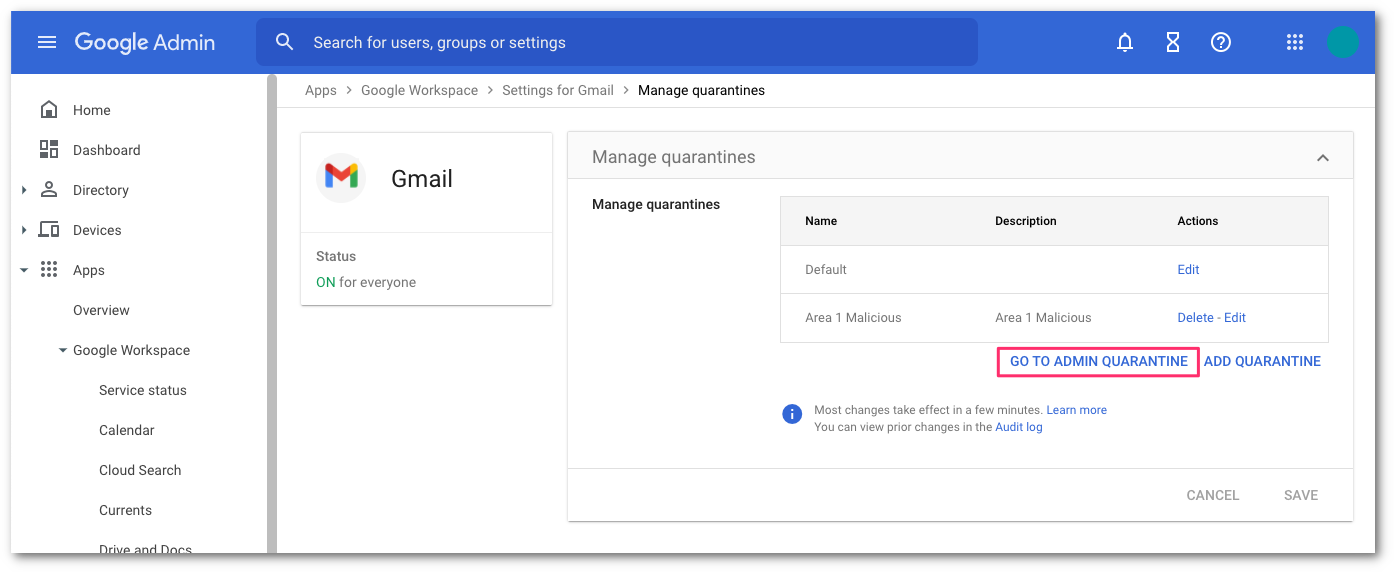
In Google’s administrative console, select the Manage quarantines panel.
Select ADD QUARANTINE to configure the new quarantine. This will bring up a pop-up for the configuration details.
In the quarantine configuration pop-up, enter the following:
- Name:
Cloud Email Security Malicious. - Description:
Cloud Email Security Malicious. - For the Inbound denial consequence, select Drop Message.
- For the Outbound denial consequence, select Drop Message.
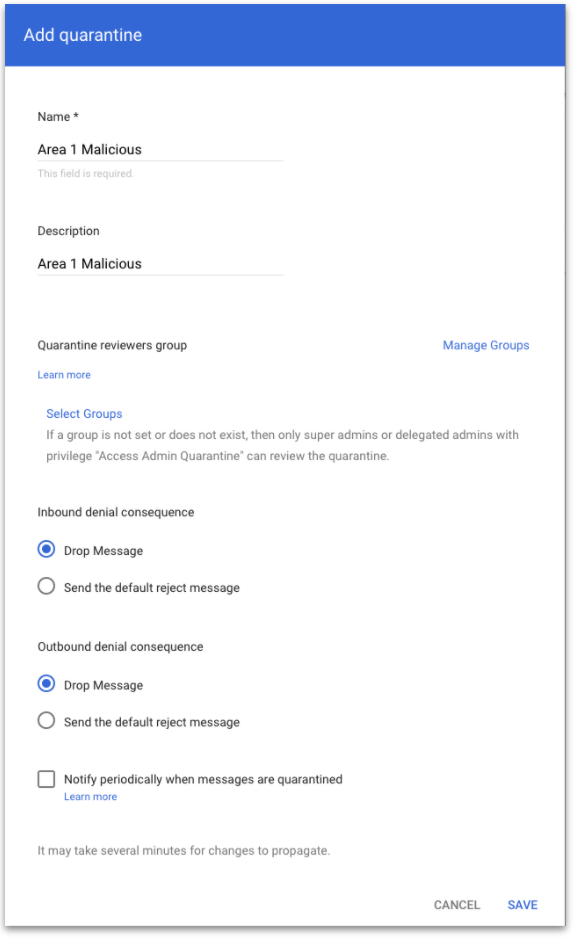
- Name:
When you are finished entering these details, select SAVE.
To access the newly create quarantine, select GO TO ADMIN QUARANTINE or access the quarantine directly by pointing your browser to https://email-quarantine.google.com/adminreview.
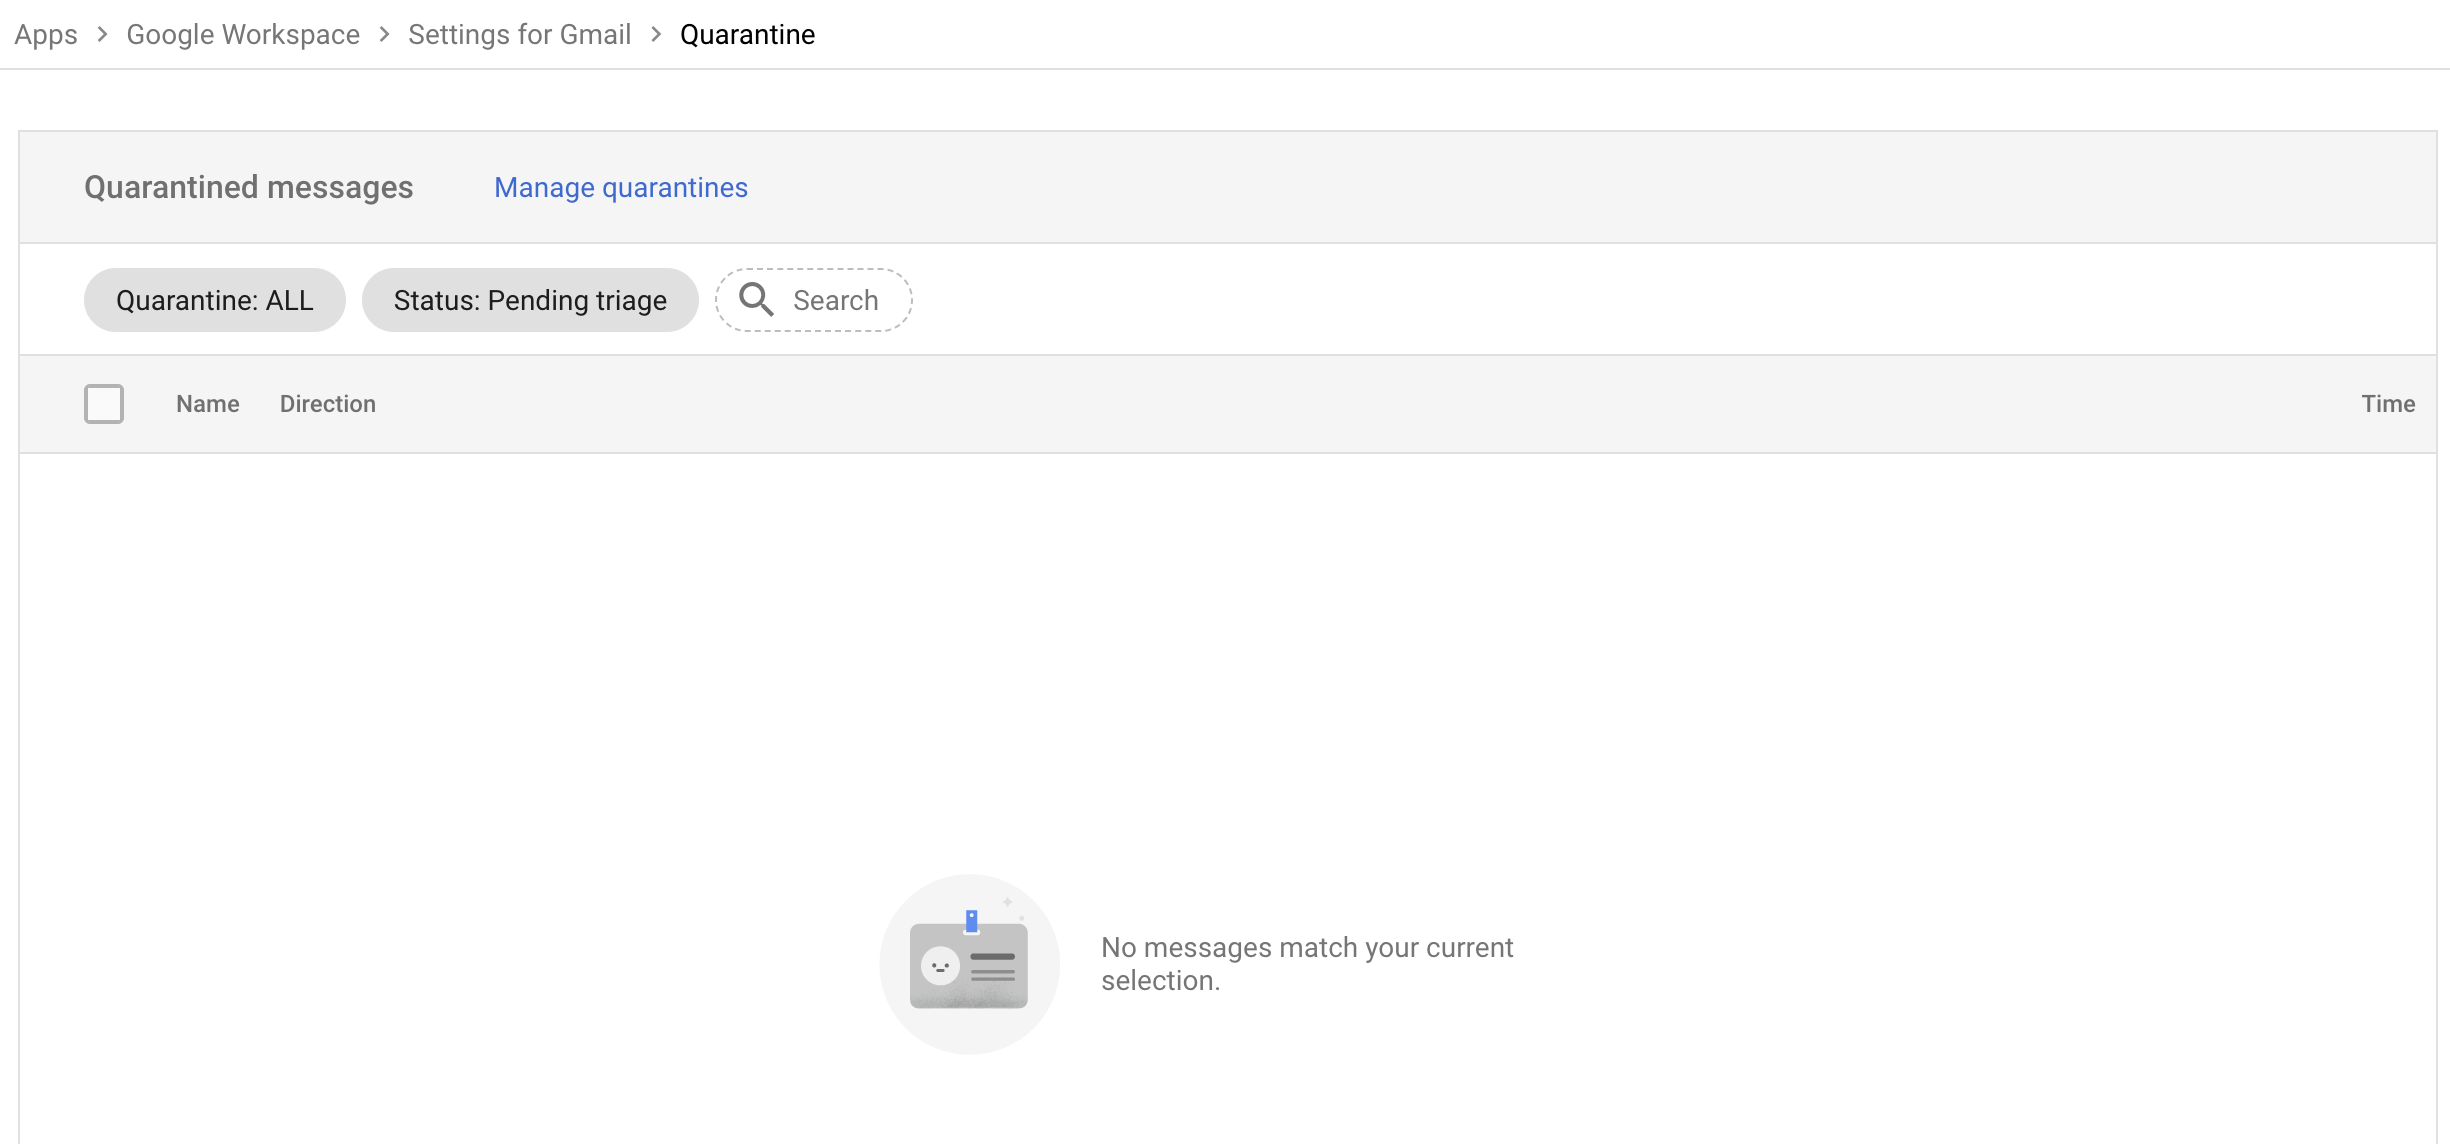
Once in the Admin quarantine console, you can access the Cloud Email Security Malicious quarantine by selecting Quarantine:ALL > Cloud Email Security Malicious in the filter section. Quarantined messages can be released as needed by an administrator.
Create a content compliance filter to send malicious messages to quarantine
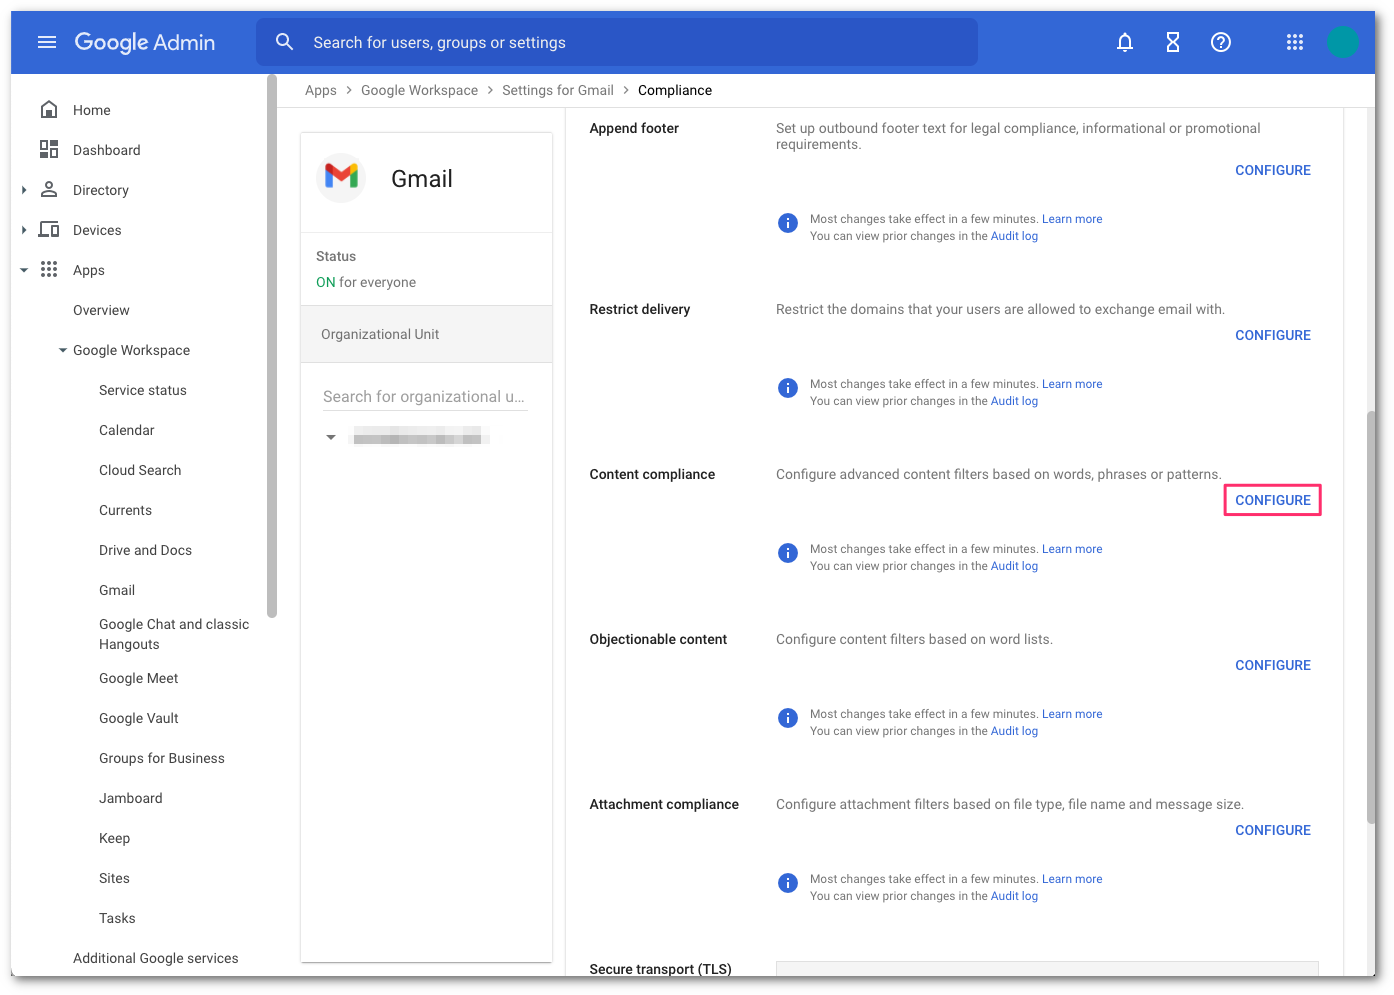
In Google’s administrative console, select Compliance to configure the content compliance filter.
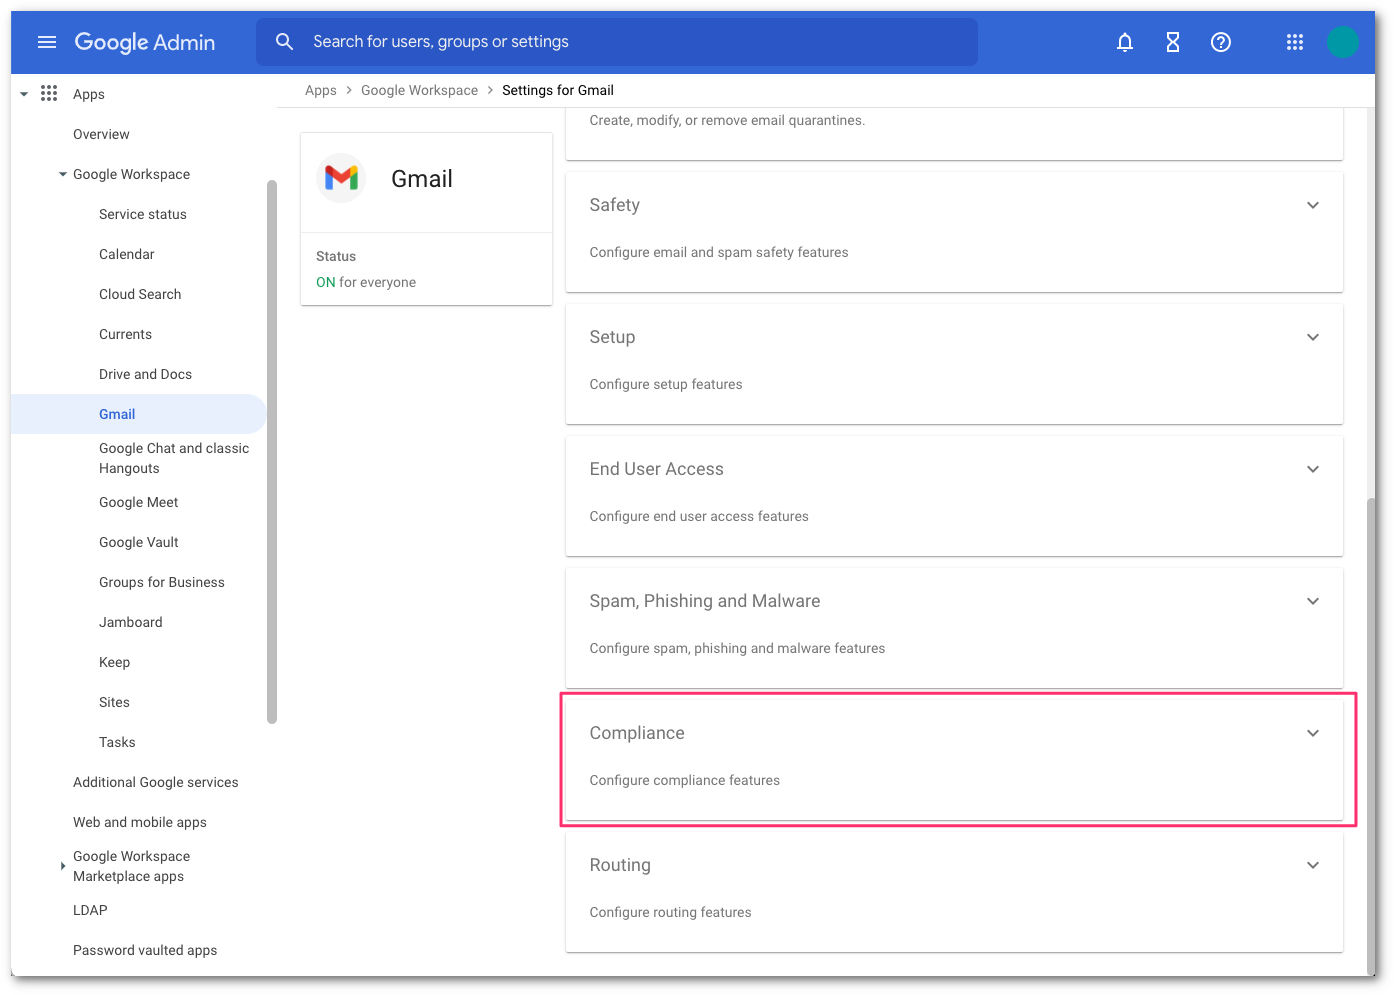
Go to the Content compliance area and select CONFIGURE to open the configuration dialog pop-up.
In the Content compliance filter configuration, enter the following:
- Name:
Quarantine Cloud Email Security Malicious. - In 1. Email message to affect, select Inbound.
- In 2. Add expression that describe the content you want to search for in each message:
- Select Add to add the condition.
- In the Simple content match dropdown, select Advanced content match.
- In Location, select Full headers.
- In Match type, select Contains text.
- In Content, enter
X-Area1Security-Disposition: MALICIOUS.
- Select SAVE to save the condition.
- Select Add to add the condition.
- In 3. If the above expression match, do the following, select the Action dropdown. Then choose Quarantine message and the Cloud Email Security Malicious quarantine that was created in the previous step.
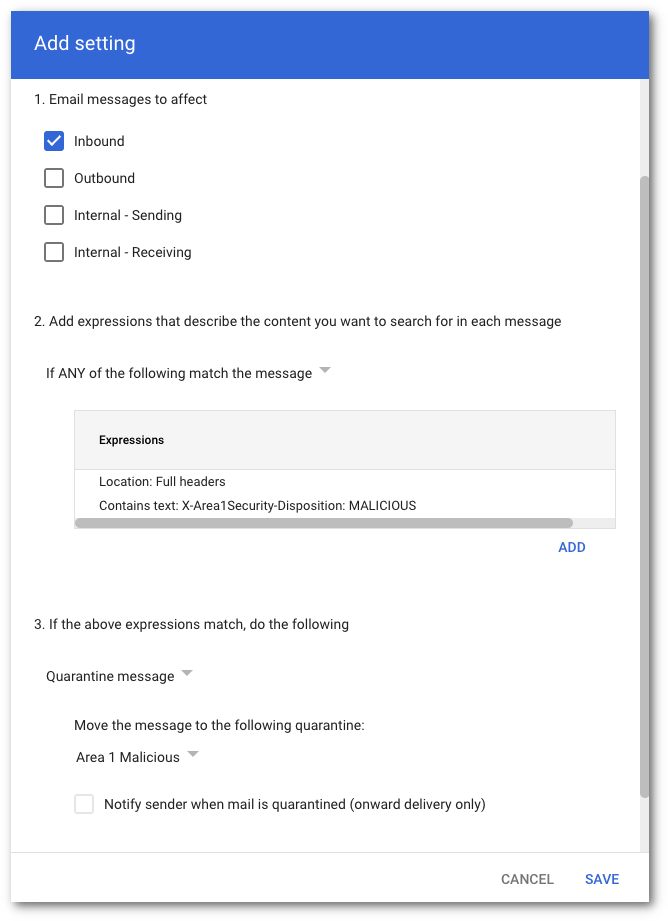
After you enter this information, select SAVE.
- Name:
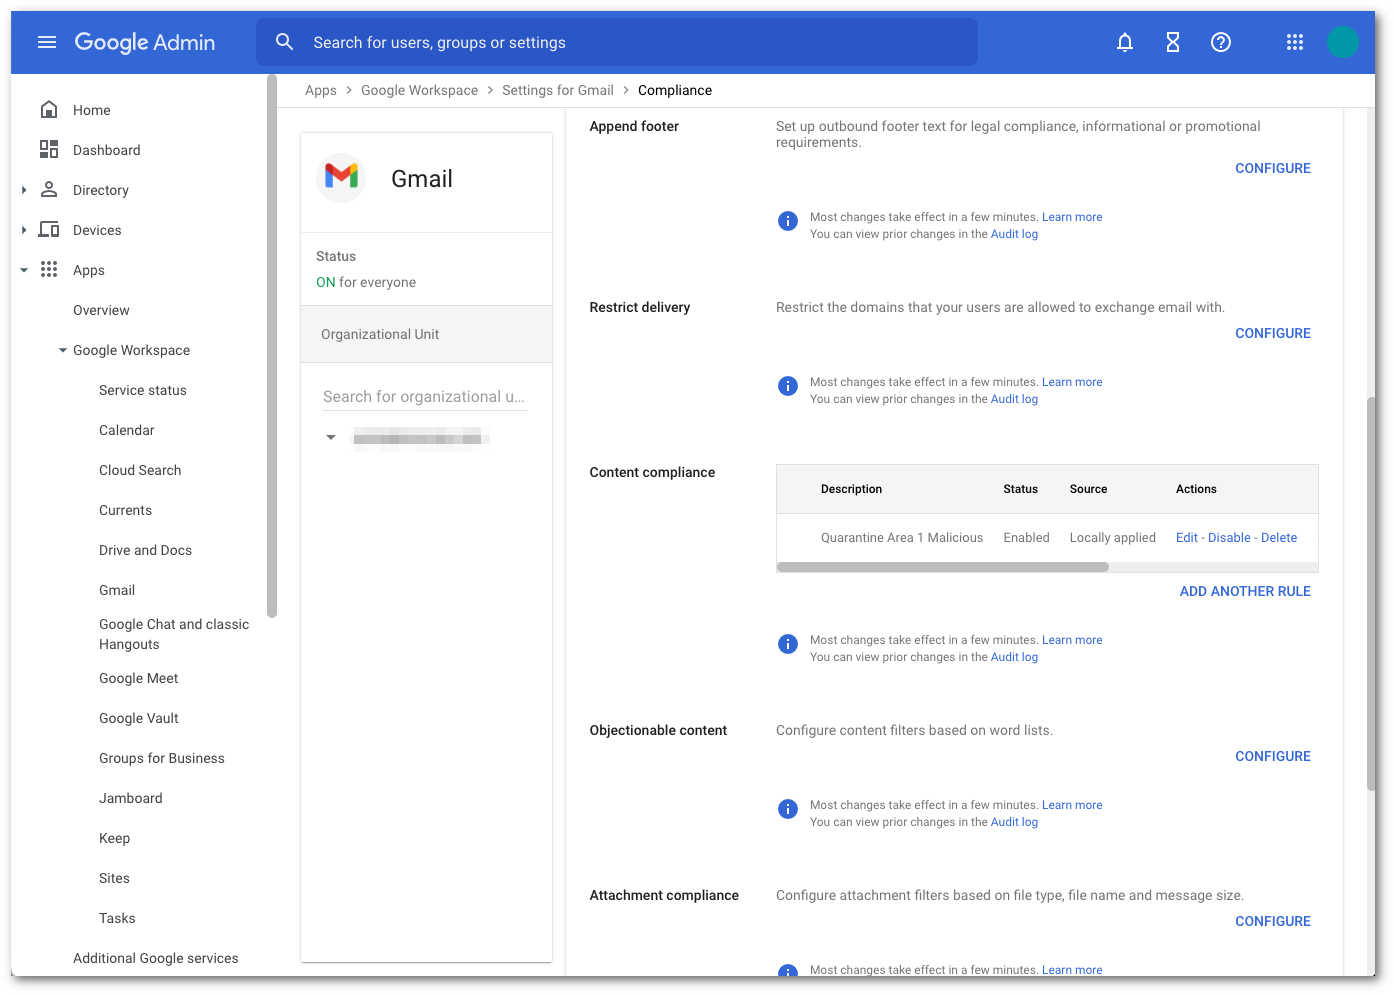
Once saved, the console will update with the newly configured content compliance filter.
If you would like to quarantine the other dispositions, repeat the above steps and use the following strings for the other dispositions:
X-Area1Security-Disposition: MALICIOUSX-Area1Security-Disposition: SUSPICIOUSX-Area1Security-Disposition: SPOOFX-Area1Security-Disposition: UCE
If desired, you can create a separate quarantine for each of the dispositions.
3. Add your domain to Cloud Email Security
To avoid email loop errors, add your domain to your Cloud Email Security dashboard.
- Log in to the Cloud Email Security dashboard.
- Go to Settings (the gear icon).
- In Email Configuration > Domains, select New Domain.
- Enter the following settings:
- Domain: Enter the domain you want Cloud Email Security to protect.
- Configured as: Select MX Records.
- Forwarding to: Add
google.com. - Quarantine policy: Select Malicious and Spam.
- Select Publish domain.
4. Update your domain MX records
Instructions to update your MX records will depend on the DNS provider you are using. You need to replace the existing Google MX records with the Cloud Email Security hosts. For example:
| MX Priority | Host |
|---|---|
5 | mailstream-eu1.mxrecord.io |
10 | mailstream-central.mxrecord.mx |
20 | mailstream-east.mxrecord.io |
20 | mailstream-west.mxrecord.io |
When configuring the Cloud Email Security (formerly Area 1) MX records, it is important to configure hosts with the correct MX priority. This will allow mail flows to the preferred hosts and fail over as needed.
Choose from the following Cloud Email Security MX hosts, and order them by priority. For example, if you are located outside the US and want to prioritize email processing in the EU, add mailstream-eu1.mxrecord.io as your first host, and then the US servers.
Host| Location | Note | mailstream-central.mxrecord.mxmailstream-east.mxrecord.iomailstream-west.mxrecord.ioUS | Best option to ensure all email traffic processing happens in the US. | mailstream-eu1.mxrecord.ioEU | Best option to ensure all email traffic processing happens in Germany, with fallback to US data centers. | mailstream-bom.mxrecord.mxIndia | Best option to ensure all email traffic processing happens within India. For compliance purposes use this MX record. Note, however, there is no redundancy should something go wrong. | mailstream-india-primary.mxrecord.mxIndia | Same as | mailstream-bom.mxrecord.mx, with fallback to US data centers.mailstream-asia.mxrecord.mxIndia | Best option for companies with a broader Asia presence. | mailstream-syd.area1.cloudflare.netAustralia / New Zealand | Best option to ensure all email traffic processing happens within Australia. | mailstream-australia-primary.area1.cloudflare.netAustralia / New Zealand | Best option to ensure all email traffic processing happens in Australia, with India and US data centers as backup. | |
|---|
DNS changes will reach the major DNS servers in about an hour or follow the TTL value as described in the Prerequisites section.
5. Secure your email flow
After 36 hours, the MX record DNS update will have sufficiently propagated across the Internet. It is now safe to secure your email flow. This will ensure that Google only accepts messages that are first received by Cloud Email Security. This step is highly recommended to prevent threat actors from using cached MX entries to bypass Cloud Email Security by injecting messages directly into Gmail.
Access the Google Administrative Console, then select Apps > Google Workspace > Gmail.
Select Spam, Phishing, and Malware.
Go to Inbound Gateway configuration and select Configure.
Enable Reject all mail not from gateway IPs and select Save.
Select Save once more to commit and activate the configuration change in the Gmail advanced configuration console.
6. Send Cloud Email Security spam to user spam folder (optional)
Unlike the configuration in step 2 where the message can be sent to an administrative quarantine, this optional step can be configured to send messages that are identified as spam by Cloud Email Security to the user’s spam folder.
Access Google’s Administrative Console, then select Apps > Google Workspace > Gmail.
Select Spam, Phishing, and Malware.
Go to Inbound Gateway configuration and select Configure.
In the Message Tagging section, select Message is considered spam if the following header regexp matches.
In the Regexp section, enter the string
X-Area1Security-Disposition: UCE.Select SAVE to save the updated configuration.