Deploy and configure Cloud Email Security (formerly Area 1) with with Cisco as MX record
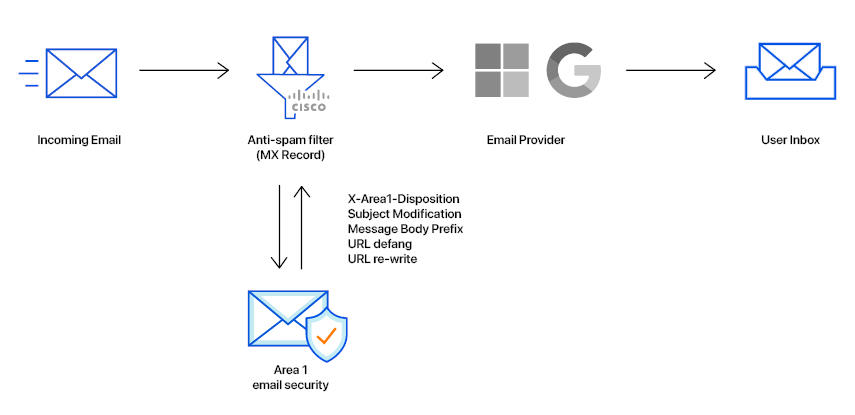
In this tutorial, you will learn how to configure Cloud Email Security email security with Cisco as MX record. This tutorial is broken down into several steps.
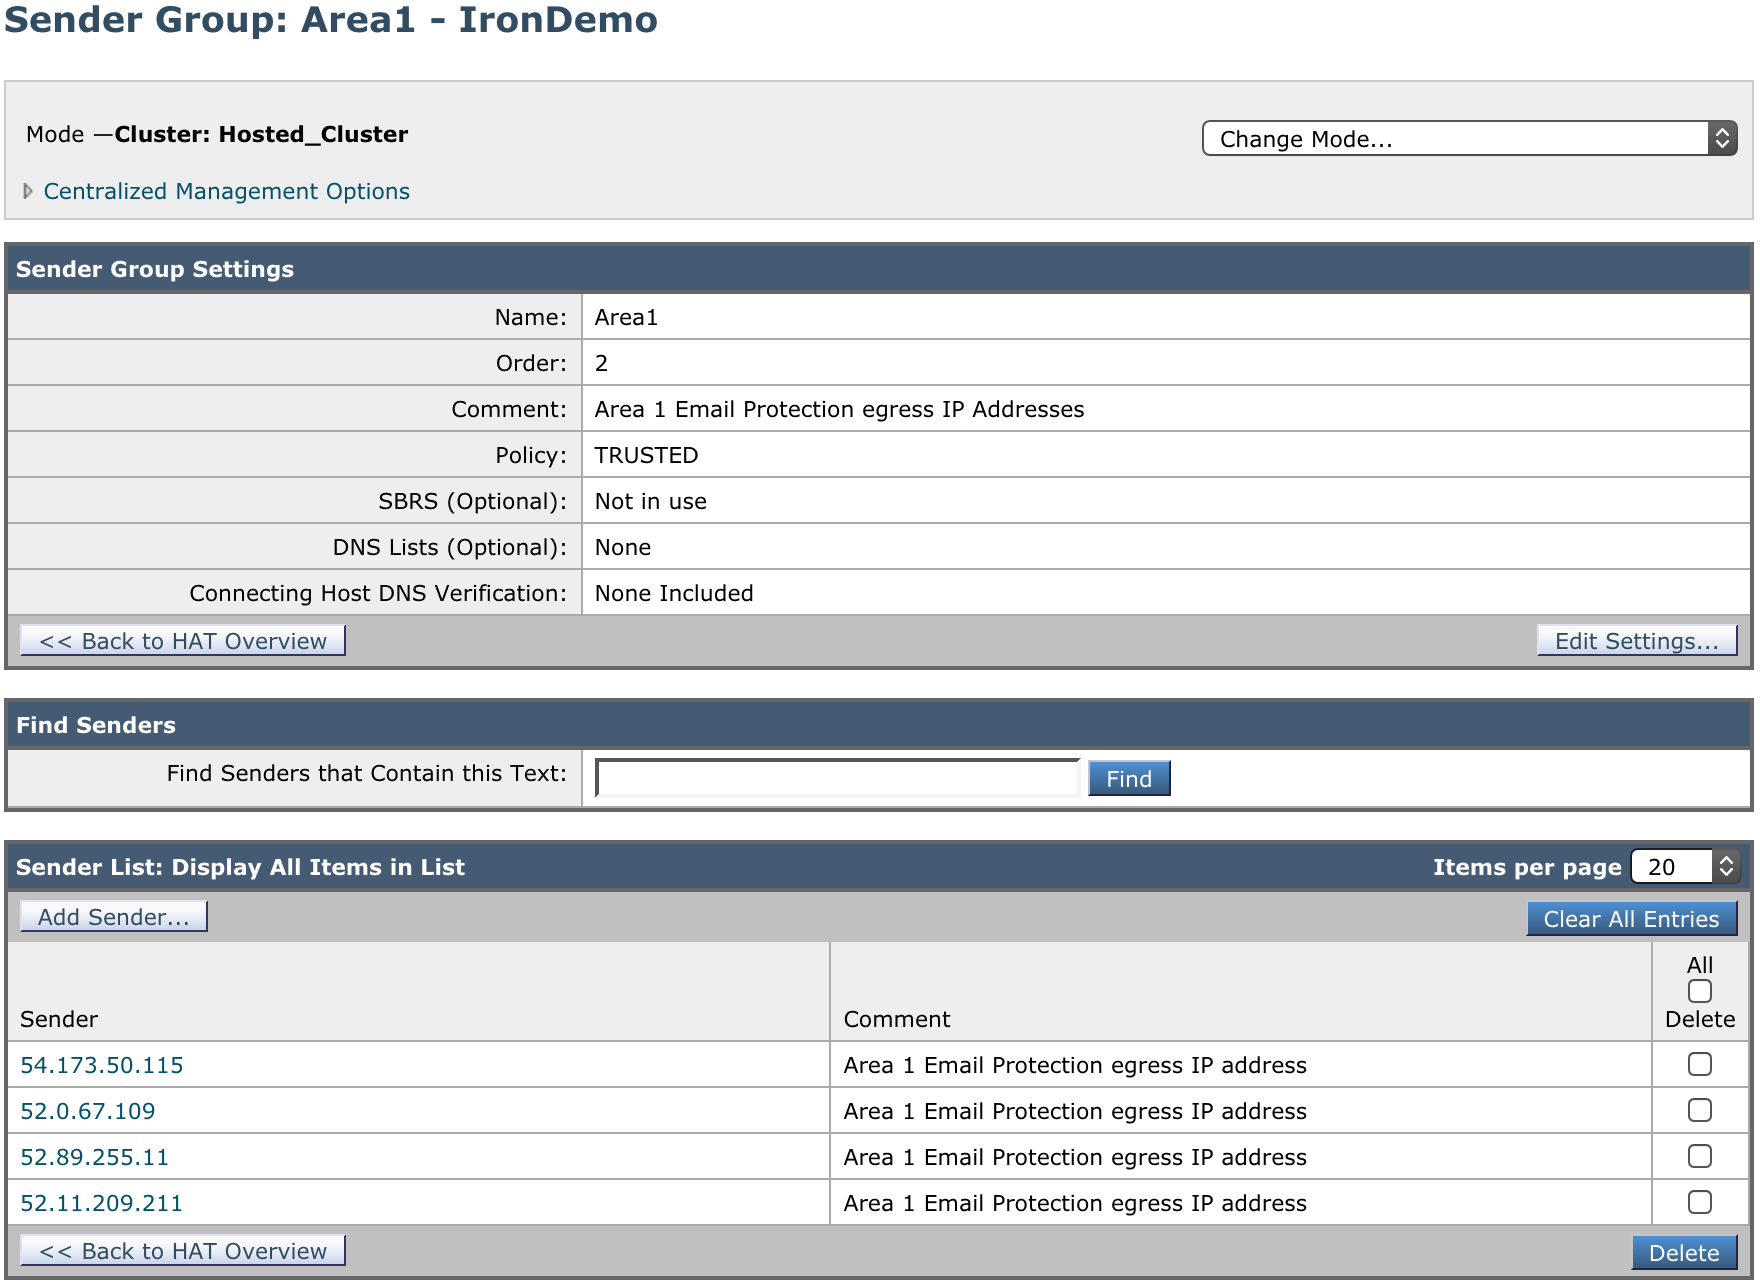
1. Add a Sender Group for Cloud Email Security Email Protection IPs
To add a new Sender Group:
Go to Mail Policies > HAT Overview.
Select the Add Sender Group button.
Configure the new Sender Group as follows:
- Name:
Area1. - Order: Order above the existing WHITELIST sender group.
- Comment:
Cloud Email Security Email Protection egress IP Addresses. - Policy:
TRUSTED(by default, spam detection is disabled for this mail flow policy). - SBRS: Leave blank.
- DNS Lists: Leave blank.
- Connecting Host DNS Verification: Leave all options unchecked.
- Name:
Select Submit and Add Senders, and add the IP addresses mentioned in Egress IPs. If you need to process emails in the EU or India regions for compliance purposes, add those IP addresses as well.
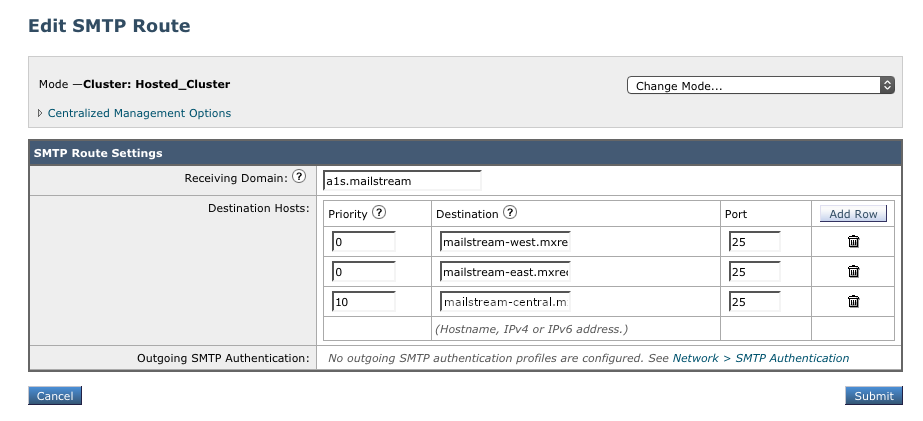
2. Add SMTP route for the Cloud Email Security Email Protection Hosts
To add a new SMTP Route:
Go to Network > SMTP Routes.
Select Add Route.
Configure the new SMTP Route as follows:
- Receiving Domain:
a1s.mailstream - In Destination Hosts, select Add Row, and add the Cloud Email Security MX hosts. Refer to the Geographic locations table for more information on what MX hosts to use.
- Receiving Domain:
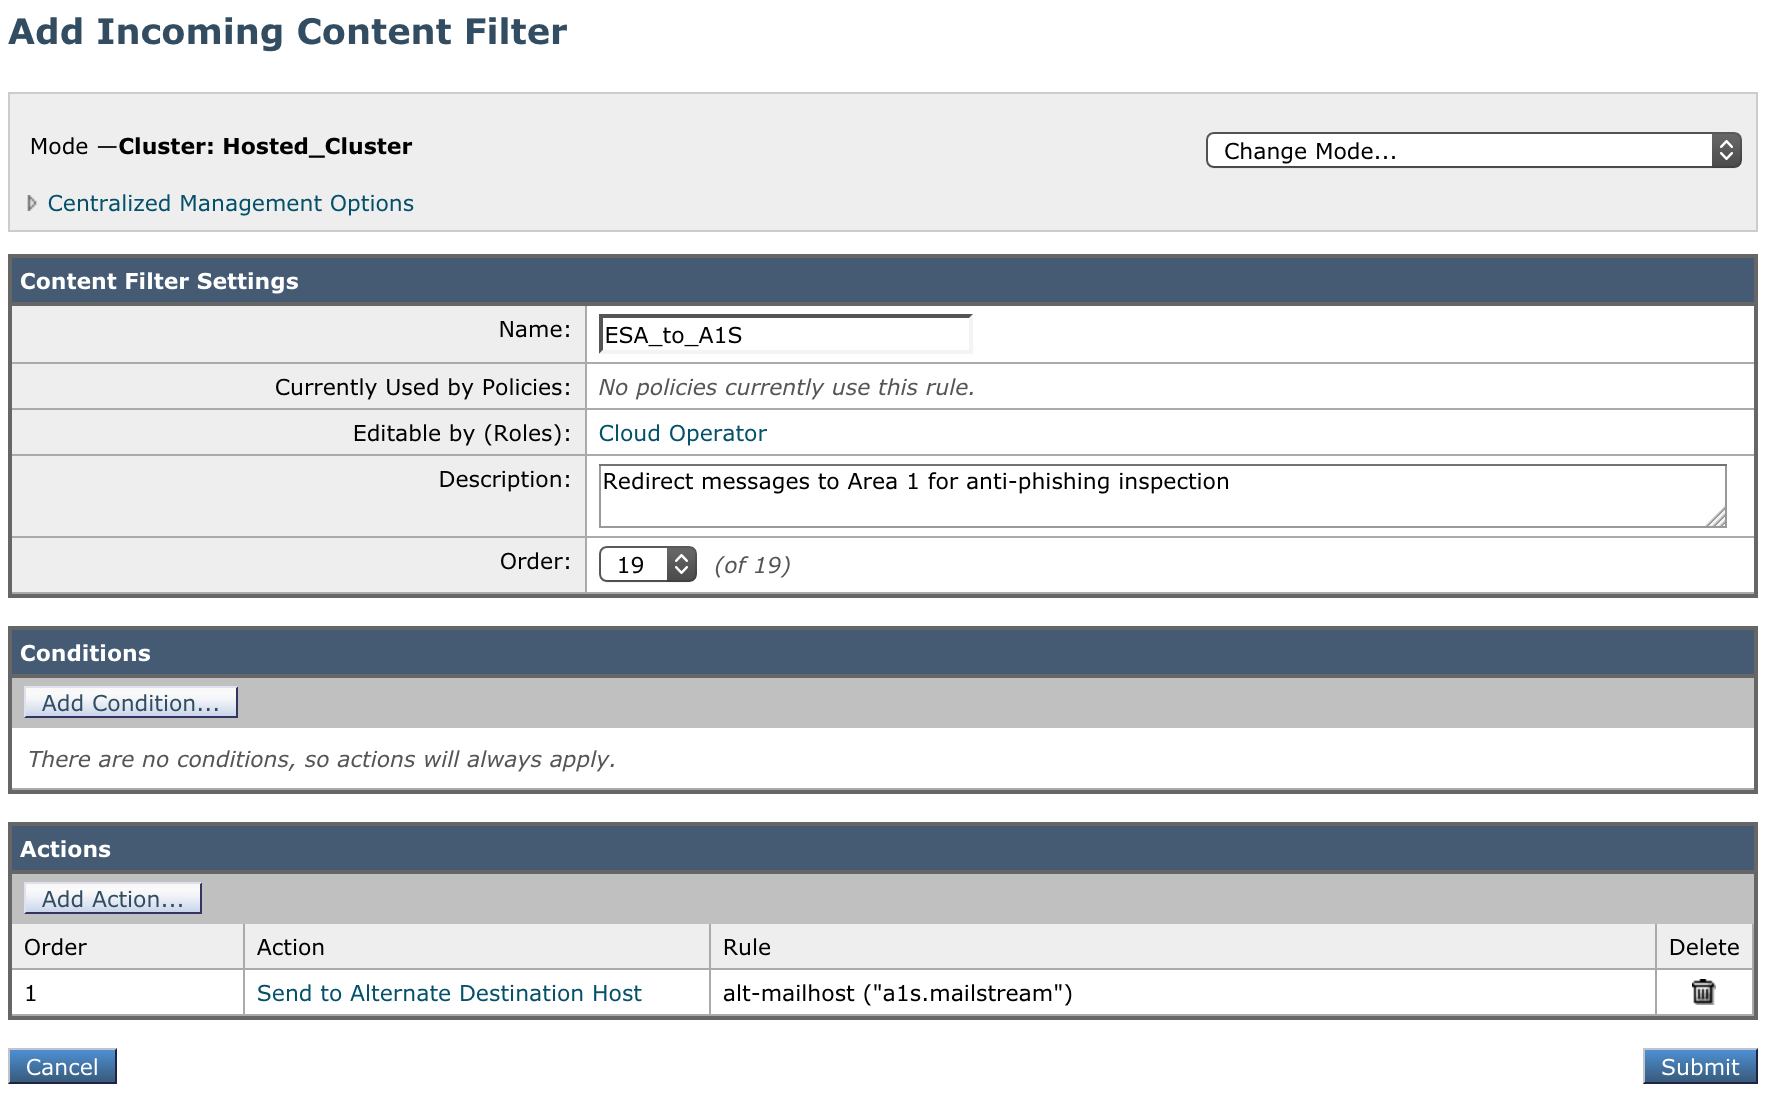
3. Create Incoming Content Filters
To manage the mail flow between Cloud Email Security and Cisco ESA, you need two filters:
- One to direct all incoming messages to Cloud Email Security.
- One to recognize messages coming back from Cloud Email Security to route for normal delivery.
Incoming Content Filter - To Cloud Email Security
To create a new Content Filter:
Go to Mail Policies > Incoming Content Filters.
Select Add Filter to create a new filter.
Configure the new Incoming Content Filter as follows:
- Name:
ESA_to_A1S - Description:
Redirect messages to Cloud Email Security for anti-phishing inspection - Order: This will depend on your other filters.
- Condition: No conditions.
- Actions:
- For Action select Send to Alternate Destination Host.
- For Mail Host input
a1s.mailstream(the SMTP route configured in step 2).
- Name:
Incoming Content Filter - From Cloud Email Security
To create a new Content Filter:
Go to Mail Policies > Incoming Content Filters.
Select the Add Filter button to create a new filter.
Configure the new Incoming Content Filter as follows:
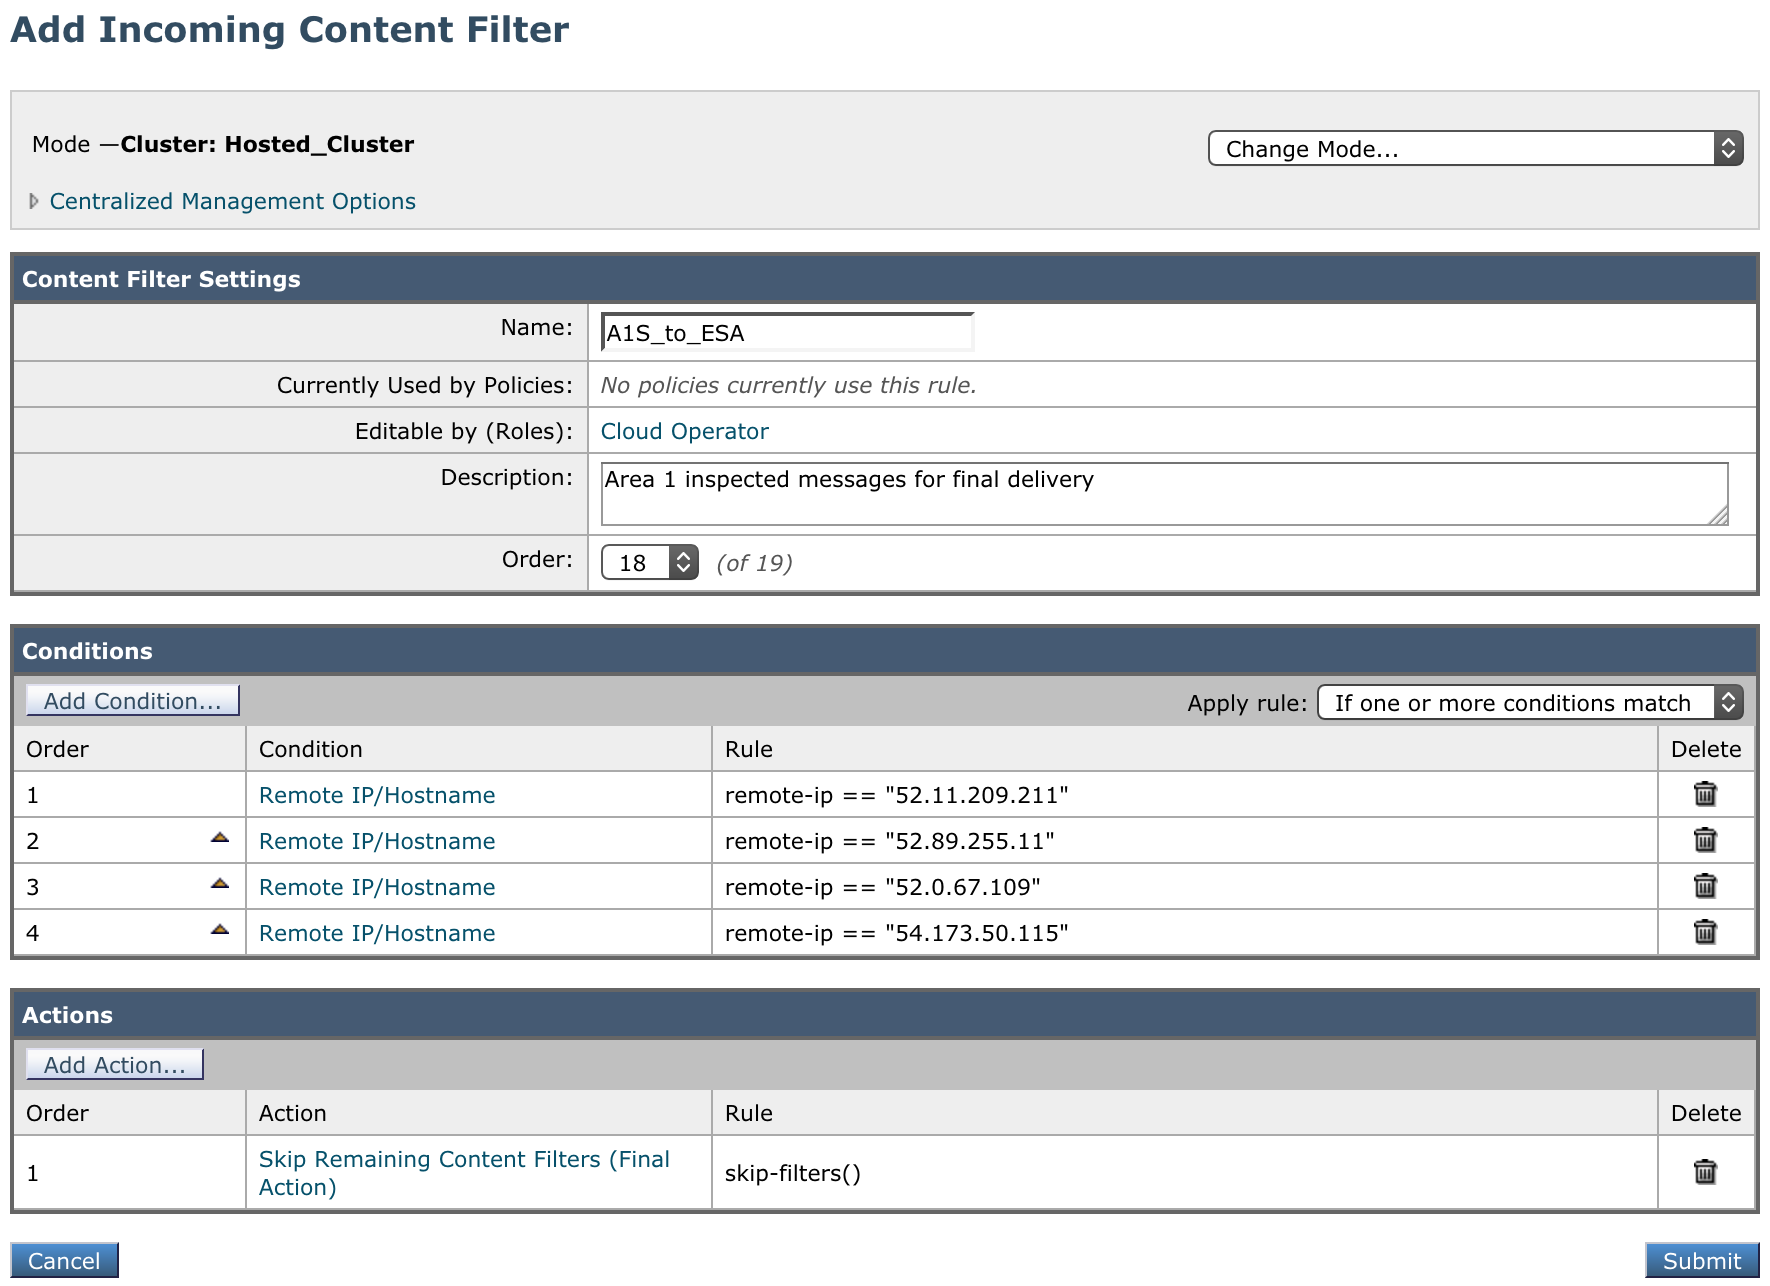
- Name:
A1S_to_ESA - Description:
Cloud Email Security inspected messages for final delivery - Order: This filter must come before the previously created filter.
- Conditions: Add conditions of type Remote IP/Hostname with all the IP addresses mentioned in Egress IPs. For example:
Order Condition Rule 1Remote IP/Hostname52.11.209.2112Remote IP/Hostname52.89.255.113Remote IP/Hostname52.0.67.1094Remote IP/Hostname54.173.50.1155Remote IP/Hostname104.30.32.0/196Remote IP/Hostname158.51.64.0/267Remote IP/Hostname158.51.65.0/26 - Ensure that the Apply rule: dropdown is set to If one or more conditions match.
- Actions: Select Add Action, and add the following:
Order Action Rule 1 Skip Remaining Content Filters (Final Action)skip-filters()
- Name:
4. Add the Incoming Content Filter to the Inbound Policy table
Assign the Incoming Content Filters created in step 3 to your primary mail policy in the Incoming Mail Policy table. Then, commit your changes to activate the email redirection.
5. Geographic locations
When configuring the Cloud Email Security (formerly Area 1) MX records, it is important to configure hosts with the correct MX priority. This will allow mail flows to the preferred hosts and fail over as needed.
Choose from the following Cloud Email Security MX hosts, and order them by priority. For example, if you are located outside the US and want to prioritize email processing in the EU, add mailstream-eu1.mxrecord.io as your first host, and then the US servers.
Host| Location | Note | mailstream-central.mxrecord.mxmailstream-east.mxrecord.iomailstream-west.mxrecord.ioUS | Best option to ensure all email traffic processing happens in the US. | mailstream-eu1.mxrecord.ioEU | Best option to ensure all email traffic processing happens in Germany, with fallback to US data centers. | mailstream-bom.mxrecord.mxIndia | Best option to ensure all email traffic processing happens within India. For compliance purposes use this MX record. Note, however, there is no redundancy should something go wrong. | mailstream-india-primary.mxrecord.mxIndia | Same as | mailstream-bom.mxrecord.mx, with fallback to US data centers.mailstream-asia.mxrecord.mxIndia | Best option for companies with a broader Asia presence. | mailstream-syd.area1.cloudflare.netAustralia / New Zealand | Best option to ensure all email traffic processing happens within Australia. | mailstream-australia-primary.area1.cloudflare.netAustralia / New Zealand | Best option to ensure all email traffic processing happens in Australia, with India and US data centers as backup. | |
|---|