Changelog
New updates and improvements at Cloudflare.

You can now send detection logs to an endpoint of your choice with Cloudflare Logpush.
Filter logs matching specific criteria you have set and select from over 25 fields you want to send. When creating a new Logpush job, remember to select Email security alerts as the dataset.
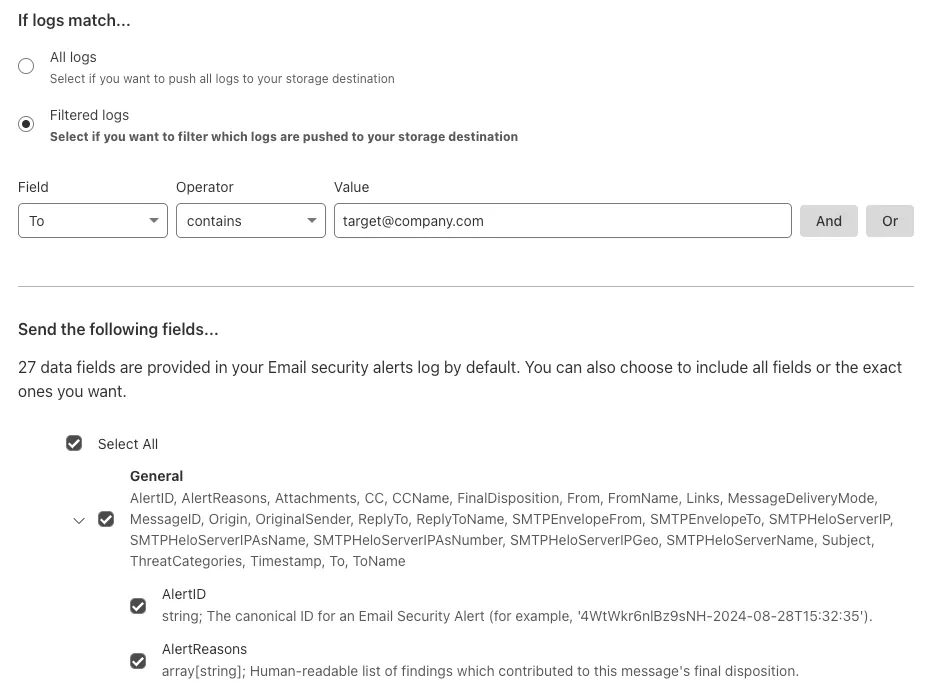
For more information, refer to Enable detection logs.
This feature is available across these Email security packages:
- Enterprise
- Enterprise + PhishGuard
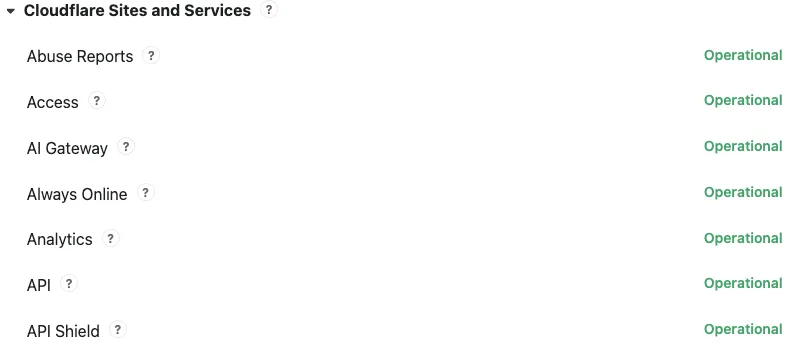
Concerns about performance for Email security or Area 1? You can now check the operational status of both on the Cloudflare Status page ↗.
For Email security, look under Cloudflare Sites and Services.
- Dashboard is the dashboard for Cloudflare, including Email security
- Email security (Zero Trust) is the processing of email
- API are the Cloudflare endpoints, including the ones for Email security
For Area 1, under Cloudflare Sites and Services:
- Area 1 - Dash is the dashboard for Cloudflare, including Email security
- Email security (Area1) is the processing of email
- Area 1 - API are the Area 1 endpoints
This feature is available across these Email security packages:
- Advantage
- Enterprise
- Enterprise + PhishGuard
Cloudflare Email security customers who have Microsoft 365 environments can quickly deploy an Email DLP (Data Loss Prevention) solution for free.
Simply deploy our add-in, create a DLP policy in Cloudflare, and configure Outlook to trigger behaviors like displaying a banner, alerting end users before sending, or preventing delivery entirely.
Refer to Outbound Data Loss Prevention to learn more about this feature.
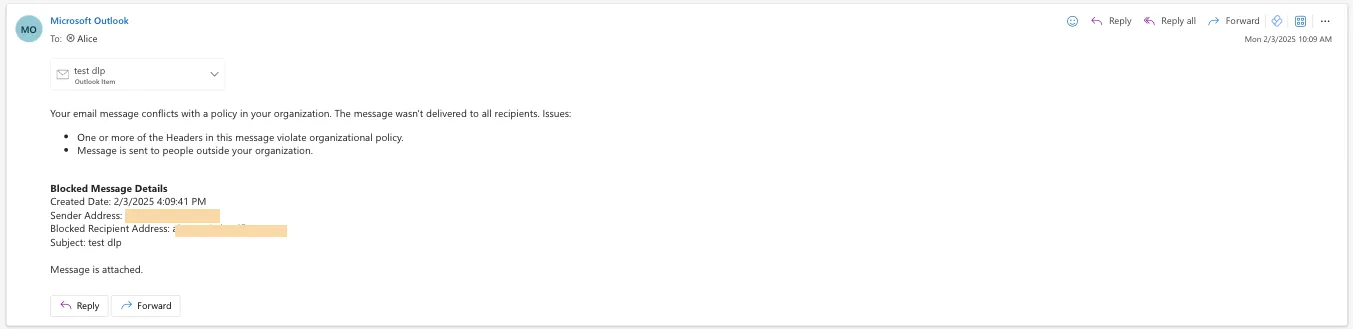
In GUI alert:

Alert before sending:
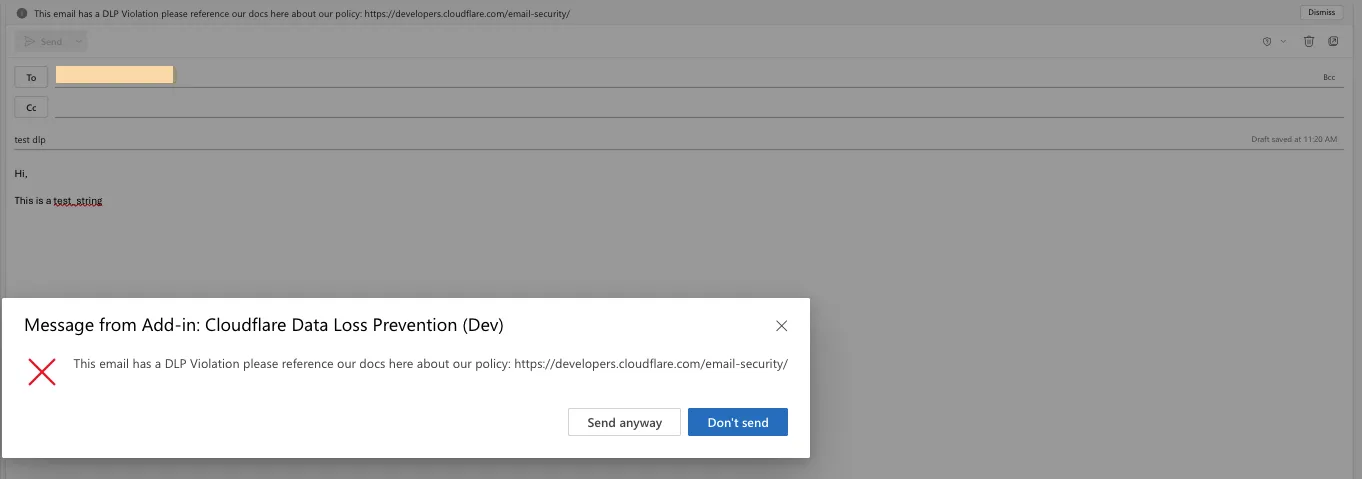
Prevent delivery:
This feature is available across these Email security packages:
- Enterprise
- Enterprise + PhishGuard
You can now locally configure your Magic WAN Connector to work in a static IP configuration.
This local method does not require having access to a DHCP Internet connection. However, it does require being comfortable with using tools to access the serial port on Magic WAN Connector as well as using a serial terminal client to access the Connector's environment.
For more details, refer to WAN with a static IP address.
You can now investigate links in emails with Cloudflare Security Center to generate a report containing a myriad of technical details: a phishing scan, SSL certificate data, HTTP request and response data, page performance data, DNS records, what technologies and libraries the page uses, and more.
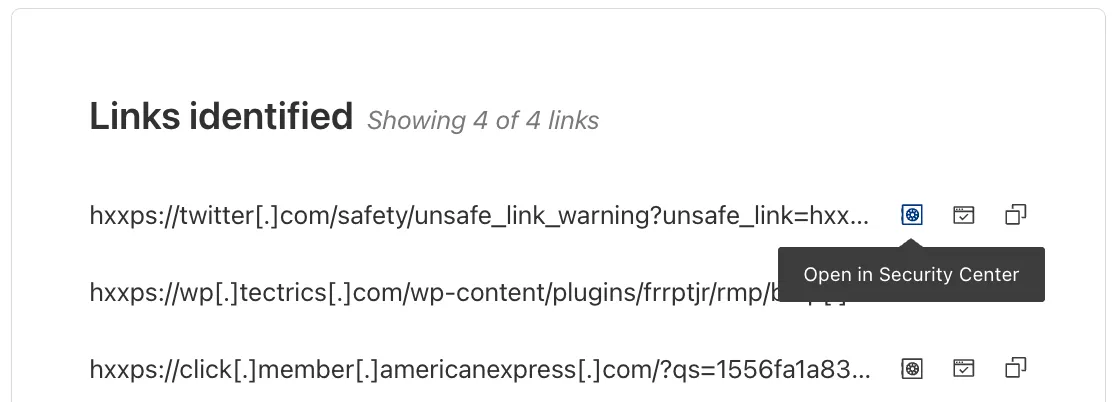
From Investigation, go to View details, and look for the Links identified section. Select Open in Security Center next to each link. Open in Security Center allows your team to quickly generate a detailed report about the link with no risk to the analyst or your environment.
For more details, refer to Open links.
This feature is available across these Email security packages:
- Advantage
- Enterprise
- Enterprise + PhishGuard
Gateway HTTP policies can now block files that are password-protected, compressed, or otherwise unscannable.
These unscannable files are now matched with the Download and Upload File Types traffic selectors for HTTP policies:
- Password-protected Microsoft Office document
- Password-protected PDF
- Password-protected ZIP archive
- Unscannable ZIP archive
To get started inspecting and modifying behavior based on these and other rules, refer to HTTP filtering.
You can now detect source code leaks with Data Loss Prevention (DLP) with predefined checks against common programming languages.
The following programming languages are validated with natural language processing (NLP).
- C
- C++
- C#
- Go
- Haskell
- Java
- JavaScript
- Lua
- Python
- R
- Rust
- Swift
DLP also supports confidence level for source code profiles.
For more details, refer to DLP profiles.
-
Cloudflare now allows you to send SSH command logs to storage destinations configured in Logpush, including third-party destinations. Once exported, analyze and audit the data as best fits your organization! For a list of available data fields, refer to the SSH logs dataset.
To set up a Logpush job, refer to Logpush integration.
After you triage your users' submissions (that are machine reviewed), you can now escalate them to our team for reclassification (which are instead human reviewed). User submissions from the submission alias, PhishNet, and our API can all be escalated.
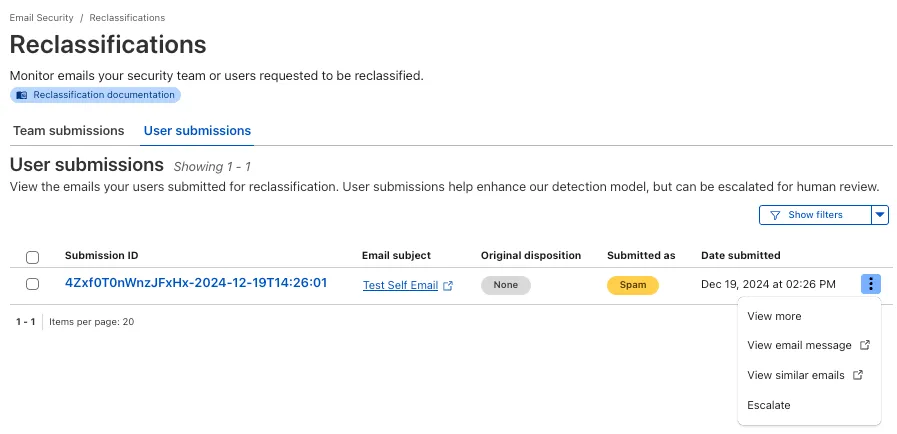
From Reclassifications, go to User submissions. Select the three dots next to any of the user submissions, then select Escalate to create a team request for reclassification. The Cloudflare dashboard will then show you the submissions on the Team Submissions tab.
Refer to User submissions to learn more about this feature.
This feature is available across these Email security packages:
- Advantage
- Enterprise
- Enterprise + PhishGuard
You now have more transparency about team and user submissions for phishing emails through a Reclassification tab in the Zero Trust dashboard.
Reclassifications happen when users or admins submit a phish to Email security. Cloudflare reviews and - in some cases - reclassifies these emails based on improvements to our machine learning models.
This new tab increases your visibility into this process, allowing you to view what submissions you have made and what the outcomes of those submissions are.

The latest
cloudflaredbuild 2024.12.2 ↗ introduces the ability to collect all the diagnostic logs needed to troubleshoot acloudflaredinstance.A diagnostic report collects data from a single instance of
cloudflaredrunning on the local machine and outputs it to acloudflared-diagfile.For more information, refer to Diagnostic logs.
Magic WAN and Magic Transit customers can use the Cloudflare dashboard to configure and manage BGP peering between their networks and their Magic routing table when using a Direct CNI on-ramp.
Using BGP peering allows customers to:
- Automate the process of adding or removing networks and subnets.
- Take advantage of failure detection and session recovery features.
With this functionality, customers can:
- Establish an eBGP session between their devices and the Magic WAN / Magic Transit service when connected via CNI.
- Secure the session by MD5 authentication to prevent misconfigurations.
- Exchange routes dynamically between their devices and their Magic routing table.
Refer to Magic WAN BGP peering or Magic Transit BGP peering to learn more about this feature and how to set it up.
You can now generate customized terraform files for building cloud network on-ramps to Magic WAN.
Magic Cloud can scan and discover existing network resources and generate the required terraform files to automate cloud resource deployment using their existing infrastructure-as-code workflows for cloud automation.
You might want to do this to:
- Review the proposed configuration for an on-ramp before deploying it with Cloudflare.
- Deploy the on-ramp using your own infrastructure-as-code pipeline instead of deploying it with Cloudflare.
For more details, refer to Set up with Terraform.
You can now use CASB to find security misconfigurations in your AWS cloud environment using Data Loss Prevention.
You can also connect your AWS compute account to extract and scan your S3 buckets for sensitive data while avoiding egress fees. CASB will scan any objects that exist in the bucket at the time of configuration.
To connect a compute account to your AWS integration:
- In Cloudflare One ↗, go to Cloud & SaaS findings > Integrations.
- Find and select your AWS integration.
- Select Open connection instructions.
- Follow the instructions provided to connect a new compute account.
- Select Refresh.
You can now type in languages that use diacritics (like á or ç) and character-based scripts (such as Chinese, Japanese, and Korean) directly within the remote browser. The isolated browser now properly recognizes non-English keyboard input, eliminating the need to copy and paste content from a local browser or device.
You can now send user action logs for Email security to an endpoint of your choice with Cloudflare Logpush.
Filter logs matching specific criteria you have set or select from multiple fields you want to send. For all users, we will log the date and time, user ID, IP address, details about the message they accessed, and what actions they took.
When creating a new Logpush job, remember to select Audit logs as the dataset and filter by:
- Field:
"ResourceType" - Operator:
"starts with" - Value:
"email_security".
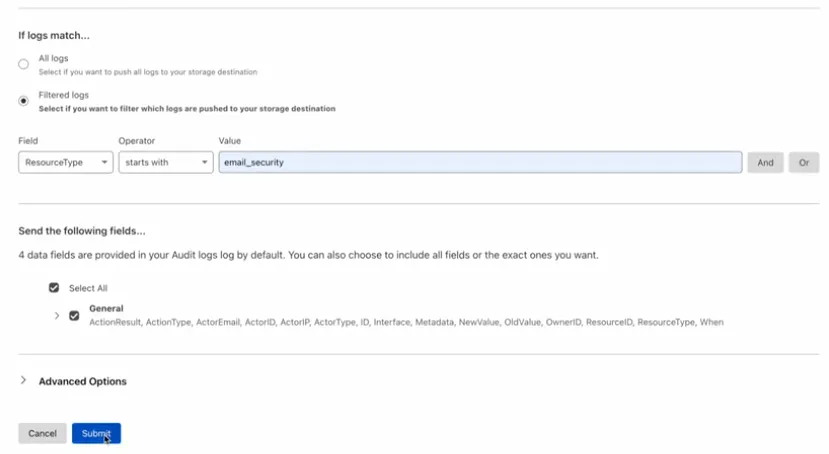
For more information, refer to Enable user action logs.
This feature is available across all Email security packages:
- Enterprise
- Enterprise + PhishGuard
- Field:
The Magic Firewall dashboard now allows you to search custom rules using the rule name and/or ID.
- Log into the Cloudflare dashboard ↗ and select your account.
- Go to Analytics & Logs > Network Analytics.
- Select Magic Firewall.
- Add a filter for Rule ID.
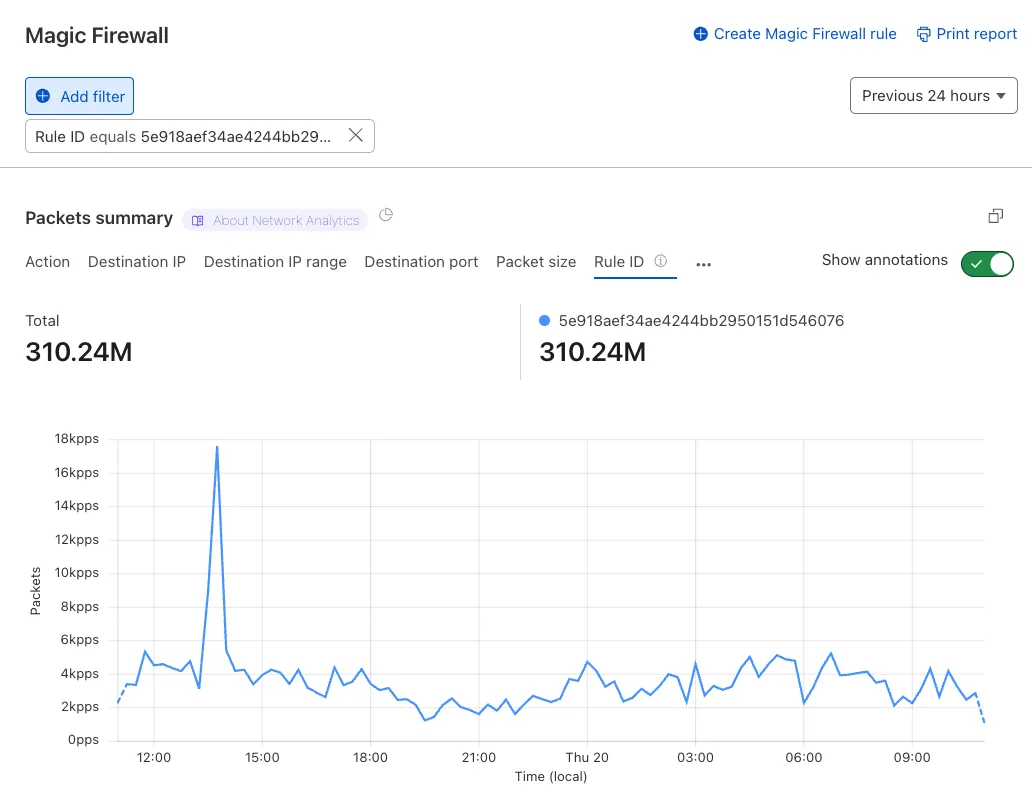
Additionally, the rule ID URL link has been added to Network Analytics.
Organizations can now eliminate long-lived credentials from their SSH setup and enable strong multi-factor authentication for SSH access, similar to other Access applications, all while generating access and command logs.
SSH with Access for Infrastructure uses short-lived SSH certificates from Cloudflare, eliminating SSH key management and reducing the security risks associated with lost or stolen keys. It also leverages a common deployment model for Cloudflare One customers: WARP-to-Tunnel.
SSH with Access for Infrastructure enables you to:
- Author fine-grained policy to control who may access your SSH servers, including specific ports, protocols, and SSH users.
- Monitor infrastructure access with Access and SSH command logs, supporting regulatory compliance and providing visibility in case of security breach.
- Preserve your end users' workflows. SSH with Access for Infrastructure supports native SSH clients and does not require any modifications to users’ SSH configs.
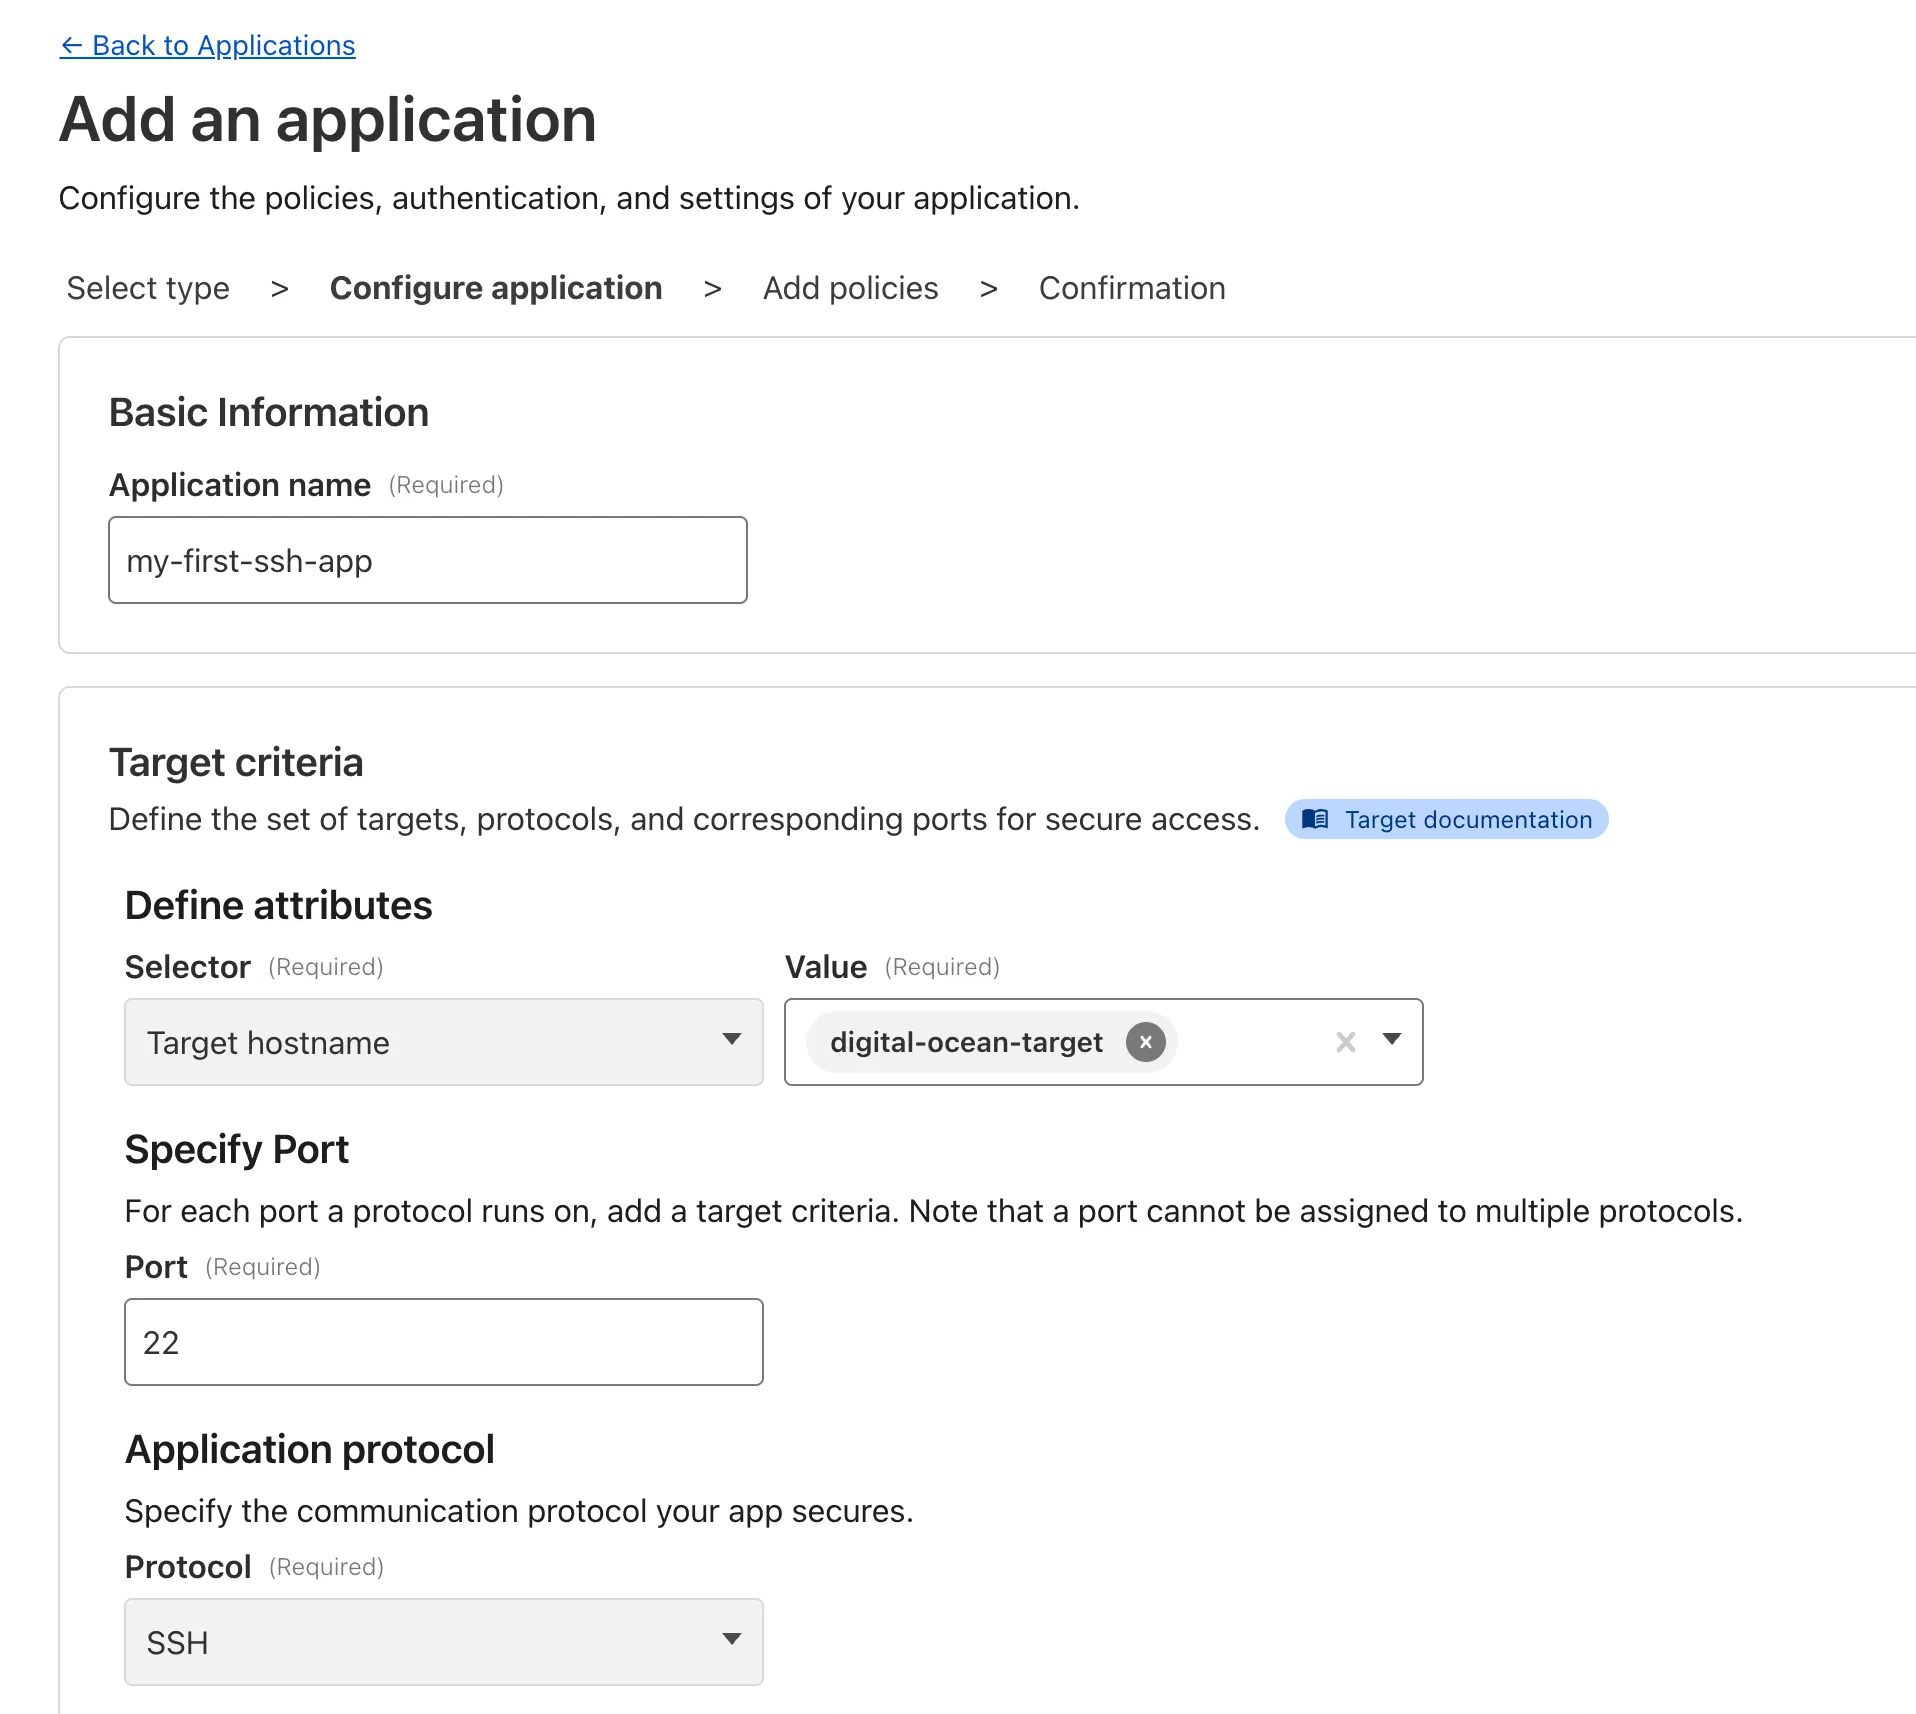
To get started, refer to SSH with Access for Infrastructure.
Beyond the controls in Zero Trust, you can now exchange user risk scores with Okta to inform SSO-level policies.
First, configure Cloudflare One to send user risk scores to Okta.
- Set up the Okta SSO integration.
- In Cloudflare One ↗, go to Integrations > Identity providers.
- In Your identity providers, locate your Okta integration and select Edit.
- Turn on Send risk score to Okta.
- Select Save.
- Upon saving, Cloudflare One will display the well-known URL for your organization. Copy the value.
Next, configure Okta to receive your risk scores.
- On your Okta admin dashboard, go to Security > Device Integrations.
- Go to Receive shared signals, then select Create stream.
- Name your integration. In Set up integration with, choose Well-known URL.
- In Well-known URL, enter the well-known URL value provided by Cloudflare One.
- Select Create.
Welcome to your new home for product updates on Cloudflare One.
Our new changelog lets you read about changes in much more depth, offering in-depth examples, images, code samples, and even gifs.
If you are looking for older product updates, refer to the following locations.