Velocloud
This document is intended to provide Arista VeloCloud customers with the steps to provision non SD-WAN destinations through Edge for connectivity with Cloudflare WAN (formerly Magic WAN).
- Log into VeloCloud Orchestrator and go to Configure > Profiles.
- Select New profile to create a new profile (for example,
vc-edge-03-profile). - Select the Device tab and expand the Interfaces section.
- Select the Edge Model corresponding to the device (Virtual Edge). The default interface scheme for the Virtual Edge will be displayed. For example: eight interfaces, from GE1 to GE8.
- You are only using interfaces GE3 and GE4. Disable all unused interfaces to ensure anyone with physical access to the edge node cannot connect any unused interfaces. Do this by selecting each interface one at a time and unchecking Interface Enabled followed by Save.
This documentation assumes:
- GE3: WAN Interface (Static IP)
- GE4: LAN Interface (Static IP)
Configure interface GE3 with the following settings:
- Interface enabled: Enabled
- Capability: Routed
- Segments: All Segments
- Radius Authentication: Not applicable
- ICMP Echo Response: Enabled
- Underlay Accounting: Enabled
- Enable WAN Link: Enabled
- Edge to Edge Encryption: Enabled
- DNS Proxy: Disabled
- VLAN: Unspecified (this example assumes the device is connected to an access-layer switch port)
- EVDSL Modem Attached: Disabled
- Addressing Type: Static
- WAN Link: User Defined
- OSPF: Not applicable
- Multicast: Not applicable
- Advertise: Disabled
- NAT Direct Traffic: Enabled
- Trusted Source: Disabled
- Reverse Path Forwarding: (unspecified)
IPv6 is currently not supported with Cloudflare WAN. Uncheck the Enabled checkbox.
Router Advertisement Host Settings
- Disabled
L2 Settings
- Autonegotiate: Enabled
- MTU: 1500
Select Save to apply changes for Interface GE3.
- Interface Enabled: Enabled
- Capability: Routed
- Segments: Global Segment
- Radius Authentication: Disabled (Not applicable)
- ICMP Echo Response: Enabled
- Underlay Accounting: Enabled
- WAN Link: Disabled
- Edge To Edge Encryption: Enabled
- DNS Proxy: Disabled
- VLAN: Unspecified (this example assumes the device is connected to an access-layer switch port)
- EVDSL Modem Attached: Disabled
- Addressing Type: DHCP or Static (example assumes Static IP)
- WAN Link: User Defined
- OSPF: Not applicable
- Multicast: Not applicable
- Advertise: Disabled
- NAT Direct Traffic: Enabled
- Trusted Source: Disabled
- Reverse Path Forwarding: Unspecified
IPv6 is currently not supported with Cloudflare WAN. Uncheck the Enabled checkbox.
Router Advertisement Host Settings
- Disabled
L2 Settings
- Autonegotiate: Enabled
- MTU: 1500
Select Save to apply changes for Interface GE4.
The Interfaces section should indicate the GE3 (WAN) and GE4 (LAN) interfaces are configured and all other interfaces are administratively disabled.
- Enable Cloud VPN.
Select Save to apply changes for the Profile.
- Go to Configure > Network Services.
- Expand Non SD-WAN Destinations through Edge and select New.
- Service Name: Name of destination here. For example,
Magic_WAN_vc-edge-03. - Tunneling Protocol: IPsec
- Service Type: Generic IKEv2 Router (Route Based VPN)
- Tunnel Mode: Active/Hot-Standby or Active/Standby
- In the IKE/IPsec Settings tab, select:
- IP Version: IPv4
- Primary VPN Gateway
- Public IP: Specify one of the two anycast IPs provided by Cloudflare.
- In IKE Proposal, expand View advanced settings for IKE Proposal:
- Encryption: AES 256 CBC
- DH Group: 14
- Hash: SHA-256
- IKE SA Lifetime (min): 1440
- DPD Timeout(sec): 20
- Expand View advanced settings for IPsec Proposal:
- Encryption: AES 256 CBC
- PFS: 14
- Hash: SHA 256
- IPsec SA Lifetime (min): 480
- Scroll up Secondary VPN Gateway, and select Add.
- Public IP: Specify the second of the two anycast IPs provided by Cloudflare
- Keep Tunnel Active: Enabled (this is read-only and cannot be modified)
- Tunnel settings are the same as the primary — therefore they are greyed out in this section.
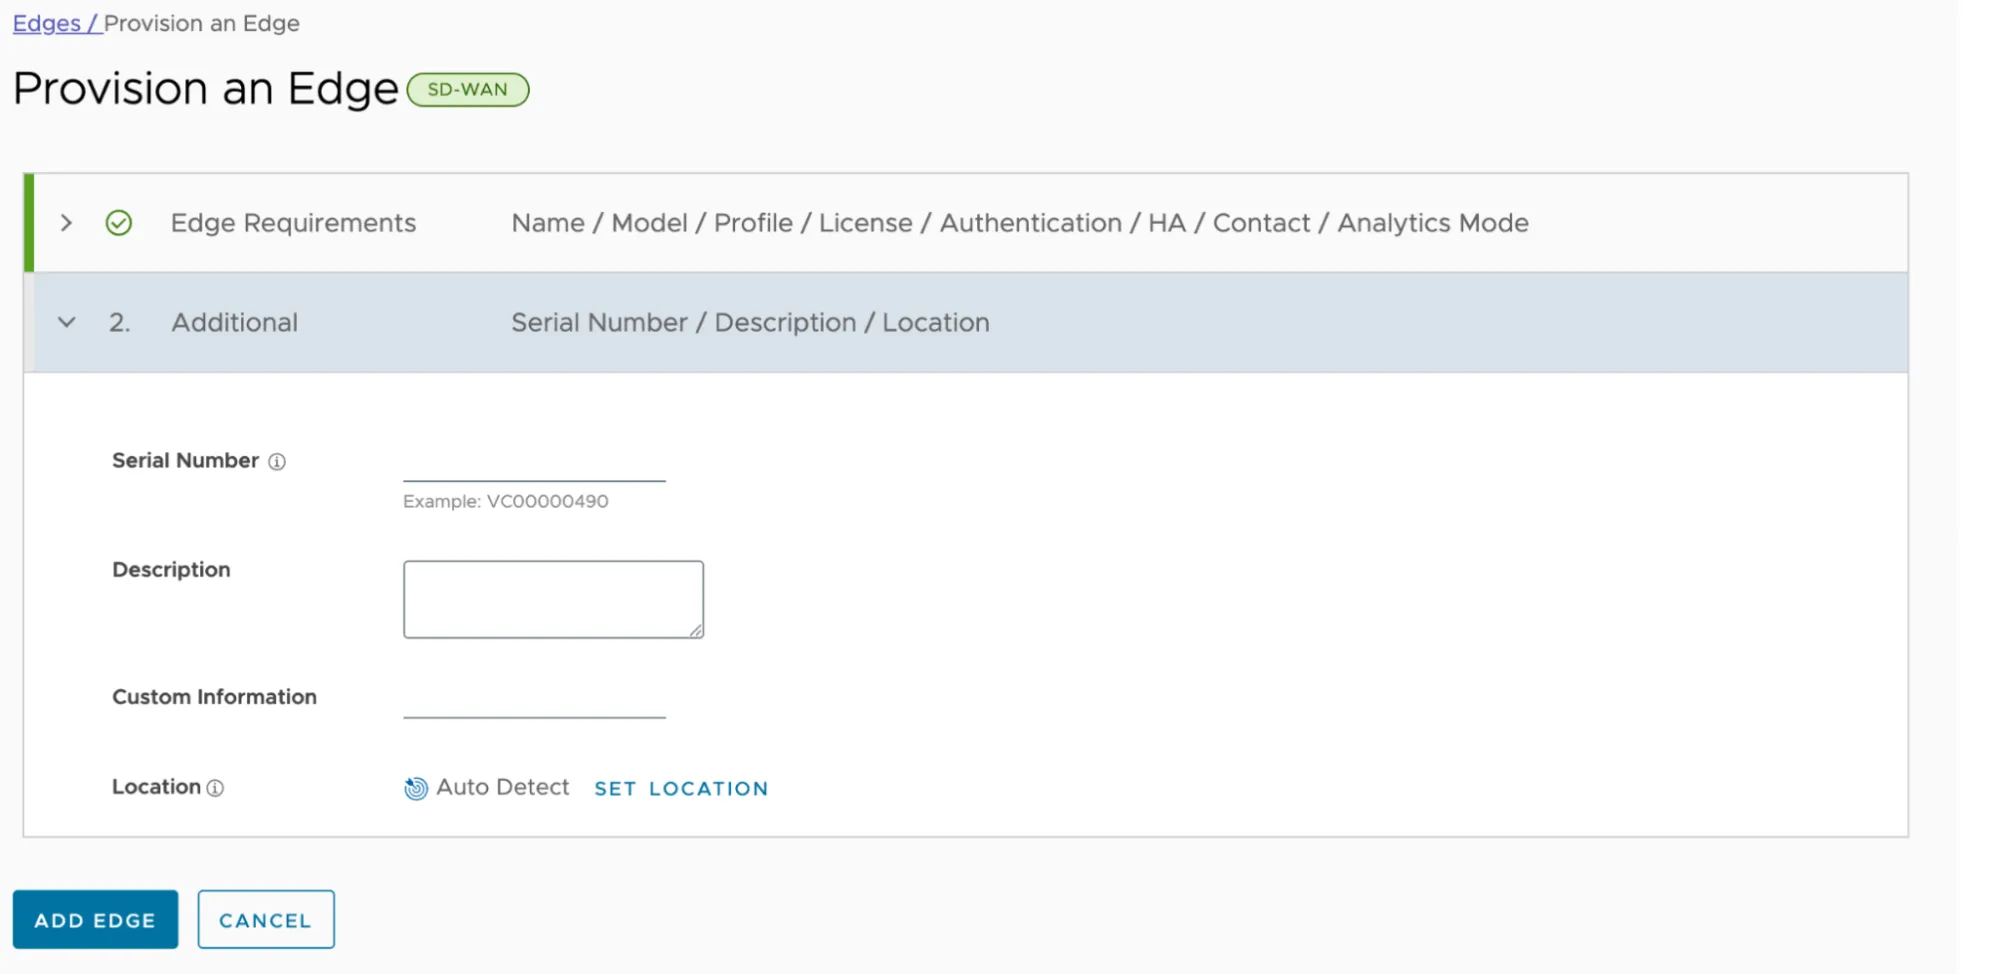
- Go to Configure > Edges, and select Add Edge.
- Select the following settings:
- Mode: SD-WAN Edge
- Name: The name for your edge. For example,
vc-edge-03 - Model: Virtual Edge (select the model of your Arista VeloCloud Edge appliance)
- Profile: Select the Profile created in the Provision configuration section. For example,
vc-edge-03-profile - Edge License: Select the appropriate license
- Authentication: Certificate Acquire
- Encrypt Device Secrets: Unchecked (do not select)
- High Availability: Unchecked (configure accordingly based on your environment)
- Contact Info: Provide a local contact name and local contact email
- Select Next to advance to the next section.
- Configure the following settings based on your environment — left blank in the following example.
- Select Add Edge to save changes.
Once the Edge device is added, you should land on the Device tab.
- Expand the Interfaces section.
- Note the interface configuration is inherited from the Profile configured in the previous section. Interfaces GE3 and GE4 will display a
WARNINGindicator as these interfaces require additional configuration. - Select GE3 to open the properties for the WAN interface.
- Many of the properties in this section were inherited from the Profile — as such, they are greyed out. You can select Override to modify the configuration specifically for this interface.
- Scroll down to IPv4 Settings, and configure the following options:
- Addressing Type: Static (this is inherited from the Profile)
- IP Address: Specify the WAN interface IP address
- CIDR Prefix: Add your subnet mask in Classless Inter-Domain Routing (CIDR) notation
- Gateway: Default Gateway (
0.0.0.0/0) - All other settings are inherited from the Profile.
- Scroll down and select Save.
- Select GE4 to open the properties for the LAN interface.
- Scroll down to IPv4 Settings, and configure the following options:
- Addressing Type: Static (inherited from the Profile)
- IP Address: Specify the WAN interface IP address
- CIDR Prefix: (subnet mask in CIDR notation)
- Gateway: Default Gateway (0.0.0.0/0)
- All other settings are inherited from the Profile.
- Scroll down and select Save.
Note the indicator next to GE3. The steps in the Profile section disabled Auto WAN Link Detection. As a result, the WAN Link must be specified.
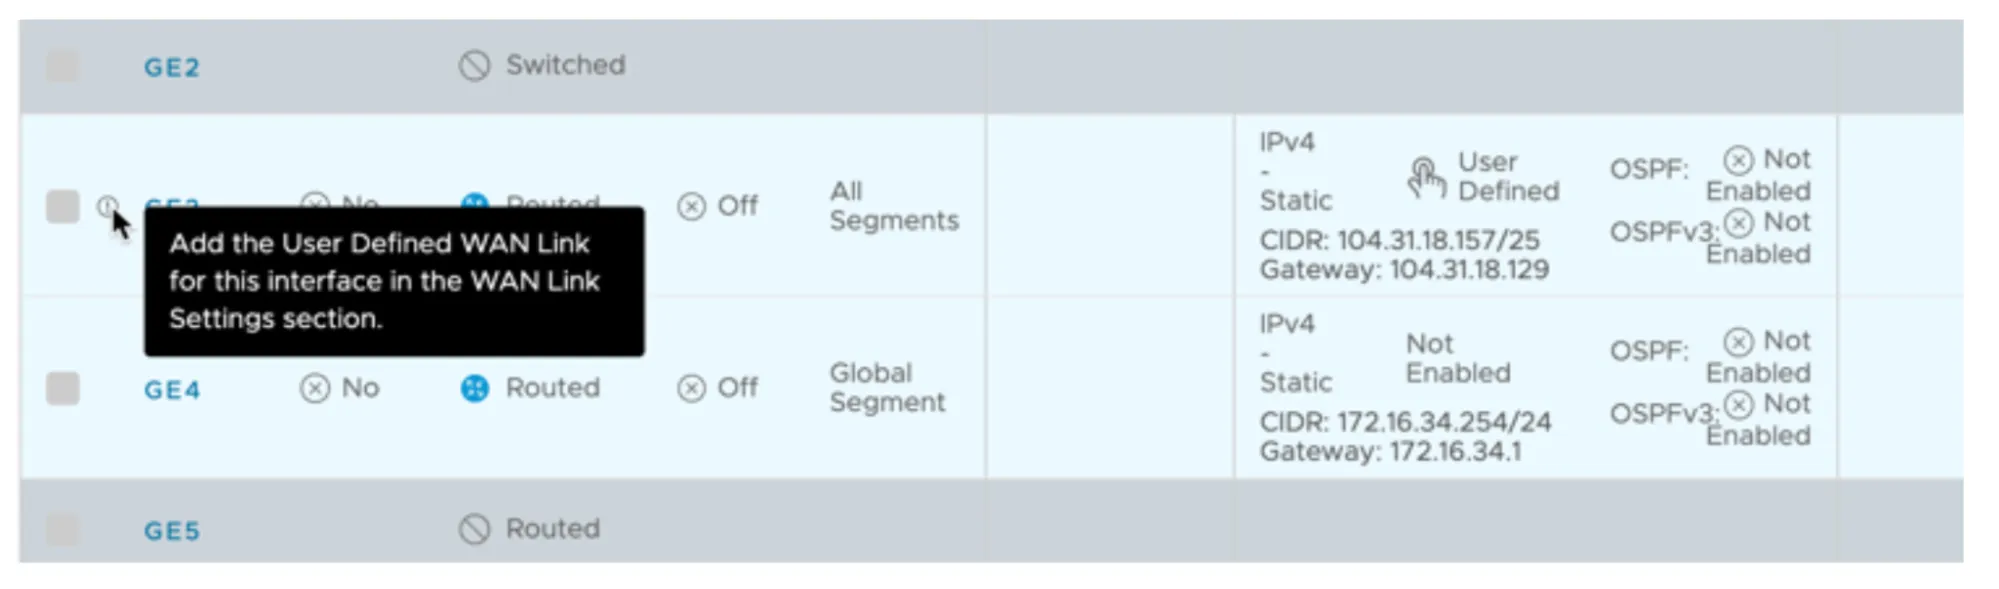
- Scroll down to WAN Link Configuration > Add User Defined WAN Link, and configure the following options:
- Link Type: Public (the WAN interface is connected directly to the Internet in this example — you may need to select Private depending on your environment)
- Interfaces: Check the box for GE3 (WAN Interface)
- This example assumes default settings under View optional configuration and View advanced settings.
- Select Add Link to save the changes.
- Confirm the User Defined WAN Link is displayed and an indicator no longer appears next to interface GE3.
- Scroll down to VPN Services.
- Expand Non SD-WAN Destination through Edge and select the Override checkbox.
- Select Add.
- Select the drop-down under the Name column.
- Select the Network Service defined earlier. For example,
Magic_WAN_vc-edge-03. - In the Action column, select the + button, and configure the following options:
- Public WAN Link: Choose the Public WAN Link (refer to User-Defined WAN Link)
- Local Identification Type: FQDN
- Local Identification: Enter the FQDN specified when configuring Cloudflare WAN IPsec tunnels through the Custom FQDN IKE ID API endpoint.
- PSK: Enter the Pre-Shared Key. Ensure you use the same PSK for both Cloudflare WAN IPsec tunnels.
- Destination Primary Public IP: Pre-populated from the Network Service defined earlier.
- Destination Secondary Public IP: Pre-populated from the Network Service defined earlier.
- Select Save to finish defining the IPsec tunnel settings.
- Scroll down to the bottom of the Edge configuration page, and select Save Changes to finalize the Edge device configuration.
Configure the Site Subnets to facilitate:
- Routing traffic from one Cloudflare WAN site to other Cloudflare WAN sites.
- Ensure Cloudflare WAN IPsec tunnel health checks perform optimally.
- Go to Configure > Network Services.
- Expand the Non SD-WAN Destinations through Edge section.
- Select the desired non SD-WAN destination, like
Magic_WAN_vc-edge-03.
Configure a minimum of three IPsec tunnels. This example demonstrates two routes for tunnel health checks and two routes for traffic destined for remote sites:
- Cloudflare WAN IPsec tunnel health checks
- Primary VPN Gateway:
- To the respective Cloudflare WAN IPv4 interface address associated with the primary Cloudflare anycast tunnel endpoint IP address
- Routed through the Primary VPN Gateway.
- Secondary VPN Gateway:
- To the respective Cloudflare WAN IPv4 interface address associated with the secondary Cloudflare anycast tunnel endpoint IP address
- Routed through the Secondary VPN Gateway.
- Remote Cloudflare WAN site(s): CIDR blocks to route through Cloudflare WAN
- The LAN interface for vc-edge-03 is:
- 172.16.34.254/24 (subnet address: 172.16.34.0/24).
- This does not need to be specified under Site Subnets as it is local.
- Assume two remote sites, each of which need to be defined as Site Subnets and routed through both the Primary VPN Gateway and Secondary VPN Gateway.
- 172.16.32.0/24
- 172.16.33.0/24
- The LAN interface for vc-edge-03 is:
- Select the Site Subnets > Add. Then, select the following configurations for routes:
- Tunnel Health Check - Primary:
- 10.252.11.4/32 - Primary VPN Gateway
- Tunnel Health Check - Secondary:
- 10.252.11.6/32 - Secondary VPN Gateway
- Site vc-edge-01:
- 172.16.32.0/24 - Primary and Secondary VPN Gateways
- Site vc-edge-02:
- 172.16.33.0/24 - Primary and Secondary VPN Gateways
- Tunnel Health Check - Primary:
- The Site Subnets tab should look like the following when configured as indicated:
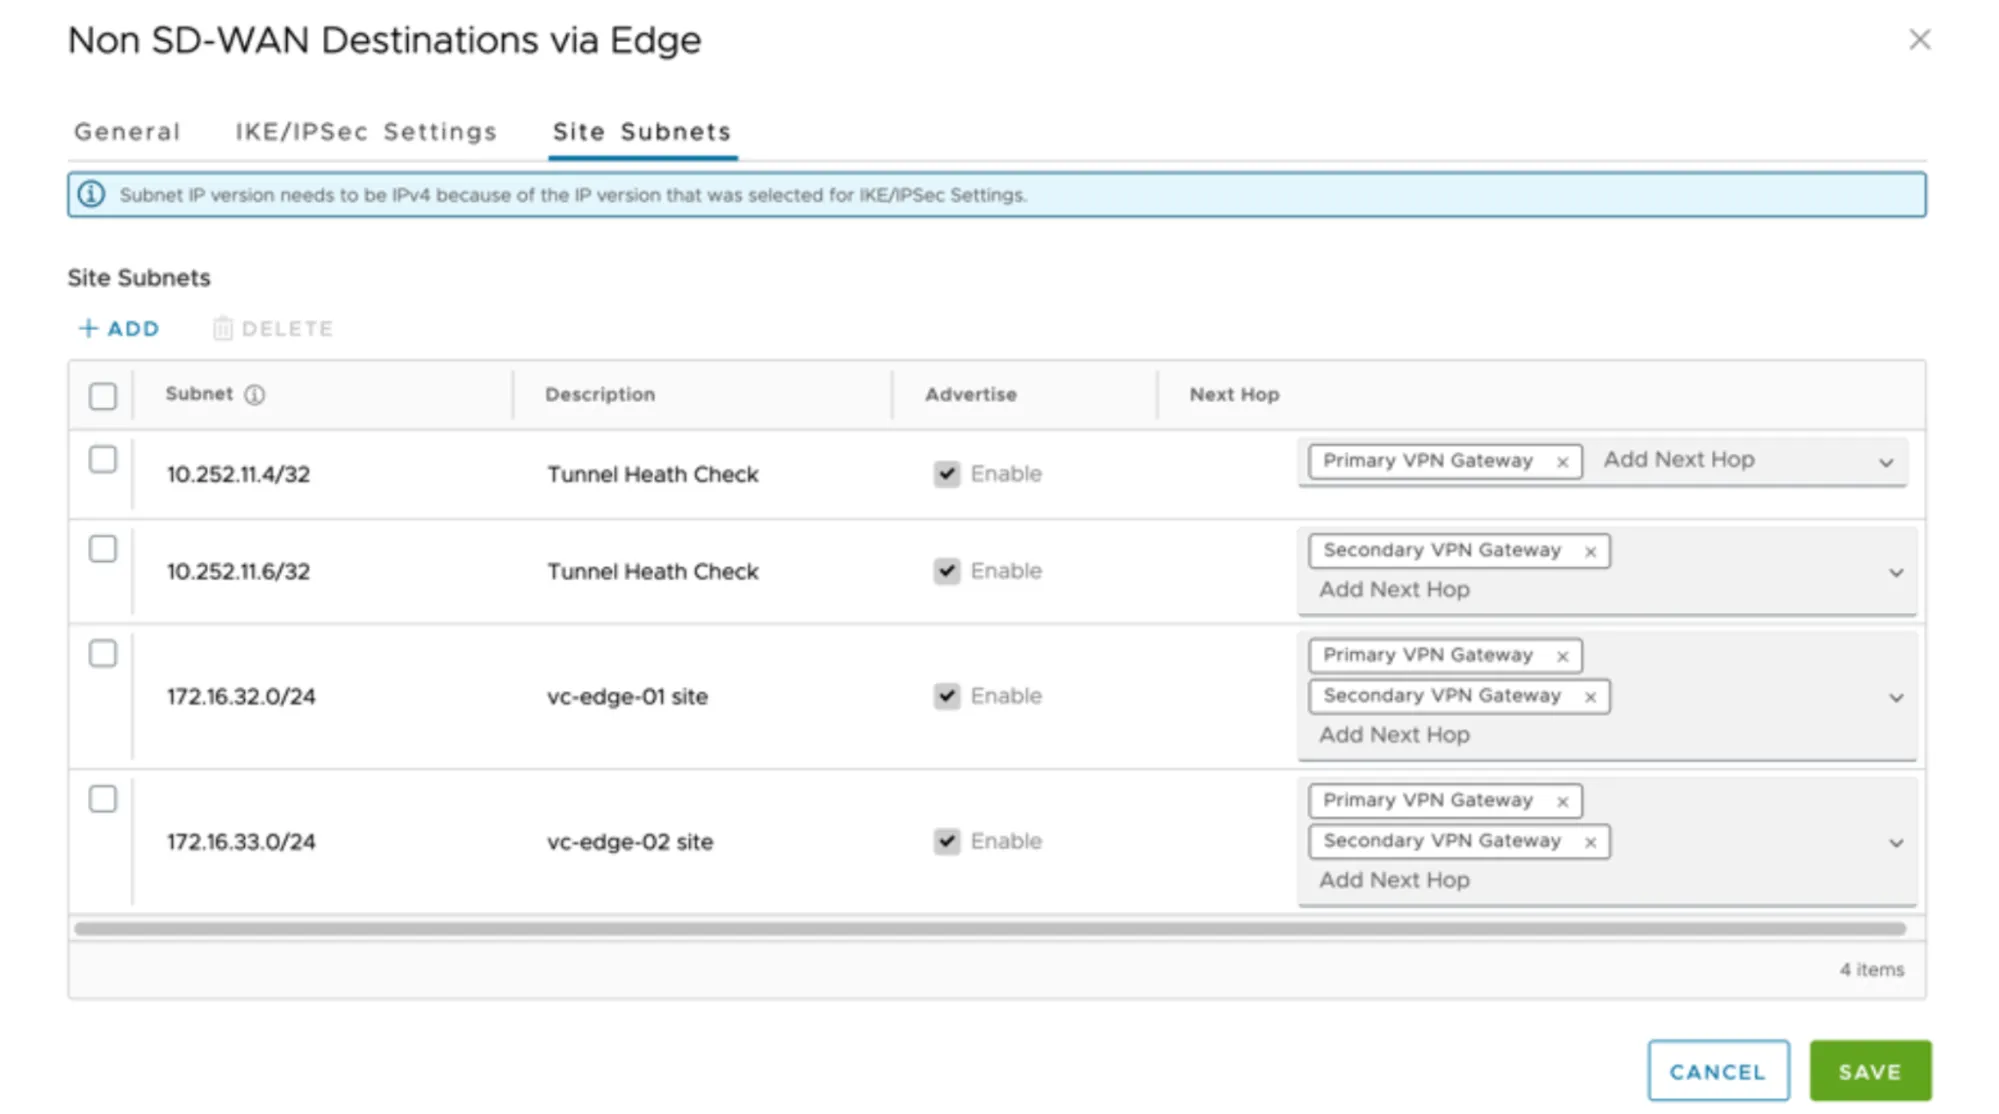
- Select Save to commit changes to the Site Subnets.
Cloudflare WAN and Secure Web Gateway (Cloudflare Gateway) are tightly integrated. Arista VeloCloud customers can easily route traffic through Cloudflare WAN to Cloudflare Gateway. All Internet egress traffic is subject to Cloudflare Gateway policies.
Arista VeloCloud's Business Policies allow for intelligent routing of traffic destined for the Internet with only a few selections.
- Go to Configure > Edges, and select the appropriate Edge appliance.
- Select the Business Policy tab.
- Select Add to create a Business Policy Rule:
- Rule Name: Provide a meaningful name to describe Internet traffic routed through the Cloudflare global anycast network.
- IP Version: IPv4
- Match
- Source: Select Any, Object Groups, or Define to classify the relevant traffic flows.
- Destination: Select Define > Internet
- Application: Any
- Action
- Priority: Normal
- Enable Rate Limit: Unchecked
- Network Service: Internet Backhaul > Non SD-WAN Destination through Edge / Cloud Security Service.
- Non SD-WAN Destination through Edge / Cloud Security Service: Select the Network Service associated with the respective Edge device. For example,
Magic_WAN_vc-edge-03.
- Select Create to save the rule.