Use Workers to draw watermarks, logos, signatures over other images. Overlays support transparency, positioning, and compositing modes.
You can draw overlays in a Worker using two approaches:
cf.imageon a fetch subrequest — Add adrawarray to the image options. All images must be accessible via URL. Use this approach when optimizing images through the URL interface.- Images binding — Chain
.draw()calls when overlaying images from any source, including hosted images or R2.
To draw overlays on a fetch() subrequest in Workers, you can add a draw array to your cf.image options.
Each entry in the array specifies an overlay and its options, including optimization parameters like width, height, fit, blur, and rotate. Overlays are drawn in the order they appear — the last entry is the topmost layer.
export default {
	async fetch(request) {
		const imageURL = "https://example.com/image.png";

		return fetch(imageURL, {
			cf: {
				image: {
					width: 800,
					height: 600,
					draw: [
						{
							url: "https://example.com/branding/logo.png",
							bottom: 5,
							right: 5,
							fit: "contain",
							width: 100,
							height: 50,
							opacity: 0.8,
						},
					],
				},
			},
		});
	},
};The Images binding uses a chainable .draw() method to draw an overlay on top of an image. You can chain multiple .draw() calls for multiple overlays.
Pass the overlay image as the first argument, then the draw options as the second. To apply optimization parameters to the overlay image, pass an .input() chain with .transform() as the first argument.
export default {
async fetch(request, env) {
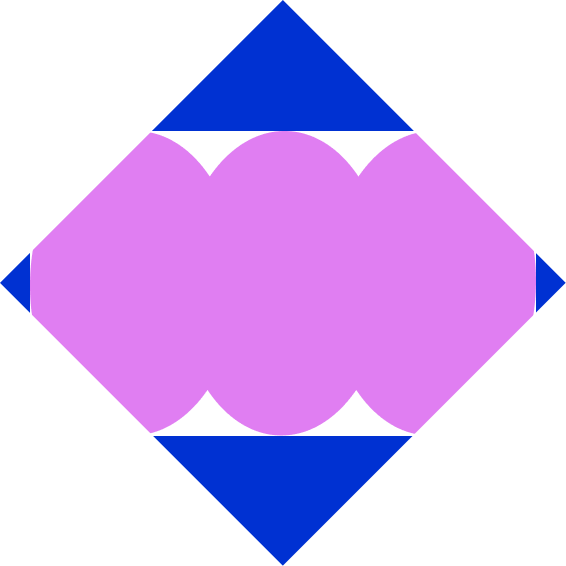
const img = await fetch("https://zzzdna.com/blue.png");
const watermark = await fetch("https://zzzdna.com/purple.png");
const response = (
await env.IMAGES
.input(img.body)
.draw(
env.IMAGES.input(watermark.body).transform({ width: 100 }),
{ bottom: 10, right: 10, opacity: 0.5 }
)
.output({ format: "image/avif" })
).response();
return response;
},
};The dimensions of the output image are always determined by the base image. The overlay is then drawn onto the base image's canvas.
The following draw-specific options can be used for positioning and blending.
Absolute URL of the overlay image when drawing with cf.image. Supports any supported image format. For watermarks or non-rectangular overlays, use PNG or WebP images.
When drawing with the Images binding, the overlay is passed as image bytes or an .input() chain instead of a URL. Refer to Draw with the Images binding.
Sets the maximum dimensions of the overlay image when drawing with cf.image. Accepts an integer (pixels) or a decimal between 0 and 1 representing a fraction of the base image's dimension. For example, height:0.25 sets the overlay height to 25% of the height of the base image.
Use fit and gravity to control how the overlay image is resized and cropped.
When drawing with the Images binding, the dimensions of the overlay image can be set using the .transform() method.
Determines whether to tile the overlay across the image.
Accepts the following values:
true— Tiles the overlay to cover the entire area. This is useful for watermarks.x— Tiles the overlay horizontally only.y— Tiles the overlay vertically only.
Sets the position of the overlay image as an offset, in pixels, to the specified edge. 0 aligns the overlay flush to the edge. If no position is specified, then the overlay is centered.
For example, { bottom: 0, right: 10 } places the overlay at the bottom-right corner, 10 pixels inward from the right edge.
Setting both left and right, or both top and bottom returns an error.
Sets the opacity of the overlay image. Accepts a decimal value between 0.0 (fully transparent) and 1.0 (fully opaque). For example, opacity: 0.5 makes the overlay semitransparent.
Controls how the overlay is blended with the base image using Porter-Duff compositing operations ↗. The default is over.
The composite mode only affects the area within the overlay's bounding box. The base image is always preserved outside of this area.
Accepts the following values:
Draws the overlay image on top of the base image. This is the default composite behavior.
The overlay covers the base where they overlap. Both images are visible where they do not overlap.

Shows the overlay only where the base image is opaque. If the overlay has transparent pixels that overlap with the base image, then those areas of the base image will also become transparent.
Draws the overlay image on top of the base image, but only where the base image is opaque. This will clip the overlay image to the shape of the base image.
If the overlay has transparent pixels that overlap with the base image, then the base image remains visible (unlike in).

Shows the overlay only where the base image is transparent. Within the overlay's bounding box, opaque areas of the base image will become transparent.
Shows the areas of each image where the other is transparent. Overlapping opaque areas will become transparent. This can be used to create rounded corners or custom shapes.

Adds the color values of both images, which makes the overlapping areas brighter.

Tile a semitransparent watermark across the entire image using cf.image.
fetch(imageURL, {
	cf: {
		image: {
			draw: [
				{
					url: "https://example.com/watermark.png",
					repeat: true,
					opacity: 0.2,
				},
			],
		},
	},
});Position a logo at the bottom-right corner using cf.image.
fetch(imageURL, {
	cf: {
		image: {
			draw: [
				{
					url: "https://example.com/logo.png",
					bottom: 5,
					right: 5,
				},
			],
		},
	},
});Combine multiple overlays in one request using cf.image. They are drawn in order — the last entry is the topmost layer.
fetch(imageURL, {
	cf: {
		image: {
			draw: [
				{ url: "https://example.com/watermark.png", repeat: true, opacity: 0.2 },
				{ url: "https://example.com/play-button.png" },
				{ url: "https://example.com/logo.png", bottom: 5, right: 5 },
			],
		},
	},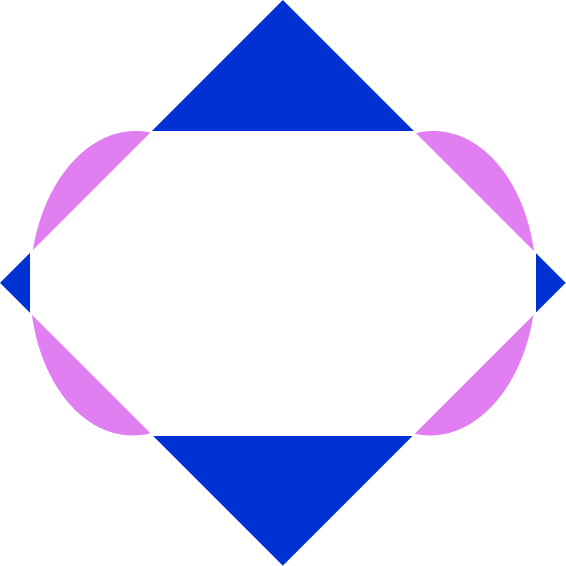
});Cut rounded corners from an image. A corner mask is drawn at each corner and rotated to match the position. xor removes the overlapping pixels.
The example below shows how this can be done using the Images binding.
const image = await fetch("https://example.com/photo.png");
const mask = await fetch("https://example.com/corner-mask.png");

let [topLeft, topRight] = mask.body.tee();
let bottomLeft, bottomRight;
[topLeft, bottomLeft] = topLeft.tee();
[topLeft, bottomRight] = topLeft.tee();

const output = await env.IMAGES
	.input(image.body)
	.draw(env.IMAGES.input(topLeft).transform({ rotate: 0 }), {
		left: 0,
		top: 0,
		composite: "xor",
	})
	.draw(env.IMAGES.input(topRight).transform({ rotate: 90 }), {
		right: 0,
		top: 0,
		composite: "xor",
	})
	.draw(env.IMAGES.input(bottomRight).transform({ rotate: 180 }), {
		bottom: 0,
		right: 0,
		composite: "xor",
	})
	.draw(env.IMAGES.input(bottomLeft).transform({ rotate: 270 }), {
		bottom: 0,
		left: 0,
		composite: "xor",
	})
	.output({ format: "image/png" });

return output.response();