Cisco SD-WAN
Cloudflare partners with Cisco's SD-WAN solution to provide users with an integrated SASE solution. The Cisco SD-WAN appliances (physical and virtual) manage subnets associated with branch offices and cloud instances. Anycast tunnels are set up between these SD-WAN edge devices and Cloudflare to securely route Internet-bound traffic. This tutorial describes how to configure the Cisco Catalyst 8000 Edge Platforms (physical or virtual) in the SD-WAN mode for north-south (Internet-bound) use cases.
Before setting up a connection between Cisco SD-WAN and Cloudflare, you must have:
- Purchased Magic WAN and Secure Web Gateway.
- Cloudflare provisions Magic WAN and Secure Web Gateway.
- Received two Cloudflare tunnel endpoints (anycast IP address) assigned to Magic WAN.
- Cisco SD-WAN appliances (physical or virtual). This ensures specific Internet-bound traffic from the sites' private networks is routed over the anycast GRE tunnels to Secure Web Gateway to enforce a user's specific web access policies.
- A static IP pair to use with the tunnel endpoints. The static IPs should be
/31addresses separate from the IPs used in the subnet deployment. - Release 20.6 Controllers and vEdge Device Builds. You should also pair them with devices that are on at least version Cisco IOS XE SD-WAN 17.6. Refer to Cisco documentation ↗ to learn more about Cisco software versions.
Cisco vManage is Cisco's SD-WAN management tool that is used to manage all the SD-WAN appliances in branch offices.
For this example scenario, a generic template for SIG-Branch was created.

To create a Secure Internet Gateway (SIG) using vManage:
- From Cisco vManage under Configuration, select Generic and Add Tunnel.
- The table below shows the setting fields and their options.
| Setting | Type/Detail |
|---|---|
| Global Template | Factory_Default_Global_CISCO_Template |
| Cisco Banner | Factory_Default_Retail_Banner |
| Policy | Branch-Local-Policy |
Transport & Management VPN settings
| Setting | Type/Detail |
|---|---|
| Cisco VPN 0 | GCP-Branch-VPN0 |
| Cisco Secure Internet Gateway | Branch-SIG-GRE-Template |
| Cisco VPN Interface Ethernet | GCP-Branch-Public-Internet-TLOC |
| Cisco VPN Interface Ethernet | GCP-VPN0-Interface |
| Cisco VPN 512 | Default_AWS_TGW_CSR_VPN512_V01 |
Basic Information settings
| Setting | Type/Detail |
|---|---|
| Cisco System | Default_BootStrap_Cisco_System_Template |
| Cisco Logging | Default_Logging_Cisco_V01 |
| Cisco AAA | AWS-Branch-AAA-Template |
| Cisco BFD | Default_BFD_Cisco-V01 |
| Cisco OMP | Default_AWS_TGW_CSR_OMP_IPv46_... |
| Cisco Security | Default_Security_Cisco_V01 |
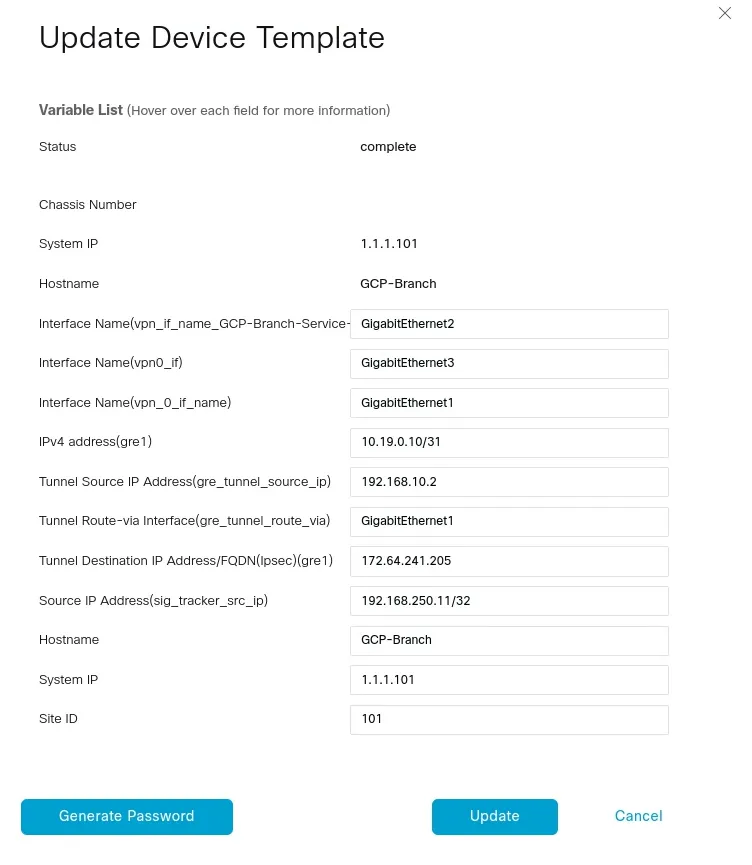
When creating the Feature Template, you can choose values that apply globally or that are device specific. For example, the Tunnel Source IP Address, Interface Name and fields from Update Tunnel are device specific and should be chosen accordingly.
From vManage, select Configuration > Templates. You should see the newly created template where you will update the device values.
Because the template was created to add GRE tunnels, you only need to update the device values. Note that VPN0 is the default, and the WAN interface used to build the tunnel must be part of VPN0.
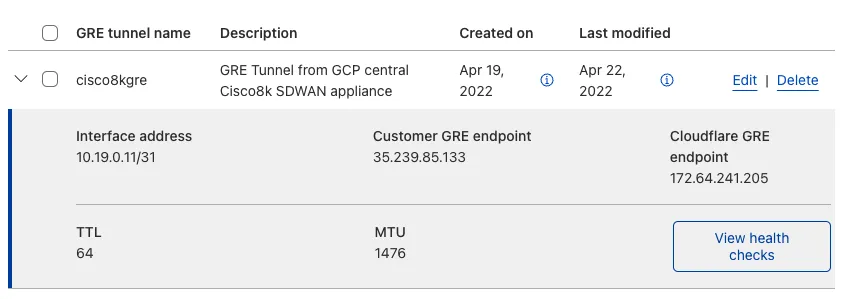
Refer to Configure tunnel endpoints for more information on creating a GRE tunnel.
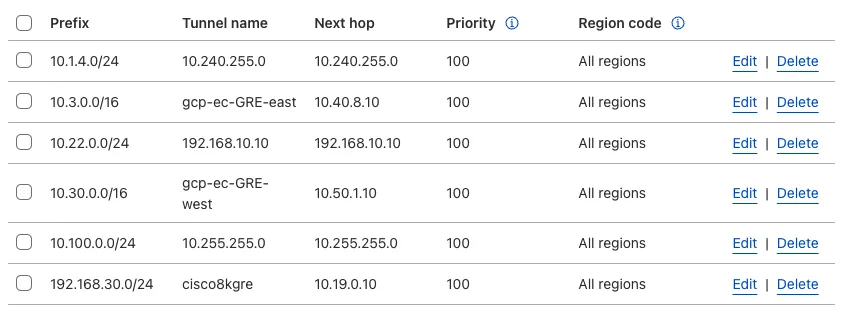
Refer to Configure static routes for more information on configuring your static routes.
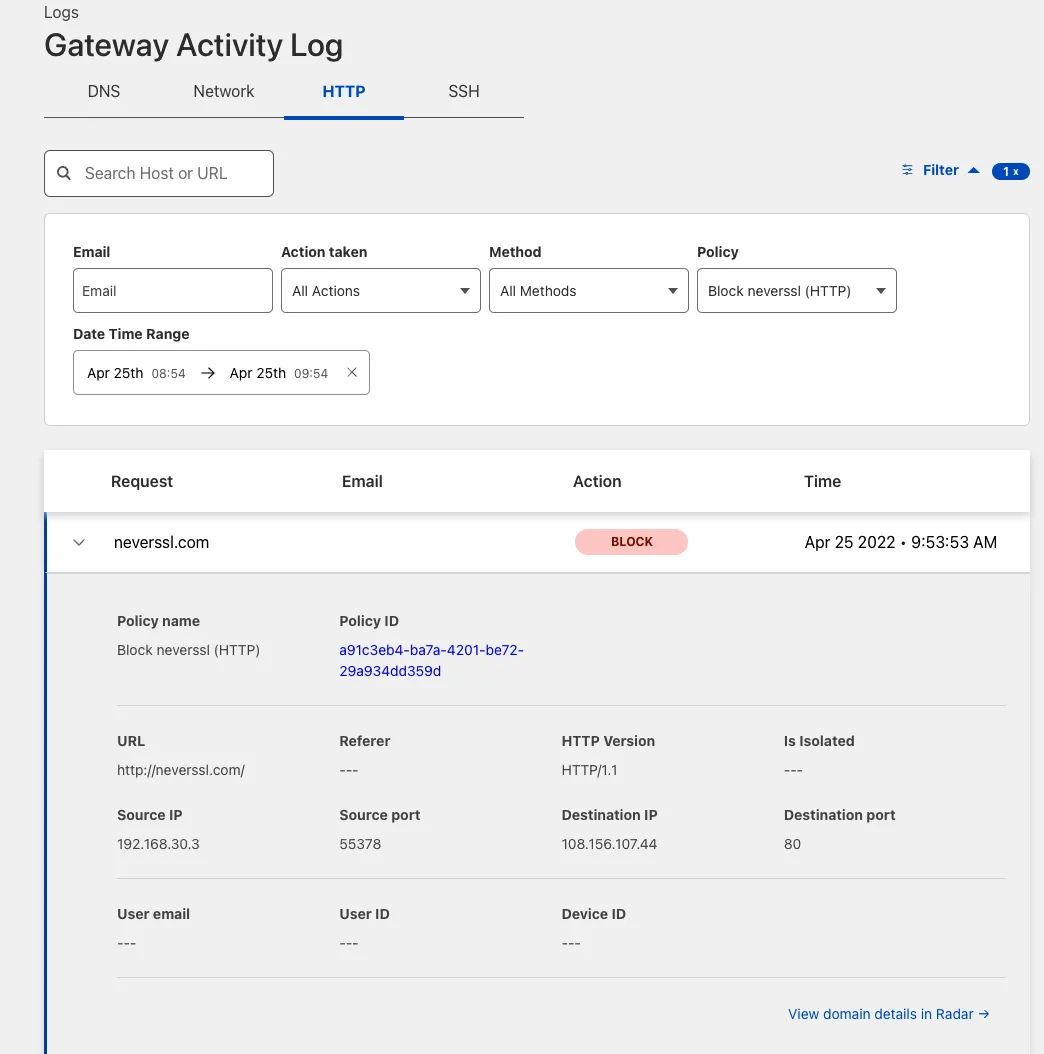
In the example below, a request for neverssl.com was issued, which has a Cloudflare policy blocking traffic to neverssl.com.
On the client VM (192.168.30.3), a blocked response is visible.
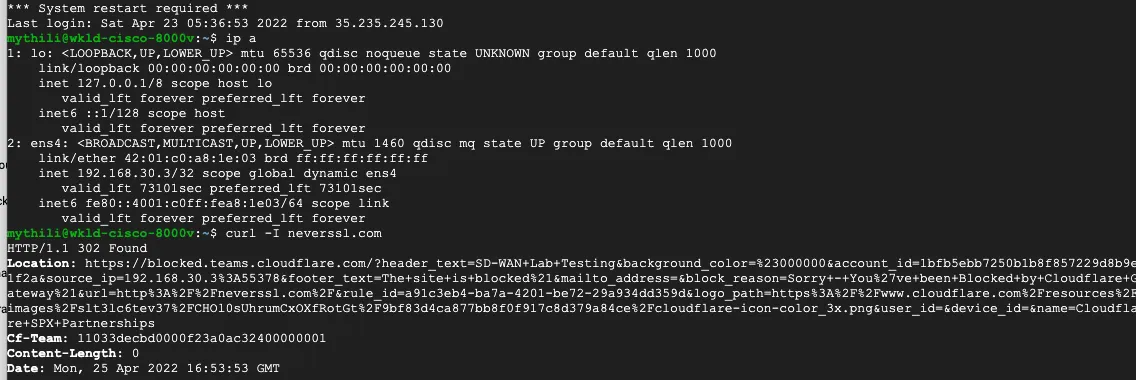
A matching blocked log line is visible from the Cloudflare logs.
IPsec tunnels to Cloudflare can only be created on Cisco 8000v in the router mode today. Refer to the Cisco IOS XE for more information.
Was this helpful?
- Resources
- API
- New to Cloudflare?
- Directory
- Sponsorships
- Open Source
- Support
- Help Center
- System Status
- Compliance
- GDPR
- Company
- cloudflare.com
- Our team
- Careers
- © 2026 Cloudflare, Inc.
- Privacy Policy
- Terms of Use
- Report Security Issues
- Trademark
-
