Generate PDFs Using HTML and CSS
As seen in the Deploy a Browser Run Worker guide, Browser Run can be used to generate screenshots for any given URL. Alongside screenshots, you can also generate full PDF documents for a given webpage, and can also provide the webpage markup and style ourselves.
You can generate PDFs with Browser Run in two ways:
- Quick Actions: Use the /pdf endpoint. This is ideal if you do not need to customize rendering behavior.
- Puppeteer or Playwright: Use browser automation within Workers for additional control and customization.
Choose the method that best fits your use case.
The following example shows you how to generate a PDF using Puppeteer.
- Use the
create-cloudflareCLI to generate a new Hello World Cloudflare Worker script:
npm create cloudflare@latest -- browser-workeryarn create cloudflare browser-workerpnpm create cloudflare@latest browser-worker- Install
@cloudflare/puppeteer, which allows you to control the Browser Run instance:
npm i -D @cloudflare/puppeteeryarn add -D @cloudflare/puppeteerpnpm add -D @cloudflare/puppeteerbun add -d @cloudflare/puppeteer- Add your Browser Run binding to your new Wrangler configuration:
{ "browser": { "binding": "BROWSER", },}[browser]binding = "BROWSER"- Replace the contents of
src/index.ts(orsrc/index.jsfor JavaScript projects) with the following skeleton script:
import puppeteer from "@cloudflare/puppeteer";
const generateDocument = (name: string) => {};
export default {  async fetch(request, env) {    const { searchParams } = new URL(request.url);    let name = searchParams.get("name");
    if (!name) {      return new Response("Please provide a name using the ?name= parameter");    }
    const browser = await puppeteer.launch(env.BROWSER);    const page = await browser.newPage();
    // Step 1: Define HTML and CSS    const document = generateDocument(name);
    // Step 2: Send HTML and CSS to our browser    await page.setContent(document);
    // Step 3: Generate and return PDF
return new Response(); },};Rather than using Browser Run to navigate to a user-provided URL, manually generate a webpage, then provide that webpage to the Browser Run instance. This allows you to render any design you want.
For this example, we are going to take in user-provided content (via a '?name=' parameter), and have that name output in the final PDF document.
To start, fill out your generateDocument function with the following:
const generateDocument = (name: string) => {  return `<!DOCTYPE html><html lang="en">  <head>    <meta charset="utf-8" />    <style>      html,      body,      #container {        width: 100%;        height: 100%;        margin: 0;      }      body {        font-family: Baskerville, Georgia, Times, serif;        background-color: #f7f1dc;      }      strong {        color: #5c594f;        font-size: 128px;        margin: 32px 0 48px 0;      }      em {        font-size: 24px;      }      #container {        flex-direction: column;        display: flex;        align-items: center;        justify-content: center;        text-align: center;      }    </style>  </head>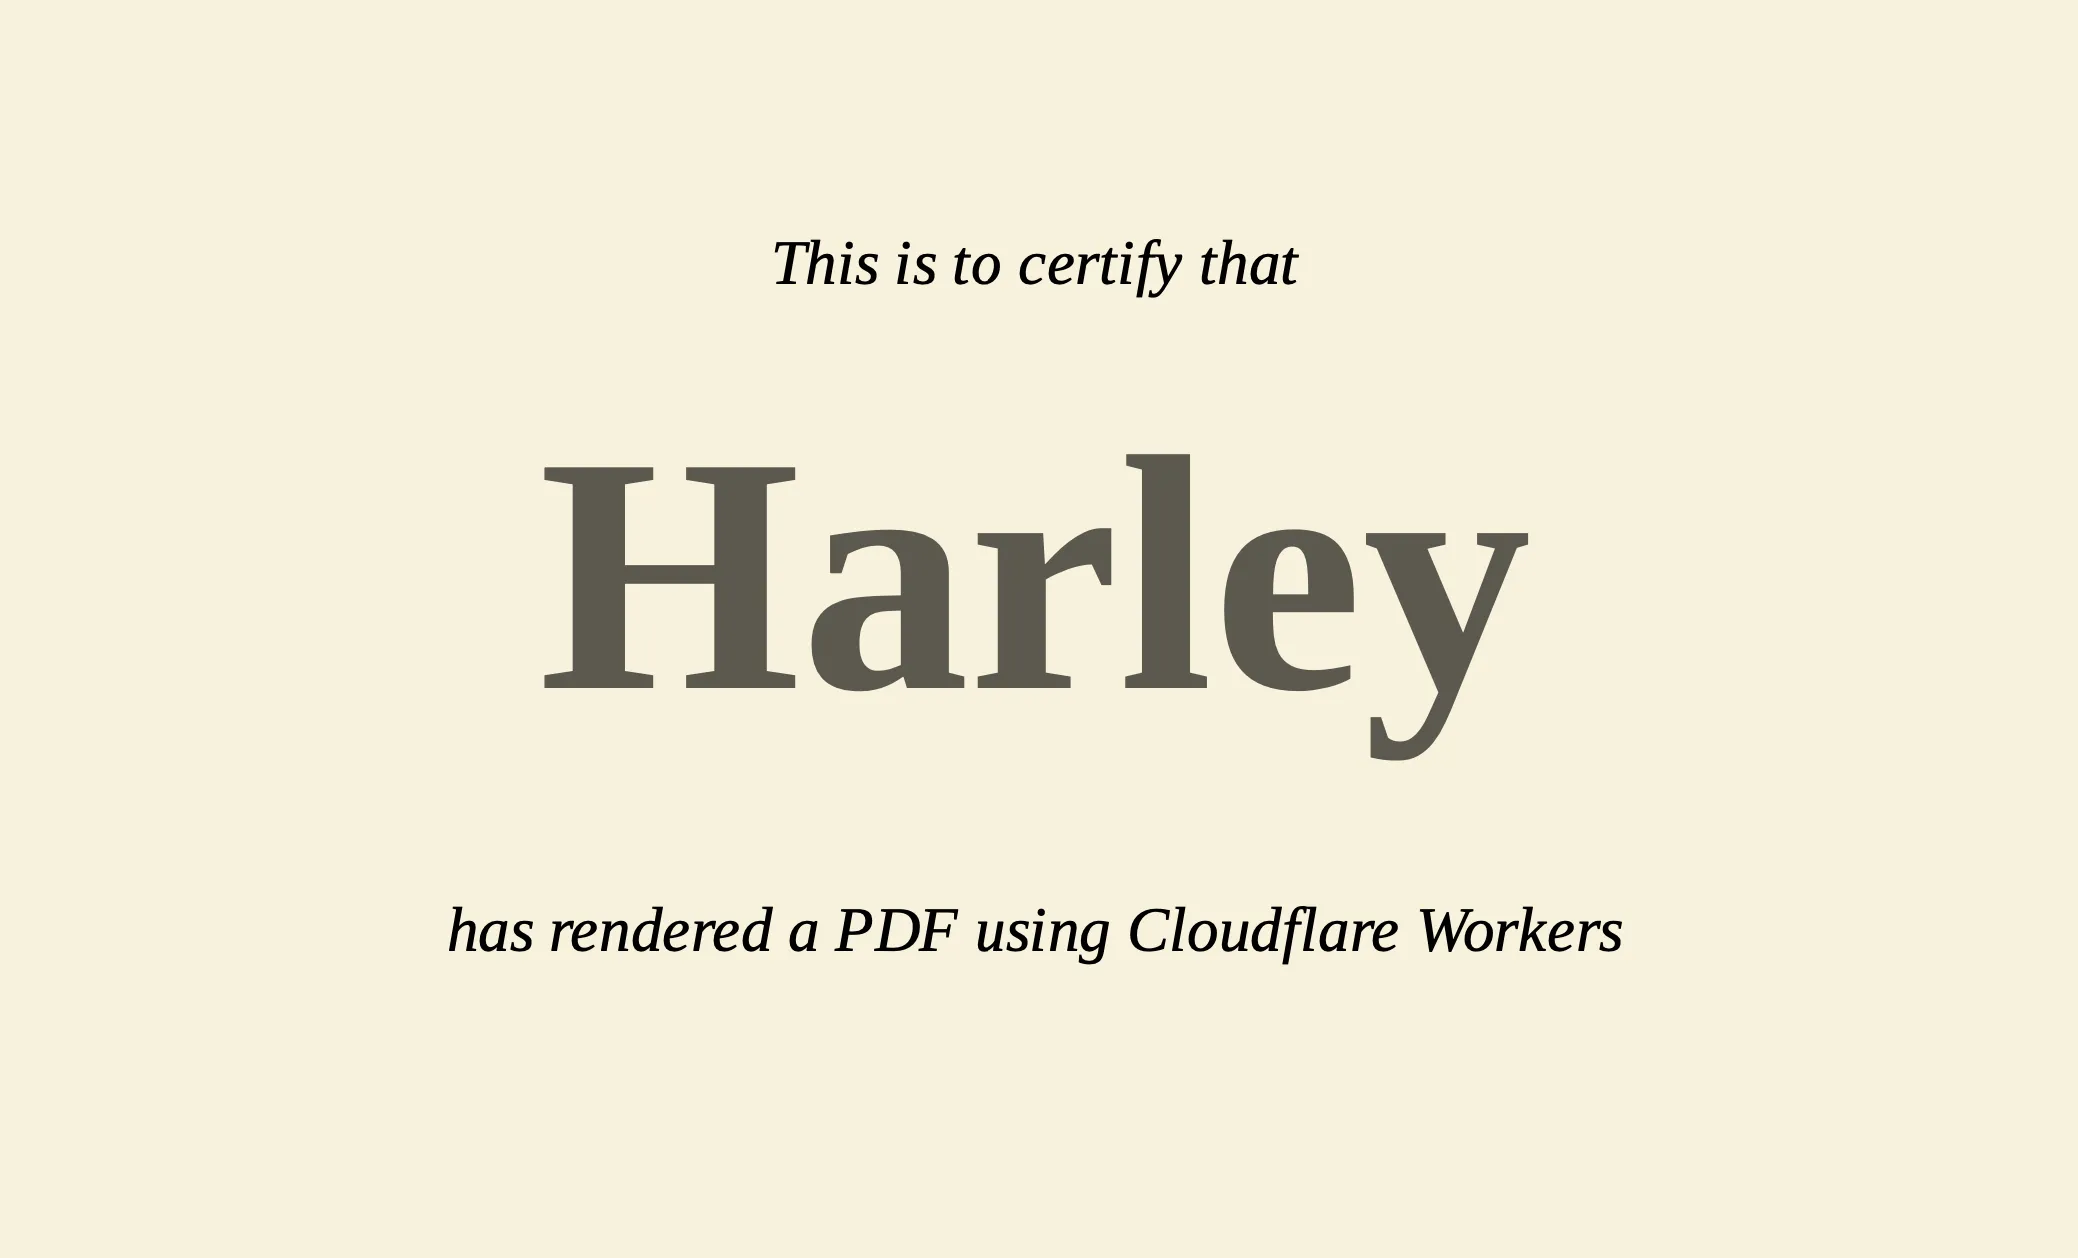
<body> <div id="container"> <em>This is to certify that</em> <strong>${name}</strong> <em>has rendered a PDF using Cloudflare Workers</em> </div> </body></html>`;};This example HTML document should render a beige background imitating a certificate showing that the user-provided name has successfully rendered a PDF using Cloudflare Workers.
Now that you have your fully styled HTML document, you can take the contents and send it to your browser instance. Create an empty page to store this document as follows:
const browser = await puppeteer.launch(env.BROWSER);const page = await browser.newPage();The page.setContent() ↗ function can then be used to set the page's HTML contents from a string, so you can pass in your created document directly like so:
await page.setContent(document);With your Browser Run instance now rendering your provided HTML and CSS, you can use the page.pdf() ↗ command to generate a PDF file and return it to the client.
let pdf = page.pdf({ printBackground: true });The page.pdf() call supports a number of options ↗, including setting the dimensions of the generated PDF to a specific paper size, setting specific margins, and allowing fully-transparent backgrounds. For now, you are only overriding the printBackground option to allow your body background styles to show up.
Now that you have your PDF data, return it to the client in the Response with an application/pdf content type:
return new Response(pdf, { headers: { "content-type": "application/pdf", },});The full Worker script now looks as follows:
import puppeteer from "@cloudflare/puppeteer";
const generateDocument = (name: string) => {  return `<!DOCTYPE html><html lang="en">  <head>    <meta charset="utf-8" />    <style>    html, body, #container {    width: 100%;      height: 100%;    margin: 0;    }      body {        font-family: Baskerville, Georgia, Times, serif;        background-color: #f7f1dc;      }      strong {        color: #5c594f;    font-size: 128px;    margin: 32px 0 48px 0;      }    em {    font-size: 24px;    }      #container {    flex-direction: column;        display: flex;        align-items: center;        justify-content: center;    text-align: center      }    </style>  </head>
  <body>    <div id="container">    <em>This is to certify that</em>    <strong>${name}</strong>    <em>has rendered a PDF using Cloudflare Workers</em>  </div>  </body></html>`;};
export default {  async fetch(request, env) {    const { searchParams } = new URL(request.url);    let name = searchParams.get("name");
    if (!name) {      return new Response("Please provide a name using the ?name= parameter");    }
    const browser = await puppeteer.launch(env.BROWSER);    const page = await browser.newPage();
    // Step 1: Define HTML and CSS    const document = generateDocument(name);
    // // Step 2: Send HTML and CSS to our browser    await page.setContent(document);
    // // Step 3: Generate and return PDF    const pdf = await page.pdf({ printBackground: true });
    // Close browser since we no longer need it    await browser.close();
return new Response(pdf, { headers: { "content-type": "application/pdf", }, }); },};You can run this script to test it via:
npx wrangler devyarn wrangler devpnpm wrangler devWith your script now running, you can pass in a ?name parameter to the local URL (such as http://localhost:8787/?name=Harley) and should see the following:
If your PDF requires a specific font that is not pre-installed in the Browser Run environment, you can load custom fonts using addStyleTag. This allows you to inject fonts from a CDN or embed them as Base64 strings before generating your PDF.
For detailed instructions and examples, refer to Use your own custom font.
Dynamically generating PDF documents solves a number of common use-cases, from invoicing customers to archiving documents to creating dynamic certificates (as seen in the simple example here).