After you subscribe to Stream, you can create Live Inputs in Dash or via the API. Broadcast to your new Live Input using RTMPS or SRT. SRT supports newer video codecs and makes using accessibility features, such as captions and multiple audio tracks, easier.
First time live streaming? You will need software to send your video to Cloudflare. Learn how to go live on Stream using OBS Studio.
Step 1: In the Cloudflare dashboard, go to the Live inputs page and create a live input.
Go to Live inputs ↗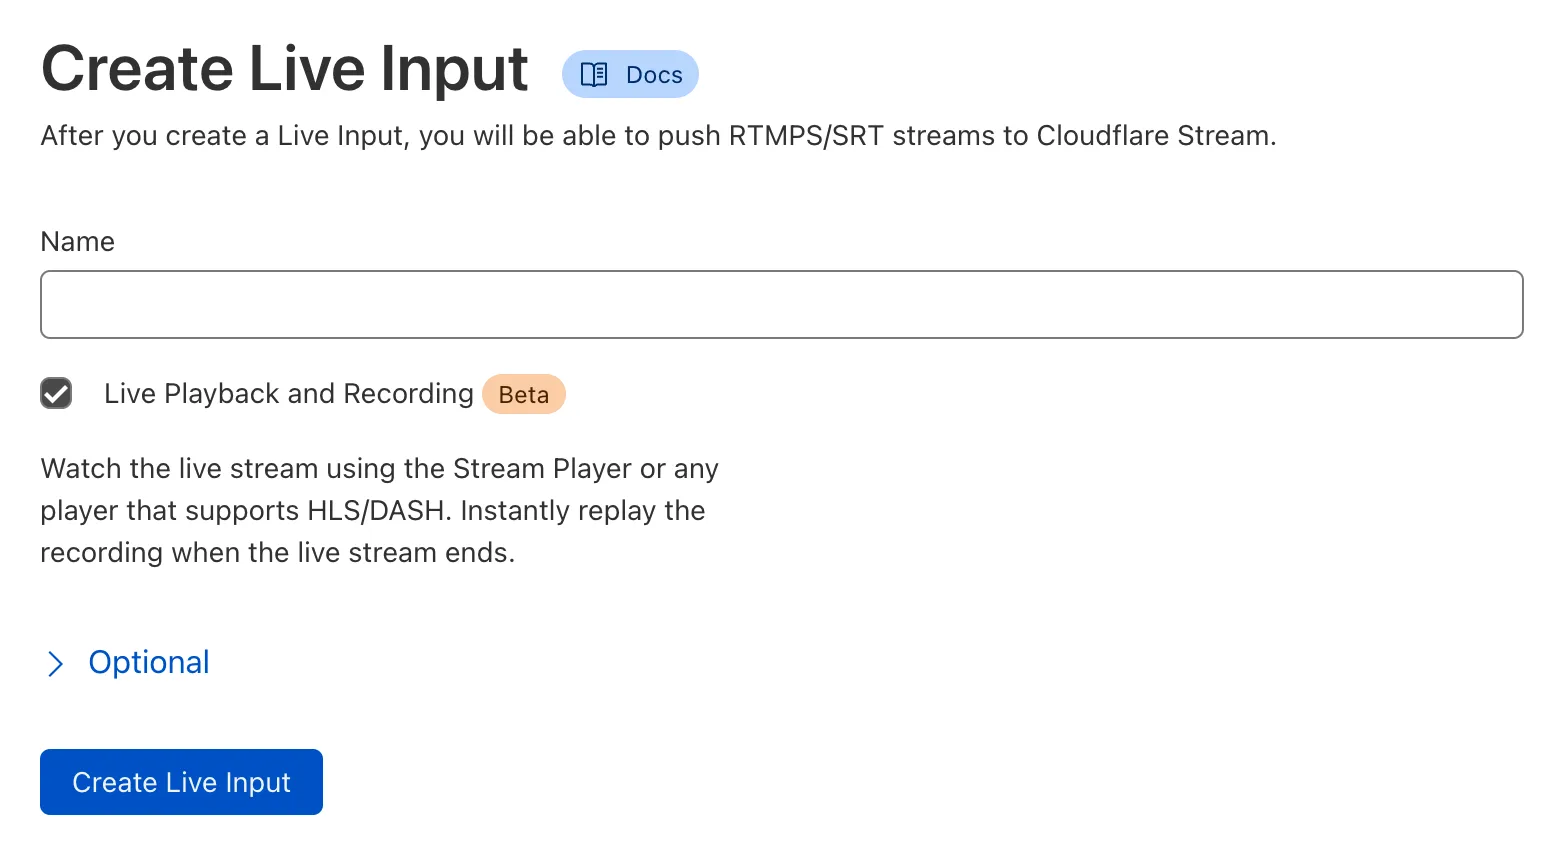
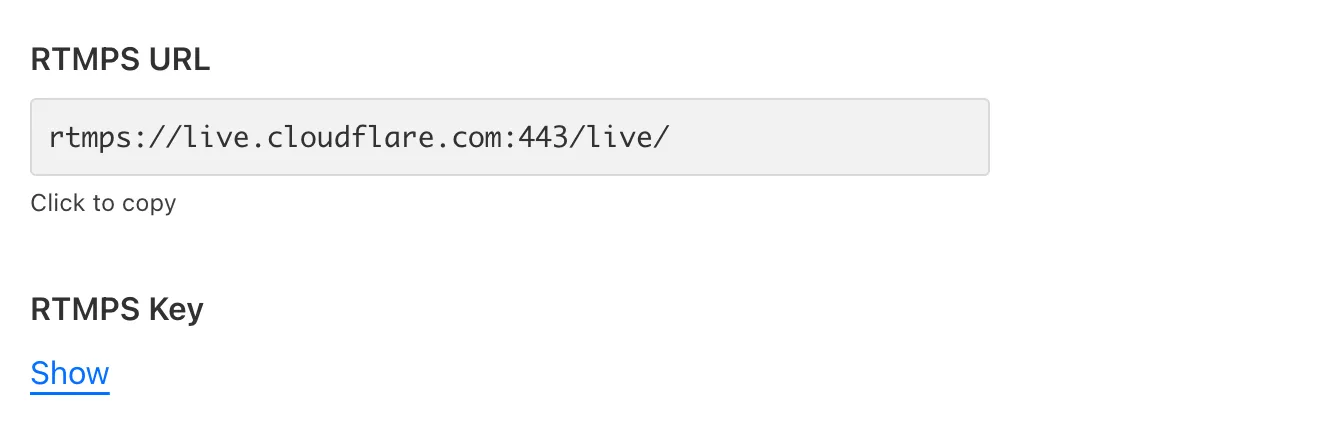
Step 2: Copy the RTMPS URL and key, and use them with your live streaming application. We recommend using Open Broadcaster Software (OBS) ↗ to get started.
Step 3: Go live and preview your live stream in the Stream Dashboard
In the Stream Dashboard, within seconds of going live, you will see a preview of what your viewers will see. To add live video playback to your website or app, refer to Play videos.
To start a live stream programmatically, make a POST request to the /live_inputs endpoint:
curl -X POST \
--header "Authorization: Bearer <API_TOKEN>" \
--data '{"meta": {"name":"test stream"},"recording": { "mode": "automatic" }}' \
https://api.cloudflare.com/client/v4/accounts/{account_id}/stream/live_inputs{
"uid": "f256e6ea9341d51eea64c9454659e576",
"rtmps": {
"url": "rtmps://live.cloudflare.com:443/live/",
"streamKey": "MTQ0MTcjM3MjI1NDE3ODIyNTI1MjYyMjE4NTI2ODI1NDcxMzUyMzcf256e6ea9351d51eea64c9454659e576"
},
"created": "2021-09-23T05:05:53.451415Z",
"modified": "2021-09-23T05:05:53.451415Z",
"meta": {
"name": "test stream"
},
"status": null,
"recording": {
"mode": "automatic",
"requireSignedURLs": false,
"allowedOrigins": null,
"hideLiveViewerCount": false
},
"enabled": true,
"deleteRecordingAfterDays": null,
"preferLowLatency": false
}API Reference Docs for /live_inputs
-
enabledboolean default:true- Controls whether the live input accepts incoming broadcasts. When set to
false, the live input will reject any incoming RTMPS or SRT connections. Use this property to programmatically end creator broadcasts or prevent new broadcasts from starting on a specific input.
- Controls whether the live input accepts incoming broadcasts. When set to
preferLowLatencyboolean default:falseBeta- When set to true, this live input will be enabled for the beta Low-Latency HLS pipeline. The Stream built-in player will automatically use LL-HLS when possible. (Recording
modeproperty must also be set toautomatic.)
- When set to true, this live input will be enabled for the beta Low-Latency HLS pipeline. The Stream built-in player will automatically use LL-HLS when possible. (Recording
-
deleteRecordingAfterDaysinteger default:null(any)-
Specifies a date and time when the recording, not the input, will be deleted. This property applies from the time the recording is made available and ready to stream. After the recording is deleted, it is no longer viewable and no longer counts towards storage for billing. Minimum value is
30, maximum value is1096.When the stream ends, a
scheduledDeletiontimestamp is calculated using thedeleteRecordingAfterDaysvalue if present.Note that if the value is added to a live input while a stream is live, the property will only apply to future streams.
-
-
timeoutSecondsinteger default:0- The
timeoutSecondsproperty specifies how long a live feed can be disconnected before it results in a new video being created.
- The
The following four properties are nested under the recording object.
-
modestring default:off- When the mode property is set to
automatic, the live stream will be automatically available for viewing using HLS/DASH. In addition, the live stream will be automatically recorded for later replays. By default, recording mode is set tooff, and the input will not be recorded or available for playback.
- When the mode property is set to
-
requireSignedURLsboolean default:false- The
requireSignedURLsproperty indicates if signed URLs are required to view the video. This setting is applied by default to all videos recorded from the input. In addition, if viewing a video via the live input ID, this field takes effect over any video-level settings.
- The
-
allowedOriginsinteger default:null(any)- The
allowedOriginsproperty can optionally be invoked to provide a list of allowed origins. This setting is applied by default to all videos recorded from the input. In addition, if viewing a video via the live input ID, this field takes effect over any video-level settings.
- The
-
hideLiveViewerCountboolean default:false- Restrict access to the live viewer count and remove the value from the player.
You can update live inputs by making a PUT request:
curl --request PUT \
https://api.cloudflare.com/client/v4/accounts/{account_id}/stream/live_inputs/{input_id} \
--header "Authorization: Bearer <API_TOKEN>" \
--data '{"meta": {"name":"test stream 1"},"recording": { "mode": "automatic", "timeoutSeconds": 10 }}'
Delete a live input by making a DELETE request:
curl --request DELETE \
https://api.cloudflare.com/client/v4/accounts/{account_id}/stream/live_inputs/{input_id} \
--header "Authorization: Bearer <API_TOKEN>"If you are experiencing buffering, freezing, experiencing latency, or having other similar issues, visit live stream troubleshooting.
- Your creators should use an appropriate bitrate for their live streams, typically well under 12Mbps (12000Kbps). High motion, high frame rate content typically should use a higher bitrate, while low motion content like slide presentations should use a lower bitrate.
- Your creators should use a GOP duration ↗ (keyframe interval) of between 2 to 8 seconds. The default in most encoding software and hardware, including Open Broadcaster Software (OBS), is within this range. Setting a lower GOP duration will reduce latency for viewers, while also reducing encoding efficiency. Setting a higher GOP duration will improve encoding efficiency, while increasing latency for viewers. This is a tradeoff inherent to video encoding, and not a limitation of Cloudflare Stream.
- When possible, select CBR (constant bitrate) instead of VBR (variable bitrate) as CBR helps to ensure a stable streaming experience while preventing buffering and interruptions.
- Turn off B Frames or set them to 0. B Frames are incompatible with LL-HLS and will result in jitter and sporadic buffering delays.
- For lowest latency, use a GOP size (or "keyframe interval") of 2 - 4 seconds.
- Broadcast to the RTMP endpoint if possible, SRT otherwise.
- If using OBS, select the "ultra low" latency profile.
- Closed GOPs are required. This means that if there are any B frames in the video, they should always refer to frames within the same GOP. This setting is the default in most encoding software and hardware, including OBS Studio ↗.
- Stream Live only supports H.264 video and AAC audio codecs as inputs. This requirement does not apply to inputs that are relayed to Stream Connect outputs. Stream Live supports ADTS but does not presently support LATM.
- Clients must be configured to reconnect when a disconnection occurs. Stream Live is designed to handle reconnection gracefully by continuing the live stream.
- Watermarks cannot yet be used with live videos.
- If a live video exceeds seven days in length, the recording will be truncated to seven days. Only the first seven days of live video content will be recorded.