Changelog
New updates and improvements at Cloudflare.

Hyperdrive now caches queries in all Cloudflare locations, decreasing cache hit latency by up to 90%.
When you make a query to your database and Hyperdrive has cached the query results, Hyperdrive will now return the results from the nearest cache. By caching data closer to your users, the latency for cache hits reduces by up to 90%.
This reduction in cache hit latency is reflected in a reduction of the session duration for all queries (cached and uncached) from Cloudflare Workers to Hyperdrive, as illustrated below.
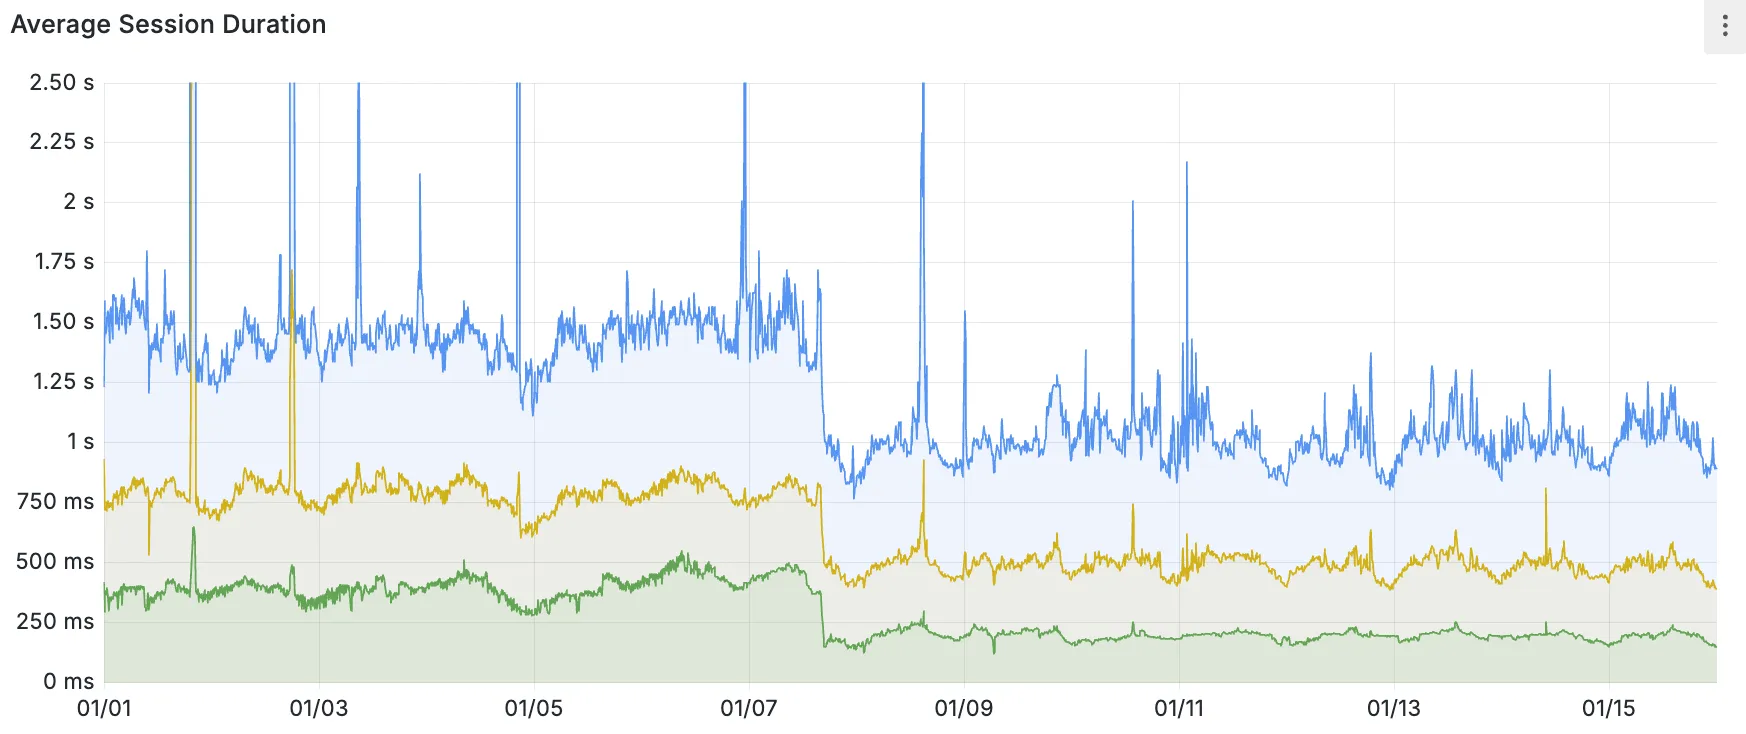
P50, P75, and P90 Hyperdrive session latency for all client connection sessions (both cached and uncached queries) for Hyperdrive configurations with caching enabled during the rollout period.
This performance improvement is applied to all new and existing Hyperdrive configurations that have caching enabled.
For more details on how Hyperdrive performs query caching, refer to the Hyperdrive documentation.
You can now use the
cacheproperty of theRequestinterface to bypass Cloudflare's cache when making subrequests from Cloudflare Workers, by setting its value tono-store.index.js export default {async fetch(req, env, ctx) {const request = new Request("https://cloudflare.com", {cache: "no-store",});const response = await fetch(request);return response;},};index.ts export default {async fetch(req, env, ctx): Promise<Response> {const request = new Request("https://cloudflare.com", { cache: 'no-store'});const response = await fetch(request);return response;}} satisfies ExportedHandler<Environment>When you set the value to
no-storeon a subrequest made from a Worker, the Cloudflare Workers runtime will not check whether a match exists in the cache, and not add the response to the cache, even if the response includes directives in theCache-ControlHTTP header that otherwise indicate that the response is cacheable.This increases compatibility with NPM packages and JavaScript frameworks that rely on setting the
cacheproperty, which is a cross-platform standard part of theRequestinterface. Previously, if you set thecacheproperty onRequest, the Workers runtime threw an exception.If you've tried to use
@planetscale/database,redis-js,stytch-node,supabase,axiom-jsor have seen the error messageThe cache field on RequestInitializerDict is not implemented in fetch— you should try again, making sure that the Compatibility Date of your Worker is set to on or after2024-11-11, or thecache_option_enabledcompatibility flag is enabled for your Worker.- Learn how the Cache works with Cloudflare Workers
- Enable Node.js compatibility for your Cloudflare Worker
- Explore Runtime APIs and Bindings available in Cloudflare Workers
Workflows is now in open beta, and available to any developer a free or paid Workers plan.
Workflows allow you to build multi-step applications that can automatically retry, persist state and run for minutes, hours, days, or weeks. Workflows introduces a programming model that makes it easier to build reliable, long-running tasks, observe as they progress, and programmatically trigger instances based on events across your services.
You can get started with Workflows by following our get started guide and/or using
npm create cloudflareto pull down the starter project:Terminal window npm create cloudflare@latest workflows-starter -- --template "cloudflare/workflows-starter"You can open the
src/index.tsfile, extend it, and usewrangler deployto deploy your first Workflow. From there, you can:- Learn the Workflows API
- Trigger Workflows via your Workers apps.
- Understand the Rules of Workflows and how to adopt best practices
You can now easily enable Real User Monitoring (RUM) monitoring for your hostnames, while safely dropping requests from visitors in the European Union to comply with GDPR and CCPA.
Our Web Analytics product has always been centered on giving you insights into your users' experience that you need to provide the best quality experience, without sacrificing user privacy in the process.
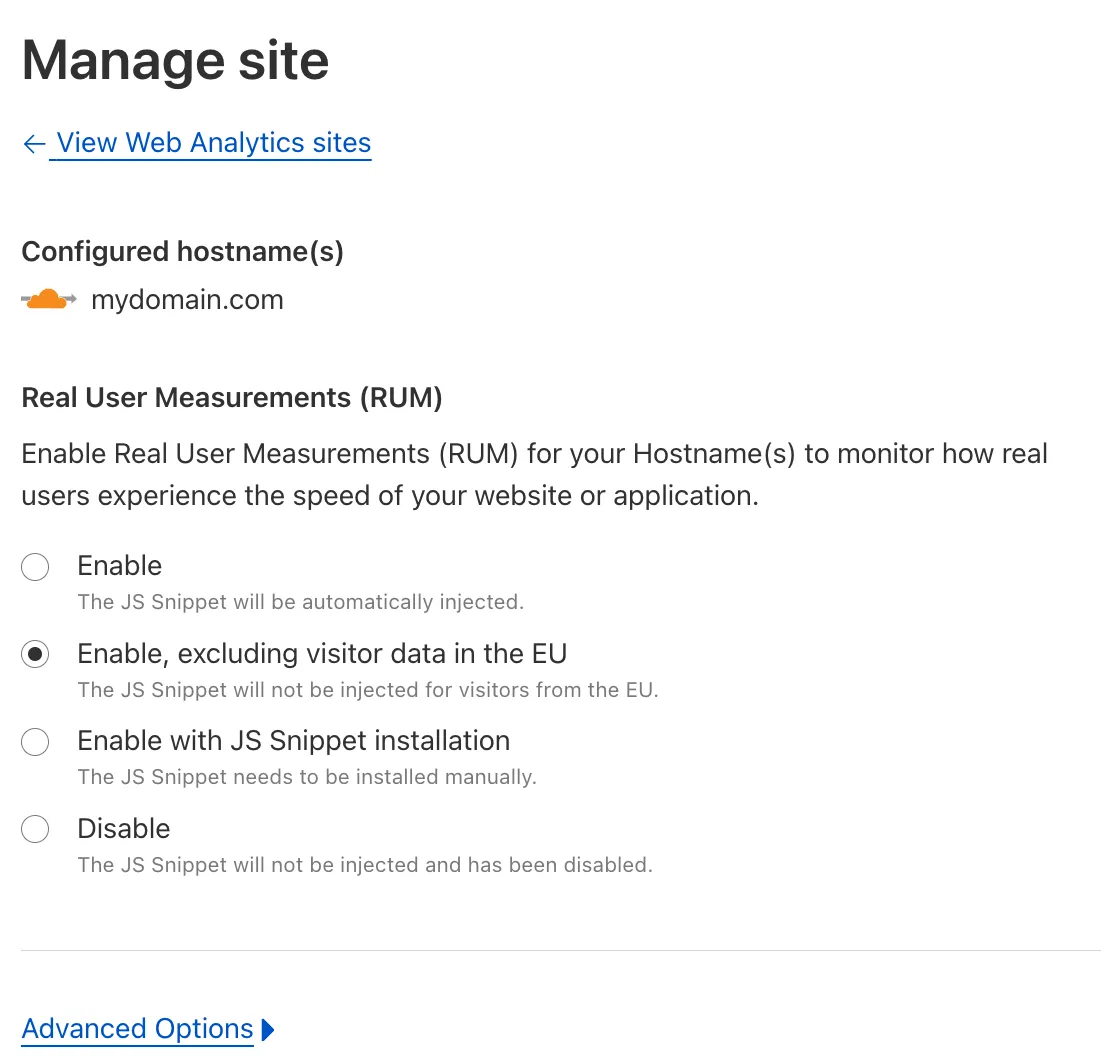
To help with that aim, you can now selectively enable RUM monitoring for your hostname and exclude EU visitor data in a single click. If you opt for this option, we will drop all metrics collected by our EU data centeres automatically.
You can learn more about what metrics are reported by Web Analytics and how it is collected in the Web Analytics documentation. You can enable Web Analytics on any hostname by going to the Web Analytics ↗ section of the dashboard, selecting "Manage Site" for the hostname you want to monitor, and choosing the appropriate enablement option.