Kentik is a network observability company that helps detect attacks on your network and triggers Cloudflare's Magic Transit to begin advertisement. Together, Kentik and Magic Transit On Demand work to create a fully Software-as-a-Service (SaaS)-based, Distributed Denial of Service (DDoS) protection solution to help you mitigate attacks and protect your network automatically.
In this tutorial, the example scenario includes two mitigations, one which pulls the advertisement from the router and a second mitigation that makes an API call to Cloudflare to begin advertising the prefixes from Cloudflare's global network.
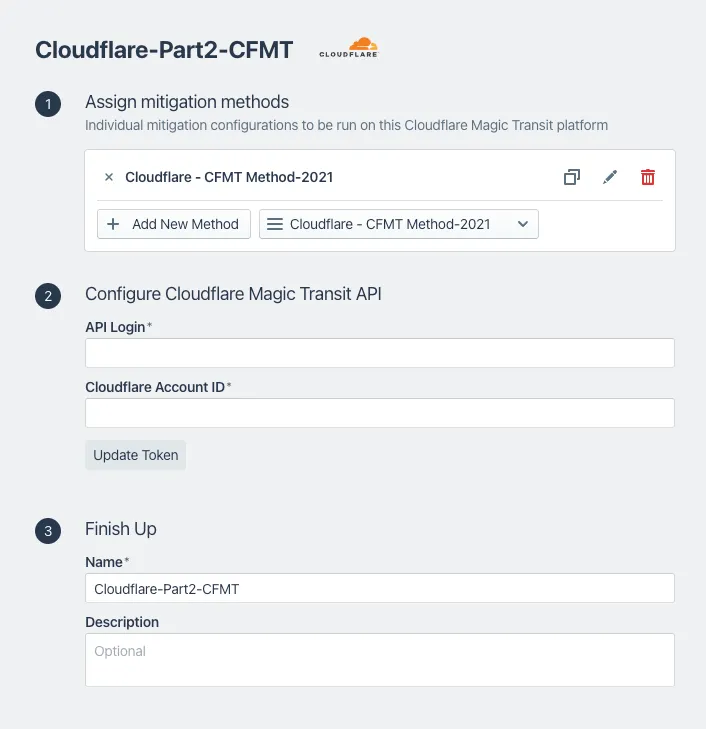
You will need the email address associated with your Cloudflare account, Cloudflare Account ID, and Cloudflare API token to configure the connection for Magic Transit in Kentik.
-
Log in to your Kentik account.
-
Select Menu > Settings.
-
From the Settings page under Customizations, select Mitigations.
-
On the Configure Mitigations page, locate the Cloudflare section.
-
Select Edit next to the Cloudflare branded mitigation to edit and review the information.
In the following example, section 2 uses the Cloudflare email address, Account ID, and API token to send the API call to Cloudflare to begin advertising routes and turn on Magic Transit for the customer's network.
-
After reviewing the information, select Update Mitigation Platform.
-
Select Menu > Library.
-
On the Library page, in the search field, enter Cloudflare.
-
Under Uncategorized Views, select Cloudflare Saved View. This displays the data explorer.
-
From Options > Time, you can edit the Lookback information to review traffic source information for a specific time period.
For additional information about Kentik and Magic Transit, refer to Kentik's Magic Transit setup ↗.
-
Go to the Address space page.
Go to Address space ↗ -
Select the BYOIP addresses tab.
-
In this example scenario, the prefix Cloudflare protects displays a Withdrawn status.
After a DDoS attack occurs, the status changes to Advertised, which indicates Cloudflare protects the network.
For a detailed view of actions taken and attack types, use the Network Analytics dashboard. For more information about Network Analytics, refer to Network Analytics.
Go to the Network Analytics page.
Go to Network analytics ↗