Follow this tutorial to start testing and deploying zone configuration changes with Version Management.
By default, Version Management is not enabled on a zone.
To enable Version Management ↗:
-
Log in to the Cloudflare dashboard.
Go to Account home ↗ -
Select your account and zone.
-
Go to Version Management.
-
Select Enable versioning.
Once you enable Version Management, Cloudflare will automatically create:
- Version Zero, think about this as the configuration of your current zone. Once default environments are created, Version Zero is automatically deployed to them, guaranteeing no disruption in your live traffic. This Version is also permanently editable. In case you decide to disable Zone Versioning, Version Zero will become your zone again.
- Global Configuration, you can find all the configurations here that are not supported by Version Management.
On the Environments page, you can create default environments for Production, Staging, and Development.
These environments each serve a specific purpose and are accessed differently:
- Development: Meant to validate that changes work correctly. The default traffic filters are that the
cf.zone.namematches your zone name, theEdge Server IPis a specific value, and the request contains a cookie withdevelopment=true. - Staging: Meant to test changes before sending them to Production. The default traffic filters are that the
cf.zone.namematches your zone name and theEdge Server IPis a specific value. - Production: Meant to hold all configurations applied to your zone. You cannot edit the traffic filters - which are just that the
cf.zone.nameis equal to your zone's name - and cannot delete this environment. This environment has a read-only check enabled, so versions promoted to this environment will become read-only as well.
Based on your organization's needs, you may need to create additional environments to test and roll out changes.
For more details, refer to Create environment.
Before making changes, make sure you are inside the correct version of your zone.
To change between different versions of your zone:
-
Log in to the Cloudflare dashboard.
Go to Account home ↗ -
Select your account and a domain that has version management. The Global Configuration of your domain will load.
-
Go to the product or feature you wish to modify.
- If the product or feature is available for versioning: The last version you were working on will load.
- If the product or feature is NOT available for versioning: Your Global Configuration will load, and any changes you make will impact live traffic.
-
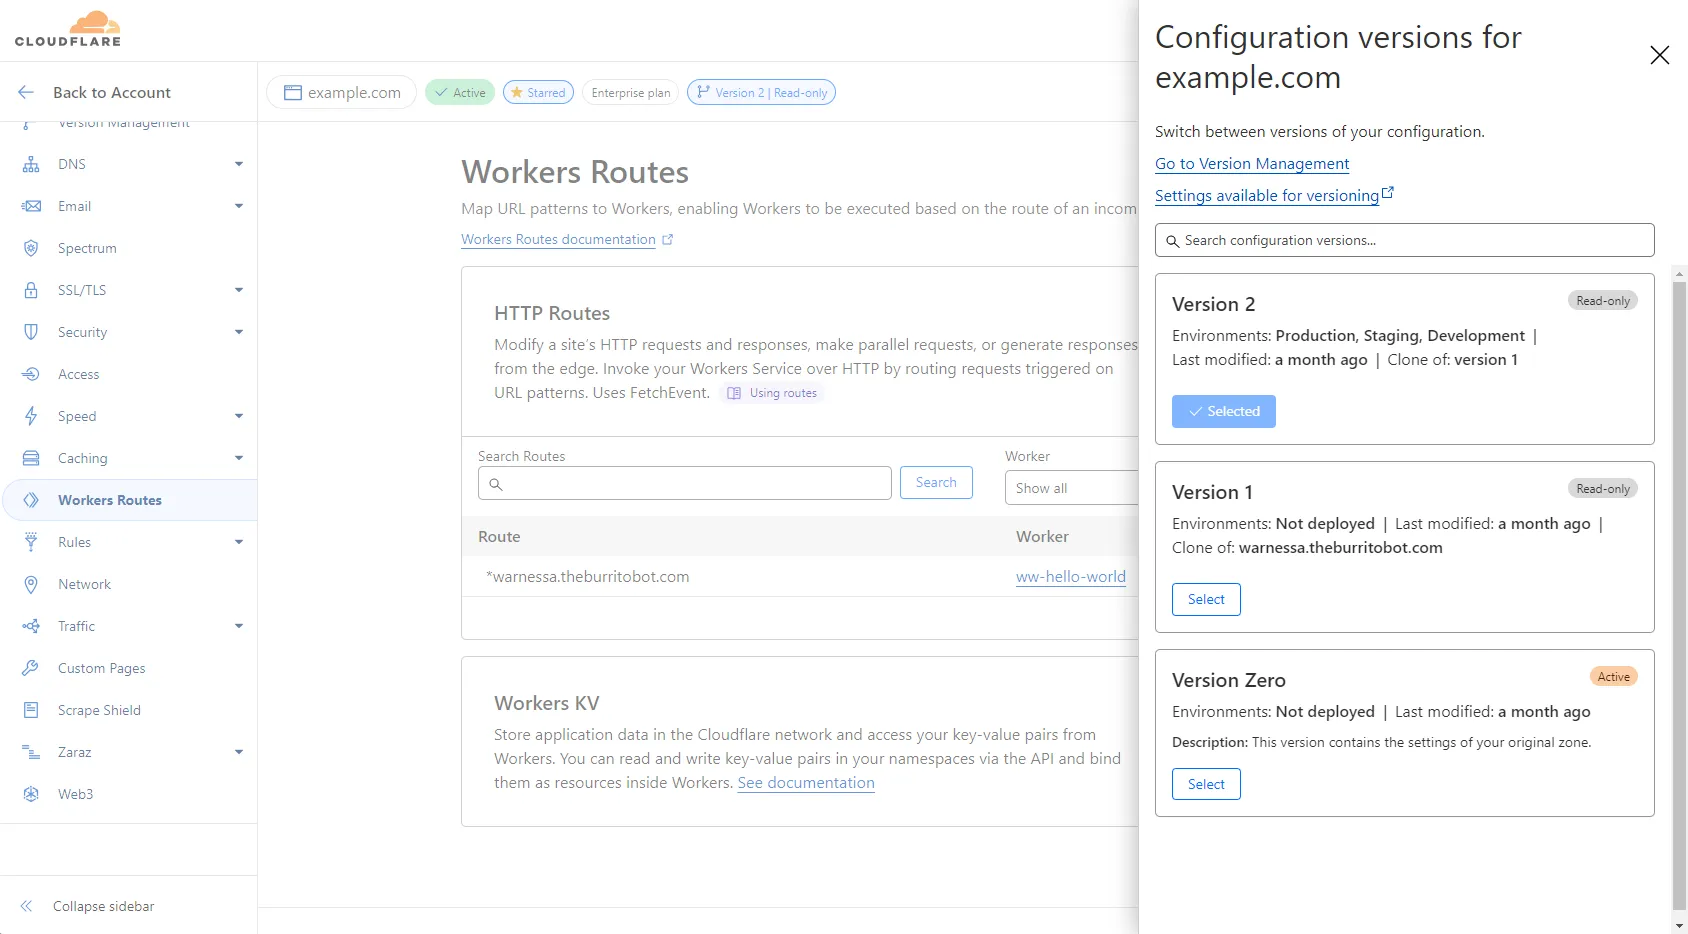
Ensure that the configuration or version displayed in the domain summary bar is the one you would like to work on. If not, select the version in the domain summary bar to open the version switcher.
The Domain Summary is accessible from all pages and allows you to quickly switch between versions and domains.
From within a version, you can update configurations just as you would with your normal zone configurations. Any changes are saved automatically.
Once you have made changes to a version, apply that version to your lowest-ranked environment.
-
Log in to the Cloudflare dashboard.
Go to Account home ↗ -
Select your account and zone.
-
Go to Version Management.
-
Go to Environments.
-
On your lowest-ranked environment, use the Version dropdown to select your desired version.
To test your version, send requests to that environment that match the pattern specified in its traffic filters.
For more details about what happens to these requests, refer to the version's metrics.
Next, promote your version through your different environments.
To promote a version:
-
Log in to the Cloudflare dashboard.
Go to Account home ↗ -
Select your account and zone.
-
Go to Version Management.
-
Select Environments.
-
On the environment in which you tested the version, select Promote. This option will only be available if the lower-ranked environment has a different version than the higher-ranked environment.
Promoting a version to a read-only environment will make the version permanently read-only.
After promoting to each environment, test the new version in your new environment.
For new changes to your zone, create a new version and repeat this process.
The versions created in Version Management are immutable and cannot be deleted to ensure that changes are tracked and can be rolled back if needed.
You can, however, create a new version and clone the configuration from the previous version, making any necessary changes before promoting it to your desired environment. This solution allows you to effectively "delete" the old version by no longer using it.