Deploy and configure Cisco IronPort with Area 1 as MX Record

In this tutorial, you will learn how to configure Cisco IronPort with Area 1 as MX record. This tutorial is broken down into several steps.
Prerequisites
To ensure changes made in this tutorial take effect quickly, update the Time to Live (TTL) value of the existing MX records on your domains to five minutes. Do this on all the domains you will be deploying.
Changing the TTL value instructs DNS servers on how long to cache this value before requesting an update from the responsible nameserver. You need to change the TTL value before changing your MX records to Cloudflare Area 1. This will ensure that changes take effect quickly and can also be reverted quickly if needed. If your DNS manager does not allow for a TTL of five minutes, set it to the lowest possible setting.
To check your existing TTL, open a terminal window and run the following command against your domain:
$ dig mx <YOUR_DOMAIN>
; <<>> DiG 9.10.6 <<>> mx <YOUR_DOMAIN>;; global options: +cmd;; Got answer:;; ->>HEADER<<- opcode: QUERY, status: NOERROR, id: 39938;; flags: qr rd ra; QUERY: 1, ANSWER: 5, AUTHORITY: 0, ADDITIONAL: 1
;; OPT PSEUDOSECTION:; EDNS: version: 0, flags:; udp: 4096;; QUESTION SECTION:;domain.		IN	MX
;; ANSWER SECTION:<YOUR_DOMAIN>.	300	IN	MX	5 mailstream-central.mxrecord.mx.<YOUR_DOMAIN>.	300	IN	MX	10 mailstream-east.mxrecord.io.<YOUR_DOMAIN>.	300	IN	MX	10 mailstream-west.mxrecord.io.
In the above example, TTL is shown in seconds as 300 (or five minutes).
If you are using Cloudflare for DNS, you can leave the TTL setting as Auto.
Below is a list with instructions on how to edit MX records for some popular services:
- Cloudflare: Set up email records
- GoDaddy: Edit an MX Record
- AWS: Creating records by using the Amazon Route 53 console
- Azure: Create DNS records in a custom domain for a web app
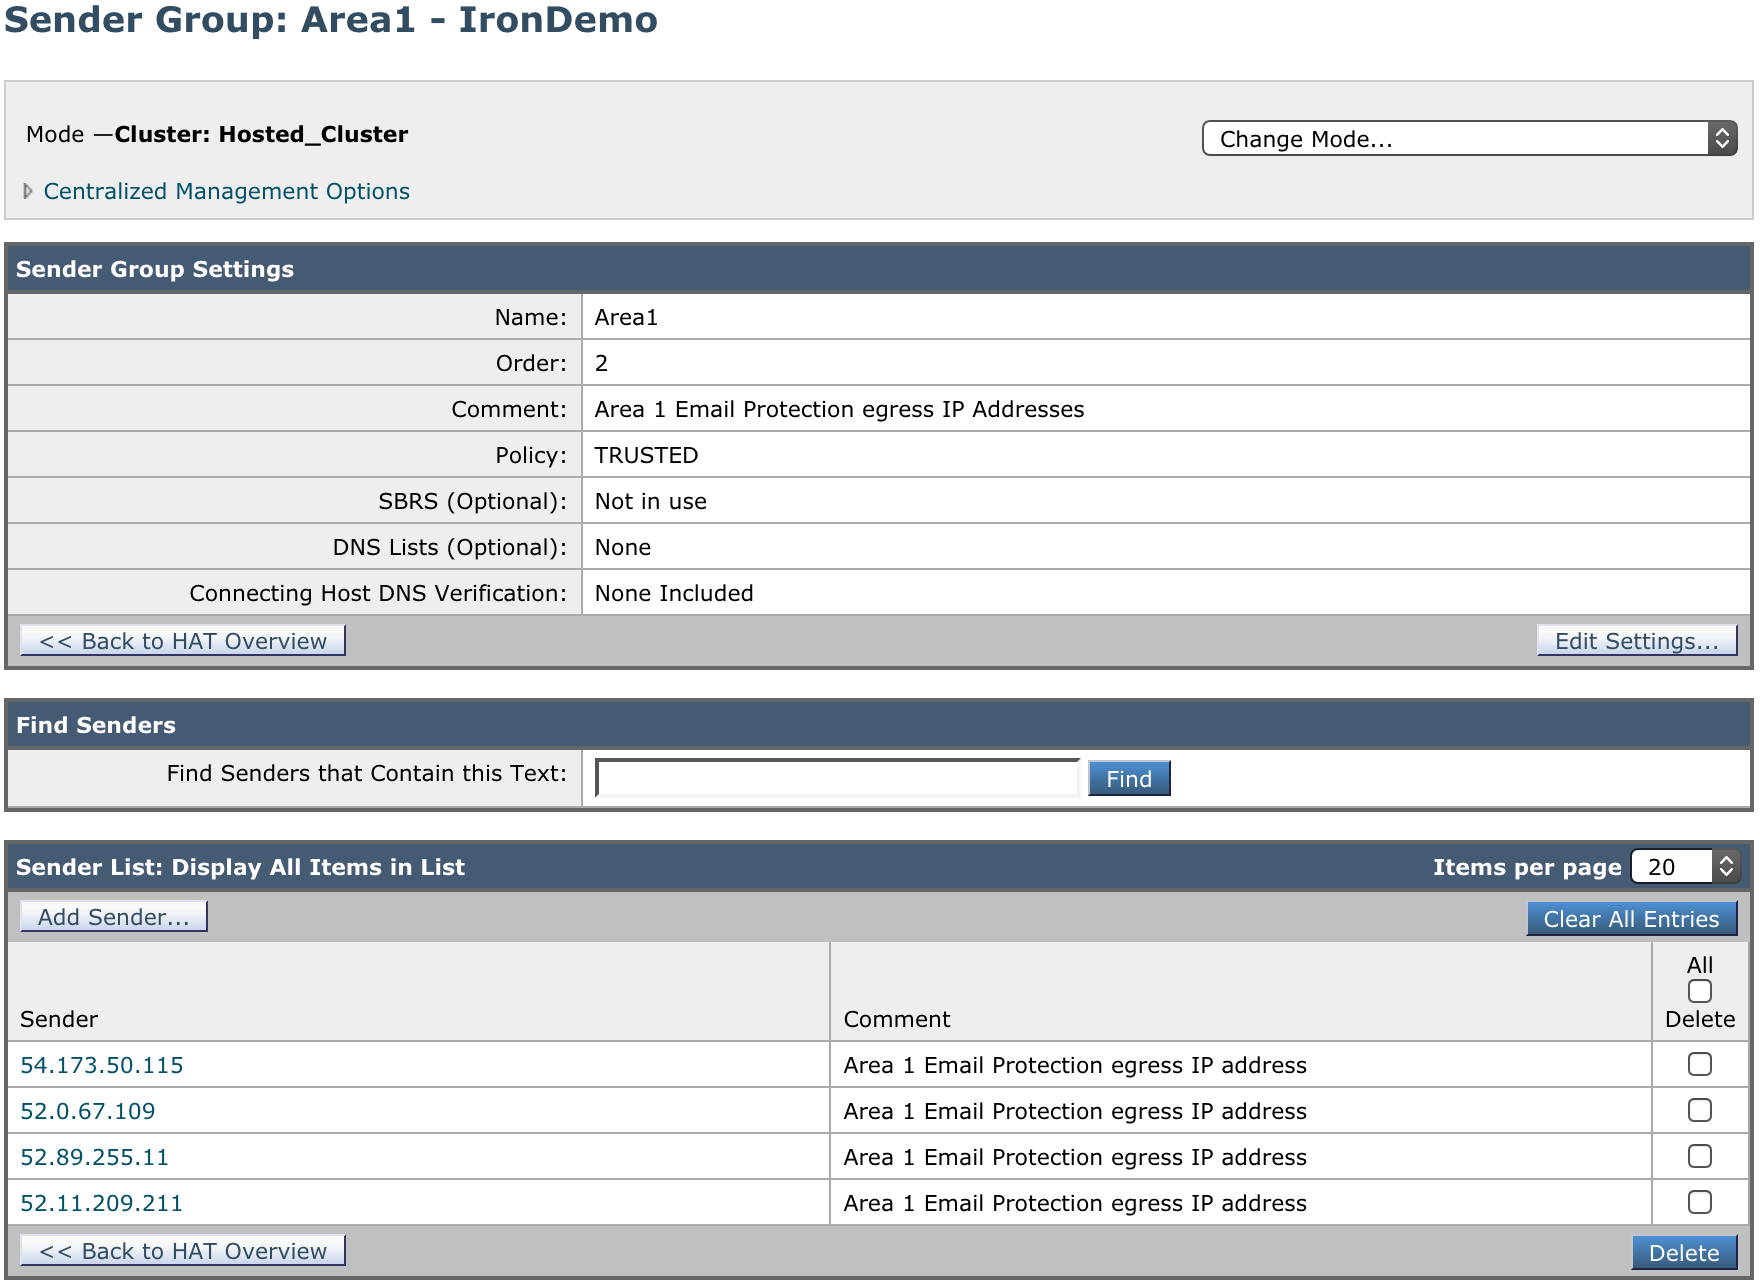
1. Add a Sender Group for Area 1 Email Protection IPs
To add a new Sender Group:
Go to Mail Policies > HAT Overview.
Select Add Sender Group.
Configure the new Sender Group as follows:
- Name:
Area1. - Order: Order above the existing WHITELIST sender group.
- Comment:
Area 1 Email Protection egress IP Addresses. - Policy:
TRUSTED(by default, spam detection is disabled for this mail flow policy). - SBRS: Leave blank.
- DNS Lists: Leave blank.
- Connecting Host DNS Verification: Leave all options unchecked.
- Name:
Select Submit and Add Senders and add the IP addresses mentioned in Egress IPs.
2. Configure Incoming Relays
You need to configure the Incoming Relays section to tell IronPort to ignore upstream hops, since all the connections are now coming from Area 1. This step is needed so the IronPort can retrieve the original IPs to calculate IP reputation. IronPort also uses this information in the Anti-Spam (IPAS) scoring of messages.
- To enable the Incoming Relays Feature, select Network > Incoming Relays.
- Select Enable and commit your changes.
- Now, you will have to add an Incoming Relay. Select Network > Incoming Relays.
- Select Add Relay and give your relay a name.
- Enter the IP address of the MTA, MX, or other machine that connects to the email gateway to relay incoming messages. You can use IPv4 or IPv6 addresses.
- Specify the
Received:header that will identify the IP address of the original external sender. - Commit your changes.
3. Disable SPF checks
Make sure you disable Sender Policy Framework (SPF) checks in IronPort. Because Area 1 is acting as the MX record, if you do not disable SPF checks, IronPort will block emails due to an SPF failure.
Refer to Cisco’s documentation for more information on how to disable SPF checks.
4. Update your domain MX records
Instructions to update your MX records will depend on the DNS provider you are using. In your domain DNS zone, you need to replace your current MX records with the Area 1 hosts. This will have to be done for every domain where Area 1 will be the primary MX. For example:
| MX Priority | Host |
|---|---|
5 | mailstream-eu1.mxrecord.io |
10 | mailstream-central.mxrecord.mx |
20 | mailstream-east.mxrecord.io |
20 | mailstream-west.mxrecord.io |
When configuring the Area 1 MX records, it is important to configure hosts with the correct MX priority. This will allow mail flows to the preferred hosts and fail over as needed.
Choose from the following Area 1 MX hosts, and order them by priority. For example, if you are located outside the US and want to prioritize email processing in the EU, add mailstream-eu1.mxrecord.io as your first host, and then the US servers.
Host| Location | Note | mailstream-central.mxrecord.mxmailstream-east.mxrecord.iomailstream-west.mxrecord.ioUS | Best option to ensure all email traffic processing happens in the US. | mailstream-eu1.mxrecord.ioEU | Best option to ensure all email traffic processing happens in Germany, with fallback to US data centers. | mailstream-bom.mxrecord.mxIndia | Best option to ensure all email traffic processing happens within India. For compliance purposes use this MX record. Note, however, there is no redundancy should something go wrong. | mailstream-india-primary.mxrecord.mxIndia | Same as | mailstream-bom.mxrecord.mx, with fallback to US data centers.mailstream-asia.mxrecord.mxIndia | Best option for companies with a broader Asia presence. | mailstream-syd.area1.cloudflare.netAustralia / New Zealand | Best option to ensure all email traffic processing happens within Australia. | mailstream-australia-primary.area1.cloudflare.netAustralia / New Zealand | Best option to ensure all email traffic processing happens in Australia, with India and US data centers as backup. | |
|---|
DNS changes will reach the major DNS servers in about an hour or follow the TTL value as described in the Prerequisites section.