Create a Cloudflare Tunnel
2 min read
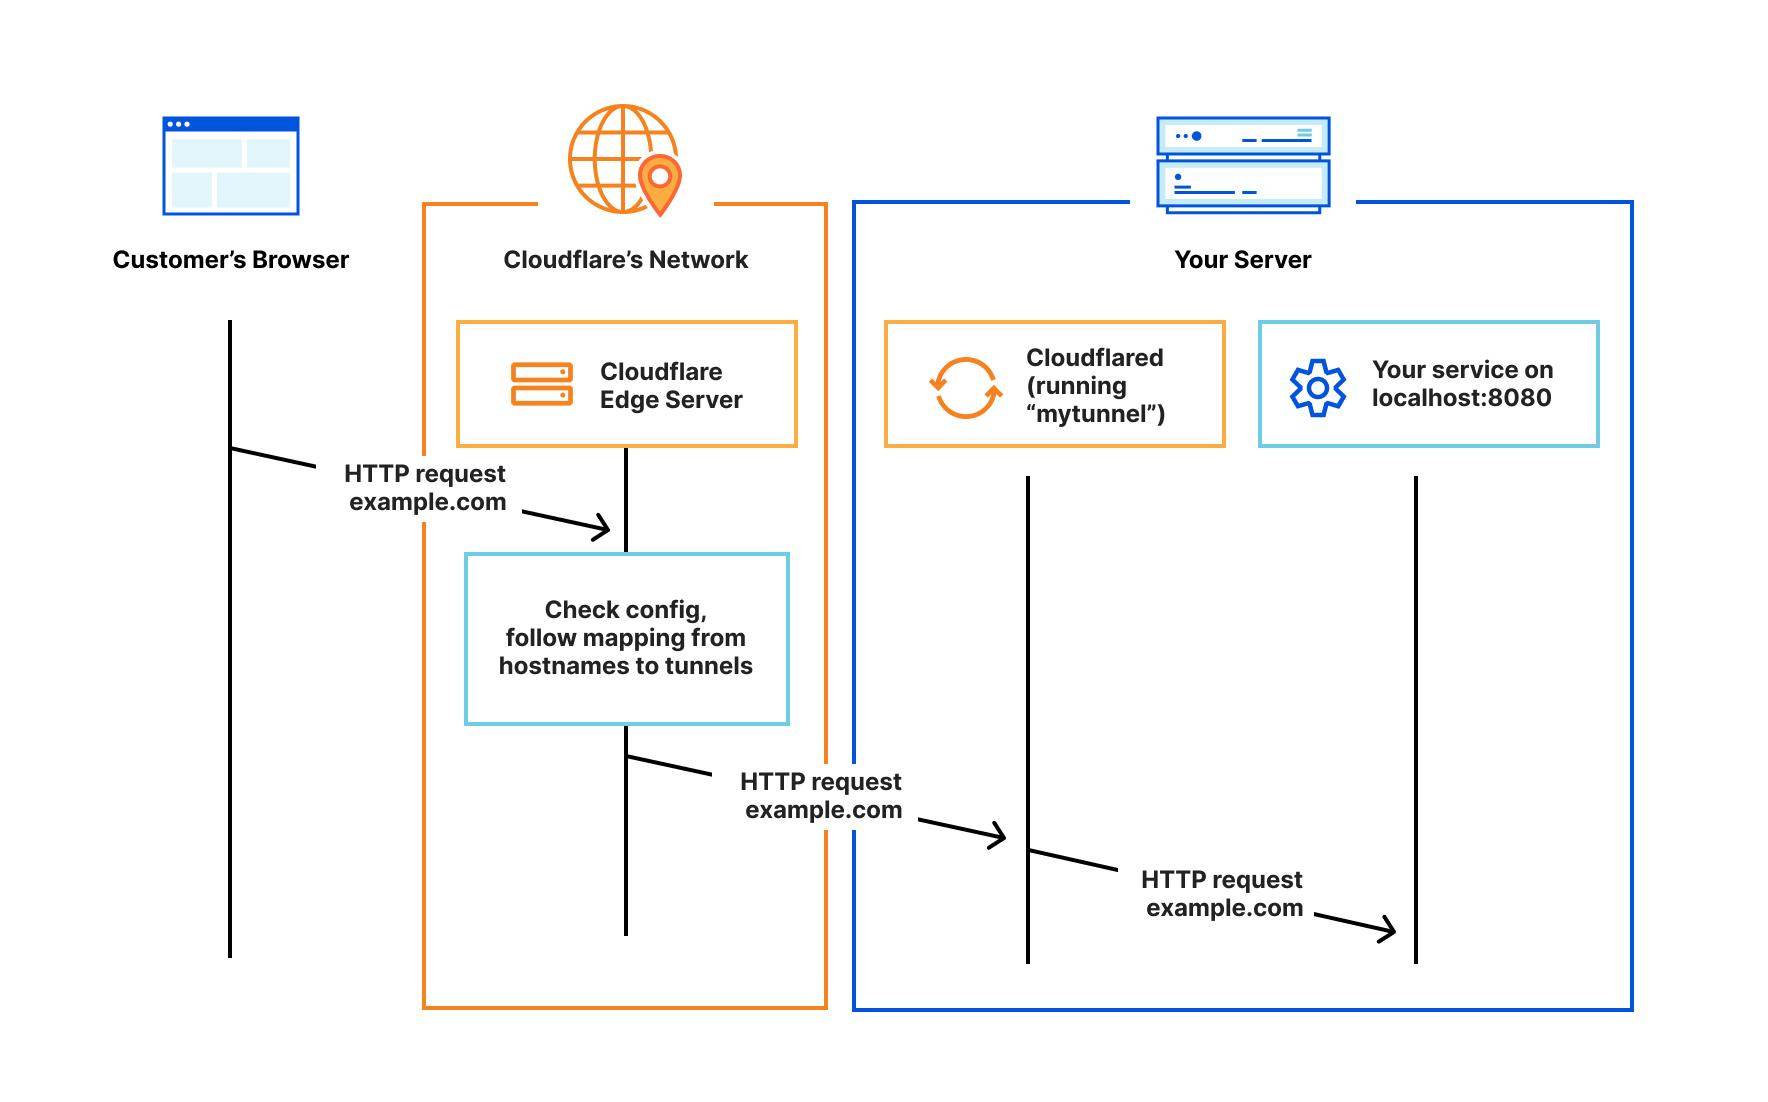
To enable clientless access to your applications, you will need to create a Cloudflare Tunnel that contains public hostname routes. A public hostname route creates a public DNS record that routes traffic to a specific address, protocol, and port associated with a private application. For example, you can define a public hostname (mywebapp.example.com) to provide access to a web server running on https://localhost:8080. When a user goes to mywebapp.example.com in their browser, their request will first route to a Cloudflare data center where it is inspected against your configured security policies. Cloudflare will then forward validated requests down your tunnel to the web server.
Create a tunnel
To create a Cloudflare Tunnel:
Log in to Zero Trust and go to Networks > Tunnels.
Select Create a tunnel.
Choose Cloudflared for the connector type and select Next.
Enter a name for your tunnel. We suggest choosing a name that reflects the type of resources you want to connect through this tunnel (for example,
enterprise-VPC-01).Select Save tunnel.
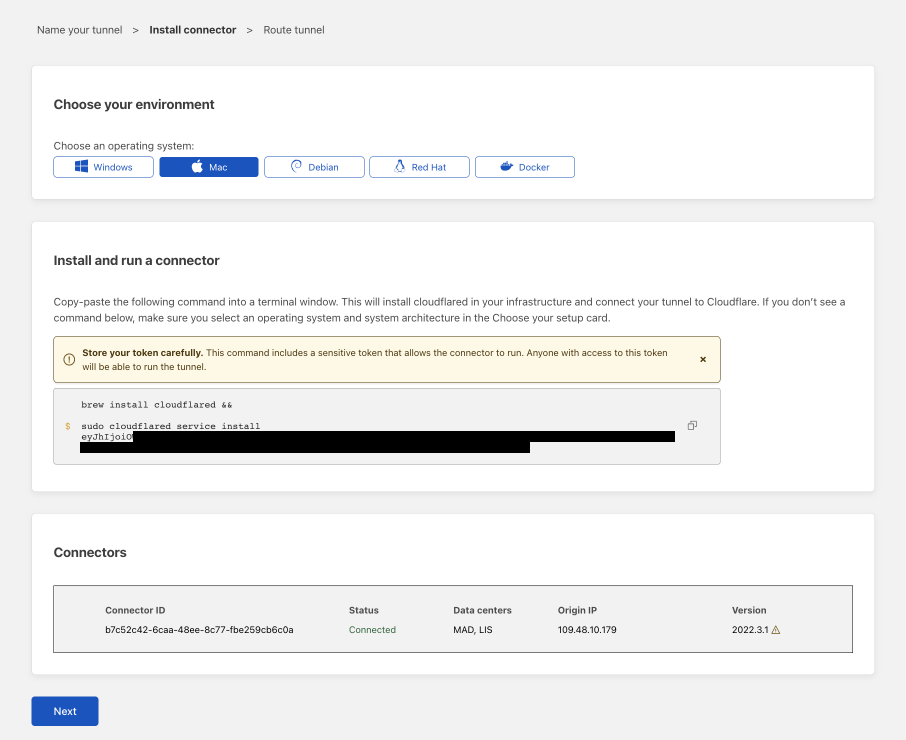
Next, you will need to install
cloudflaredand run it. To do so, check that the environment under Choose an environment reflects the operating system on your machine, then copy the command in the box below and paste it into a terminal window. Run the command.Once the command has finished running, your connector will appear in Zero Trust.
Select Next.
Connect an application
To add a public hostname route to the tunnel:
In the Public Hostnames tab, choose a Domain and specify any subdomain or path information.
Specify a service, for example
https://localhost:8000.Under Additional application settings, specify any parameters you would like to add to your tunnel configuration.
Select Save tunnel.
All users on the Internet can now connect to this application via its public hostname. In Module 4: Secure your applications, we will discuss how to restrict access to authorized users.
Additional resources
For more control over how traffic routes through your tunnel, refer to the following links: