Retraction guide for Gmail
In this tutorial you will learn how to set up email retraction for Gmail.
1. Configure project and service account in Google Cloud Platform
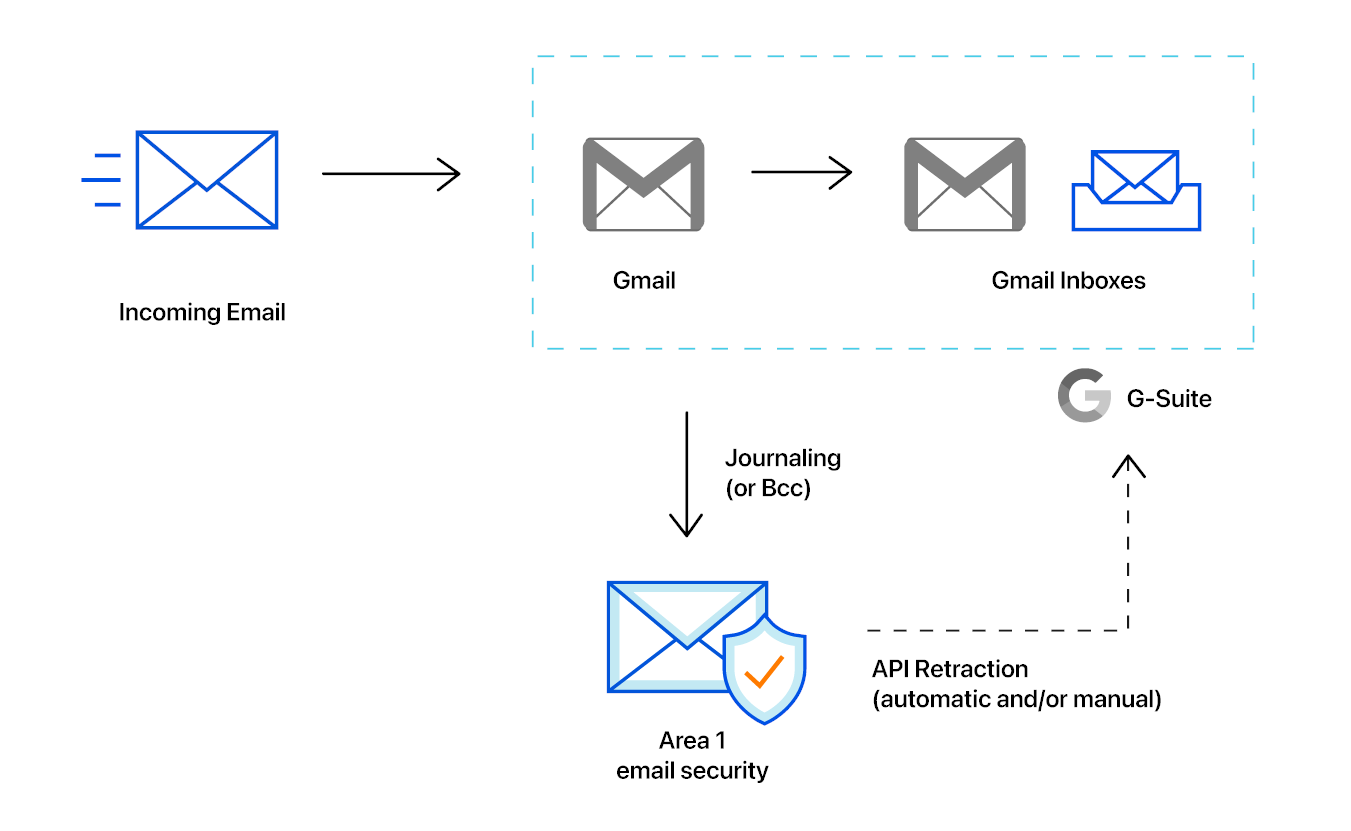
For Area 1 to be able to retract messages from Gmail inboxes, you first need to create a service account in a Google Cloud Platform (GCP) project.
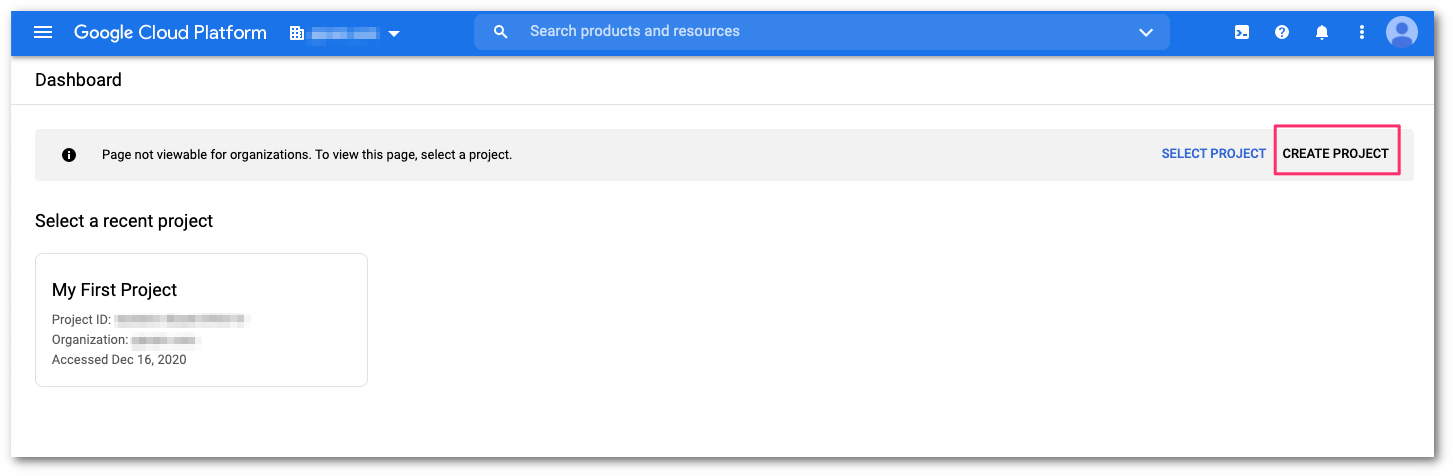
Access the Google Cloud Console. From the Dashboard, select CREATE PROJECT.
Provide the details for the new project, and select CREATE to start your new project.

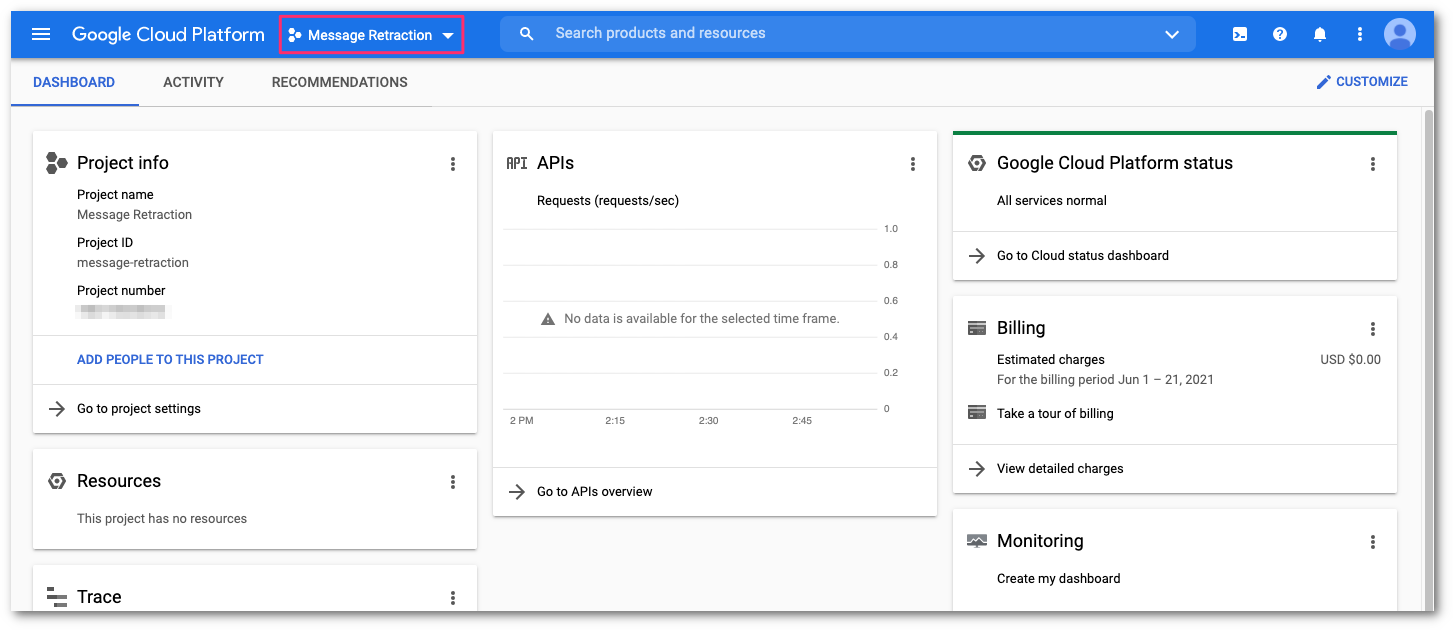
Once the new project has been created, the GCP console will automatically redirect you to the Project console. If not, you can use the Project selector to change to the project you created.
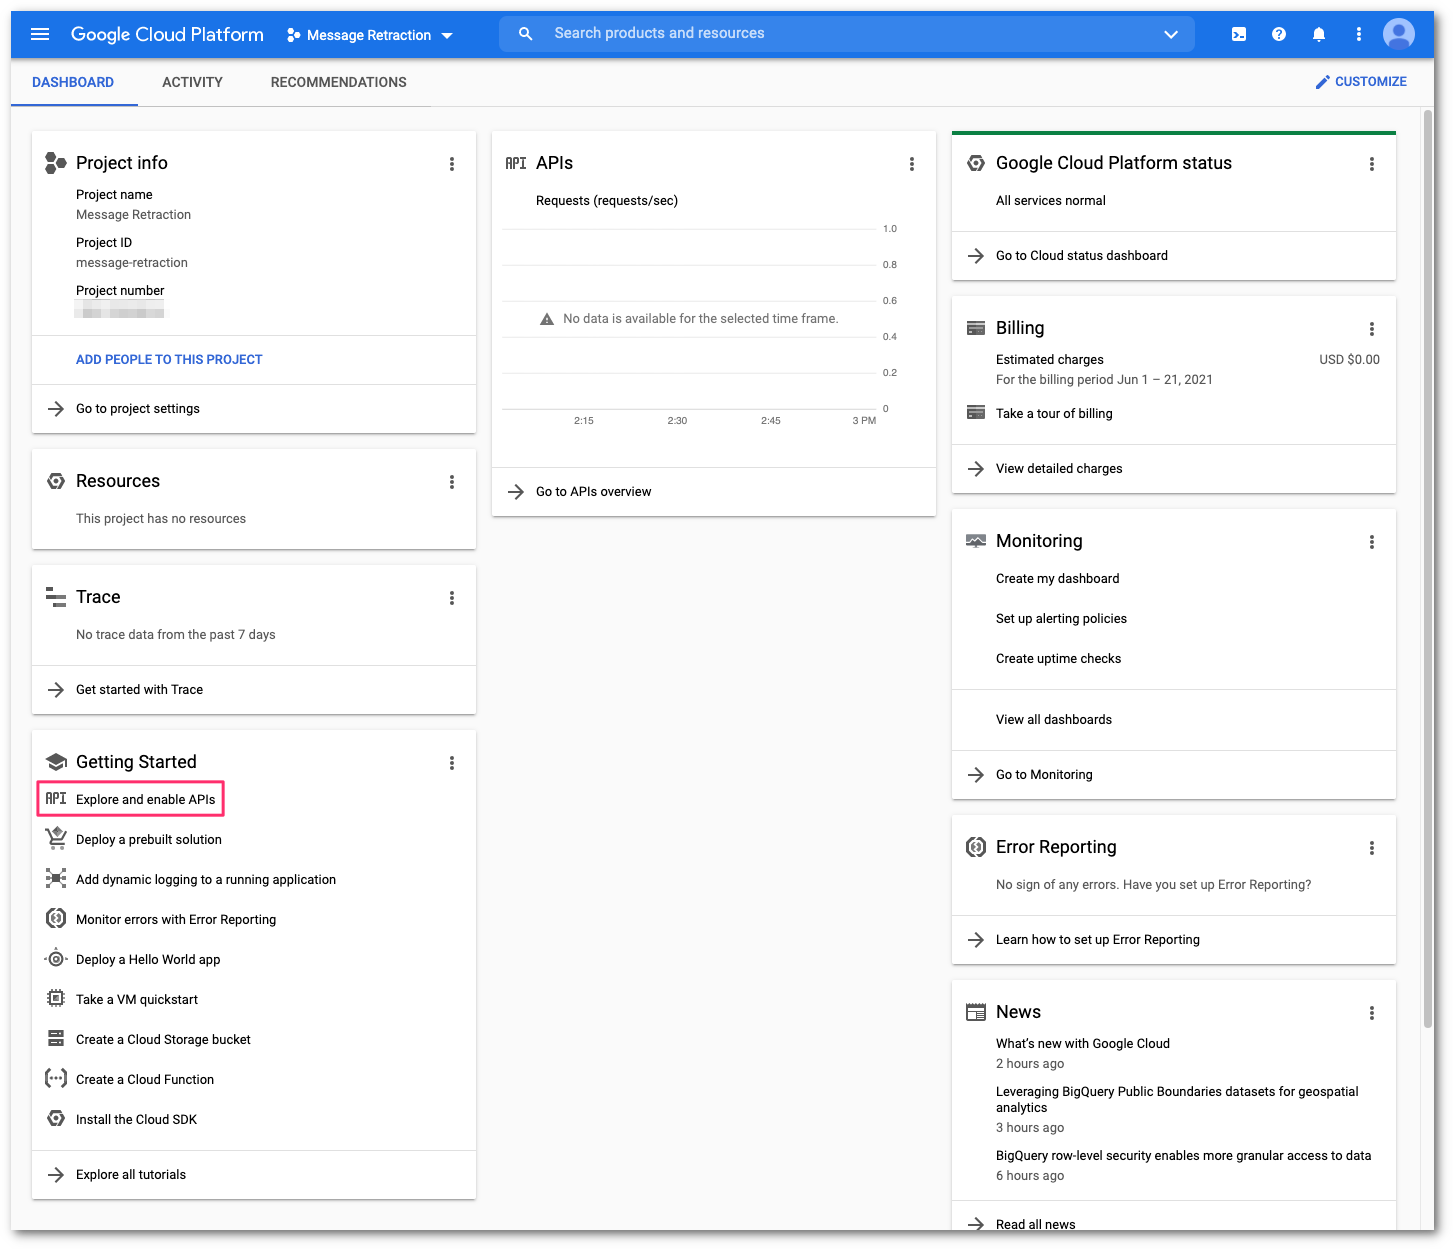
In the Getting Started card, select Explore and enable APIs to access the APIs and services configuration console.
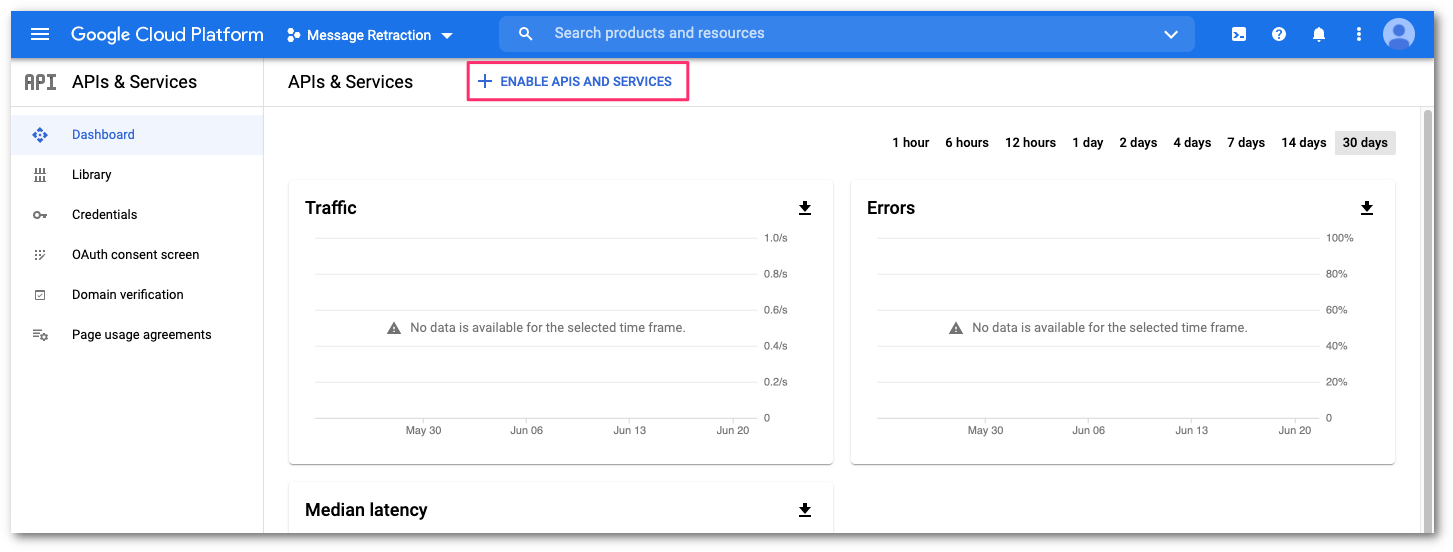
Select ENABLE APIS AND SERVICES to open the API Library.
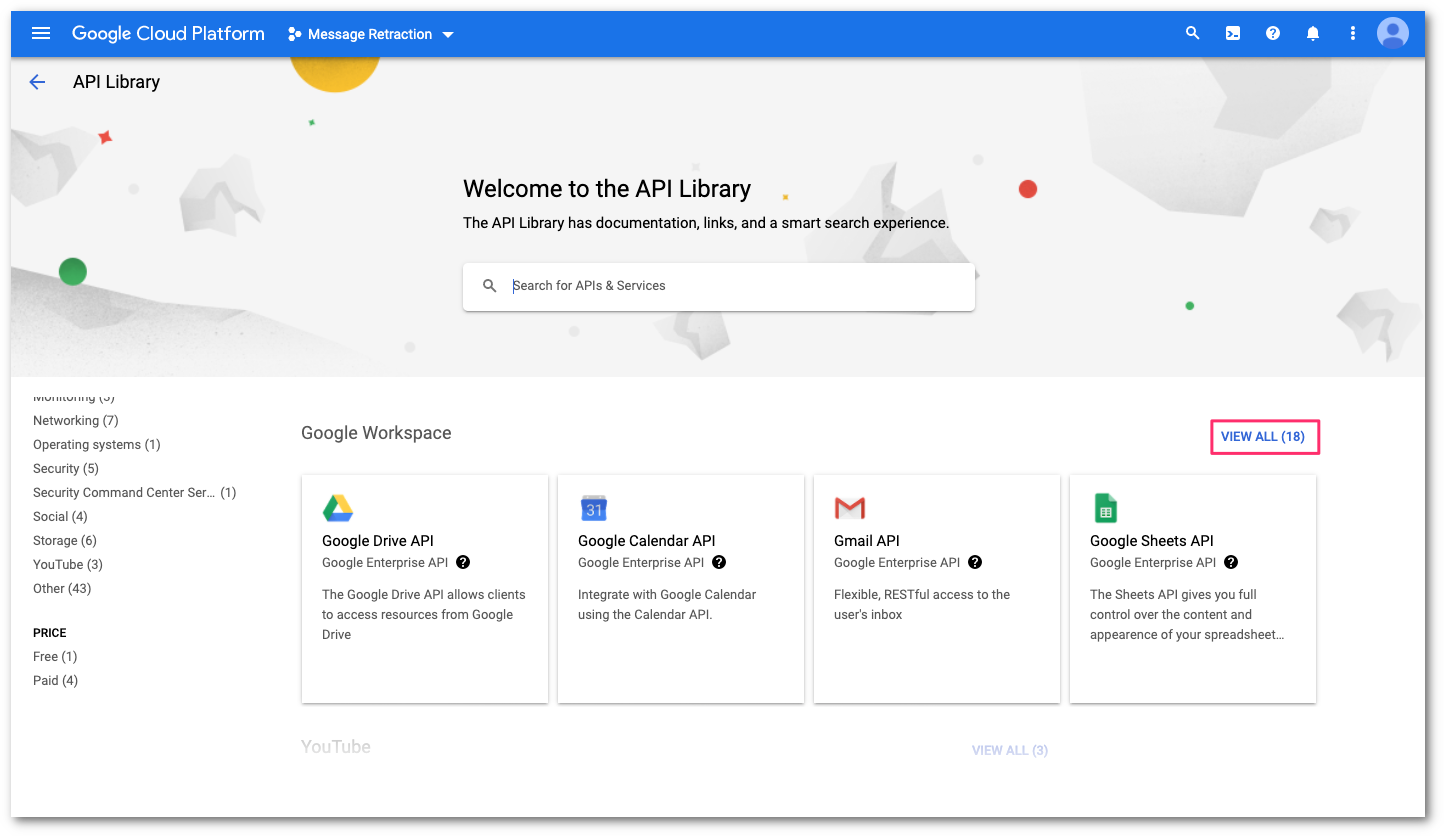
You will need to enable the Admin SDK API and the Gmail API. On the API Library, locate the Google Workspace section. Then, select View All to access all the available APIs for Google Workspace.
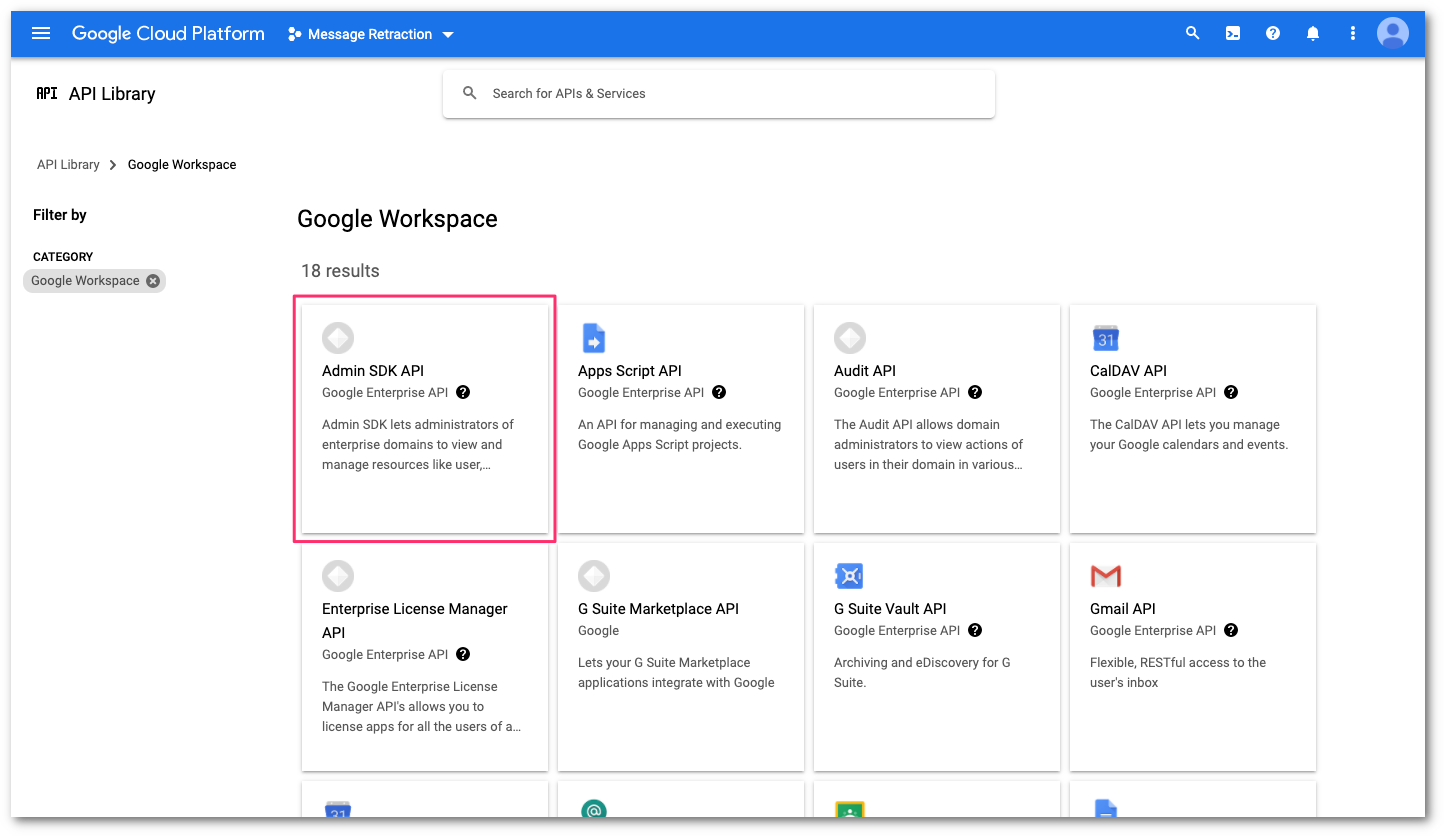
Select Admin SDK API.
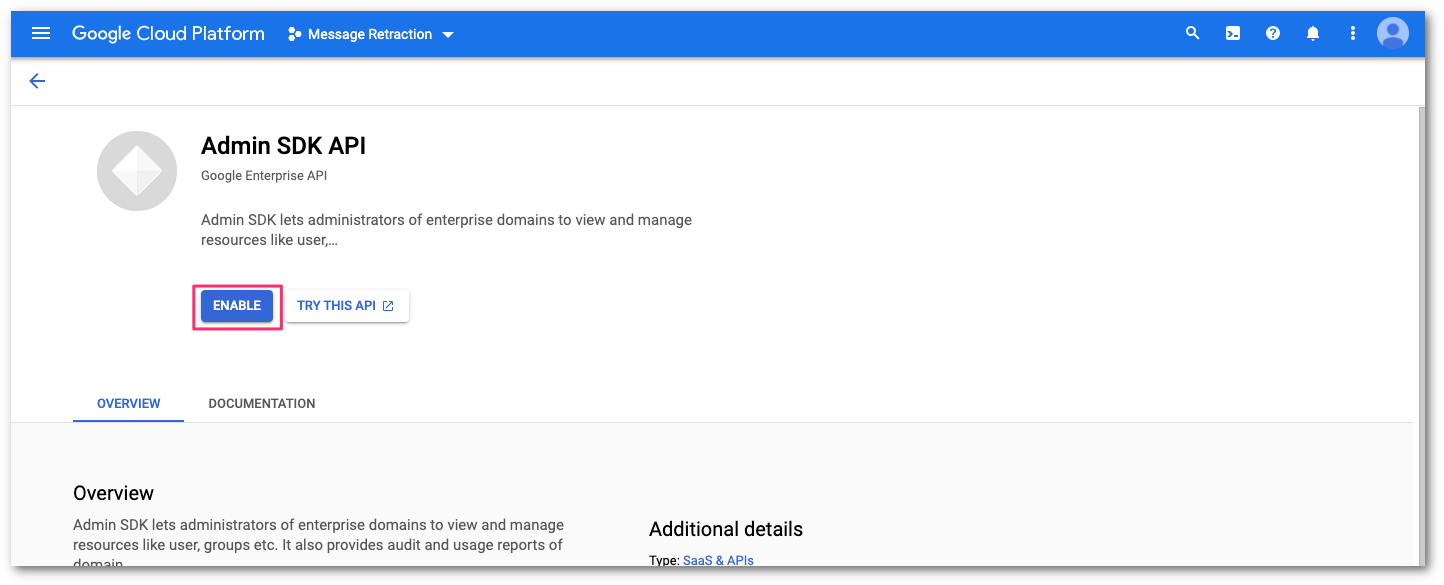
Select Enable to activate the Admin SDK API.
Return to the Google Workspace API library, and select the Gmail API.
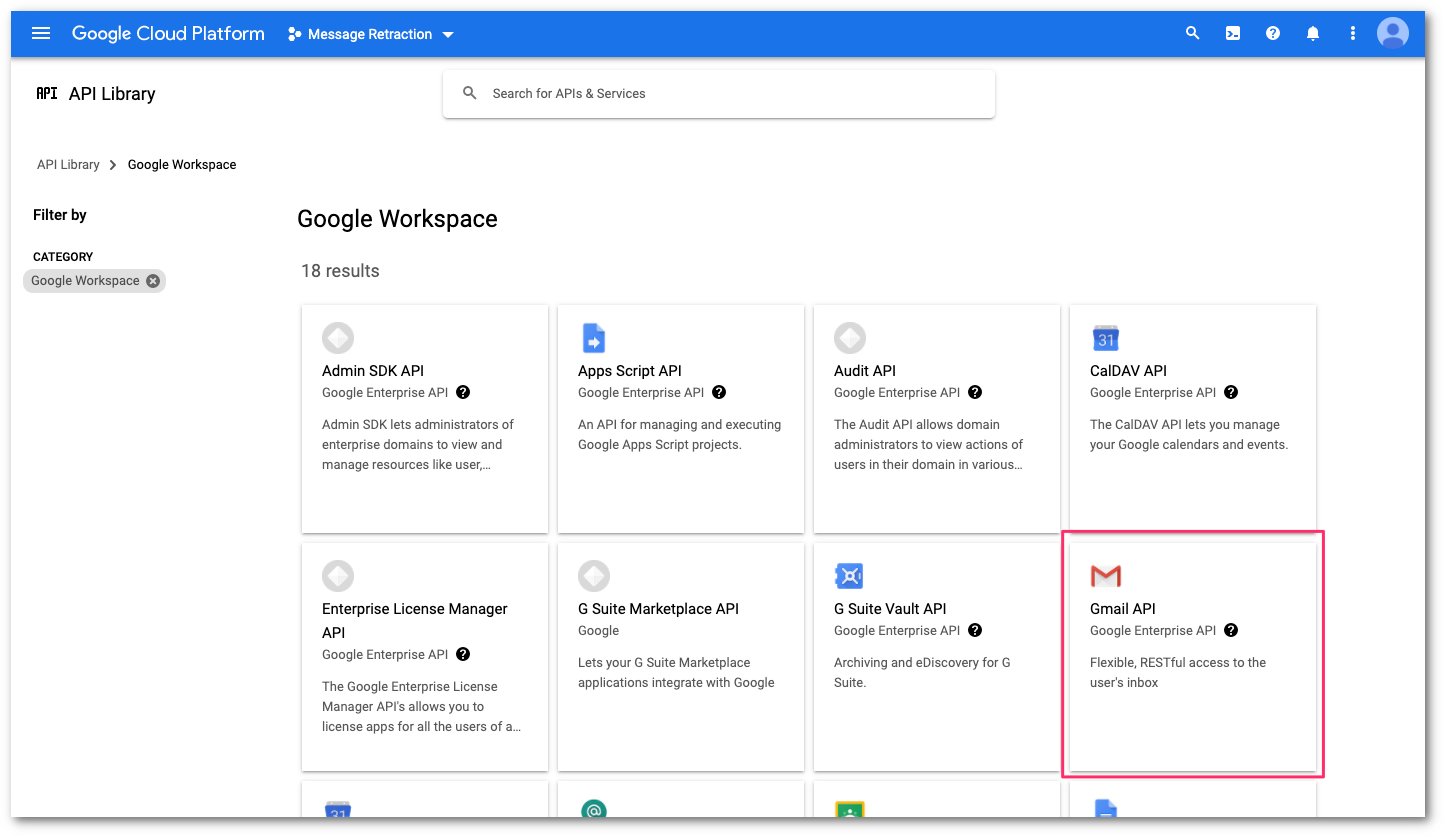
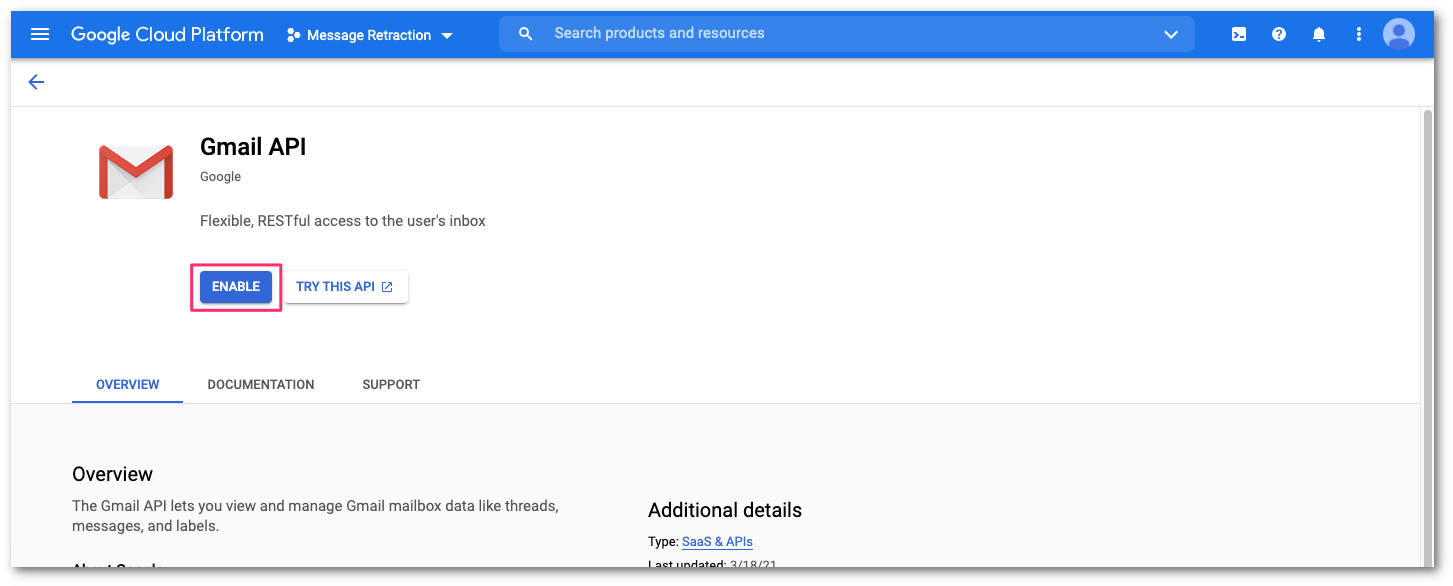
Select ENABLE to activate the Gmail API.
You will now create a service account to use the API. From the Gmail API console, select Credentials.
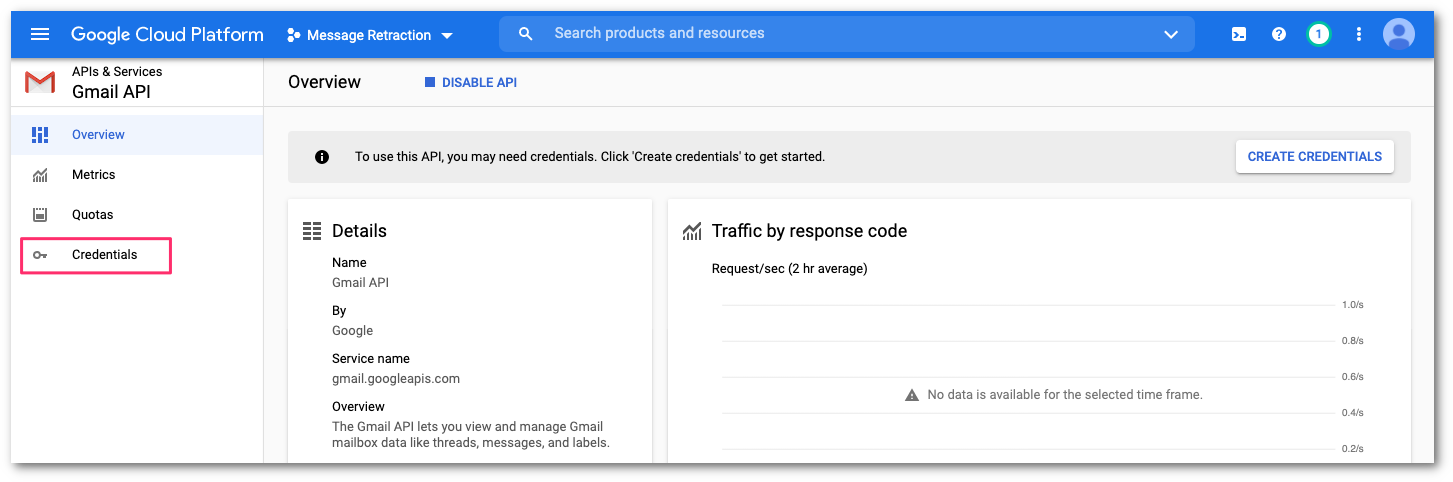
Select CREATE CREDENTIALS > Service account.

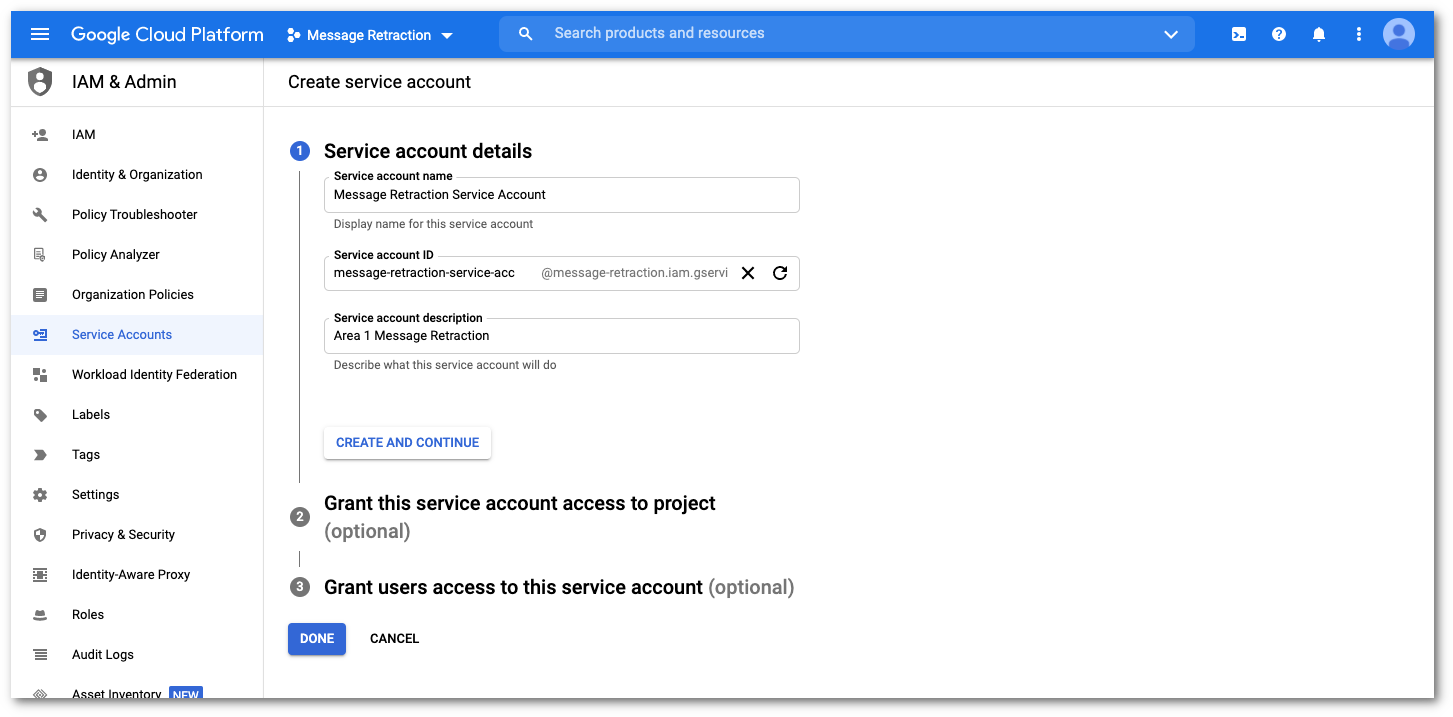
In Service account details provide the following information:
- Service account name:
Message Retraction Service Account - Service account ID: This value is automatically generated.
- Service account description: A description for this service. For example,
Area 1 Message Retraction
Select CREATE AND CONTINUE when you are done.
- Service account name:
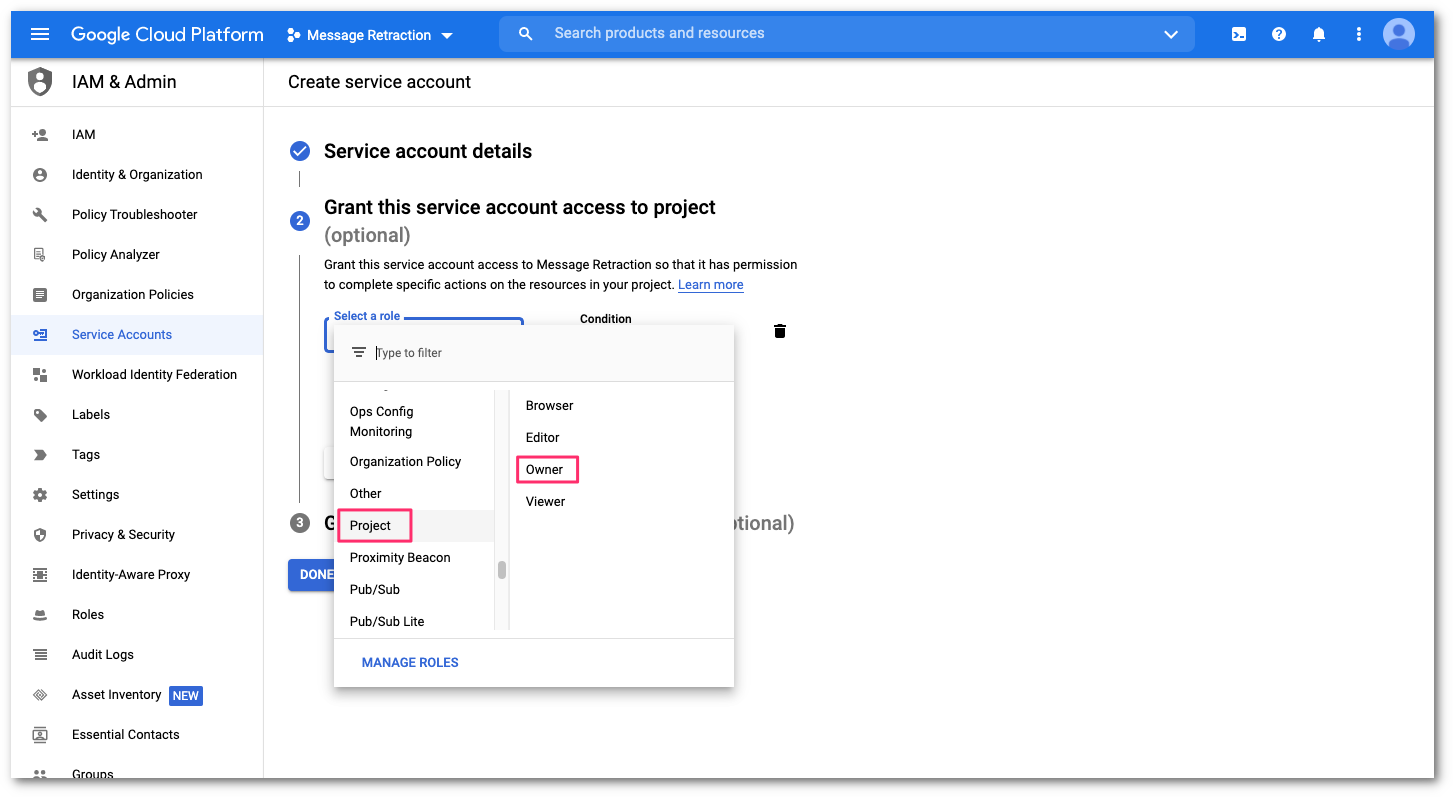
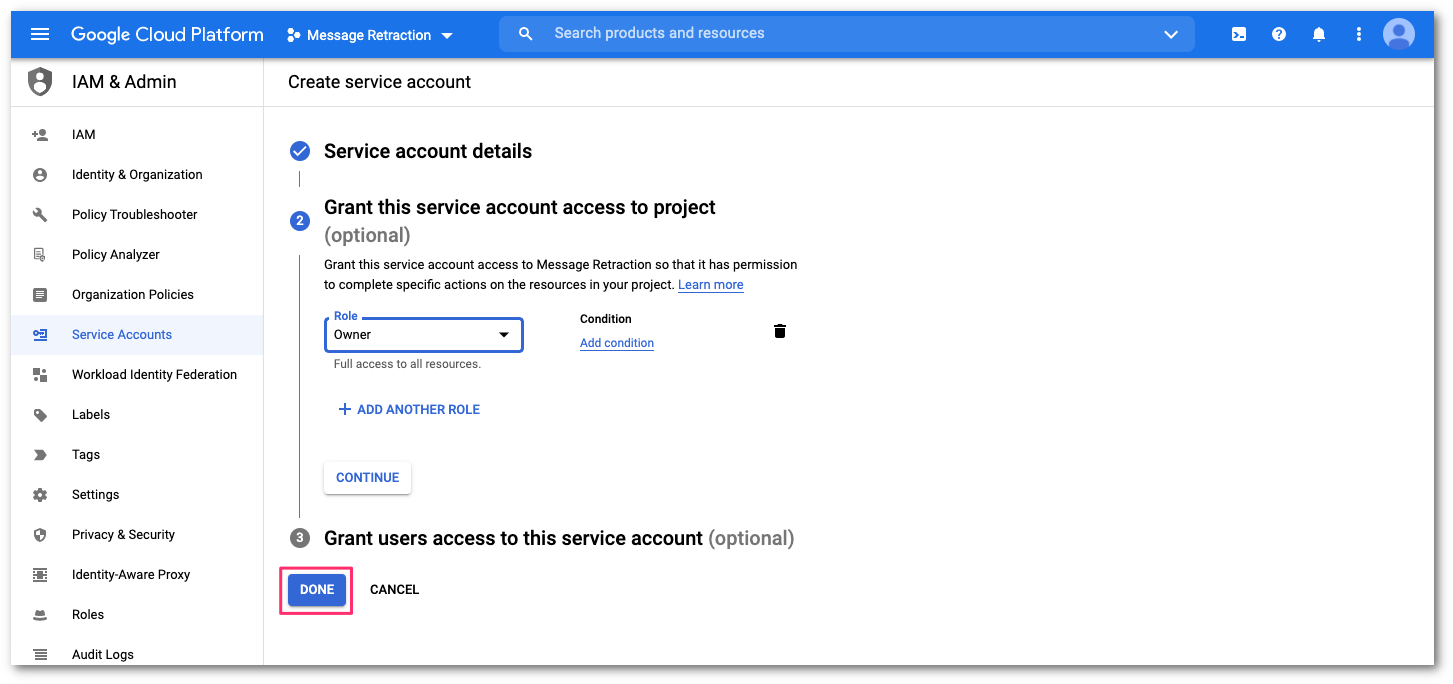
In Grant this service account access to project, select the Select a role drop-down menu. Then, select Project on the left column, and Owner on the right column.
Once the role is assigned, select DONE to complete the setup.
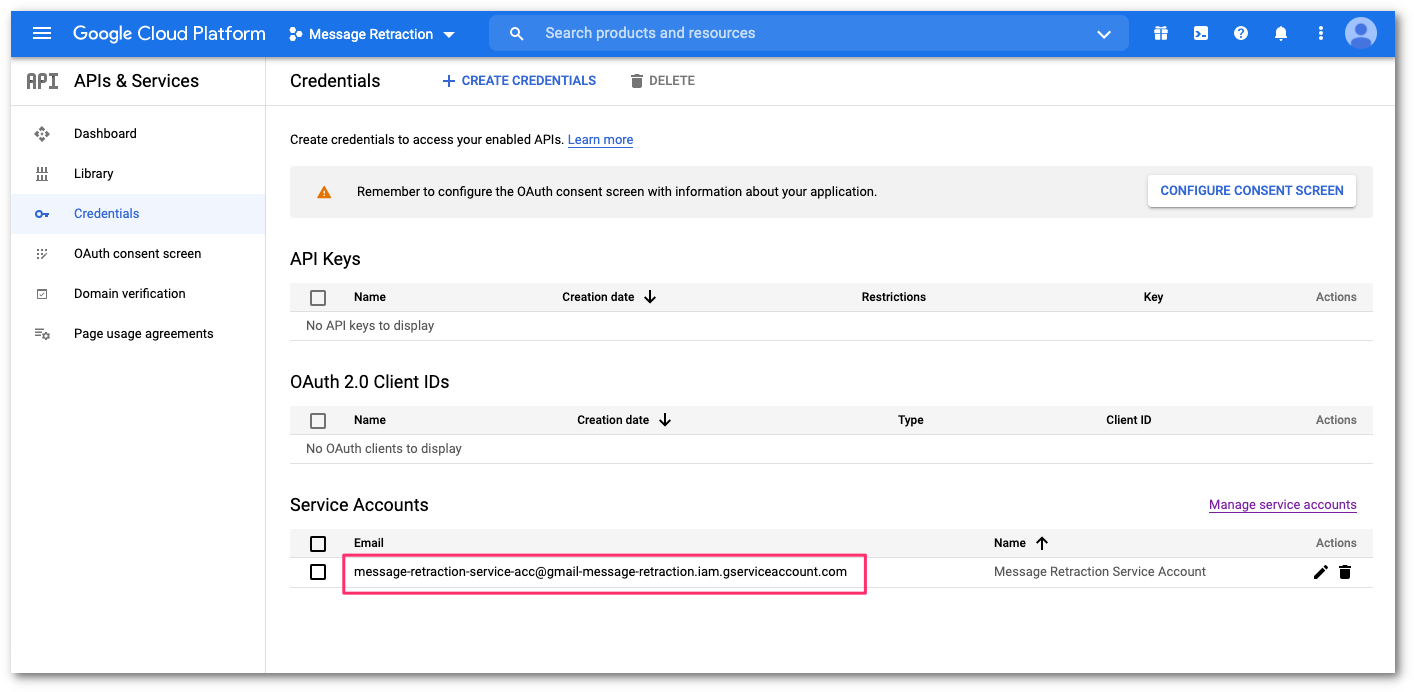
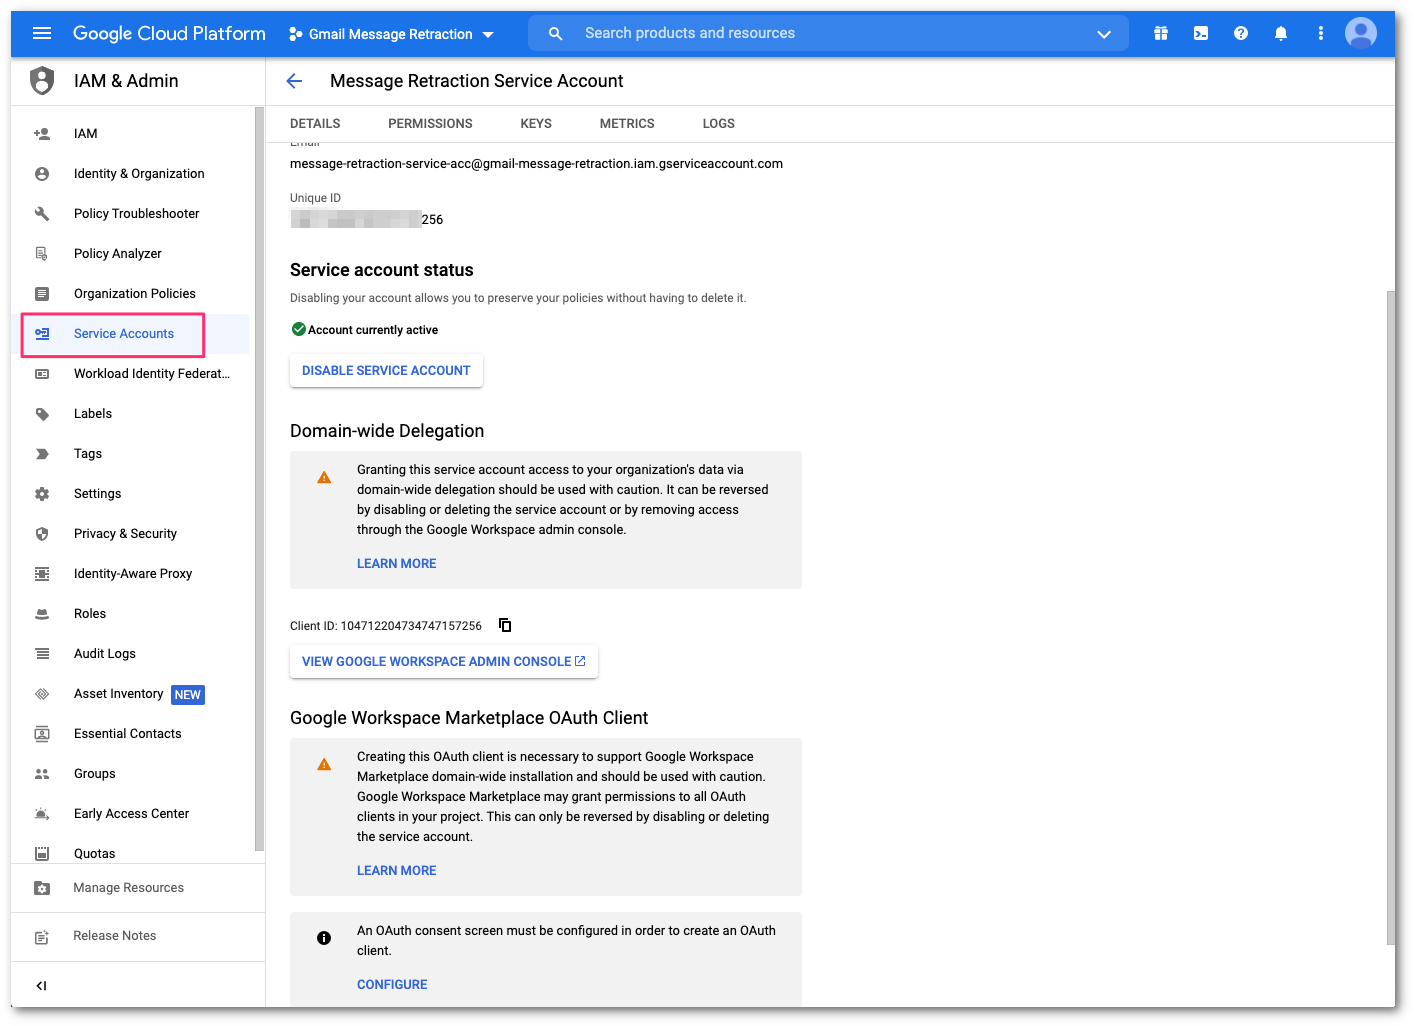
Once the role assignment has been saved, you will return to the API credential configuration console. In Service Accounts, select the newly-created service account to configure the domain-wide delegation.
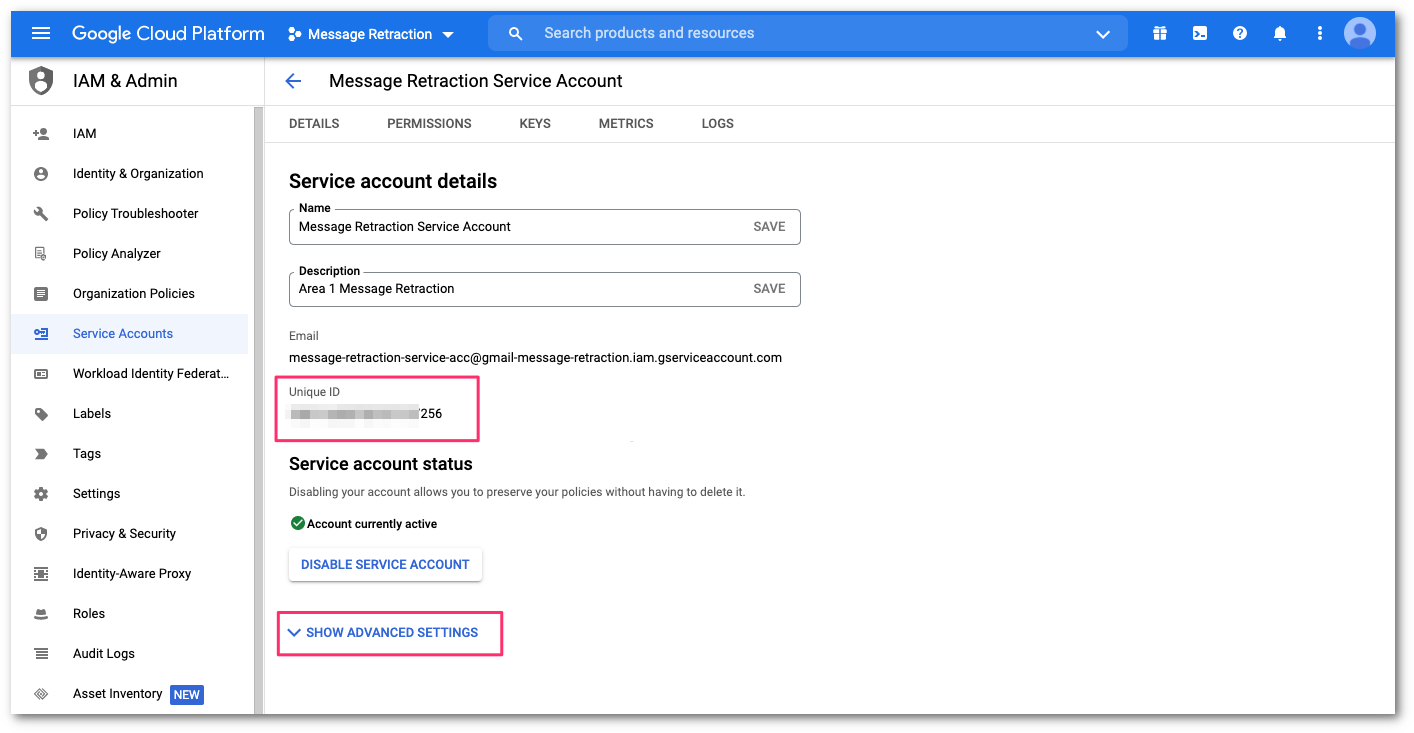
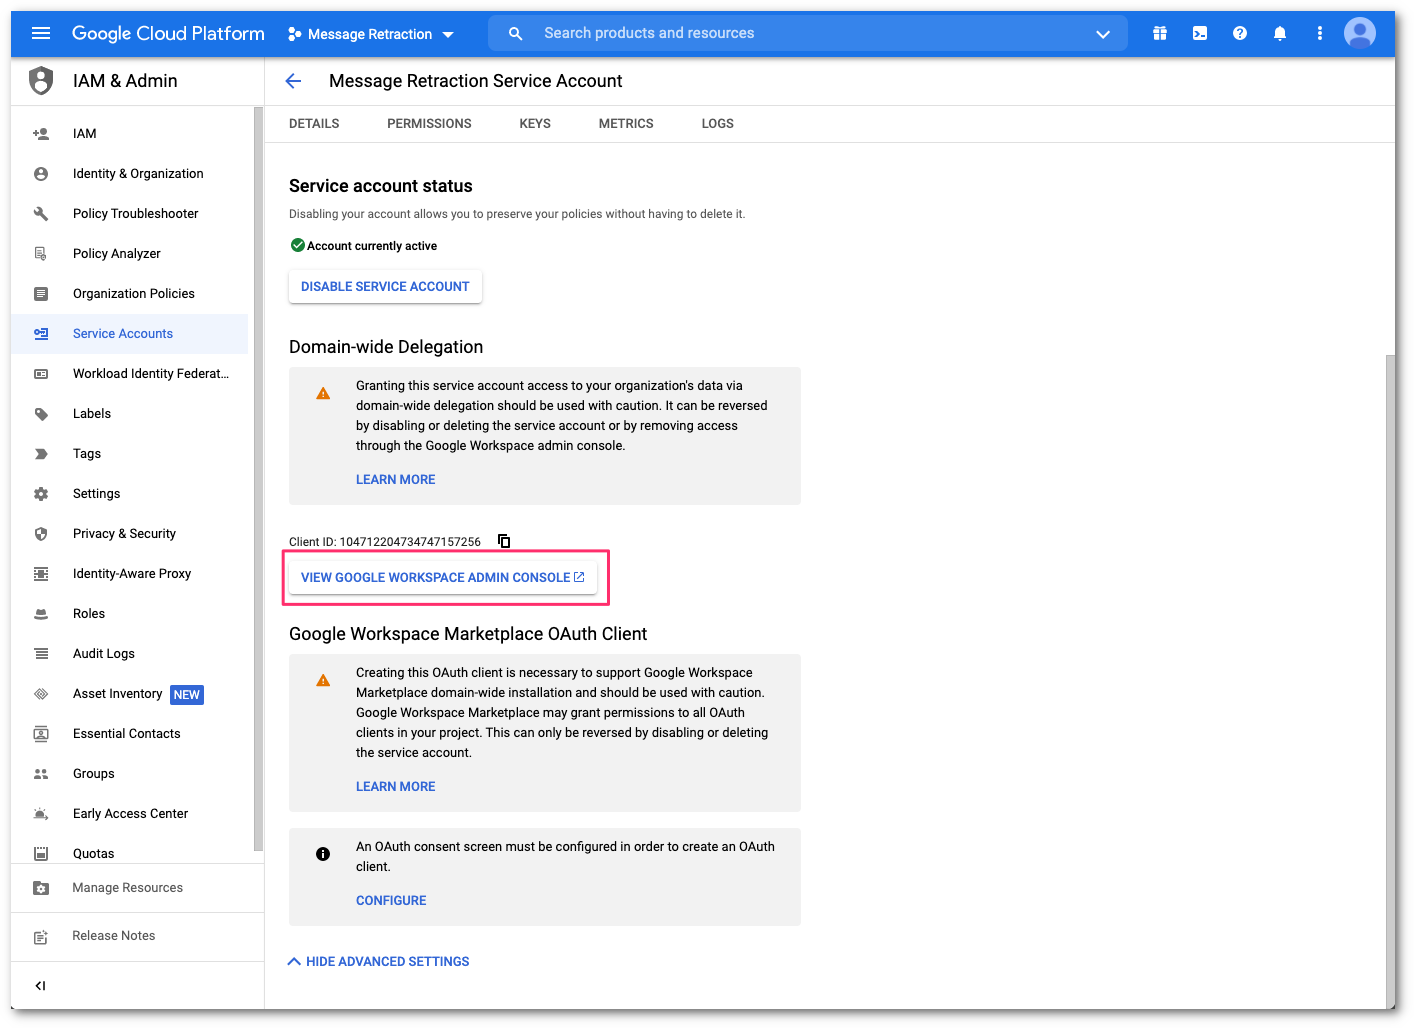
In Details, take note of the Unique ID. Then, select SHOW ADVANCED SETTINGS.
Select VIEW GOOGLE WORKSPACE ADMIN CONSOLE to configure the domain-wide delegation. This will open a new window to the Google admin console.
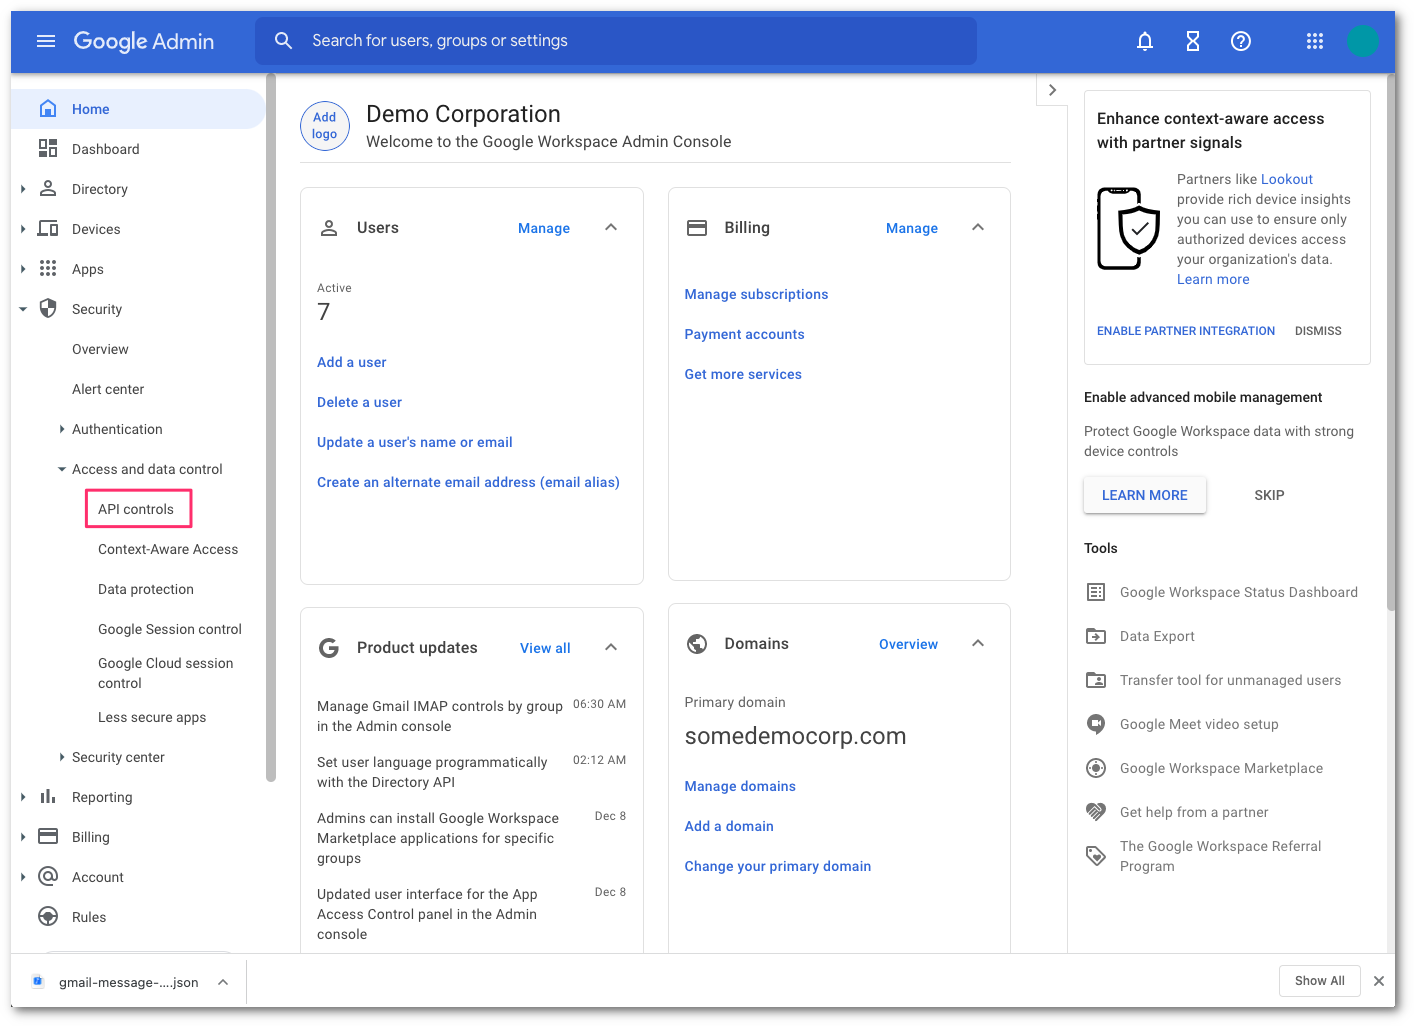
Go to Security > Access and data control > API controls.
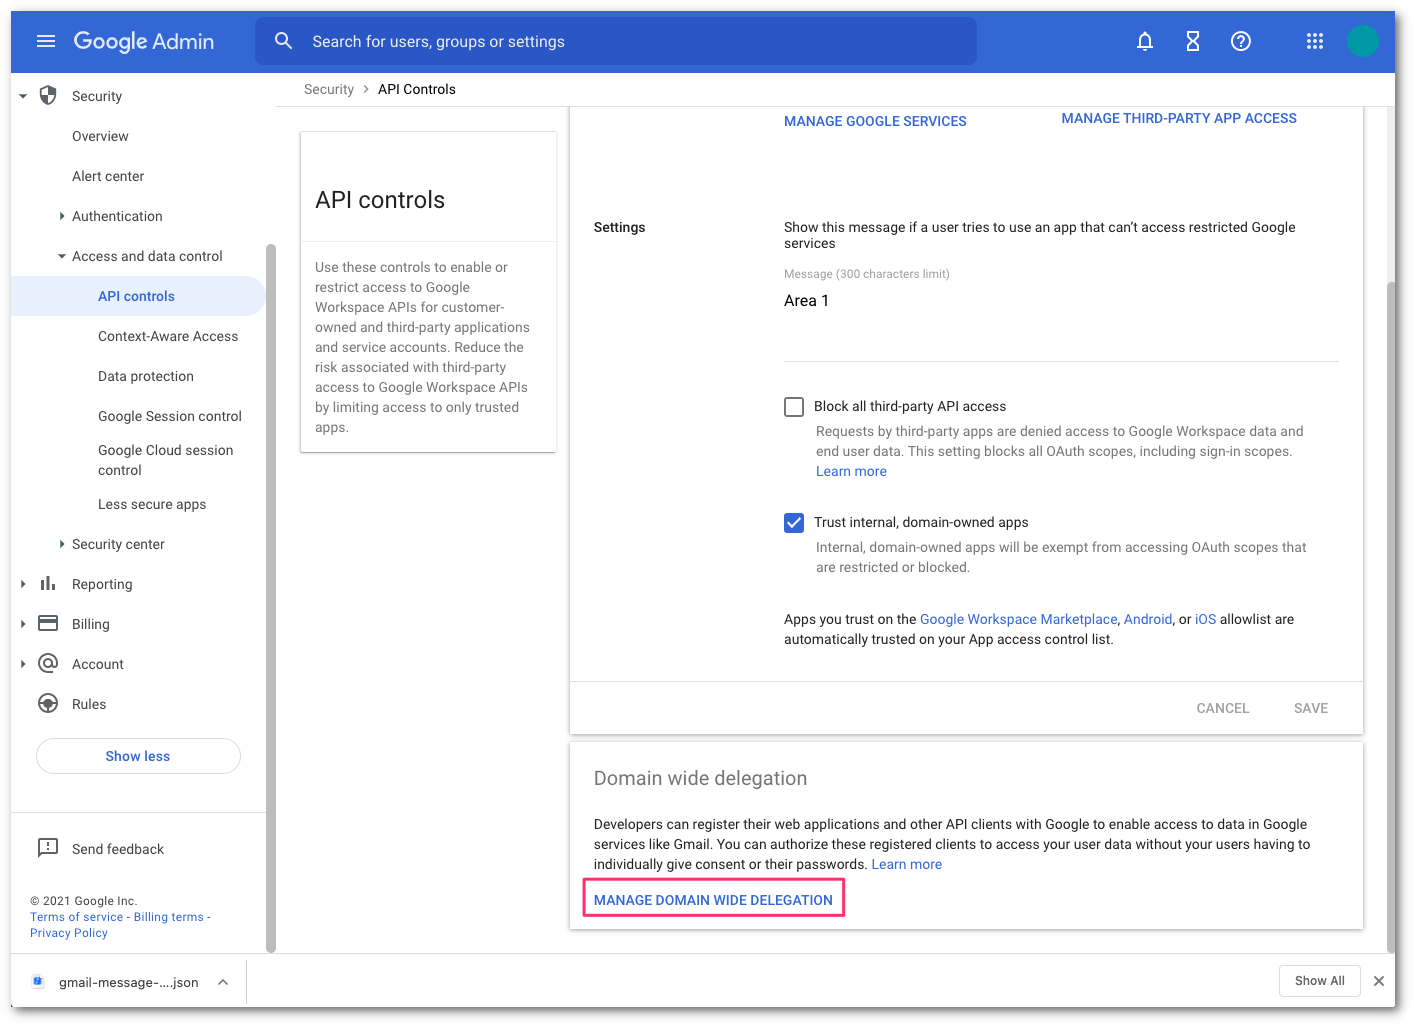
Find the Domain wide delegation section, and select MANAGE DOMAIN WIDE DELEGATION.
Select Add new to add a new client ID.
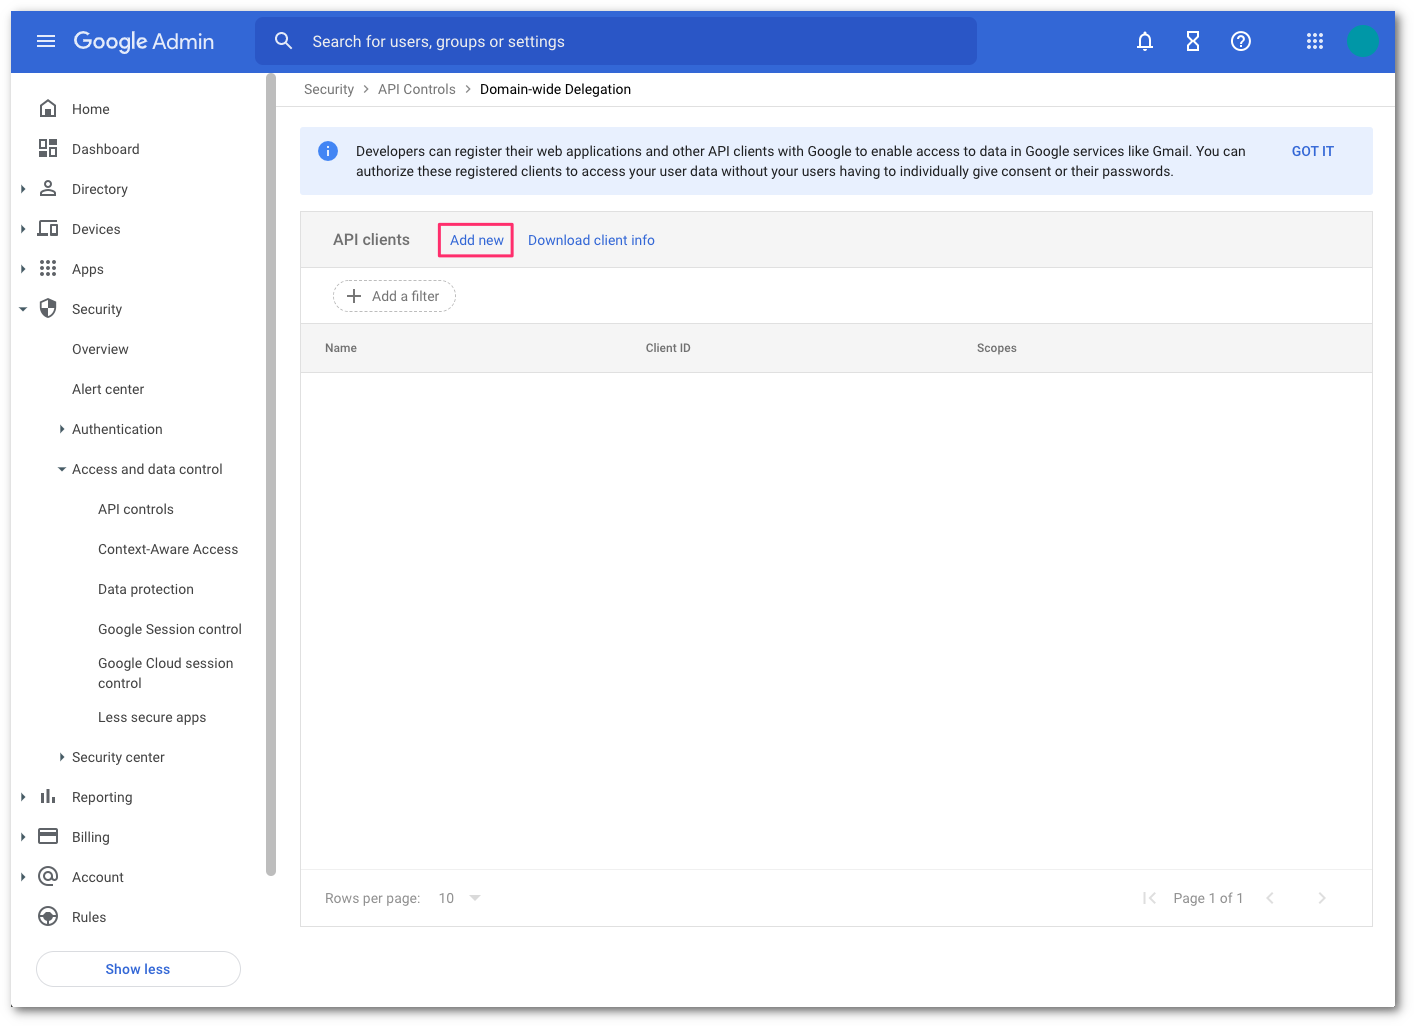
In Add a new client ID, enter the following information:
- Client ID: Enter your client ID. This is the Unique ID value you saved in step 17.
- OAuth scopes: Enter the following information (the input field accepts comma separated values):
https://www.googleapis.com/auth/admin.directory.user.readonly, https://www.googleapis.com/auth/admin.directory.group.readonly, https://www.googleapis.com/auth/admin.directory.user.alias.readonly, https://www.googleapis.com/auth/gmail.labels, https://mail.google.com/Select AUTHORIZE when you are finished.

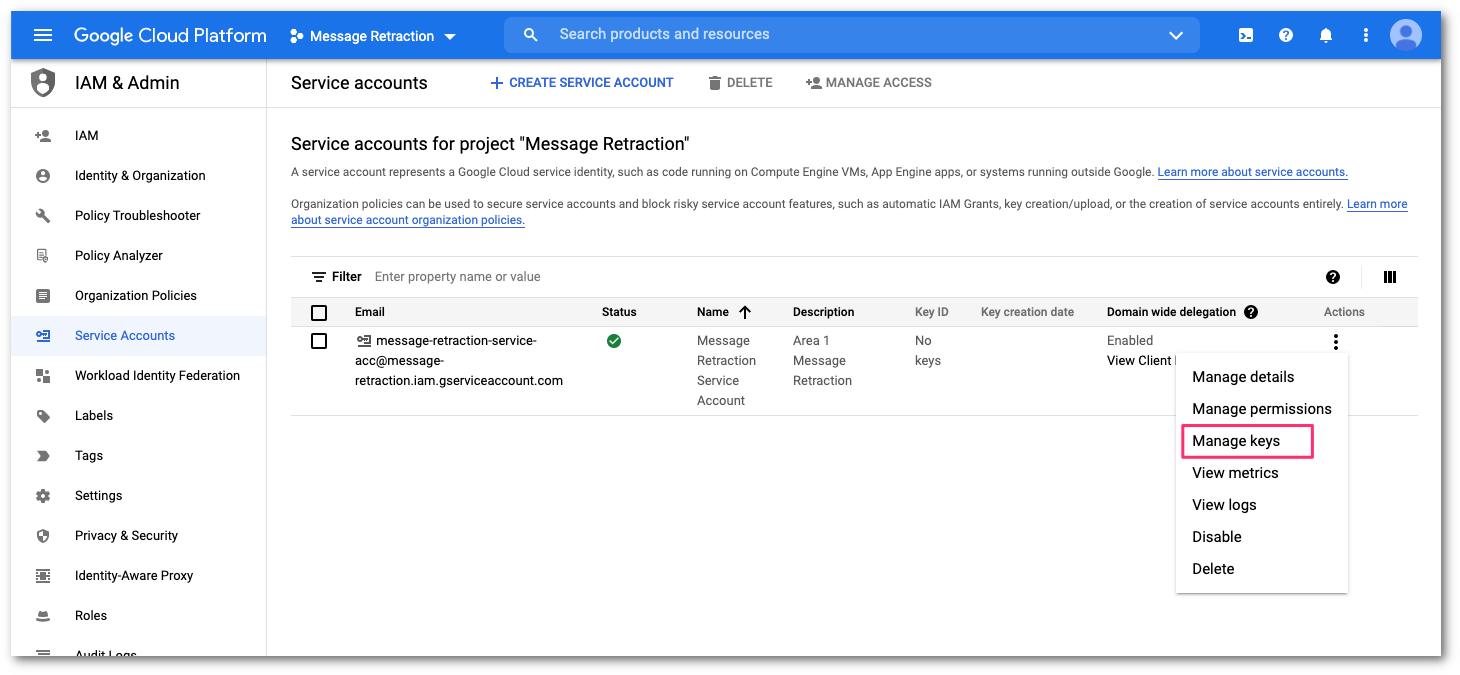
Return to the Google Cloud Platform (GCP) console, and select IAM & Admin > Service Accounts to return to the service account screen.
You need to create an API key in the Service account configuration panel. Select the three dots button to open the menu. Then, select Manage keys:
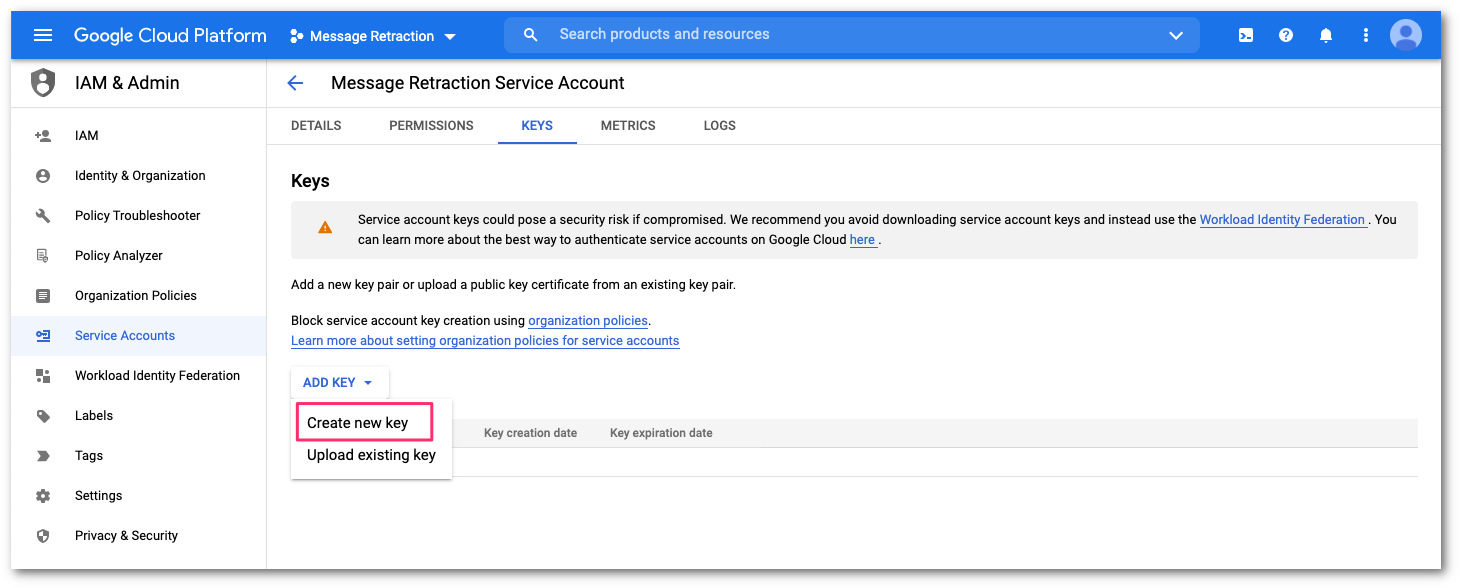
In the Keys configuration panel, select ADD KEY > Create new key.
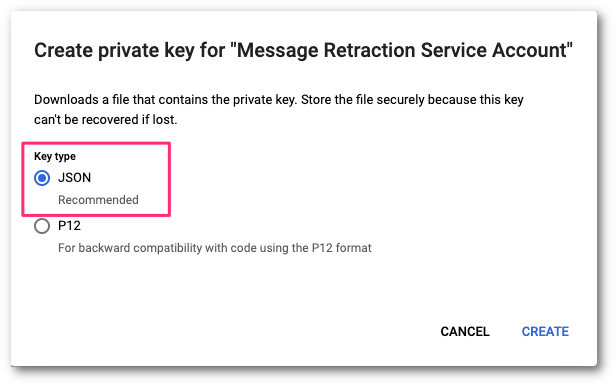
In Key type select JSON as the format to create the private key. Then, select CREATE.
2. Share the service account JSON key with Area 1
You have to upload the private key generated in the previous step to Area 1. This is needed to execute retractions on your Gmail inboxes.
Log in to the Area 1 dashboard, and select Settings (the gear icon).
Go to Email Configuration > RETRACT SETTINGS > Authorize Gmail.
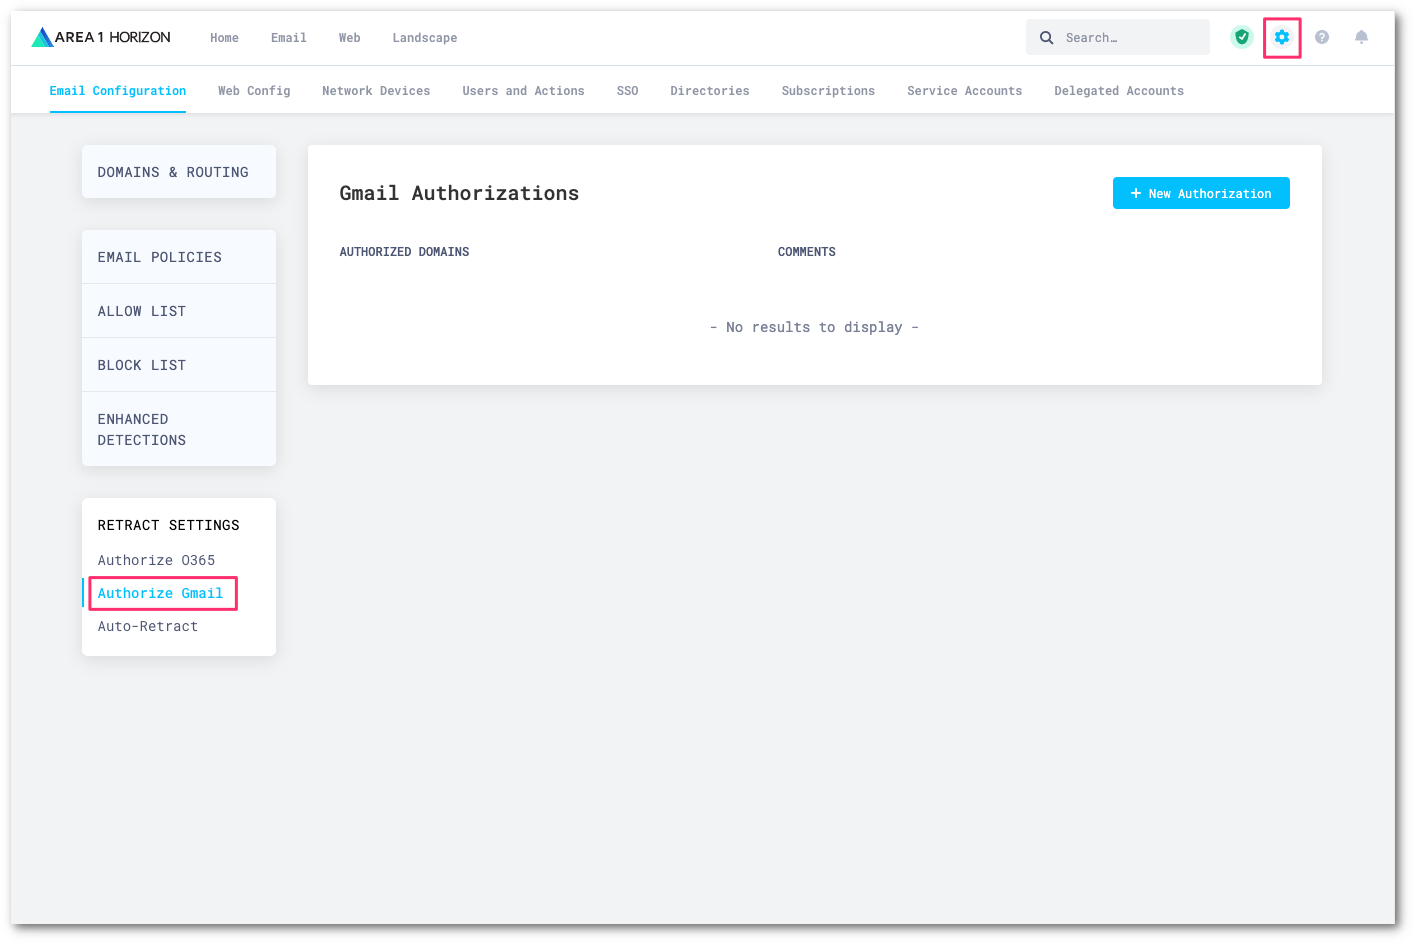
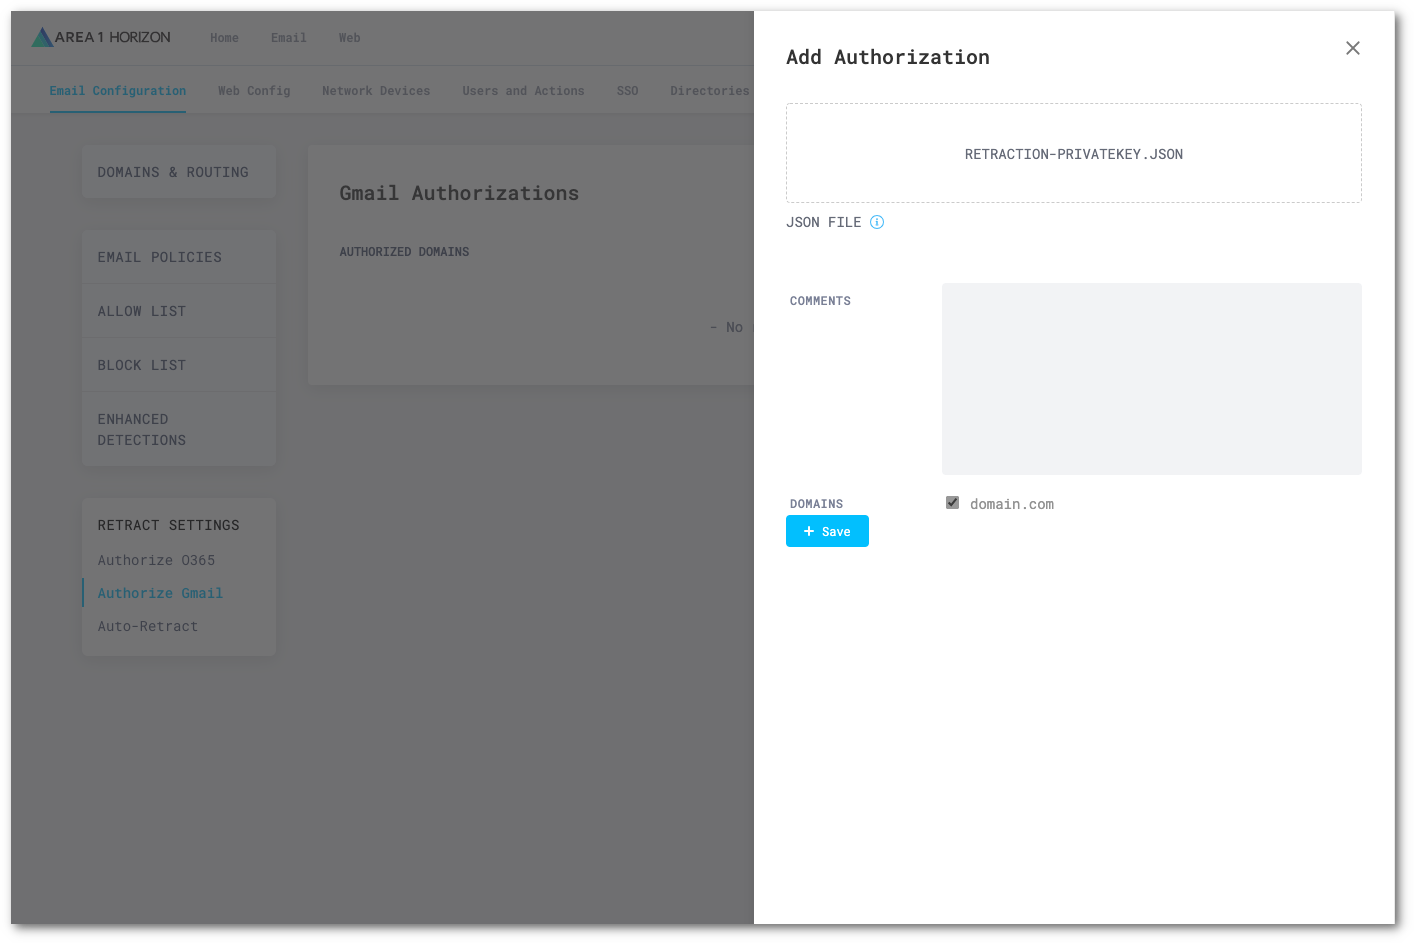
Select New Authorization and configure the following settings:
- Select AUTHORIZATION DATA (JWT), and find and upload your JSON private key.
- Under Domains, specify which domain this private key belongs to.
- Select Save to save the configuration.
3. Configure auto-retraction actions in Area 1
You can set up auto-retraction to automatically move messages matching certain dispositions to specific folders within a user’s mailbox.
To set up automatic retraction:
Log in to the Area 1 dashboard.
Go to Settings (the gear icon).
On Email Configuration, go to Retract Settings > Auto-Retract.
Select Edit.
For each disposition, choose which folder the message should be sent to:
- No Action: Do not move the message.
- Junk Email: Sends the message to the junk or spam email folder.
- Trash: Sends the message to the trash or deleted items email folder.
- Soft Delete — user recoverable (Microsoft only): Sends the message to the user’s Deleted Items folder. Messages can be recovered by the user.
- Hard Delete — admin recoverable: Completely deletes messages from a user’s inbox. Google Gmail messages cannot be recovered, even by the admin.
Select Update Auto-retract Settings.
Post delivery retractions for new threats
Area 1 is continuously gathering new information about phishing campaigns. Users might have email messages in their inboxes that were scanned by Area 1 but not retracted initially because, at the time of scan, these email messages had not been identified as a threat. To mitigate risk, Area 1 offers you tools to re-evaluate email messages at a fixed time interval based on knowledge Cloudflare may have acquired since initial delivery. Any email messages that fit this new threat knowledge will be retracted.
You can enable two options:
- Post Delivery Response: Area 1 will continue to re-evaluate emails already delivered to your users’ inboxes at a fixed time interval in search for phishing sites or campaigns not previously known to Cloudflare. If any email messages fitting these new criteria are found, Area 1 retracts them.
- Phish Submission Response: Area 1 will retract emails already delivered that are reported by your users as phishing, and are found to be malicious by Area 1. Retraction will occur according to your configuration.
4. Adjust the hop count in Area 1
Since Area 1 is not configured as the MX record for your domains, you will need to adjust Area 1’s position (hop count) relative to Area 1’s position in the email processing order.
Log in to the Area 1 dashboard, and select Settings (the gear icon).
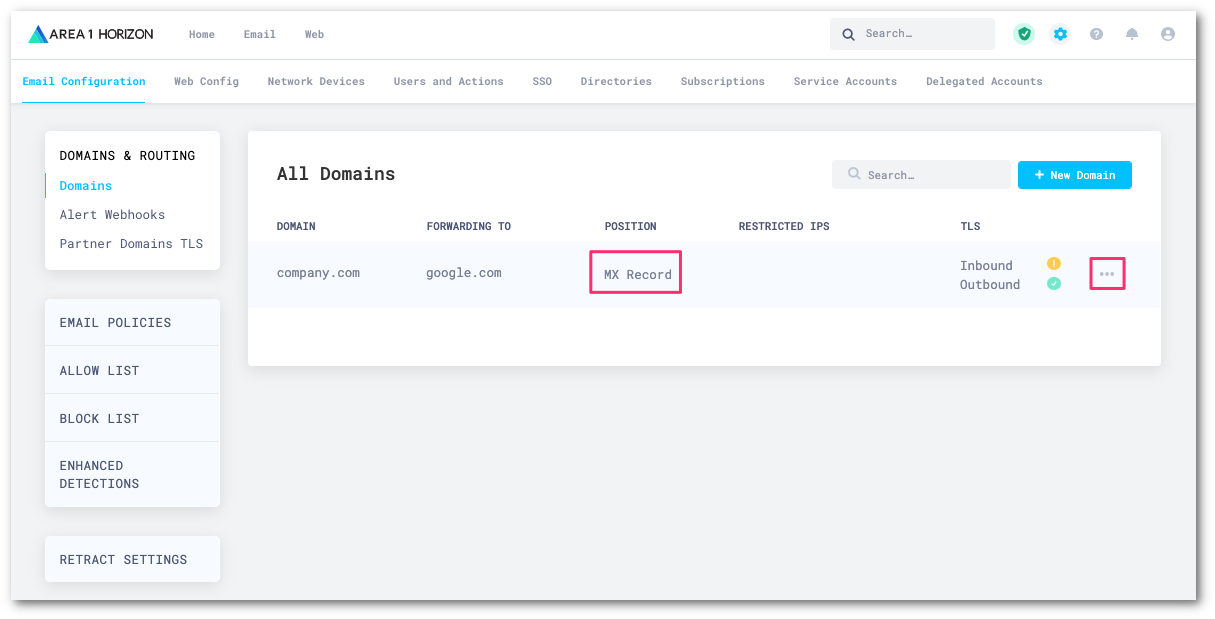
Go to Email Configuration > DOMAINS & ROUTING.
Select the three-dots menu on the domain you want to verify the position, and then select Edit.
For standalone Gmail only deployments, the value should be set to
2. If it is not, adjust the Hops count to2, and select Update Domain.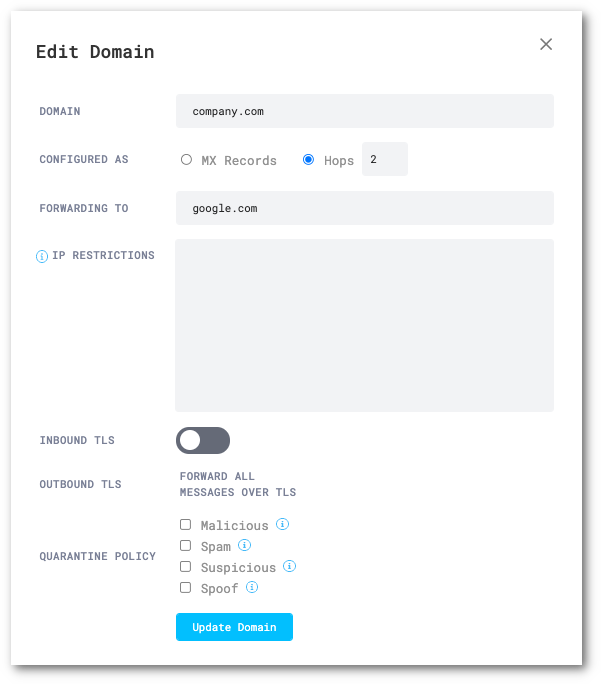
5. Configure BCC rule in Google Workspaces
You must send copies of inbound email messages to Area 1 for inspection, so that Area 1 can automatically retract messages. Messages can be sent to Area 1 using a BCC compliance rule. Refer to the steps below to learn how to set this up. Automatic retraction is not available when Area 1 is deployed as MX.
In the Admin console, go to Menu > Apps > Google Workspace > Gmail > Compliance.
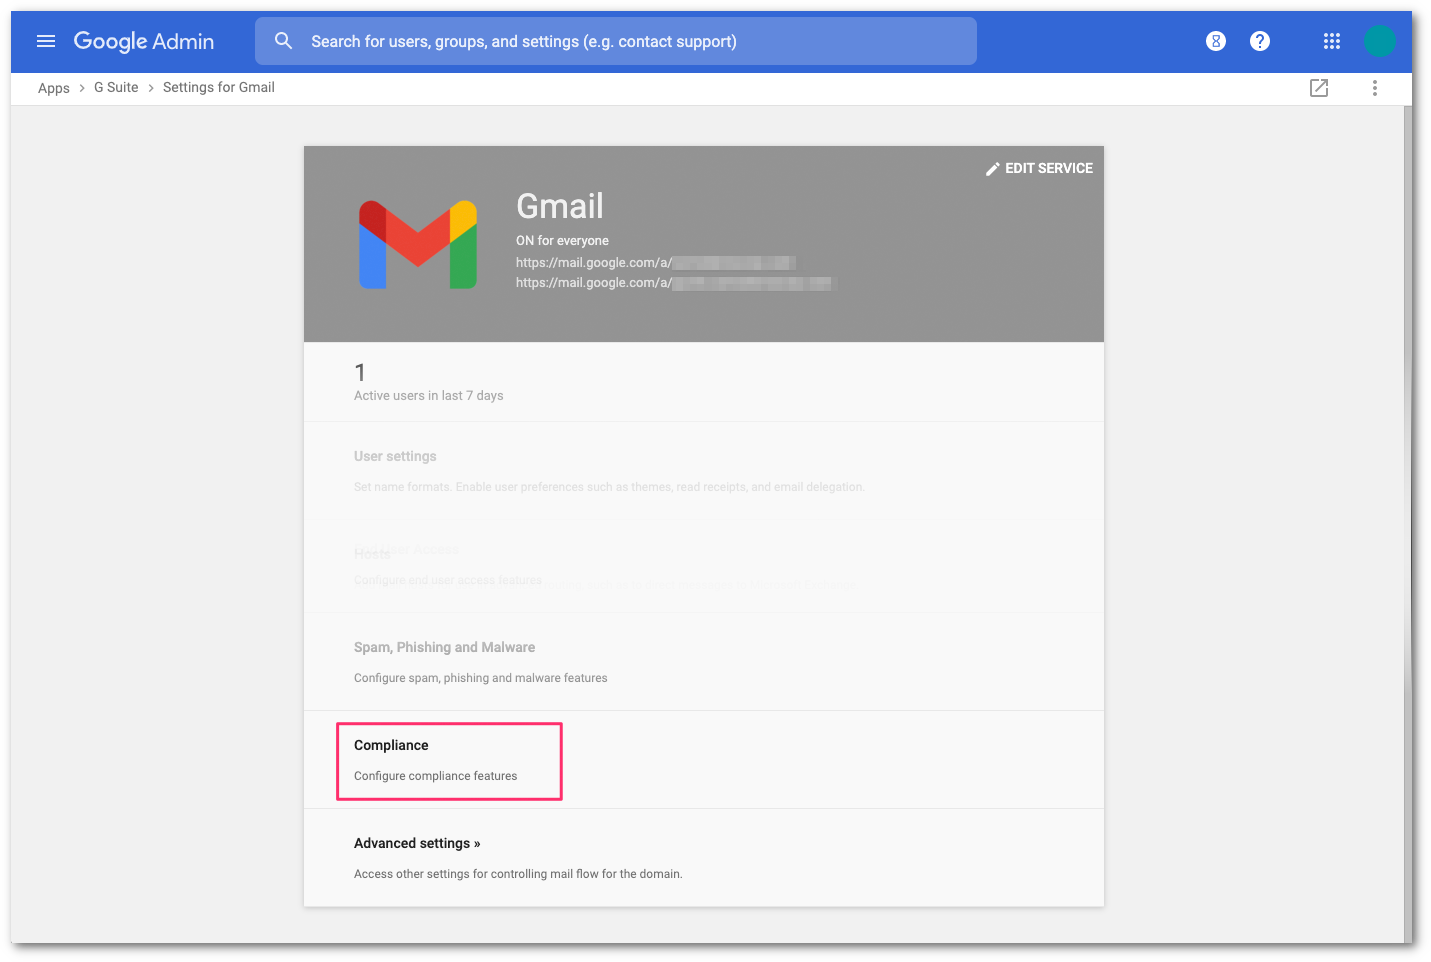
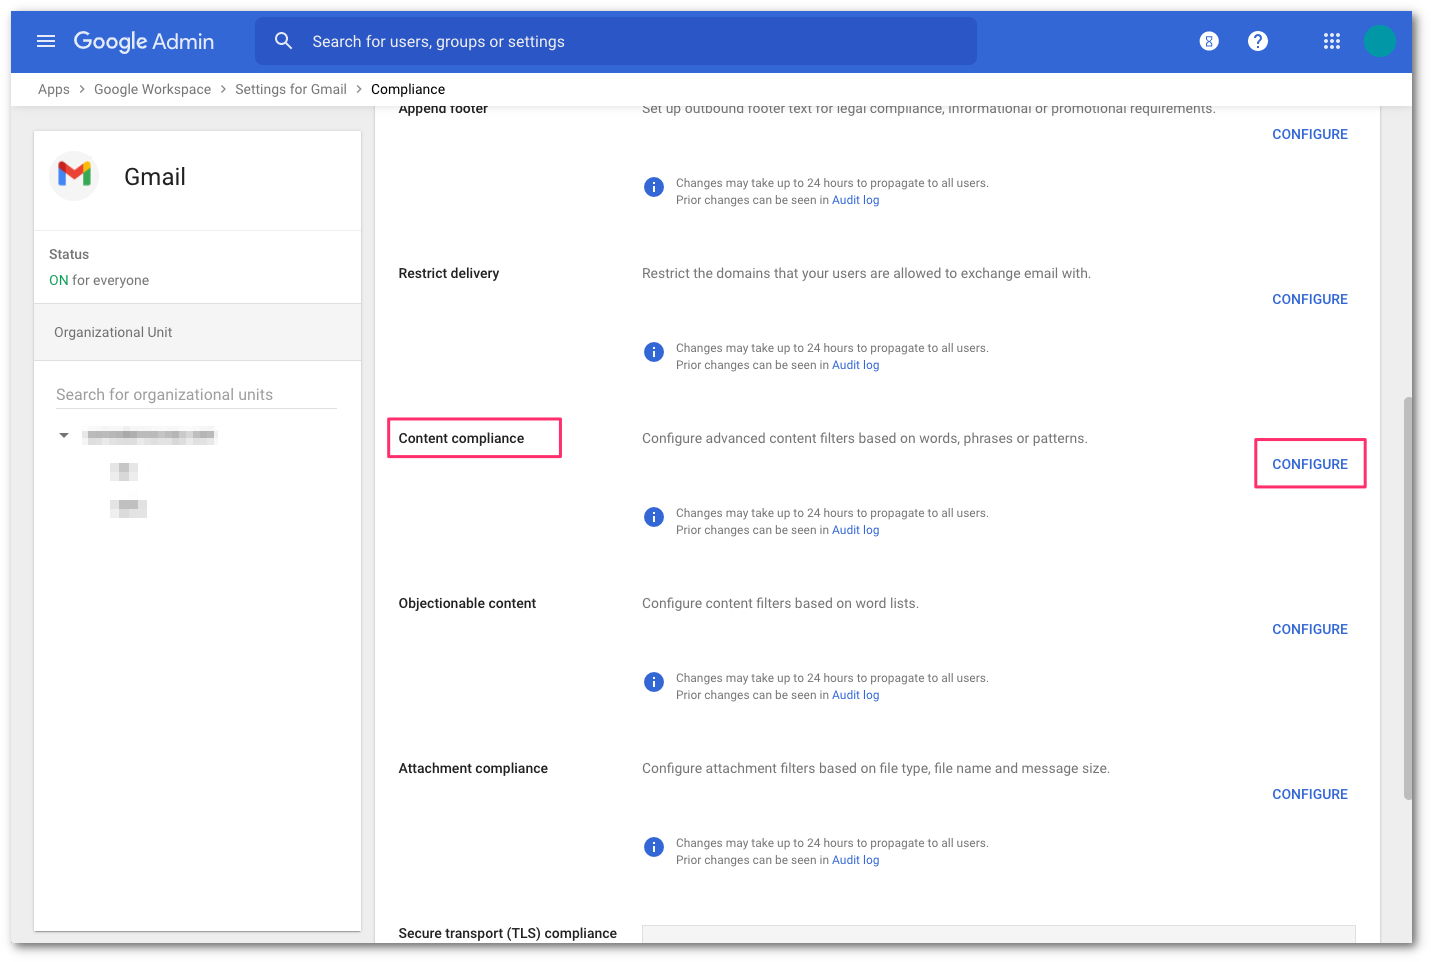
Scroll to Content Compliance and select CONFIGURE.
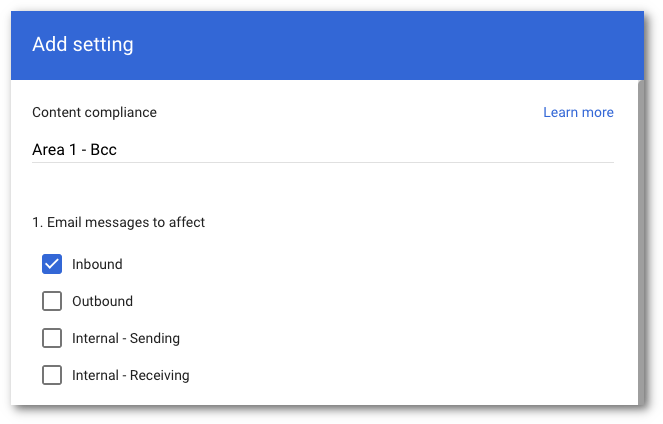
Add a Content Compliance filter and name it
Area 1 - BCC.In Email messages to affect, select Inbound.
Select the recipients that you want to send emails to Area 1 via BCC:
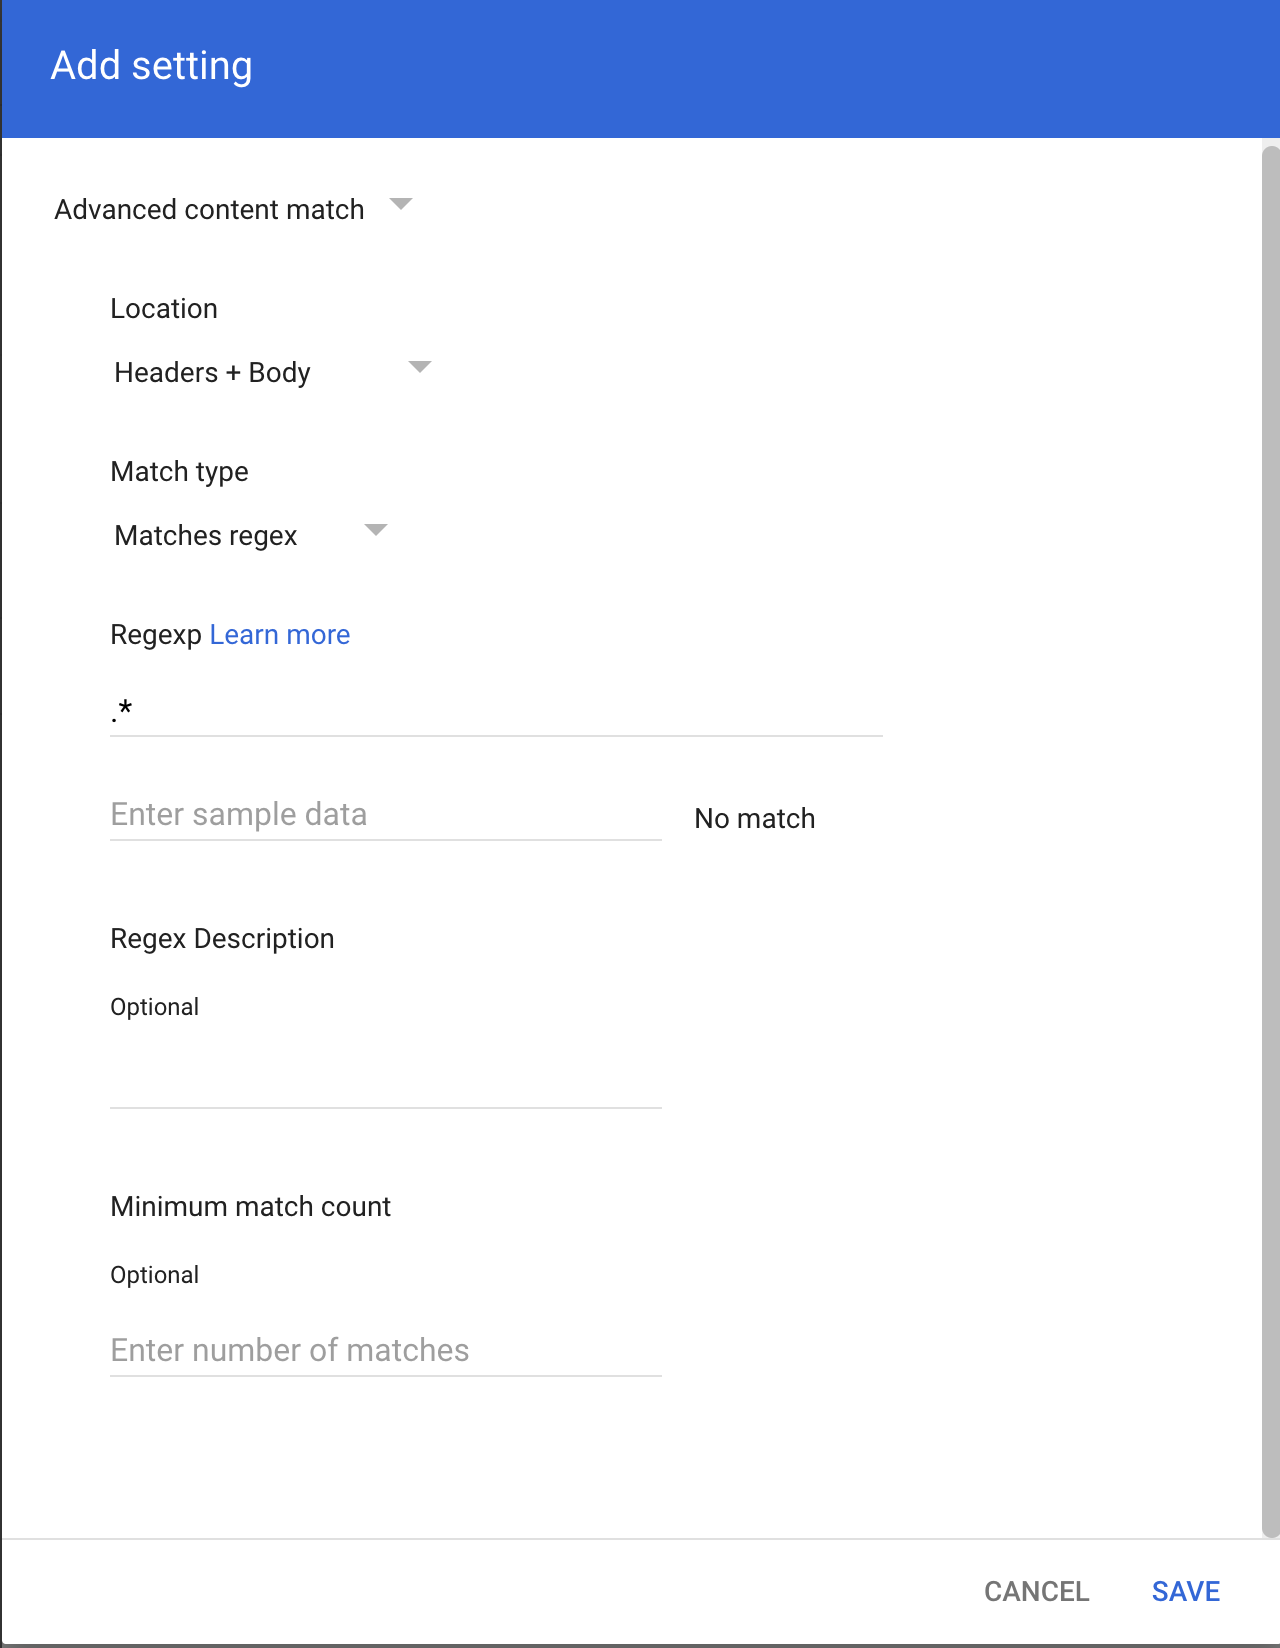
- Select Add to configure the expression.
- Select Advanced content match.
- In Location, select Headers + Body from the dropdown.
- In Match type select Matches regex.
- In Regexp input
.*. You can customize the regex as needed and test within the admin page or on sites like https://regexr.com/. - Select SAVE.
In If the above expressions match, do the following, make the following changes:
In Also deliver to select Add more recipients.
- Under Recipients select Add.
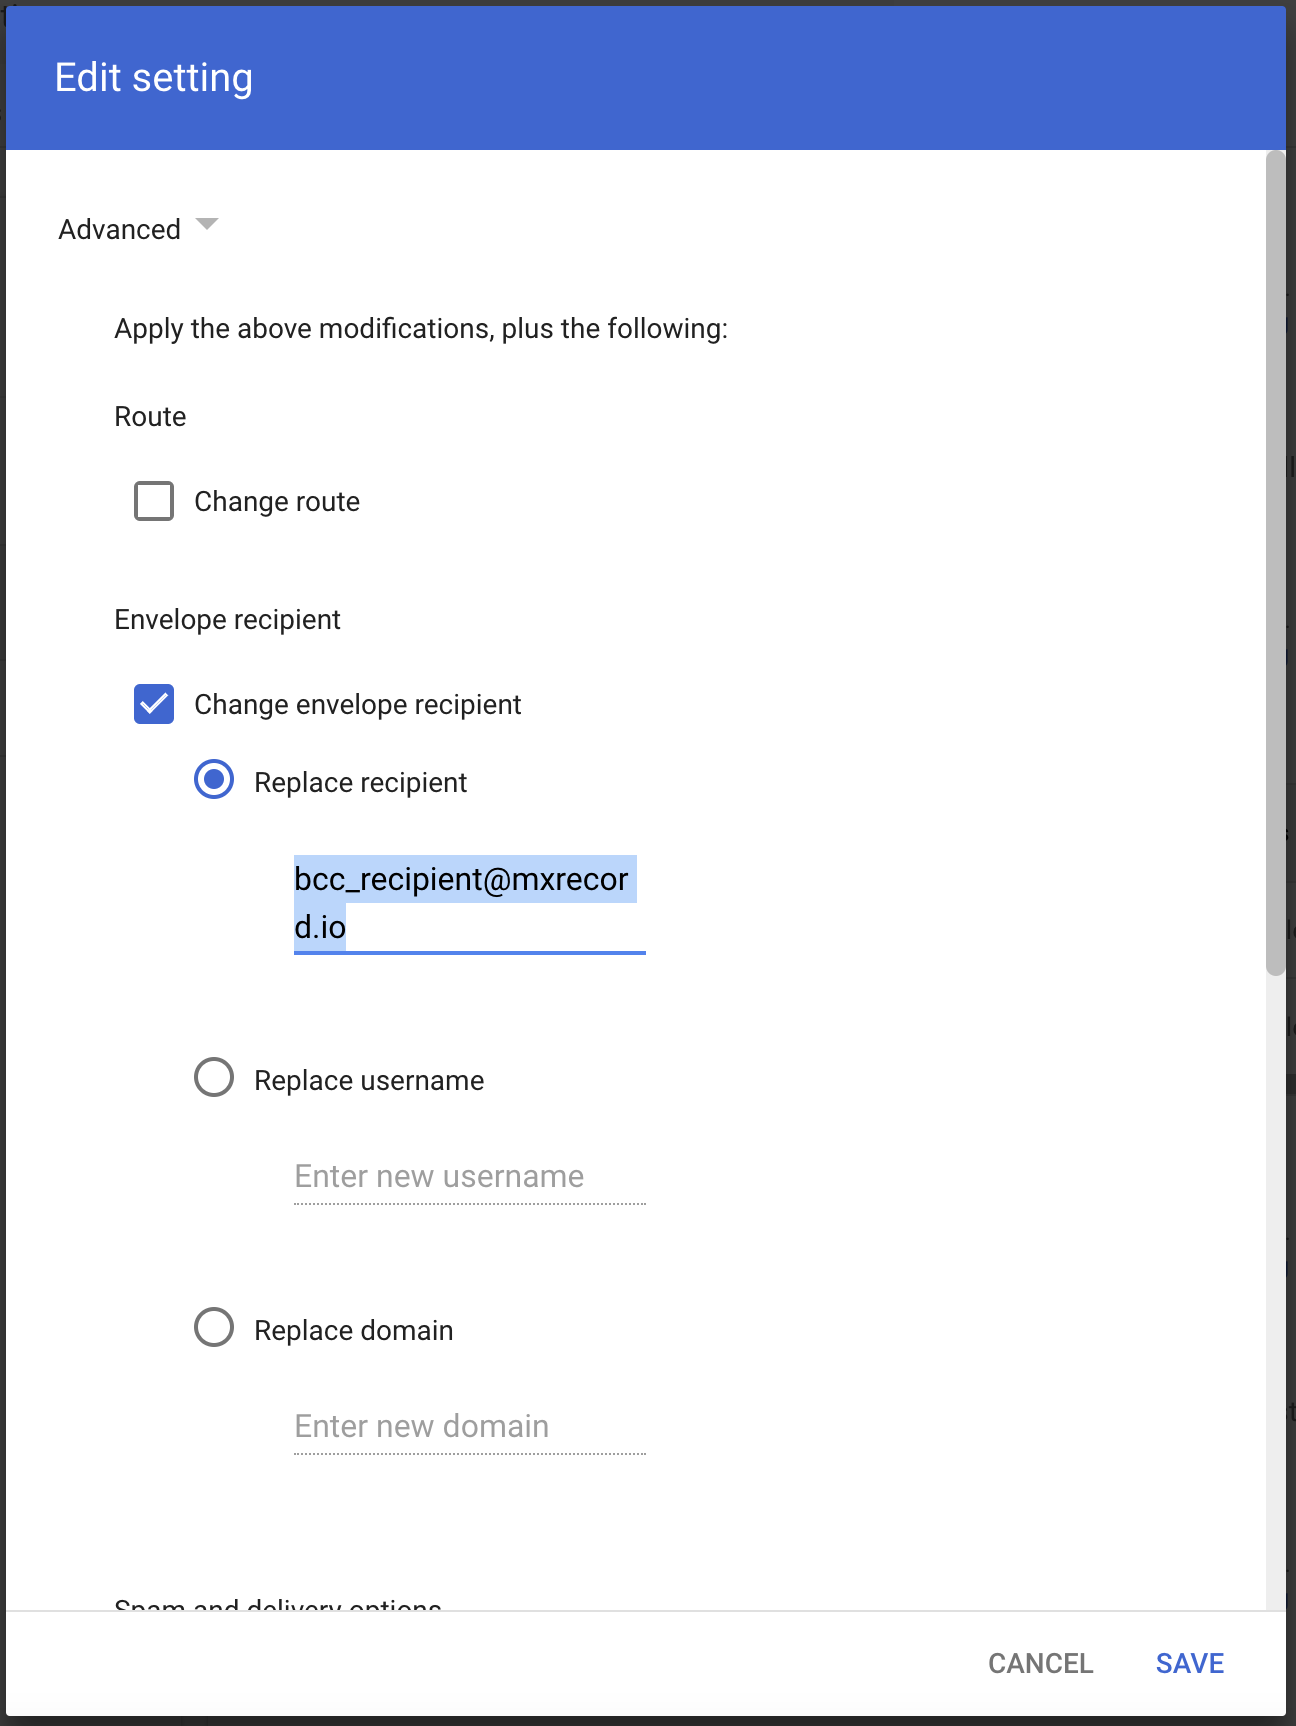
- Change the setting to Advanced.
- In Envelope recipient select Change envelope recipient.
- In Replace recipient add the recipient BCC address. For example,
<customer_name>@journaling.mxrecord.io. This address is specific to each customer tenant and can be found in your Portal.
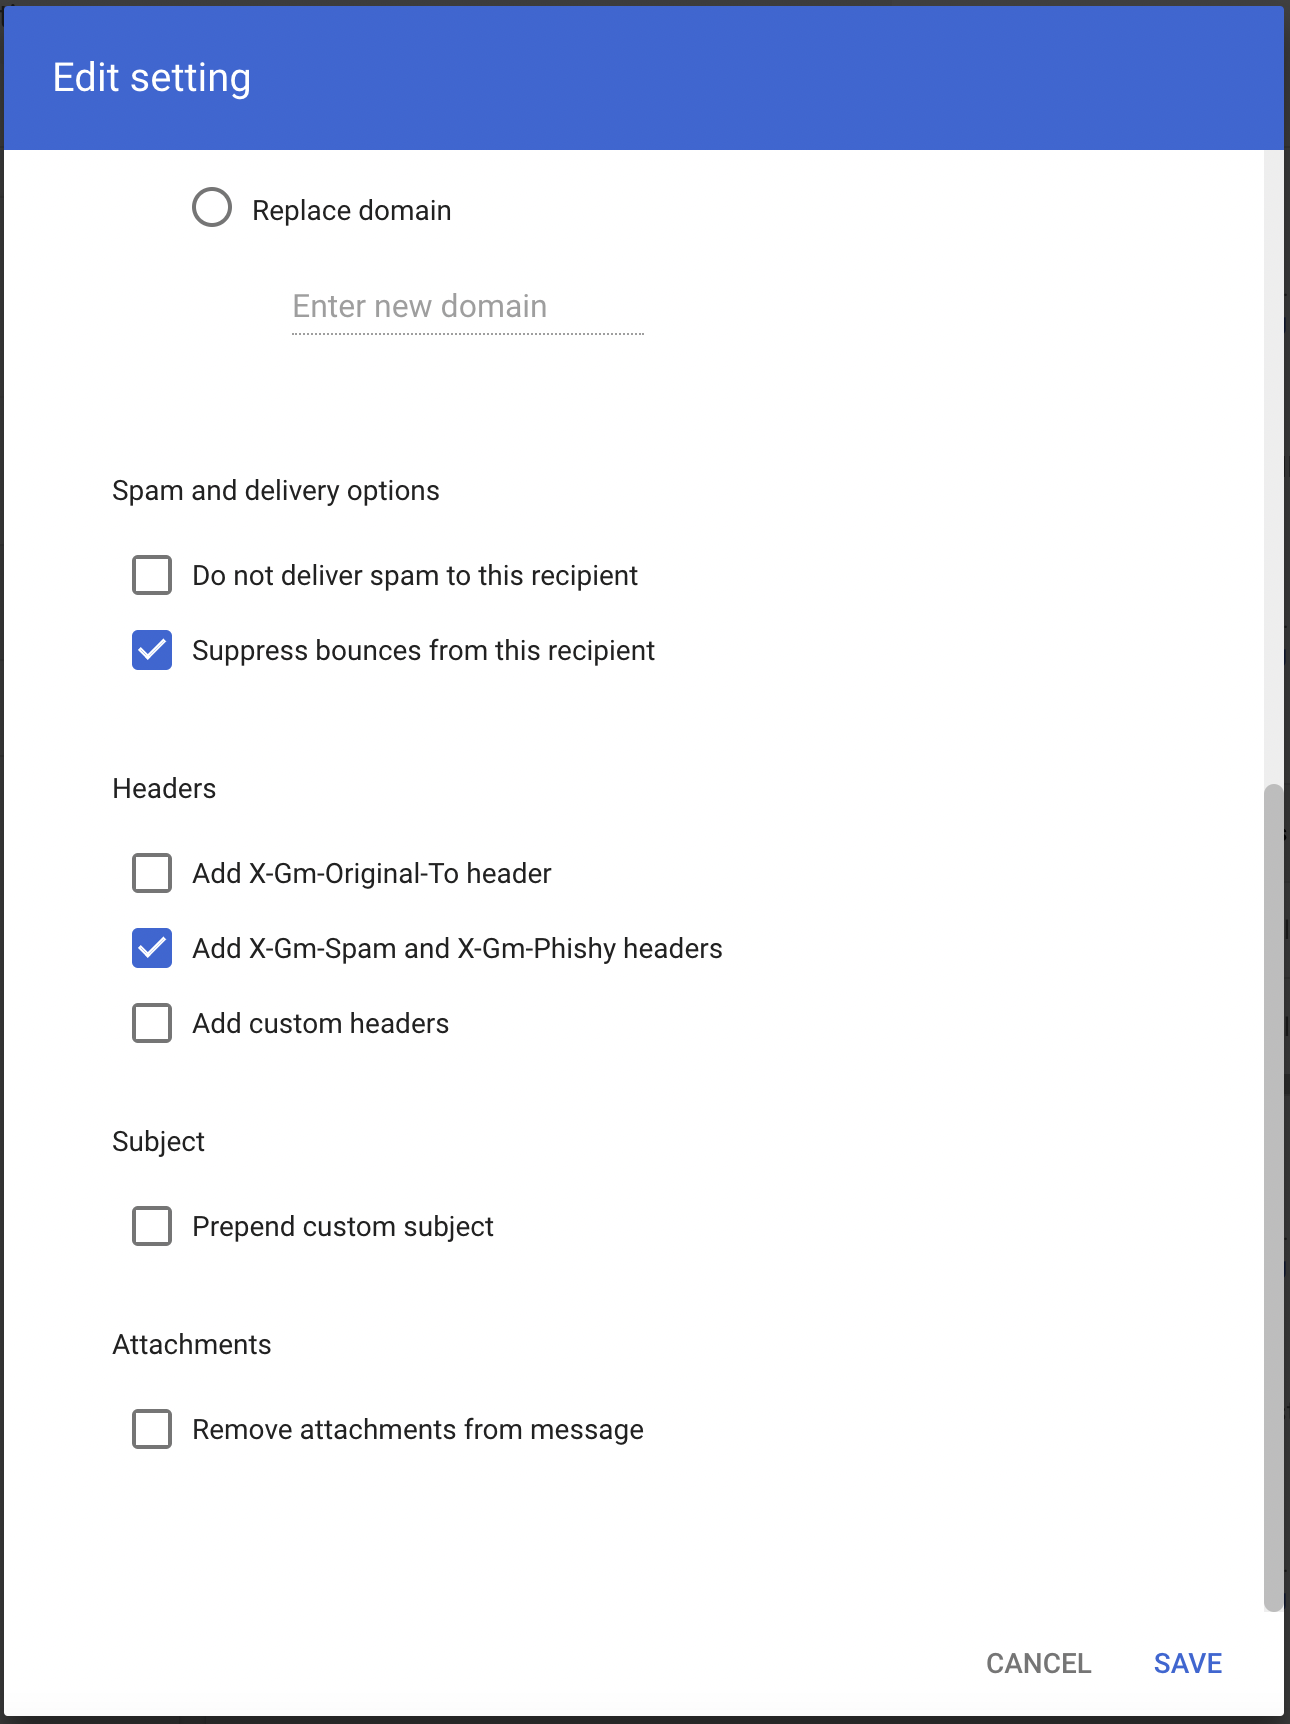
- Make sure that in Spam and delivery options > Do not deliver spam to this recipient is not checked.
- Under Headers select Add X-Gm-Spam and X-Gm-Phishy headers.
- Select SAVE.
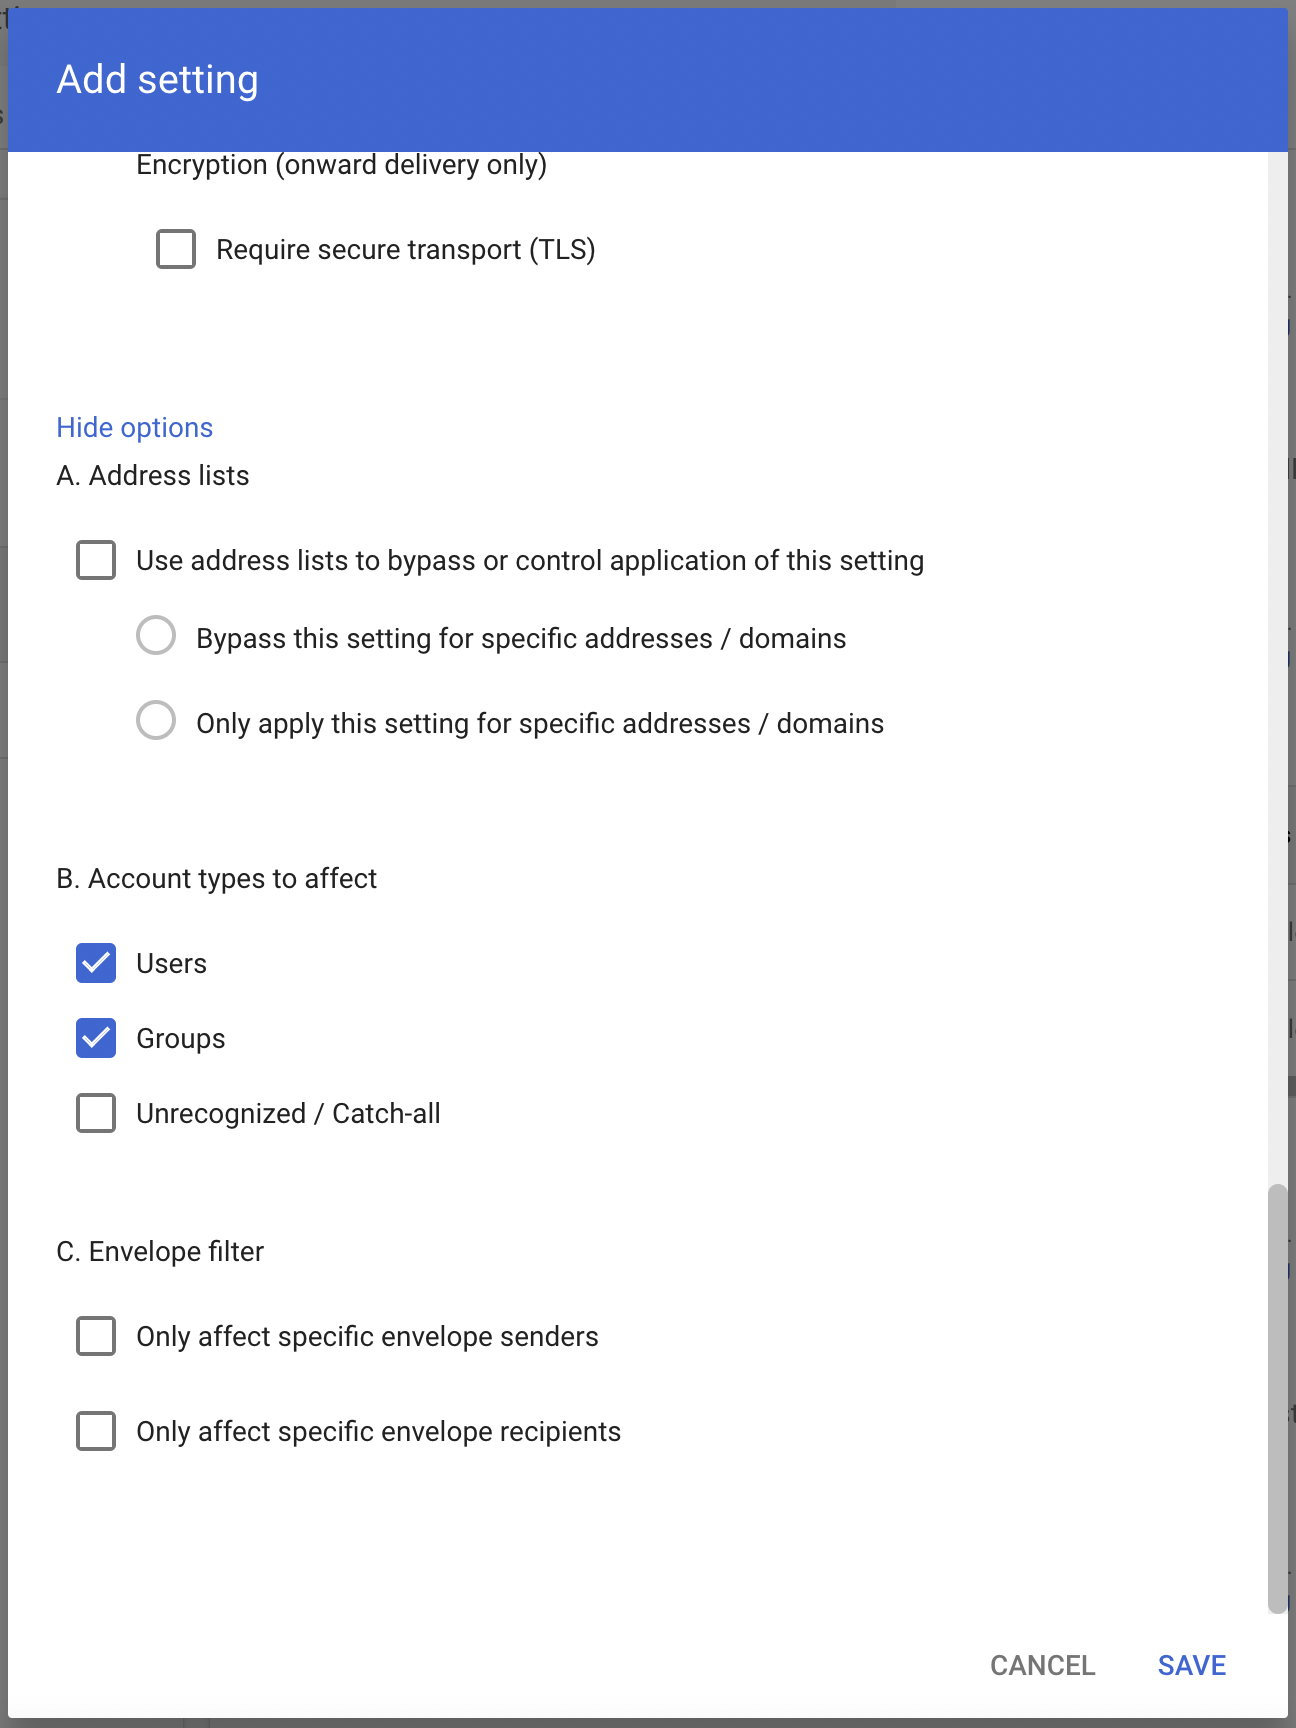
Scroll down and select Show options.
- Under Account types to affect select Groups.
- Select SAVE.
Geographic locations
Select from the following BCC addresses to process email in the correct geographic location.
Host| Location | Note | <customer_name>@journaling.mxrecord.ioUS | Best option to ensure all email traffic processing happens US data centers. | <customer_name>@journaling.mailstream-eu-primary.mxrecord.ioEU | Best option to ensure all email traffic processing happens in Germany, with fallback to US data centers. | <customer_name>@journaling.mailstream-eu1.mxrecord.ioEU | Best option to ensure all email traffic processing happens within the EU without fallback to US data centers. | <customer_name>@journaling.mailstream-bom.mxrecord.mxIndia | Best option to ensure all email traffic processing happens within India. | <customer_name>@journaling.mailstream-india-primary.mxrecord.mxIndia | Same as | mailstream-bom.mxrecord.mx, with fallback to US data centers.<customer_name>@journaling.mailstream-asia.mxrecord.mxIndia | Best option for companies with a broader Asia presence. | <customer_name>@journaling.mailstream-syd.area1.cloudflare.netAustralia / New Zealand | Best option to ensure all email traffic processing happens within Australia. | <customer_name>@journaling.mailstream-australia.area1.cloudflare.netAustralia / New Zealand | Best option to ensure all email traffic processing happens in Australia, with India and US data centers as backup. | |
|---|
6. Manual message retraction
When retraction is enabled, you can manually retract messages that were not automatically retracted.
Log in to the Area 1 dashboard.
Select the search bar and enter the search parameters to find the emails you are looking for.
To retract a single message, select Retract. To retract multiple messages, first select the checkboxes on the messages you want to retract. Then, select Retract.
Choose where you want to retract the message to, and select Retract message.
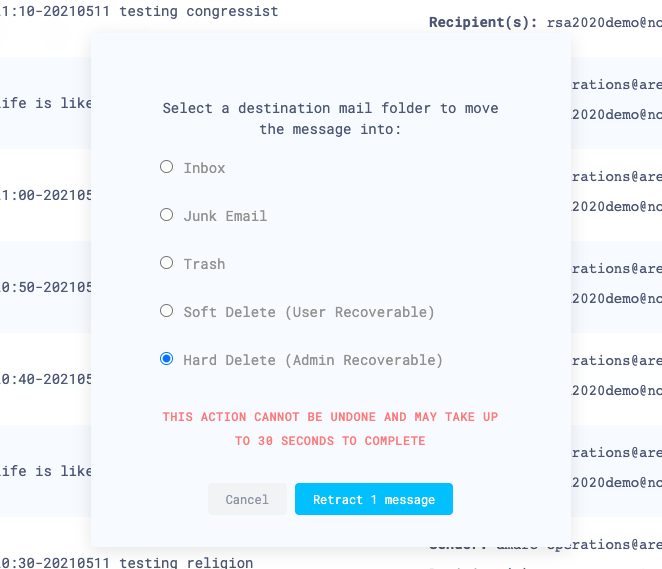
If the retraction was successful, there will be positive confirmation on Area 1’s dashboard.