Protect payment forms from malicious bots using Turnstile
This tutorial shows how you can build a more secure payment form using Turnstile. You can learn how to block bot access on the checkout page and trigger additional authentication flows by integrating Turnstile with Stripe.
- Sign up for a Cloudflare account ↗.
- Install
Node.js↗.
Node.js version manager
Use a Node version manager like Volta ↗ or nvm ↗ to avoid permission issues and change Node.js versions. Wrangler, discussed later in this guide, requires a Node version of 16.17.0 or later.
- Sign up for a Stripe ↗ account.
First, you will need to prepare a Cloudflare Turnstile widget to use for this application.
- Log in to the Cloudflare dashboard ↗ and select your account.
- Go to Turnstile and create a new Turnstile widget.
- Copy the sitekey and the secret key to use in the next step.
Now that your Turnstile widget it ready to use, you can create your Worker application.
C3 (create-cloudflare-cli) ↗ is a command-line tool designed to help you set up and deploy new applications to Cloudflare. In addition to speed, it leverages officially developed templates for Workers and framework-specific setup guides to ensure each new application that you set up follows Cloudflare and any third-party best practices for deployment on the Cloudflare network.
To efficiently create and manage multiple APIs, let's use Hono ↗. It is lightweight and allows for the creation of multiple API paths, as well as efficient request and response handling.
Open your command line interface (CLI) and run the following command:
npm create cloudflare@latest -- secure-payment-form --framework=honopnpm create cloudflare@latest secure-payment-form --framework=honoyarn create cloudflare secure-payment-form --framework=honoIf this is your first time running the C3 command, you will be asked whether you want to install it. Confirm that the package name for installation is create-cloudflare and answer y.
Need to install the following packages:create-cloudflare@latestOk to proceed? (y)Additionally, you need to install the create-hono package.
Need to install the following packages:create-hono@0.14.2Ok to proceed? (y) yDuring the setup, you will be asked if you want to manage your project source code with Git. It is recommended to answer Yes as it helps in recording your work and rolling back changes. You can also choose No, which will not affect the tutorial progress.
╰ Do you want to use git for version control? Yes / NoFinally, you will be asked if you want to deploy the application to your Cloudflare account. For now, select No and start development locally.
╭ Deploy with Cloudflare Step 3 of 3│╰ Do you want to deploy your application? Yes / NoIf you see a message like the one below, the project setup is complete. You can open the secure-payment-form directory in your preferred IDE to start development.
────────────────────────────────────────────────────────────🎉  SUCCESS  Application created successfully!
💻 Continue DevelopingChange directories: cd secure-payment-formStart dev server: npm run devDeploy: npm run deploy
📖 Explore Documentationhttps://developers.cloudflare.com/workers
🐛 Report an Issuehttps://github.com/cloudflare/workers-sdk/issues/new/choose
💬 Join our Communityhttps://discord.cloudflare.com────────────────────────────────────────────────────────────
Cloudflare Workers applications can be developed and tested in a local environment. On your CLI, change directory into your newly created Workers and run npx wrangler dev to start the application. Using Wrangler, the application will start, and you'll see a URL beginning with localhost.
 ⛅️ wrangler 3.84.1-------------------
⎔ Starting local server...[wrangler:inf] Ready on http://localhost:8787╭───────────────────────────╮│  [b] open a browser       ││  [d] open devtools        ││  [l] turn off local mode  ││  [c] clear console        ││  [x] to exit              │╰───────────────────────────╯
You can send a request to the API using the curl command. If you see the text Hello Hono!, the API is running correctly.
curl http://localhost:8787Hello Hono!So far, we've covered how to create a Worker project using C3 and introduced the open source Hono framework that streamlines web-application development with Workers.
At the next step, we need to update the Hono project for supporting to web application.
Since we will use JSX to dynamically create HTML, you will need to change src/index.ts to src/index.tsx.
mv src/index.ts src/index.tsxAt the same time, change the filename specified in the Wrangler configuration file.
#:schema node_modules/wrangler/config-schema.jsonname = "secure-payment-form"main = "src/index.ts"main = "src/index.tsx"compatibility_date = "2024-10-22"To connect your web application to both Stripe and Turnstile, you must register the necessary API keys for Stripe and Turnstile as environment variables within your application.
You can obtain test site keys and secret keys for Turnstile from the Turnstile documentation.
Get the publishable key and secret key for Stripe from the Stripe dashboard ↗.
Then, place each key into the .dev.vars file like the following:
TURNSTILE_SITE_KEY = '1x00000000000000000000AA'TURNSTILE_SECRET_KEY = '1x0000000000000000000000000000000AA'STRIPE_PUBLISHABLE_KEY='Publishable key starting with pk_test_'STRIPE_SECRET_KEY='Secret key starting with sk_test_'After that, you can generate TypeScript type definition by running the npm run cf-typegen command.
$ npm run cf-typegen
Generating project types...
interface CloudflareBindings {        TURNSTILE_SITE_KEY: string;        TURNSTILE_SECRET_KEY: string;        STRIPE_PUBLISHABLE_KEY: string;        STRIPE_SECRET_KEY: string;}
In local development using Hono and Wrangler, you can retrieve values set in .dev.vars like this:
app.get("/hello", async (c) => { console.log(c.env.TURNSTILE_SITE_KEY); return c.json({ message: "test" });});Now we are ready for application development. In the next steps, we will develop a payment form using Turnstile and Stripe.
Start by creating a form that uses Turnstile to detect bot access. Add the following code to src/index.tsx to create a simple form:
import { Hono } from "hono";
const app = new Hono<{  Bindings: CloudflareBindings;}>();
app.get("/", async (c) => {  return c.html(    <main>      <form id="payment-form">        <div id="payment-element"></div>        <div id="result"></div>        <button type="submit">Order</button>      </form>    </main>,  );});
export default app;
Add JavaScript code to our application to implement bot detection using Turnstile. By adding this implementation, the order form submission process will be disabled until the Turnstile bot detection process is completed and it is confirmed that the access request is not from a bot.
import { Hono } from "hono";import { env } from "hono/adapter";import { html } from "hono/html";
const app = new Hono<{  Bindings: CloudflareBindings;}>();
app.get("/", async (c) => {  const { TURNSTILE_SITE_KEY } = env(c);  return c.html(    <main>      <form id="payment-form">        <div id="payment-element"></div>        <div id="result"></div>        <div class="cf-turnstile"></div>        <button type="submit" disabled>Order</button>        <button type="submit">Order</button>      </form>      {html`        <script          src="https://challenges.cloudflare.com/turnstile/v0/api.js?onload=_turnstileCb"          defer        ></script>        <script>          let turnstileToken = "";          const submitButon = document.querySelector("button[type='submit']");          function _turnstileCb() {            turnstile.render(".cf-turnstile", {              sitekey: "${TURNSTILE_SITE_KEY}",              callback: function (token) {                turnstileToken = token;                submitButon.removeAttribute("disabled");              },            });          }        </script>      `}    </main>,  );});
export default app;
This will load the Turnstile script file with a script tag. The _turnstileCB function is executed when the script file loading is complete, triggered by the onload=_turnstileCB in the query string.
In the _turnstileCB function, turnstile.render() is executed. The callback set here removes the disabled attribute from the submit button of the form.
This implementation blocks order operations for any requests that Cloudflare identifies as being made by a bots.
To integrate Turnstile with a Stripe payment form, first you will need to install the Stripe SDK:
npm install stripeyarn add stripepnpm add stripeNext, implement the code to create a payment form in src/index.tsx. The following code creates a Payment Intent ↗ on the server side:
import { Hono } from "hono";import { env } from "hono/adapter";import { html } from "hono/html";import Stripe from "stripe";
const app = new Hono<{  Bindings: CloudflareBindings;}>();
app.get("/", async (c) => {  const { TURNSTILE_SITE_KEY } = env(c);  const { TURNSTILE_SITE_KEY, STRIPE_SECRET_KEY, STRIPE_PUBLISHABLE_KEY } =    env(c);  const stripe = new Stripe(STRIPE_SECRET_KEY, {    apiVersion: "2024-10-28.acacia",    appInfo: {      name: "example/cloudflare-turnstile",    },  });  const paymentIntent = await stripe.paymentIntents.create({    amount: 100,    currency: "usd",  });  return c.html(
Then, add the following code to display the payment form. Edit src/index.tsx:
{html` <script src="https://js.stripe.com/v3/"></script> <script src="https://challenges.cloudflare.com/turnstile/v0/api.js?onload=_turnstileCb" defer ></script> <script> let turnstileToken = ""; const submitButon = document.querySelector("button[type='submit']"); function _turnstileCb() { turnstile.render(".cf-turnstile", { sitekey: "${TURNSTILE_SITE_KEY}", callback: function (token) { turnstileToken = token; submitButon.removeAttribute("disabled"); }, }); } const stripe = Stripe("${STRIPE_PUBLISHABLE_KEY}"); const elementsAppearance = { theme: "stripe", }; const elements = stripe.elements({ appearance: elementsAppearance, clientSecret: "${paymentIntent.client_secret}", }); const resultElement = document.getElementById("result"); const paymentElement = elements.create("payment"); paymentElement.mount("#payment-element"); const paymentForm = document.getElementById("payment-form"); paymentForm.addEventListener("submit", async (e) => { e.preventDefault(); if (!turnstileToken) { return; } if (submitButon) { submitButon.setAttribute("disabled", true); } resultElement.innerHTML = ""; const { error: submitError } = await elements.submit(); if (submitError) { console.log(submitError); submitButon.removeAttribute("disabled"); return; } const { error: confirmationError } = await stripe.confirmPayment({ elements, confirmParams: { return_url: "http://localhost:8787", }, }); submitButon.removeAttribute("disabled"); console.log(confirmationError); resultElement.innerHTML = JSON.stringify( confirmationError, null, 2, ); }); </script>`}The payment form is now ready. To experience how it behaves when a bot is detected, change .dev.vars as follows:
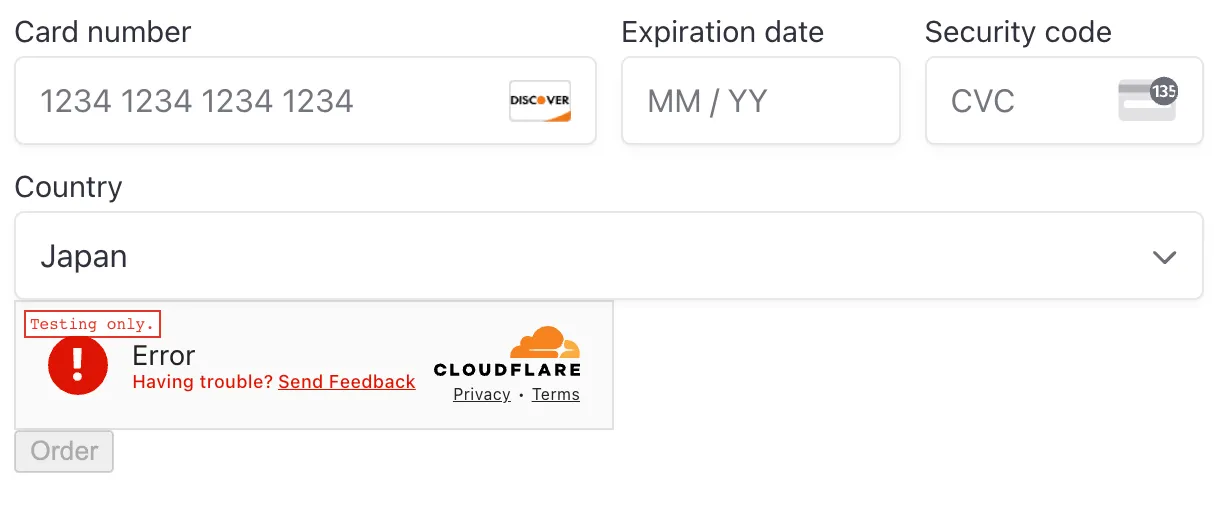
TURNSTILE_SITE_KEY = '1x00000000000000000000AA'TURNSTILE_SITE_KEY = '2x00000000000000000000AB'If you restart the application now, you will notice that you cannot submit the payment form.
This way, you can block requests that use bots to try and manipulate the payment form, such as card testing attacks.
By verifying whether the turnstileToken is set by the callback of turnstile.render(), you can use Turnstile's result when processing the form's submit event.
Next, add a step to verify that the token generated by the Turnstile widget is valid and not forged.
In this case, we'll add an API that performs additional validation and server-side processing based on the result of turnstile.render.
For easier testing, remove the disabled attribute from the button tag:
<button type="submit" disabled>Order</button><button type="submit" >Order</button>Next, add an API for server-side verification. Please add the following code to src/index.tsx.
This API validates the Turnstile token generated by the client application and incorporates the result into Stripe's Payment Intent.
import { HTTPException } from "hono/http-exception";
type TurnstileResult = {  success: boolean;  challenge_ts: string;  hostname: string;  "error-codes": Array<string>;  action: string;  cdata: string;};
app.post("/pre-confirm", async (c) => {  const { TURNSTILE_SECRET_KEY, STRIPE_SECRET_KEY } = env(c);  const stripe = new Stripe(STRIPE_SECRET_KEY, {    apiVersion: "2024-10-28.acacia",    appInfo: {      name: "example/cloudflare-turnstile",    },  });
  const body = await c.req.json();  const ip = c.req.header("CF-Connecting-IP");  const paymentIntentId = body.payment_intent_id;
  const formData = new FormData();  formData.append("secret", TURNSTILE_SECRET_KEY);  formData.append("response", body.turnstile_token);  formData.append("remoteip", ip || "");  const turnstileResult = await fetch(    "https://challenges.cloudflare.com/turnstile/v0/siteverify",    {      body: formData,      method: "POST",    },  );  const outcome = await turnstileResult.json<TurnstileResult>();
  await stripe.paymentIntents.update(paymentIntentId, {    metadata: {      turnstile_result: outcome.success ? "success" : "failed",      turnstile_challenge_ts: outcome.challenge_ts,    },  });
  if (!outcome.success) {    throw new HTTPException(401, {      res: new Response(        JSON.stringify({          success: outcome.success,          message: "Unauthorized",          error_codes: outcome["error-codes"],        }),      ),    });  }  return c.json({    success: outcome.success,  });});
Then, add the process to call the created API.
By executing this before calling Stripe's JavaScript SDK in the form's submit event, we can decide whether to proceed with the payment based on the server-side validation result:
paymentForm.addEventListener("submit", async (e) => {  e.preventDefault();  if (!turnstileToken) {    return;  }  if (submitButon) {    submitButon.setAttribute("disabled", true);  }  resultElement.innerHTML = "";
  const preConfirmationResponse = await fetch("/pre-confirm", {    method: "POST",    headers: {      "Content-Type": "application/json",    },    body: JSON.stringify({      turnstile_token: turnstileToken,      payment_intent_id: "${paymentIntent.id}",    }),  });  const preConfirmationResult = await preConfirmationResponse.json();  if (!preConfirmationResult.success) {    submitButon.removeAttribute("disabled");    resultElement.innerHTML = JSON.stringify(      preConfirmationResult,      null,      2,    );    return;  }
  const { error: submitError } = await elements.submit();  if (submitError) {    console.log(submitError);    submitButon.removeAttribute("disabled");    return;  }  const { error: confirmationError } = await stripe.confirmPayment({    elements,    confirmParams: {      return_url: "http://localhost:8787",    },  });
By adding this step, we now perform a two-stage check using Turnstile before the payment process.
Since we're saving the Turnstile authentication result in the Stripe data, it is also easier to investigate if a user reports a payment failure.
If you want more strict control, you could add a process to invalidate the Stripe Payment Intent if authentication fails in the POST /pre-confirm API.
In online payments, it is necessary to protect applications from bot attacks such as card testing and DDoS attacks.
While payment services like Stripe are increasingly implementing bot prevention measures, adding Turnstile can provide an extra layer of security for your payment forms.