Use R2 as static asset storage with Cloudflare Pages
This tutorial will teach you how to use R2 as a static asset storage bucket for your Pages app. This is especially helpful if you're hitting the file limit or the max file size limit on Pages.
To illustrate how this is done, we will use R2 as a static asset storage for a fictional cat blog.
Imagine you run a static cat blog containing funny cat videos and helpful tips for cat owners. Your blog is growing and you need to add more content with cat images and videos.
The blog is hosted on Pages and currently has the following directory structure:
.├── public│ ├── index.html│ ├── static│ │ ├── favicon.ico│ │ └── logo.png│ └── style.css└── wrangler.tomlAdding more videos and images to the blog would be great, but our asset size is above the file limit on Pages. Let us fix this with R2.
The first step is creating an R2 bucket to store the static assets. A new bucket can be created with the dashboard or via Wrangler.
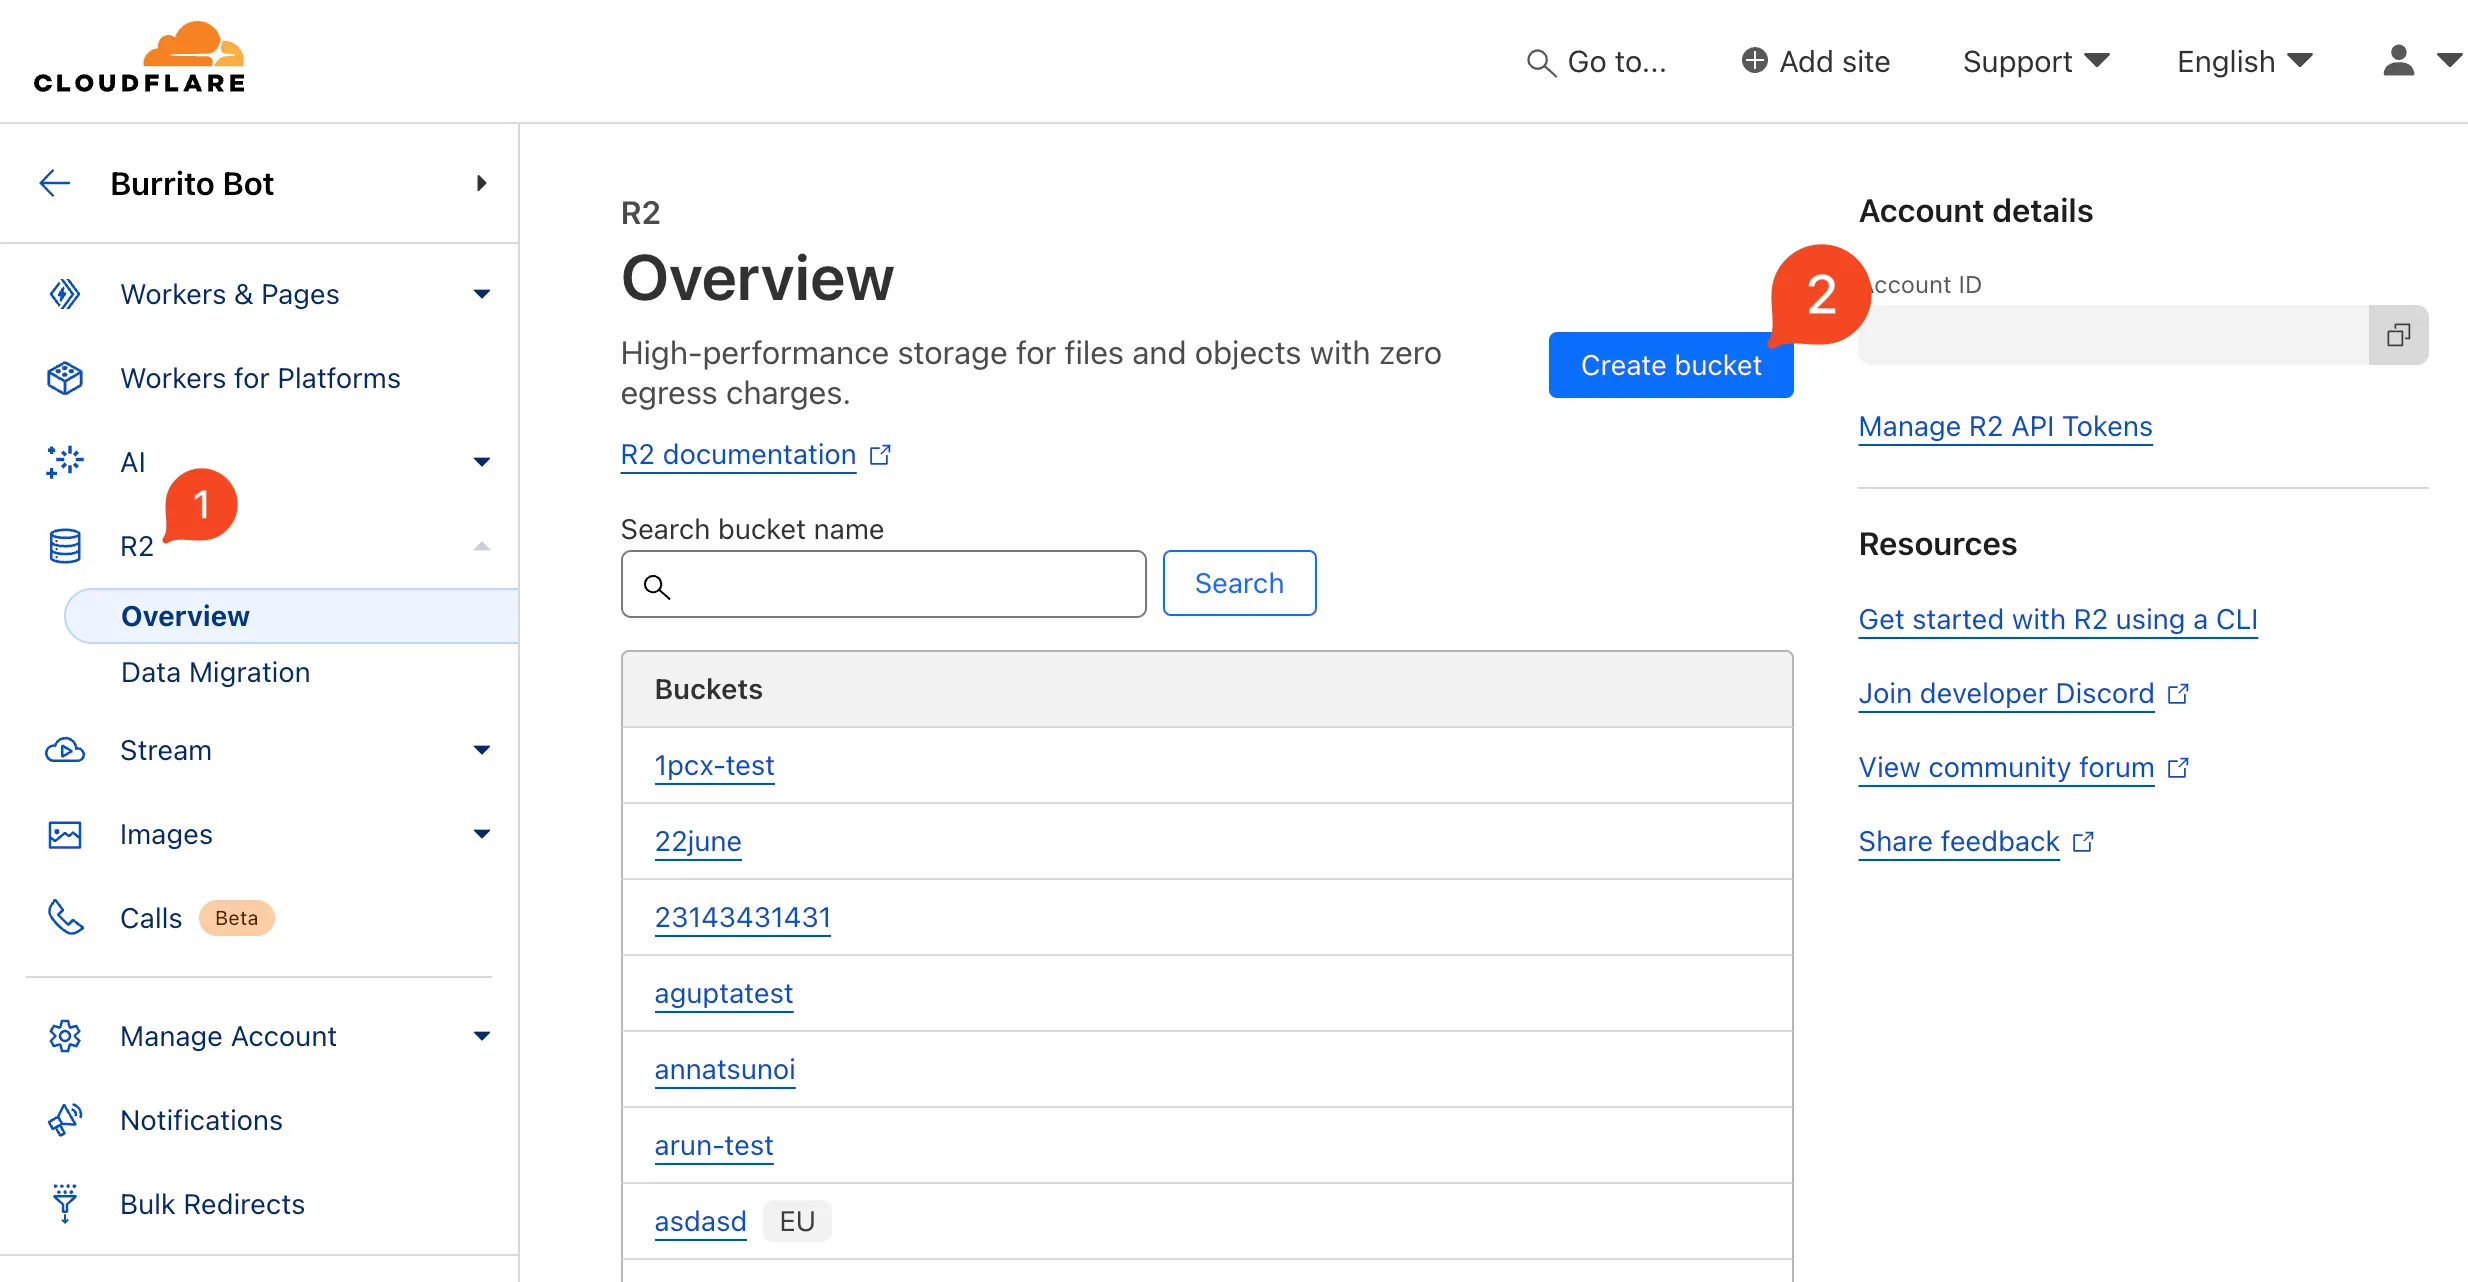
Using the dashboard, navigate to the R2 tab, then click on Create bucket. We will name the bucket for our blog cat-media. Always remember to give your buckets descriptive names:

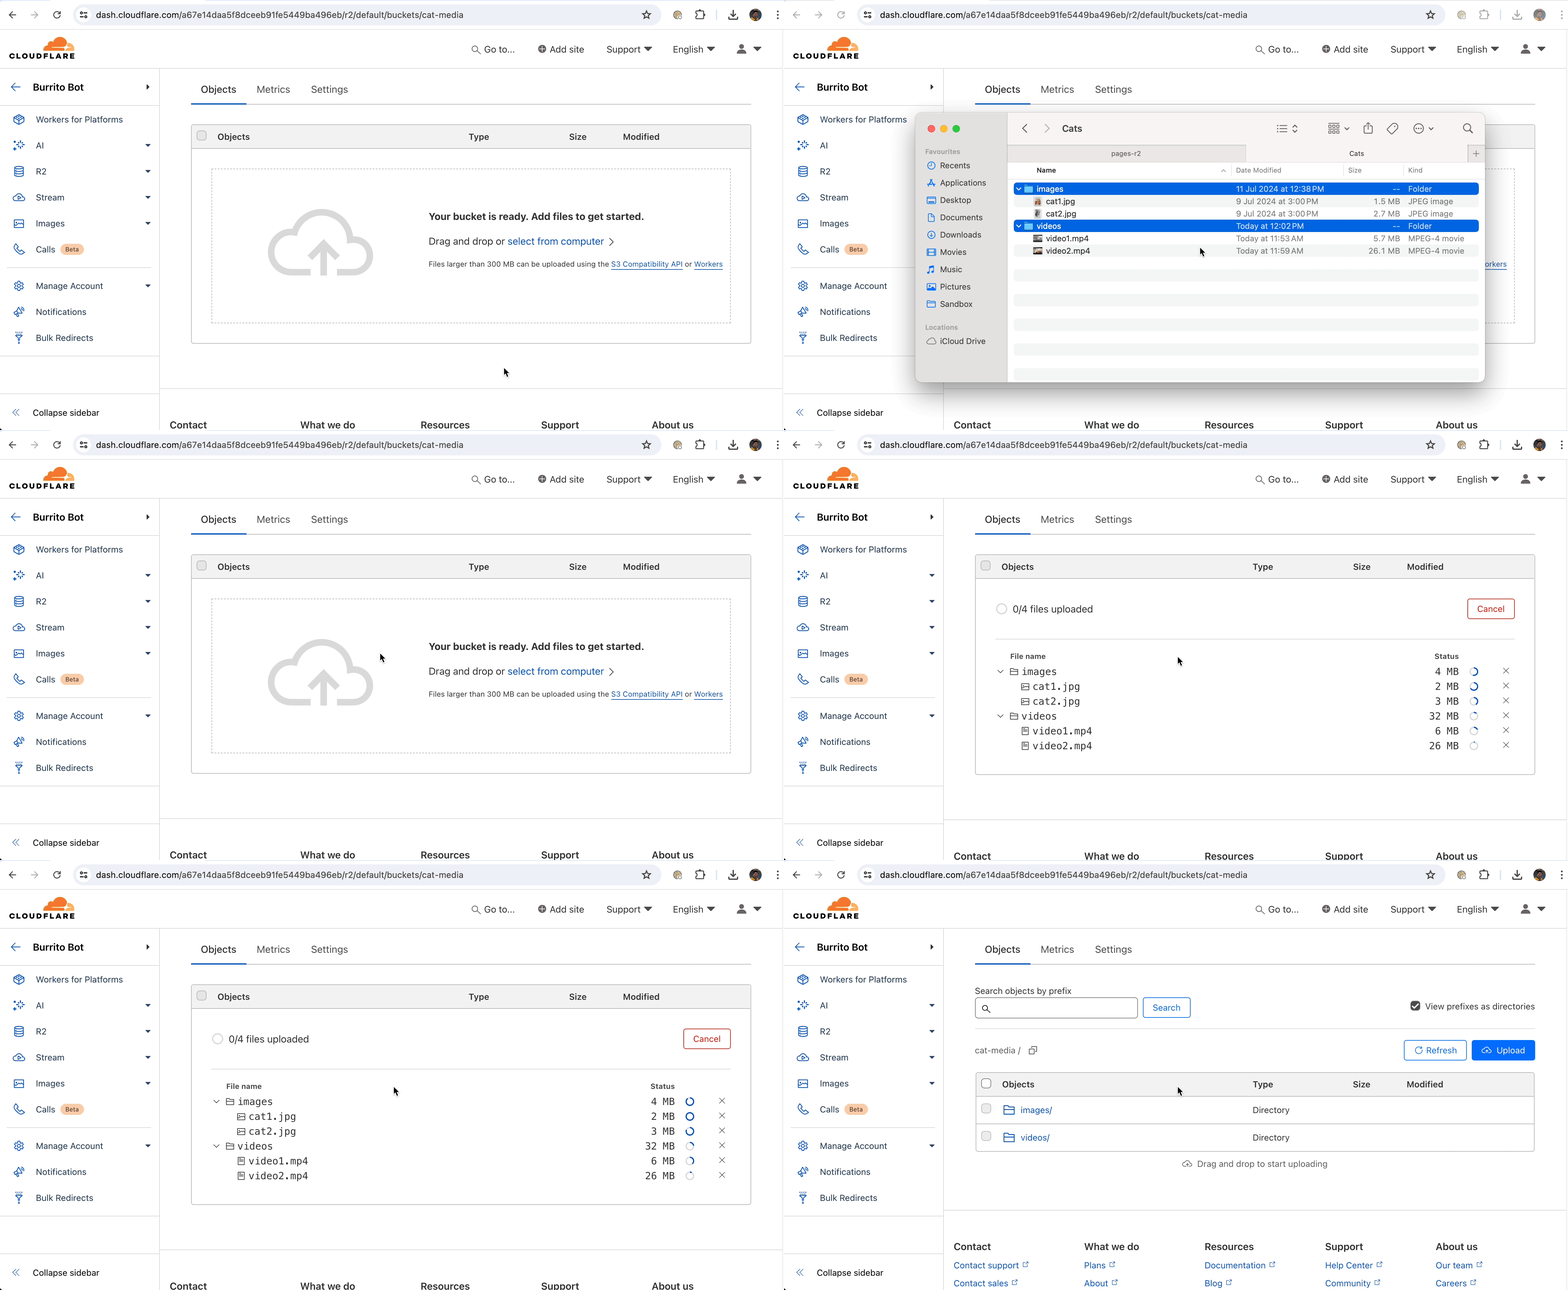
With the bucket created, we can upload media files to R2. I’ll drag and drop two folders with a few cat images and videos into the R2 bucket:

Alternatively, an R2 bucket can be created with Wrangler from the command line by running:
npx wrangler r2 bucket create <bucket_name># i.e# npx wrangler r2 bucket create cat-mediaFiles can be uploaded to the bucket with the following command:
npx wrangler r2 object put <bucket_name>/<file_name> -f <path_to_file># i.e# npx wrangler r2 object put cat-media/videos/video1.mp4 -f ~/Downloads/videos/video1.mp4To bind the R2 bucket we have created to the cat blog, we need to update the Wrangler configuration.
Open the Wrangler configuration file, and add the following binding to the file. bucket_name should be the exact name of the bucket created earlier, while binding can be any custom name referring to the R2 resource:
{ "r2_buckets": [ { "binding": "MEDIA", "bucket_name": "cat-media" } ]}[[r2_buckets]]binding = "MEDIA"bucket_name = "cat-media"Save the Wrangler configuration file, and we are ready to move on to the last step.
Alternatively, you can add a binding to your Pages project on the dashboard by navigating to the project’s Settings tab > Functions > R2 bucket bindings.
The last step involves serving media assets from R2 on the blog. To do that, we will create a function to handle requests for media files.
In the project folder, create a functions directory. Then, create a media subdirectory and a file named [[all]].js in it. All HTTP requests to /media will be routed to this file.
After creating the folders and JavaScript file, the blog directory structure should look like:
.├── functions│ └── media│ └── [[all]].js├── public│ ├── index.html│ ├── static│ │ ├── favicon.ico│ │ └── icon.png│ └── style.css└── wrangler.tomlFinally, we will add a handler function to [[all]].js. This function receives all media requests, and returns the corresponding file asset from R2:
export async function onRequestGet(ctx) { const path = new URL(ctx.request.url).pathname.replace("/media/", ""); const file = await ctx.env.MEDIA.get(path); if (!file) return new Response(null, { status: 404 }); return new Response(file.body, { headers: { "Content-Type": file.httpMetadata.contentType }, });}Before deploying the changes made so far to our cat blog, let us add a few new posts to index.html. These posts depend on media assets served from R2:
<!doctype html><html lang="en"> <body> <h1>Awesome Cat Blog! 😺</h1> <p>Today's post:</p> <video width="320" controls> <source src="/media/videos/video1.mp4" type="video/mp4" /> </video> <p>Yesterday's post:</p> <img src="/media/images/cat1.jpg" width="320" /> </body></html>With all the files saved, open a new terminal window to deploy the app:
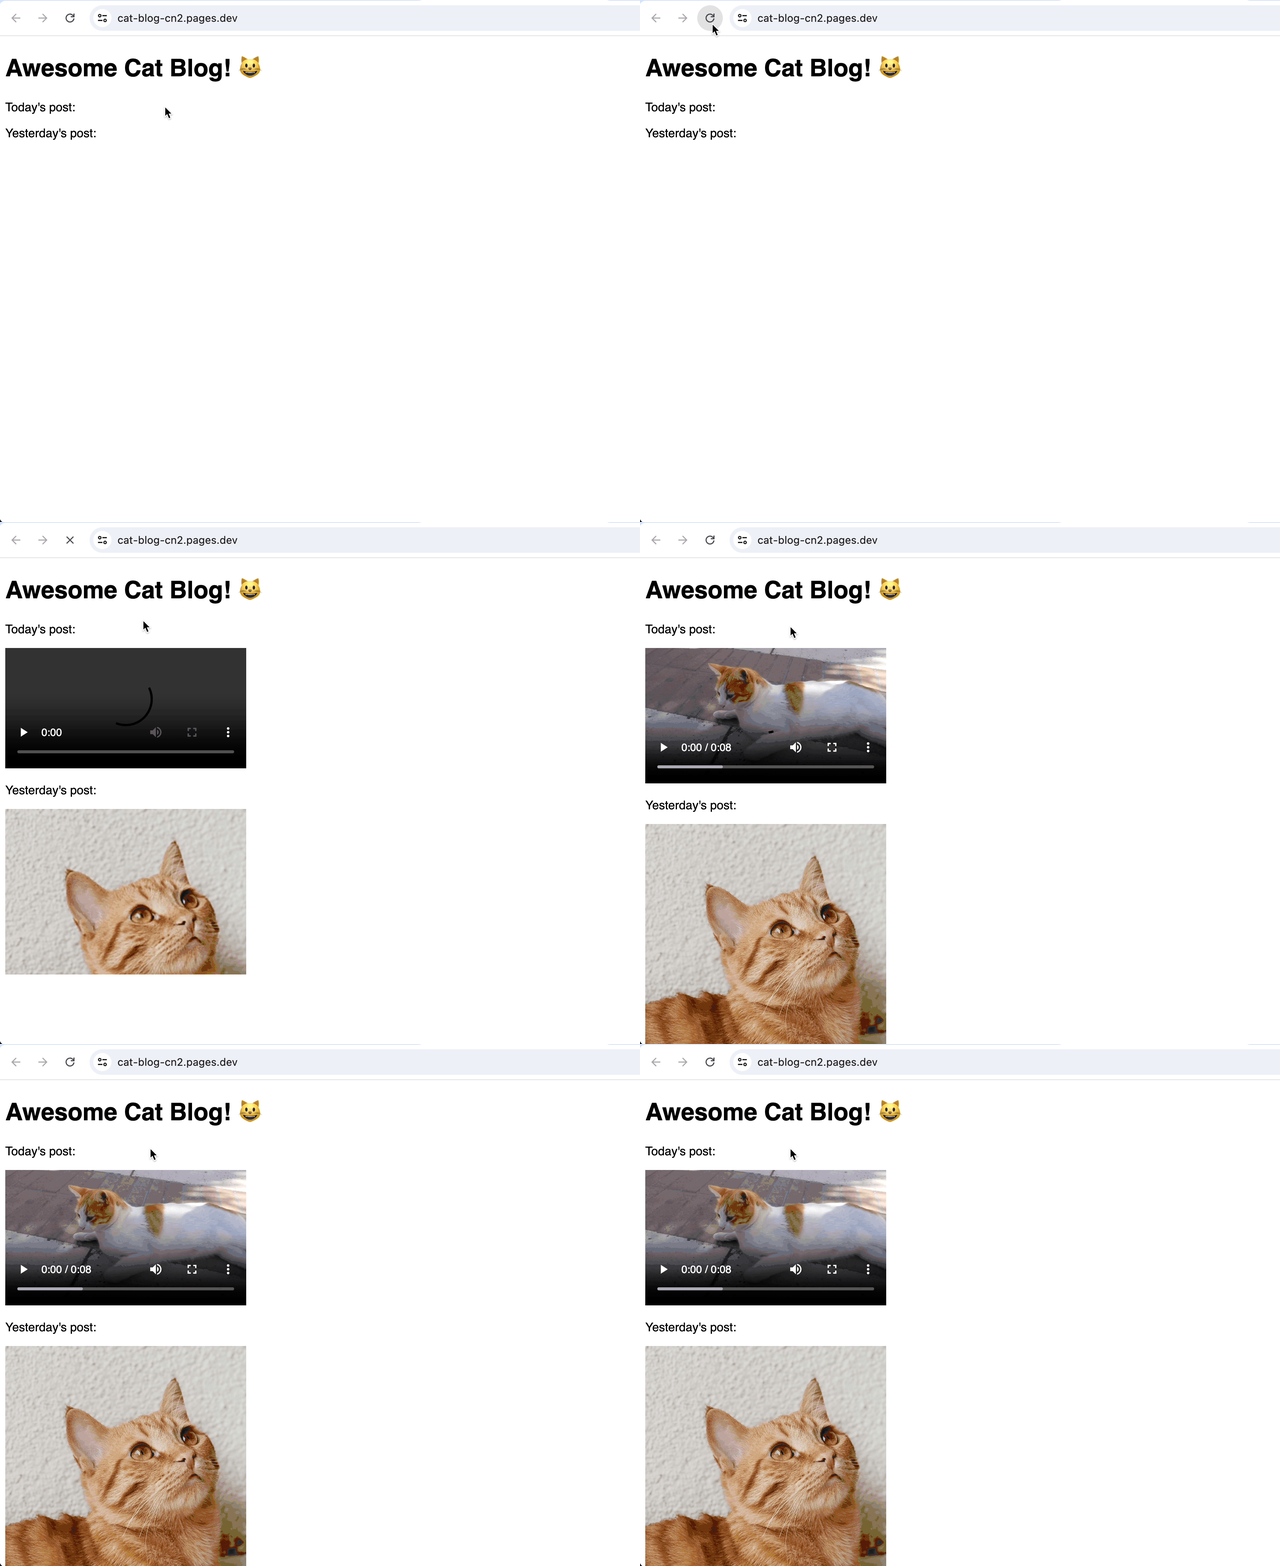
npm run deployOnce deployed, media assets are fetched and served from the R2 bucket.
