# Demos and architectures
URL: https://developers.cloudflare.com/pages/demos/
import { ExternalResources, GlossaryTooltip, ResourcesBySelector } from "~/components"
Learn how you can use Pages within your existing application and architecture.
## Demos
Explore the following demo applications for Pages.
## Reference architectures
Explore the following reference architectures that use Pages:
---
# Overview
URL: https://developers.cloudflare.com/pages/
import { CardGrid, Description, Feature, LinkTitleCard, Plan, RelatedProduct, Render } from "~/components"
Create full-stack applications that are instantly deployed to the Cloudflare global network.
Deploy your Pages project by connecting to [your Git provider](/pages/get-started/git-integration/), uploading prebuilt assets directly to Pages with [Direct Upload](/pages/get-started/direct-upload/) or using [C3](/pages/get-started/c3/) from the command line.
***
## Features
Use Pages Functions to deploy server-side code to enable dynamic functionality without running a dedicated server.
Rollbacks allow you to instantly revert your project to a previous production deployment.
Set up redirects for your Cloudflare Pages project.
***
## Related products
Cloudflare Workers provides a serverless execution environment that allows you to create new applications or augment existing ones without configuring or maintaining infrastructure.
Cloudflare R2 Storage allows developers to store large amounts of unstructured data without the costly egress bandwidth fees associated with typical cloud storage services.
D1 is Cloudflare’s native serverless database. Create a database by importing data or defining your tables and writing your queries within a Worker or through the API.
Offload third-party tools and services to the cloud and improve the speed and security of your website.
***
## More resources
Learn about limits that apply to your Pages project (500 deploys per month on the Free plan).
Migrate to Pages from your existing hosting provider.
Deploy popular frameworks such as React, Hugo, and Next.js on Pages.
Connect with the Workers community on Discord to ask questions, show what you are building, and discuss the platform with other developers.
Follow @CloudflareDev on Twitter to learn about product announcements, and what is new in Cloudflare Workers.
---
# REST API
URL: https://developers.cloudflare.com/pages/configuration/api/
The [Pages API](/api/resources/pages/subresources/projects/methods/list/) empowers you to build automations and integrate Pages with your development workflow. At a high level, the API endpoints let you manage deployments and builds and configure projects. Cloudflare supports [Deploy Hooks](/pages/configuration/deploy-hooks/) for headless CMS deployments. Refer to the [API documentation](https://api.cloudflare.com/) for a full breakdown of object types and endpoints.
## How to use the API
### Get an API token
To create an API token:
1. Log in to the [Cloudflare dashboard](https://dash.cloudflare.com).
2. Select the user icon on the top right of your dashboard > **My Profile**.
3. Select [**API Tokens**](https://dash.cloudflare.com/profile/api-tokens) > **Create Token**.
4. You can go to **Edit Cloudflare Workers** template > **Use template** or go to **Create Custom Token** > **Get started**. If you create a custom token, you will need to make sure to add the **Cloudflare Pages** permission with **Edit** access.
### Make requests
After creating your token, you can authenticate and make requests to the API using your API token in the request headers. For example, here is an API request to get all deployments in a project.
```bash
curl 'https://api.cloudflare.com/client/v4/accounts/{account_id}/pages/projects/{project_name}/deployments' \
--header 'Authorization: Bearer '
```
Try it with one of your projects by replacing `{account_id}`, `{project_name}`, and ``. Refer to [Find your account ID](/fundamentals/setup/find-account-and-zone-ids/) for more information.
## Examples
The API is even more powerful when combined with Cloudflare Workers: the easiest way to deploy serverless functions on Cloudflare's global network. The following section includes three code examples on how to use the Pages API. To build and deploy these samples, refer to the [Get started guide](/workers/get-started/guide/).
### Triggering a new build every hour
Suppose we have a CMS that pulls data from live sources to compile a static output. You can keep the static content as recent as possible by triggering new builds periodically using the API.
```js
const endpoint = "https://api.cloudflare.com/client/v4/accounts/{account_id}/pages/projects/{project_name}/deployments";
export default {
async scheduled(_, env) {
const init = {
method: "POST",
headers: {
"Content-Type": "application/json;charset=UTF-8",
// We recommend you store the API token as a secret using the Workers dashboard or using Wrangler as documented here: https://developers.cloudflare.com/workers/wrangler/commands/#secret
"Authorization": `Bearer ${env.API_TOKEN}`,
},
};
await fetch(endpoint, init);
}
}
```
After you have deployed the JavaScript Worker, set a cron trigger in your Worker to run this script periodically. Refer to [Cron Triggers](/workers/configuration/cron-triggers/) for more details.
### Deleting old deployments after a week
Cloudflare Pages hosts and serves all project deployments on preview links. Suppose you want to keep your project private and prevent access to your old deployments. You can use the API to delete deployments after a month, so that they are no longer public online. The latest deployment for a branch cannot be deleted.
```js
const endpoint = "https://api.cloudflare.com/client/v4/accounts/{account_id}/pages/projects/{project_name}/deployments";
const expirationDays = 7;
export default {
async scheduled(_, env) {
const init = {
headers: {
"Content-Type": "application/json;charset=UTF-8",
// We recommend you store the API token as a secret using the Workers dashboard or using Wrangler as documented here: https://developers.cloudflare.com/workers/wrangler/commands/#secret
"Authorization": `Bearer ${env.API_TOKEN}`,
},
};
const response = await fetch(endpoint, init);
const deployments = await response.json();
for (const deployment of deployments.result) {
// Check if the deployment was created within the last x days (as defined by `expirationDays` above)
if ((Date.now() - new Date(deployment.created_on)) / 86400000 > expirationDays) {
// Delete the deployment
await fetch(`${endpoint}/${deployment.id}`, {
method: "DELETE",
headers: {
"Content-Type": "application/json;charset=UTF-8",
"Authorization": `Bearer ${env.API_TOKEN}`,
},
});
}
}
}
}
```
After you have deployed the JavaScript Worker, you can set a cron trigger in your Worker to run this script periodically. Refer to the [Cron Triggers guide](/workers/configuration/cron-triggers/) for more details.
### Sharing project information
Imagine you are working on a development team using Pages to build your websites. You would want an easy way to share deployment preview links and build status without having to share Cloudflare accounts. Using the API, you can easily share project information, including deployment status and preview links, and serve this content as HTML from a Cloudflare Worker.
```js
const deploymentsEndpoint =
"https://api.cloudflare.com/client/v4/accounts/{account_id}/pages/projects/{project_name}/deployments";
const projectEndpoint =
"https://api.cloudflare.com/client/v4/accounts/{account_id}/pages/projects/{project_name}";
export default {
async fetch(request, env) {
const init = {
headers: {
"content-type": "application/json;charset=UTF-8",
// We recommend you store the API token as a secret using the Workers dashboard or using Wrangler as documented here: https://developers.cloudflare.com/workers/wrangler/commands/#secret
"Authorization": `Bearer ${env.API_TOKEN}`,
},
};
const style = `body { padding: 6em; font-family: sans-serif; } h1 { color: #f6821f }`;
let content = "
`;
return new Response(html, {
headers: {
"Content-Type": "text/html;charset=UTF-8",
},
});
}
}
```
## Related resources
* [Pages API Docs](/api/resources/pages/subresources/projects/methods/list/)
* [Workers Getting Started Guide](/workers/get-started/guide/)
* [Workers Cron Triggers](/workers/configuration/cron-triggers/)
---
# Branch deployment controls
URL: https://developers.cloudflare.com/pages/configuration/branch-build-controls/
import { Render } from "~/components"
When connected to your git repository, Pages allows you to control which environments and branches you would like to automatically deploy to. By default, Pages will trigger a deployment any time you commit to either your production or preview environment. However, with branch deployment controls, you can configure automatic deployments to suit your preference on a per project basis.
## Production branch control
:::caution[Direct Upload]
:::
To configure deployment options, go to your Pages project > **Settings** > **Builds & deployments** > **Configure Production deployments**. Pages will default to setting your production environment to the branch you first push, but you can set your production to another branch if you choose.
You can also enable or disable automatic deployment behavior on the production branch by checking the **Enable automatic production branch deployments** box. You must save your settings in order for the new production branch controls to take effect.
## Preview branch control
When configuring automatic preview deployments, there are three options to choose from.
* **All non-Production branches**: By default, Pages will automatically deploy any and every commit to a preview branch.
* **None**: Turns off automatic builds for all preview branches.
* **Custom branches**: Customize the automatic deployments of certain preview branches.
### Custom preview branch control
By selecting **Custom branches**, you can specify branches you wish to include and exclude from automatic deployments in the provided configuration fields. The configuration fields can be filled in two ways:
* **Static branch names**: Enter the precise name of the branch you are looking to include or exclude (for example, staging or dev).
* **Wildcard syntax**: Use wildcards to match multiple branches. You can specify wildcards at the start or end of your rule. The order of execution for the configuration is (1) Excludes, (2) Includes, (3) Skip. Pages will process the exclude configuration first, then go to the include configuration. If a branch does not match either then it will be skipped.
:::note[Wildcard syntax]
A wildcard (`*`) is a character that is used within rules. It can be placed alone to match anything or placed at the start or end of a rule to allow for better control over branch configuration. A wildcard will match zero or more characters.For example, if you wanted to match all branches that started with `fix/` then you would create the rule `fix/*` to match strings like `fix/1`, `fix/bugs`or `fix/`.
:::
**Example 1:**
If you want to enforce branch prefixes such as `fix/`, `feat/`, or `chore/` with wildcard syntax, you can include and exclude certain branches with the following rules:
* Include Preview branches:
`fix/*`, `feat/*`, `chore/*`
* Exclude Preview branches:
\`\`
Here Pages will include any branches with the indicated prefixes and exclude everything else. In this example, the excluding option is left empty.
**Example 2:**
If you wanted to prevent [dependabot](https://github.com/dependabot) from creating a deployment for each PR it creates, you can exclude those branches with the following:
* Include Preview branches:
`*`
* Exclude Preview branches:
`dependabot/*`
Here Pages will include all branches except any branch starting with `dependabot`. In this example, the excluding option means any `dependabot/` branches will not be built.
**Example 3:**
If you only want to deploy release-prefixed branches, then you could use the following rules:
* Include Preview branches:
`release/*`
* Exclude Preview branches:
`*`
This will deploy only branches starting with `release/`.
---
# Build caching
URL: https://developers.cloudflare.com/pages/configuration/build-caching/
Improve Pages build times by caching dependencies and build output between builds with a project-wide shared cache.
The first build to occur after enabling build caching on your Pages project will save to cache. Every subsequent build will restore from cache unless configured otherwise.
## About build cache
When enabled, the build cache will automatically detect and cache data from each build. Refer to [Frameworks](/pages/configuration/build-caching/#frameworks) to review what directories are automatically saved and restored from the build cache.
### Requirements
Build caching requires the [V2 build system](/pages/configuration/build-image/#v2-build-system) or later. To update from V1, refer to the [V2 build system migration instructions](/pages/configuration/build-image/#v1-to-v2-migration).
### Package managers
Pages will cache the global cache directories of the following package managers:
| Package Manager | Directories cached |
| ----------------------------- | -------------------- |
| [npm](https://www.npmjs.com/) | `.npm` |
| [yarn](https://yarnpkg.com/) | `.cache/yarn` |
| [pnpm](https://pnpm.io/) | `.pnpm-store` |
| [bun](https://bun.sh/) | `.bun/install/cache` |
### Frameworks
Some frameworks provide a cache directory that is typically populated by the framework with intermediate build outputs or dependencies during build time. Pages will automatically detect the framework you are using and cache this directory for reuse in subsequent builds.
The following frameworks support build output caching:
| Framework | Directories cached |
| ---------- | --------------------------------------------- |
| Astro | `node_modules/.astro` |
| Docusaurus | `node_modules/.cache`, `.docusaurus`, `build` |
| Eleventy | `.cache` |
| Gatsby | `.cache`, `public` |
| Next.js | `.next/cache` |
| Nuxt | `node_modules/.cache/nuxt` |
### Limits
The following limits are imposed for build caching:
- **Retention**: Cache is purged seven days after its last read date. Unread cache artifacts are purged seven days after creation.
- **Storage**: Every project is allocated 10 GB. If the project cache exceeds this limit, the project will automatically start deleting artifacts that were read least recently.
## Enable build cache
To enable build caching :
1. Navigate to [Workers & Pages Overview](https://dash.cloudflare.com) on the Dashboard.
2. Find your Pages project.
3. Go to **Settings** > **Build** > **Build cache**.
4. Select **Enable** to turn on build caching.
## Clear build cache
The build cache can be cleared for a project if needed, such as when debugging build issues. To clear the build cache:
1. Navigate to [Workers & Pages Overview](https://dash.cloudflare.com) on the Dashboard.
2. Find your Pages project.
3. Go to **Settings** > **Build** > **Build cache**.
4. Select **Clear Cache** to clear the build cache.
---
# Build configuration
URL: https://developers.cloudflare.com/pages/configuration/build-configuration/
import { Details, PagesBuildPresetsTable } from "~/components";
You may tell Cloudflare Pages how your site needs to be built as well as where its output files will be located.
## Build commands and directories
You should provide a build command to tell Cloudflare Pages how to build your application. For projects not listed here, consider reading the tool's documentation or framework, and submit a pull request to add it here.
Build directories indicates where your project's build command outputs the built version of your Cloudflare Pages site. Often, this defaults to the industry-standard `public`, but you may find that you need to customize it.
The build command is provided by your framework. For example, the Gatsby framework uses `gatsby build` as its build command. When you are working without a framework, leave the **Build command** field blank. Pages determines whether a build has succeeded or failed by reading the exit code returned from the user supplied build command. Any non-zero return code will cause a build to be marked as failed. An exit code of 0 will cause the Pages build to be marked as successful and assets will be uploaded regardless of if error logs are written to standard error.
The build directory is generated from the build command. Each framework has its own naming convention, for example, the build output directory is named `/public` for many frameworks.
The root directory is where your site’s content lives. If not specified, Cloudflare assumes that your linked git repository is the root directory. The root directory needs to be specified in cases like monorepos, where there may be multiple projects in one repository.
## Framework presets
Cloudflare maintains a list of build configurations for popular frameworks and tools. These are accessible during project creation. Below are some standard build commands and directories for popular frameworks and tools.
If you are not using a preset, use `exit 0` as your **Build command**.
## Environment variables
If your project makes use of environment variables to build your site, you can provide custom environment variables:
1. Log in to the [Cloudflare dashboard](https://dash.cloudflare.com) and select your account.
2. In **Account Home**, select **Workers & Pages**.
3. In **Overview**, select your Pages project.
4. Select **Settings** > **Environment variables**.
The following system environment variables are injected by default (but can be overridden):
| Environment Variable | Injected value | Example use-case |
| --------------------- | ------------------------------------- | --------------------------------------------------------------------------------------- |
| `CF_PAGES` | `1` | Changing build behaviour when run on Pages versus locally |
| `CF_PAGES_COMMIT_SHA` | `` | Passing current commit ID to error reporting, for example, Sentry |
| `CF_PAGES_BRANCH` | `` | Customizing build based on branch, for example, disabling debug logging on `production` |
| `CF_PAGES_URL` | `` | Allowing build tools to know the URL the page will be deployed at |
---
# Build image
URL: https://developers.cloudflare.com/pages/configuration/build-image/
import {
PagesBuildEnvironment,
PagesBuildEnvironmentLanguages,
PagesBuildEnvironmentTools,
} from "~/components";
Cloudflare Pages' build environment has broad support for a variety of languages, such as Ruby, Node.js, Python, PHP, and Go.
If you need to use a [specific version](/pages/configuration/build-image/#overriding-default-versions) of a language, (for example, Node.js or Ruby) you can specify it by providing an associated environment variable in your build configuration, or setting the relevant file in your source code.
## Supported languages and tools
In the following tables, review the preinstalled versions for languages and tools included in the Cloudflare Pages' build image, and the environment variables and/or files available for [overriding the preinstalled version](/pages/configuration/build-image/#overriding-default-versions):
### Languages and runtime
:::note[Any version]
Under Supported versions, "Any version" refers to support for all versions of the language or tool including versions newer than the Default version.
:::
### Tools
:::note[Any version]
Under Supported versions, "Any version" refers to support for all versions of the language or tool including versions newer than the Default version.
:::
### Frameworks
To use a specific version of a framework, specify it in the project's package manager configuration file.
For example, if you use Gatsby, your `package.json` should include the following:
```
"dependencies": {
"gatsby": "^5.13.7",
}
```
When your build starts, if not already [cached](/pages/configuration/build-caching/), version 5.13.7 of Gatsby will be installed using `npm install`.
## Advanced Settings
### Override default versions
To override default versions of languages and tools in the build system, you can either set the desired version through environment variables or by adding files to your project.
To set the version using environment variables, you can:
1. Find the environment variable name for the language or tool in [this table](/pages/configuration/build-image/#supported-languages-and-tools).
2. Add the environment variable on the dashboard by going to **Settings** > **Environment variables** in your Pages project, or [add the environment variable via Wrangler](/workers/configuration/environment-variables/#add-environment-variables-via-wrangler).
Or, to set the version by adding a file to your project, you can:
1. Find the file name for the language or tool in [this table](/pages/configuration/build-image/#supported-languages-and-tools).
2. Add the specified file name to the root directory of your project, and add the desired version number as the contents of the file.
For example, if you were previously relying on the default version of Node.js in the v1 build system, to migrate to v2, you must specify that you need Node.js `12.18.0` by setting a `NODE_VERSION = 12.18.0` environment variable or by adding a `.node-version` or `.nvmrc` file to your project with `12.18.0` added as the contents to the file.
### Skip dependency install
You can add the following environment variable to disable automatic dependency installation, and run a custom install command instead.
| Build variable | Value |
| ------------------------- | ------------- |
| `SKIP_DEPENDENCY_INSTALL` | `1` or `true` |
## V2 build system
The [v2 build system](https://blog.cloudflare.com/moderizing-cloudflare-pages-builds-toolbox/) announced in May 2023 brings several improvements to project builds.
### V1 to V2 Migration
To migrate to this new version, configure your Pages project settings in the dashboard:
1. Log in to the [Cloudflare dashboard](https://dash.cloudflare.com) and select your account.
2. Select **Workers & Pages** > in **Overview**, select your Pages project.
3. Go to **Settings** > **Build & deployments** > **Build system version** and select the latest version.
If you were previously relying on the default versions of any languages or tools in the build system, your build may fail when migrating to v2. To fix this, you must specify the version you wish to use by [overriding](/pages/configuration/build-image/#overriding-default-versions) the default versions.
### Limitations
Here are some limitations with the v2 build system:
- Specifying Node.js versions as codenames (for example, `hydrogen` or `lts/hydrogen`).
- Detecting Yarn version from `yarn.lock` file version.
- Detecting pnpm version detection based `pnpm-lock.yaml` file version.
- Detecting Node.js and package managers from `package.json` -> `"engines"`.
- `pipenv` and `Pipfile` support.
## Build environment
Cloudflare Pages builds are run in a [gVisor](https://gvisor.dev/docs/) container.
---
# Build watch paths
URL: https://developers.cloudflare.com/pages/configuration/build-watch-paths/
When you connect a git repository to Pages, by default a change to any file in the repository will trigger a Pages build. You can configure Pages to include or exclude specific paths to specify if Pages should skip a build for a given path. This can be especially helpful if you are using a monorepo project structure and want to limit the amount of builds being kicked off.
## Configure paths
To configure which paths are included and excluded:
1. In **Overview**, select your Pages project.
2. Go to **Settings** > **Build** > **Build watch paths**. Pages will default to setting your project’s includes paths to everything (\[\*]) and excludes paths to nothing (`[]`).
The configuration fields can be filled in two ways:
- **Static filepaths**: Enter the precise name of the file you are looking to include or exclude (for example, `docs/README.md`).
- **Wildcard syntax:** Use wildcards to match multiple path directories. You can specify wildcards at the start or end of your rule.
:::note[Wildcard syntax]
A wildcard (`*`) is a character that is used within rules. It can be placed alone to match anything or placed at the start or end of a rule to allow for better control over branch configuration. A wildcard will match zero or more characters.For example, if you wanted to match all branches that started with `fix/` then you would create the rule `fix/*` to match strings like `fix/1`, `fix/bugs`or `fix/`.
:::
For each path in a push event, build watch paths will be evaluated as follows:
- Paths satisfying excludes conditions are ignored first
- Any remaining paths are checked against includes conditions
- If any matching path is found, a build is triggered. Otherwise the build is skipped
Pages will bypass the path matching for a push event and default to building the project if:
- A push event contains 0 file changes, in case a user pushes a empty push event to trigger a build
- A push event contains 3000+ file changes or 20+ commits
## Examples
### Example 1
If you want to trigger a build from all changes within a set of directories, such as all changes in the folders `project-a/` and `packages/`
- Include paths: `project-a/*, packages/*`
- Exclude paths: \`\`
### Example 2
If you want to trigger a build for any changes, but want to exclude changes to a certain directory, such as all changes in a docs/ directory
- Include paths: `*`
- Exclude paths: `docs/*`
### Example 3
If you want to trigger a build for a specific file or specific filetype, for example all files ending in `.md`.
- Include paths: `*.md`
- Exclude paths: \`\`
---
# Custom domains
URL: https://developers.cloudflare.com/pages/configuration/custom-domains/
When deploying your Pages project, you may wish to point custom domains (or subdomains) to your site.
## Add a custom domain
To add a custom domain:
1. Log in to the [Cloudflare dashboard](https://dash.cloudflare.com/login).
2. Select your account in **Account Home** > **Workers & Pages**.
3. Select your Pages project > **Custom domains**.
4. Select **Set up a domain**.
5. Provide the domain that you would like to serve your Cloudflare Pages site on and select **Continue**.

### Add a custom apex domain
If you are deploying to an apex domain (for example, `example.com`), then you will need to add your site as a Cloudflare zone and [configure your nameservers](#configure-nameservers).
#### Configure nameservers
To use a custom apex domain (for example, `example.com`) with your Pages project, [configure your nameservers to point to Cloudflare's nameservers](/dns/zone-setups/full-setup/setup/). If your nameservers are successfully pointed to Cloudflare, Cloudflare will proceed by creating a CNAME record for you.
### Add a custom subdomain
If you are deploying to a subdomain, it is not necessary for your site to be a Cloudflare zone. You will need to [add a custom CNAME record](#add-a-custom-cname-record) to point the domain to your Cloudflare Pages site. To deploy your Pages project to a custom apex domain, that custom domain must be a zone on the Cloudflare account you have created your Pages project on.
:::note
If the zone is on the Enterprise plan, make sure that you [release the zone hold](/fundamentals/setup/account/account-security/zone-holds/#release-zone-holds) before adding the custom domain. A zone hold would prevent the custom subdomain from activating.
:::
#### Add a custom CNAME record
If you do not want to point your nameservers to Cloudflare, you must create a custom CNAME record to use a subdomain with Cloudflare Pages. After logging in to your DNS provider, add a CNAME record for your desired subdomain, for example, `shop.example.com`. This record should point to your custom Pages subdomain, for example, `.pages.dev`.
| Type | Name | Content |
| ------- | ------------------ | ----------------------- |
| `CNAME` | `shop.example.com` | `.pages.dev` |
If your site is already managed as a Cloudflare zone, the CNAME record will be added automatically after you confirm your DNS record.
:::note
To ensure a custom domain is added successfully, you must go through the [Add a custom domain](#add-a-custom-domain) process described above. Manually adding a custom CNAME record pointing to your Cloudflare Pages site - without first associating the domain (or subdomains) in the Cloudflare Pages dashboard - will result in your domain failing to resolve at the CNAME record address, and display a [`522` error](/support/troubleshooting/cloudflare-errors/troubleshooting-cloudflare-5xx-errors/#error-522-connection-timed-out).
:::
## Delete a custom domain
To detach a custom domain from your Pages project, you must modify your zone's DNS records.
First, log in to the Cloudflare dashboard > select your account in **Account Home** > select your website > **DNS**.
Then, in **DNS** > **Records**:
1. Locate your Pages project's CNAME record.
2. Select **Edit**.
3. Select **Delete**.
Next, in Account Home, go to **Workers & Pages**:
1. In **Overview**, select your Pages project.
2. Go to **Custom domains**.
3. Select the **three dot icon** next to your custom domain > **Remove domain**.
After completing these steps, your Pages project will only be accessible through the `*.pages.dev` subdomain you chose when creating your project.
## Disable access to `*.pages.dev` subdomain
To disable access to your project's provided `*.pages.dev` subdomain:
1. Use Cloudflare Access over your previews (`*.{project}.pages.dev`). Refer to [Customize preview deployments access](/pages/configuration/preview-deployments/#customize-preview-deployments-access).
2. Redirect the `*.pages.dev` URL associated with your production Pages project to a custom domain. You can use the account-level [Bulk Redirect](/rules/url-forwarding/bulk-redirects/) feature to redirect your `*.pages.dev` URL to a custom domain.
## Caching
For guidelines on caching, refer to [Caching and performance](/pages/configuration/serving-pages/#caching-and-performance).
## Known issues
### CAA records
Certification Authority Authorization (CAA) records allow you to restrict certificate issuance to specific Certificate Authorities (CAs).
This can cause issues when adding a [custom domain](/pages/configuration/custom-domains/) to your Pages project if you have CAA records that do not allow Cloudflare to issue a certificate for your custom domain.
To resolve this, add the necessary CAA records to allow Cloudflare to issue a certificate for your custom domain.
```
example.com. 300 IN CAA 0 issue "letsencrypt.org"
example.com. 300 IN CAA 0 issue "pki.goog; cansignhttpexchanges=yes"
example.com. 300 IN CAA 0 issue "ssl.com"
example.com. 300 IN CAA 0 issuewild "letsencrypt.org"
example.com. 300 IN CAA 0 issuewild "pki.goog; cansignhttpexchanges=yes"
example.com. 300 IN CAA 0 issuewild "ssl.com"
```
Refer to the [Certification Authority Authorization (CAA) FAQ](/ssl/edge-certificates/troubleshooting/caa-records/) for more information.
### Change DNS entry away from Pages and then back again
Once a custom domain is set up, if you change the DNS entry to point to something else (for example, your origin), the custom domain will become inactive. If you then change that DNS entry to point back at your custom domain, anybody using that DNS entry to visit your website will get errors until it becomes active again. If you want to redirect traffic away from your Pages project temporarily instead of changing the DNS entry, it would be better to use an [Origin rule](/rules/origin-rules/) or a [redirect rule](/rules/url-forwarding/single-redirects/create-dashboard/) instead.
## Relevant resources
* [Debugging Pages](/pages/configuration/debugging-pages/) - Review common errors when deploying your Pages project.
---
# Debugging Pages
URL: https://developers.cloudflare.com/pages/configuration/debugging-pages/
When setting up your Pages project, you may encounter various errors that prevent you from successfully deploying your site. This guide gives an overview of some common errors and solutions.
## Check your build log
You can review build errors in your Pages build log. To access your build log:
1. Log in to the [Cloudflare dashboard](https://dash.cloudflare.com).
2. In **Account Home**, go to **Workers & Pages**.
3. In **Overview**, select your Pages project > **View build**.

Possible errors in your build log are included in the following sections.
### Initializing build environment
Possible errors in this step could be caused by improper installation during Git integration.
To fix this in GitHub:
1. Log in to your GitHub account.
2. Go to **Settings** from your user icon > find **Applications** under Integrations.
3. Find **Cloudflare Pages** > **Configure** > scroll down and select **Uninstall**.
4. Re-authorize your GitHub user/organization on the Cloudflare dashboard.
To fix this in GitLab:
1. Log in to your GitLab account.
2. Go to **Preferences** from your user icon > **Applications**.
3. Find **Cloudflare Pages** > scroll down and select **Revoke**.
Be aware that you need a role of **Maintainer** or above to successfully link your repository, otherwise the build will fail.
### Cloning git repository
Possible errors in this step could be caused by lack of Git Large File Storage (LFS). Check your LFS usage by referring to the [GitHub](https://docs.github.com/en/billing/managing-billing-for-git-large-file-storage/viewing-your-git-large-file-storage-usage) and [GitLab](https://docs.gitlab.com/ee/topics/git/lfs/) documentation.
Make sure to also review your submodule configuration by going to the `.gitmodules` file in your root directory. This file needs to contain both a `path` and a `url` property.
Example of a valid configuration:
```js
[submodule "example"]
path = example/path
url = git://github.com/example/repo.git
```
Example of an invalid configuration:
```js
[submodule "example"]
path = example/path
```
or
```js
[submodule "example"]
url = git://github.com/example/repo.git
```
### Building application
Possible errors in this step could be caused by faulty setup in your Pages project. Review your build command, output folder and environment variables for any incorrect configuration.
:::note
Make sure there are no emojis or special characters as part of your commit message in a Pages project that is integrated with GitHub or GitLab as it can potentially cause issues when building the project.
:::
### Deploying to Cloudflare's global network
Possible errors in this step could be caused by incorrect Pages Functions configuration. Refer to the [Functions](/pages/functions/) documentation for more information on Functions setup.
If you are not using Functions or have reviewed that your Functions configuration does not contain any errors, review the [Cloudflare Status site](https://www.cloudflarestatus.com/) for Cloudflare network issues that could be causing the build failure.
## Differences between `pages.dev` and custom domains
If your custom domain is proxied (orange-clouded) through Cloudflare, your zone's settings, like caching, will apply.
If you are experiencing issues with new content not being shown, go to **Rules** > **Page Rules** in the Cloudflare dashboard and check for a Page Rule with **Cache Everything** enabled. If present, remove this rule as Pages handles its own cache.
If you are experiencing errors on your custom domain but not on your `pages.dev` domain, go to **DNS** > **Records** in the Cloudflare dashboard and set the DNS record for your project to be **DNS Only** (grey cloud). If the error persists, review your zone's configuration.
## Domain stuck in verification
If your [custom domain](/pages/configuration/custom-domains/) has not moved from the **Verifying** stage in the Cloudflare dashboard, refer to the following debugging steps.
### Blocked HTTP validation
Pages uses HTTP validation and needs to hit an HTTP endpoint during validation. If another Cloudflare product is in the way (such as [Access](/cloudflare-one/policies/access/), [a redirect](/rules/url-forwarding/), [a Worker](/workers/), etc.), validation cannot be completed.
To check this, run a `curl` command against your domain hitting `/.well-known/acme-challenge/randomstring`. For example:
```sh
curl -I https://example.com/.well-known/acme-challenge/randomstring
```
```sh output
HTTP/2 302
date: Mon, 03 Apr 2023 08:37:39 GMT
location: https://example.cloudflareaccess.com/cdn-cgi/access/login/example.com?kid=...&redirect_url=%2F.well-known%2Facme-challenge%2F...
access-control-allow-credentials: true
cache-control: private, max-age=0, no-store, no-cache, must-revalidate, post-check=0, pre-check=0
server: cloudflare
cf-ray: 7b1ffdaa8ad60693-MAN
```
In the example above, you are redirecting to Cloudflare Access (as shown by the `Location` header). In this case, you need to disable Access over the domain until the domain is verified. After the domain is verified, Access can be re-enabled.
You will need to do the same kind of thing for Redirect Rules or a Worker example too.
### Missing CAA records
If nothing is blocking the HTTP validation, then you may be missing Certification Authority Authorization (CAA) records. This is likely if you have disabled [Universal SSL](/ssl/edge-certificates/universal-ssl/) or use an external provider.
To check this, run a `dig` on the custom domain's apex (or zone, if this is a [subdomain zone](/dns/zone-setups/subdomain-setup/)). For example:
```sh
dig CAA example.com
```
```sh output
; <<>> DiG 9.10.6 <<>> CAA example.com
;; global options: +cmd
;; Got answer:
;; ->>HEADER<<- opcode: QUERY, status: NOERROR, id: 59018
;; flags: qr rd ra; QUERY: 1, ANSWER: 1, AUTHORITY: 0, ADDITIONAL: 1
;; OPT PSEUDOSECTION:
; EDNS: version: 0, flags:; udp: 4096
;; QUESTION SECTION:
;example.com. IN CAA
;; ANSWER SECTION:
example.com. 300 IN CAA 0 issue "amazon.com"
;; Query time: 92 msec
;; SERVER: 127.0.2.2#53(127.0.2.2)
;; WHEN: Mon Apr 03 10:15:51 BST 2023
;; MSG SIZE rcvd: 76
```
In the above example, there is only a single CAA record which is allowing Amazon to issue ceritficates.
To resolve this, you will need to add the following CAA records which allows all of the Certificate Authorities (CAs) Cloudflare uses to issue certificates:
```
example.com. 300 IN CAA 0 issue "letsencrypt.org"
example.com. 300 IN CAA 0 issue "pki.goog; cansignhttpexchanges=yes"
example.com. 300 IN CAA 0 issue "ssl.com"
example.com. 300 IN CAA 0 issuewild "letsencrypt.org"
example.com. 300 IN CAA 0 issuewild "pki.goog; cansignhttpexchanges=yes"
example.com. 300 IN CAA 0 issuewild "ssl.com"
```
### Zone holds
A [zone hold](/fundamentals/setup/account/account-security/zone-holds/) will prevent Pages from adding a custom domain for a hostname under a zone hold.
To add a custom domain for a hostname with a zone hold, temporarily [release the zone hold](/fundamentals/setup/account/account-security/zone-holds/#release-zone-holds) during the custom domain setup process.
Once the custom domain has been successfully completed, you may [reinstate the zone hold](/fundamentals/setup/account/account-security/zone-holds/#enable-zone-holds).
:::caution[Still having issues]
If you have done the steps above and your domain is still verifying after 15 minutes, join our [Discord](https://discord.cloudflare.com) for support or contact our support team through the [Support Portal](https://dash.cloudflare.com/?to=/:account/support).
:::
## Resources
If you need additional guidance on build errors, contact your Cloudflare account team (Enterprise) or refer to the [Support Center](/support/contacting-cloudflare-support/) for guidance on contacting Cloudflare Support.
You can also ask questions in the Pages section of the [Cloudflare Developers Discord](https://discord.com/invite/cloudflaredev).
---
# Deploy Hooks
URL: https://developers.cloudflare.com/pages/configuration/deploy-hooks/
With Deploy Hooks, you can trigger deployments using event sources beyond commits in your source repository. Each event source may obtain its own unique URL, which will receive HTTP POST requests in order to initiate new deployments. This feature allows you to integrate Pages with new or existing workflows. For example, you may:
* Automatically deploy new builds whenever content in a Headless CMS changes
* Implement a fully customized CI/CD pipeline, deploying only under desired conditions
* Schedule a CRON trigger to update your website on a fixed timeline
To create a Deploy Hook:
1. Log in to the [Cloudflare dashboard](https://dash.cloudflare.com) and select your account.
2. In Account Home, select **Workers & Pages**.
3. In **Overview**, select your Pages project.
4. Go to **Settings** > **Builds & deployments** and select **Add deploy hook** to start configuration.

## Parameters needed
To configure your Deploy Hook, you must enter two key parameters:
1. **Deploy hook name:** a unique identifier for your Deploy Hook (for example, `contentful-site`)
2. **Branch to build:** the repository branch your Deploy Hook should build

## Using your Deploy Hook
Once your configuration is complete, the Deploy Hook’s unique URL is ready to be used. You will see both the URL as well as the POST request snippet available to copy.

Every time a request is sent to your Deploy Hook, a new build will be triggered. Review the **Source** column of your deployment log to see which deployment were triggered by a Deploy Hook.

## Security Considerations
Deploy Hooks are uniquely linked to your project and do not require additional authentication to be used. While this does allow for complete flexibility, it is important that you protect these URLs in the same way you would safeguard any proprietary information or application secret.
If you suspect unauthorized usage of a Deploy Hook, you should delete the Deploy Hook and generate a new one in its place.
## Integrating Deploy Hooks with common CMS platforms
Every CMS provider is different and will offer different pathways in integrating with Pages' Deploy Hooks. The following section contains step-by-step instructions for a select number of popular CMS platforms.
### Contentful
Contentful supports integration with Cloudflare Pages via its **Webhooks** feature. In your Contentful project settings, go to **Webhooks**, create a new Webhook, and paste in your unique Deploy Hook URL in the **URL** field. Optionally, you can specify events that the Contentful Webhook should forward. By default, Contentful will trigger a Pages deployment on all project activity, which may be a bit too frequent. You can filter for specific events, such as Create, Publish, and many others.

### Ghost
You can configure your Ghost website to trigger Pages deployments by creating a new **Custom Integration**. In your Ghost website’s settings, create a new Custom Integration in the **Integrations** page.
Each custom integration created can have multiple **webhooks** attached to it. Create a new webhook by selecting **Add webhook** and **Site changed (rebuild)** as the **Event**. Then paste your unique Deploy Hook URL as the **Target URL** value. After creating this webhook, your Cloudflare Pages application will redeploy whenever your Ghost site changes.

### Sanity
In your Sanity project's Settings page, find the **Webhooks** section, and add the Deploy Hook URL, as seen below. By default, the Webhook will trigger your Pages Deploy Hook for all datasets inside of your Sanity project. You can filter notifications to individual datasets, such as production, using the **Dataset** field:

### WordPress
You can configure WordPress to trigger a Pages Deploy Hook by installing the free **WP Webhooks** plugin. The plugin includes a number of triggers, such as **Send Data on New Post, Send Data on Post Update** and **Send Data on Post Deletion**, all of which allow you to trigger new Pages deployments as your WordPress data changes. Select a trigger on the sidebar of the plugin settings and then [**Add Webhook URL**](https://wordpress.org/plugins/wp-webhooks/), pasting in your unique Deploy Hook URL.

### Strapi
In your Strapi Admin Panel, you can set up and configure webhooks to enhance your experience with Cloudflare Pages. In the Strapi Admin Panel:
1. Navigate to **Settings**.
2. Select **Webhooks**.
3. Select **Add New Webhook**.
4. In the **Name** form field, give your new webhook a unique name.
5. In the **URL** form field, paste your unique Cloudflare Deploy Hook URL.
In the Strapi Admin Panel, you can configure your webhook to be triggered based on events. You can adjust these settings to create a new deployment of your Cloudflare Pages site automatically when a Strapi entry or media asset is created, updated, or deleted.
Be sure to add the webhook configuration to the [production](https://strapi.io/documentation/developer-docs/latest/setup-deployment-guides/installation.html) Strapi application that powers your Cloudflare site.

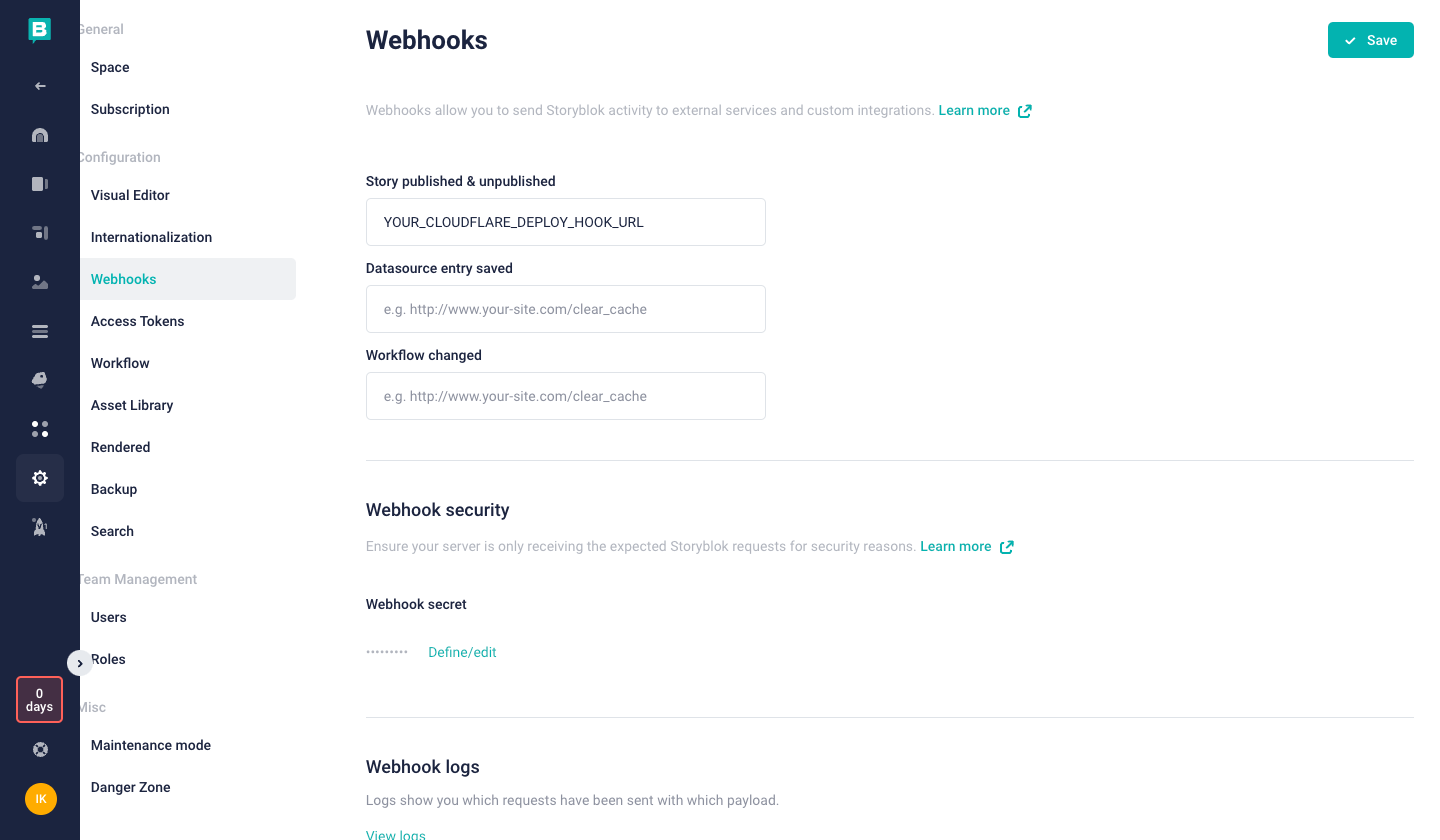
### Storyblok
You can set up and configure deploy hooks in Storyblok to trigger events. In your Storyblok space, go to **Settings** and scroll down to **Webhooks**. Paste your deploy hook into the **Story published & unpublished** field and select **Save**.
---
# Early Hints
URL: https://developers.cloudflare.com/pages/configuration/early-hints/
[Early Hints](/cache/advanced-configuration/early-hints/) help the browser to load webpages faster. Early Hints is enabled automatically on all `pages.dev` domains and custom domains.
Early Hints automatically caches any [`preload`](https://developer.mozilla.org/en-US/docs/Web/HTML/Link_types/preload) and [`preconnect`](https://developer.mozilla.org/en-US/docs/Web/HTML/Link_types/preconnect) type [`Link` headers](https://developer.mozilla.org/en-US/docs/Web/HTTP/Headers/Link) to send as Early Hints to the browser. The hints are sent to the browser before the full response is prepared, and the browser can figure out how to load the webpage faster for the end user. There are two ways to create these `Link` headers in Pages:
## Configure Early Hints
Early Hints can be created with either of the two methods detailed below.
### 1. Configure your `_headers` file
Create custom headers using the [`_headers` file](/pages/configuration/headers/). If you include a particular stylesheet on your `/blog/` section of your website, you would create the following rule:
```txt
/blog/*
Link: ; rel=preload; as=style
```
Pages will attach this `Link: ; rel=preload; as=style` header. Early Hints will then emit this header as an Early Hint once cached.
### 2. Automatic `Link` header generation
In order to make the authoring experience easier, Pages also automatically generates `Link` headers from any `` HTML elements with the following attributes:
* `href`
* `as` (optional)
* `rel` (one of `preconnect`, `preload`, or `modulepreload`)
`` elements which contain any other additional attributes (for example, `fetchpriority`, `crossorigin` or `data-do-not-generate-a-link-header`) will not be used to generate `Link` headers in order to prevent accidentally losing any custom prioritization logic that would otherwise be dropped as an Early Hint.
This allows you to directly create Early Hints as you are writing your document, without needing to alternate between your HTML and `_headers` file.
```html
```
### Disable automatic `Link` header generation Automatic `Link` header
Remove any automatically generated `Link` headers by adding the following to your `_headers` file:
```txt
/*
! Link
```
:::caution
Automatic `Link` header generation should not have any negative performance impact on your website. If you need to disable this feature, contact us by letting us know about your circumstance in our [Discord server](https://discord.com/invite/cloudflaredev).
:::
---
# Headers
URL: https://developers.cloudflare.com/pages/configuration/headers/
import { Render } from "~/components"
## Attach a header
To attach headers to Cloudflare Pages responses, create a `_headers` plain text file in the output folder of your project. It is usually the folder that contains the deploy-ready HTML files and assets generated by the build, such as favicons. Changes to headers will be updated to your website at build time. Make sure you commit and push the file to trigger a new build each time you update headers.
:::caution
Custom headers defined in the `_headers` file are not applied to responses from [Functions](/pages/functions/), even if the Function route matches the URL pattern. If your Pages application uses Functions, you must migrate any behaviors from the `_headers` file to the `Response` object in the appropriate `/functions` route. When altering headers for multiple routes, you may be interested in [adding middleware](/pages/functions/middleware/) for shared behavior.
:::
Header rules are defined in multi-line blocks. The first line of a block is the URL or URL pattern where the rule's headers should be applied. On the next line, an indented list of header names and header values must be written:
```txt
[url]
[name]: [value]
```
Using absolute URLs is supported, though be aware that absolute URLs must begin with `https` and specifying a port is not supported. Cloudflare Pages ignores the incoming request's port and protocol when matching against an incoming request. For example, a rule like `https://example.com/path` would match against requests to `other://example.com:1234/path`.
You can define as many `[name]: [value]` pairs as you require on subsequent lines. For example:
```txt
# This is a comment
/secure/page
X-Frame-Options: DENY
X-Content-Type-Options: nosniff
Referrer-Policy: no-referrer
/static/*
Access-Control-Allow-Origin: *
X-Robots-Tag: nosnippet
https://myproject.pages.dev/*
X-Robots-Tag: noindex
```
An incoming request which matches multiple rules' URL patterns will inherit all rules' headers. Using the previous `_headers` file, the following requests will have the following headers applied:
| Request URL | Headers |
| ----------------------------------------------- | ------------------------------------------------------------------------------------------------------------------------------------- |
| `https://custom.domain/secure/page` | `X-Frame-Options: DENY` `X-Content-Type-Options: nosniff ` `Referrer-Policy: no-referrer` |
| `https://custom.domain/static/image.jpg` | `Access-Control-Allow-Origin: *` `X-Robots-Tag: nosnippet` |
| `https://myproject.pages.dev/home` | `X-Robots-Tag: noindex` |
| `https://myproject.pages.dev/secure/page` | `X-Frame-Options: DENY` `X-Content-Type-Options: nosniff` `Referrer-Policy: no-referrer` `X-Robots-Tag: noindex` |
| `https://myproject.pages.dev/static/styles.css` | `Access-Control-Allow-Origin: *` `X-Robots-Tag: nosnippet, noindex` |
A project is limited to 100 header rules. Each line in the `_headers` file has a 2,000 character limit. The entire line, including spacing, header name, and value, counts towards this limit.
If a header is applied twice in the `_headers` file, the values are joined with a comma separator. Headers defined in the `_headers` file override what Cloudflare Pages ordinarily sends, so be aware when setting security headers. Cloudflare reserves the right to attach new headers to Pages projects at any time in order to improve performance or harden the security of your deployments.
### Detach a header
You may wish to remove a header which has been added by a more pervasive rule. This can be done by prepending an exclamation mark `!`.
```txt
/*
Content-Security-Policy: default-src 'self';
/*.jpg
! Content-Security-Policy
```
### Match a path
The same URL matching features that [`_redirects`](/pages/configuration/redirects/) offers is also available to the `_headers` file. Note, however, that redirects are applied before headers, when a request matches both a redirect and a header, the redirect takes priority.
#### Splats
When matching, a splat pattern — signified by an asterisk (`*`) — will greedily match all characters. You may only include a single splat in the URL.
The matched value can be referenced within the header value as the `:splat` placeholder.
#### Placeholders
```txt
/movies/:title
x-movie-name: You are watching ":title"
```
## Examples
### Cross-Origin Resource Sharing (CORS)
To enable other domains to fetch every asset from your Pages project, the following can be added to the `_headers` file:
```txt
/*
Access-Control-Allow-Origin: *
```
This applies the `Access-Control-Allow-Origin` header to any incoming URL. To be more restrictive, you can define a URL pattern that applies to a `*.pages.dev` subdomain, which then only allows access from its `staging` branch's subdomain:
```txt
https://:project.pages.dev/*
Access-Control-Allow-Origin: https://staging.:project.pages.dev/
```
### Prevent your pages.dev deployments showing in search results
[Google](https://developers.google.com/search/docs/advanced/robots/robots_meta_tag#directives) and other search engines often support the `X-Robots-Tag` header to instruct its crawlers how your website should be indexed.
For example, to prevent your `*.pages.dev` deployment from being indexed, add the following to your `_headers` file:
```txt
https://:project.pages.dev/*
X-Robots-Tag: noindex
```
### Harden security for an application
:::note
If you are using Pages Functions and wish to attach security headers in order to control access to or browser behavior of server-side logic, the headers should be sent from in Pages Functions' `Response` instead of the `_headers` file. For example, if you have an API endpoint and want to allow cross-origin requests, you should ensure that your Pages Functions attaches CORS headers to its responses, including to `OPTIONS` requests. This is to ensure that, in the unlikely event of an incident involving serving static assets, your API security headers will continue to be configured.
:::
You can prevent click-jacking by informing browsers not to embed your application inside another (for example, with an `