Access and secure a MySQL database using Cloudflare Tunnel and network policies
Using Cloudflare Tunnel's private networks, users can connect to arbitrary non-browser based TCP/UDP applications, like databases. You can set up network policies that implement zero trust controls to define who and what can access those applications using the WARP client.
By the end of this tutorial, users that pass network policies will be able to access a remote MySQL database available through a Cloudflare Tunnel on TCP port 3306.
Make sure you have:
- A MySQL database listening for remote connections and configured with users that can connect remotely
- (Optional)Resolver policies enabled on your account
Install cloudflared on a server in your private network. This server should have connectivity to the MySQL database.
-
Log in to Zero Trust ↗ and go to Networks > Tunnels.
-
Select Create a tunnel.
-
Choose Cloudflared for the connector type and select Next.
-
Enter a name for your tunnel. We suggest choosing a name that reflects the type of resources you want to connect through this tunnel (for example,
enterprise-VPC-01). -
Select Save tunnel.
-
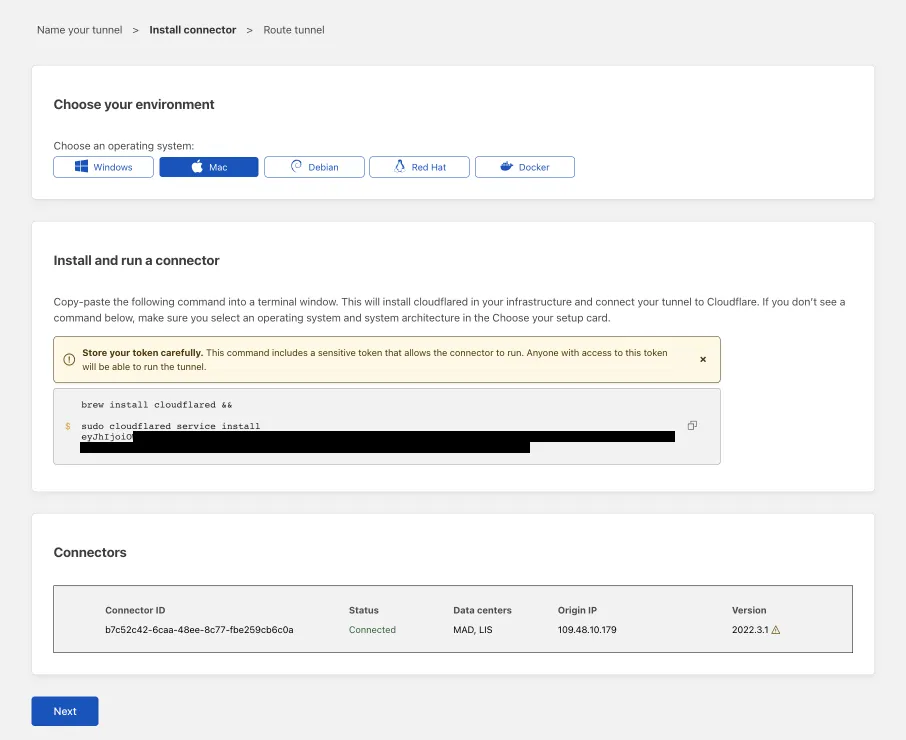
Next, you will need to install
cloudflaredand run it. To do so, check that the environment under Choose an environment reflects the operating system on your machine, then copy the command in the box below and paste it into a terminal window. Run the command. -
Once the command has finished running, your connector will appear in Zero Trust.

-
Select Next.
- In the Private Networks tab, add the following IP addresses:
- Private IP/CIDR of your MySQL server (for example,
10.128.0.175/32) - (Optional) Private IP/CIDR of your internal DNS server
- Select Save tunnel.
The application and (optional) DNS server are now connected to Cloudflare.
- Go to Gateway > Firewall policies > Network.
- Add a network policy that targets the private IP address and the port of the MySQL database (port 3306 by default). The following example allows access to the database to the users that enrolled into WARP using an
@example.comemail address. The network policies can also take into consideration device posture checks.
| Selector | Operator | Value | Logic | Action |
|---|---|---|---|---|
| Destination IP | in | 10.128.0.175 | And | Allow |
| Destination Port | in | 3306 | And | |
| User Email | matches regex | .*example.com |
In addition to the Allow rule above, Cloudflare recommends adding a catch-all block policy to the bottom of your network policy list to enforce a default-deny model.
Allowed WARP users can now connect to the MySQL server at 10.128.0.175 using the MySQL client of their choice.
To allow users to access the MySQL database using an internal hostname instead of the private IP address, configure a Gateway resolver policy.
-
Go to Gateway > Resolver policies.
-
Select Add a policy.
-
Create an expression to match against the private domain or hostname of the application, like in the following example:
Selector Operator Value Domain in internalrecord.com -
In Select DNS resolver, select Configure custom DNS resolvers.
-
Enter the private IP address of your DNS server.
-
In the dropdown menu, select
<IP-address> - Private. -
(Optional) Enter a custom port.
-
Select Create policy.
If your internal DNS server has an A record for the MySQL database, users can connect to the server using this record. For example, assuming a BIND server that includes the entry:
mysql IN A 10.128.0.175
Allowed WARP users can connect to the MySQL database at mysql.internalrecord.com using the MySQL client of their choice.